
Otherworld: Omens of Summer: Chapter Eight: The Last Masquerade
Let our Otherworld: Omens of Summer Walkthrough be your companion as you fight to save the world from an eternal winter. Saving the young magic user Fiona was only the first leg of your journey; now you must reunite with her teacher in order to find a way to stop the evil Shade who kidnapped Fiona in the first place. Our insider tips, step-by-step instructions, and custom screenshots will guide you as you dodge the minions of shadows and race to save the world from winter.
General Info and Tips
Chapter One: Death of the Crows
Chapter Two: The Antiques
Chapter Three: Never Ending Love
Chapter Four: Lighthouse View
Chapter Five: The Mermaid’s Anguish
Chapter Six: The Secret-Keeping Swamp
Chapter Seven: The Banshee's Sorrow
Chapter Eight: The Last Masquerade
Chapter Nine: Fay
Ask for help in the comments below!

- Solve this puzzle by matching the pairs (A-F).
- If the game is exited then the icons will be randomized.
- Shuffle through the various icons using the arrow button.

- Examine the mirror.
- Select the scrap of cloth and click the mirror.
- Examine the book.
- Play the hidden objects scene.
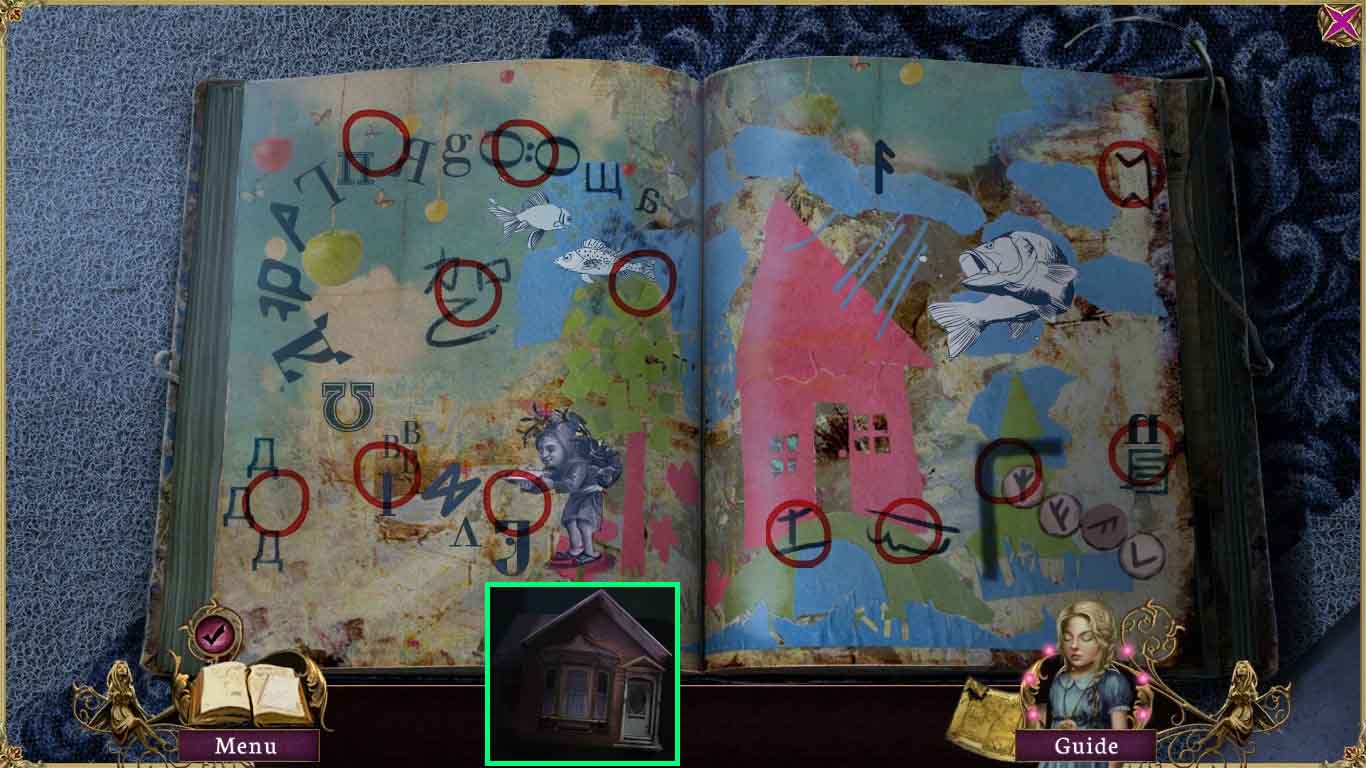
- Uncover the 12 fragmented items.
- Click the pages 3 times; collect the house statuette.
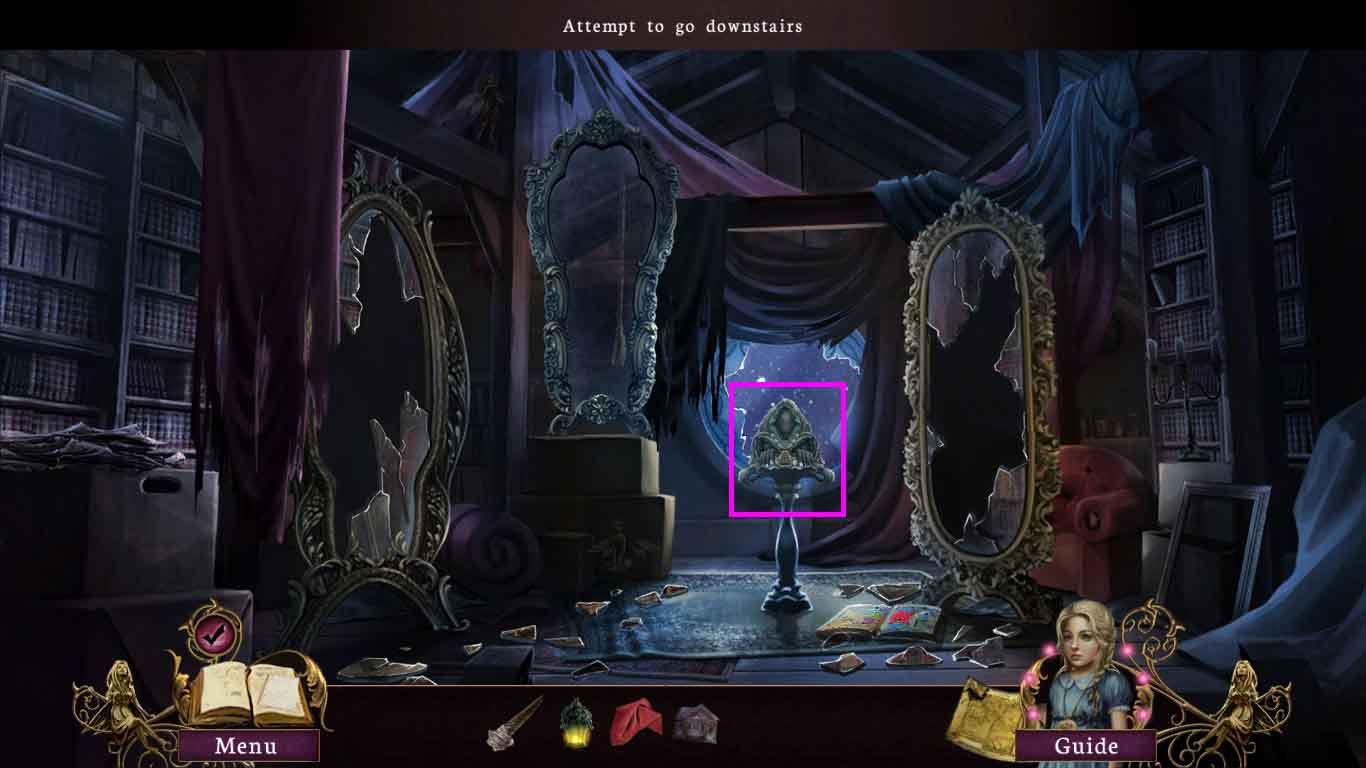
- Examine the navigation device.
- Place the house statuette down.
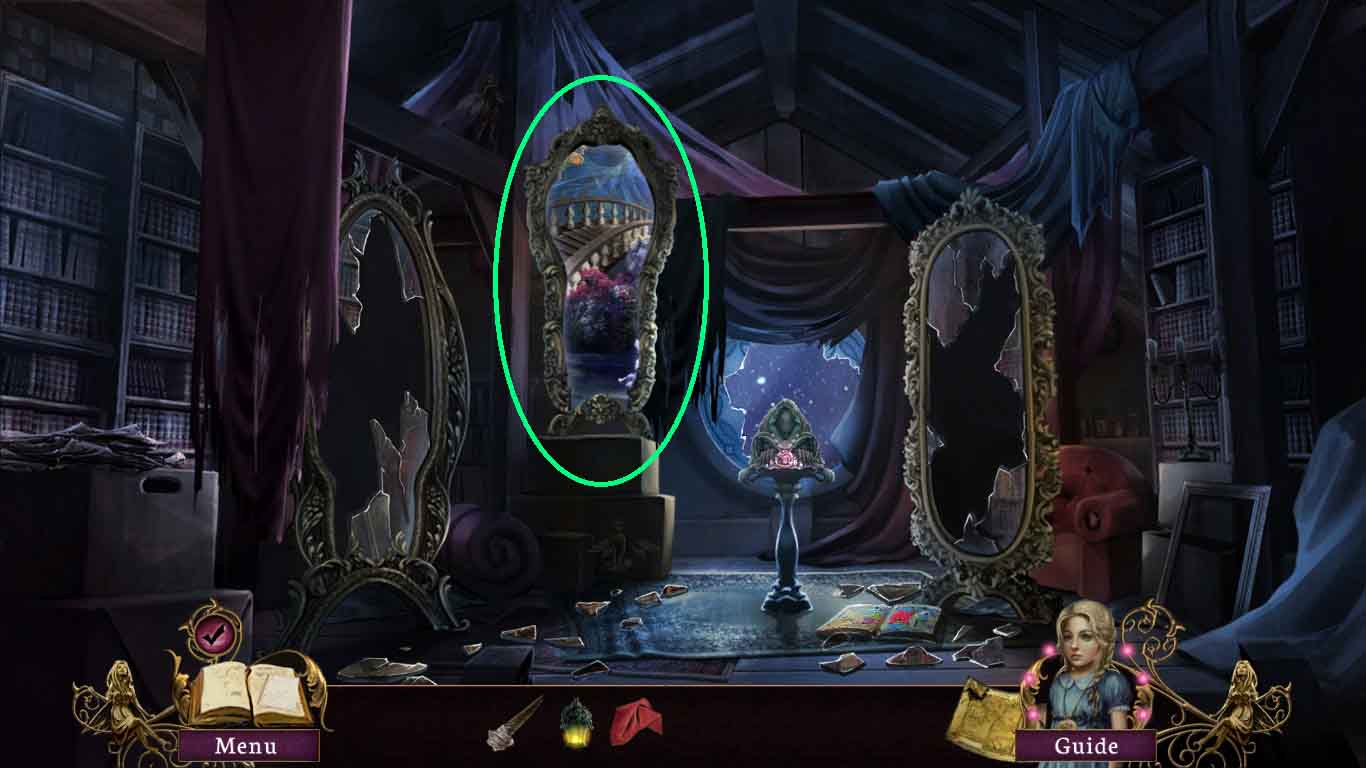
- Move through the portal.

- Collect the 1st mirror fragment using the scrap of cloth.
- Collect the uncharged stone.
- Examine the 3 buds; use the lantern to light all of them.
- Examine the statue.
- Play the hidden objects scene.
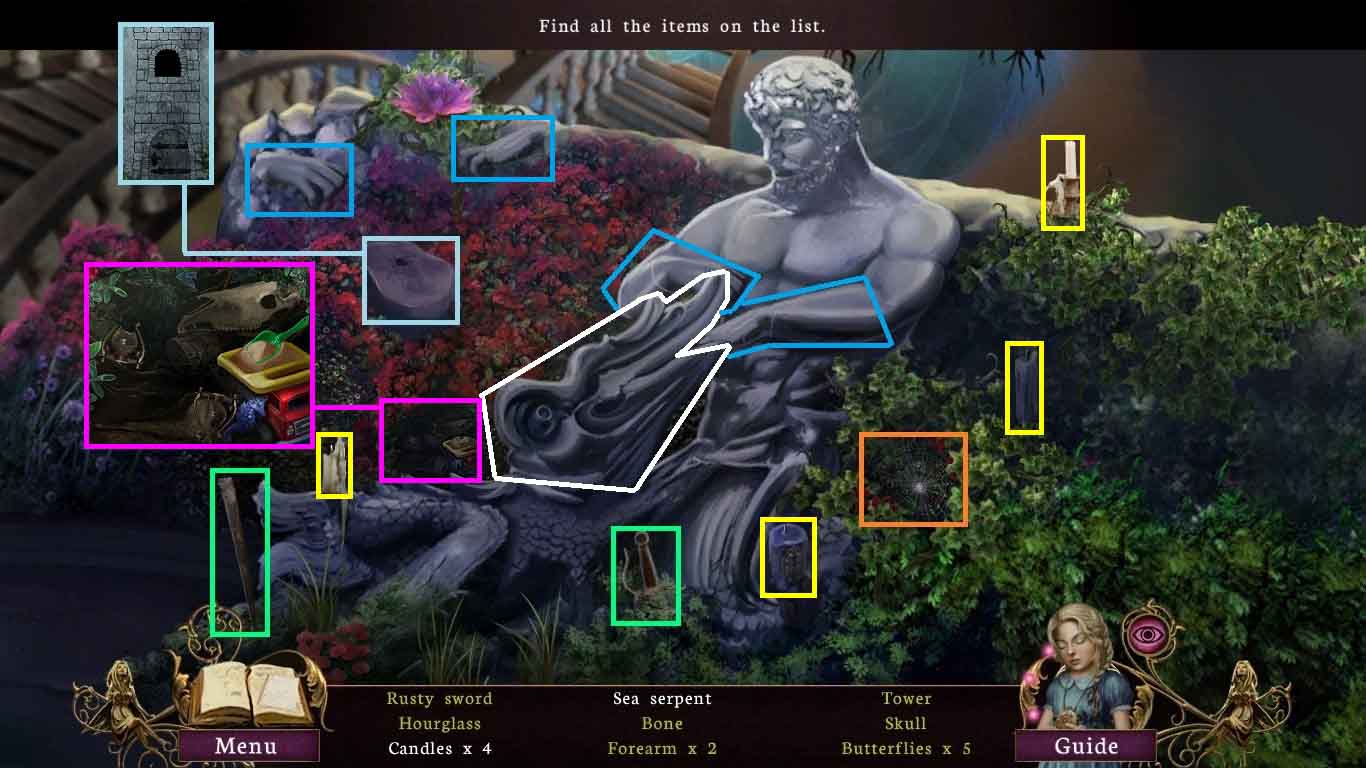
- Examine the rock; clear the leaves.
- Move the sticks to a tower shape and collect the tower.
- Examine the cobweb; collect the 5 butterflies.
- Collect the sword hilt; place it onto the sword.
- Collect the rusty sword.
- Select the 2 hands and place them onto the statue’s arm; collect the 2 forearms.
- Examine the toys; collect the bone.
- Attach the 2 skull halves; collect it.
- Select the sand and fill the broken hourglass.
- Attach the 2 hourglass halves.
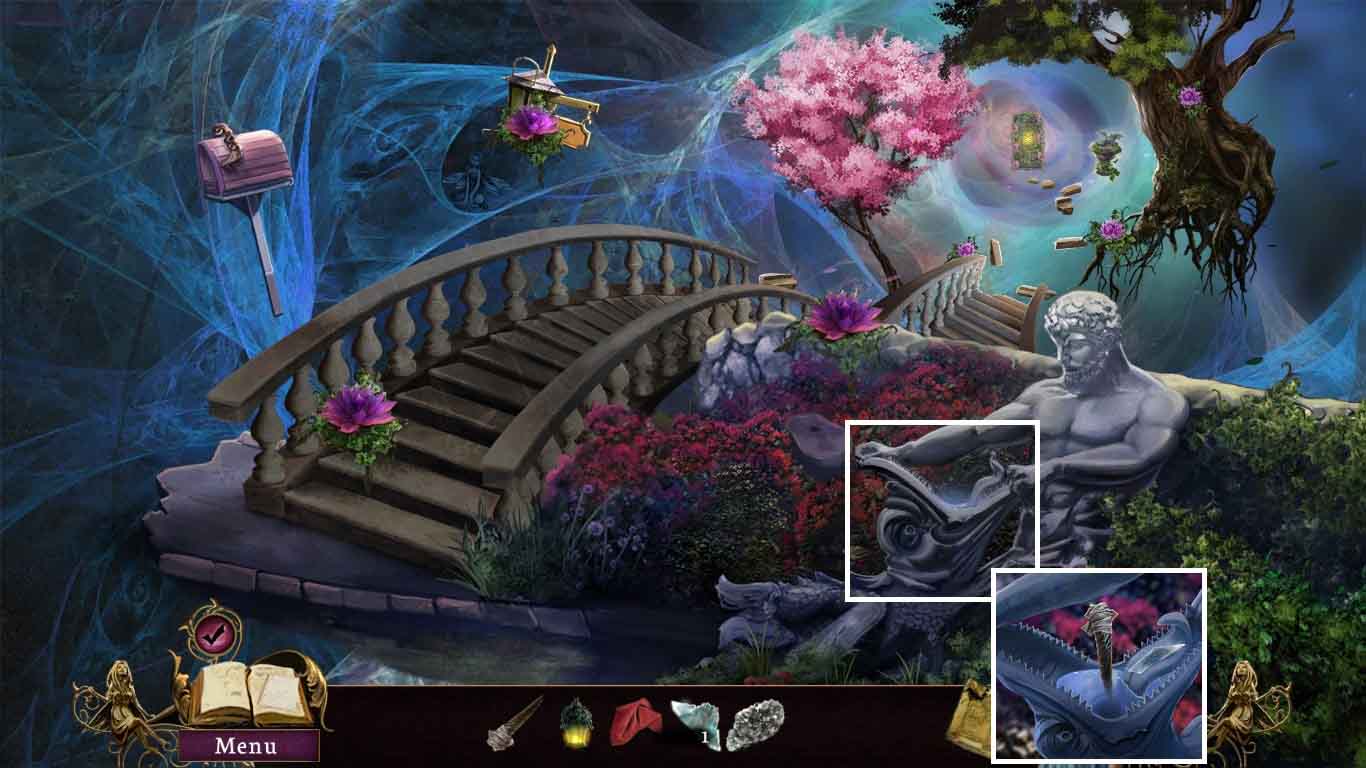
- Examine the statue.
- Using the scrap of cloth; collect the 2nd mirror fragment.
- Insert the blade into the mouth.
- Collect the charged blade.
- Go forward.
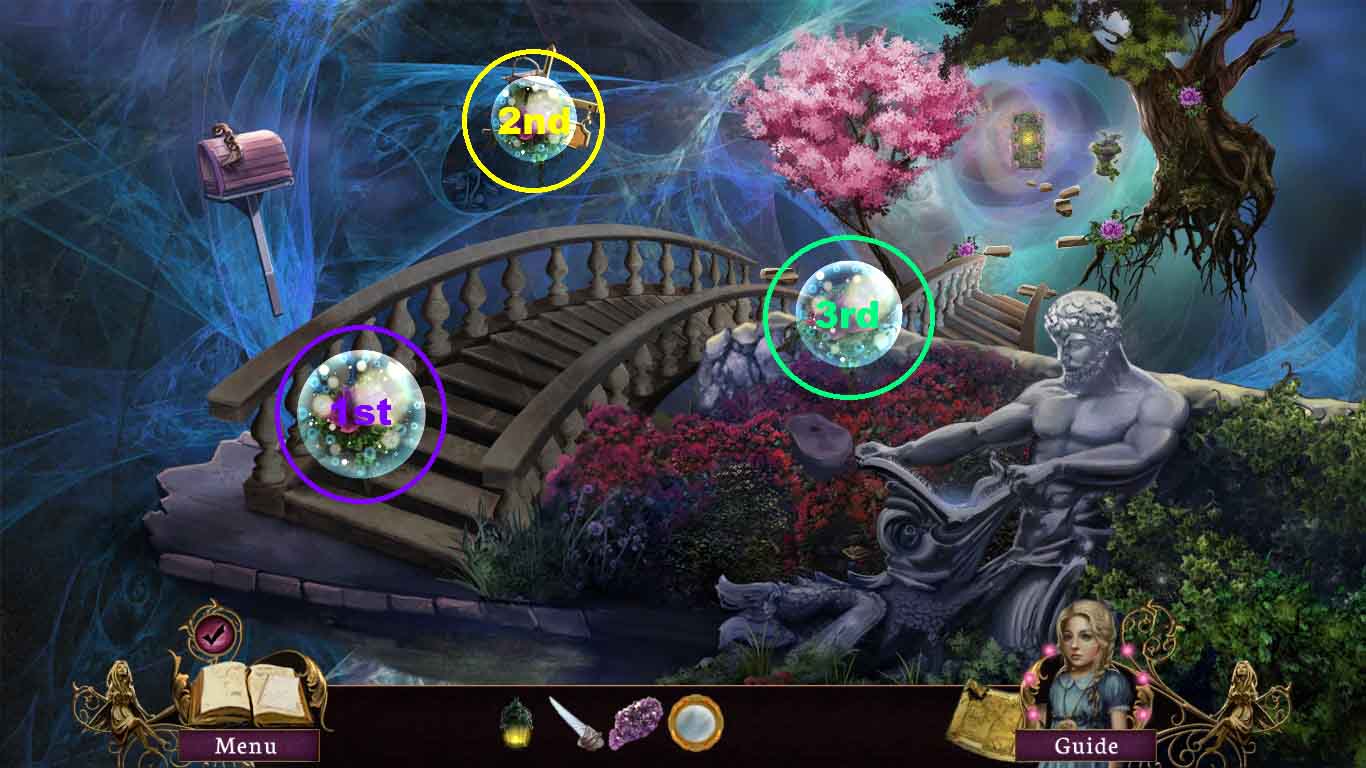
- Examine the 3 magical buds.
- Light them using the lantern.
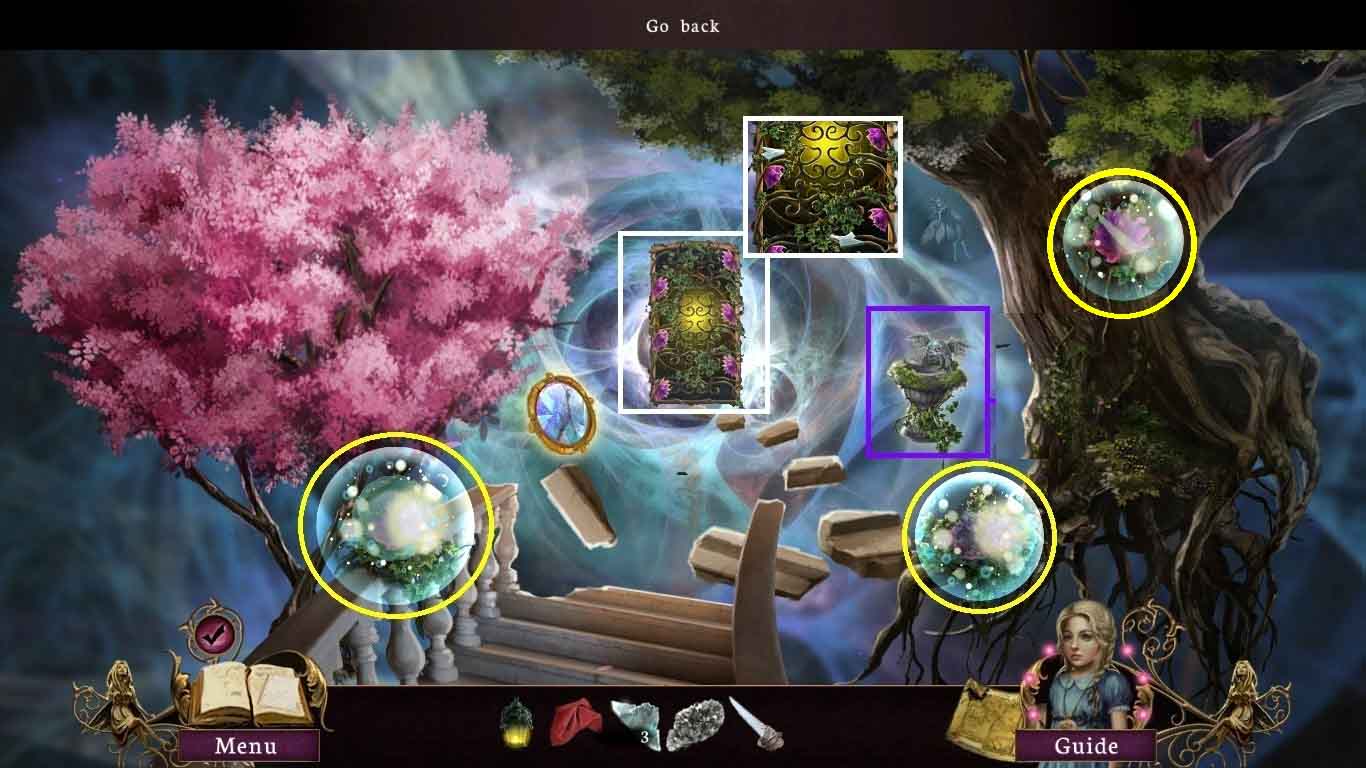
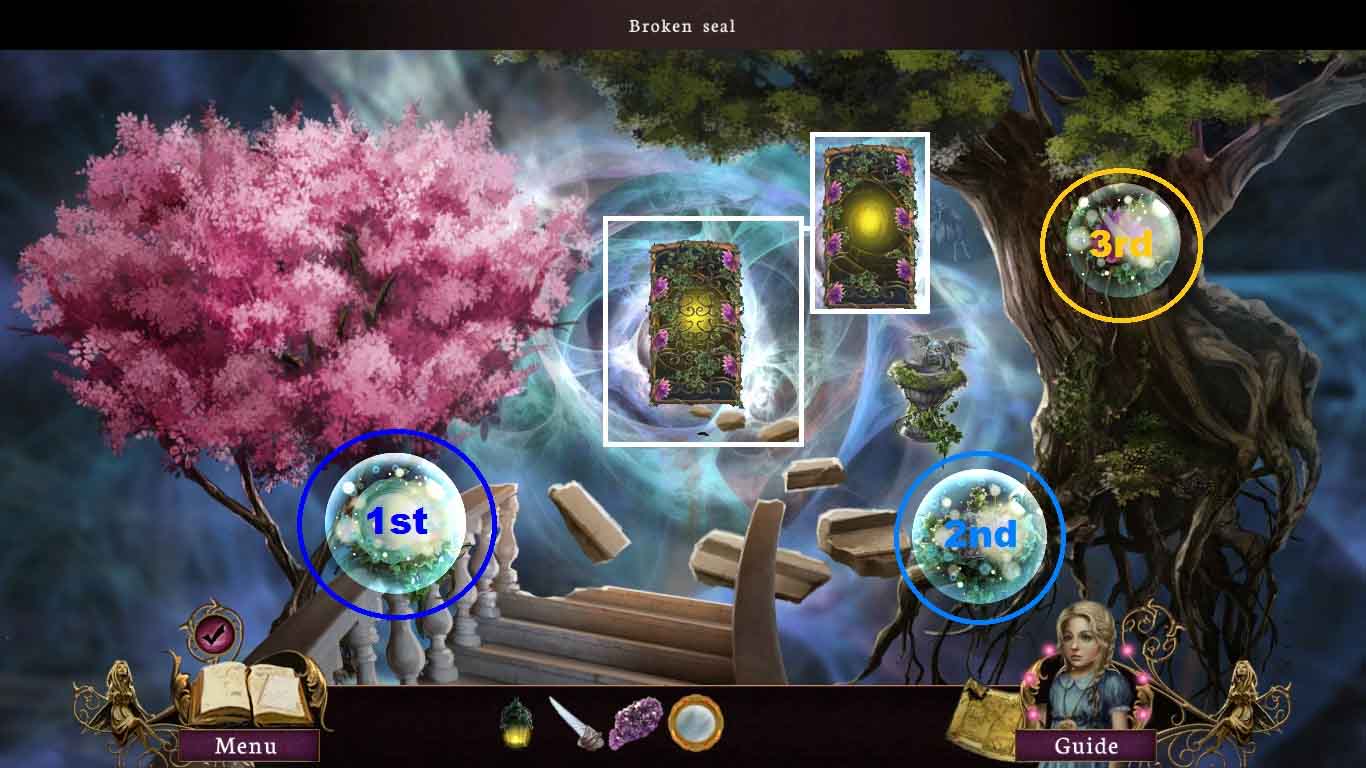
- Examine the door.
- Collect the 3rd and 4th mirror fragments using the scrap of cloth.
- Examine the birdbath; insert the uncharged stone.
- Play the mini-game.
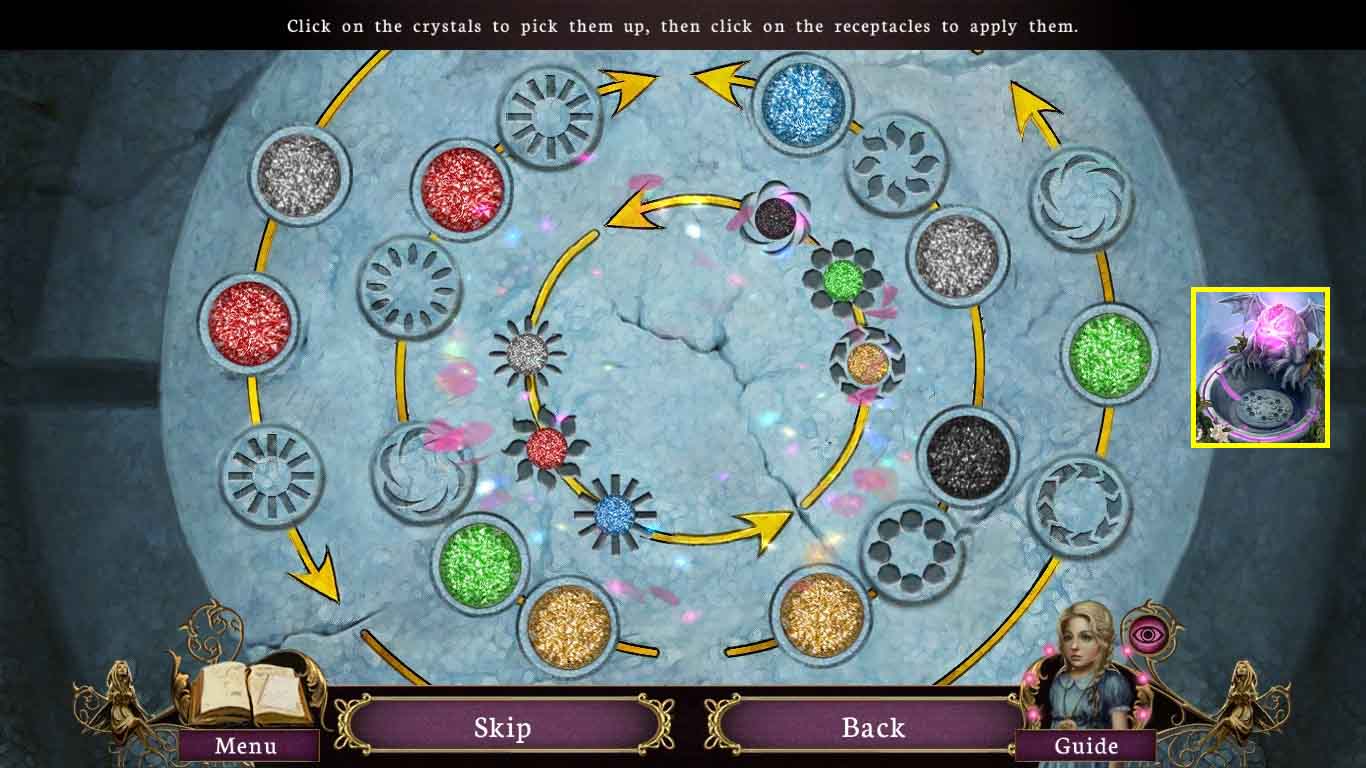
- Solve this puzzle by selecting the colored crystals and placing them into the correct slots.
- Use the icons and arrows as clues.
- Collect the charged crystal.
- Collect the 5th mirror fragment using the scrap of cloth.
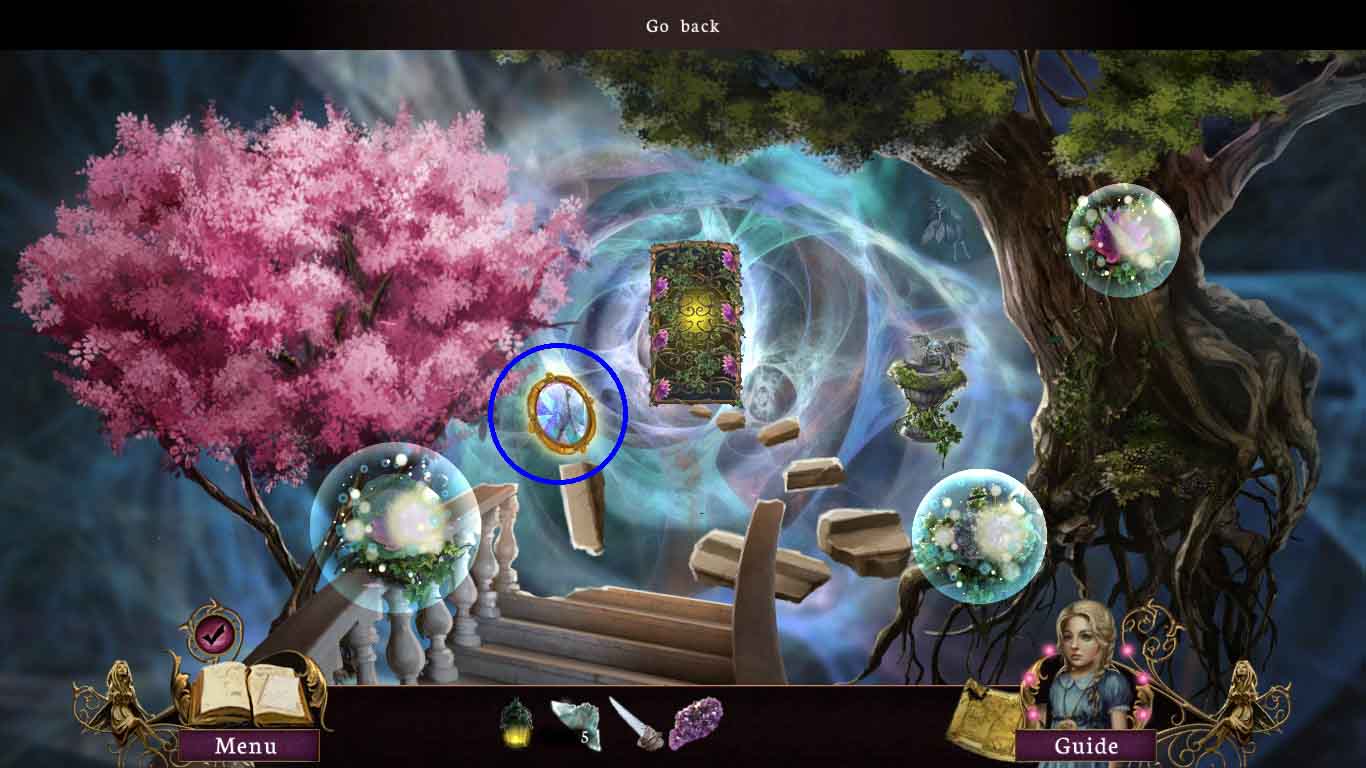
- Examine the mirror; insert the 5 mirror fragments.
- Collect the mirror.
- Move down one time.
- Examine the 3 flowers.
- Insert the charged crystal into the 1st magical bud.
- Insert the charged blade into the 2nd magical bud.
- Insert the mirror into the 3rd magical bud.
- Go forward.
- Examine the 3 flowers.
- Insert the mirror into the 1st flower.
- Insert the charged crystal into the 2nd flower.
- Insert the charged blade into the 3rd flower.
- Examine the door, move back and re-enter the door.
- Play the mini-game.
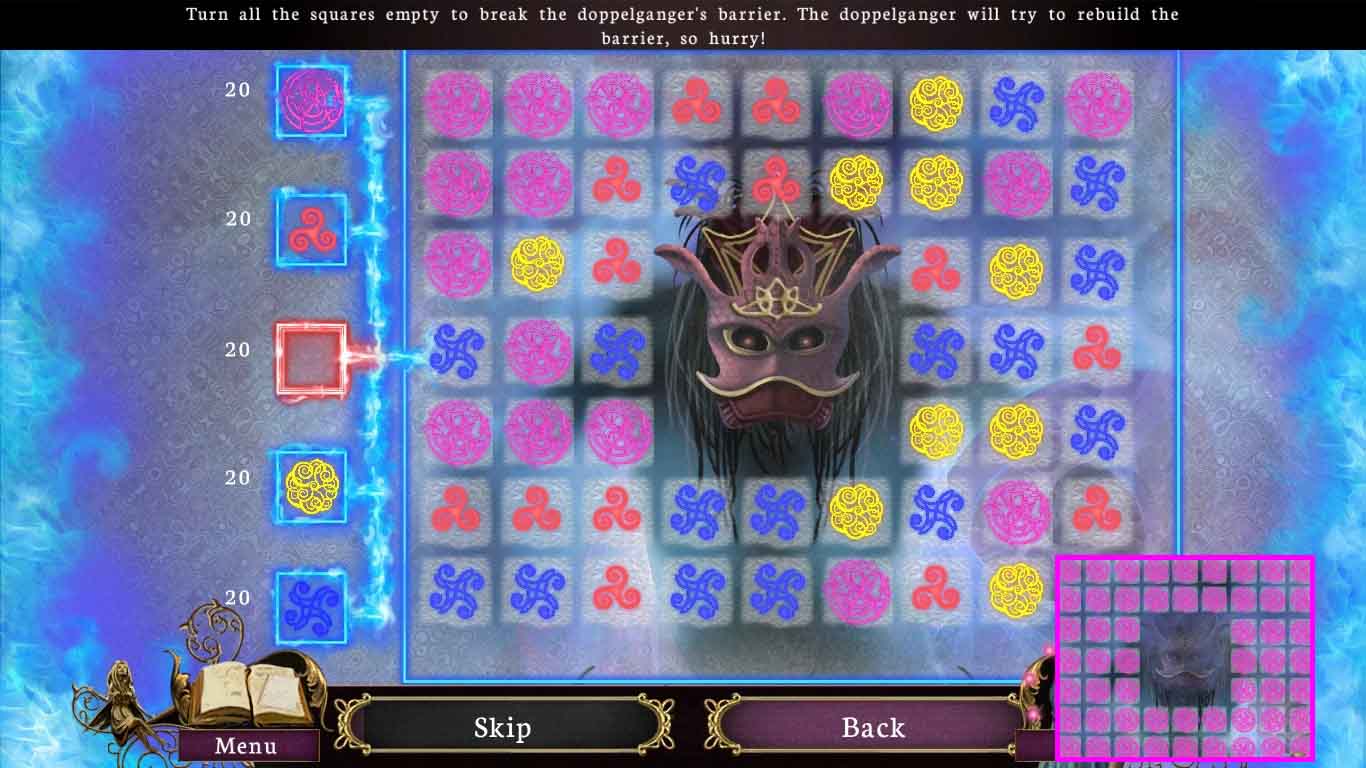
- Solve this puzzle by changing all the squares the same color.
- Click the button to clear all the squares from the board.
- Notice the squares that have been already turned due to the doppelganger’s attempts to block your forward movement.

- Hold the mirror next to the doppelganger.
- Play the mini-game.
- Solve this puzzle by switching the colored nodes into the correct positions.
- Be aware that the doppelganger can trigger buttons also, notice any changes.
- Show the doppelganger the mirror.
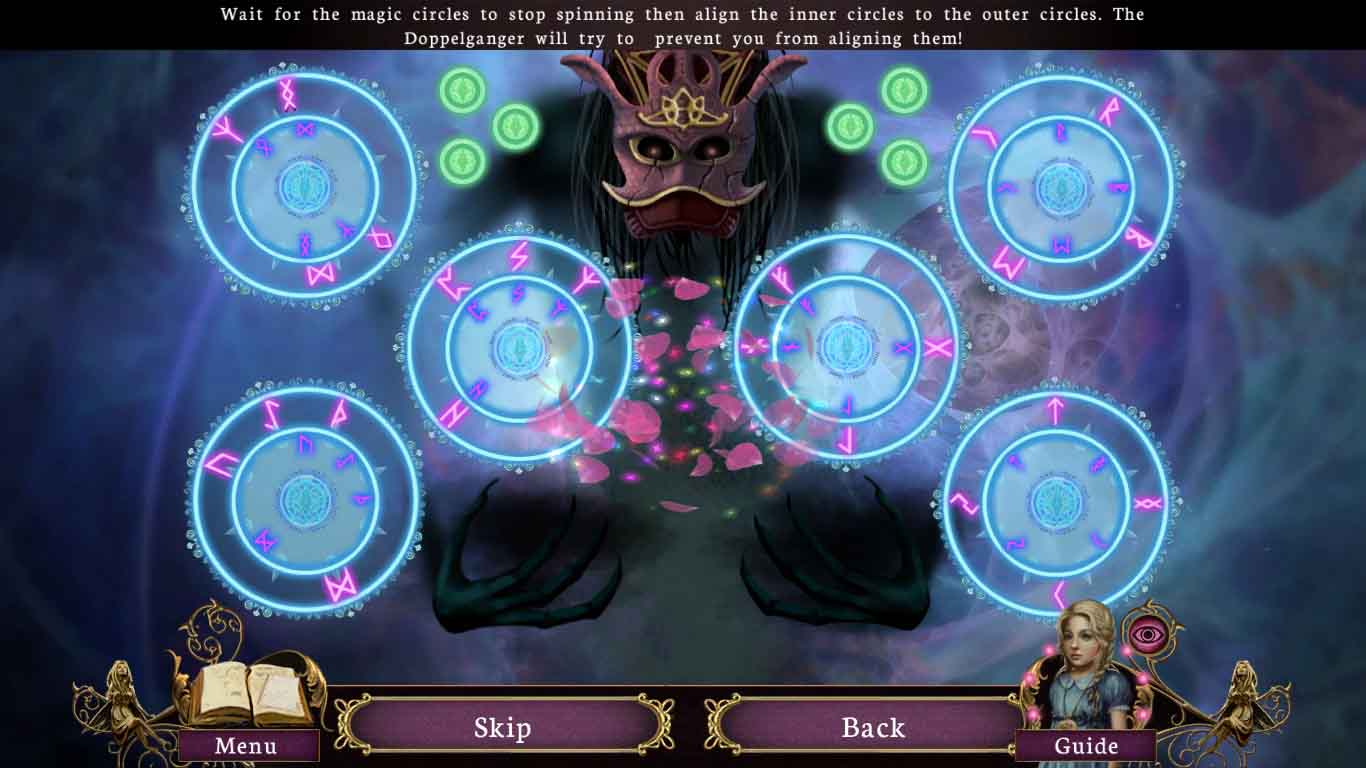
- Play the mini-game.
- Solve the puzzle by allowing the outermost circle to stop spinning.
- Then move the innermost circles to align with the out circles.
General Info and Tips
Chapter One: Death of the Crows
Chapter Two: The Antiques
Chapter Three: Never Ending Love
Chapter Four: Lighthouse View
Chapter Five: The Mermaid’s Anguish
Chapter Six: The Secret-Keeping Swamp
Chapter Seven: The Banshee's Sorrow
Chapter Eight: The Last Masquerade
Chapter Nine: Fay
Ask for help in the comments below!
Chapter One: Death of the Crows
Chapter Two: The Antiques
Chapter Three: Never Ending Love
Chapter Four: Lighthouse View
Chapter Five: The Mermaid’s Anguish
Chapter Six: The Secret-Keeping Swamp
Chapter Seven: The Banshee's Sorrow
Chapter Eight: The Last Masquerade
Chapter Nine: Fay
Ask for help in the comments below!