Nightmare Realm: In the End...: Chapter Six: Meeting Jeff
Our Nightmare Realm: In the End Walkthrough will be your guide as you journey into the strange and twisted world of the Nightmare Realm. It took years after your husband died for you and your daughter to find any kind of peace. But now, with college on the horizon and normalcy finally restored, your daughter has been attacked by the mysterious Nightmare Realm, and the only way to save her is to travel into the darkness and face the truth of what really happened to your husband. With our step-by-step instructions, insider hints, and custom screenshots along for the ride you’re sure to find victory, even in the darkest of places.
Chapter One: Emily
Chapter Two: The Nightmare Realm
Chapter Three: The Dryad
Chapter Four: David's Tears
Chapter Five: The Demon Book
Chapter Six: Meeting Jeff
Chapter Seven: Kjuu
Chapter Eight: The Secret Room
Chapter Nine: The Postman
Chapter Ten: Philip
Ask for help in the comments below!
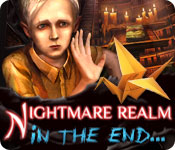
- Take the LARGE BRANCH.
- Click to zoom into the roots.
- Click on the mask.
- Click on the sign to read it.
- Look in the rat hole.
- Use the LARGE BRANCH on the rock.
- Click to talk to the man.
- Go back 4 screens.
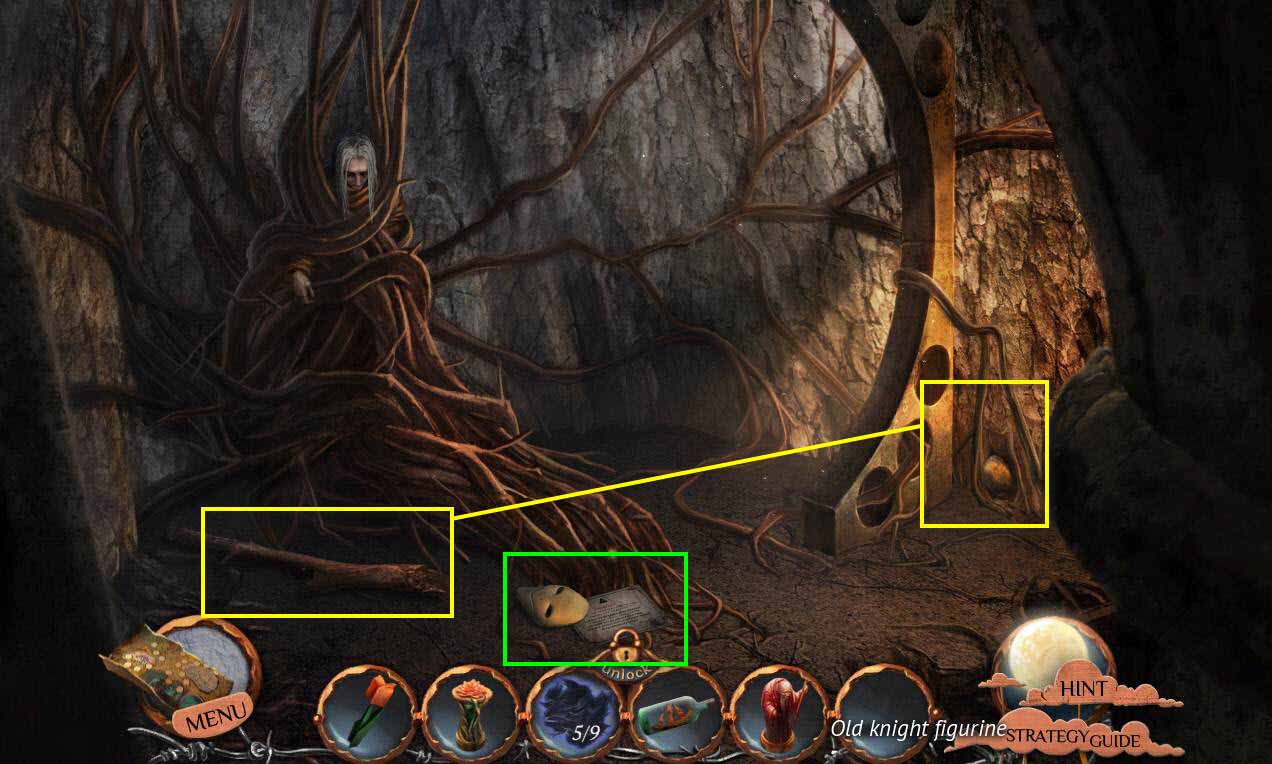
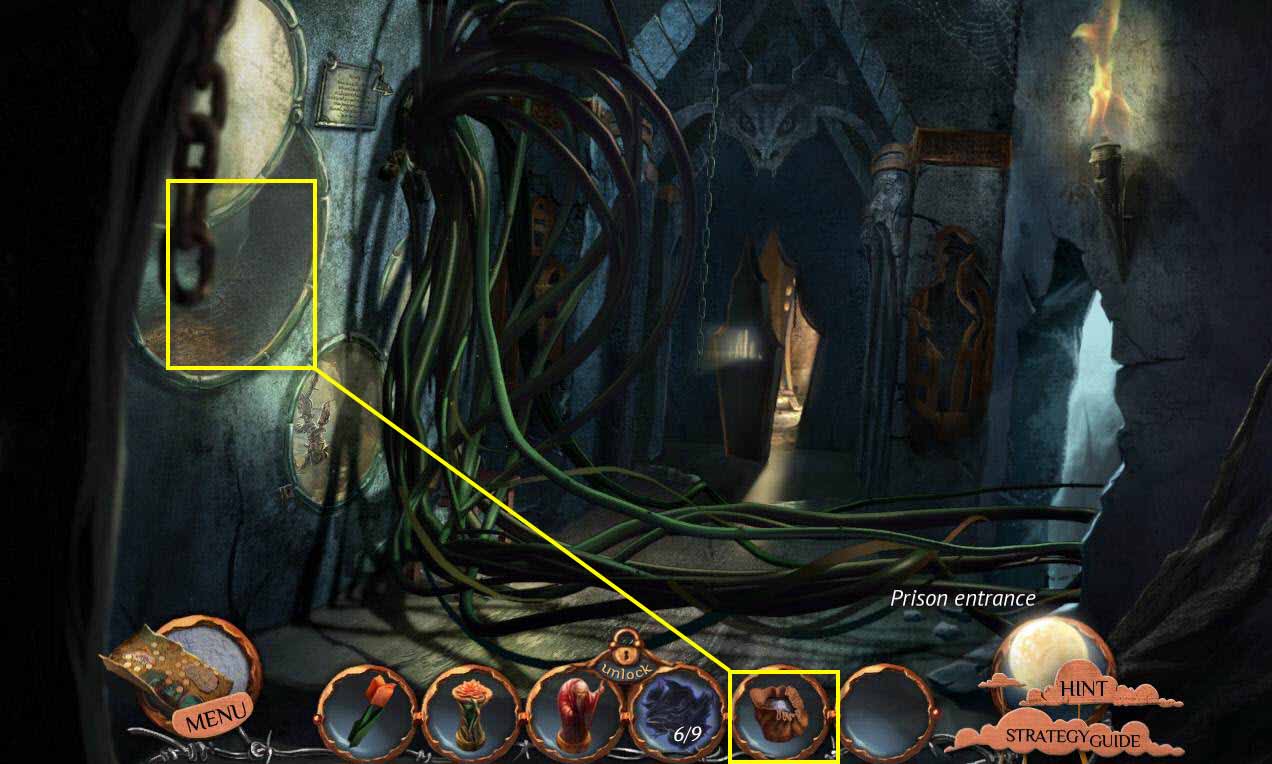
- Click to zoom in on the termitarium.
- Take the 6/9 PARTS of DARK ROBE.
- Use the WOODEN SHIP IN BOTTLE on the termite hill.
- You will receive the BOTTLE WITH TERMITES.
- Go back to the prisoner's cell.
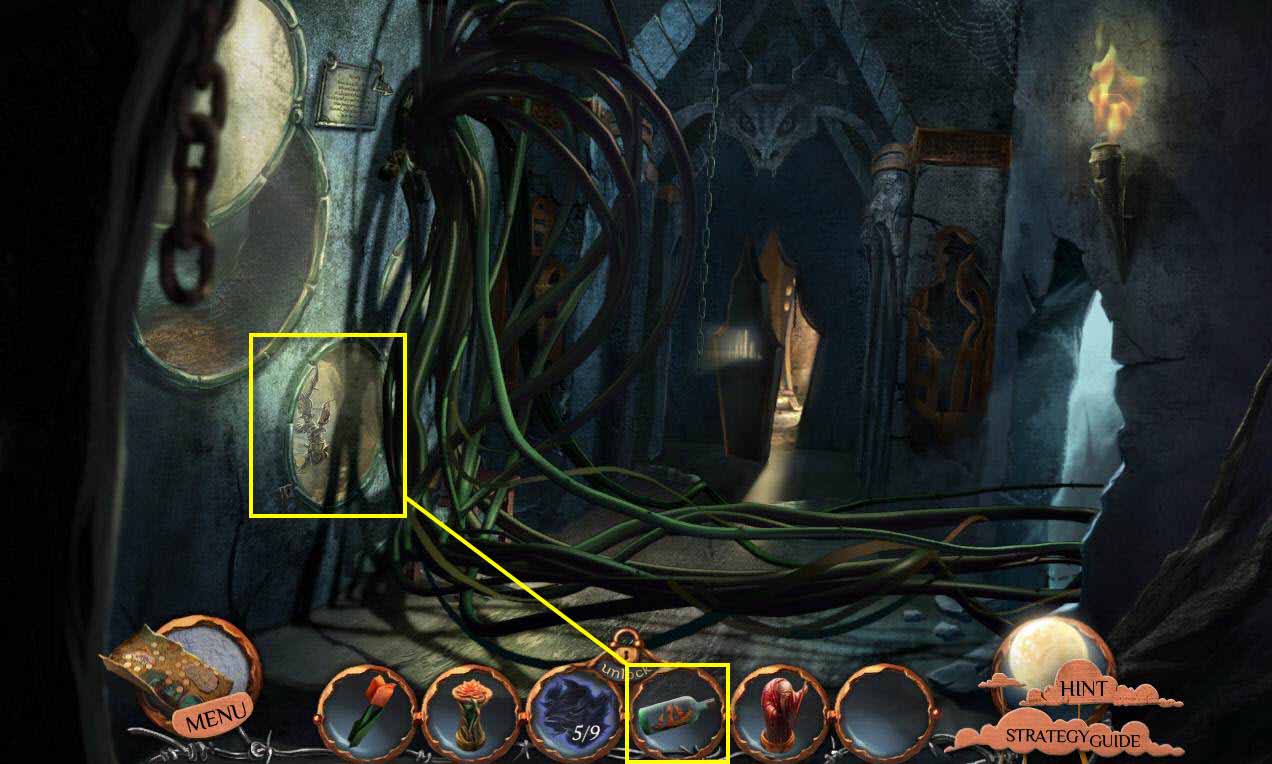
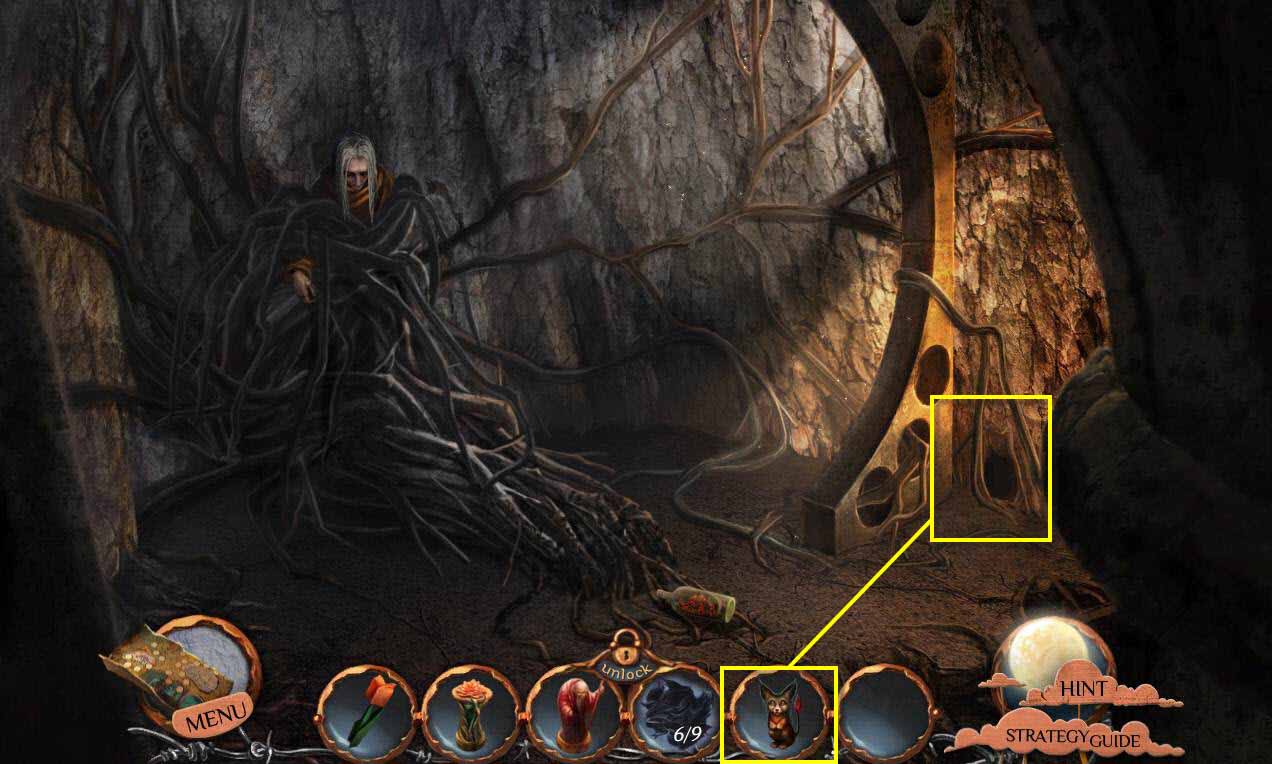
- Click to zoom into the roots.
- Use the BOTTLE WITH TERMITES on the roots.
- Click to talk to the man.
- You will receive the MAGIC POWDER.
- Go back 4 screens.
- Click to zoom in on the aquarium.
- Use the MAGIC POWDER on the beast.
- Take the ENCHANTED BEAST.
- Go back to the prisoner's cell.
- Click to zoom in on the rat hole.
- Use the ENCHANTED BEAST on the hole.
- This will start a mini-game.
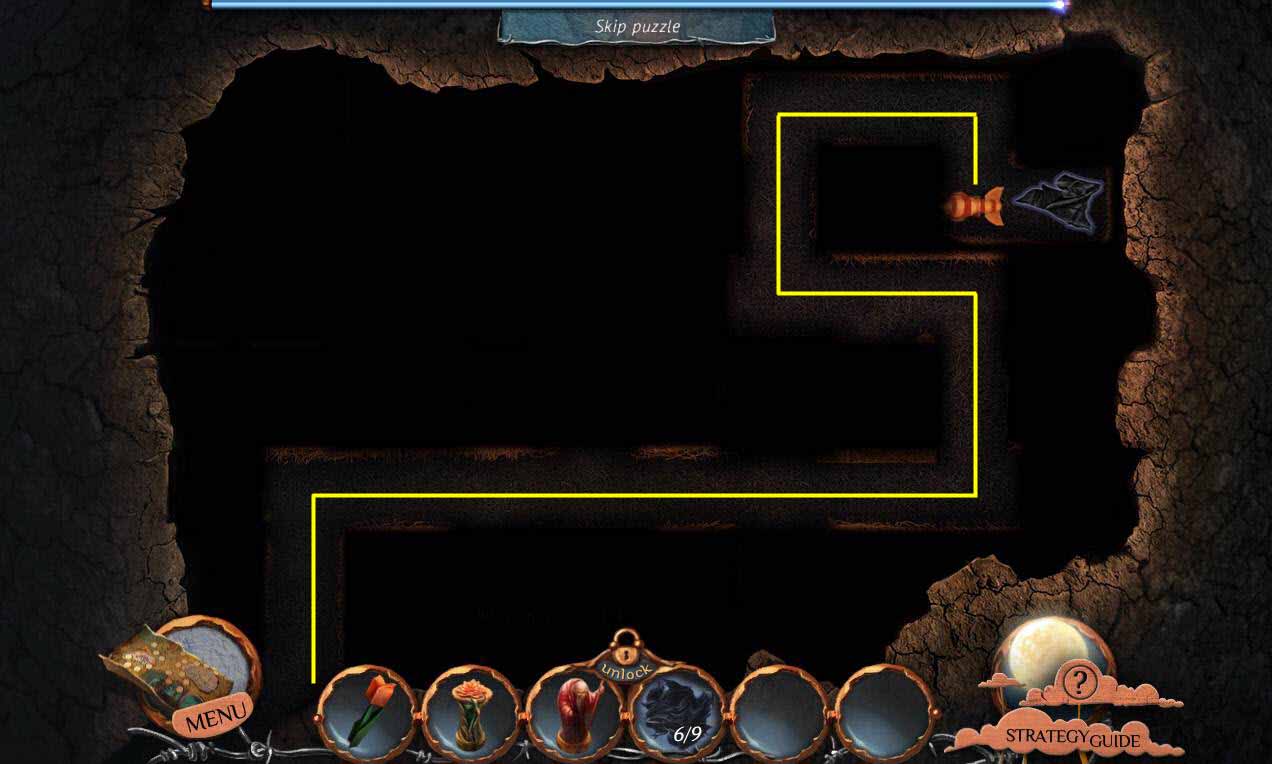
- The goal of the game is to move the beast through the maze.
- If you run across danger, you will have to start over.
- See the screenshot for the solution.
- You will receive the 7/9 PARTS of DARK ROBE.
- Go back 6 screens.
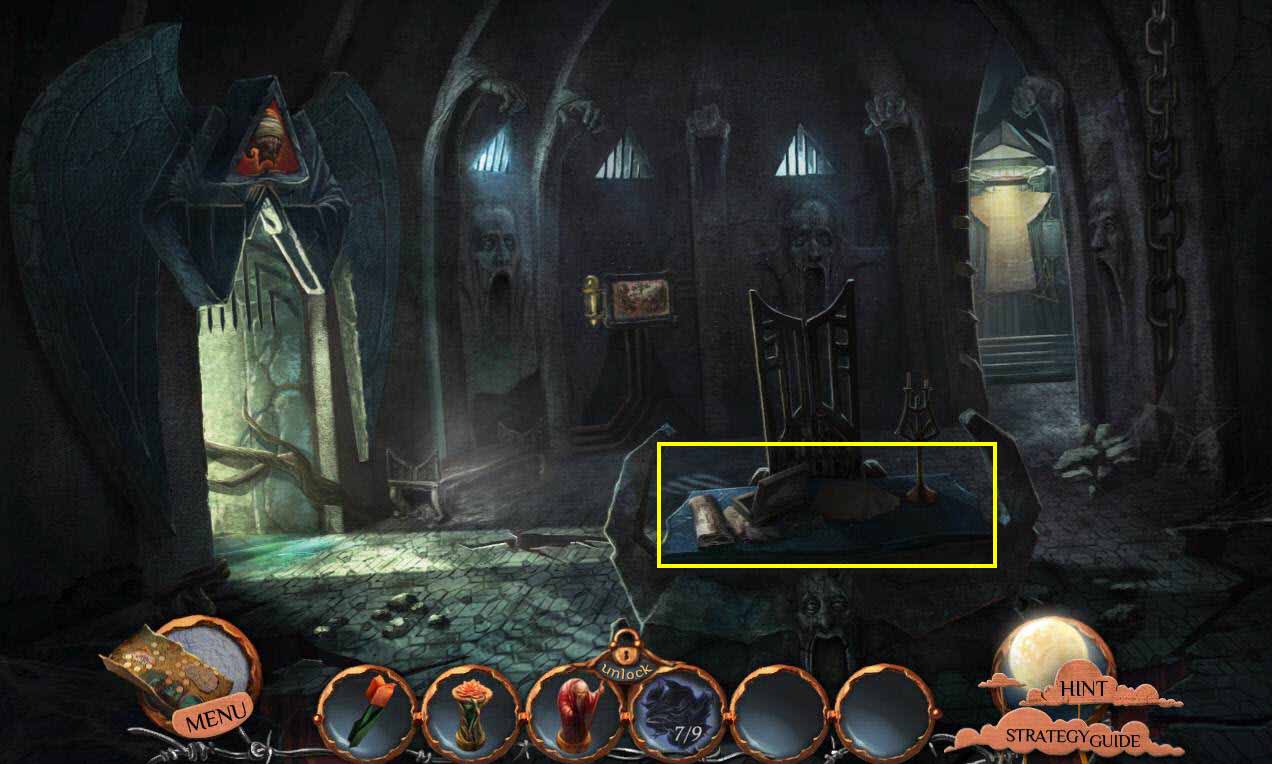
- Click on the desk to zoom in.
- Take the 8/9 PARTS OF DARK ROBE.
- Go straight to the Loom.
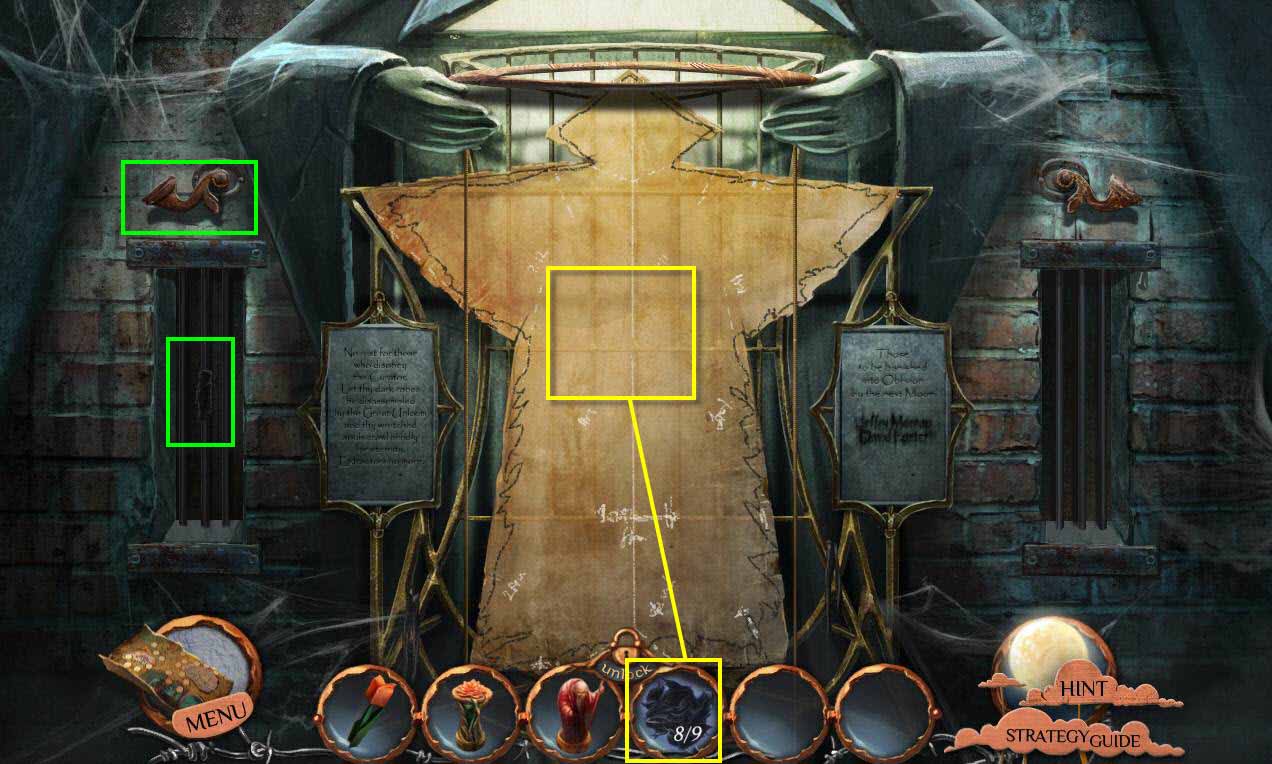
- Click on the lever on each side of the loom.
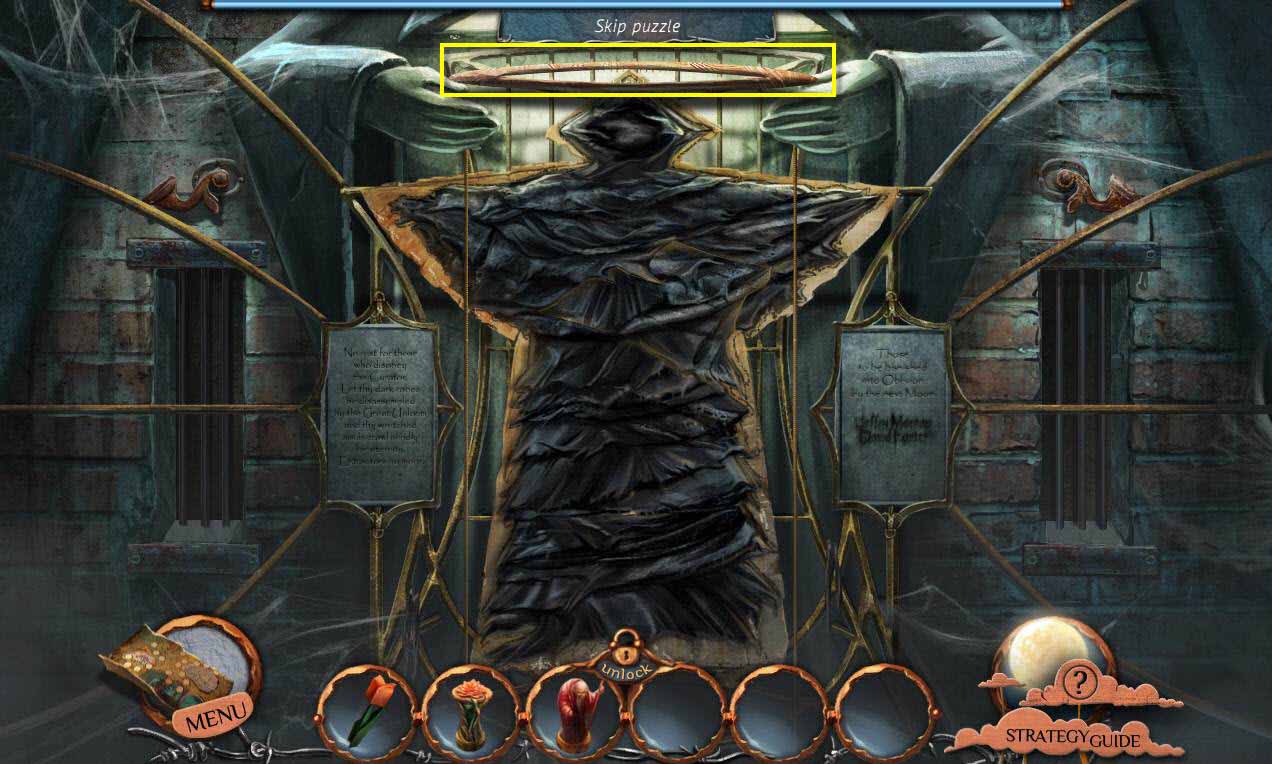
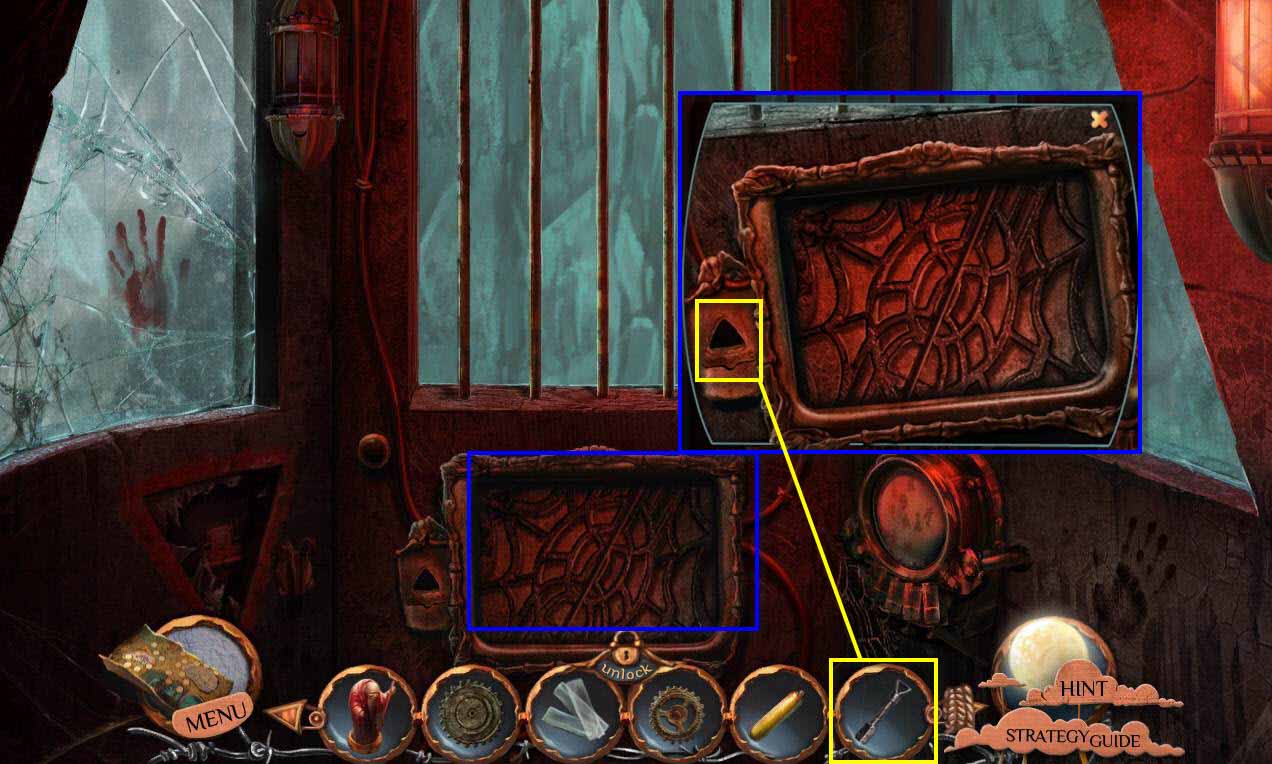
- Click on the window on the left to zoom in.
- Take the 9/9 PARTS OF DARK ROBE.
- Click on the window on the right.
- Use the 9/9 PARTS OF DARK ROBE on the loom.
- This will start a mini-game.
- The goal of the game is to place the pieces of the robe in the right spots.
- Right click to rotate a piece.
- Once you think you have two pieces together correctly, you can click on the top to weave the pieces together. This will lock them in if they are correct.
- Click on the top once the entire robe is put together.
- Take the DARK ROBE.
- Go back one screen, then go to the left.
- Go through the gate after the cut scene.

- Click on Jeff to talk to him.
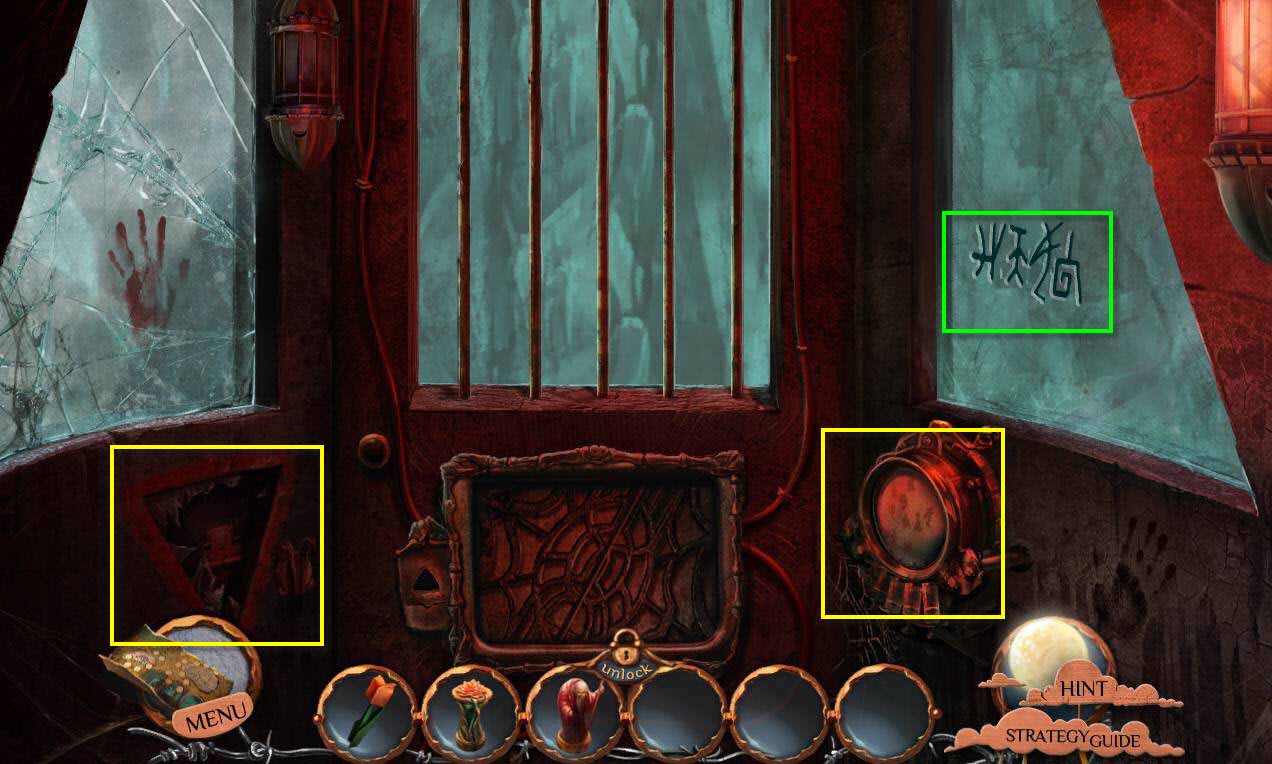
- Click to zoom in on the hole on the left.
- Click to move the glass.
- Take the SACK LABELED DETERMINATION.
- Click to zoom in on the crate.
- Take the SACK LABELED FAMILY BONDS.
- Click to swing the wrecking ball a few times.
- This will break the right statue's head.
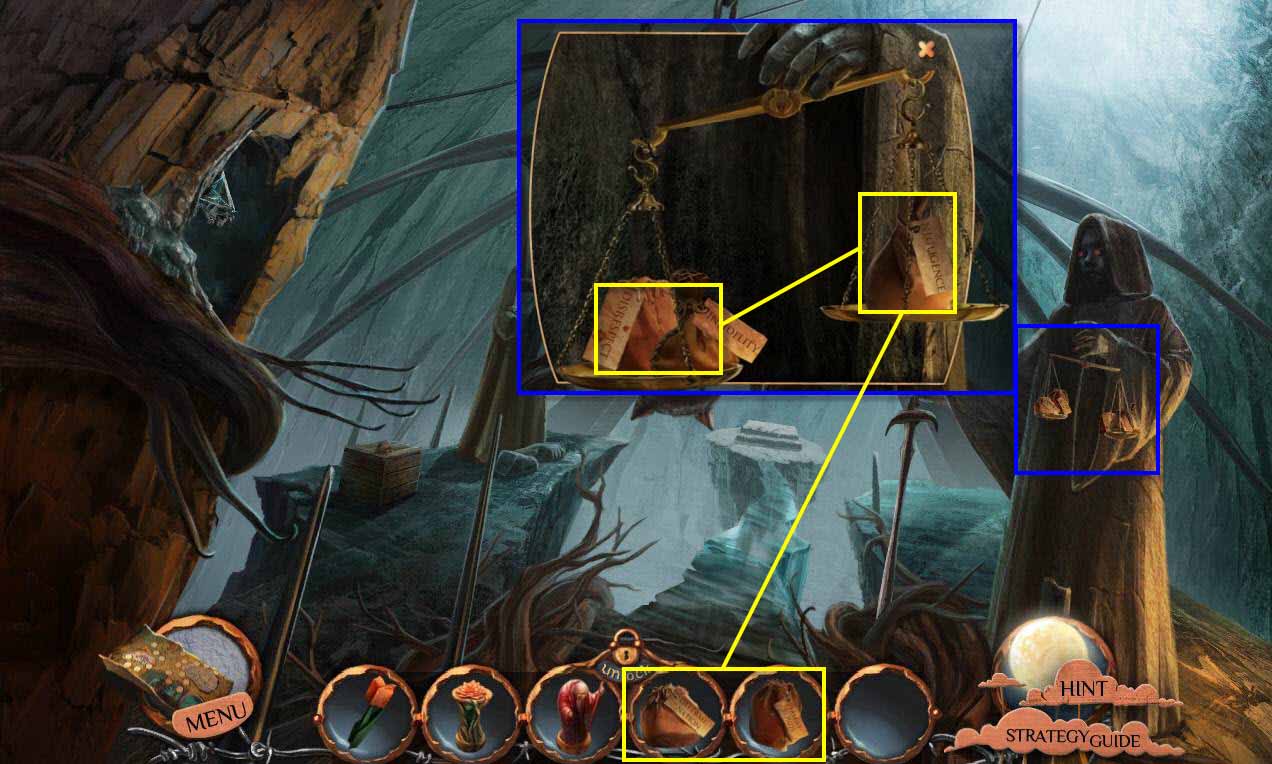
- Click to zoom in on the scales.
- Use the SACK LABELED DETERMINATION and the SACK LABELED FAMILY BONDS on the scale on the right.
- This will start a puzzle... just move the sack labeled negligence to the scale on the left.
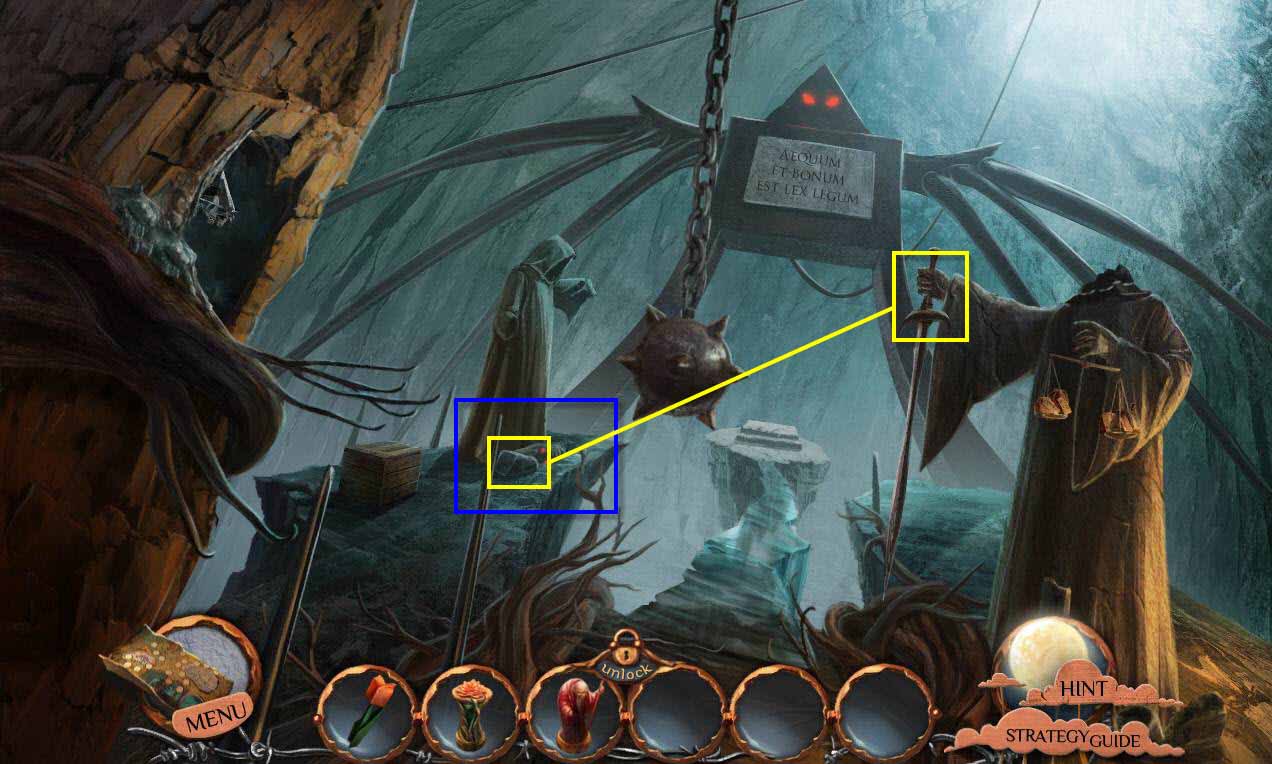
- Click to zoom in on the left statue.
- Take the ROCK.
- Use the ROCK on the sword.
- Take the PART OF THE SWORD.
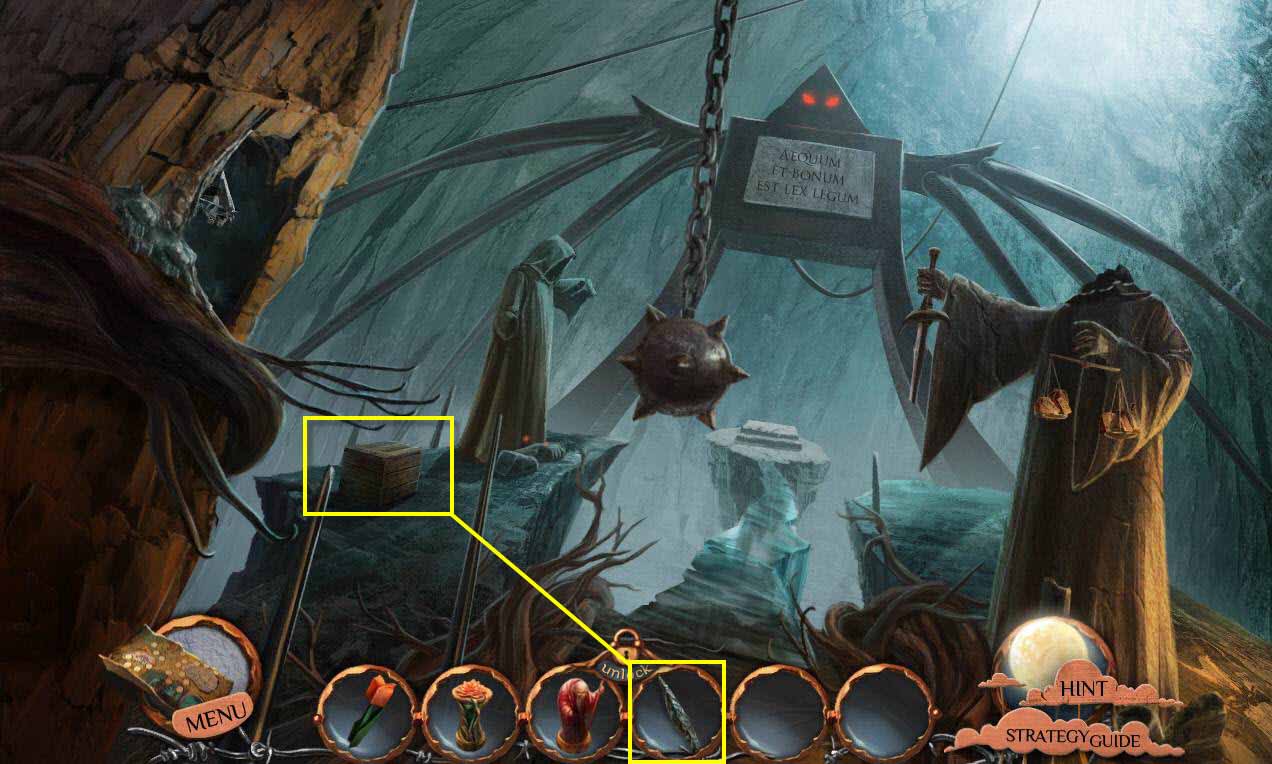
- Click to zoom in on the crate.
- Use the PART OF THE SWORD on the lid.
- Click to open the lid.
- Take the GLASS PYRAMID.
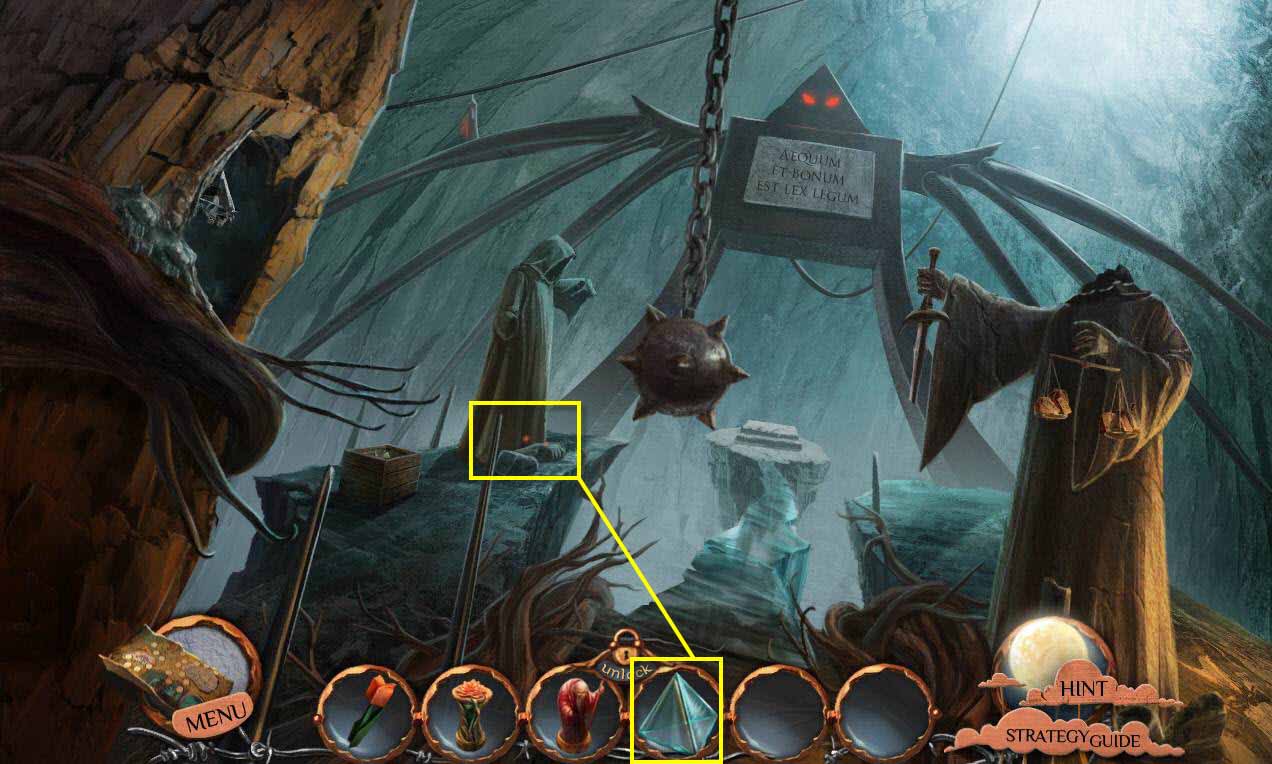
- Click on the statue on the left to zoom in.
- Use the GLASS PYRAMID on the glowworms.
- Make sure it's on the glass and not the rocks or the pyramid will break and you'll have to get another one from the crate.
- You will receive the GLASS PYRAMID WITH GLOWWORMS.
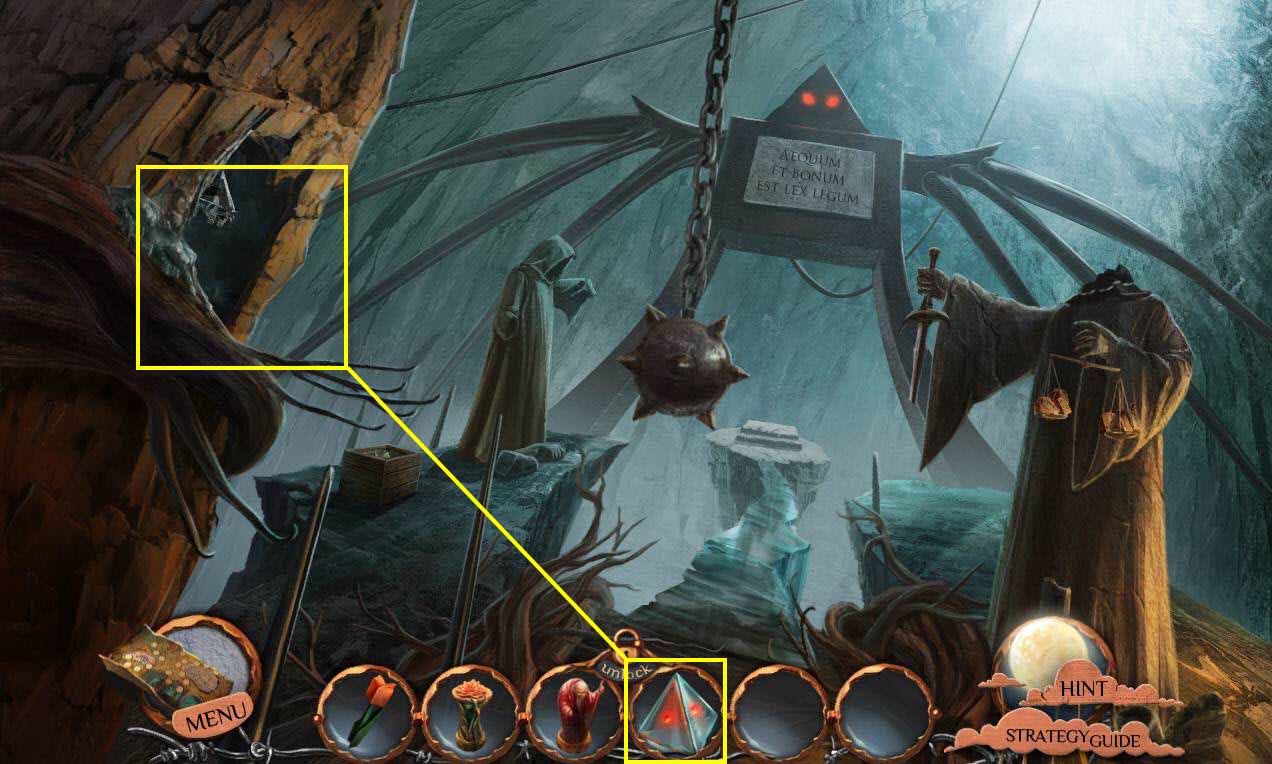
- Click to zoom in on the hole on the left.
- Use the GLASS PYRAMID WITH GLOWWORMS on the lantern holder.
- This will start a mini-game.

- The goal of the game is to move the stack of weights from the far left to the far right.
- Bigger weights cannot go on top of smaller weights.
-
Use the following solution:
- 1 to 3
- 1 o 2
- 3 to 2
- 1 to 3
- 2 to 1
- 2 to 3
- 1 to 3
- 1 to 2
- 3 to 2
- 3 to 1
- 2 to 1
- 3 to 2
- 1 to 3
- 1 to 2
- 3 to 2
- 1 to 3
- 2 to 1
- 2 to 3
- 1 to 3
- 2 to 1
- 3 to 2
- 3 to 1
- 2 to 1
- 2 to 3
- 1 to 3
- 1 to 2
- 3 to 2
- 1 to 3
- 2 to 1
- 2 to 3
- 1 to 3
- Go forward.
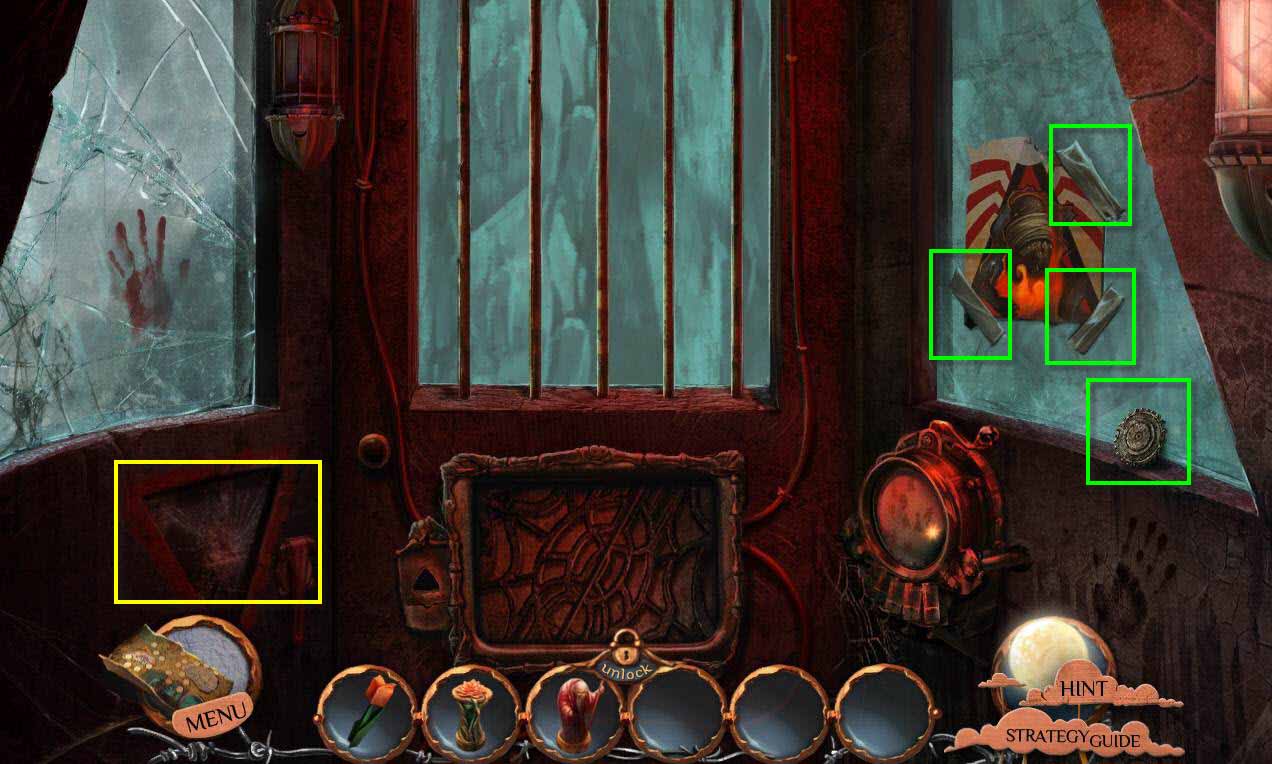
- Take the COGWHEEL and the 3 pieces of ADHESIVE TAPE.
- Click to zoom in on the switchboard.
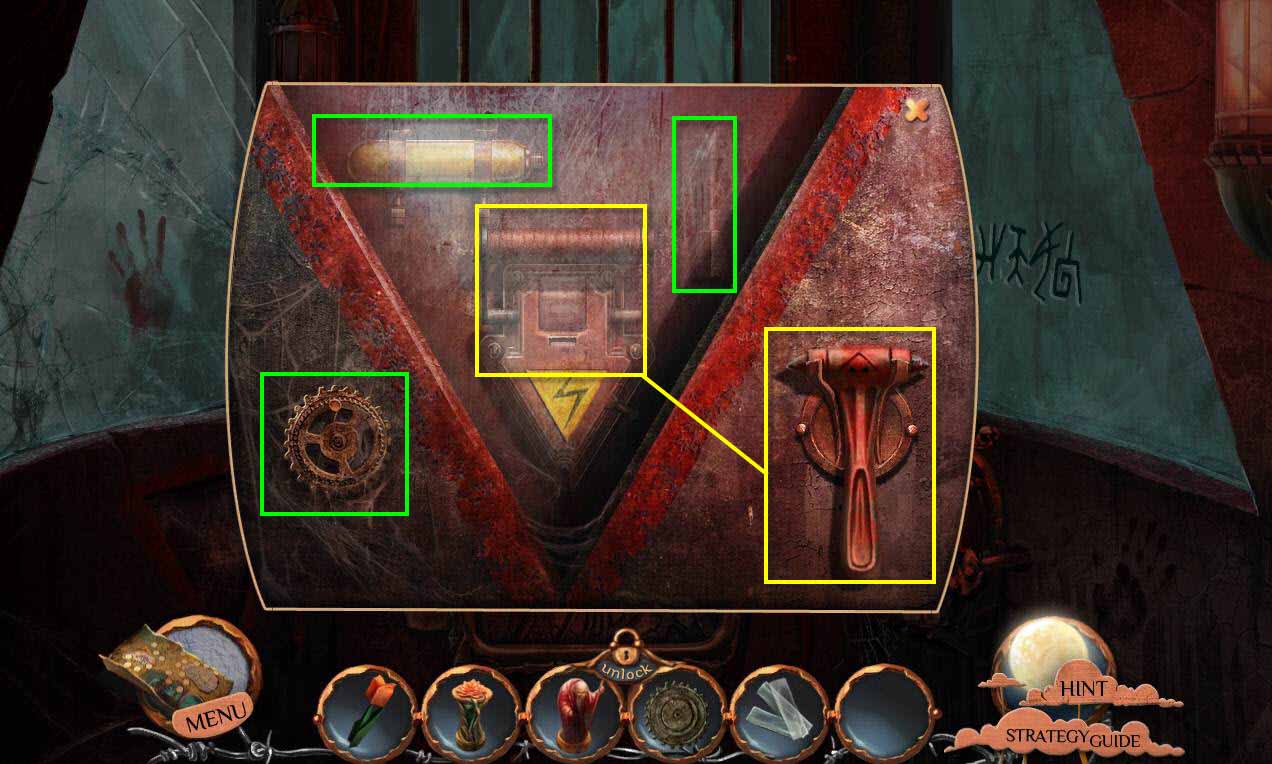
- Take the COGWHEEL.
- Use the hammer on the glass until it breaks.
- Take the ENERGY BULB and the KEY.
- Click to pull the lever.
- Zoom out.
- Click to zoom in on the engine.
- Use the KEY on the lock.
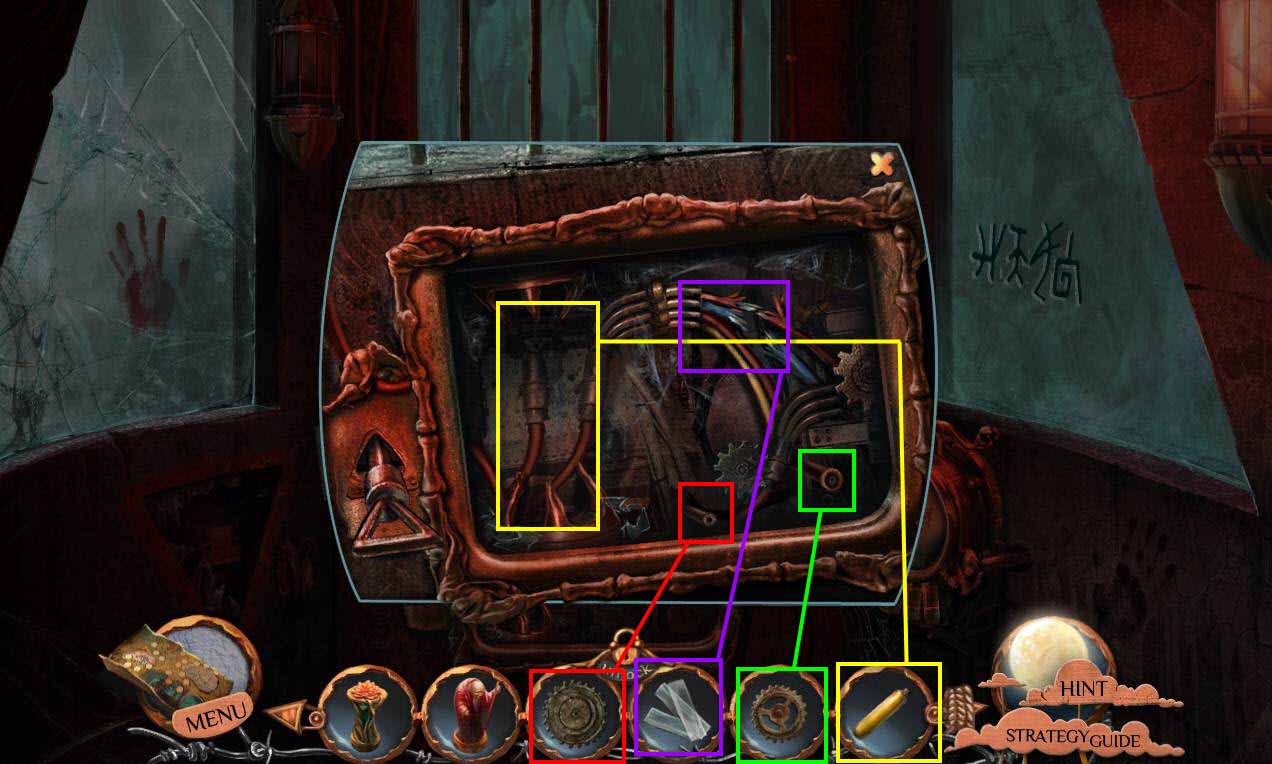
- Click to move the cogwheels and the broken bulb.
- Use the 2 COGWHEELS and the ENERGY BULB to replace the broken pieces.
- Use the ADHESIVE TAPE on the wires.
- Click to zoom in on the switchboard.
- Click on the lever.
- Take notice of the symbols on the window.
- Click to zoom in on the telegraph.
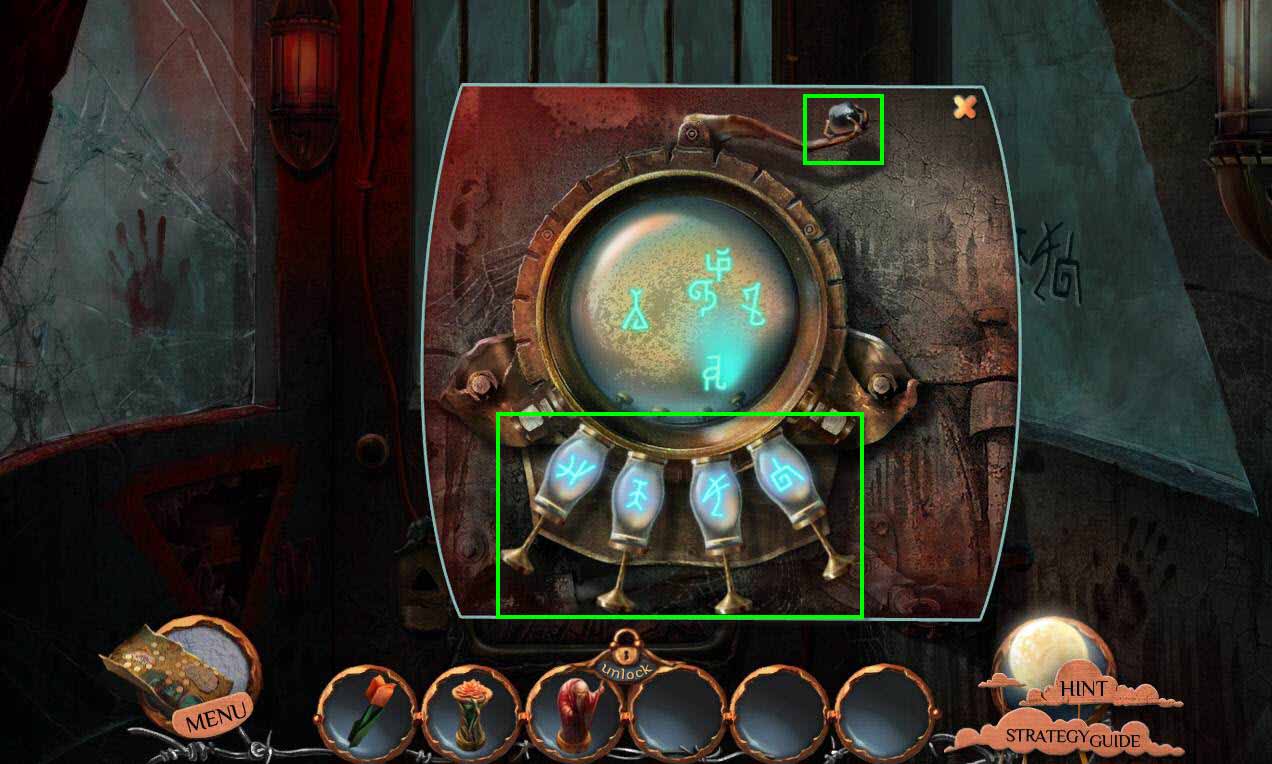
- Click on a symbol that matches the window.
- Start from left to right.
- Once you select a symbol, click the tube at the bottom.
- Repeat this with all the symbols.
- When you are done, click the lever at the top of the telegraph.
- Go forward.
Chapter One: Emily
Chapter Two: The Nightmare Realm
Chapter Three: The Dryad
Chapter Four: David's Tears
Chapter Five: The Demon Book
Chapter Six: Meeting Jeff
Chapter Seven: Kjuu
Chapter Eight: The Secret Room
Chapter Nine: The Postman
Chapter Ten: Philip
Ask for help in the comments below!