
Nevertales: Shattered Image: Chapter Three: Underwater
Our Nevertales: Shattered Image Walkthrough will assist you as you travel through the Book Worlds searching for the daughter who was taken from you by a strange mirror-hopping monster. Rely on our detailed instructions, custom game screenshots, and simple puzzle solutions to save both your daughter, Alice, and the entire Taleworld before it's too late!
- Attempt to move ahead.
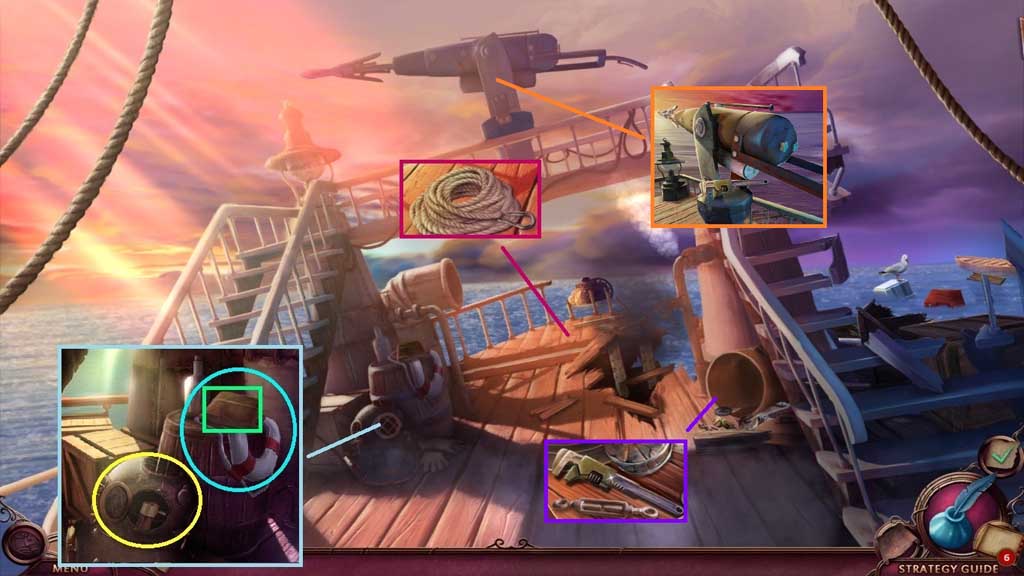
- Click the faceplate; collect the spyglass.
- Click the book 3x’s.
- Collect the deflated life ring.
- Collect the monkey wrench and the rope.
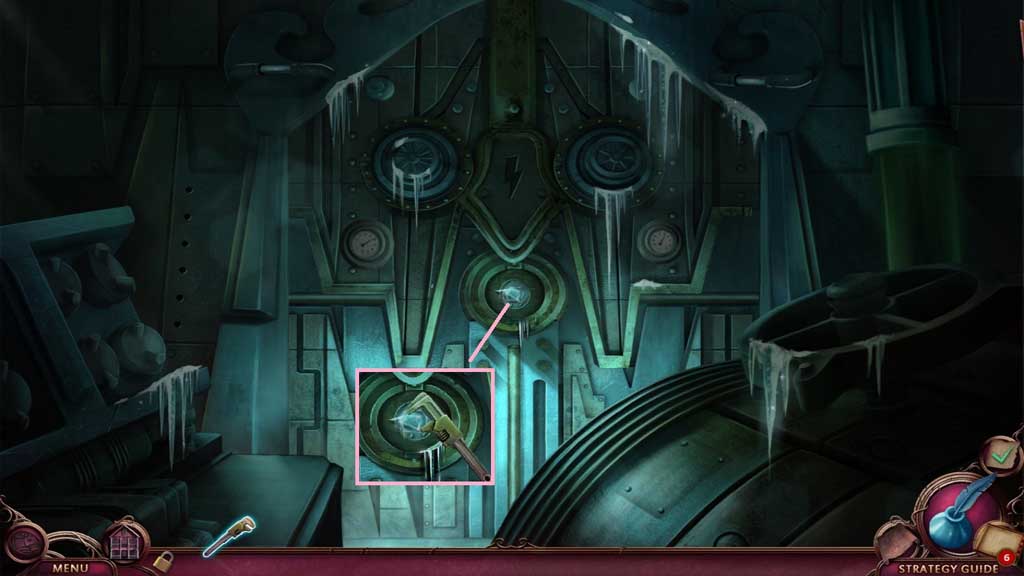
- Remove the bolt using the monkey wrench; click the harpoon.
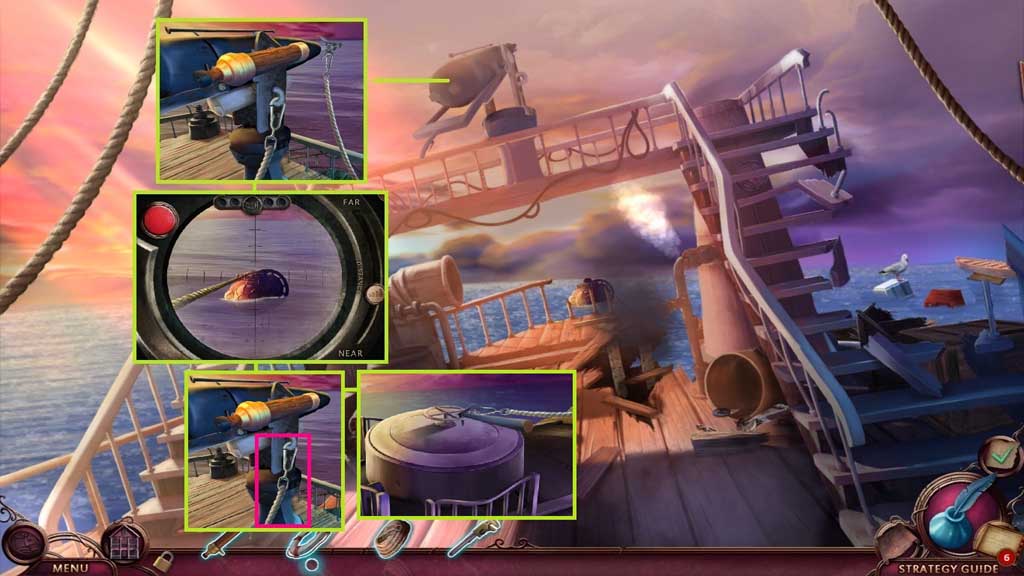
- Connect the rope and the spyglass and look into it to trigger a mini game.
- Solve the game by using the harpoon to retrieve the pod.
- Click the rope.
- Zoom into the pod and click the rope.
- Click the harpoon.
- Click the hatch and enter.
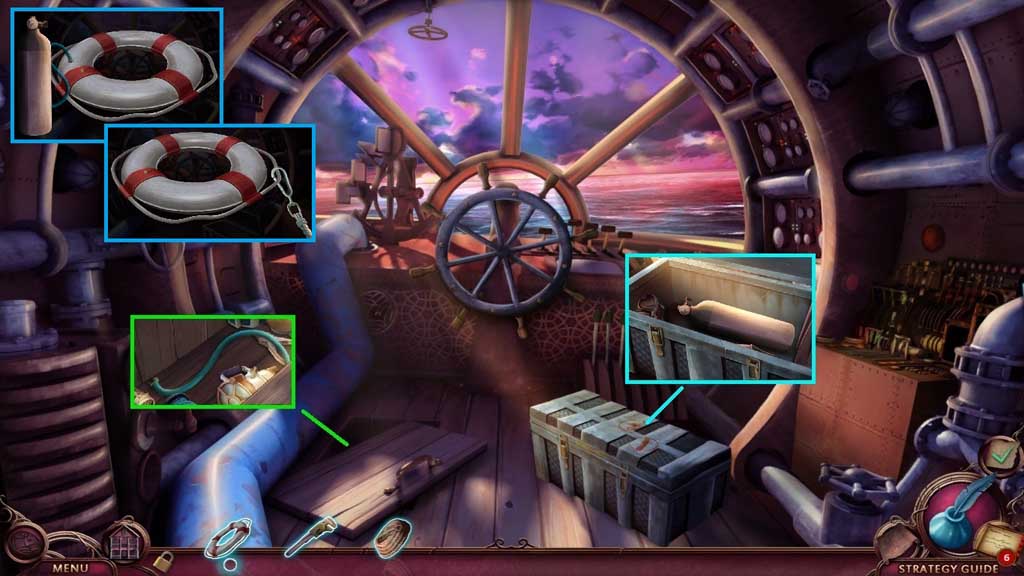
- Click the trap door cover, and then click the items aside.
- Collect the oxygen hose.
- Click the latches and the lid on the tool box.
- Click the items aside.
- Collect the oxygen tank.
- Create and collect the life belt with rope by combining the deflated life ring, the oxygen hose, the oxygen tank and the rope.
- Move down once.
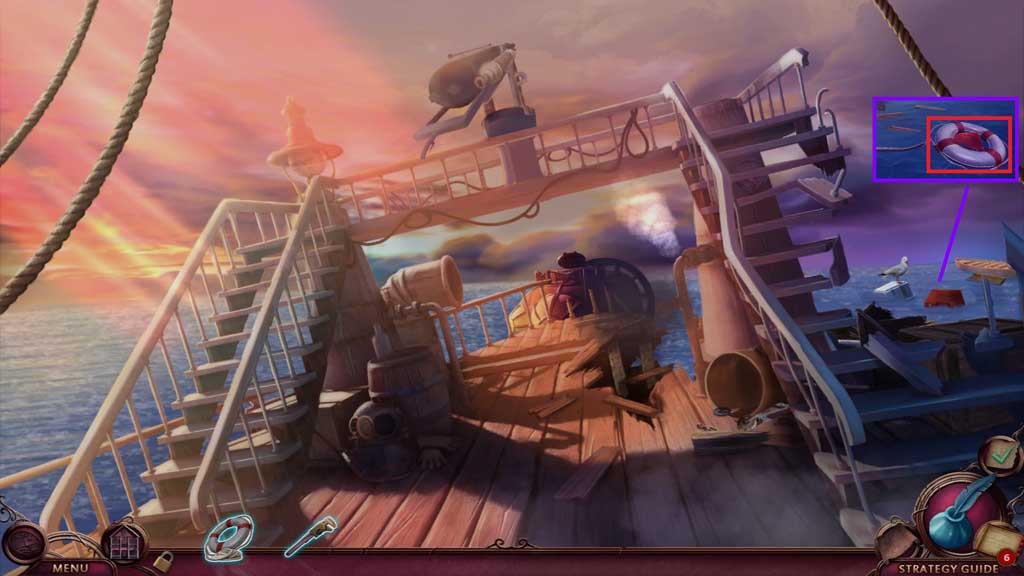
- Select the life belt with rope to collect the first-aid kit.
- Click the first aid kit and click it open to trigger a hidden objects area.
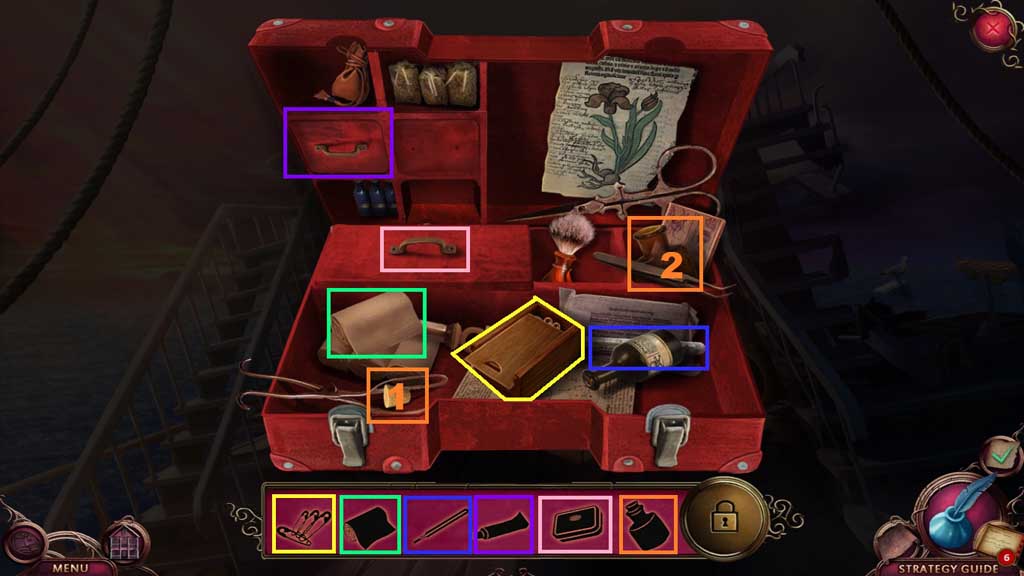
- Click the box; collect the pins.
- Collect the gauze; click the bottle aside and collect the thermometer.
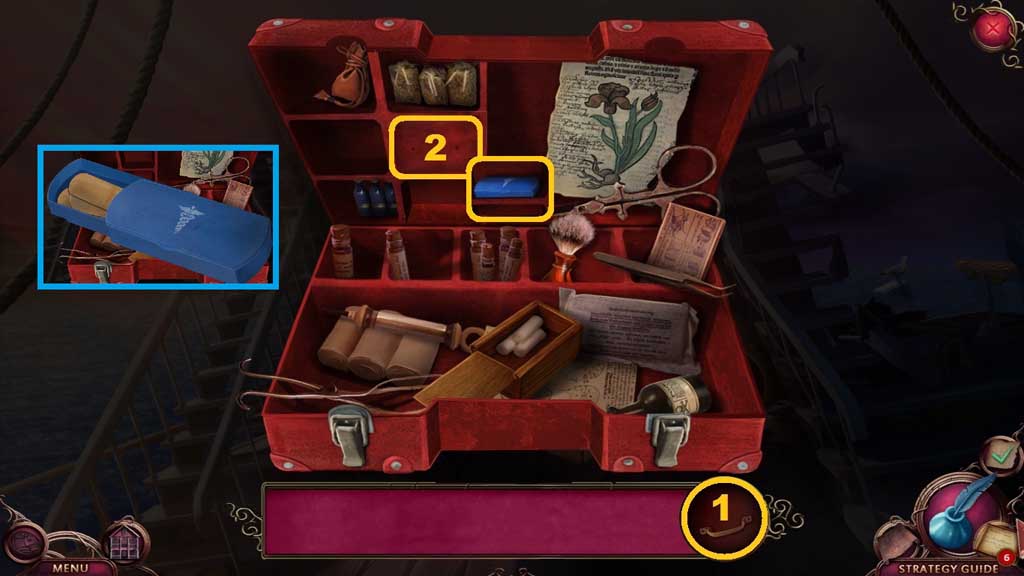
- Click the drawer; collect the tube.
- Click the panel handle; collect the tin.
- Insert the cork into the bottle; click the handle.
- Click the container; collect the adhesive bandage.
- Move ahead.

- Click the panel.
- Mend the wires using the adhesive bandage.
- Click the hidden objects area.
- Find the items.
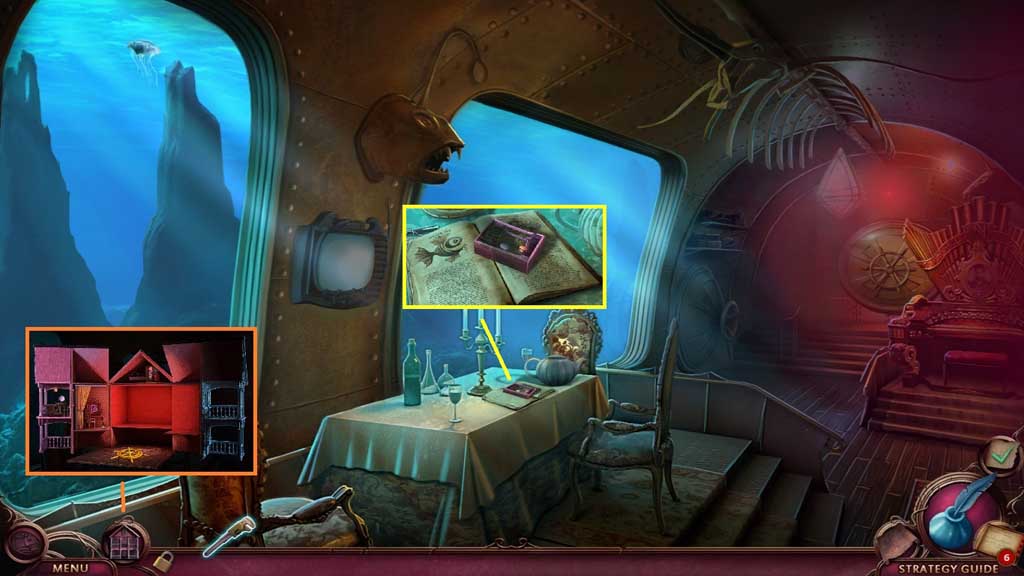
- Collect the doll house piece.
- Insert the dollhouse piece; collect the ship’s wheel.
- Read the book; collect the note.
- Move ahead.
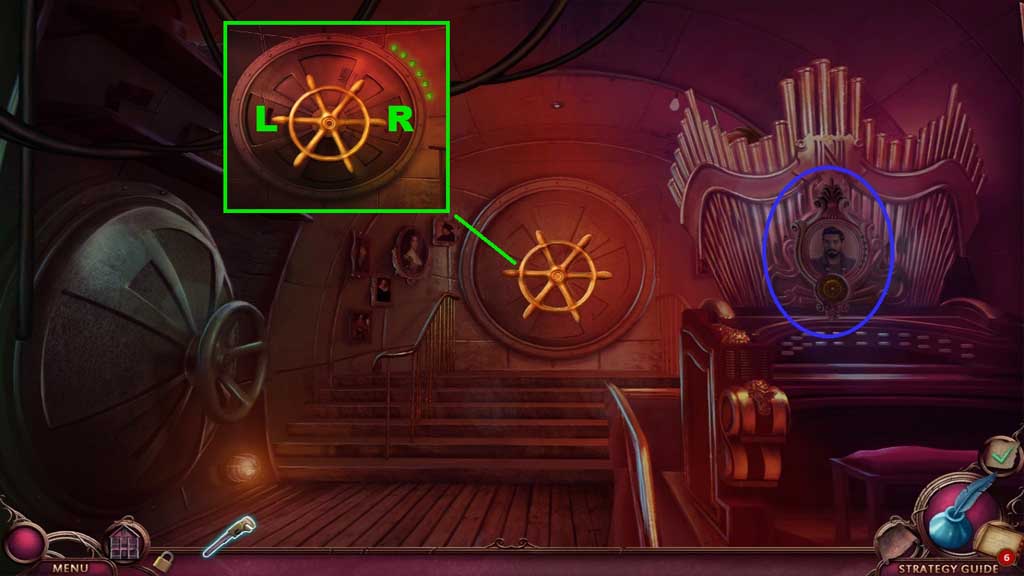
- Zoom into the picture and insert the ship’s wheel; click it once.
- Collect the clue.
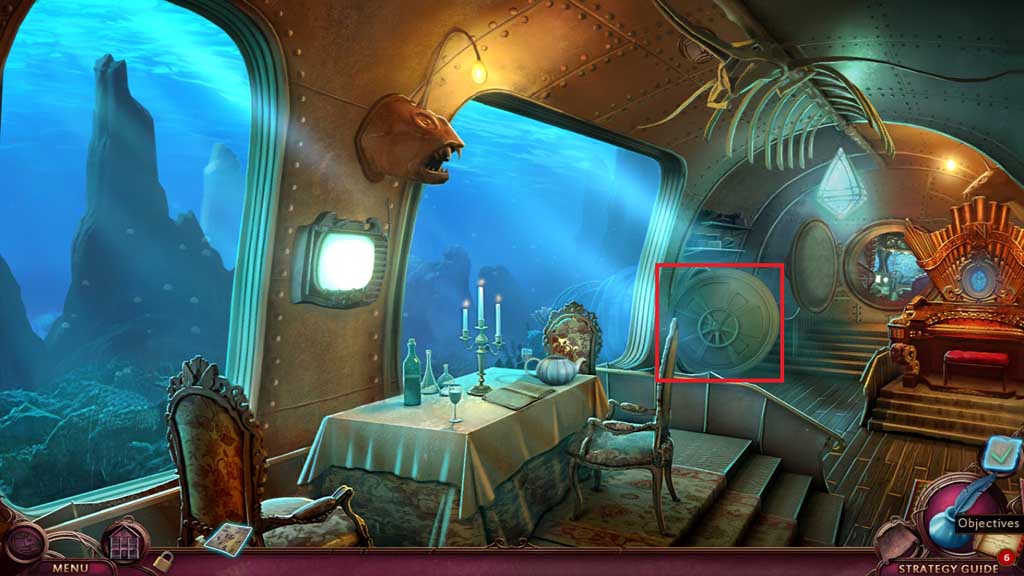
- Zoom into the wheel on the door to trigger a mini game.
- Solve the game by turning the wheel correctly.
- Use the following sequence to solve: L – R – R – L – R - L
- Click the wheel.
- Move ahead and go upstairs to the generator.
- Collect the frozen part using the monkey wrench.
- Move to the Lounge.
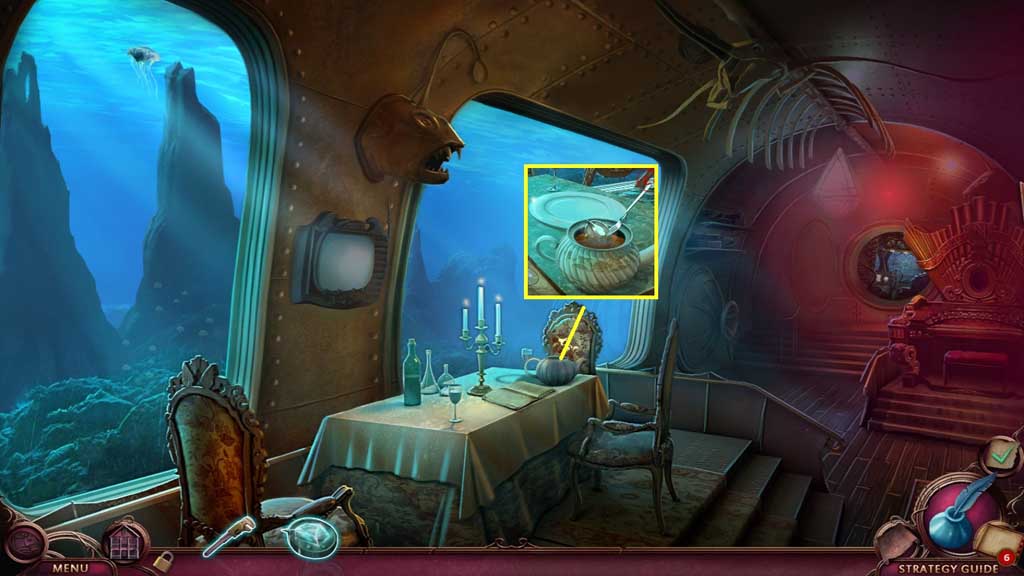
- Click the teapot; insert the frozen door part.
- Select the fork to retrieve the door part.
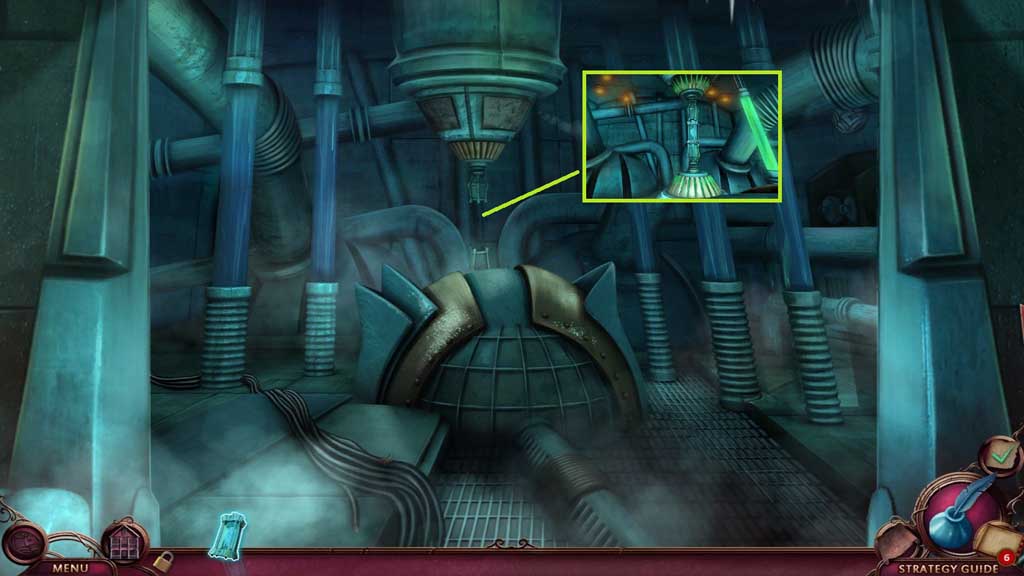
- Move to the generator.
- Insert the door part; click it once.
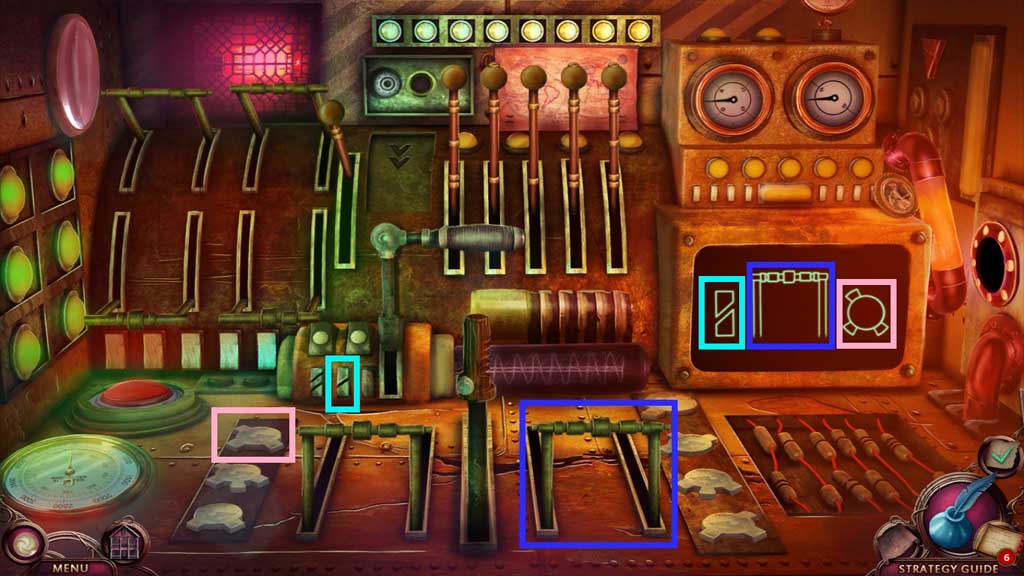
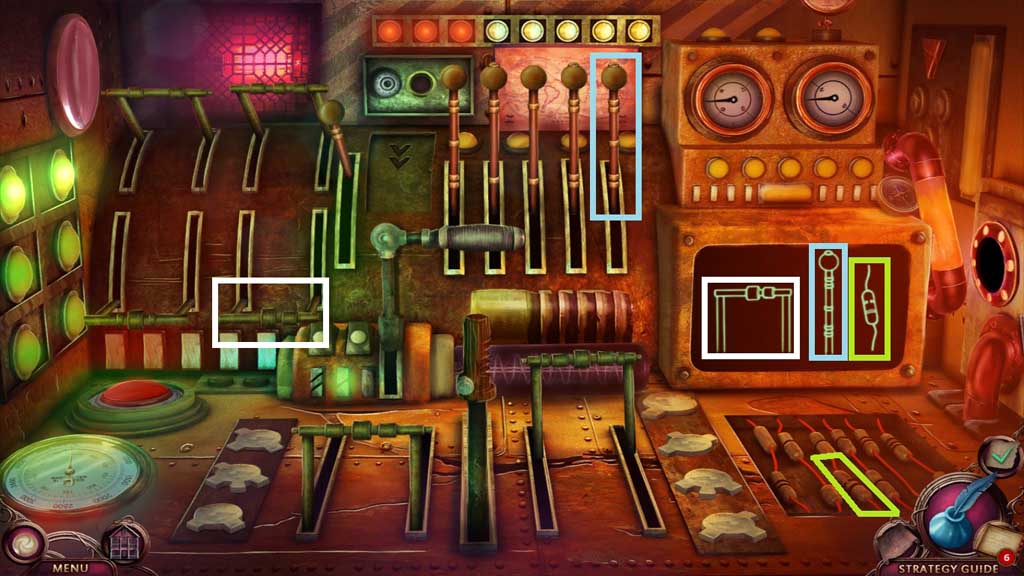
- A mini game will trigger.
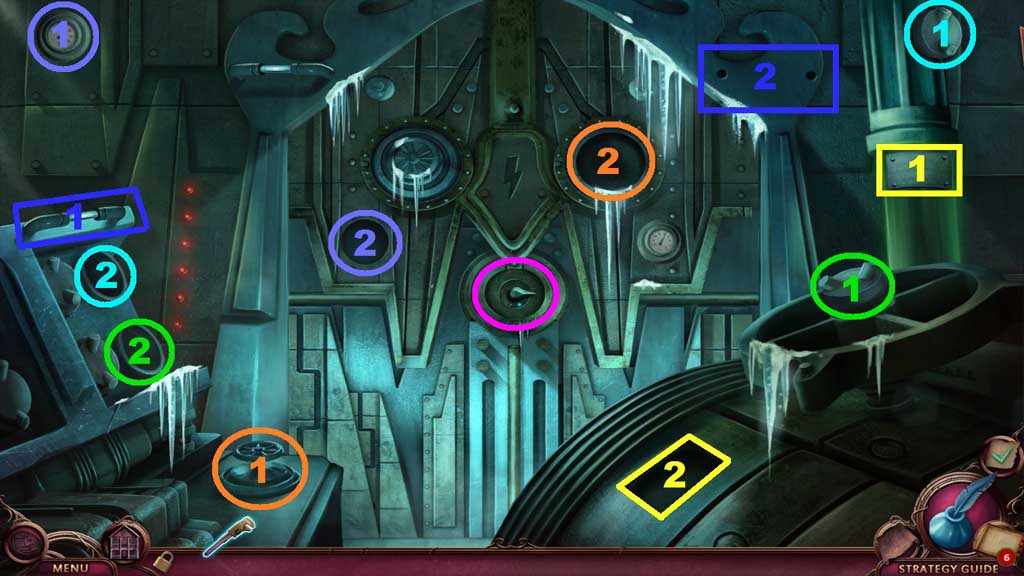
- Solve the game by finding and placing the parts into the correct spots.
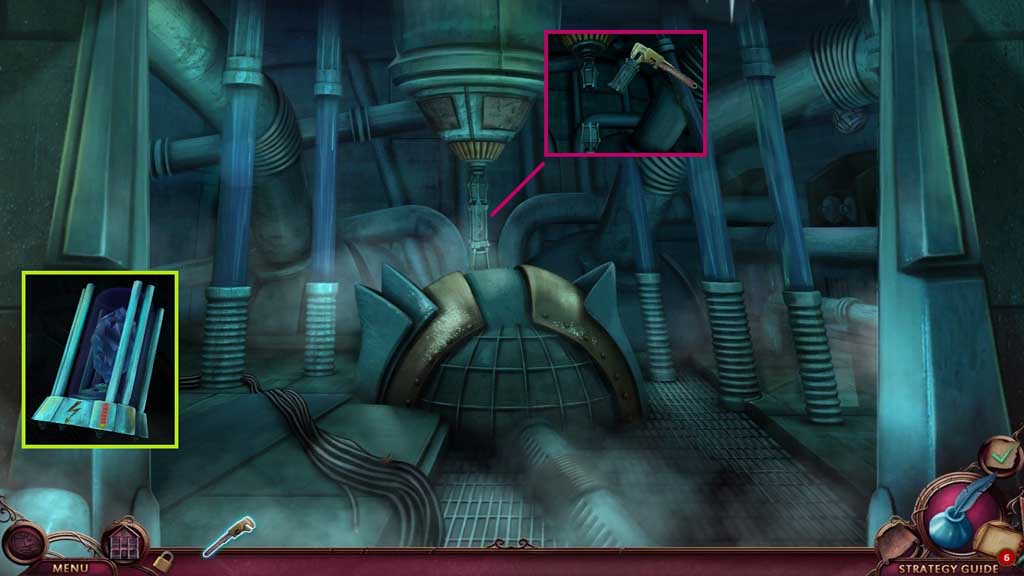
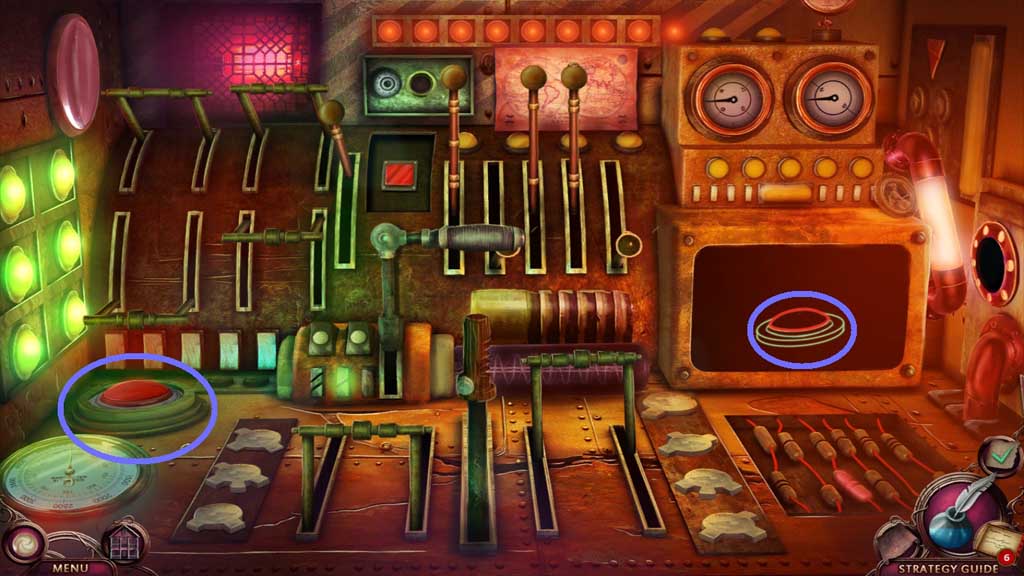
- Collect the depleted battery using the monkey wrench; zoom into it.
- Click the top open; collect the spent crystal and the empty battery.
- Move down 2x’s.
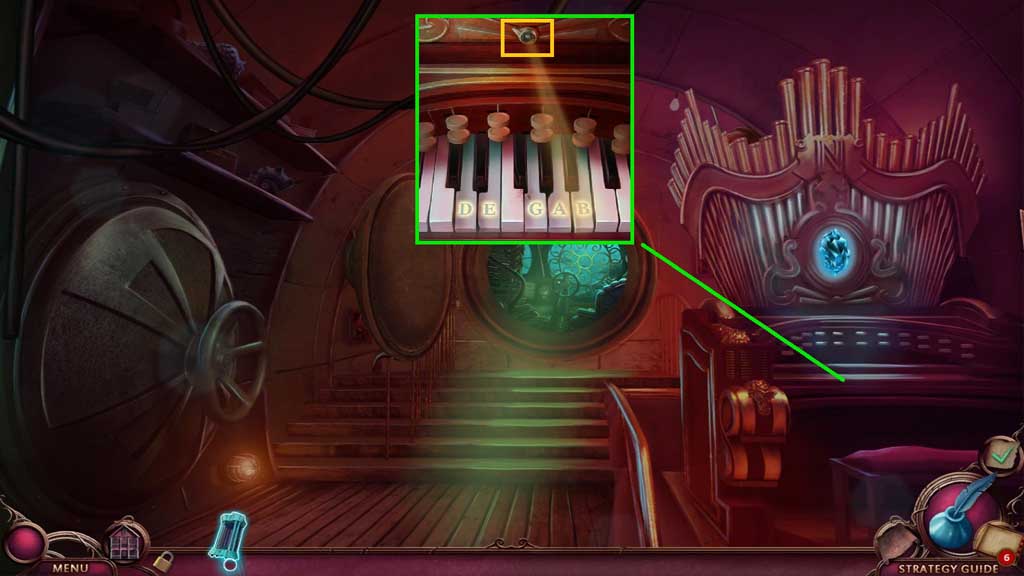
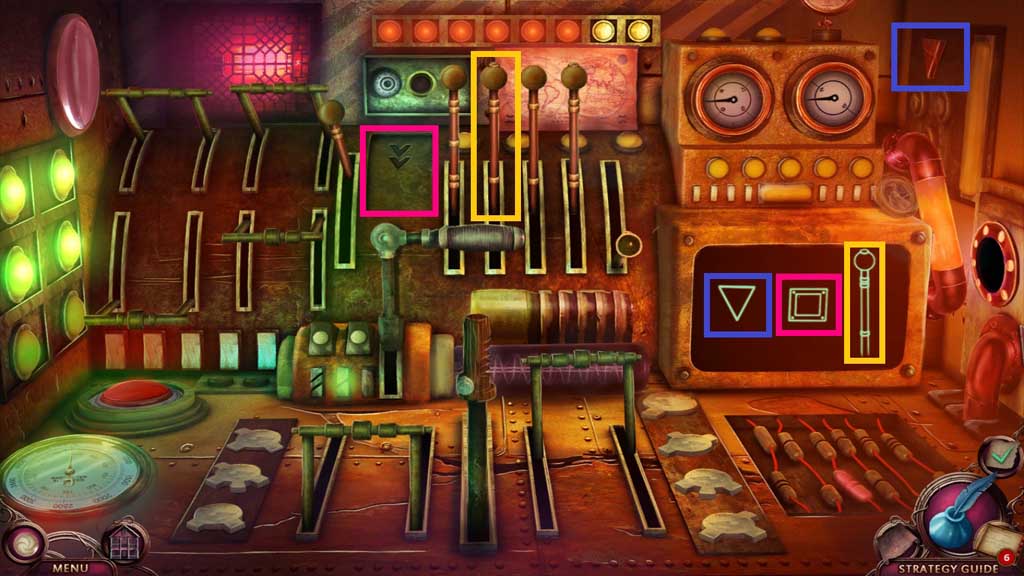
- Insert the spent crystal to trigger a mini game.
- Solve the game by selecting the correct notes.
- Click the illumination button to see the keys.
- Use the following sequence to solve: G – D – A – E – B
- Move to the Lounge.

- Click the hatch; collect the charged crystal.
- Create and collect the recharged battery by combining the empty battery and the charged crystal.
- Move to the generator.
- Insert the recharged battery.
- Move down 2x’s into the Lounge.
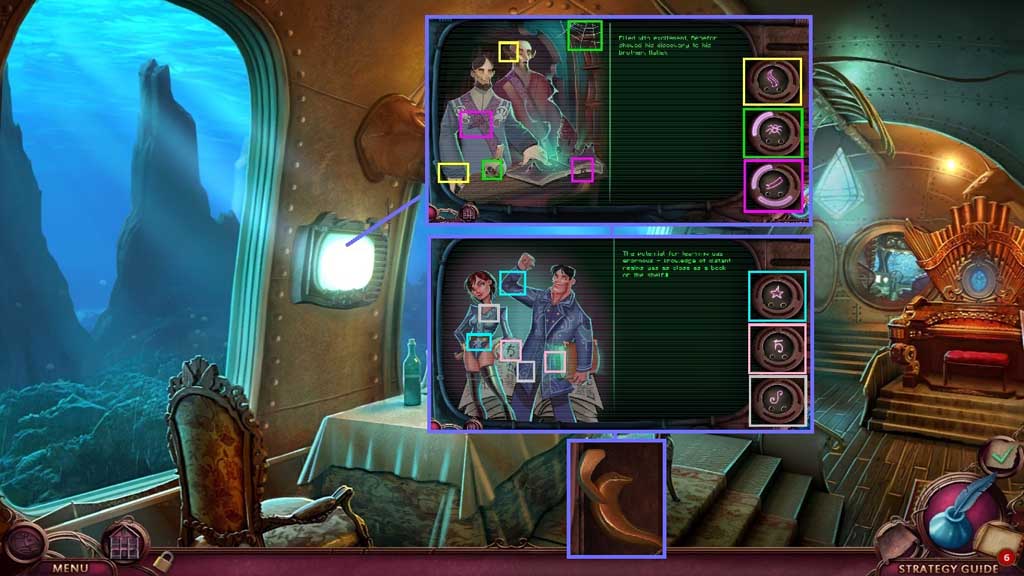
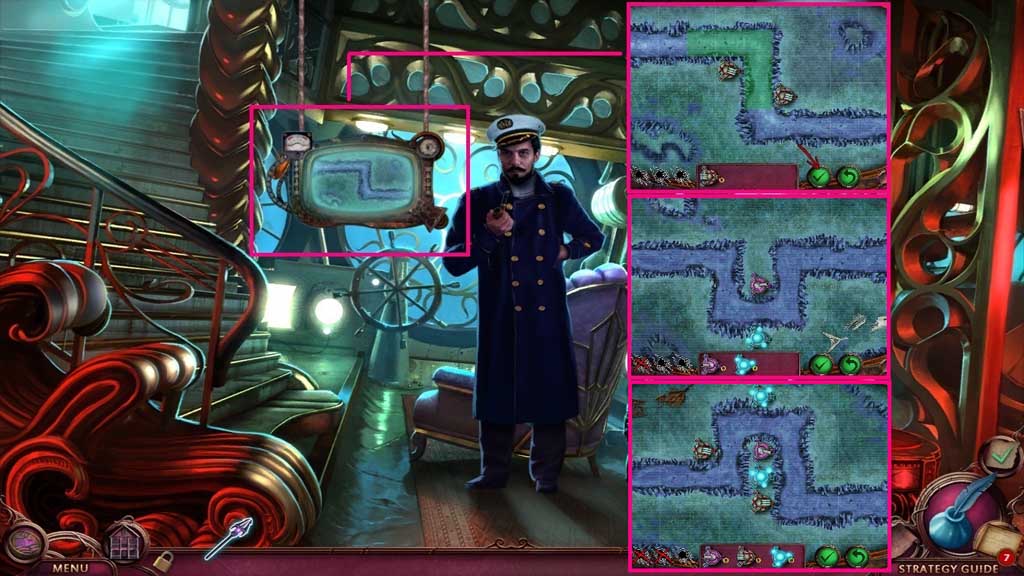
- Zoom into the screen to trigger a mini game.
- Solve the mini game by finding the items within the images.
- Collect the golden dolphin.
- Move to the Bridge.

- Insert the golden dolphin.
- Click the items aside; collect the family picture.
- Speak to the Captain and give him the family picture.
- Collect the instructions.
- Move back once.
- Place the instructions onto the hatch and enter into it to trigger a hidden objects area.
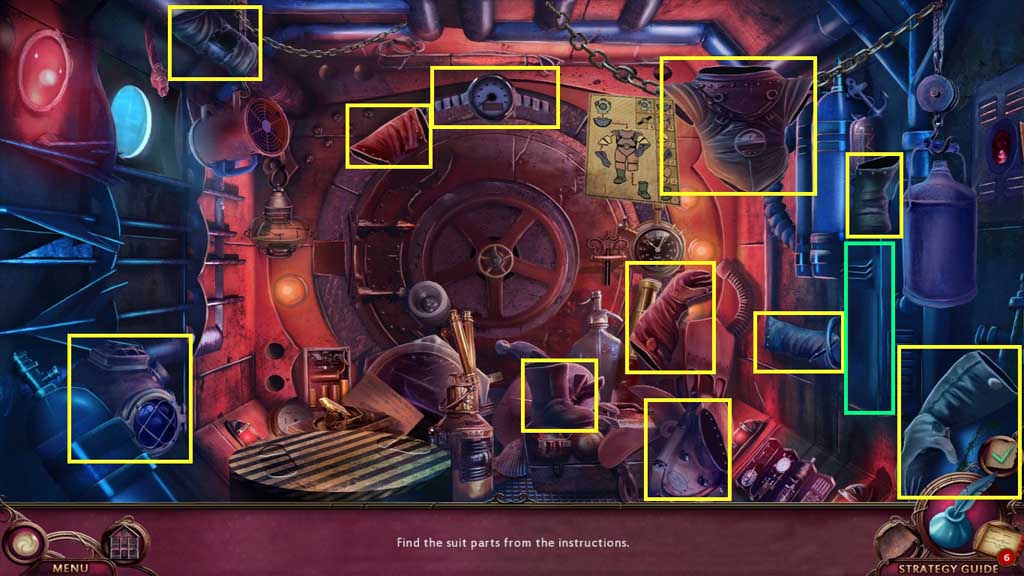
- Find the items.
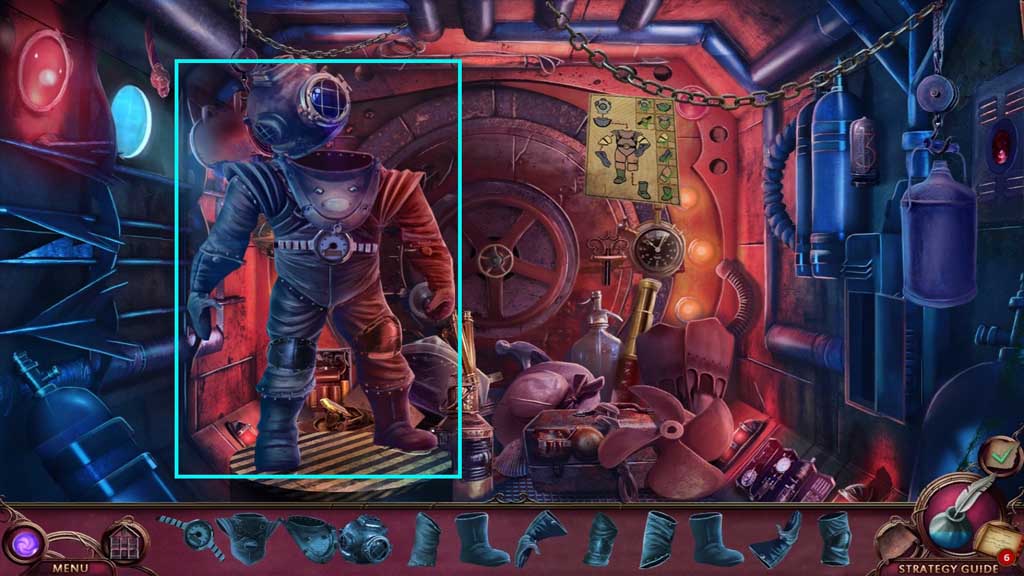
- Click the locker panel; collect the part.
- Assemble the suit.
- Move ahead.
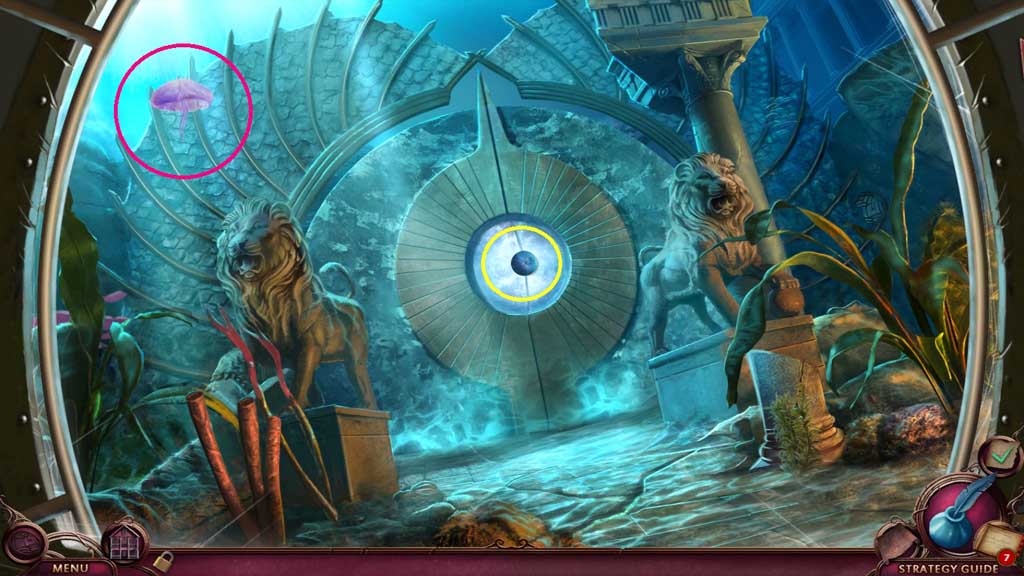
- Collect the rough pearl.
- Collect the jelly fish.
- Move down once.
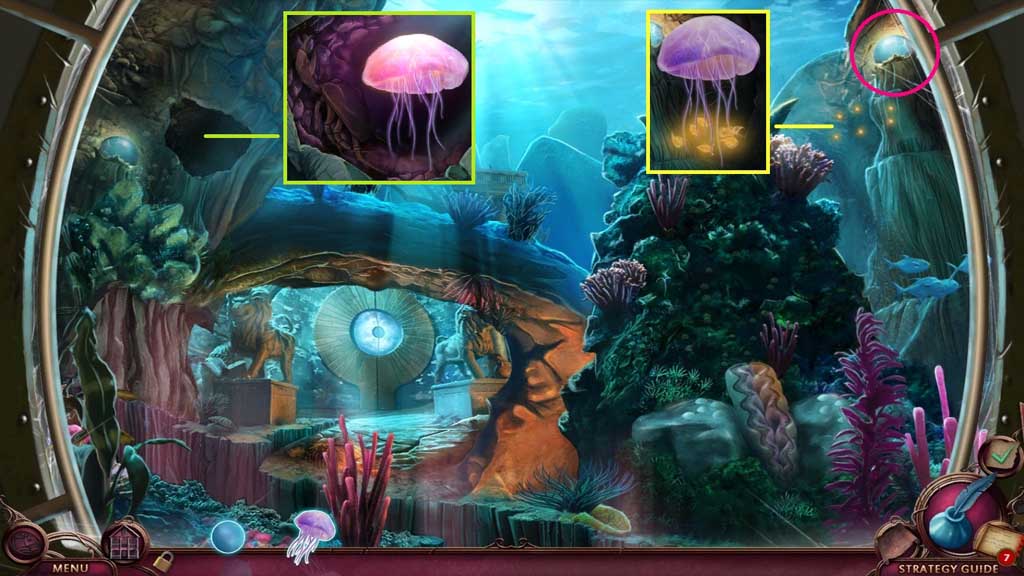
- Click the plankton into a group; place the jellyfish onto them.
- Collect the glowing jellyfish.
- Collect 1 /2 stone eyes.
- Place the glowing jellyfish into the hole; collect the crab claw.
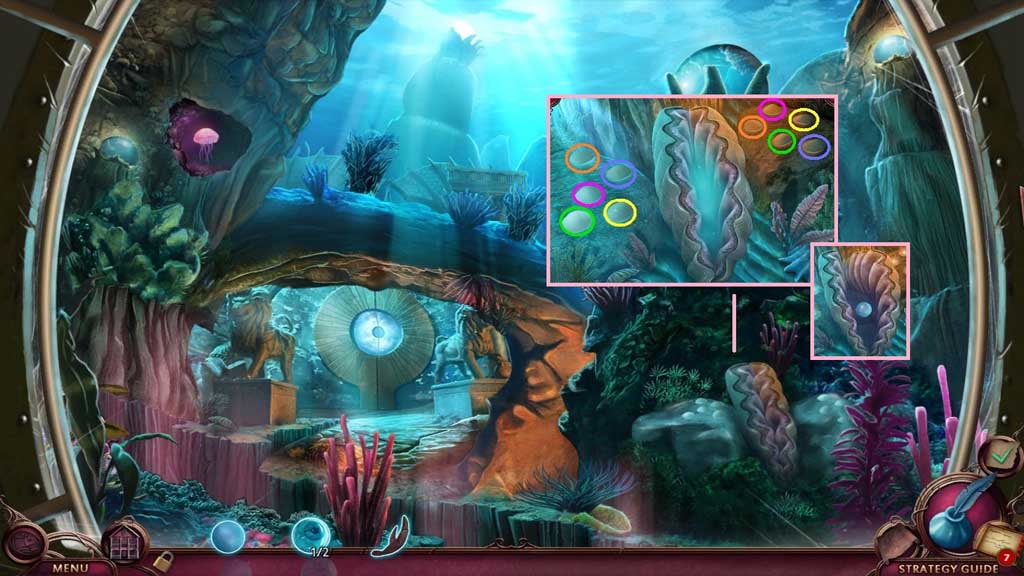
- Open the clam using the crab claw; insert the rough pearl to trigger a mini game.
- Solve the game by finding the matches.
- Collect the perfect pearl.
- Move ahead.

- Insert the perfect pearl.
- Click the weeds; collect 2 /2 stone eyes.
- Insert the 2 stone eyes.
- Move ahead.
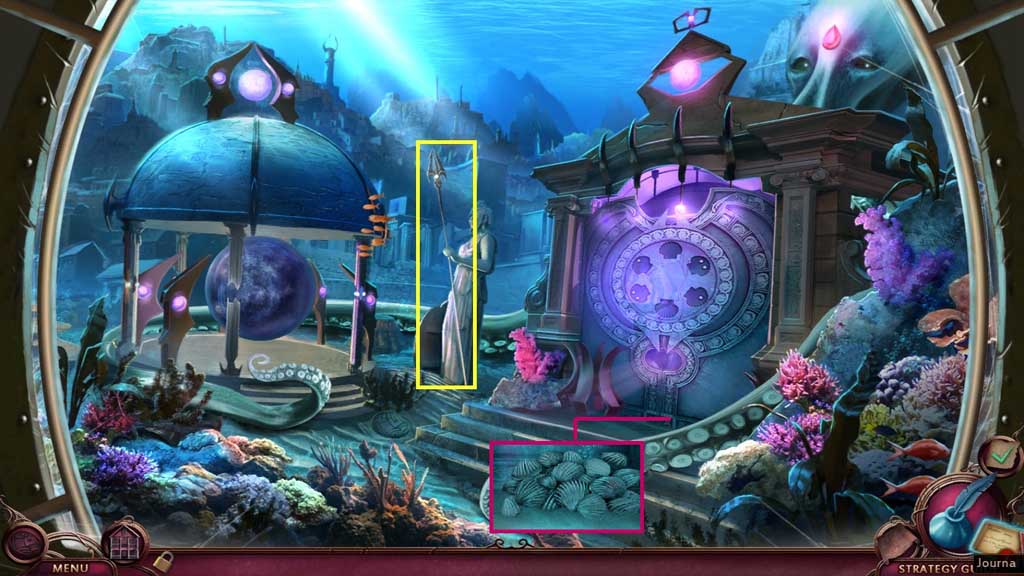
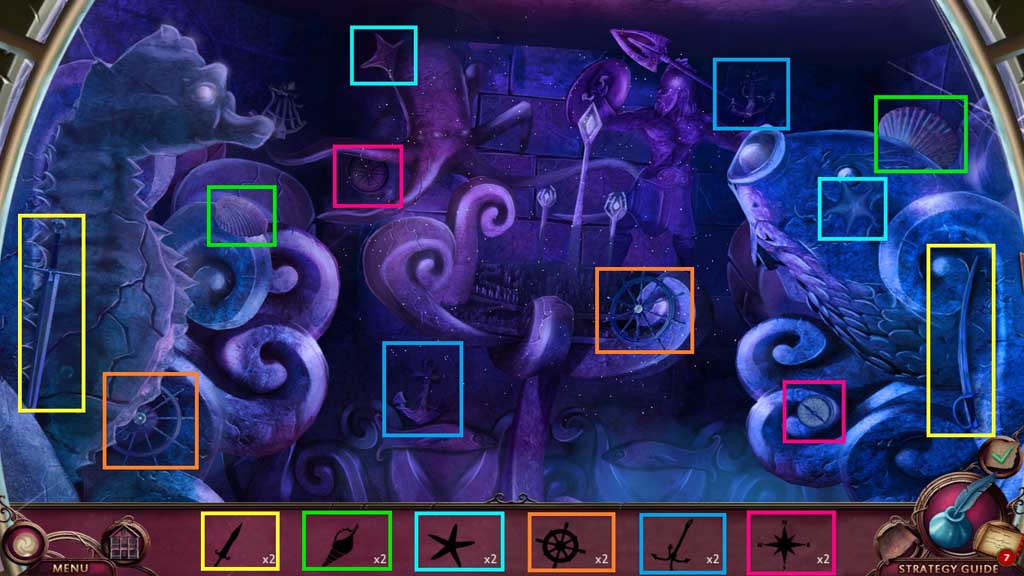
- Click the trident 3x’s to collect it.
- Collect the pile of shells.
- Move back once.
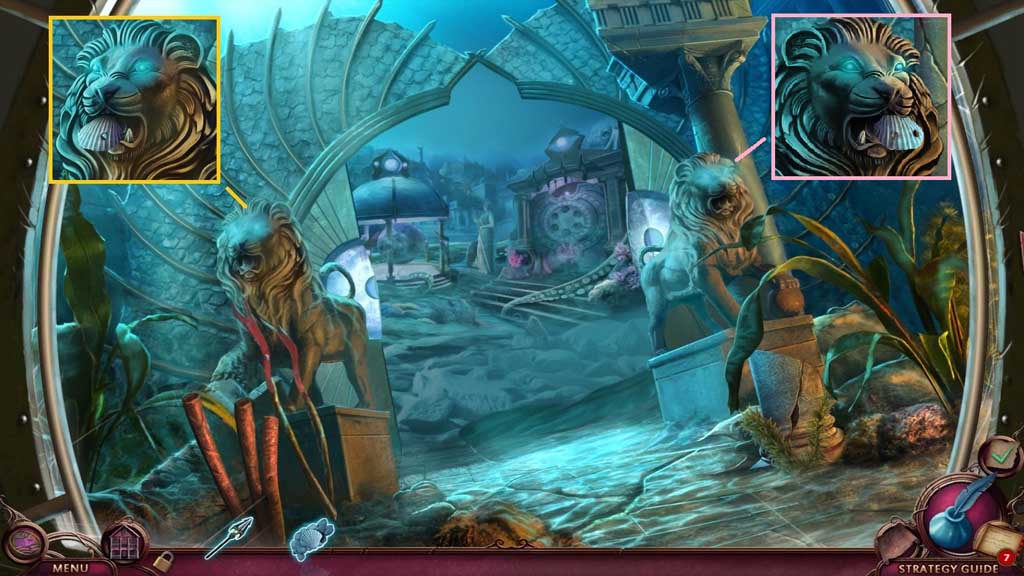
- Zoom into the lion on the left; select the pile of shells and place it into the lion’s mouth to receive the shell with one hole.
- Do this 2x’s.
- Zoom into the lion on the right; select the pile of shells and place it into the lion’s mouth to receive the shell with two holes.
- Do this 2x’s.
- Move ahead.
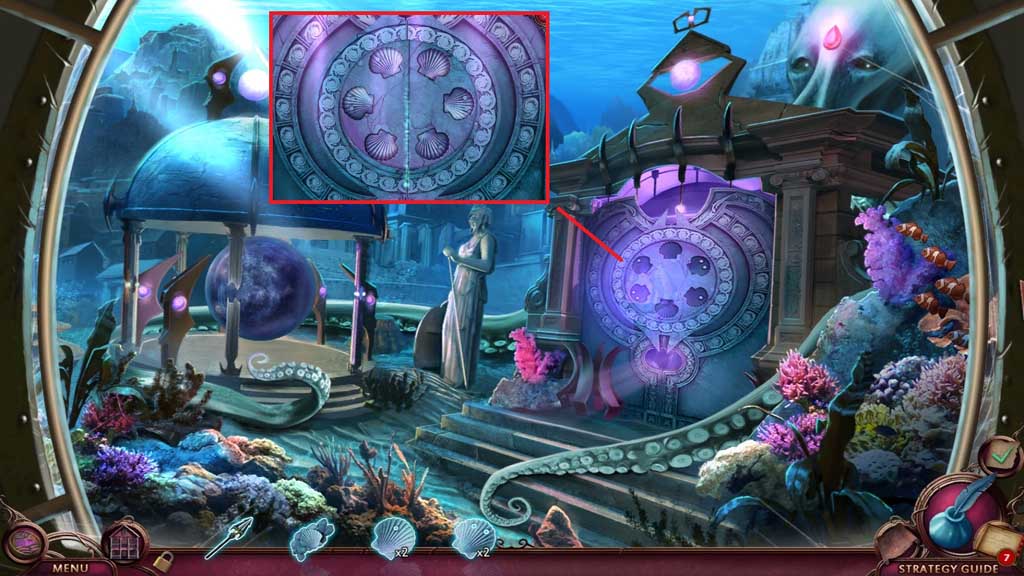
- Insert the pile of shells, the shells with one hole and the shells with 2 holes into the grooves to trigger a hidden objects area.
- Find the items.
- Collect the Atlantean Power.
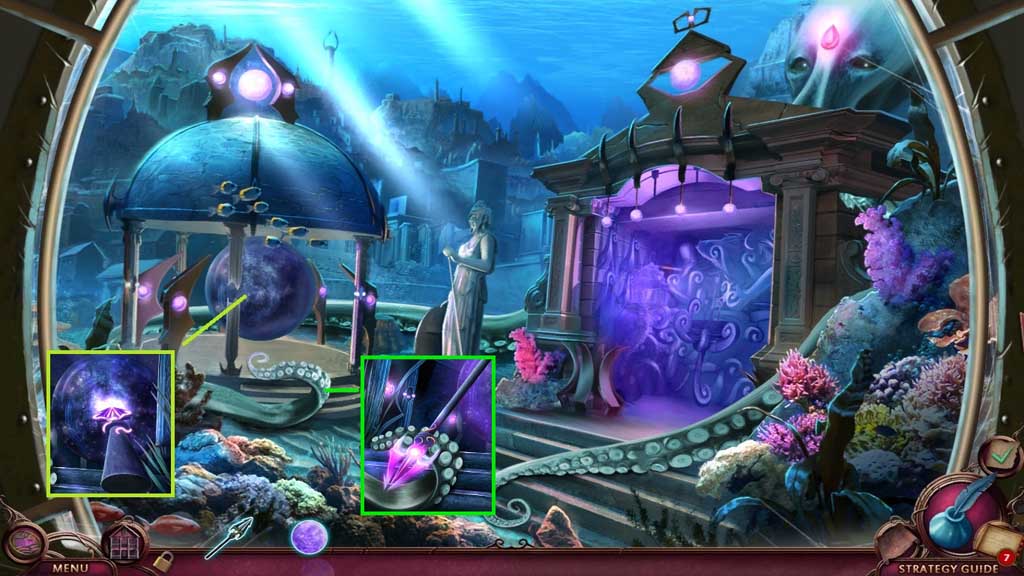
- Select the Atlantean Power and the trident to use on the sphere.
- Receive the charged trident and use it to pierce the octopus.
- Zoom into the screen to trigger a mini game.
- Solve the game by setting the weapons correctly.
- Click the check mark to check the arrangement.
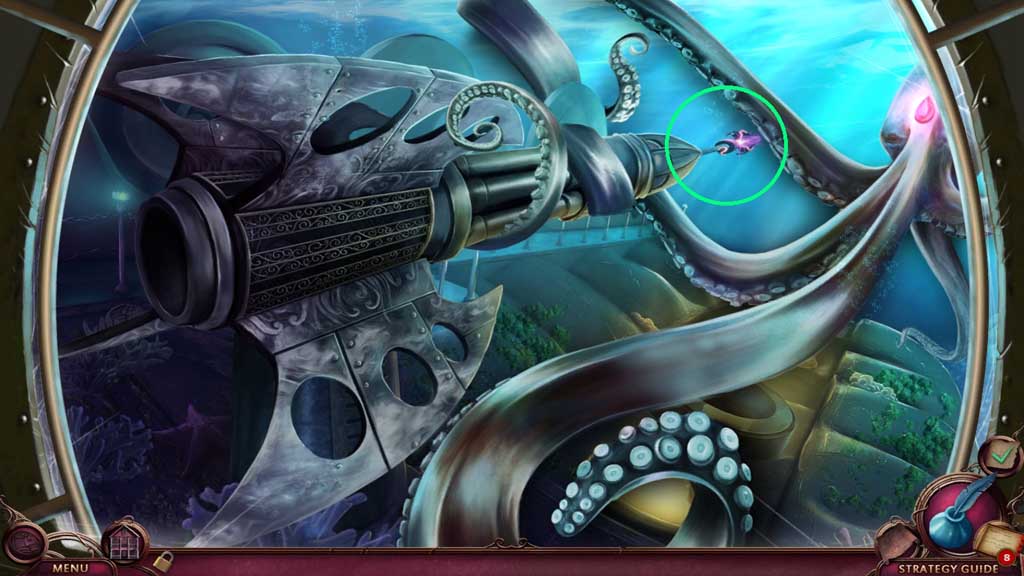
- Place the charged trident into the tip of the harpoon; click it once.
- Click the harpoon.
- Move ahead.

- Click the crystal 4x’s.