
Mysteries of the Mind: Coma: Dream Three: Your Soul
Our Mysteries of the Mind Coma Walkthrough will help you delve deep into the most painful memories of your past as you attempt to right the wrongs you once committed in order to free yourself from your coma. With detailed instructions for each memory paired with custom screenshots and solutions to all puzzles, you'll have no problem tracking down the ghosts of your past and righting the wrongs in this hauntingly tragic hidden object game.
General Info and Tips
Dream One: Your Mother
Dream Two: Your Grandpa
Dream Three: Your Soul
Ask for help in the comments below!
Dream One: Your Mother
Dream Two: Your Grandpa
Dream Three: Your Soul
Ask for help in the comments below!
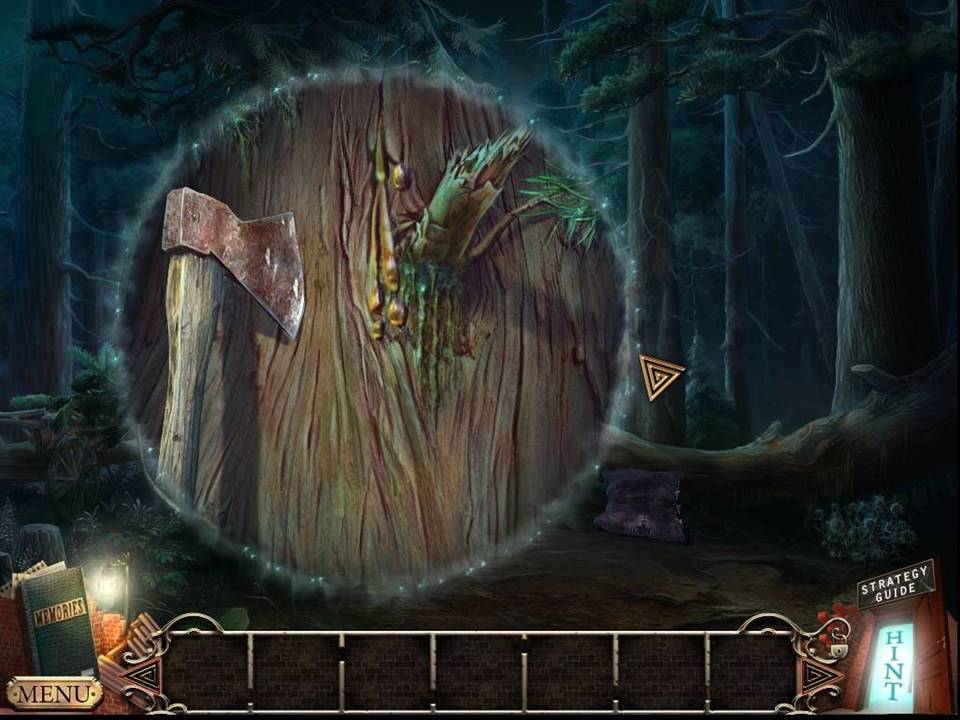
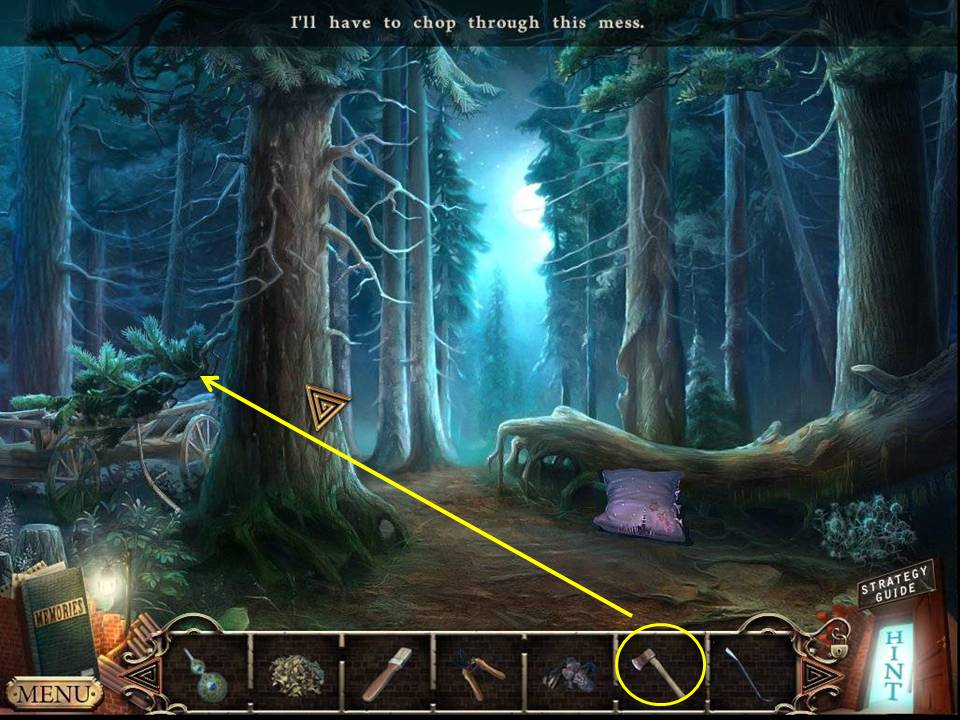
- Zoom into the tree.
- Take the BLUNT AXE.
-
Go forward to the cabin.

-
Click the bucket to make it fall into the well.
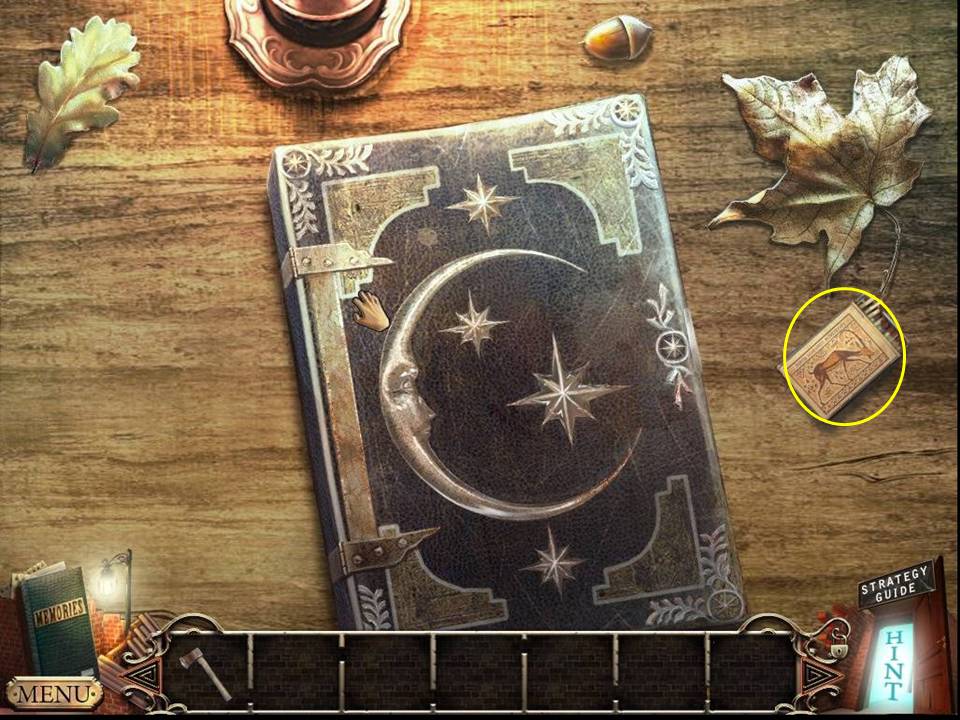
- Zoom into the table.
- Take the MATCHES.
- Open the book.
- Click the page and take the ELIXIR OF LIFE.
-
Go to the back of the cabin.
- Zoom into the tire swing.
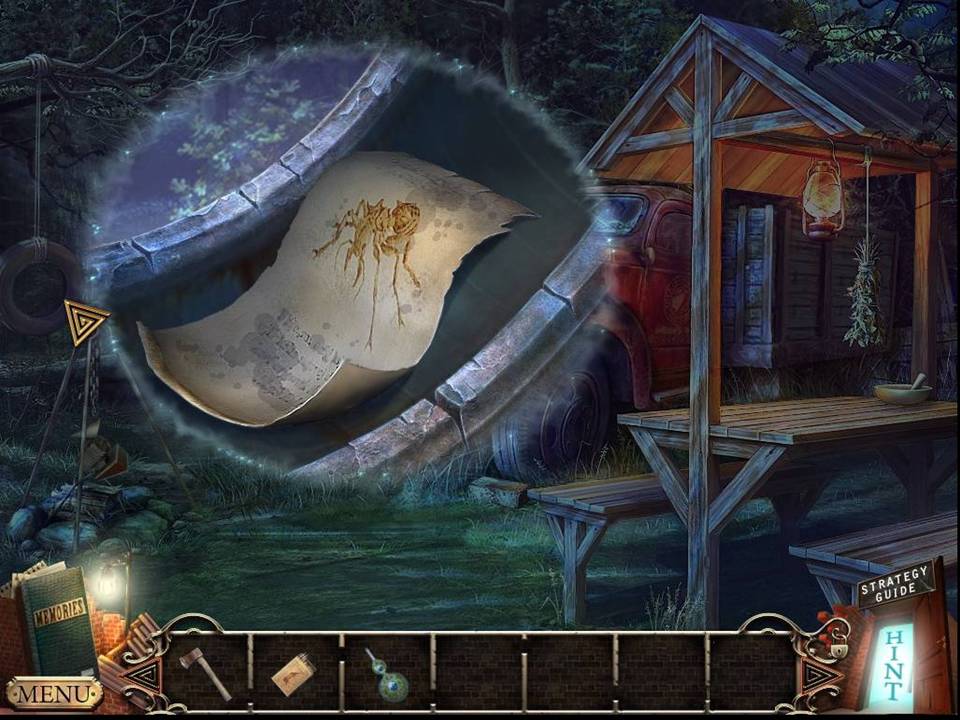
-
Take the note and the WELL HANDLE from underneath.
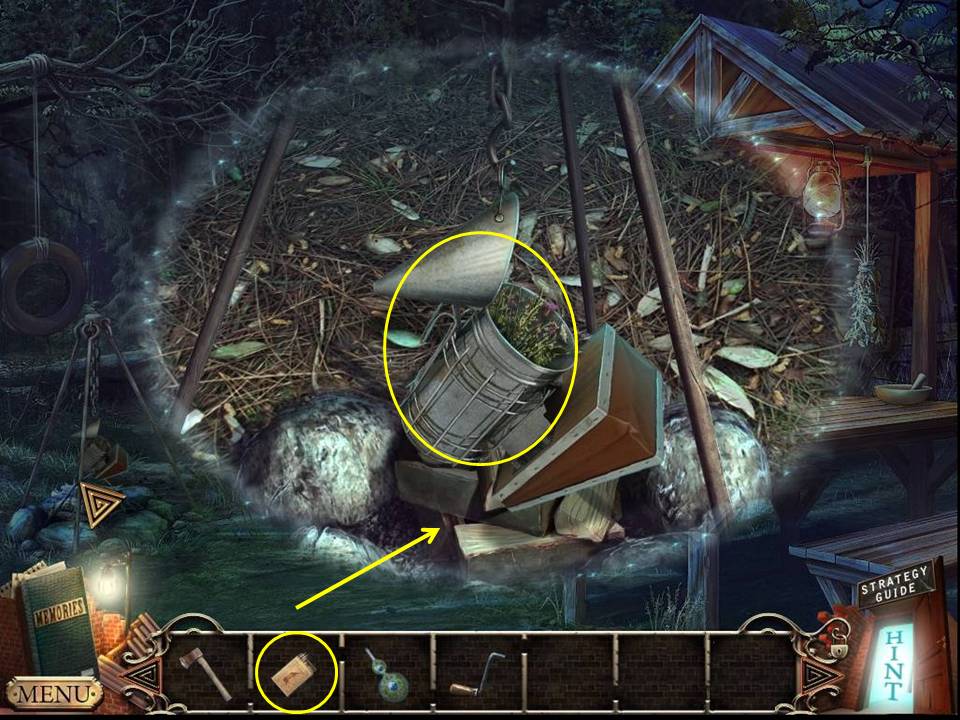
- Zoom into the firepit.
- Take the BEE SMOKER.
-
Start the fire with the MATCHES.
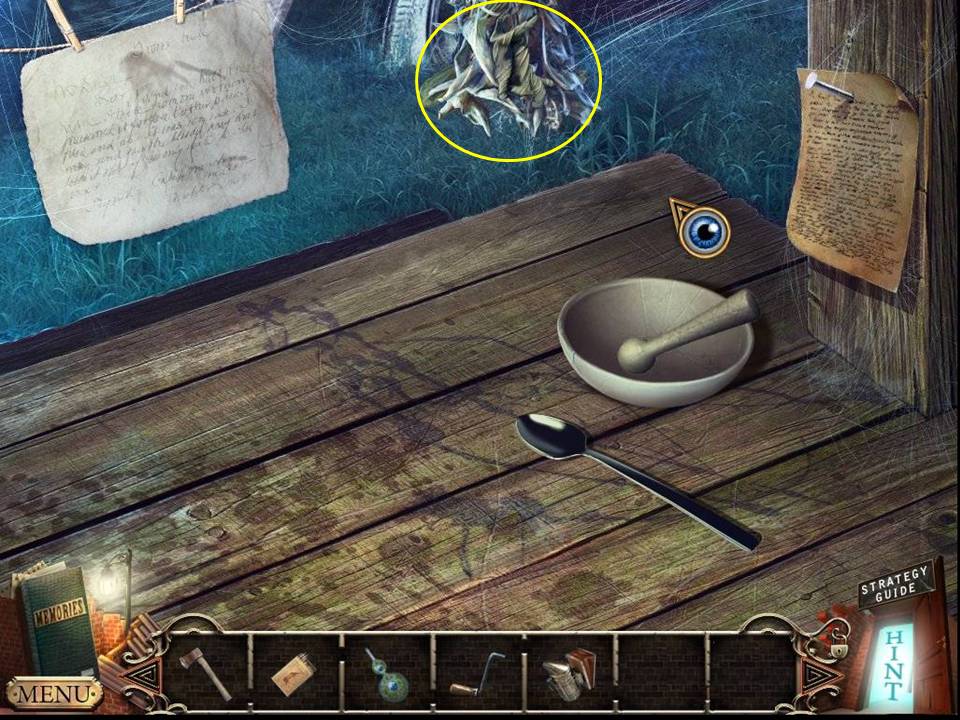
- Zoom into the table.
- Take the DRY LEAVES.
-
Go to the front of the cabin.
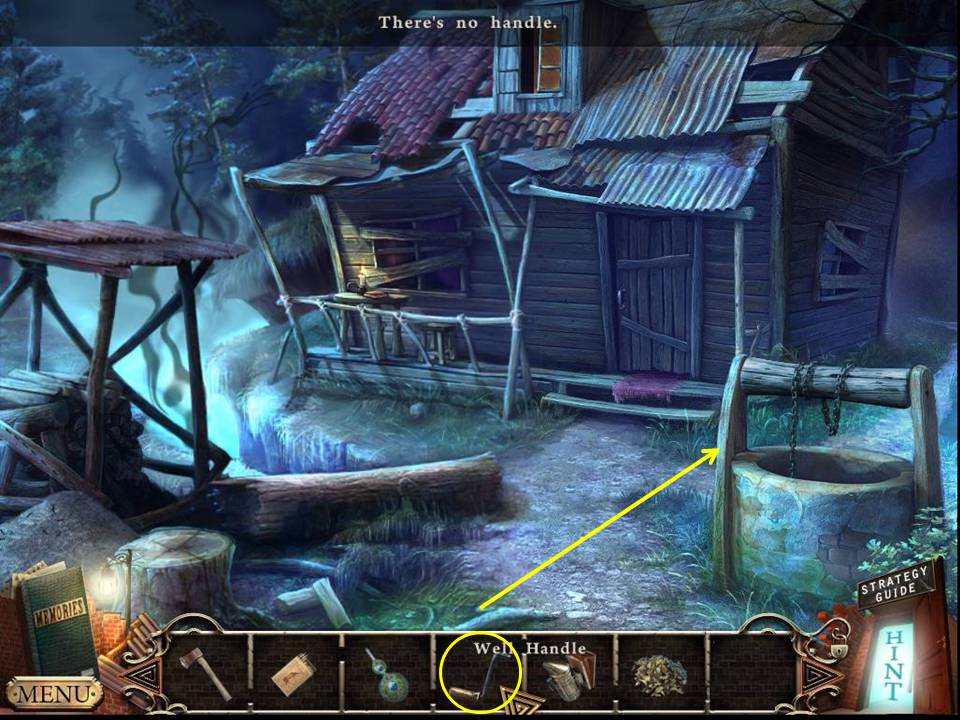
- Put the WELL HANDLE on the well.
- Zoom into the well.
-
Take the BRUSH from the raised bucket.
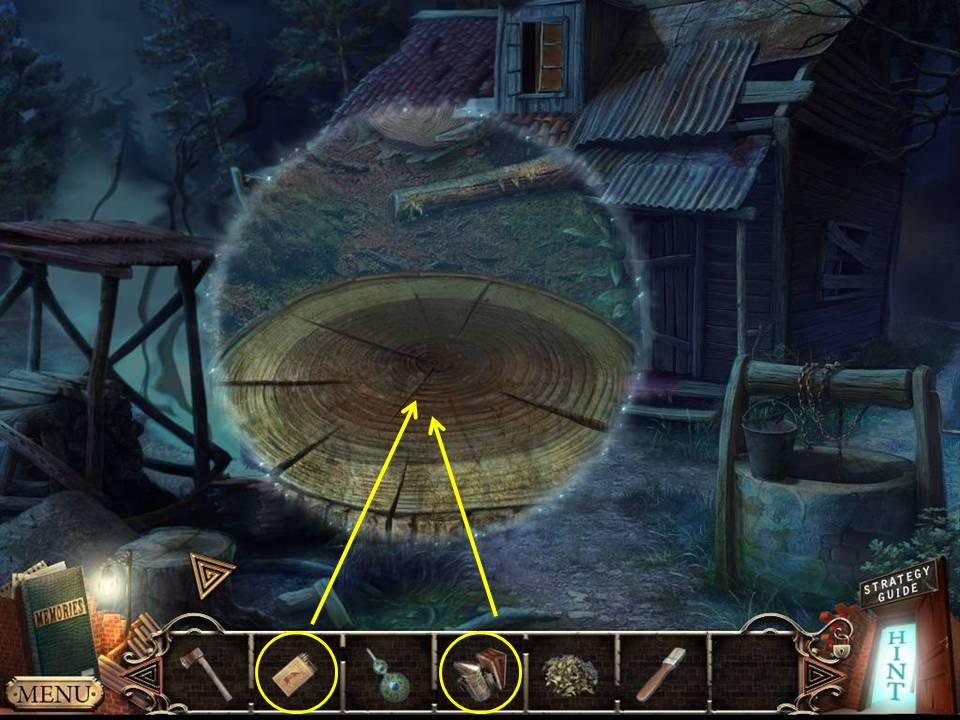
- Zoom into the stump.
- Place the BEE SMOKER in the scene and light it with the MATCHES.
-
Play the HOA.
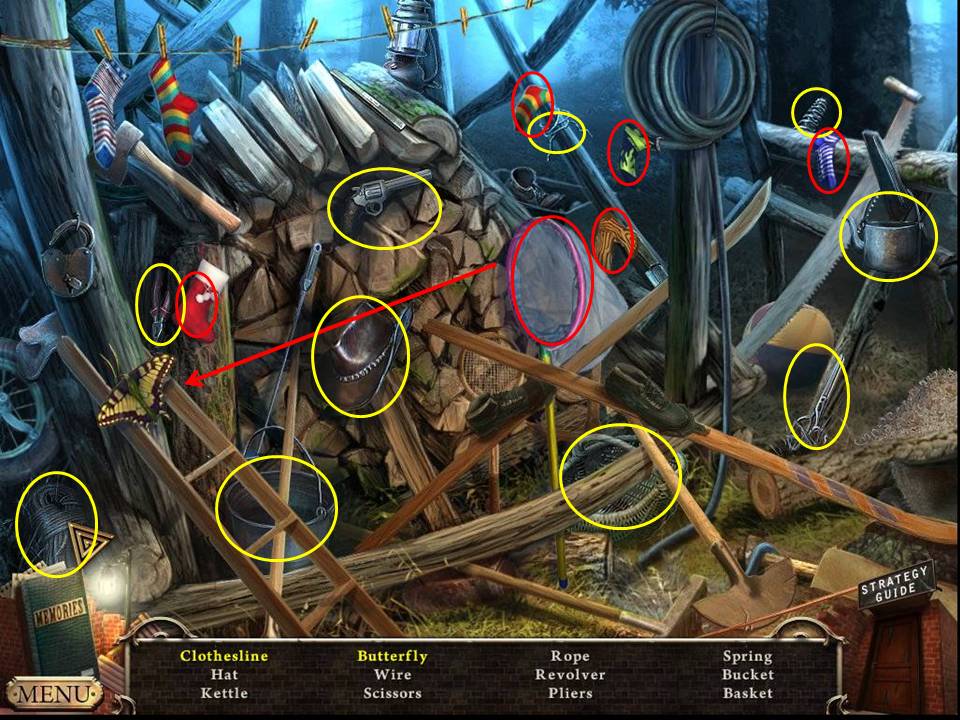
- Find the items listed.
- Place five socks on the clothesline.
- Use the net to get the butterfly.
-
Receive the WIRE.
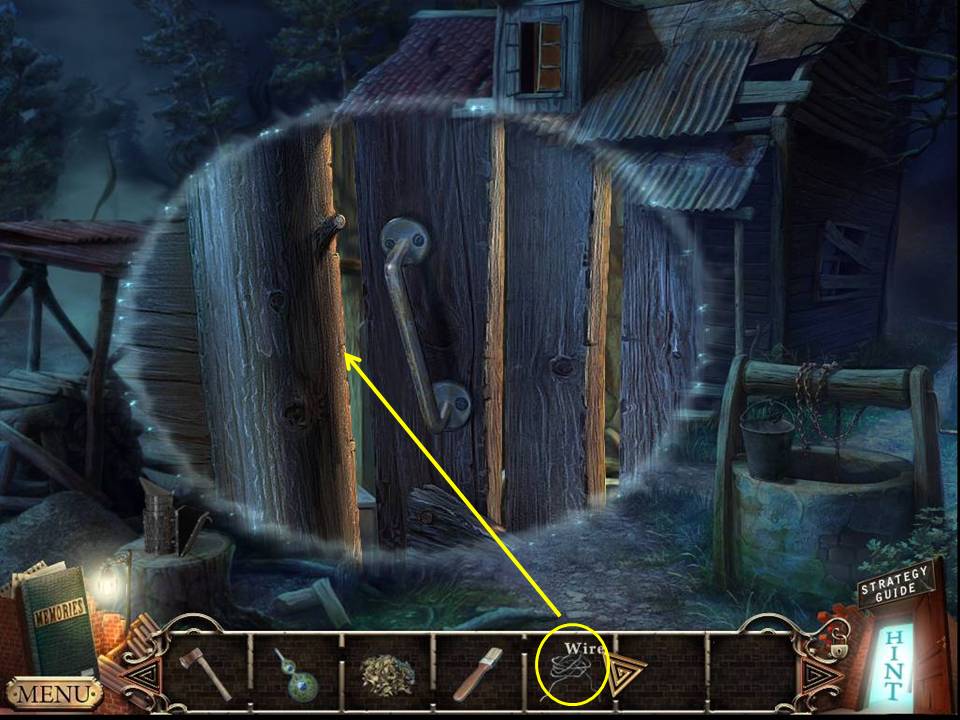
- Zoom into the door.
- Use the WIRE to open the latch.
-
Open the door and enter the cabin.
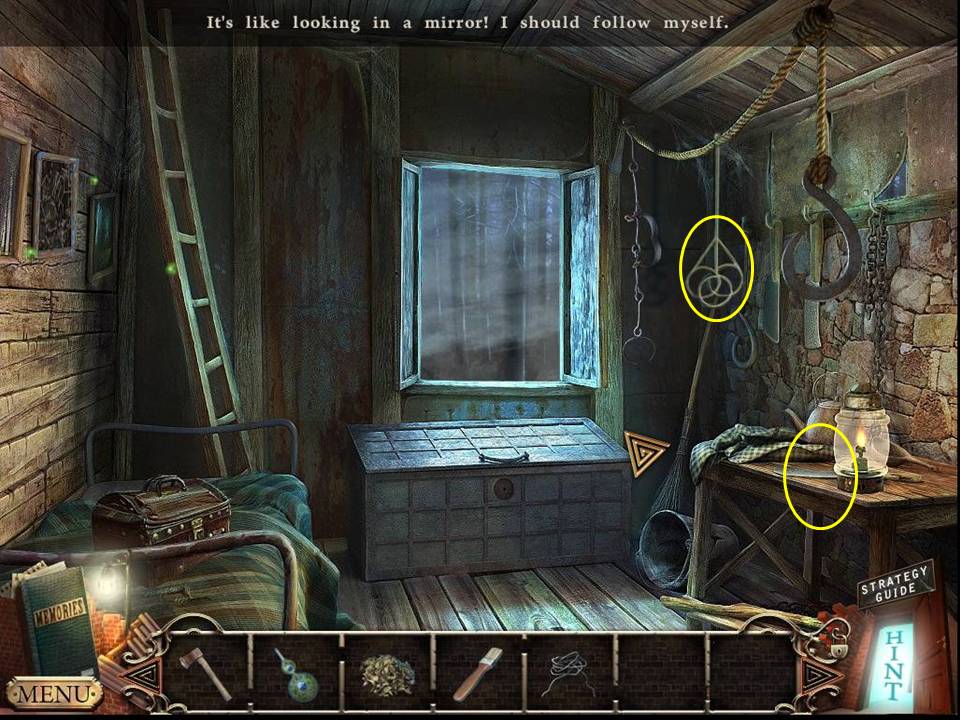
- Take the CARPET BEATER.
- Zoom into the desk.
- Take the PINCERS.
-
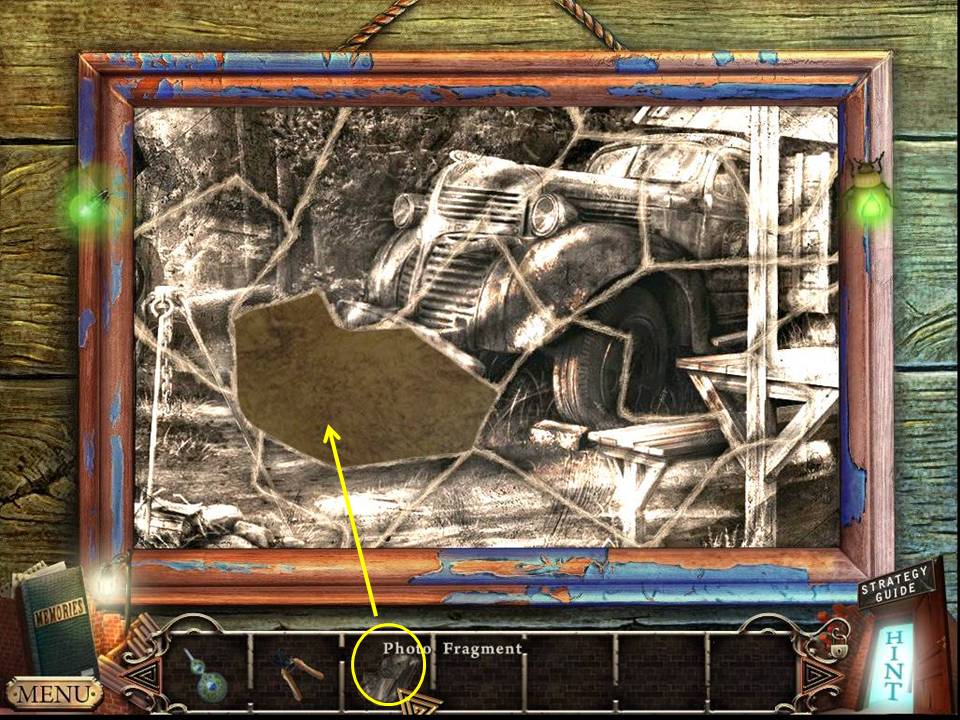
Zoom into the photo.
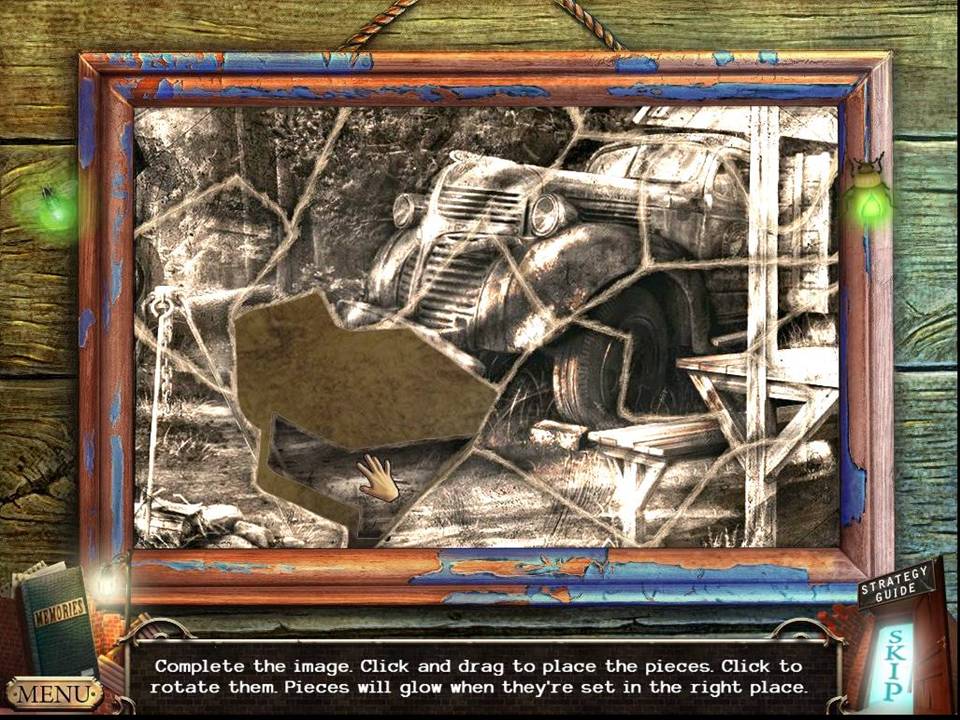
- Assemble the pieces of the photo as shown in the screenshot.
- Note: The photo is incomplete.
-
When finished, go back to the rear of the cabin.
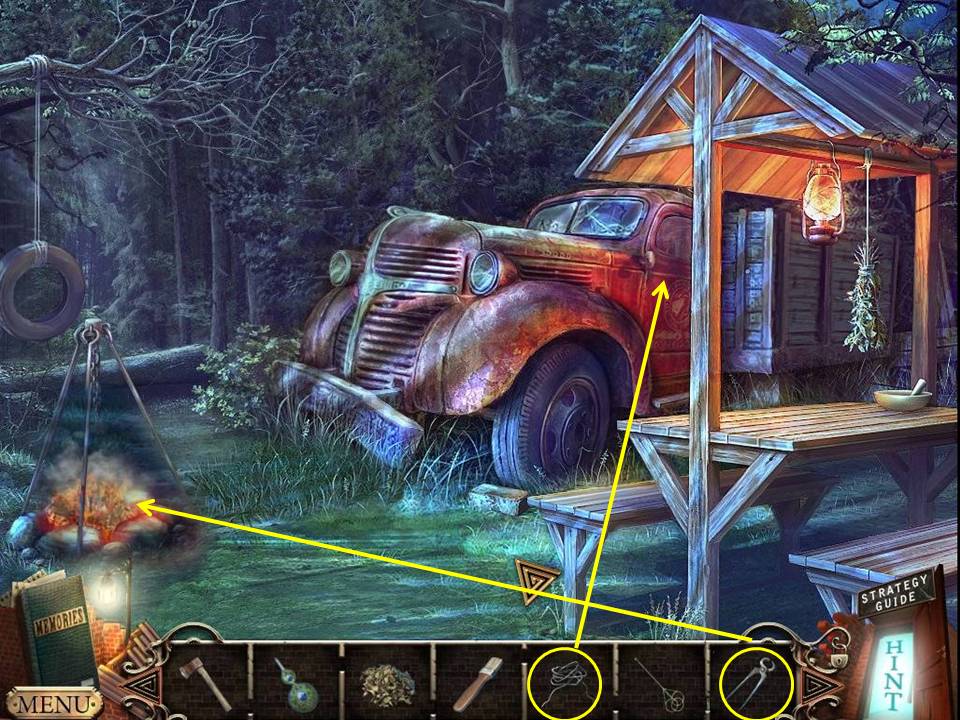
- Zoom into the truck.
- Open the door with the WIRE.
- Take the GARDEN SHEARS.
- Zoom into the fire.
- Retrieve a piece of COAL with the PINCERS.
-
Go back to the forest scene from the beginning of the chapter.
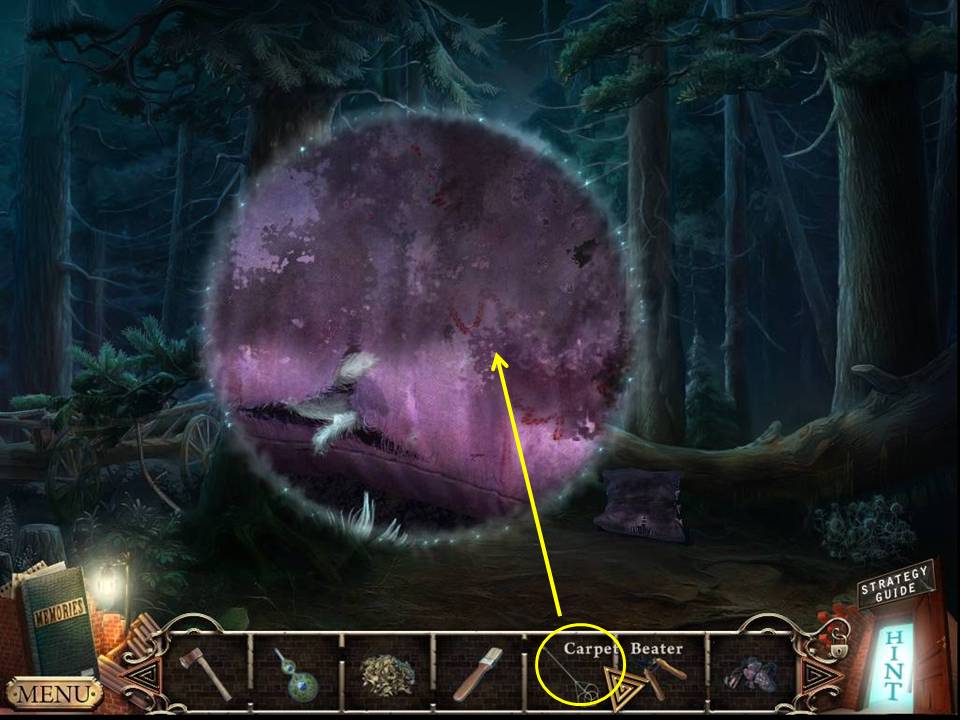
- Zoom into the pillow.
-
Pound the pillow with the CARPET BEATER to get a code.
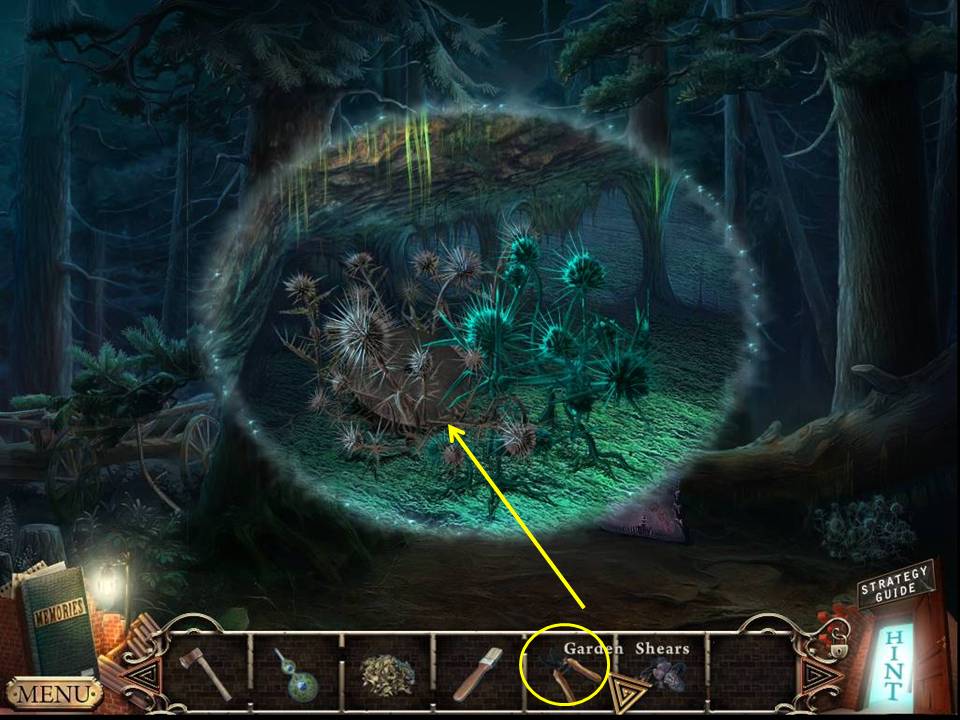
- Zoom into the bush.
- Clip the branches with the GARDEN SHEARS.
- Take the GRINDSTONE.
-
Go back to the cabin.
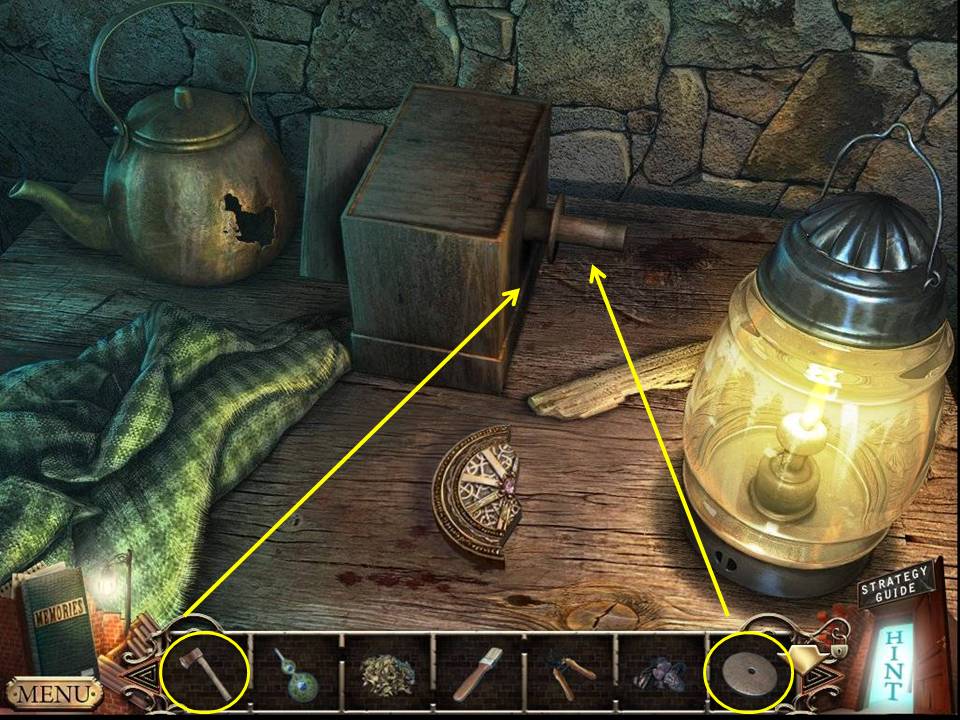
- Zoom into the desk.
- Put the GRINDSTONE on the wheel.
- Sharpen the BLUNT AXE to get the SHARPENED AXE.
-
Zoom out.
- Zoom into the bag.
- Click the buttons to match the code (flower, butterfly, leaf).
- Zoom into the open bag.
- Take the note and the NAIL PULLER.
-
Go back to the forest.
- Use the SHARPENED AXE to chop the tree branch.
-
Play the HOA.
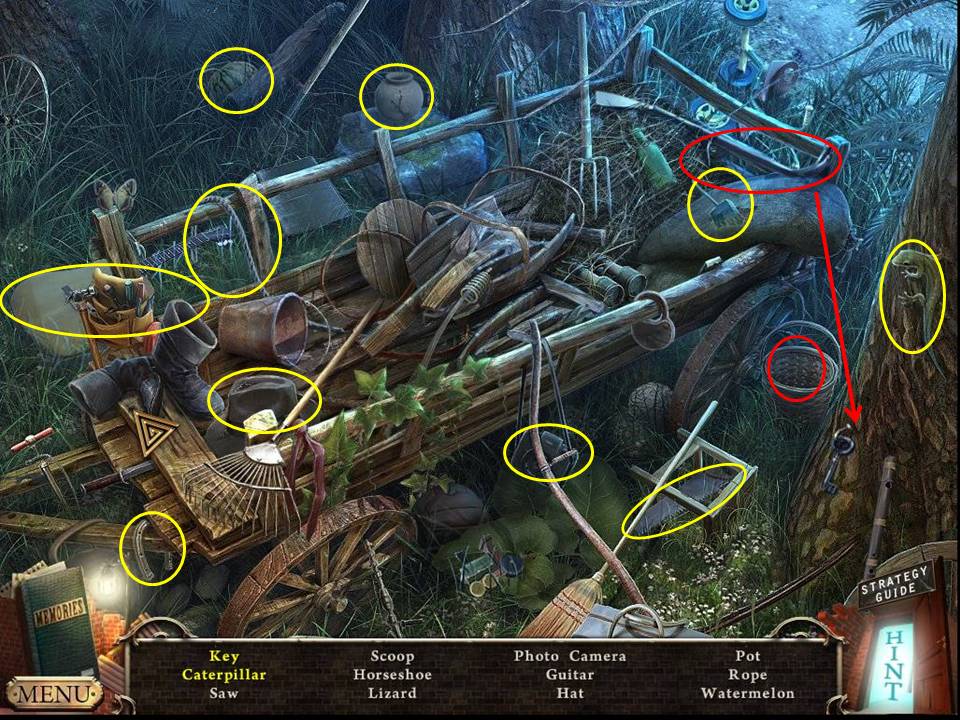
- Find the items listed.
- Find the caterpillar in the basket.
- Pry the nail from the key with the crowbar.
- Receive the ATTIC KEY.
-
Go back to the cabin.
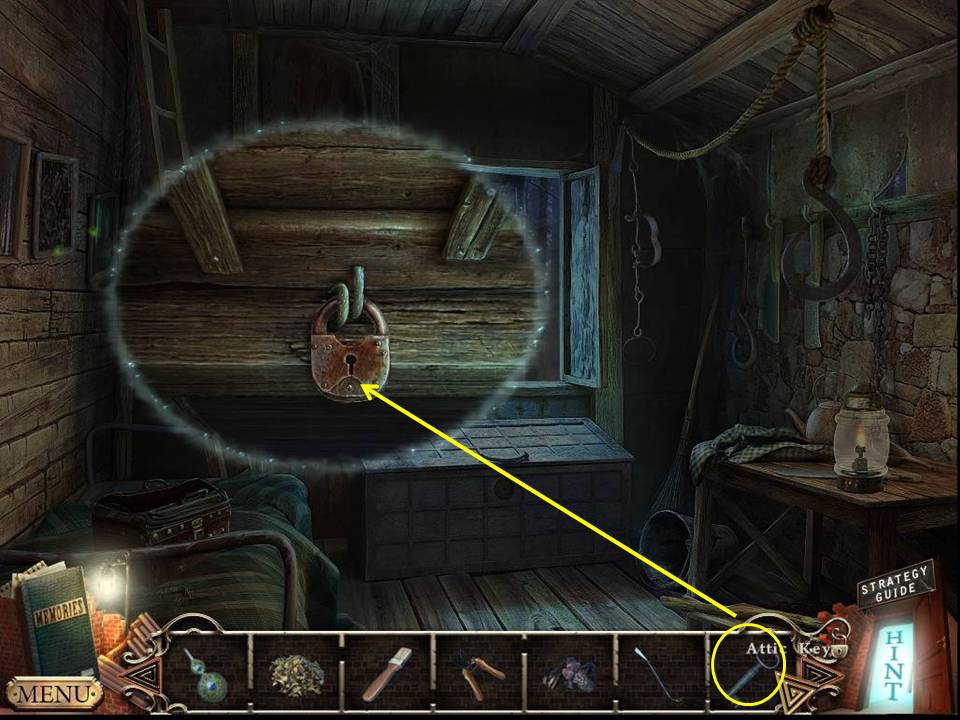
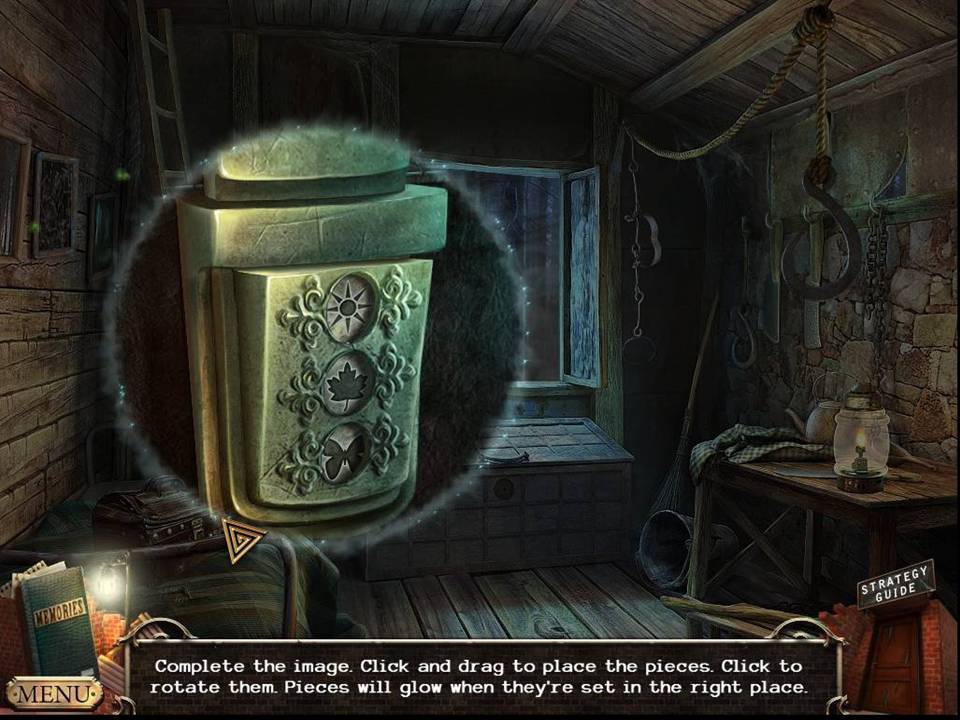
- Zoom into the attic door and unlock it with the ATTIC KEY.
-
Enter the attic.
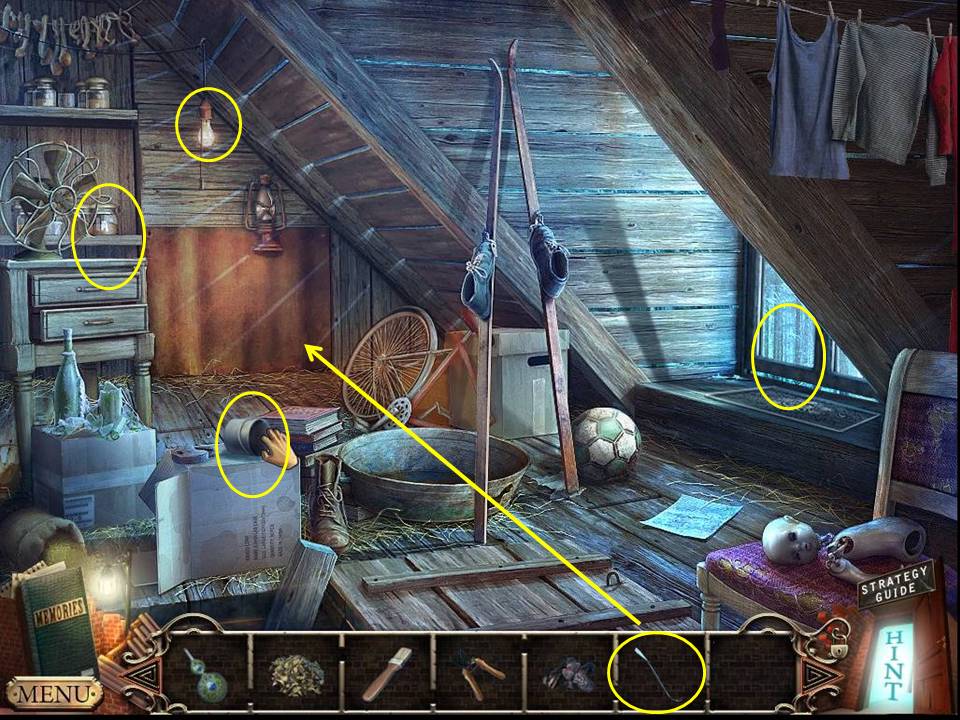
- Take the BUCKET.
- Zoom into the window.
- Take the instructions and the RAT REPELLENT.
- Zoom into the dresser.
- Take the LOCK PARTS.
- Use the NAIL PULLER to remove the panel.
- Zoom into the panel, then out again.
-
Click the light off.
- Zoom back into the panel.
-
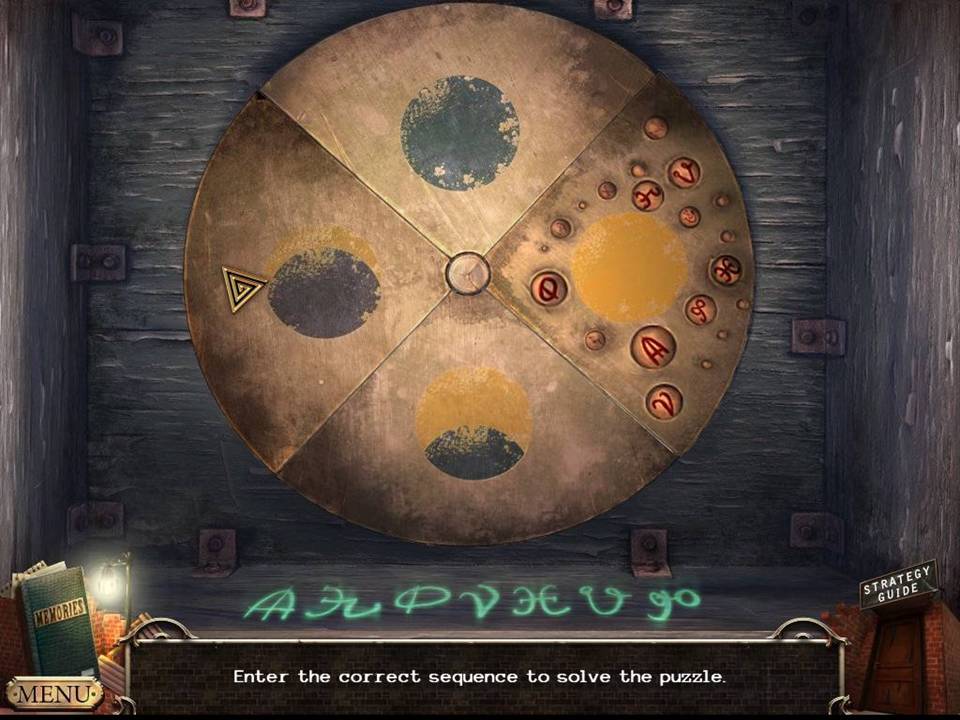
Click the buttons in the order shown.
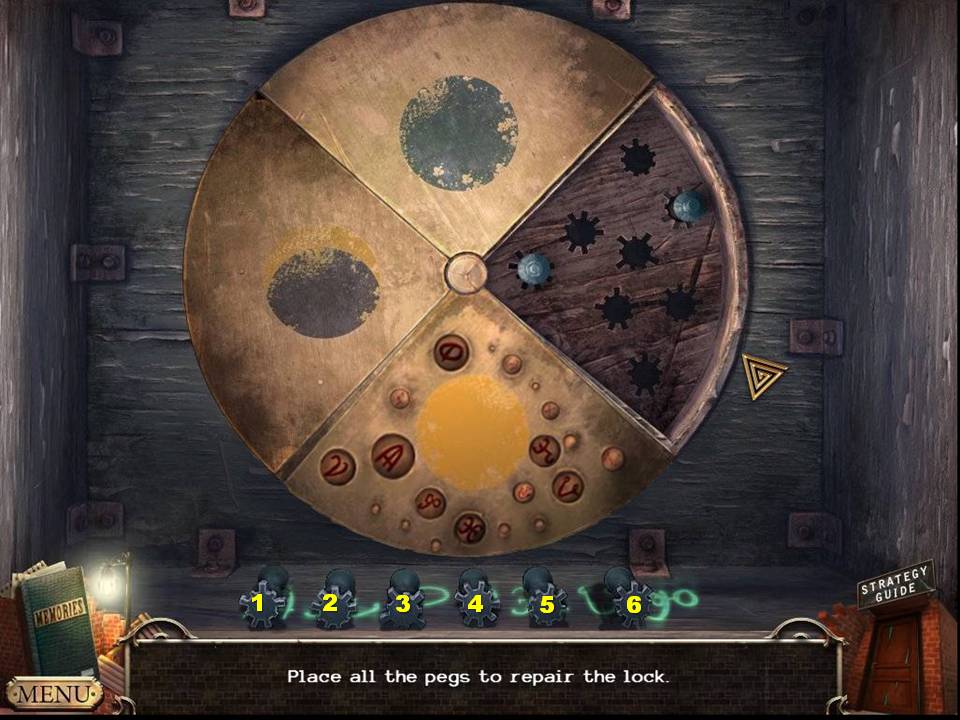
- Place the LOCK PARTS in the scene.
- Assuming the lock parts are numbered one to six from left to right, place the parts in this order beginning at the top and going down: 5, 4, 3, 1, 2, 6.
- When these are in position, numbered levers will appear.
- Move the numbered levers in this order: 8, 5, 2, 7, 1, 5.
- Take the BATTERY from the compartment that appears.
-
Go back to the forest.
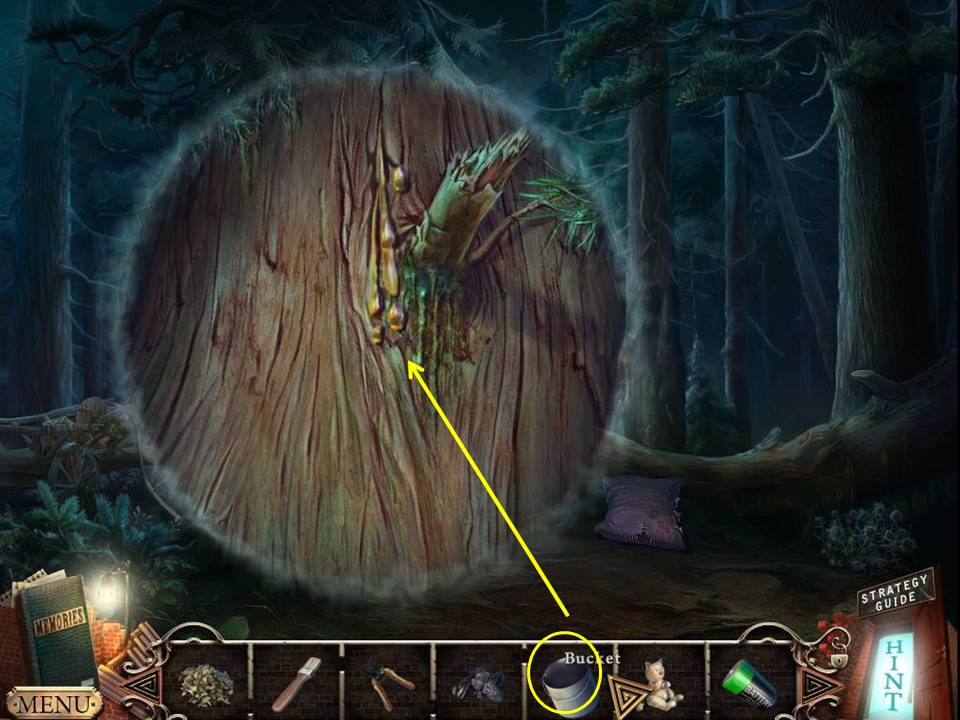
- Zoom into the tree.
- Put the BUCKET under the sap.
-
Take the MAPLE SYRUP.
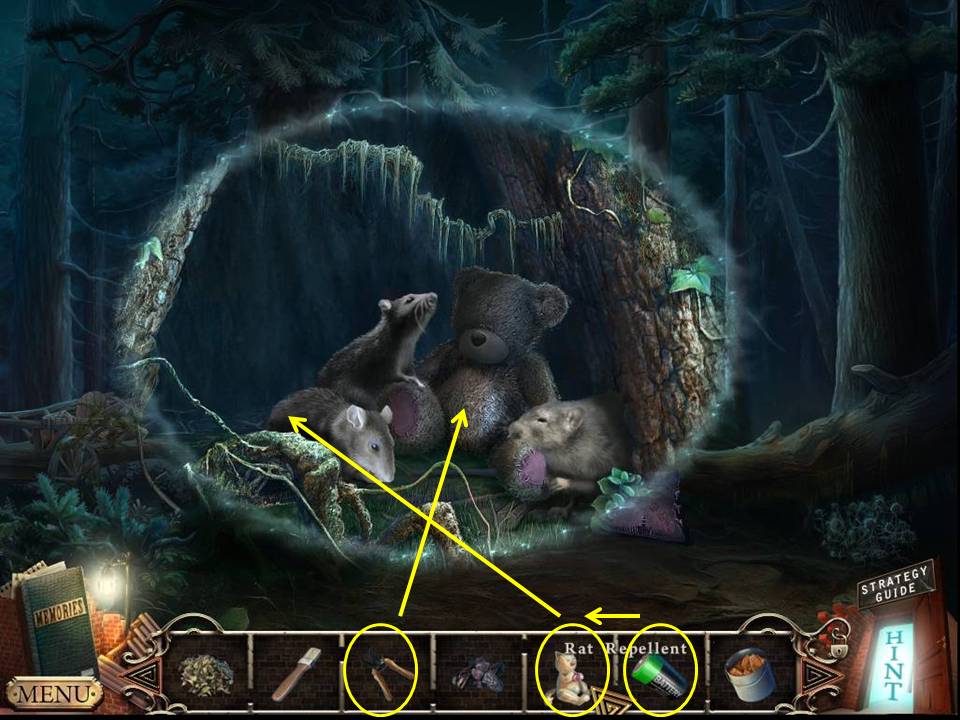
- Zoom into the base of the tree in the foreground.
- Put the RAT REPELLENT near the rats.
- Insert the BATTERY and pull the cord.
- Move the bear closer and cut it open with the GARDEN SHEARS.
- Take the PUZZLE PIECE.
-
Go to the back of the cabin.
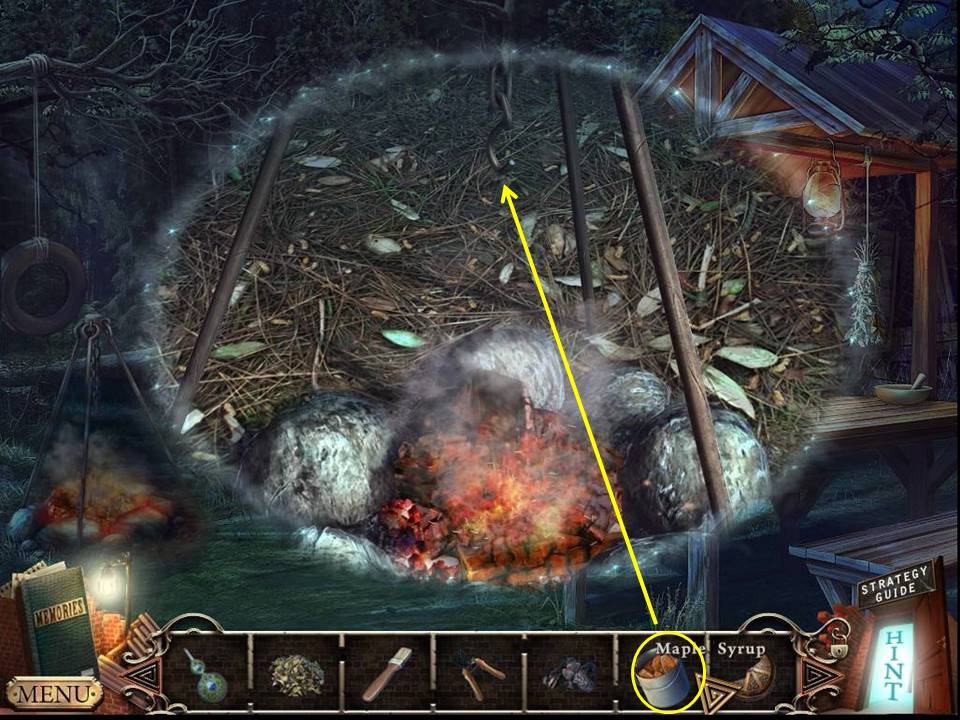
- Zoom into the fire.
- Put the MAPLE SYRUP on the hook.
-
Take the BUCKET OF HOT SYRUP.
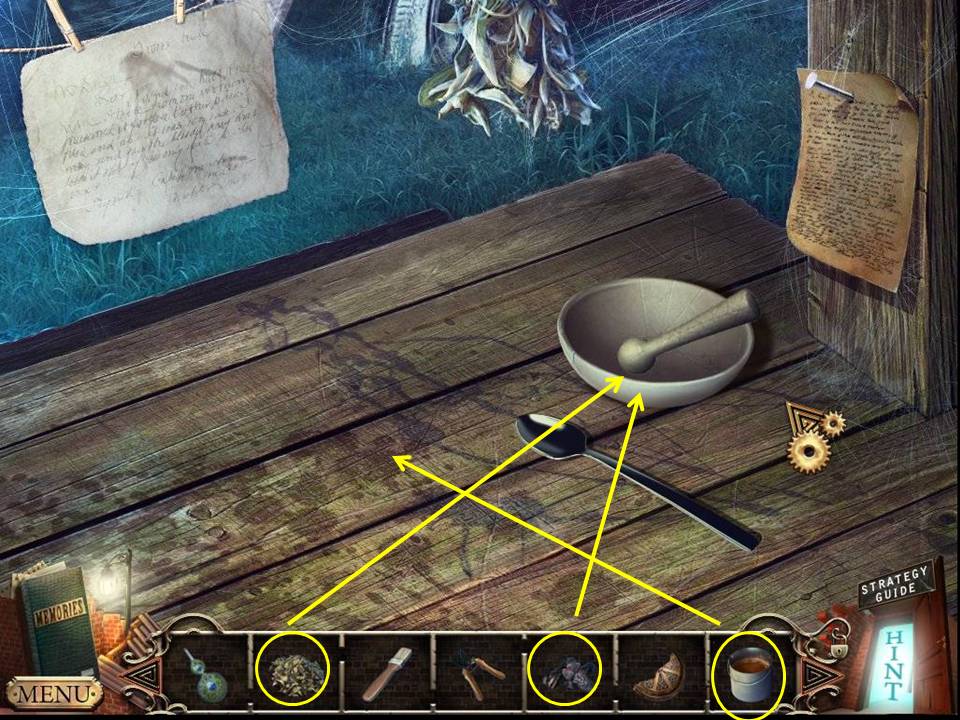
- Zoom into the table.
- Put the BUCKET OF HOT SYRUP on the table.
- Put the DRIED LEAVES in the mortar.
- Put the COAL in the mortar.
- Stir the mixture with the spoon.
- Take the BUCKET OF GLUE.
-
Go back to the cabin.

- Zoom into the desk.
- Put the BUCKET OF GLUE on the surface.
- Put the PUZZLE PIECE next to the other half.
- Dunk the BRUSH in the GLUE.
- Repair the pieces to get the PUZZLE PART.
-
Zoom into the chest. Put the PUZZLE PART in the lock. Play the HOA.
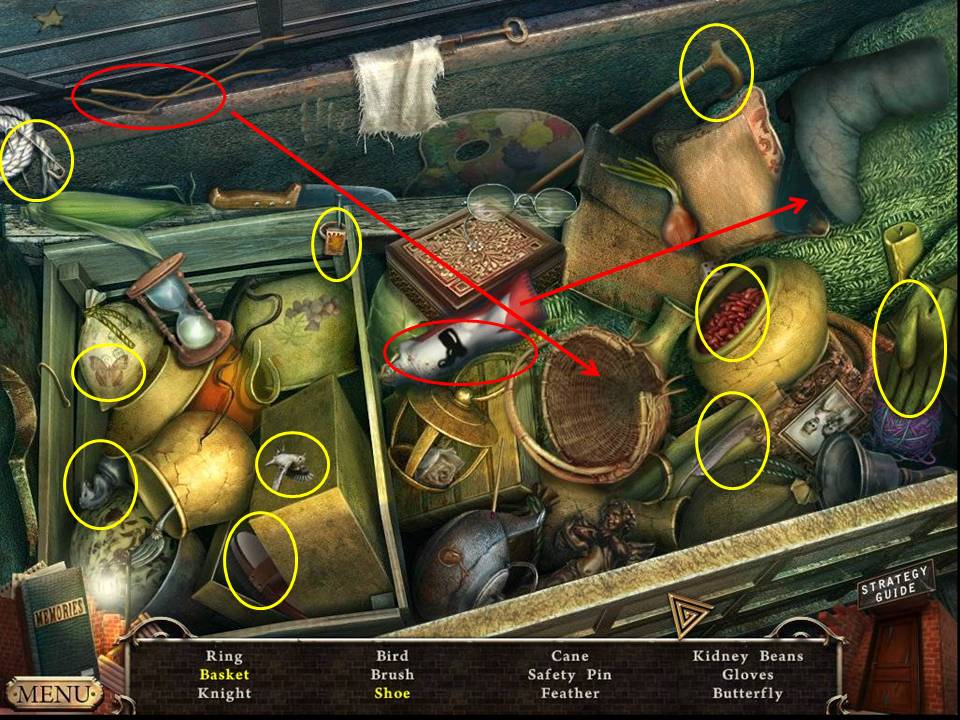
- Find the items listed.
- Glue the shoe.
- Mend the basket with the twigs.
- Receive the BRUSH.
-
Go back to the attic.
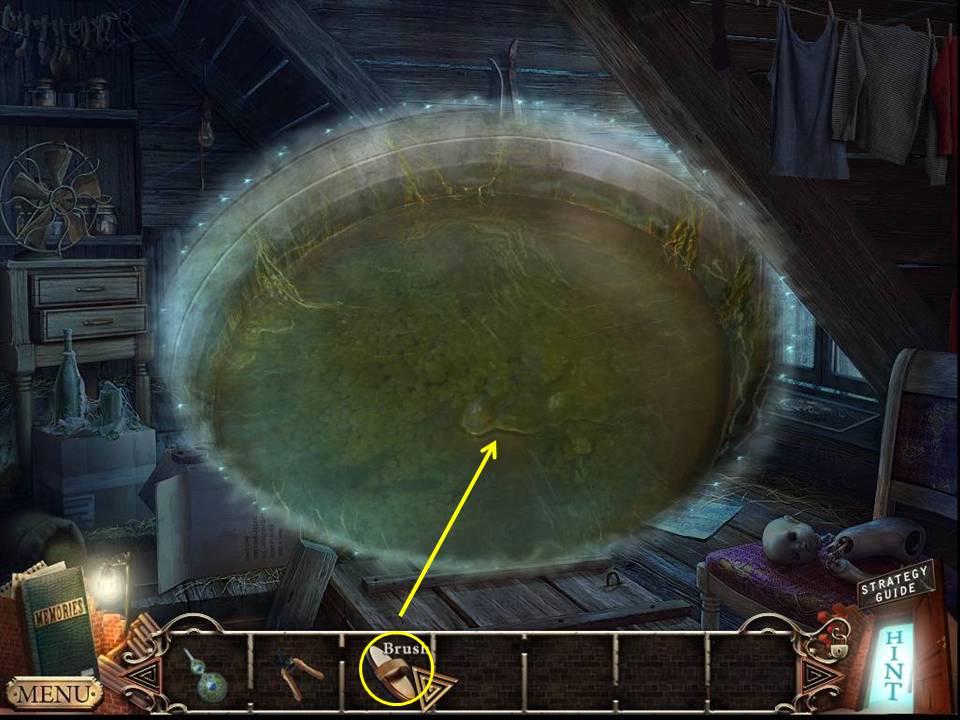
- Zoom into the pan.
- BRUSH the water to get the PHOTO FRAGMENT.
- Note the code.
-
Return downstairs.
- Zoom into the photo.
-
Insert the PHOTO FRAGMENT.

- Zoom into the cellar door.
- Use the GARDEN SHEARS to cut the rope.
-
Play the HOA.
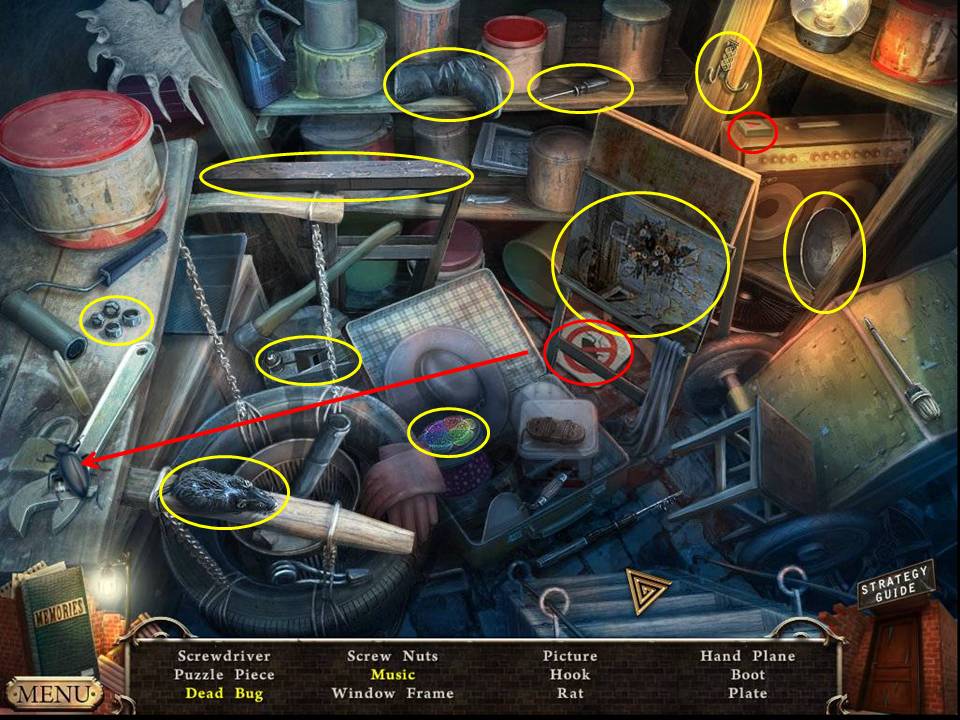
- Find the items listed.
- Swat the bug to get the dead bug.
- Click the radio to get music.
- Receive the PUZZLE PIECE.
-
Go back to the attic.
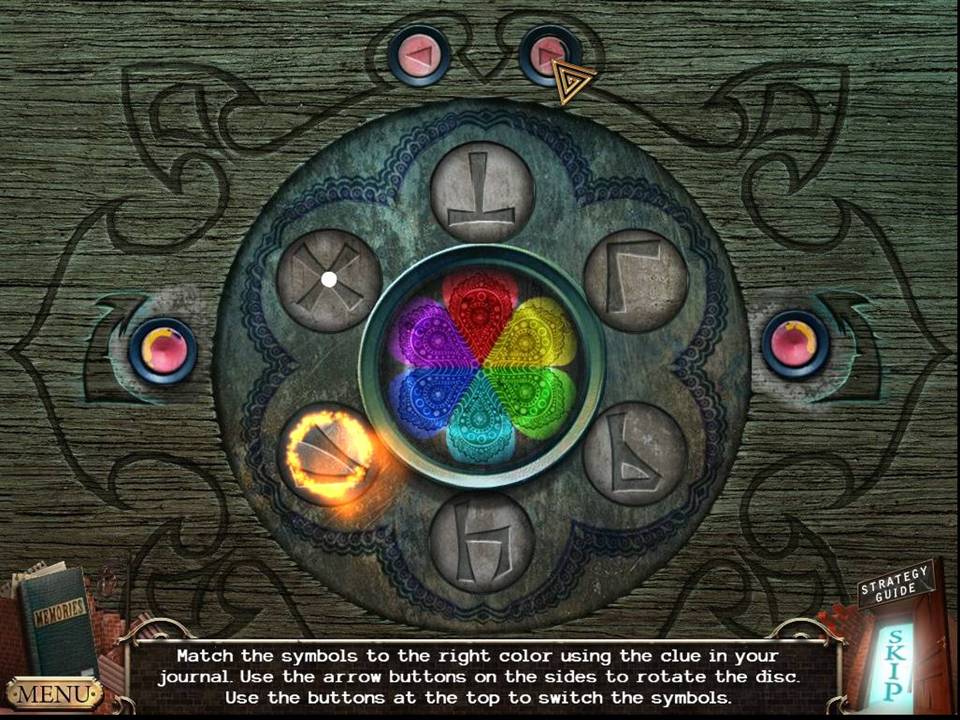
- Zoom into the window.
- Put the PUZZLE PIECE in the center.
- Arrange the symbols as shown in the screenshot.
-
Look out the window.
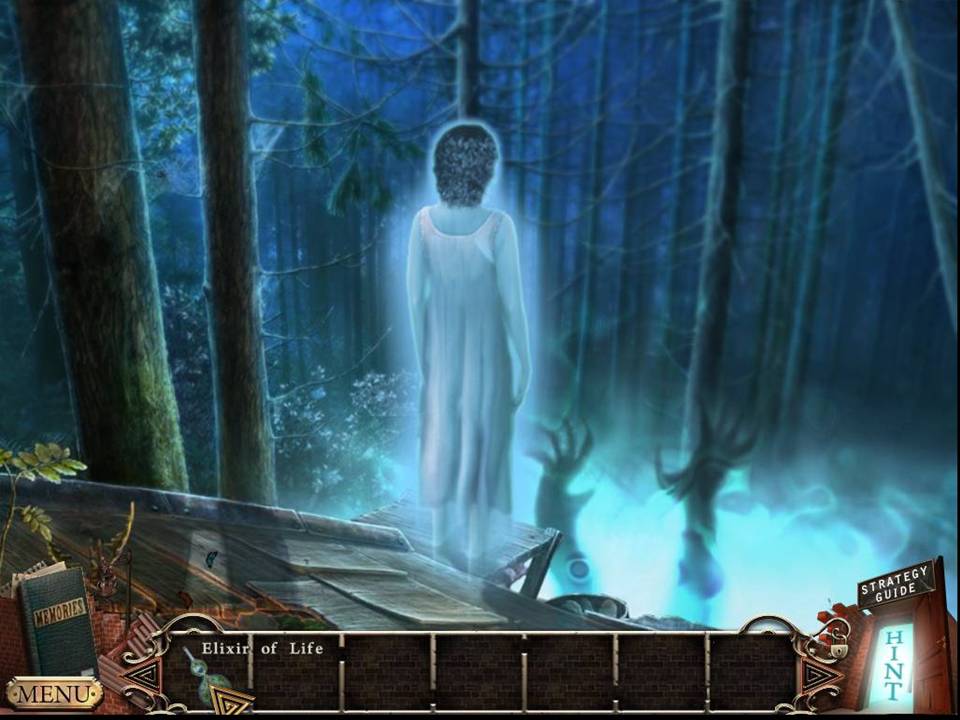
- Pour the ELIXIR OF LIFE on your spirit.
General Info and Tips
Dream One: Your Mother
Dream Two: Your Grandpa
Dream Three: Your Soul
Ask for help in the comments below!
Dream One: Your Mother
Dream Two: Your Grandpa
Dream Three: Your Soul
Ask for help in the comments below!