
Love Chronicles: Salvation: Chapter Five: Into the Glen
Trust our Love Chronicles Salvation Walkthrough to guide you through the depths of time in search of the dark lord Zander, the one responsible for the witch Alura's evil ways. Use our detailed, step-by-step instructions for each and every chapter, our custom screenshots beautifully marked, and our solutions to all the puzzles and mini-games you'll encounter as you step back through time and attempt to stop this senseless corruption from ever happening.
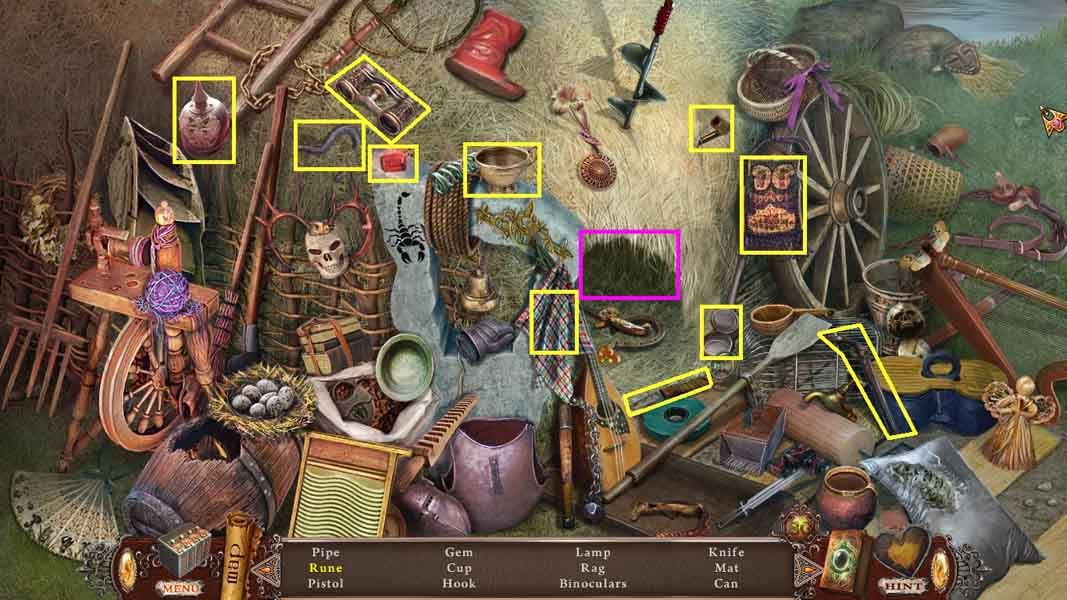
- Click the hidden objects area.
- Find the listed items.
- Zoom into the niche of hay; collect the rune.
- Collect the rune of energy.
- Move ahead to the mushrooms.
- Click the hidden objects area.
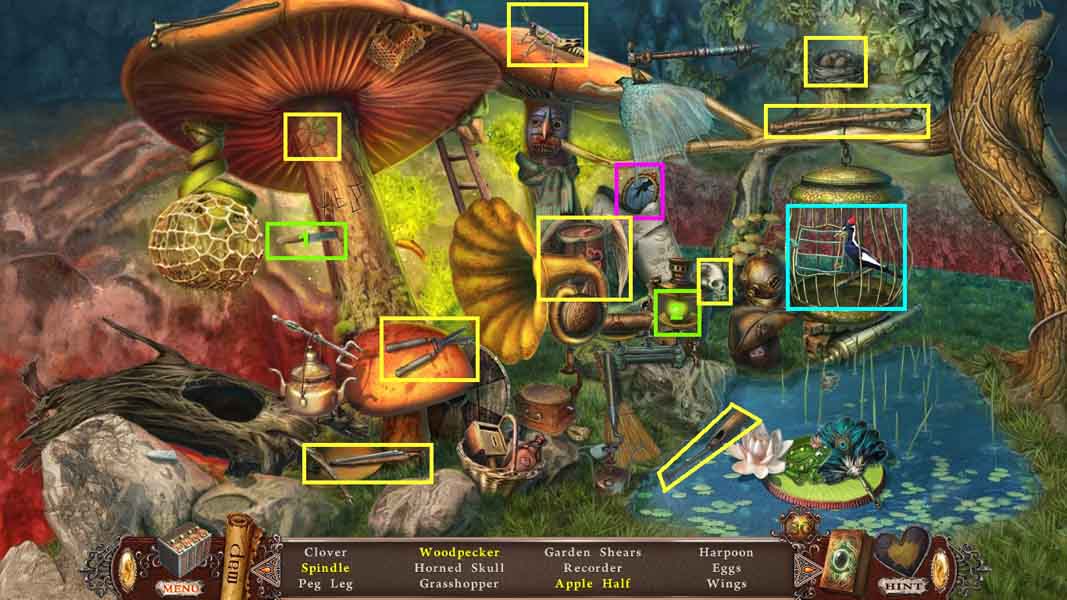
- Find the listed items.
- Click the mirror to collect the spindle.
- Click the cage open to collect the woodpecker.
- Select the knife and use it to slice the apple; collect the apple half.
- Collect the garden shears.
- Move down to the Glen.
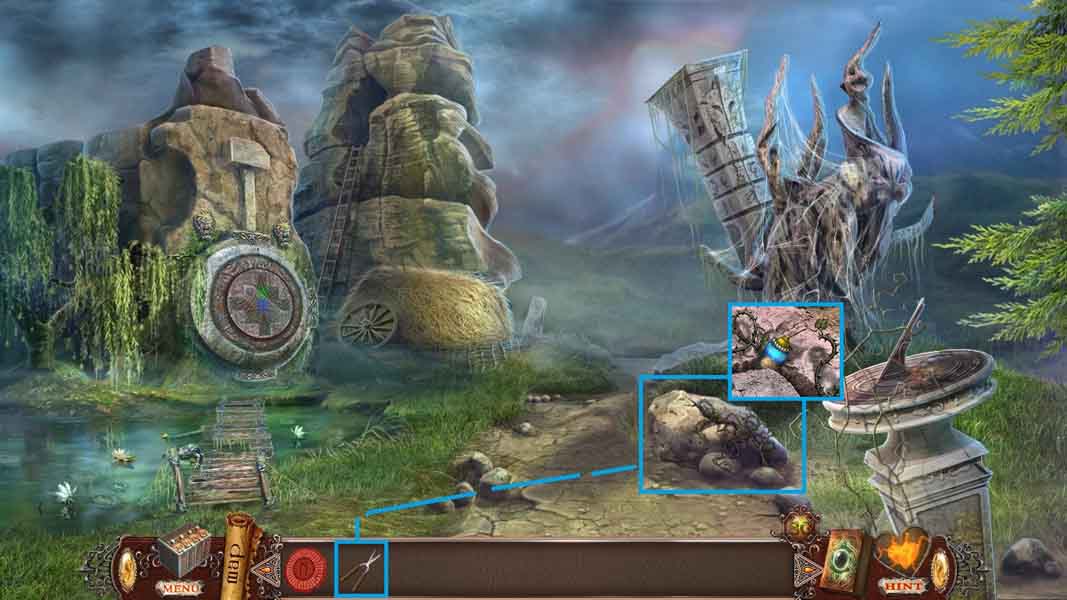
- Click the stone and use the garden shears to cut the vines.
- Collect the glue.
- Move ahead.
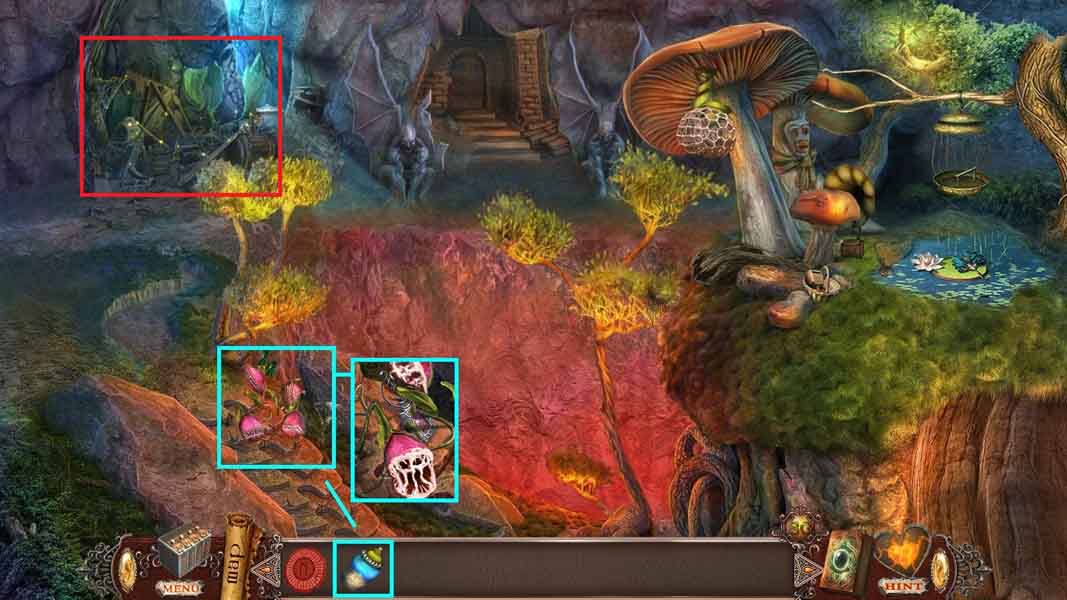
- Click the carnivorous plants.
- Give them the glue and collect the oilcan.
- Click the hidden objects area.
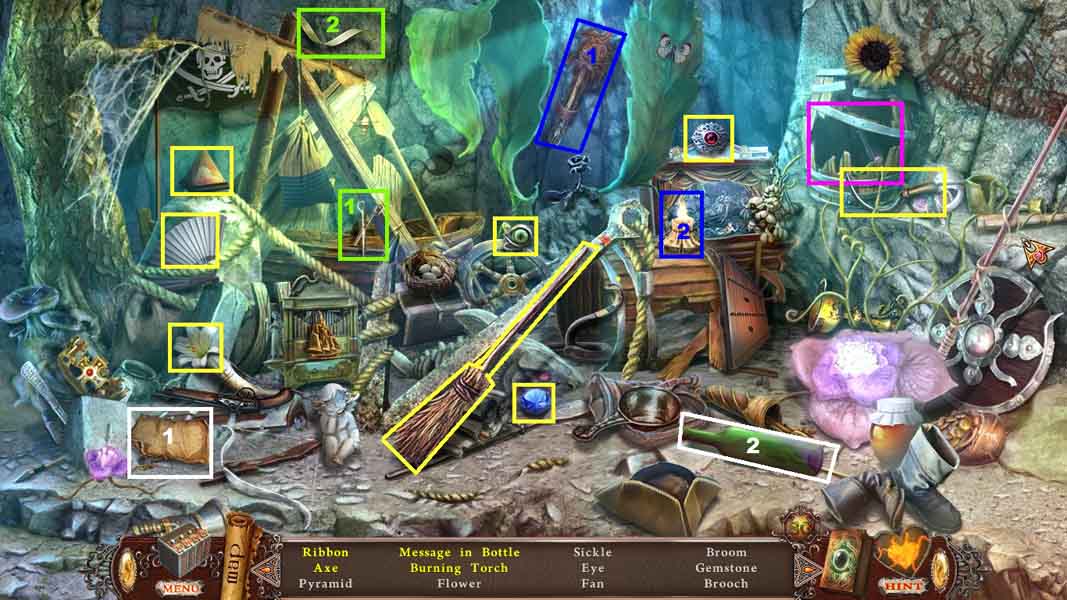
- Find the listed items.
- Select the shears and use them to cut and collect the ribbon.
- Select the note and place it into the bottle; collect the message in a bottle.
- Select the torch and place it near the candle; collect the burning torch.
- Zoom into the broken barrel; collect the axe.
- Collect the torch.
- Move ahead to the Throne Hall Entrance.
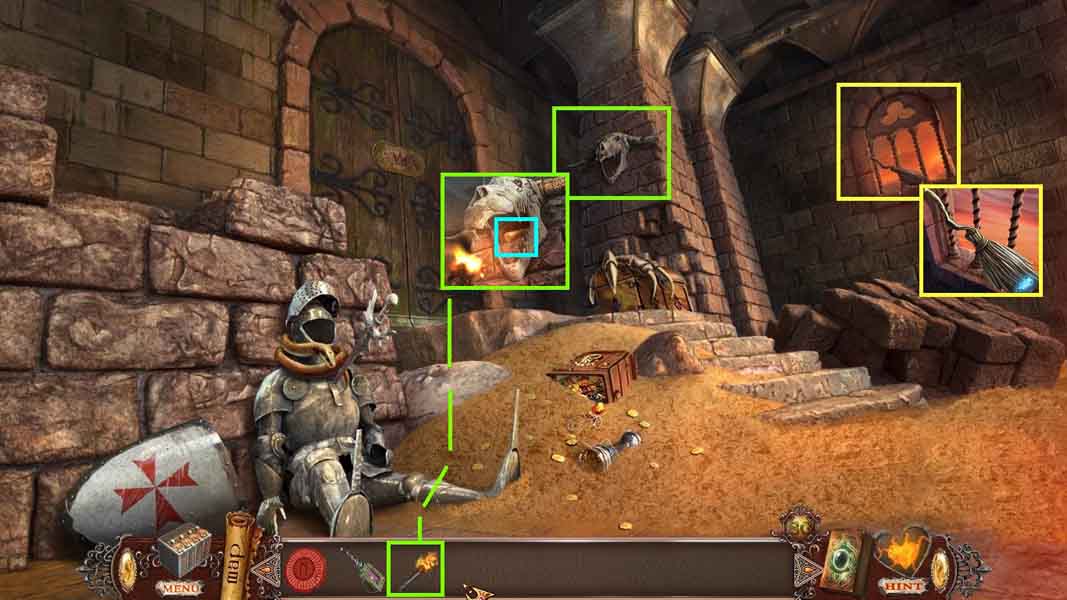
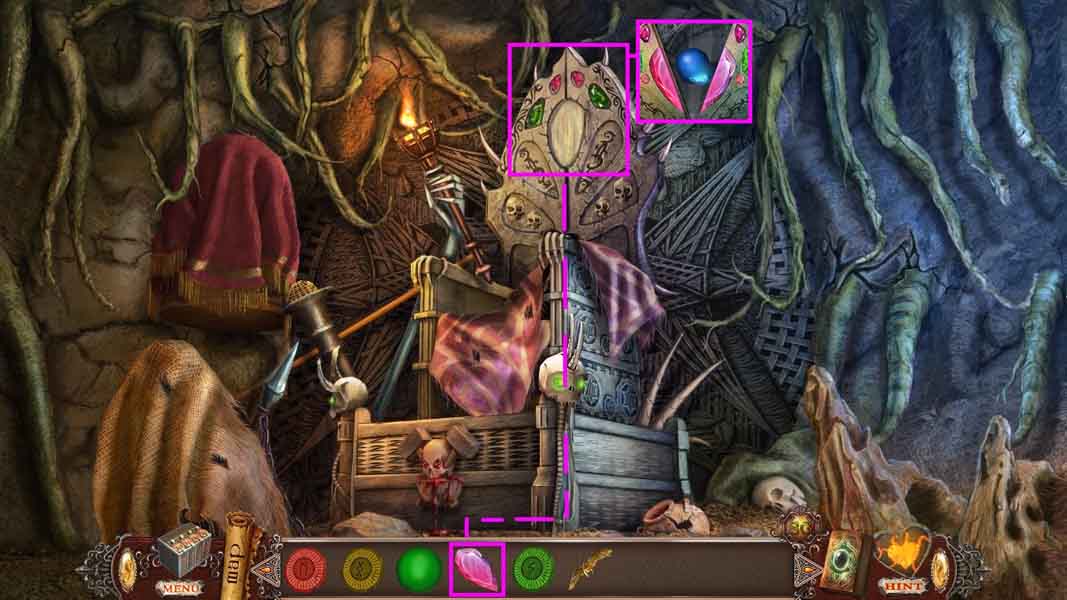
- Click the window; collect the gem and the broom.
- Click the hanging skull and use the torch on it; collect the note.
- Move to the guardians of Silence.
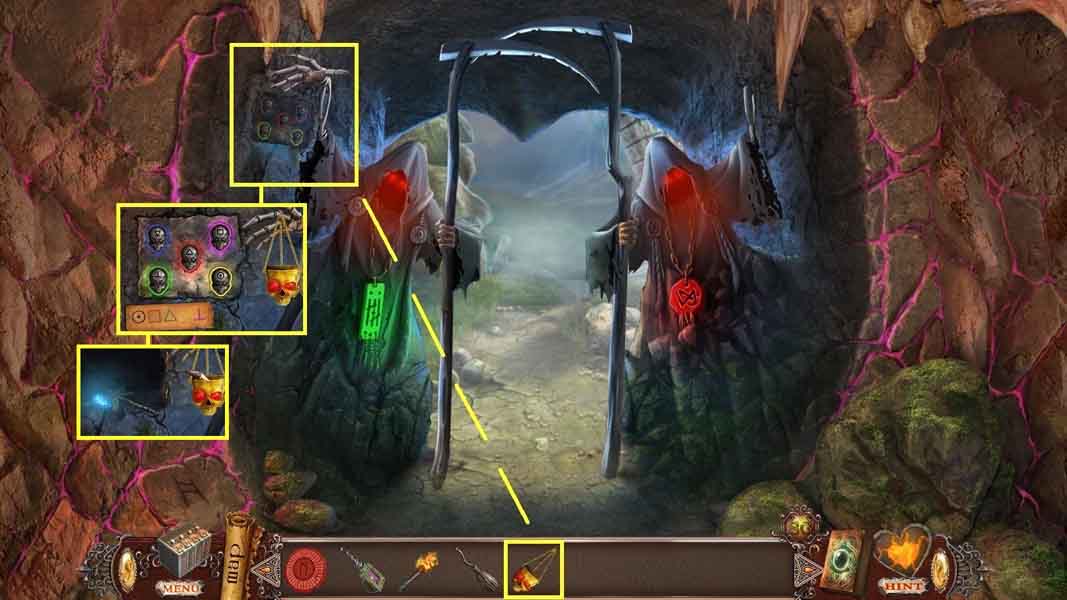
- Click the wall on the left and hang the lantern to trigger a puzzle.
- Move the skull symbols as shown on the clue.
- Collect the finger, the gem and the stone dragonfly.
- Move ahead.

- Click the stone frog; place the stone dragonfly onto its head.
- Collect the rune of renewal, the gem and the crown.
- Select the broom to remove the cobwebs on the tree.
- Click the tree to trigger a puzzle.
- Click the hands in ABC order.
- Collect the hammer.
- Click the ladder and use the torch to chase away the bird.
- Move the up ladder to the Idol Room.
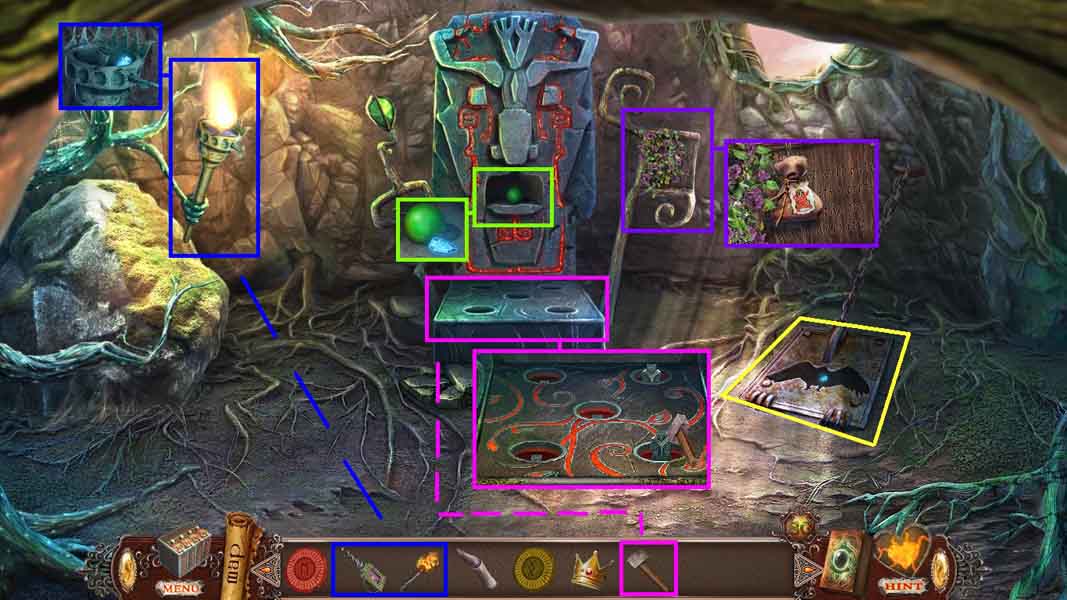
- Click the torch; collect the gem.
- Pour the oilcan onto the torch and use the lit torch to light it.
- Click the plate; collect the gem.
- Click the sign then click the flowers; collect the soporific powder.
- Click the idol base to trigger a puzzle.
- To solve the puzzle hit the idols using the hammer 10 consecutive times.
- Click the niche; collect the gem and the green marble.
- Move to the Throne Hall Entrance.
- Click the armor and use the soporific powder on the snake.
- Collect the throne gem and the rune of inspiration.
- Click the chest and attach the finger onto the hand.
- Collect the gem and the eagle token.
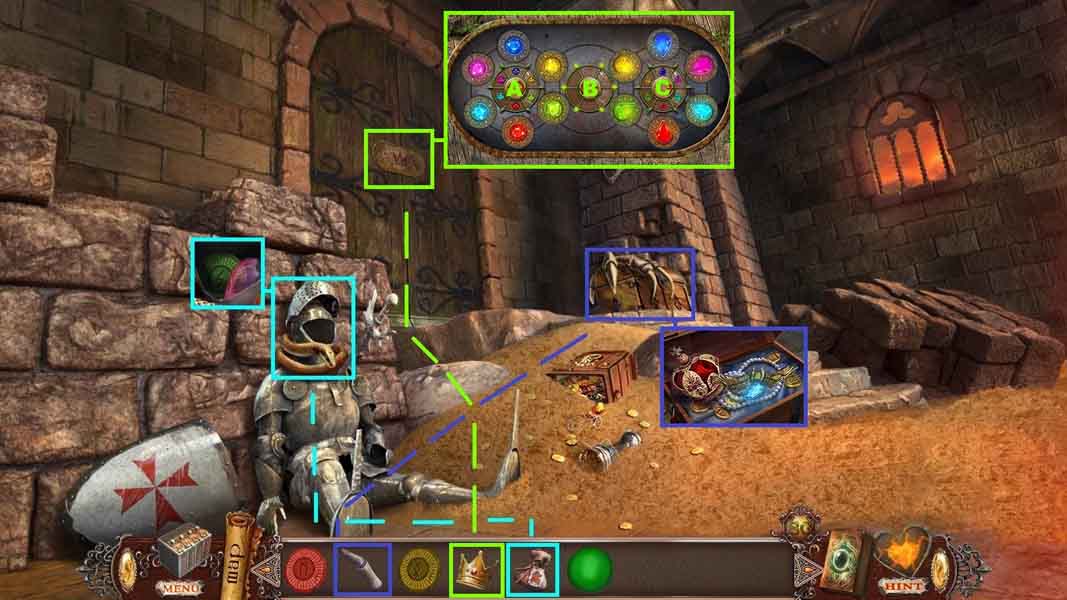
- Click the door and insert the crown to trigger a puzzle.
- Place the tokens in the areas of the same shape and color.
-
Click the tokens as follows to solve the puzzle:
- C: 4x’s
- B: 5x’s
- A: 5x’s
- Enter the doorway to the Throne Hall.
- Click the stone and insert throne gem.
- Collect the gem and the blue marble.
- Move to the Idol Room.

- Click the plate and insert the eagle token to trigger a hidden objects area.
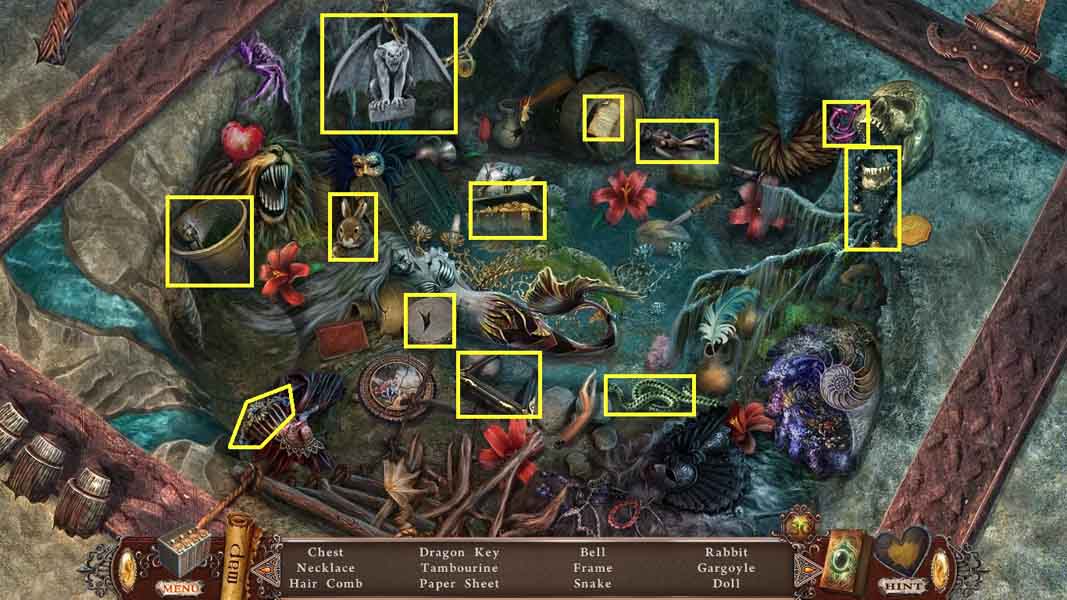
- Find the listed items.
- Collect the dragon key.
- Move to the Throne Hall.
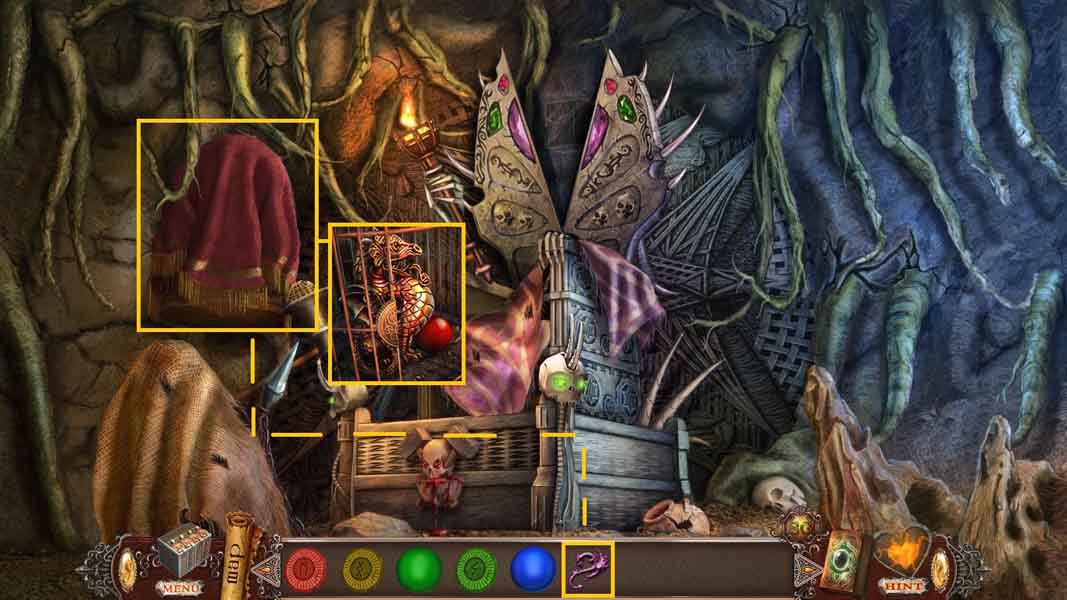
- Click the cloth and click the cage.
- Insert the dragon key into the lock; collect the red marble and the fire dragon.
- Move to the Glen.
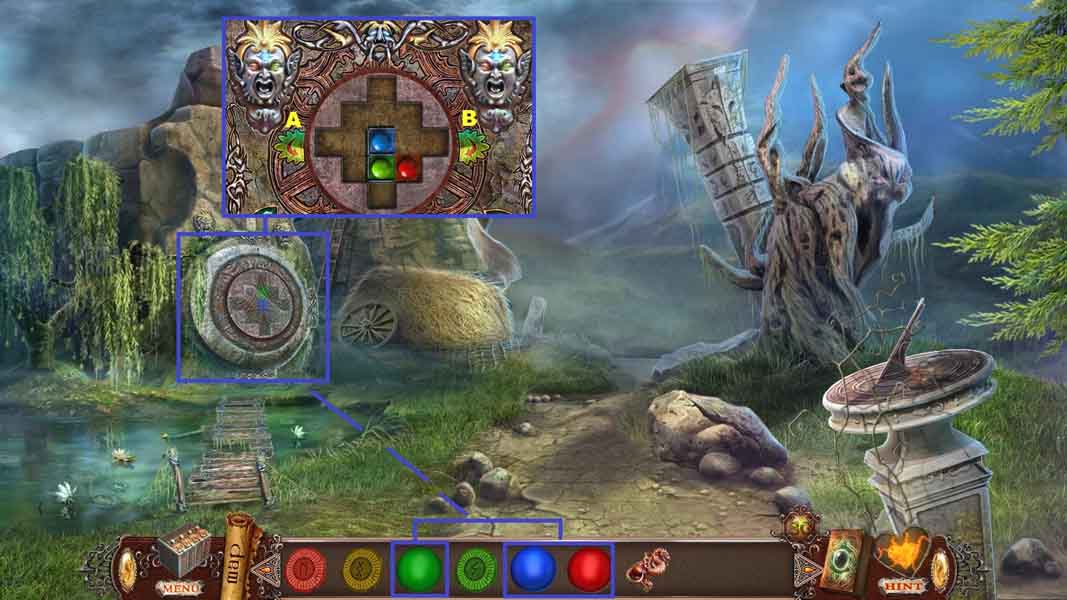
- Click the wall.
- Insert the green, blue and red marbles to trigger a puzzle.
- Click the arrows as follows to solve the puzzle.
- A, B, A, A, A, B, B, B, B, A, A, A, A, B
- Find the silhouetted items.
- Insert the emblem into the slot; collect the matches.
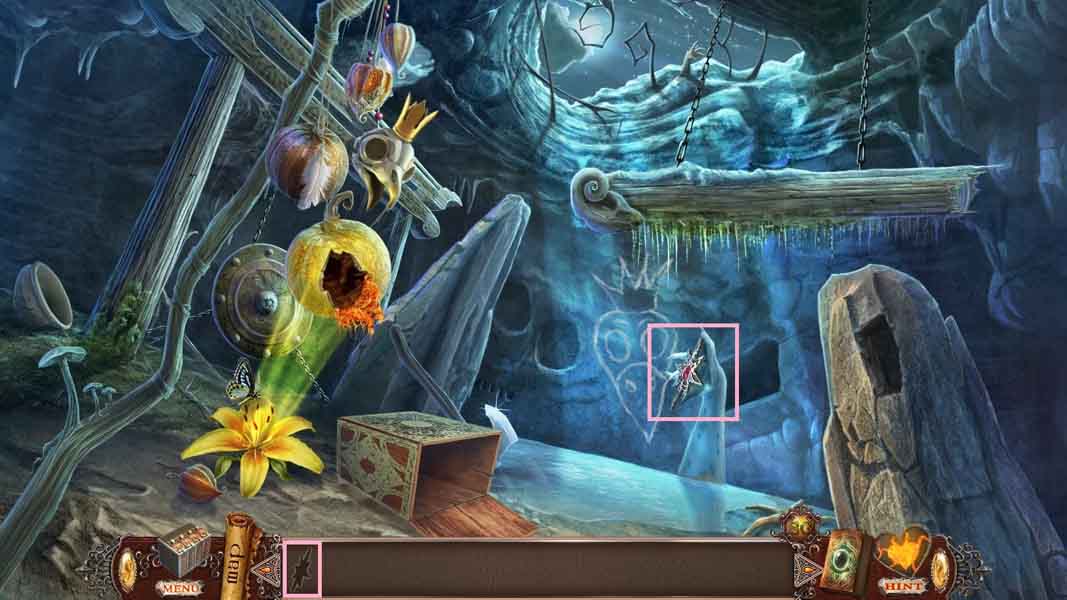
- Click the niche; use the matches to light the candle and collect the butterfly.
- Select the brush to clear the moss; collect the crown.
- Place the crown onto the bird’s head and collect the disc.
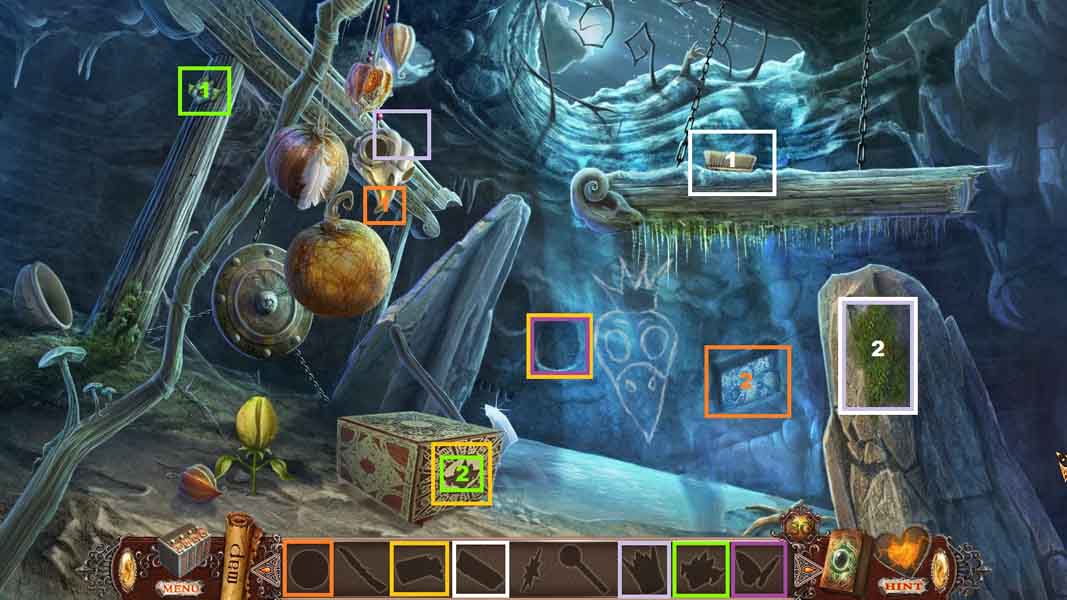
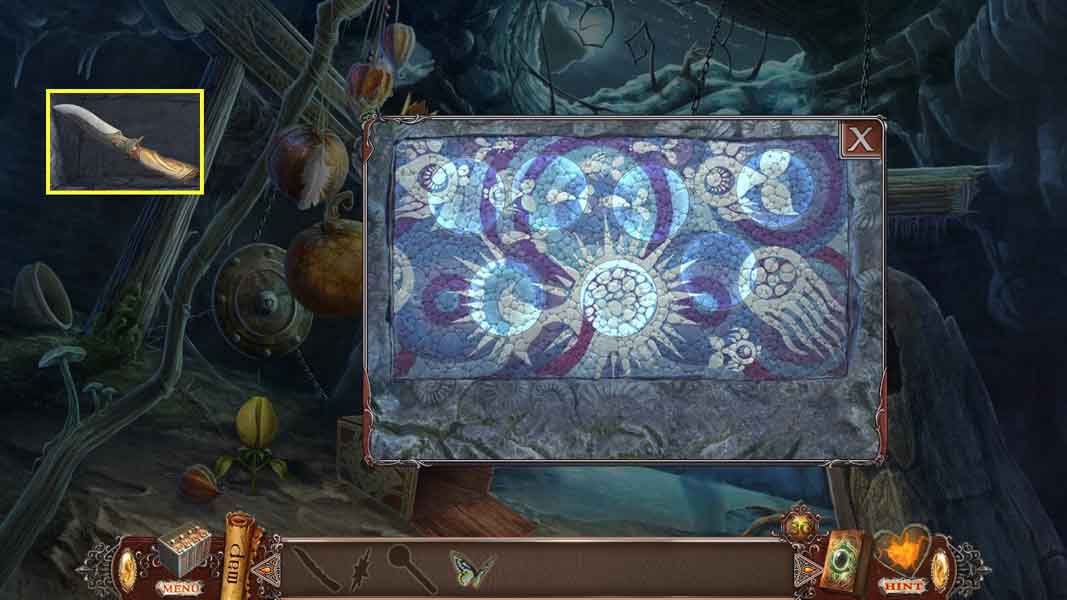
- Click the niches and insert the disc to trigger a puzzle.
- Click all the pieces into place.
- Collect the knife.
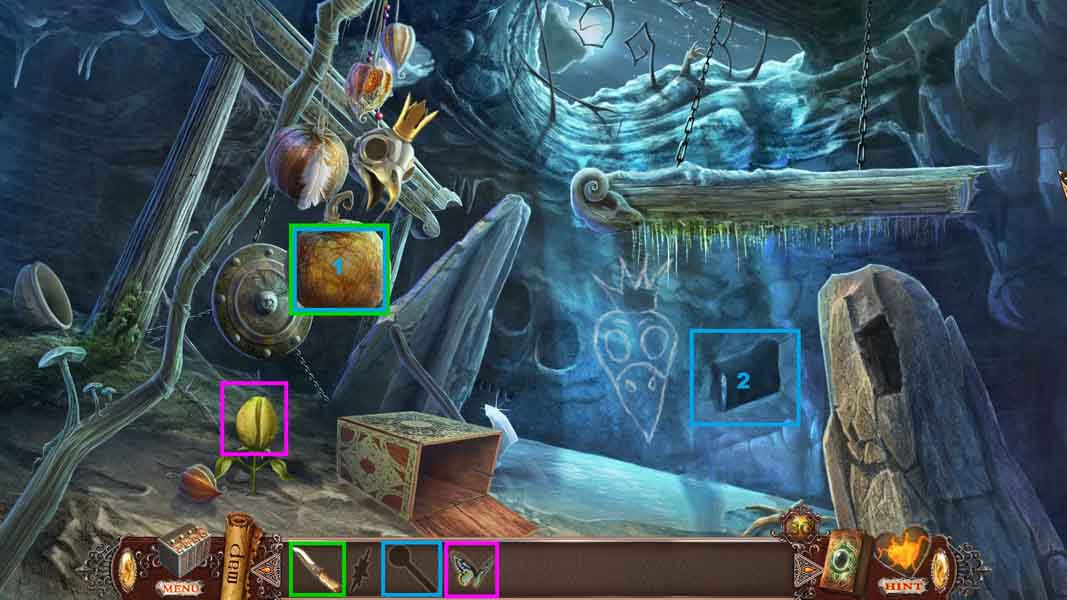
- Put the butterfly onto the flower.
- Select the knife to cut the pod; collect the lever.
- Click the niche and insert the lever; click the lever.
- Collect the star.
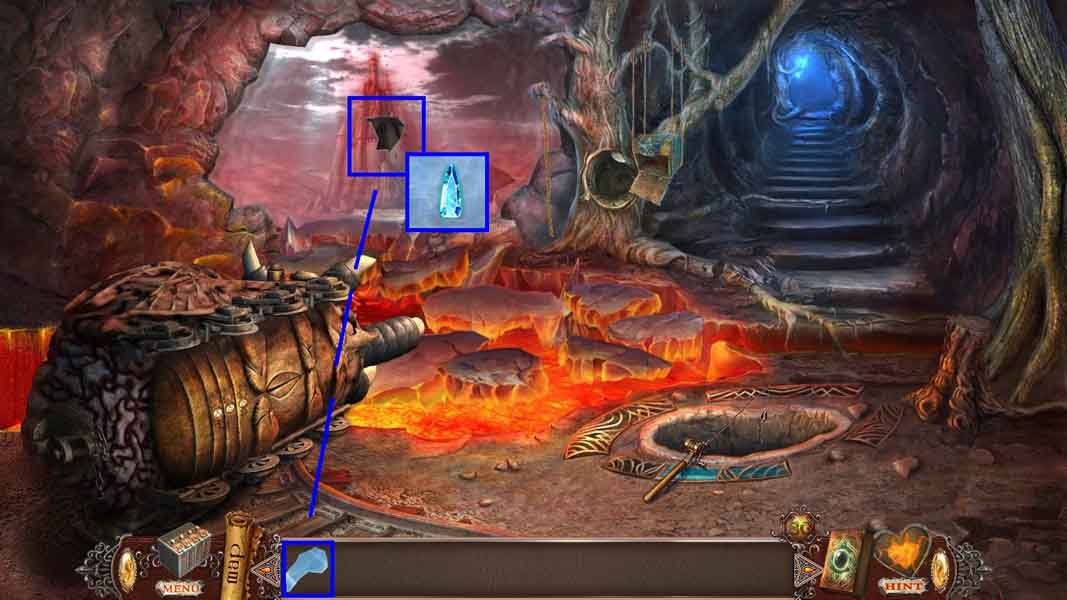
- Move to the Chasm.
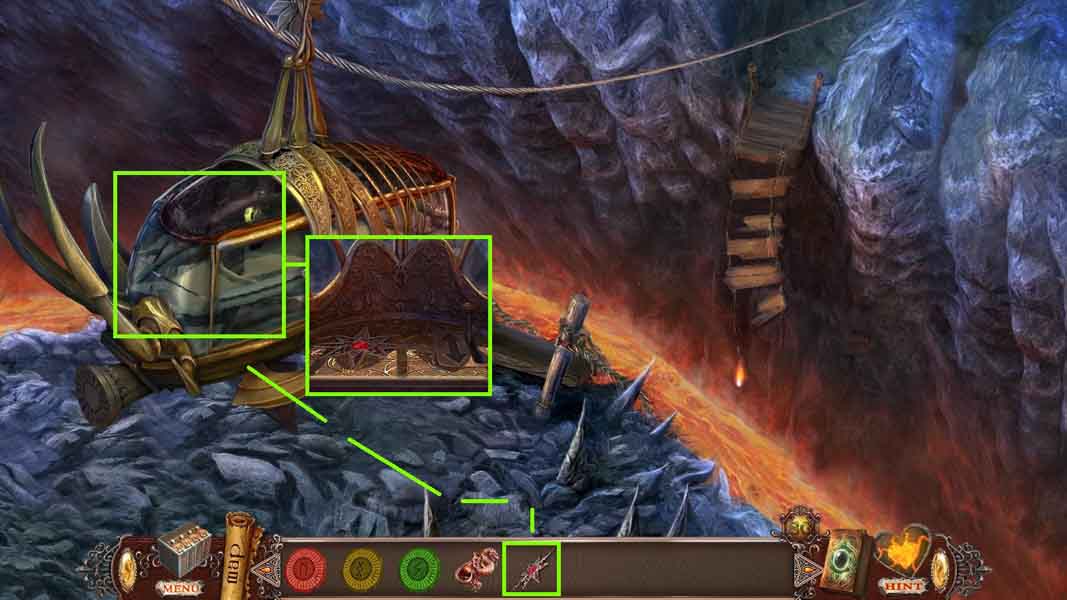
- Click the tram.
- Insert the star and click the lever.
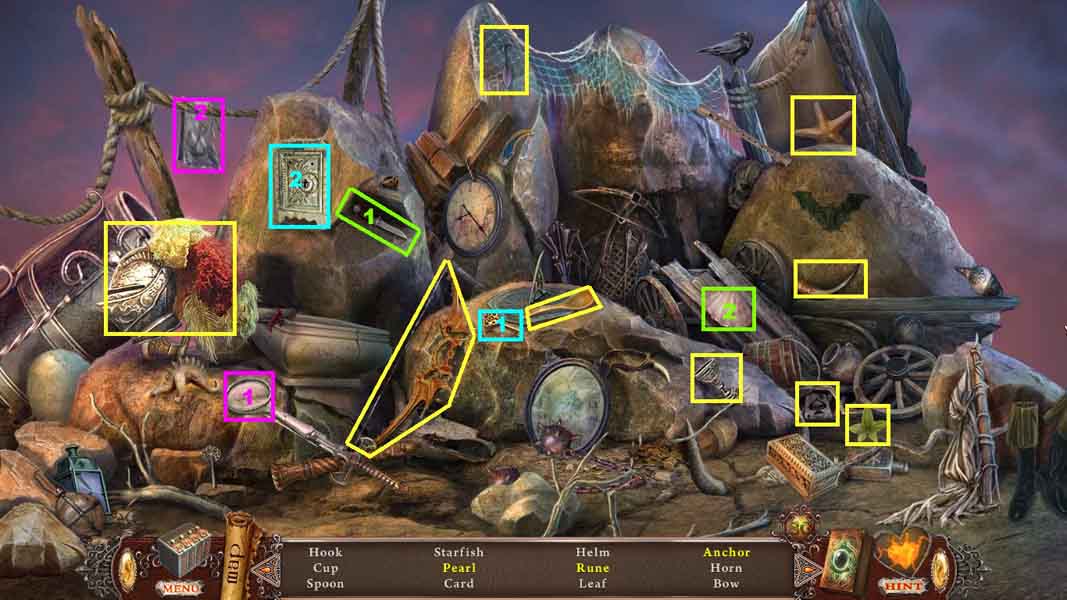
- Find the listed items.
- Select the knife and use it to open the oyster shell; collect the pearl.
- Select the key and insert it into the safe; collect the rune.
- Select the magnifying glass and place it in front of the cloth; collect the anchor.
- Collect the rune of justice.
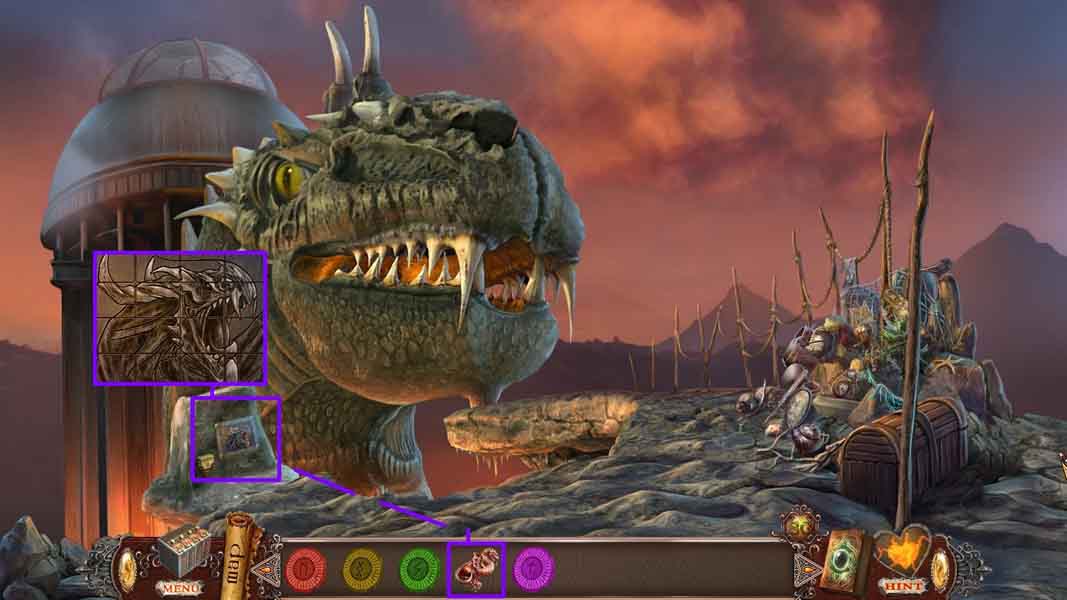
- Click the stone and insert the fire dragon to trigger a puzzle.
- Move the tiles to reassemble the picture.
- Move to the dragon’s mouth the access the Cup of Evil.

- Click the plate.
- Insert the runes of Justice, Inspiration, Renewal and Energy to trigger a puzzle.
- Move the runes to empty spots until all the tokens are on their matching color.
- Click the runes in ABC order.
- Collect the magic bow and arrow.
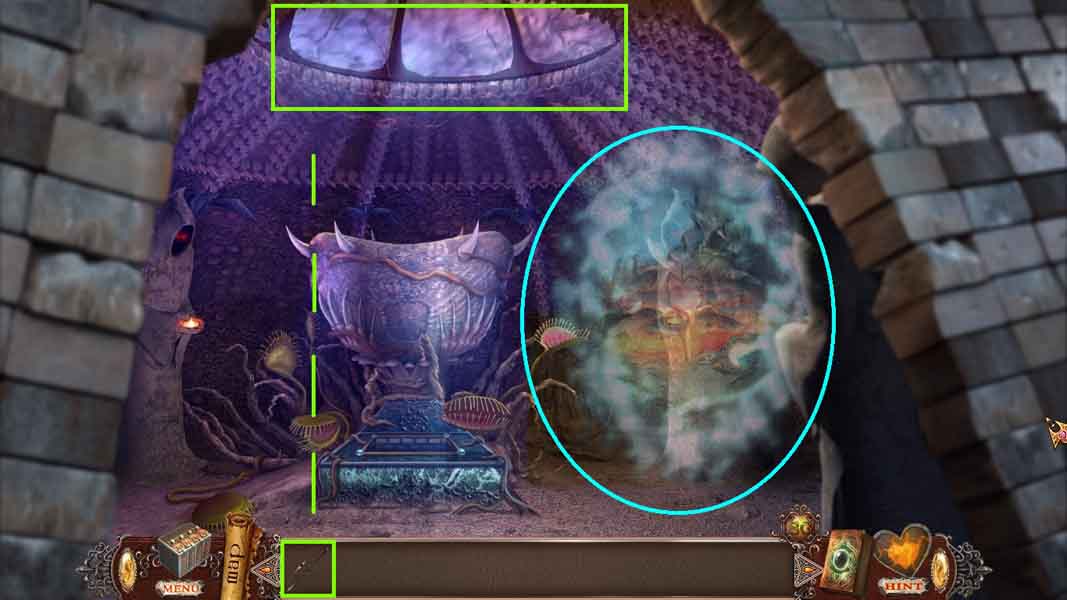
- Shoot the magic bow and arrow toward the dome.
- Collect the mirror shard.
- Move into the portal.
- Click the mirror and insert the mirror shard.
- Collect the gem and receive the diadem.
- Move to Alura’s Cage.
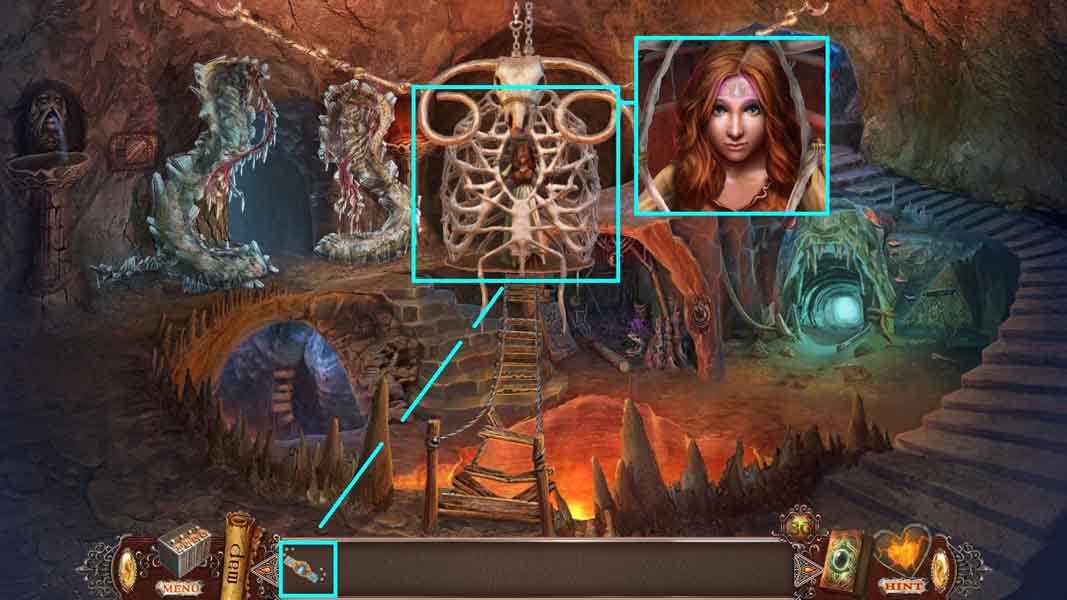
- Click the cage and give her the diadem.
-
Congratulations! You have successfully completed Love Chronicles: Salvation