
Living Legends: Wrath of the Beast: Chapter Six: Bear
Our Living Legends: Wrath of the Beast Walkthrough is the perfect companion as you set forth to discover why the magical bears of the forest have become suddenly aggressive. As the son of the legendary Goldilocks, it's up to you to save the village, but you won't have to go it alone. Our detailed instructions, custom marked screenshots, and simple puzzle solutions will be there to guide you during your journey in the enchanting hidden object adventure game!
General Information & Tips
Chapter One: Home
Chapter Two: Mountain Side
Chapter Three: Father
Chapter Four: Paw Print
Chapter Five: Enter Amaretta’s House
Chapter Six: Bear
Ask for help in the comments below!
Chapter One: Home
Chapter Two: Mountain Side
Chapter Three: Father
Chapter Four: Paw Print
Chapter Five: Enter Amaretta’s House
Chapter Six: Bear
Ask for help in the comments below!
Living Legends: Wrath of the Beast C. E.
Chapter Six Bear
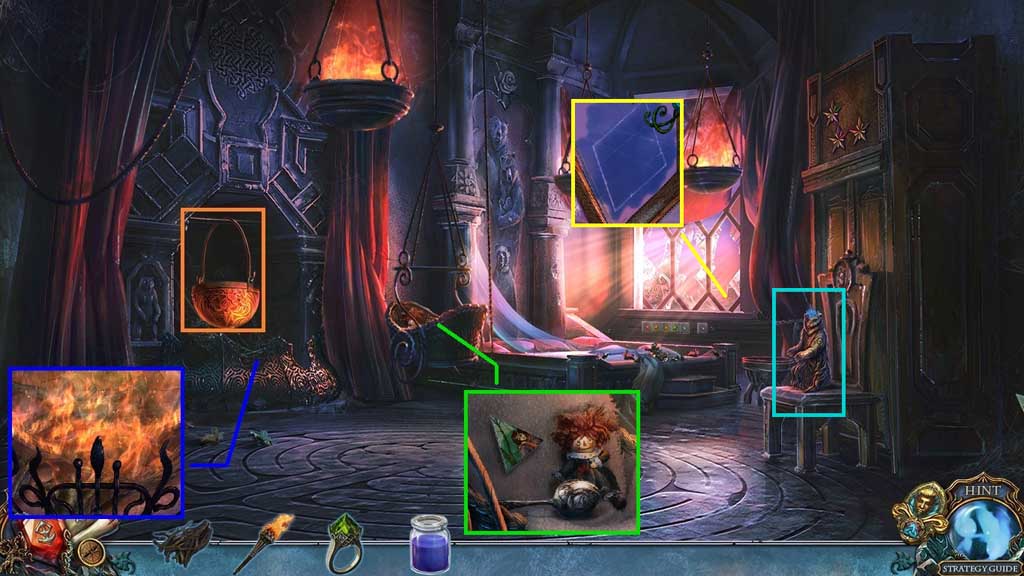
- Collect the kettle.
- Place the firewood into the fireplace and use the torch to ignite it.
- Click the blanket, the photo and the doll.
- Collect the fresco part and the silver rattle.
- Select the blue paint to use on the glass and use the sharped jeweled ring to cut and collect the blue glass.
- Collect the bear figurine.
- Move down once.
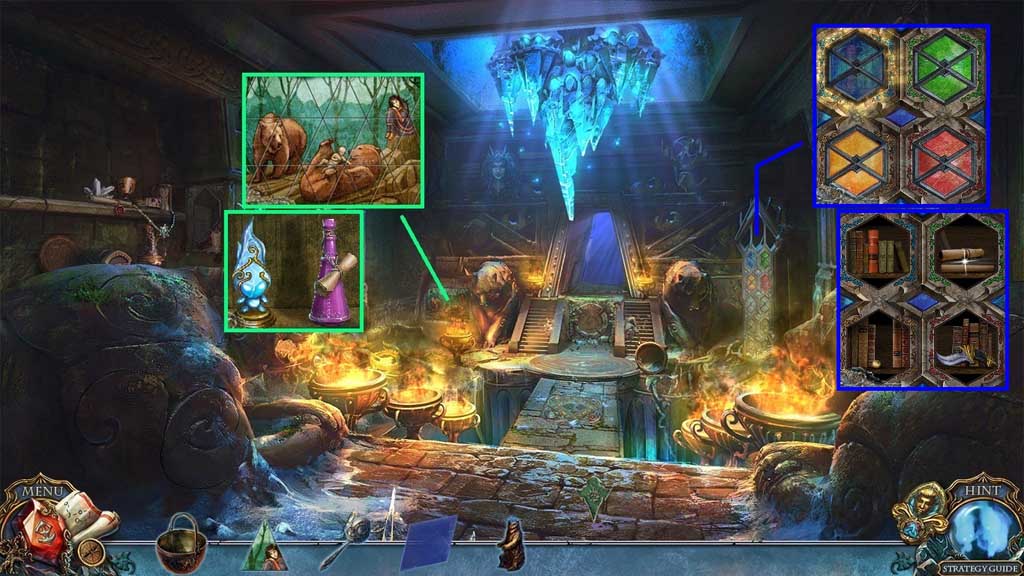
- Insert the fresco part; arrange it correctly.
- Collect the concentrated essence and the firefly figurine.
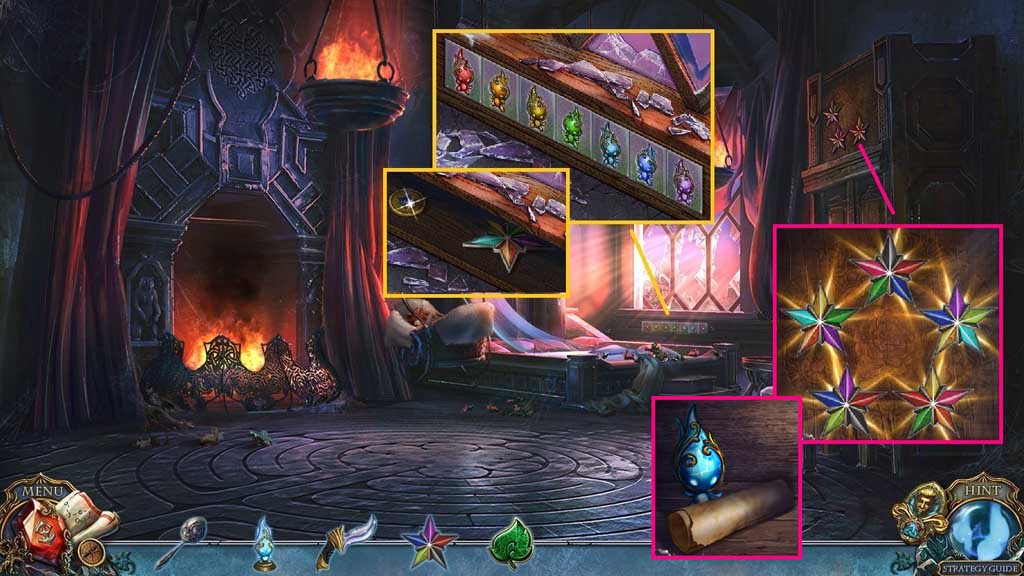
- Insert the blue glass and arrange the glass pieces correctly.
- Collect the pearl, the figurine and the diamond knife.
- Move down once.
- Place the bear figurine.
- Insert the pearl.
- Select the kettle to collect the water and create the kettle with water.
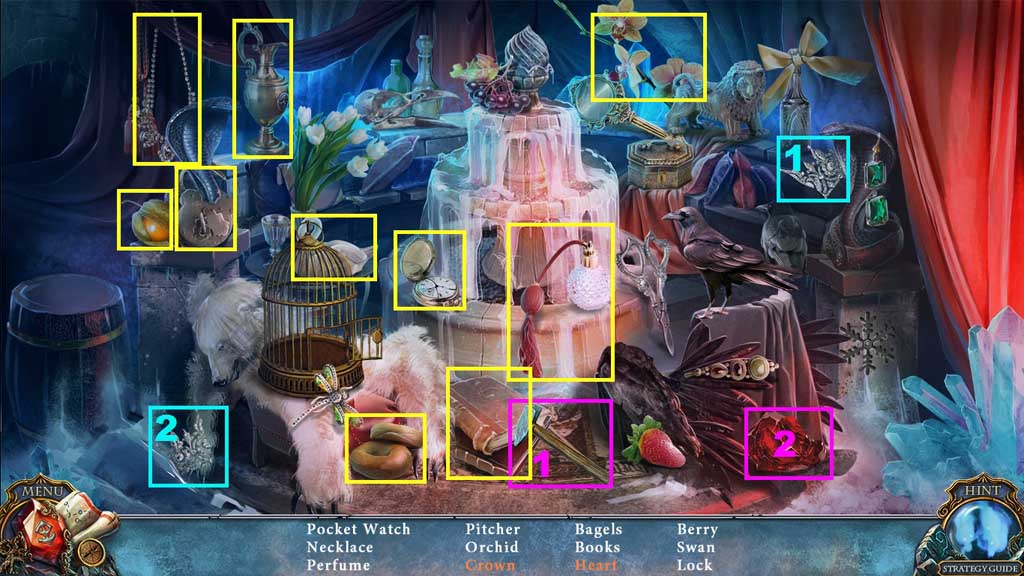
- Move ahead and click the hidden objects area.
- Find the items.
- Collect the chain.
- Move ahead.
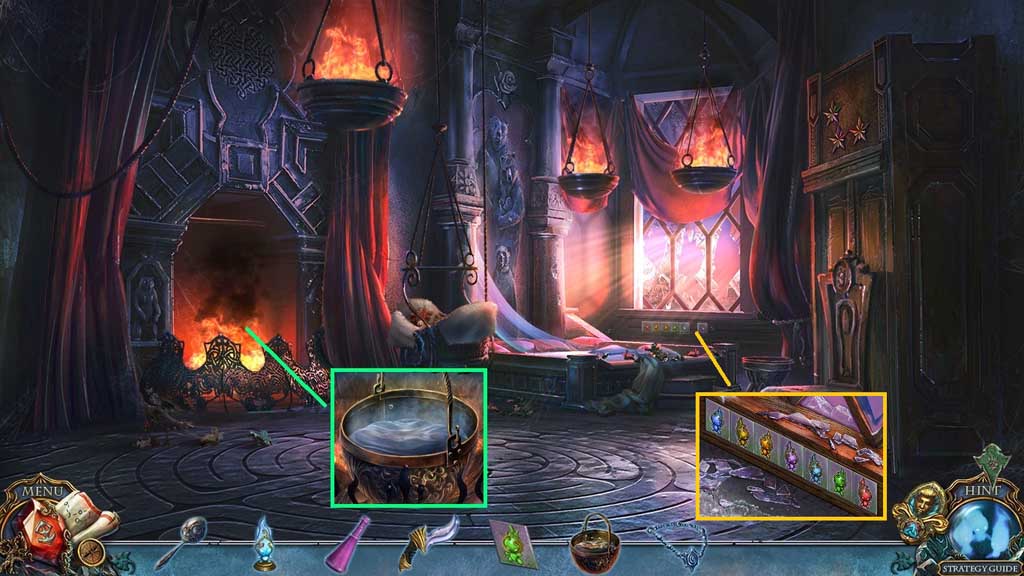
- Place the kettle with water into the fireplace and pour in the concentrated essence; collect the potion.
- Place the figurine.
- Move down 2x’s.
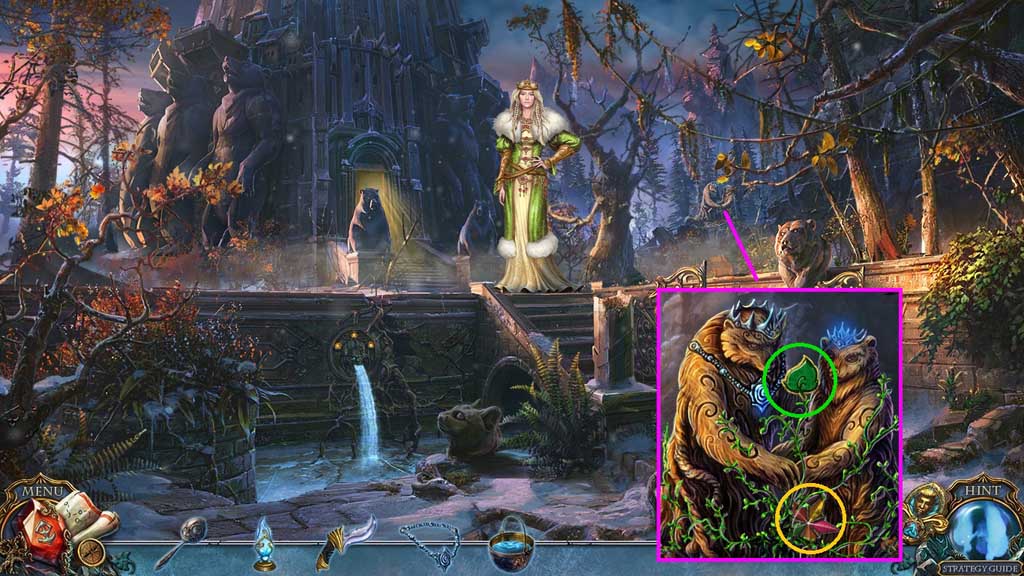
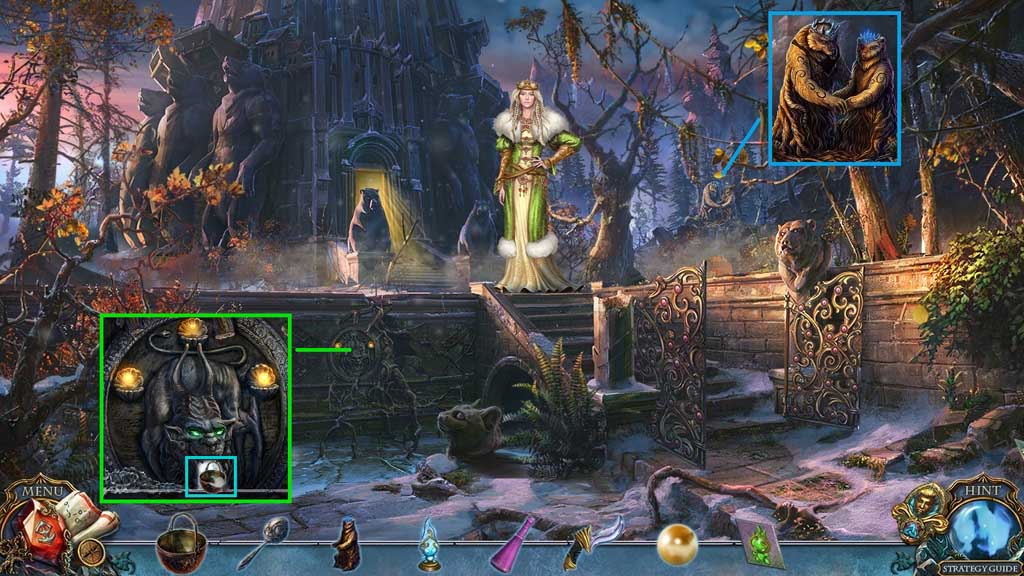
- Place the chain onto the bear.
- Select the potion to use on the vines.
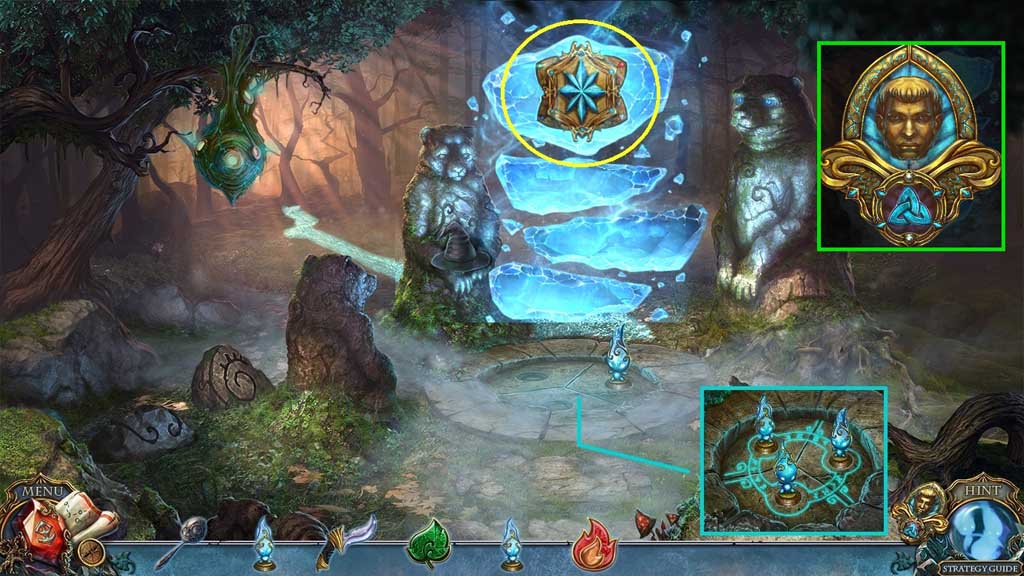
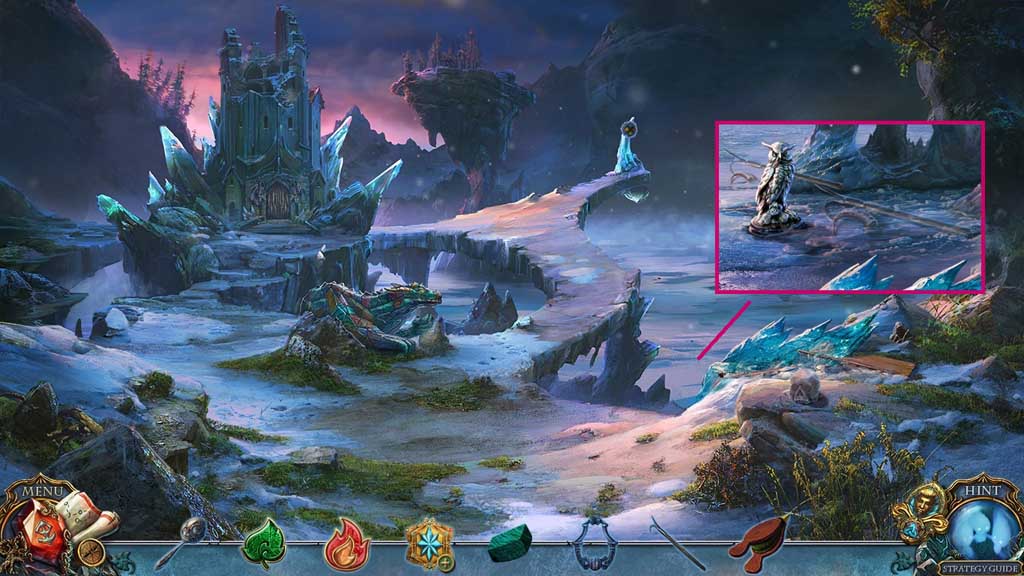
- Collect the star.
- Collect the force of earth.
- Move ahead 2x’s.
- Arrange the figurines correctly.
- Collect the star and the chip.
- Insert the 2 stars and arrange them correctly.
- Collect the note and the firefly figurine.
- Move down once.
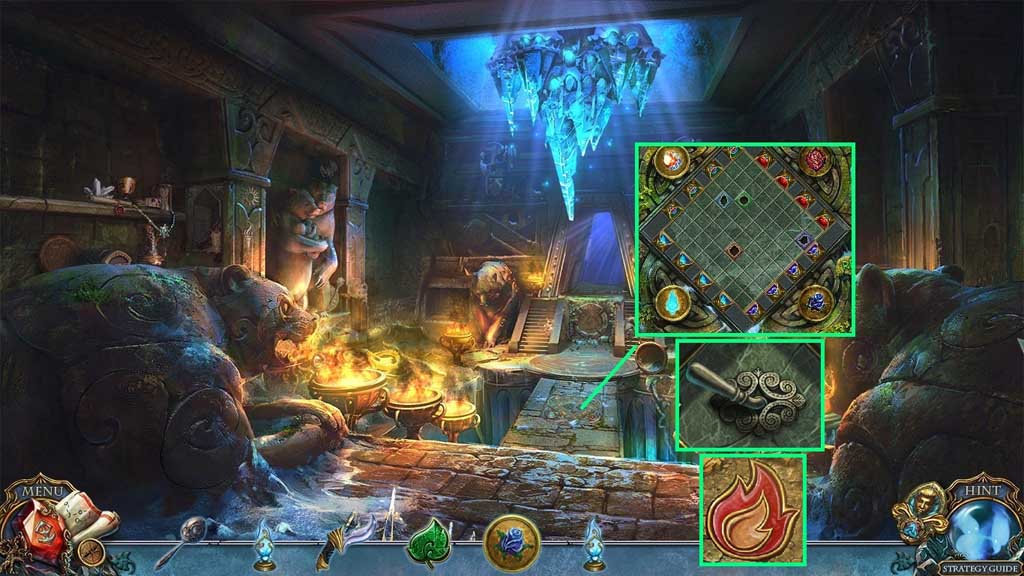
- Insert the chip to trigger a mini game.
- Solve the game by placing the chips into the correct holes.
- Click the lever.
- Collect the force of fire.
- Move down 2x’s.
- Place the 2 firefly figurines into the slots.
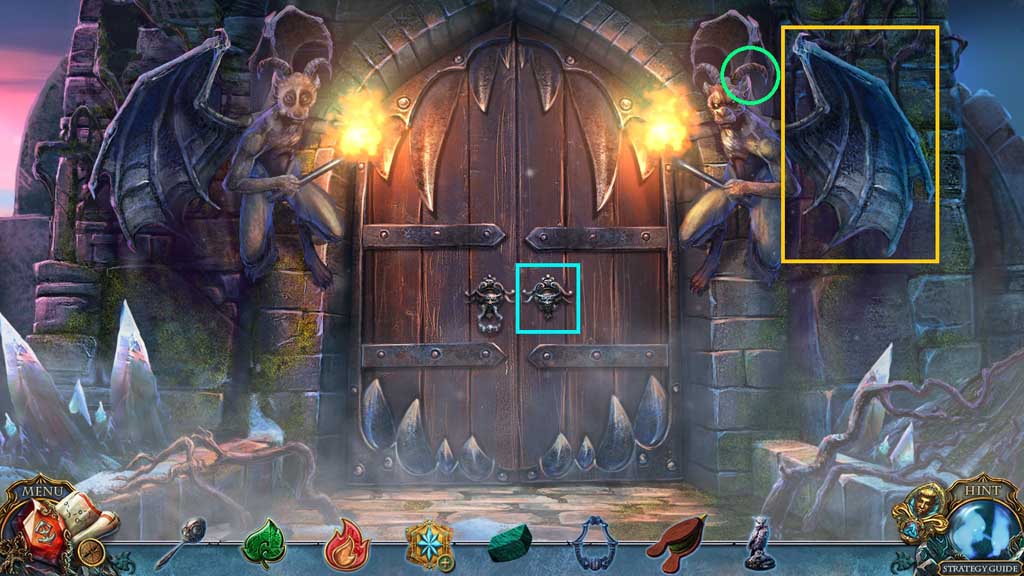
- Click the medallion to speak to the bear.
- Select the diamond knife to collect the medallion.
- Click the medallion.
- Move ahead.
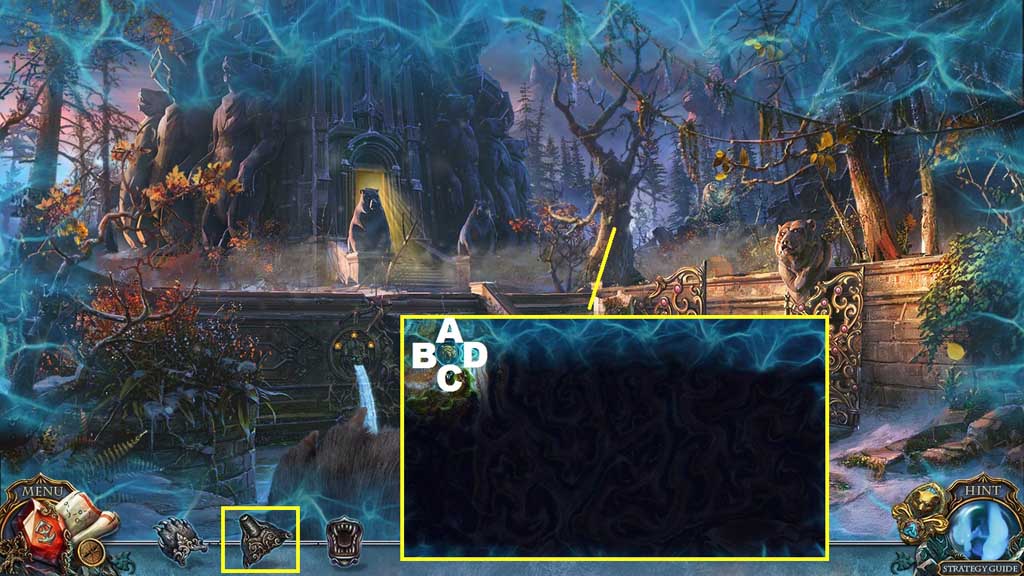
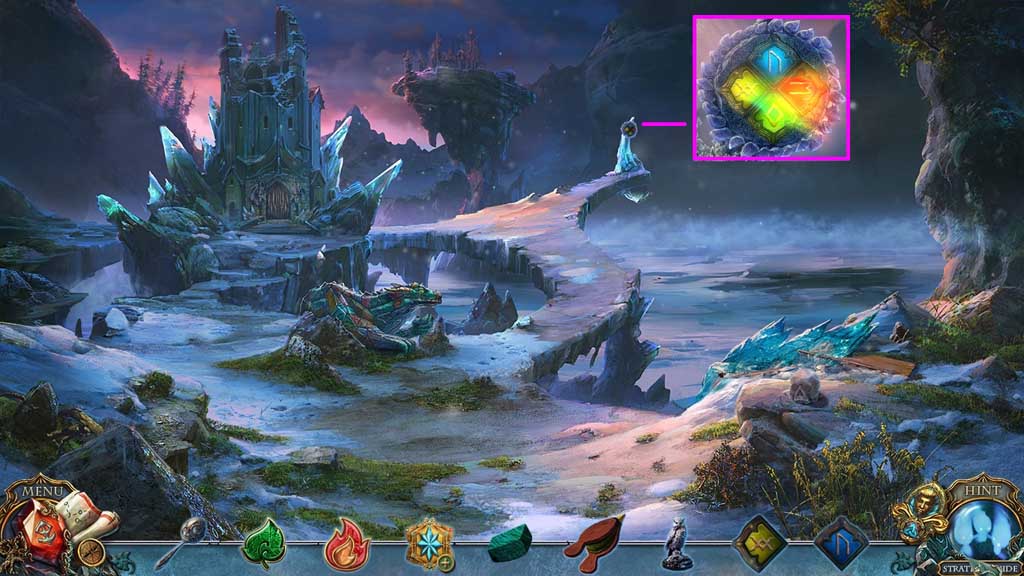
- Zoom into the tree.
- Select the nose to trigger a mini game.
- Solve the game by guiding the nose through the maze.
- Use the following solution to solve: D – C x 2 – D – C – D x 3 – C – B – C x 2 – D x 2 – A – B – A x 2 – D x 2
- Collect the symbol.
- Click the medallion.
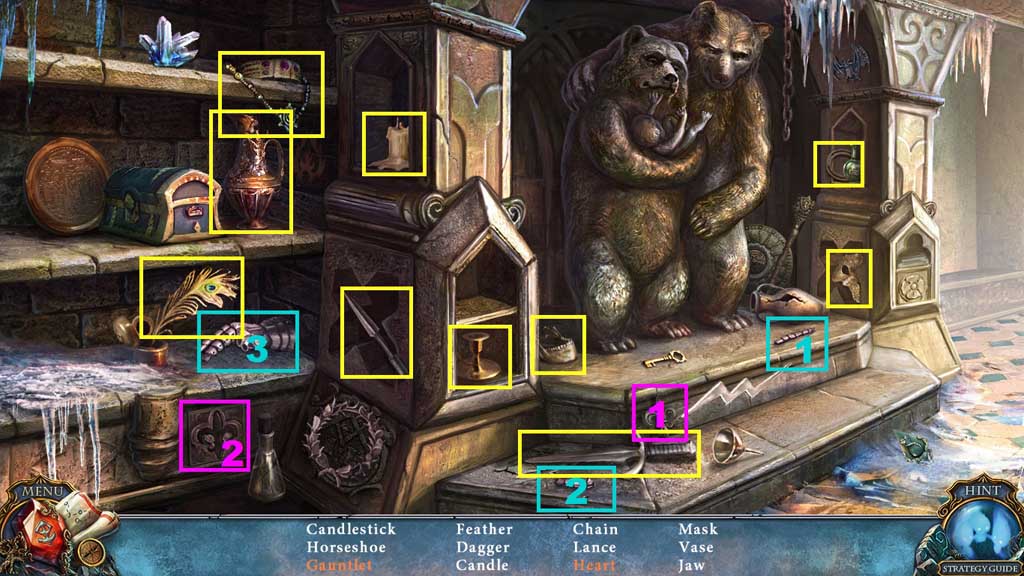
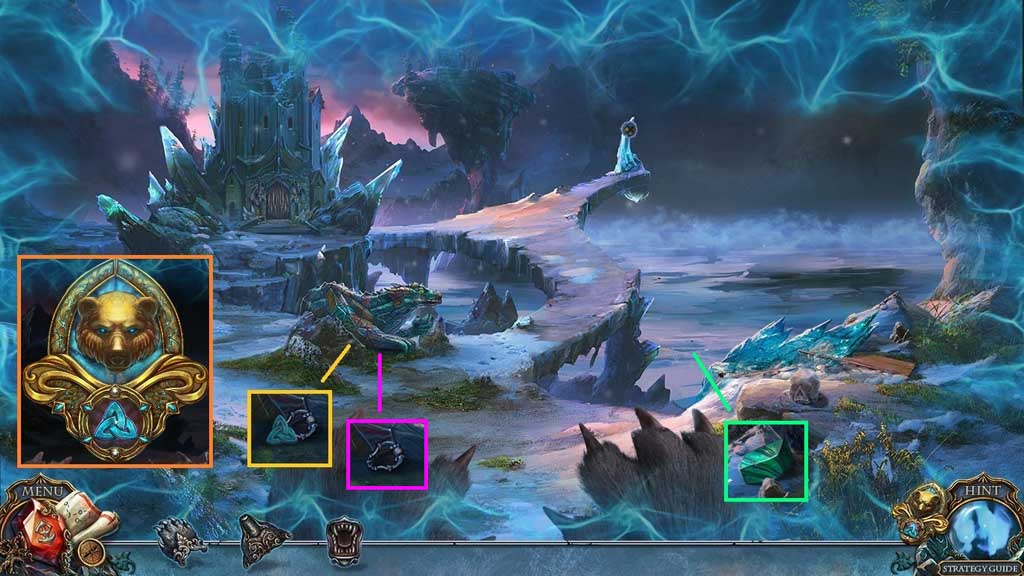
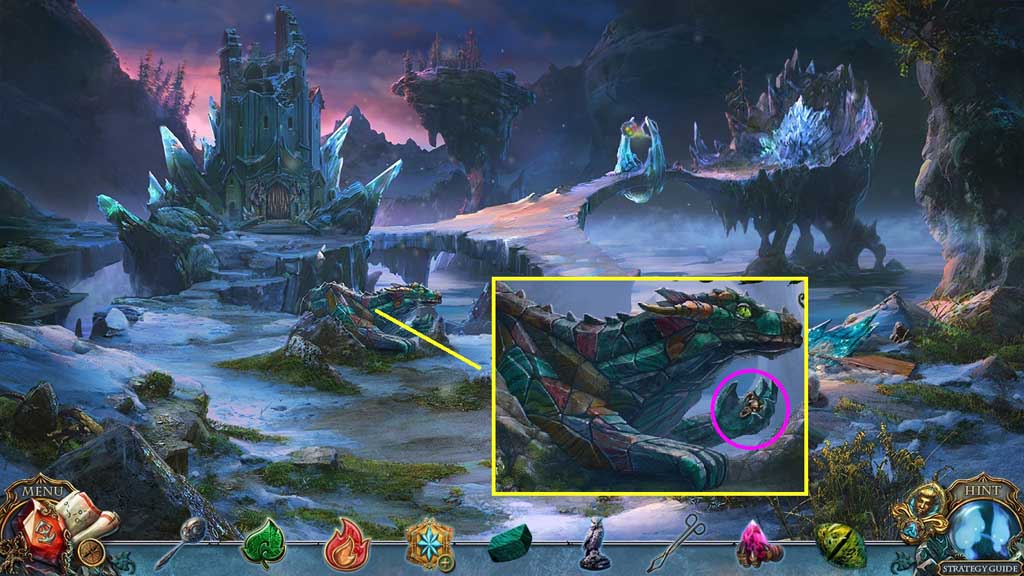
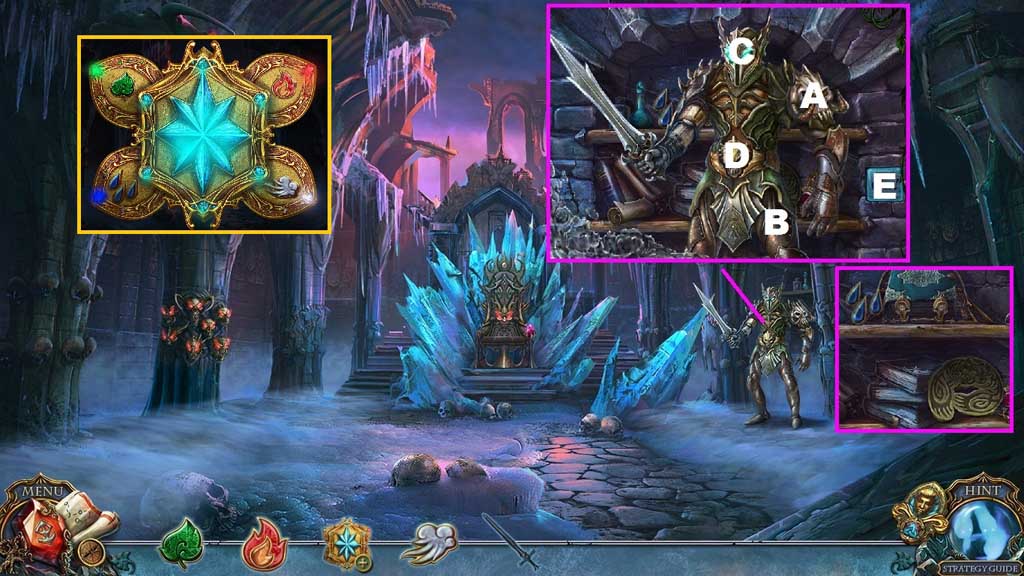
- Collect the stone scale.
- Collect the handle.
- Move ahead.
- Collect the gaff.
- Collect the bellows.
- Move down once.
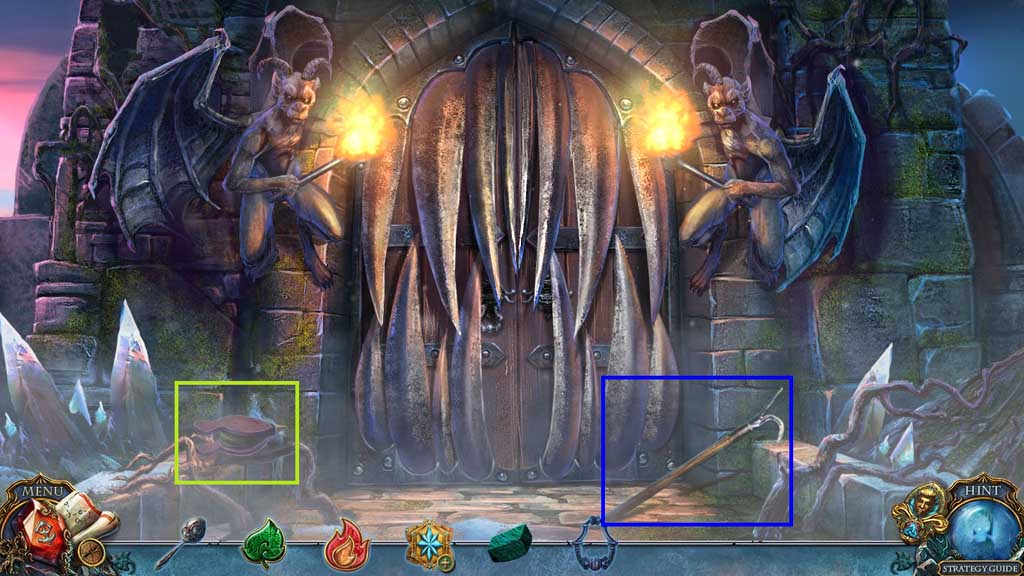
- Select the gaff to collect the silver statuette and the horn.
- Move ahead.
- Place the horn; click the horn and the wing.
- Attach the handle.
- Move ahead and click the hidden objects area.
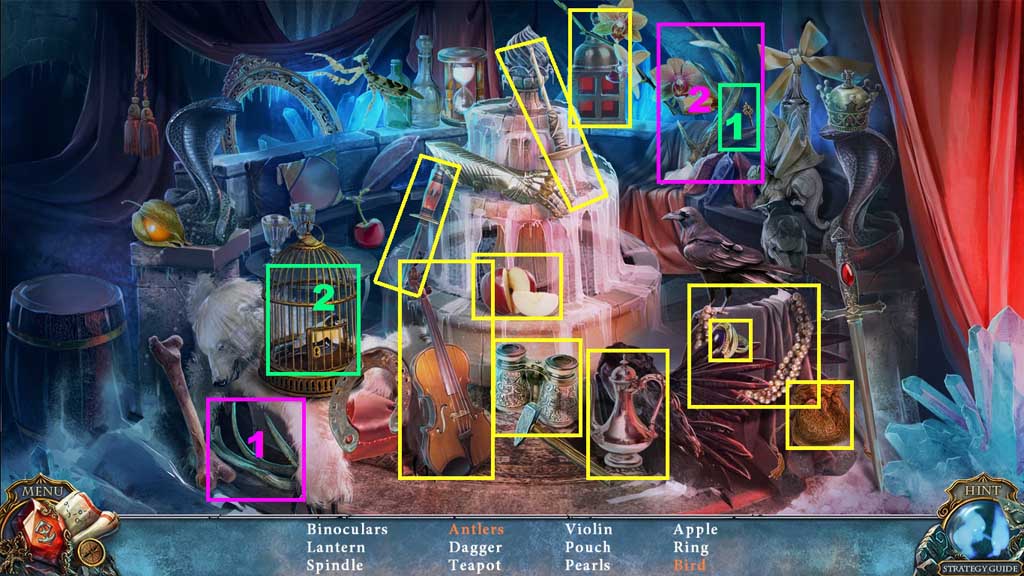
- Find the items.
- Collect the rune.
- Click the fur.
- Collect the note and the rune.
- Move down 2x’s.
- Insert the 2 runes.
- Move to the right.
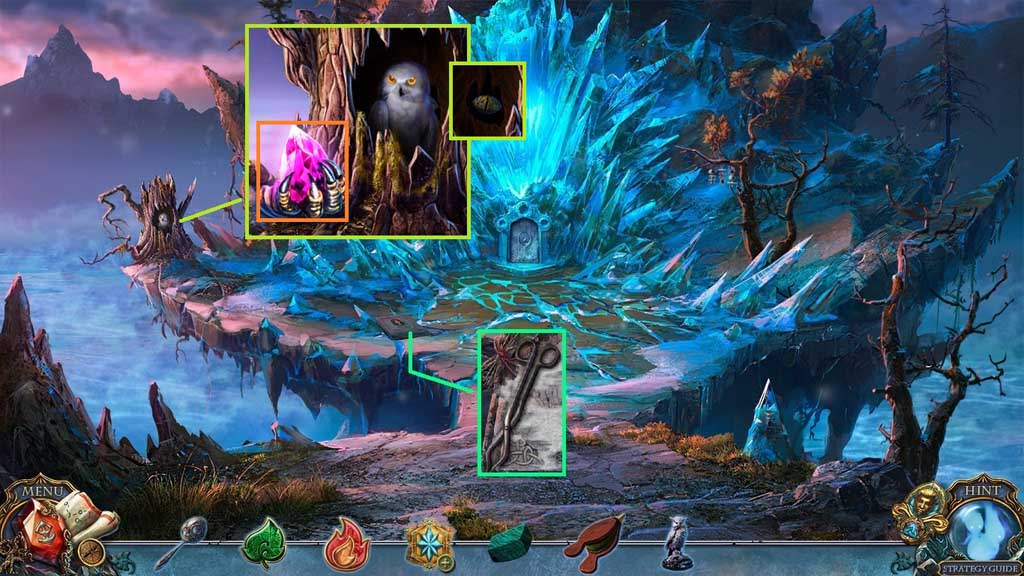
- Collect the tongs.
- Collect the throne crystal.
- Select the bellows to use on the owl.
- Collect the dragon eye.
- Move down once.
- Insert the stone scale and the dragon eye.
- Collect the skull.
- Move to the left and ahead once; click the hidden objects area.
- Find the items.
- Collect the grinding stone.
- Attach the skull.
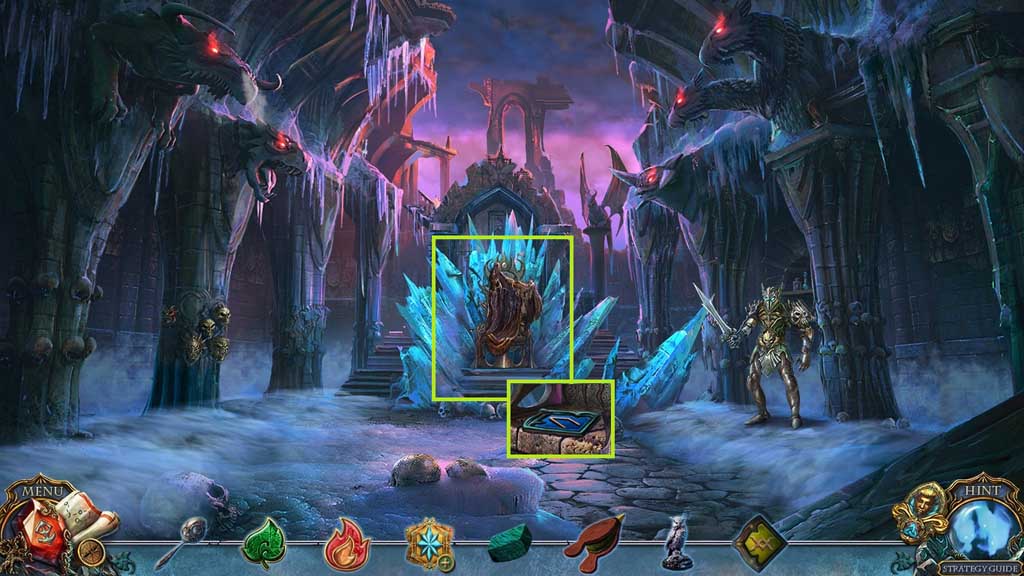
- Insert the throne crystal.
- Collect the silver scepter.
- Move down 2x’s and to the right.
- Select the grinding stone to clean off the headstone.
- Arrange the image.
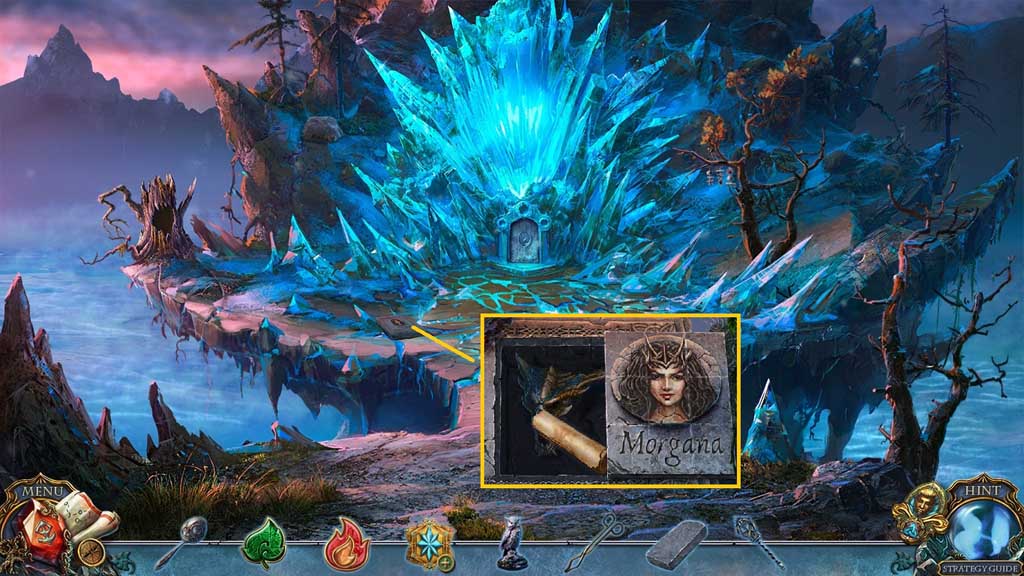
- Collect the note and the skull.
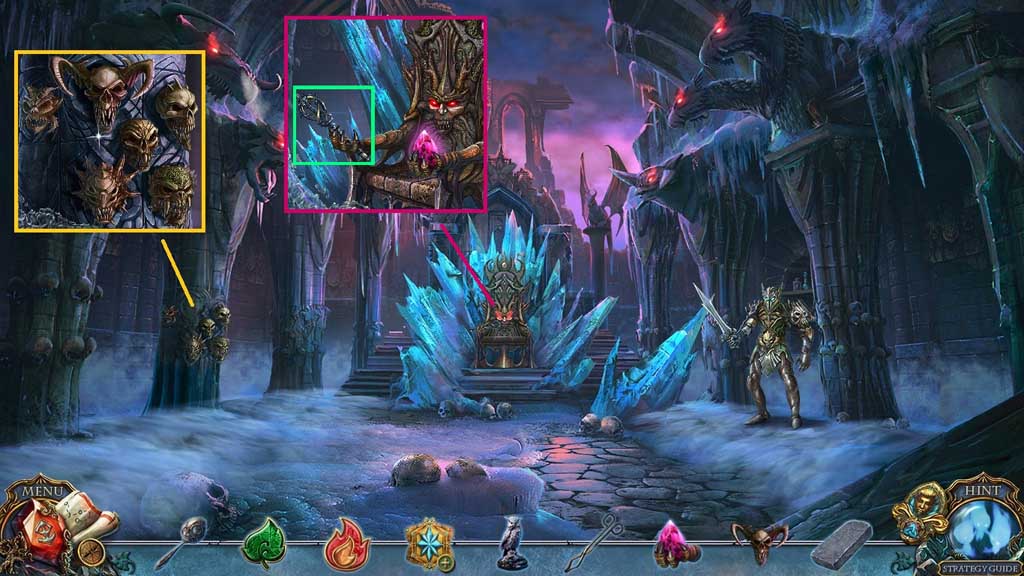
- Move down once, to the left and move ahead once more.
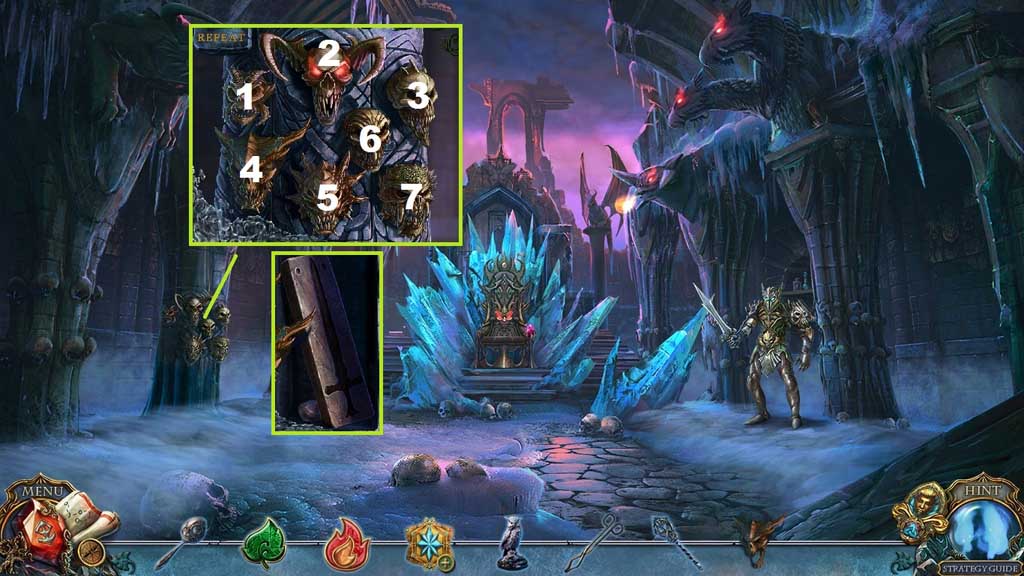
- Attach the skull and click the skulls to trigger a mini game.
- Solve the game by clicking the skulls in the correct sequence.
- Use the following sequence to solve:
- A. 3 – 2 – 4
- B. 7 – 4 – 2 – 5 – 1
- C. 5 – 1 - 3 – 2 – 7 – 4 – 6
- Collect the sword mold and the shell.
- Move down 2x’s and to the right.
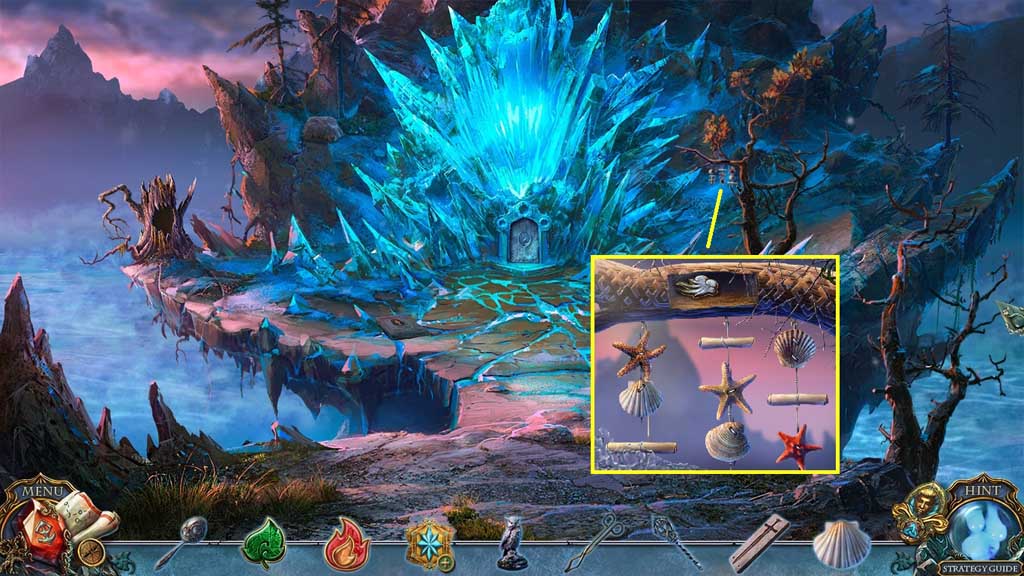
- Place the shell onto the chimes.
- Arrange the figures correctly.
- Collect the force of air.
- Move down 2x’s, move left and ahead once.
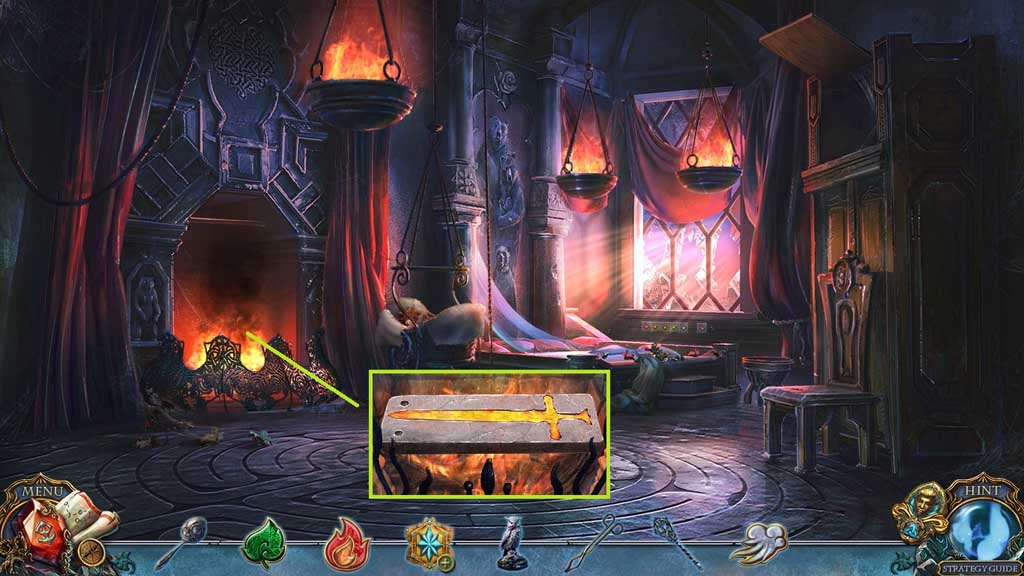
- Place the sword mold down.
- Select the silver rattle, silver scepter and the silver statuette to melt into the mold.
- Select the tongs to collect the hot sword.
- Move down 2x’s.
- Place the hot sword into the water; collect the silver sword.
- Move to the right, then go to the left and ahead once more.
- Select the silver to use on the swordsman sword to trigger a mini game.
- Solve the game by clicking the body parts in ABC order.
- Collect the force of water and the bear seal.
- Click the magic crystal.
- Insert the forces of air – earth – fire and water to collect the crystal of life.
- Move down 2x’s and to the right.

- Insert the bear seal.
- Attempt to move ahead.
- Move ahead.
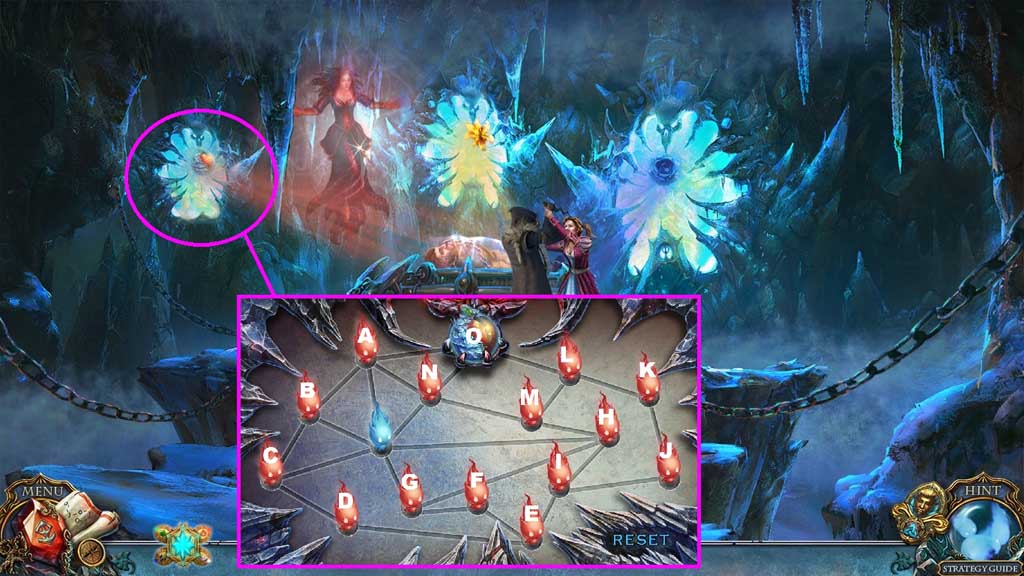
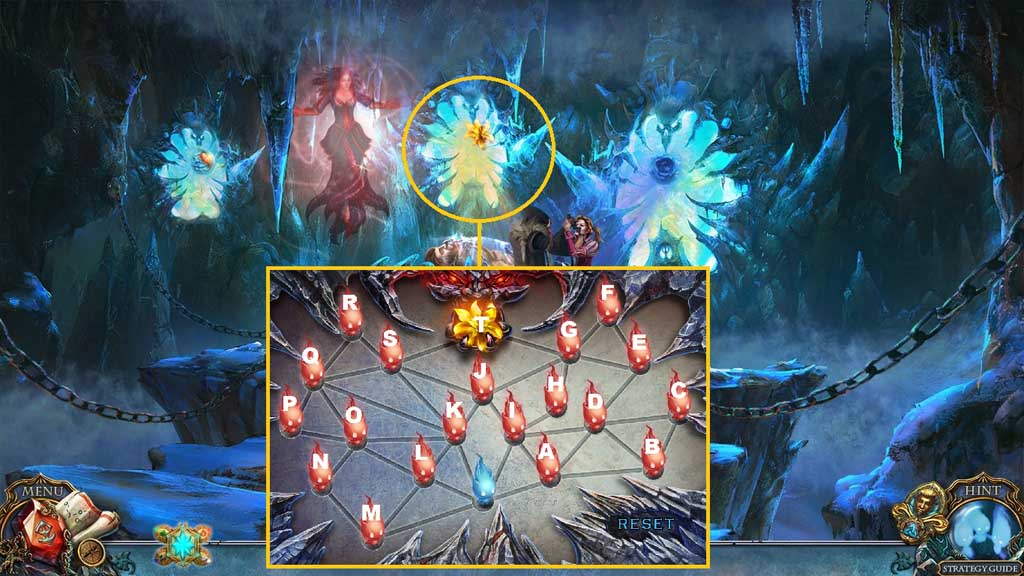
- Select the crystal of life to use on the scene and trigger a mini game.
- Solve the game by clicking the fireflies in the correct sequence.
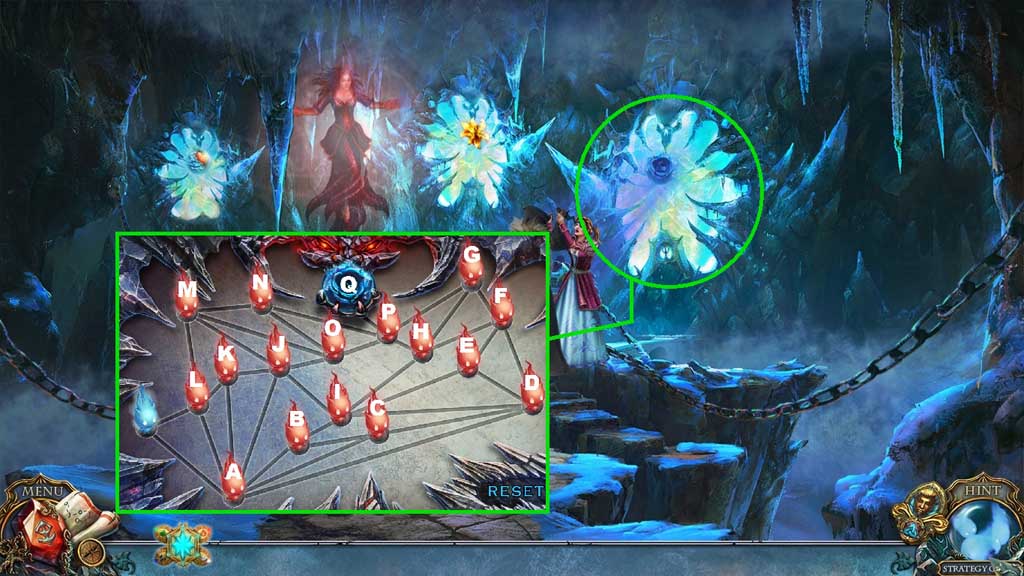
- Select the crystal of life to use on the scene and trigger a mini game.
- Solve the game by clicking the fireflies in the correct sequence.
- Select the crystal of life to use on the scene and trigger a mini game.
- Solve the game by clicking the fireflies in the correct sequence.
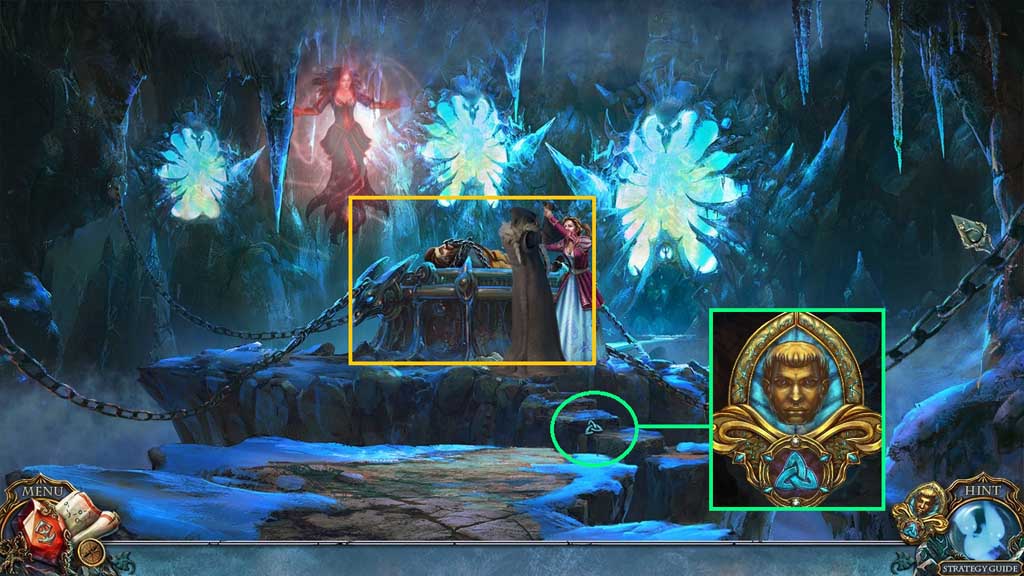
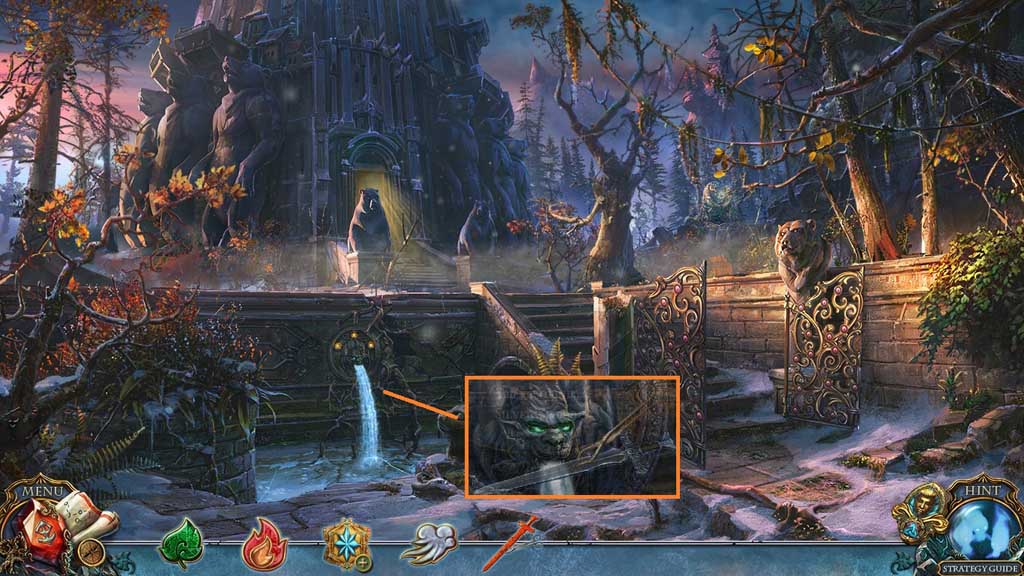
- Zoom into the altar.
- Click the medallion.
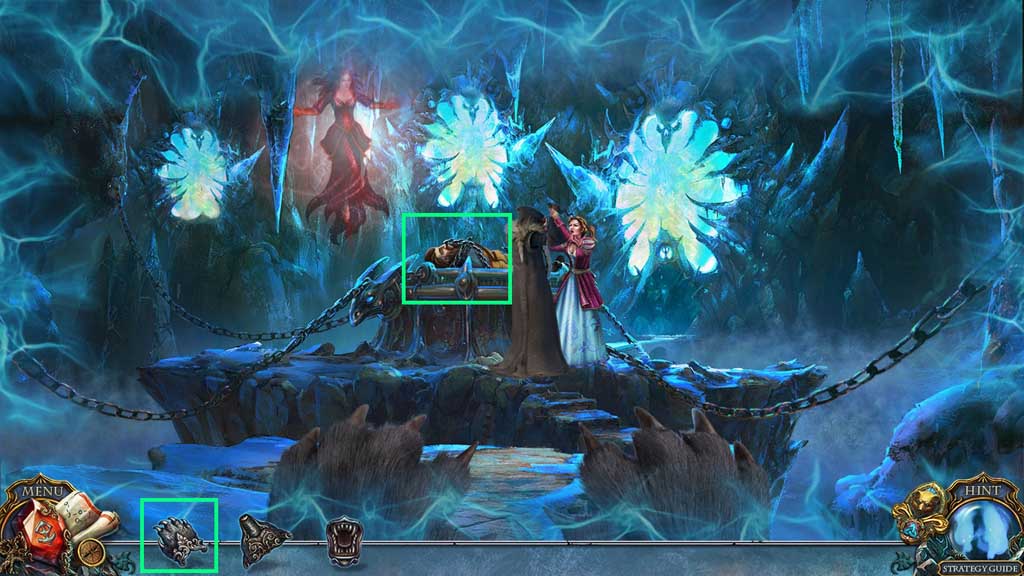
- Select the claw to remove the chains.
- Congratulations! You have successfully completed the main game of Living Legends: Wrath of the Beast C. E.
General Information & Tips
Chapter One: Home
Chapter Two: Mountain Side
Chapter Three: Father
Chapter Four: Paw Print
Chapter Five: Enter Amaretta’s House
Chapter Six: Bear
Ask for help in the comments below!
Chapter One: Home
Chapter Two: Mountain Side
Chapter Three: Father
Chapter Four: Paw Print
Chapter Five: Enter Amaretta’s House
Chapter Six: Bear
Ask for help in the comments below!