
Living Legends: Wrath of the Beast: Chapter Three: Father
Our Living Legends: Wrath of the Beast Walkthrough is the perfect companion as you set forth to discover why the magical bears of the forest have become suddenly aggressive. As the son of the legendary Goldilocks, it's up to you to save the village, but you won't have to go it alone. Our detailed instructions, custom marked screenshots, and simple puzzle solutions will be there to guide you during your journey in the enchanting hidden object adventure game!
General Information & Tips
Chapter One: Home
Chapter Two: Mountain Side
Chapter Three: Father
Chapter Four: Paw Print
Chapter Five: Enter Amaretta’s House
Chapter Six: Bear
Ask for help in the comments below!
Chapter One: Home
Chapter Two: Mountain Side
Chapter Three: Father
Chapter Four: Paw Print
Chapter Five: Enter Amaretta’s House
Chapter Six: Bear
Ask for help in the comments below!
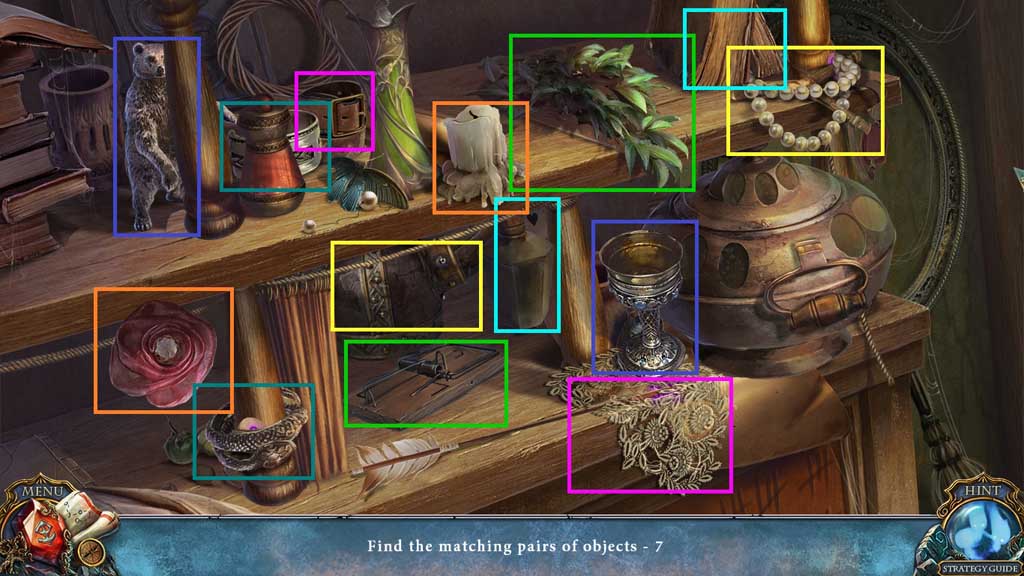
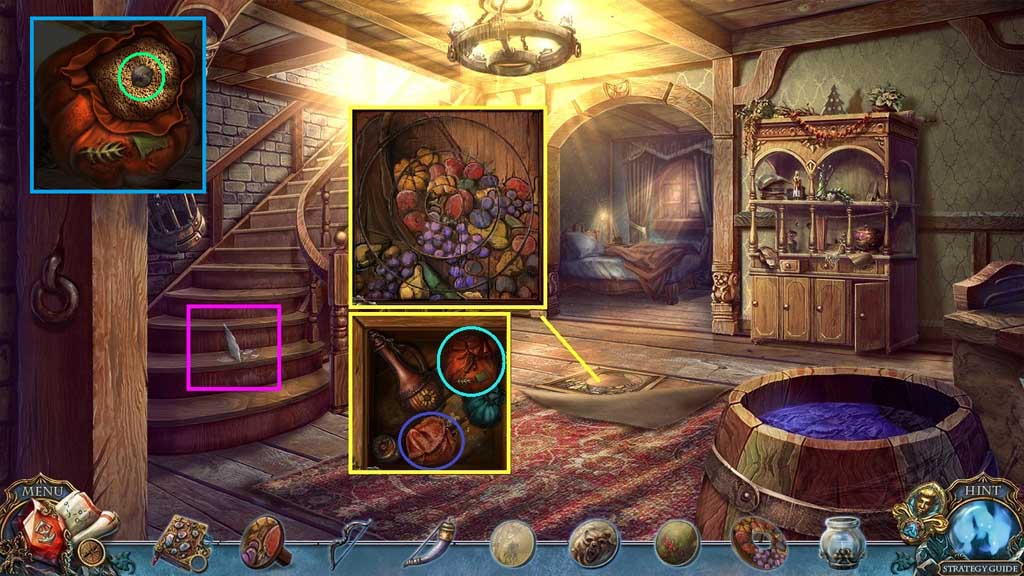
- Find the matching items.
- Collect the statuettes.
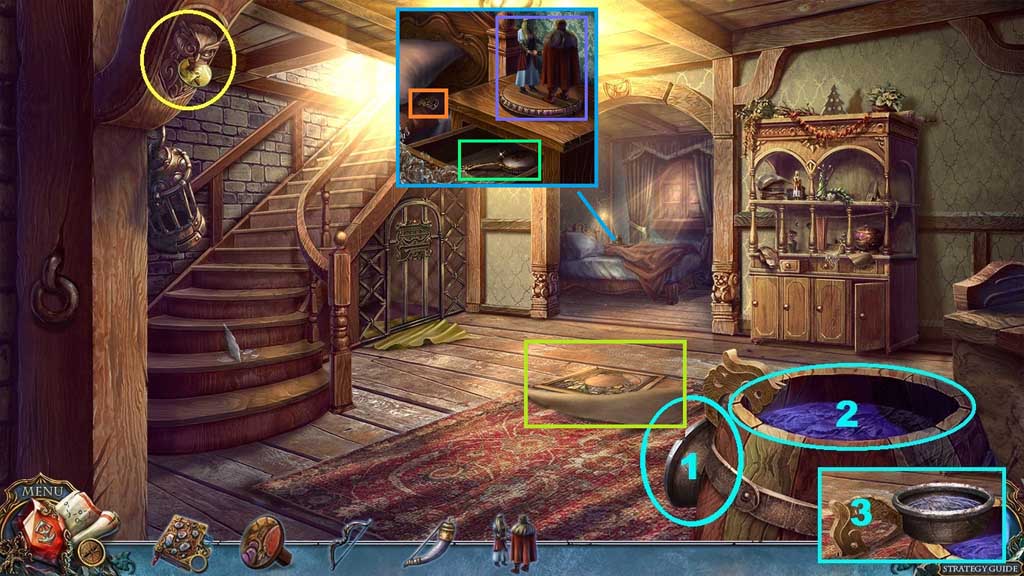
- Collect the picture part.
- Select the dipper and dip it into the water; collect the dipper of water.
- Click the carpet.
- Place the statuette; collect the brush.
- Click the pillow; collect the picture part.
- Move upstairs.
- Collect the picture part.
- Select the dipper of water to douse the flames.
- Click the grate.
- Select the brush to clean the soot.
- Collect the painted circle and collect the jar.
- Click the cloth.
- Move down once.
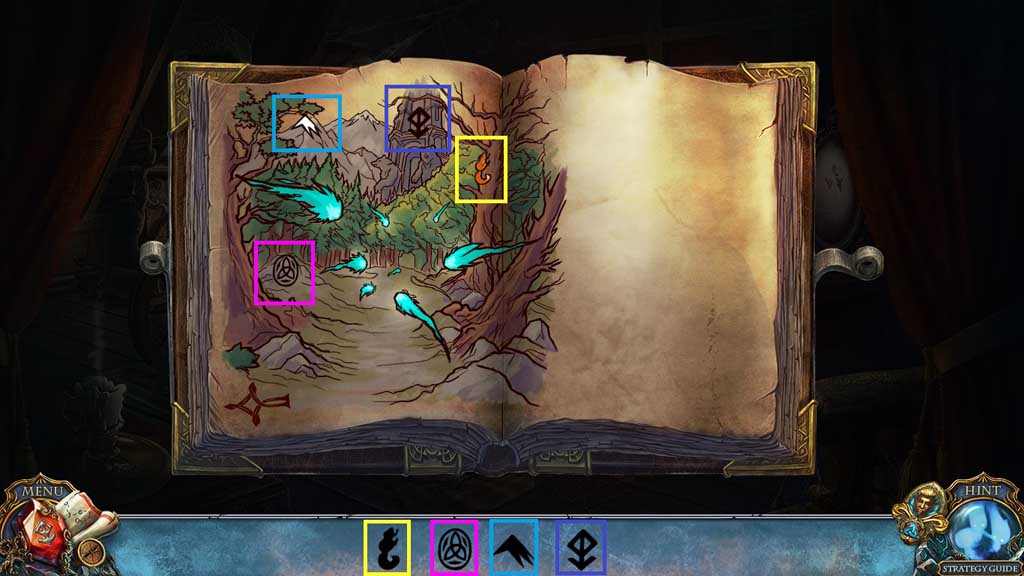
- Place the painted token and the painted circle into the floor.
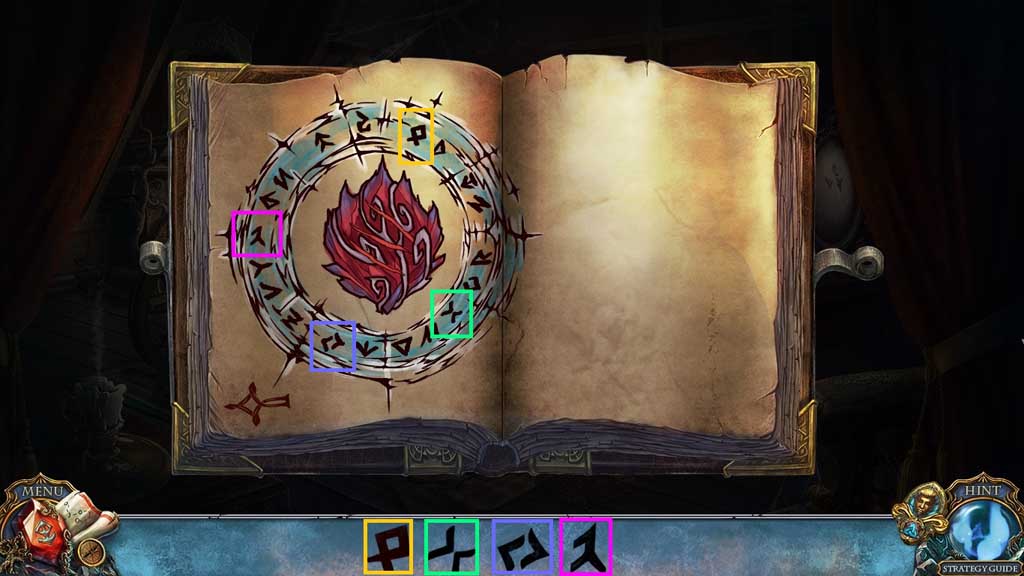
- Arrange the image correctly.
- Collect the pouch and the rag; use the rag to collect the glass.
- Select the glass to slice the pouch open.
- Click the grain 3x’s; collect the picture part.
- Collect the bag of grain.
- Move upstairs.
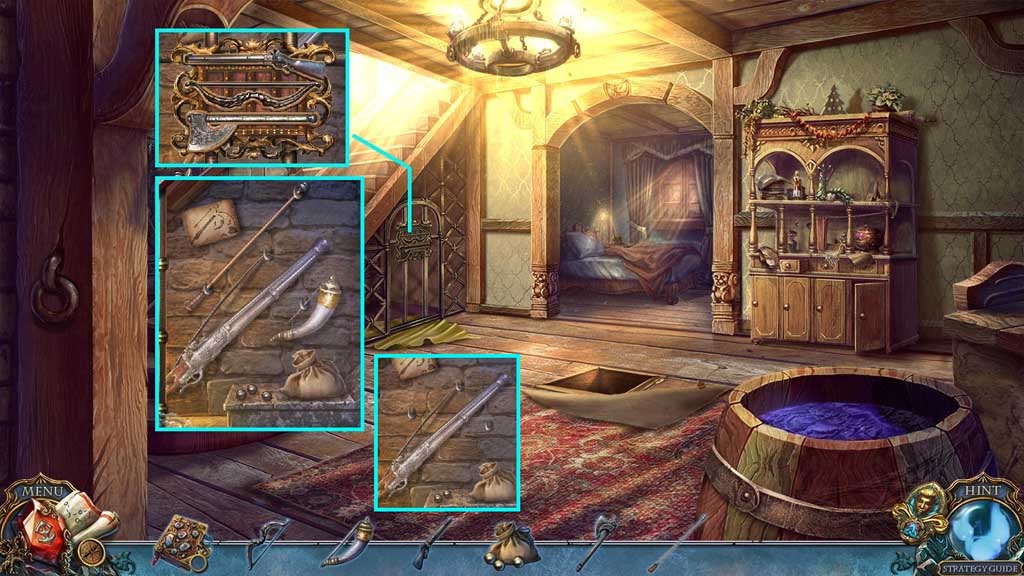
- Select the glass to collect the tiny gun.
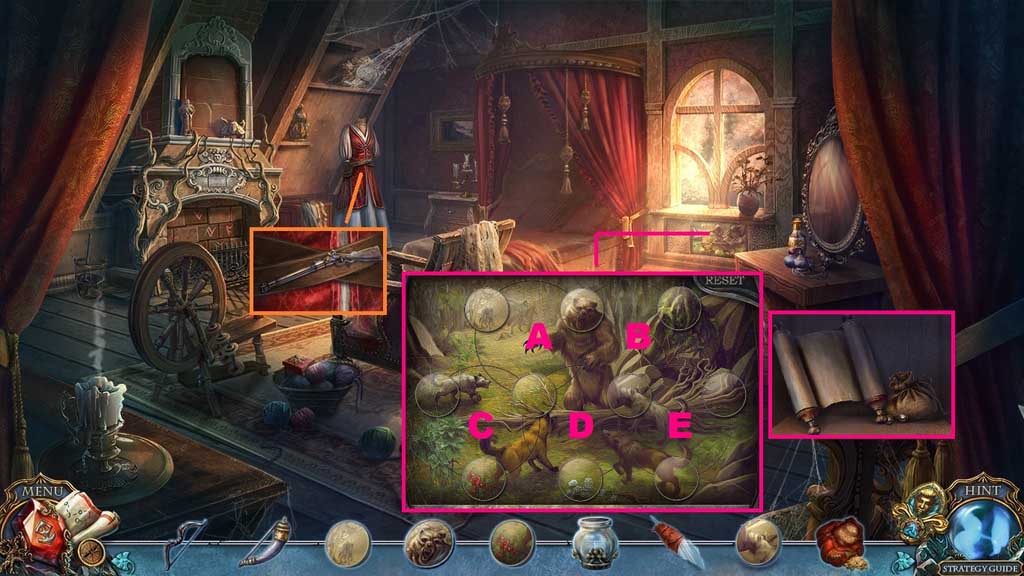
- Insert the 4 picture parts to trigger a mini game.
- Solve the game by restoring the image.
- Use the following sequence to solve: A x 2 – D x 2 – C x 2 – D – E – D – C x 2 – A – D – A – C x 2 – D – C x 2 – D – C – D x 2 – C x 2 – D x 2
- Collect the note and the bullets.
- Move down 2x’s.
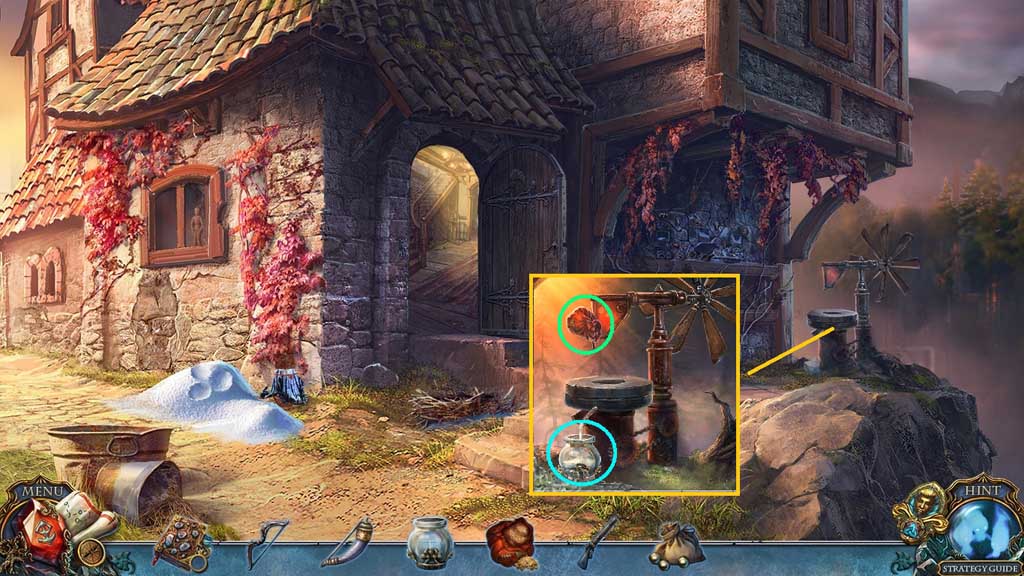
- Select the jar and place it near the grinder and pour in the bag of grain.
- Collect the flour.
- Move ahead 2x’s.
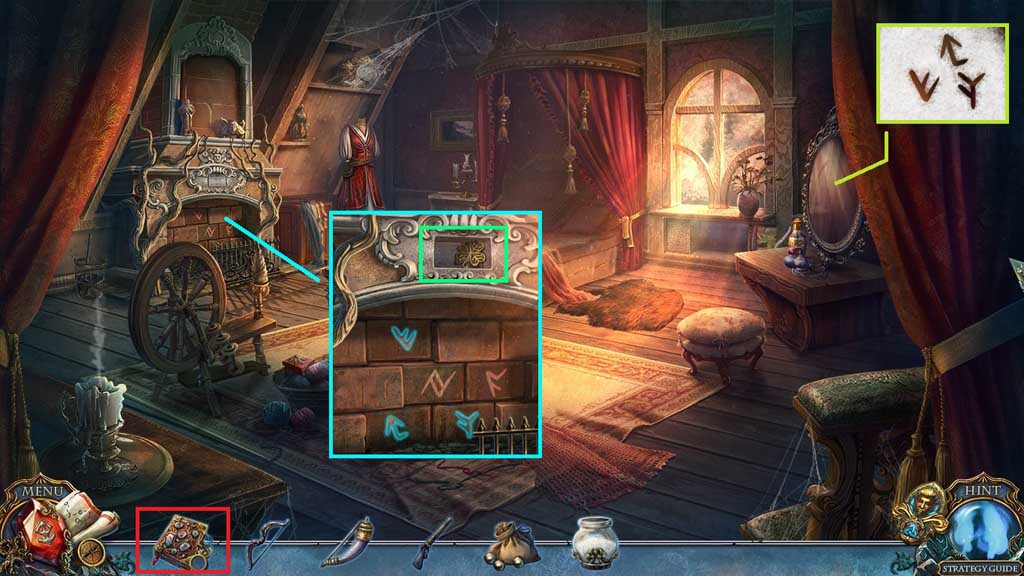
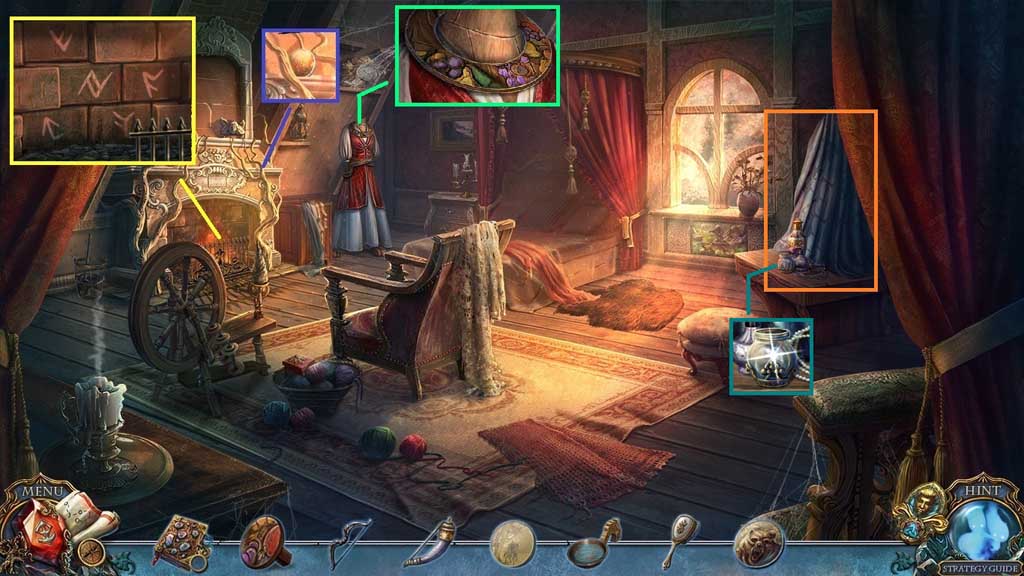
- Select the flour to toss onto the mirror to reveal the code.
- Click the 3 symbols in the fireplace; collect the clover and insert it into mom’s diary to trigger a hidden objects area.
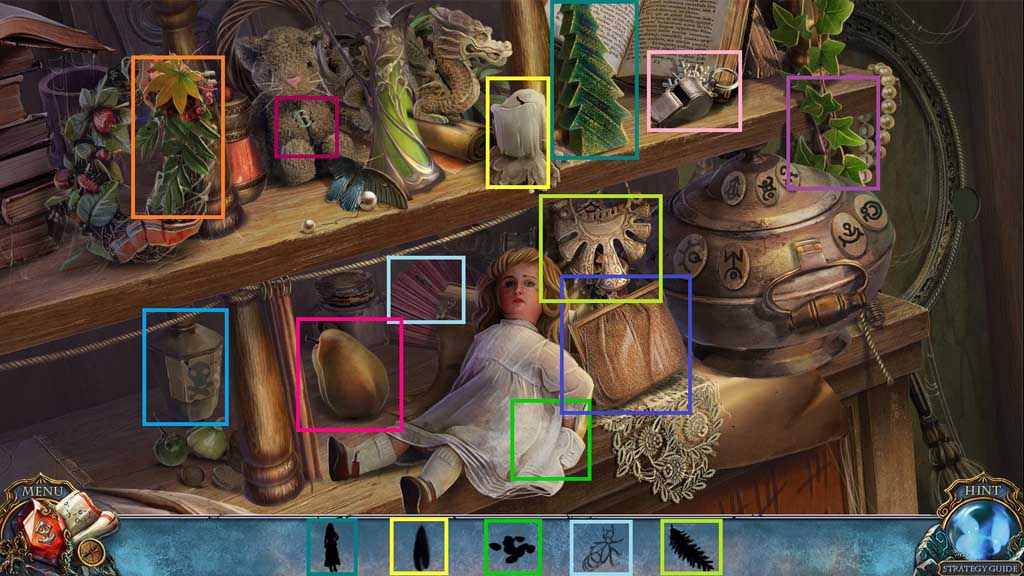
- Find the items.
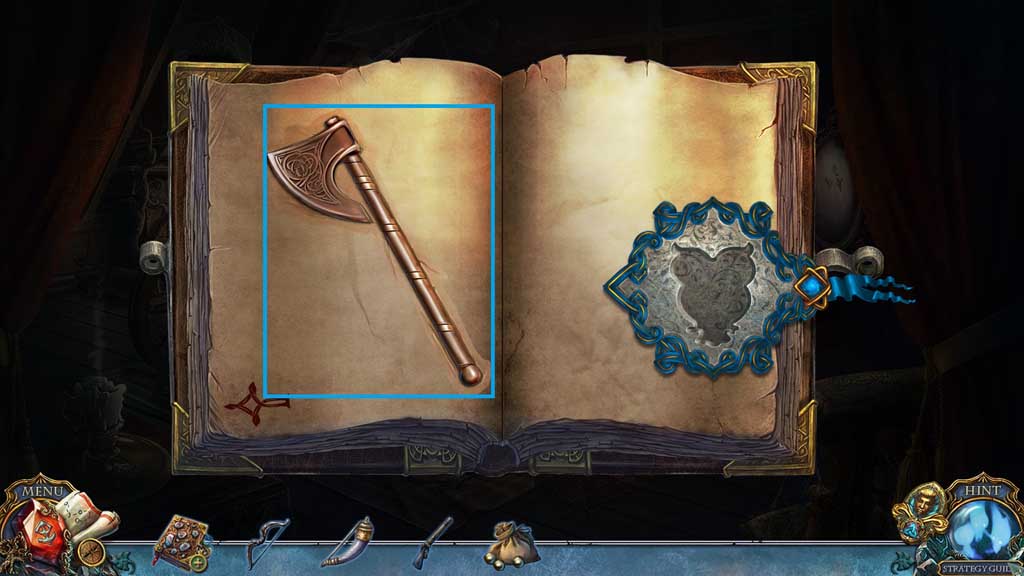
- Collect the tiny axe.
- Move down once and click the hidden objects area.
- Find the items.
- Collect the ramrod.
- Insert the tiny gun, the tiny bow and the tiny axe.
- Place down the gunpowder horn, the bullets and the ramrod; use those items as shown in the diagram to collect the musket.
- Move down 2x’s and ahead once.
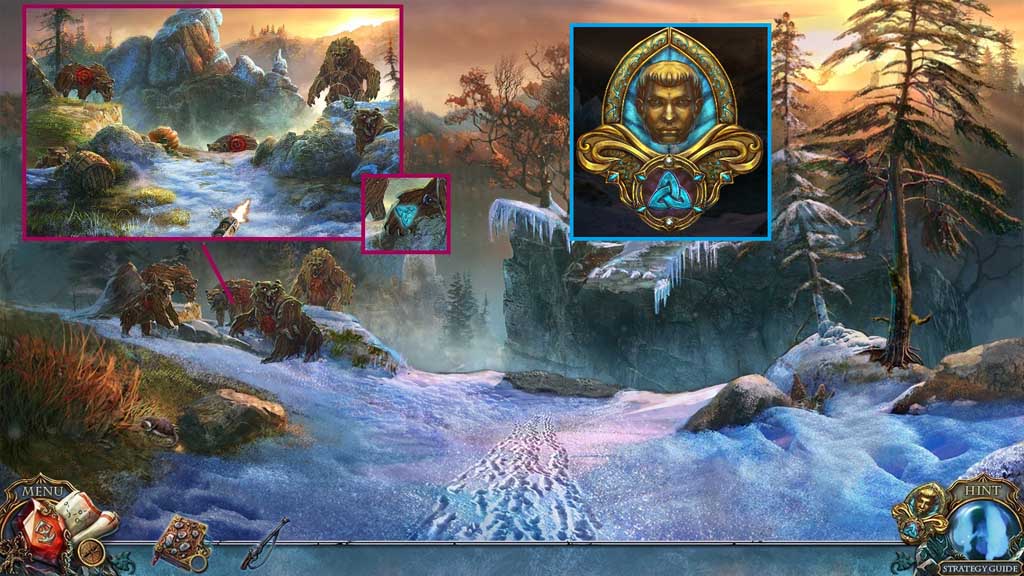
- Shoot the musket toward the bear targets trigger a mini game.
- Solve the game by shooting the targets on 5 bears.
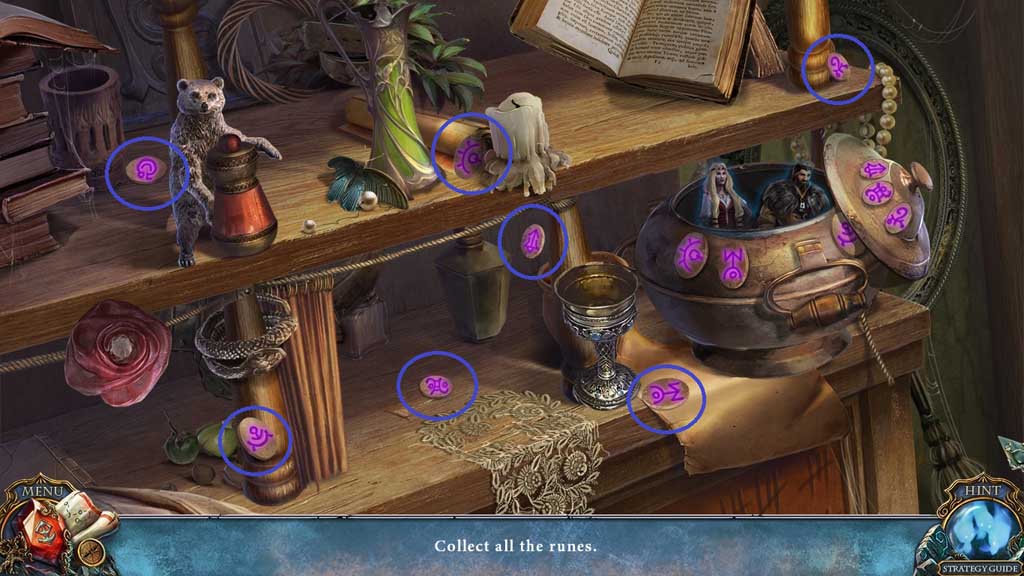
- Collect the symbol.
- Click the medallion.
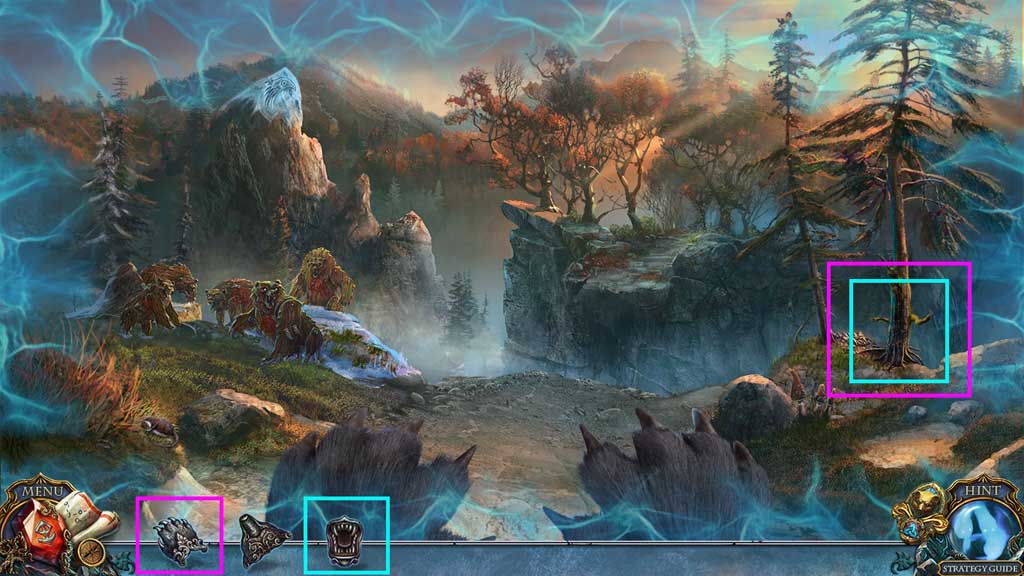
- Select the teeth and use them 2x’s and select the claws.
- Click the tree.
- Move ahead.
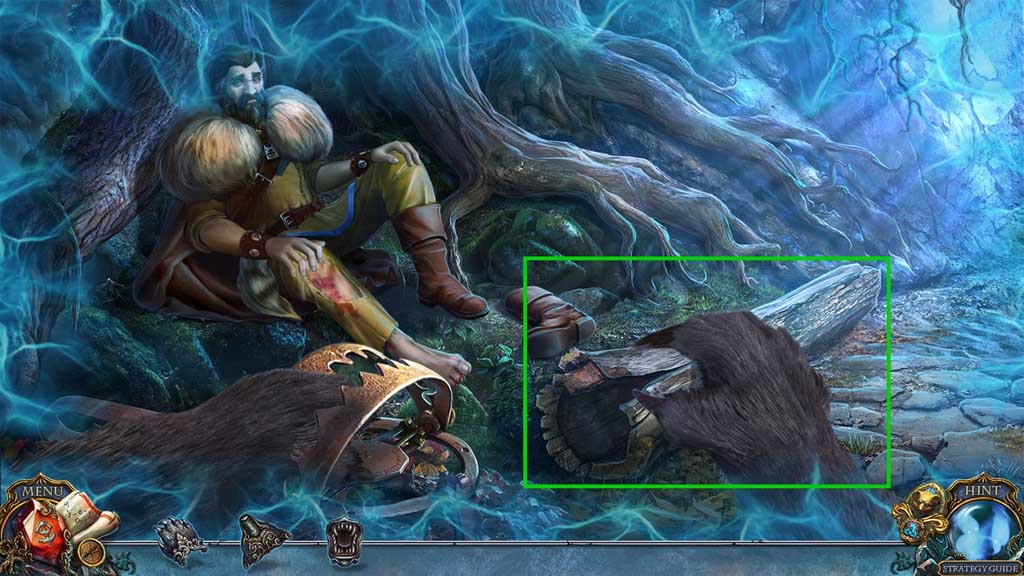
- Click the log.
- Zoom into the cave and select and use the claws 3x’s.
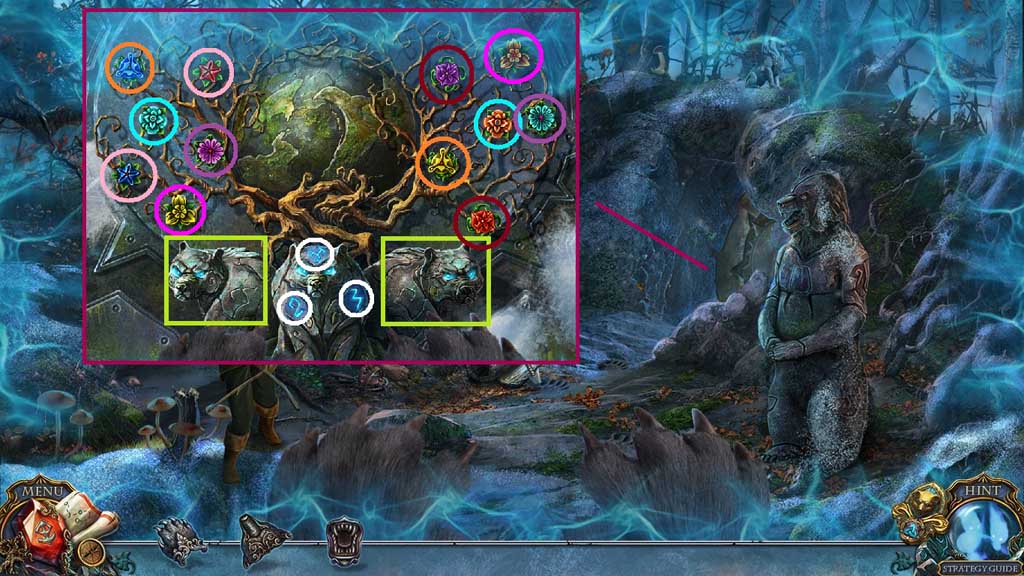
- Click the 3 symbols and 2 bears.
- Click the 4 branches.
- Click 6 pairs of flowers.
- Move to the right.
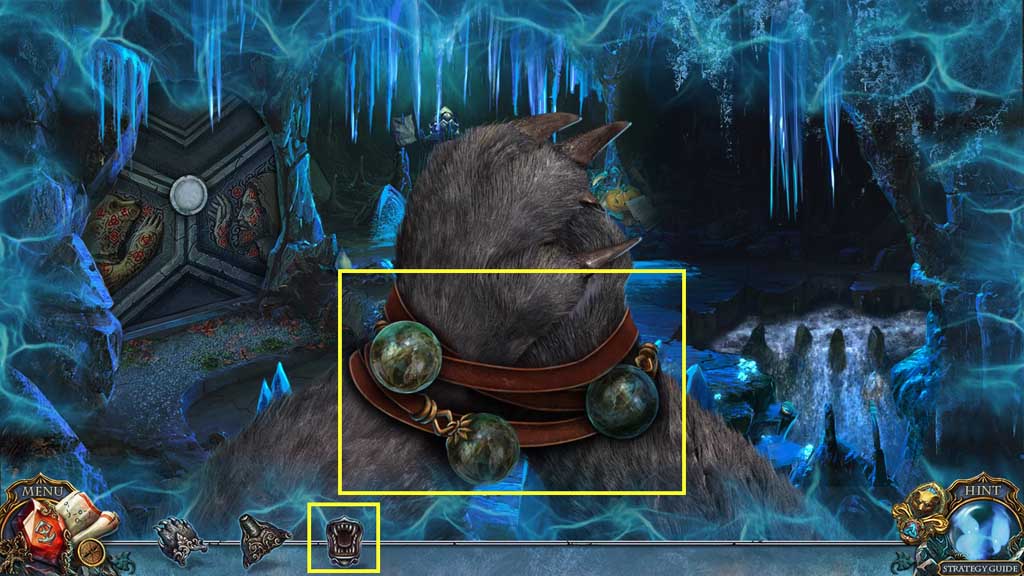
- Select the teeth and use them 3x’s on the leather strap.
- Select the claws to collect the symbol.
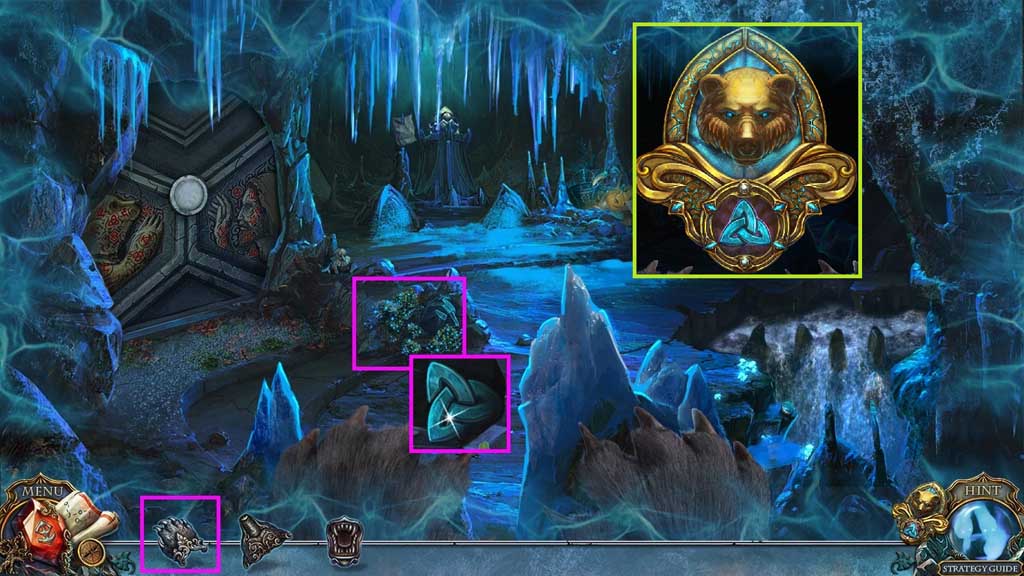
- Click the medallion.
- Collect the hand token and insert and click it.
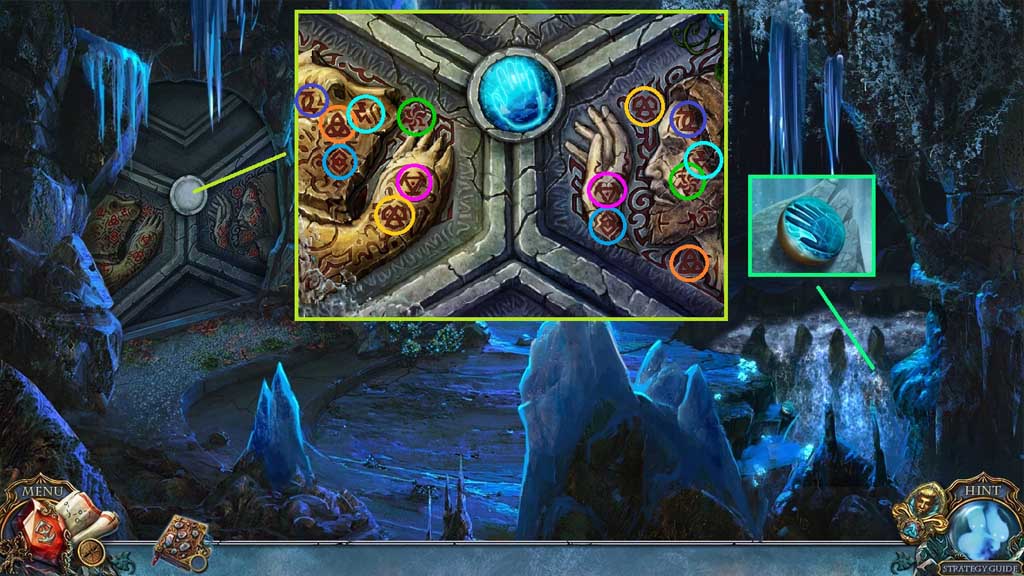
- Click the 7 symbol pairs.
- Move to the left.
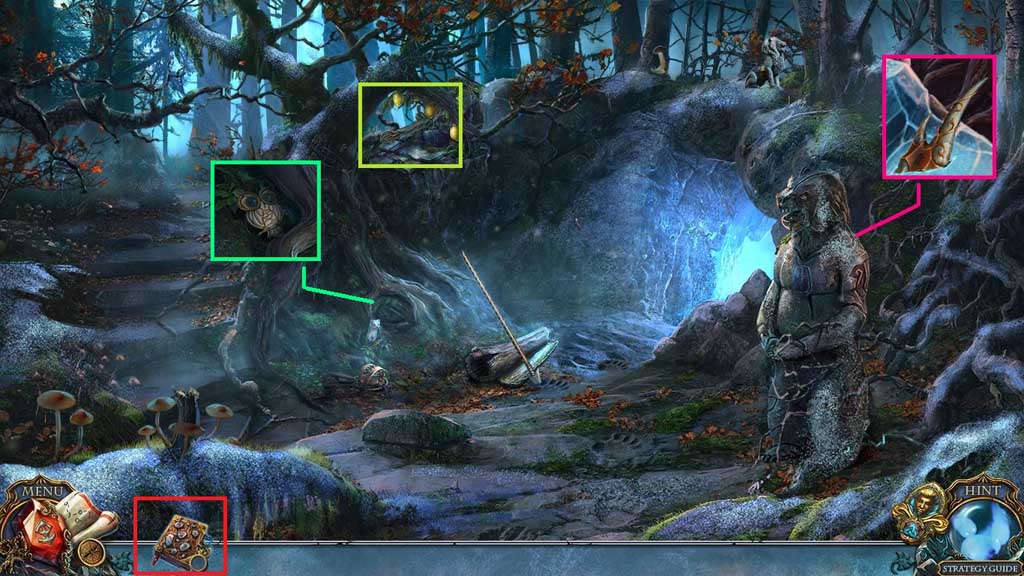
- Collect the crown part, the staff top and the owl.
- Insert the owl into mom’s diary to trigger a hidden object area.

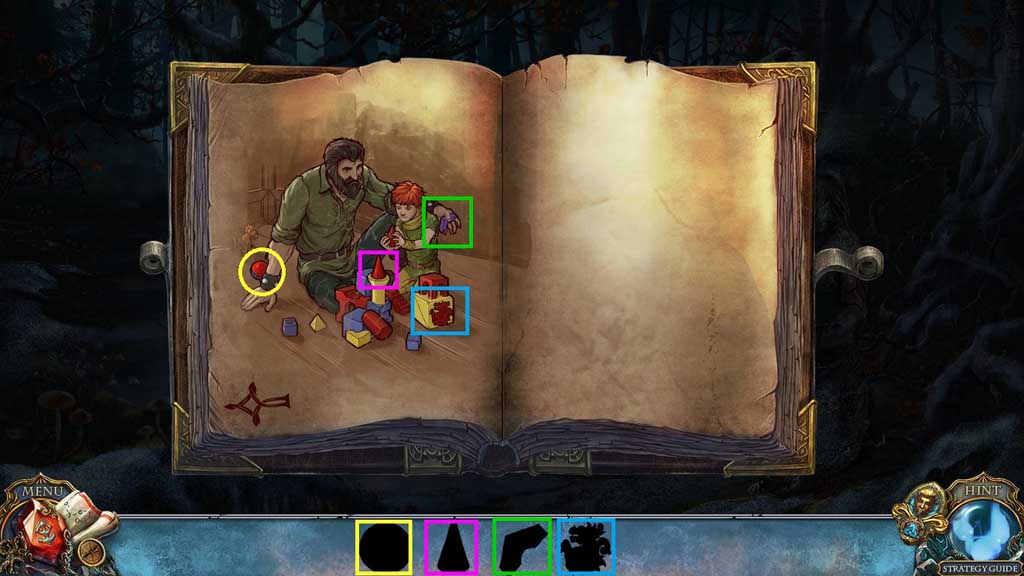
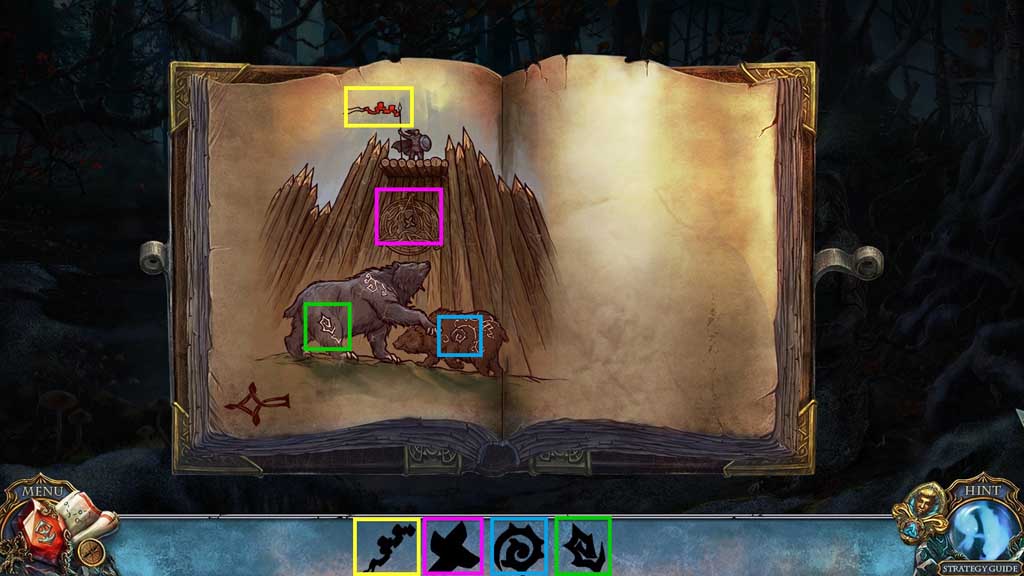
- Find the items.
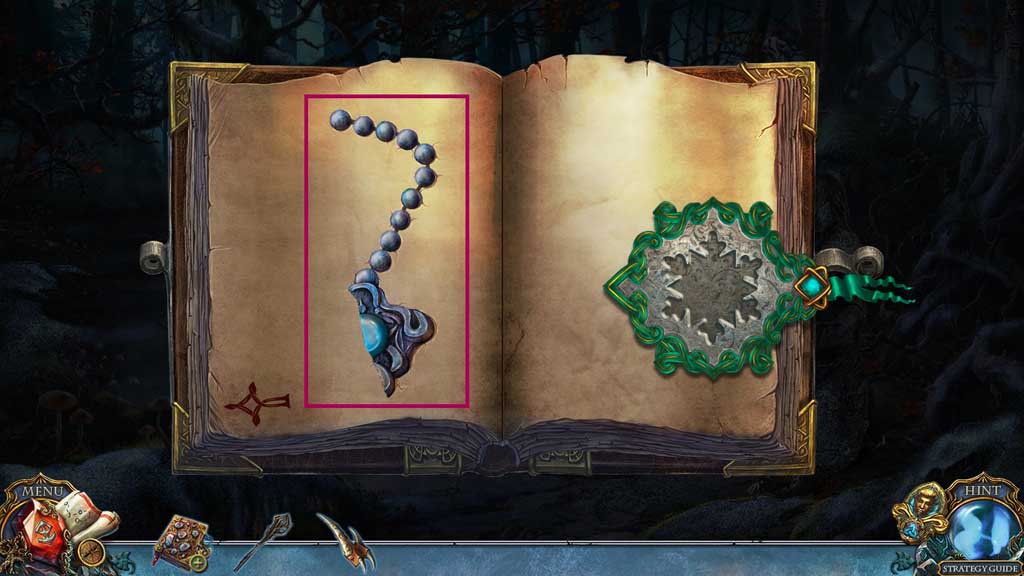
- Collect the medallion.
- Move to the left.
General Information & Tips
Chapter One: Home
Chapter Two: Mountain Side
Chapter Three: Father
Chapter Four: Paw Print
Chapter Five: Enter Amaretta’s House
Chapter Six: Bear
Ask for help in the comments below!
Chapter One: Home
Chapter Two: Mountain Side
Chapter Three: Father
Chapter Four: Paw Print
Chapter Five: Enter Amaretta’s House
Chapter Six: Bear
Ask for help in the comments below!