Hidden Mysteries: Gates of Graceland: Chapter Four: The Jungle Room
Our Hidden Mysteries Gates of Graceland Walkthrough will be your personal tour guide as you search the rambling grounds and vast rooms of the famed Graceland Estate in search of the missing song Elvis wrote for his mother shortly before he died. We've packed this Hidden Mysteries Walkthrough full of everything you need to know to complete the game, including tons of screenshots clearly marked with key locations, solutions to each and every puzzle, and detailed start-to-finish instructions.
General Info and Tips
Chapter One: Pop Culture Hall of Fame
Chapter Two: Entering Graceland
Chapter Three: The Sound Stage
Chapter Four: The Jungle Room
Chapter Five: Moving into Graceland
Chapter Six: The Stables
Chapter Seven: Hawaii
Chapter Eight: The TV Room
Chapter Nine: Tupelo
Chapter Ten: The Final Song
Ask for help in the comments below!
- Pick up and read the note sitting in the tray.
- Then pick up the DOOR KEY that was concealed under the note.
-
Exit out to the kitchen, where you’ll find that you now have access to the side door leading to the Jungle room.
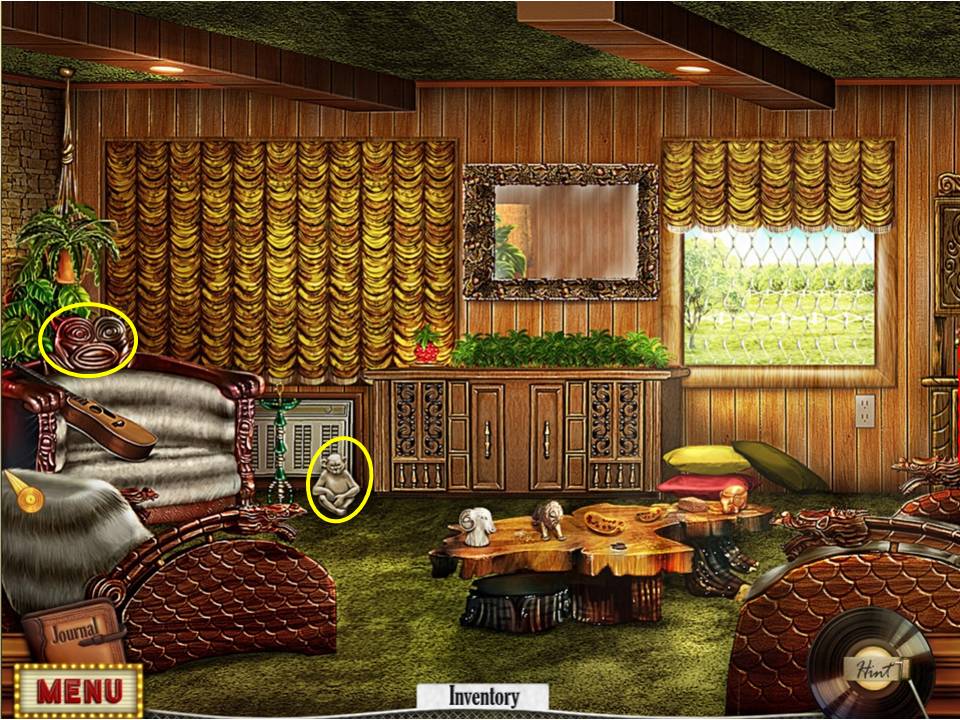
- Note the carved figure on the left with the gem stuck in one eye.
-
Note also the lonely monkey sitting on the floor, and what look like ball-bearings stuck in the carpet to the right.
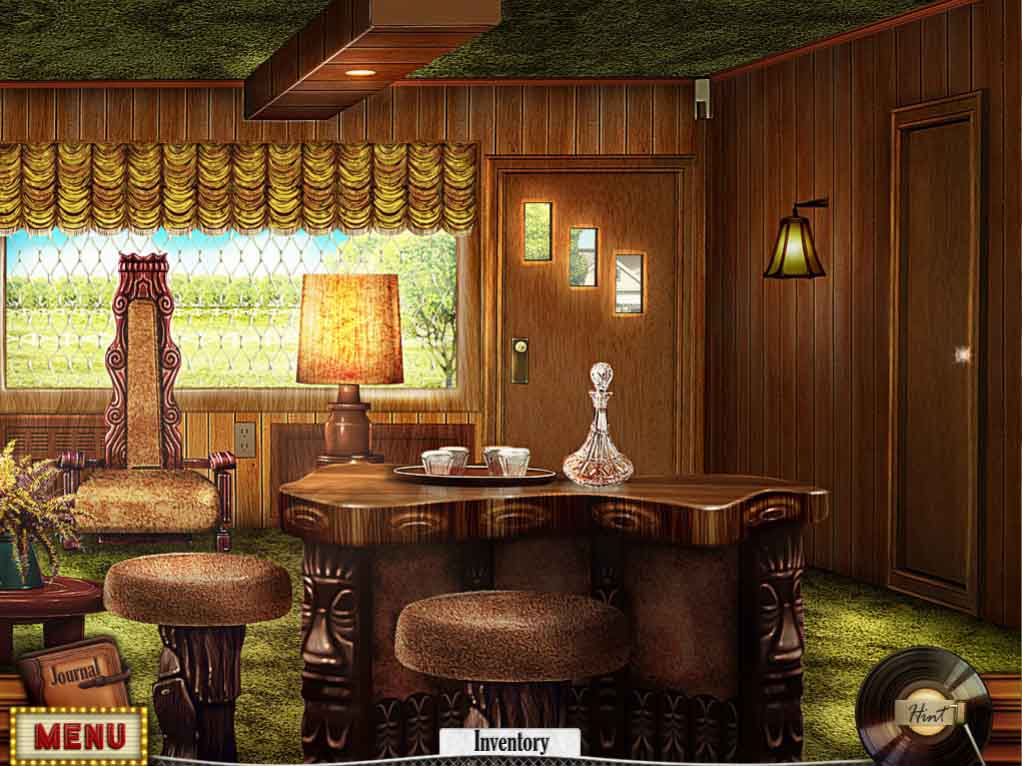
- Pan right across the room and note the door on the right with a missing doorknob.
-
Zoom in on the exterior door, use the DOOR KEY to unlock it, and exit out.
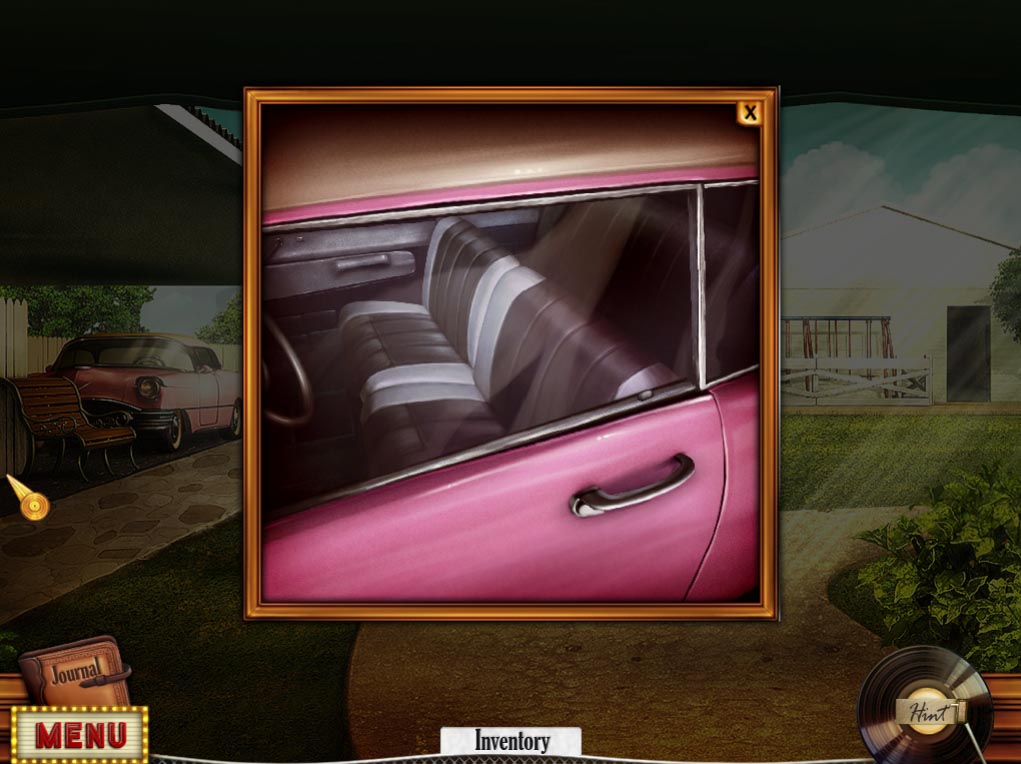
- Zero in on the car and note that you can possibly wedge something from inventory into the door to pop the lock. The goldfish? The pen? The fuses? Nothing works? Why not just smash the window with the stone ball? I mean, you’ve been stealing everything in sight, why not indulge in a bit of destruction of property to round things off? No? Okay, have it your way, I guess we’ll have to find something else!
- Go Zoom in to the nearby swing set and pick up the WOODEN RUNGS (1/4) – no, they won’t work on the car door either.
-
Head to the building straight ahead and enter the office.
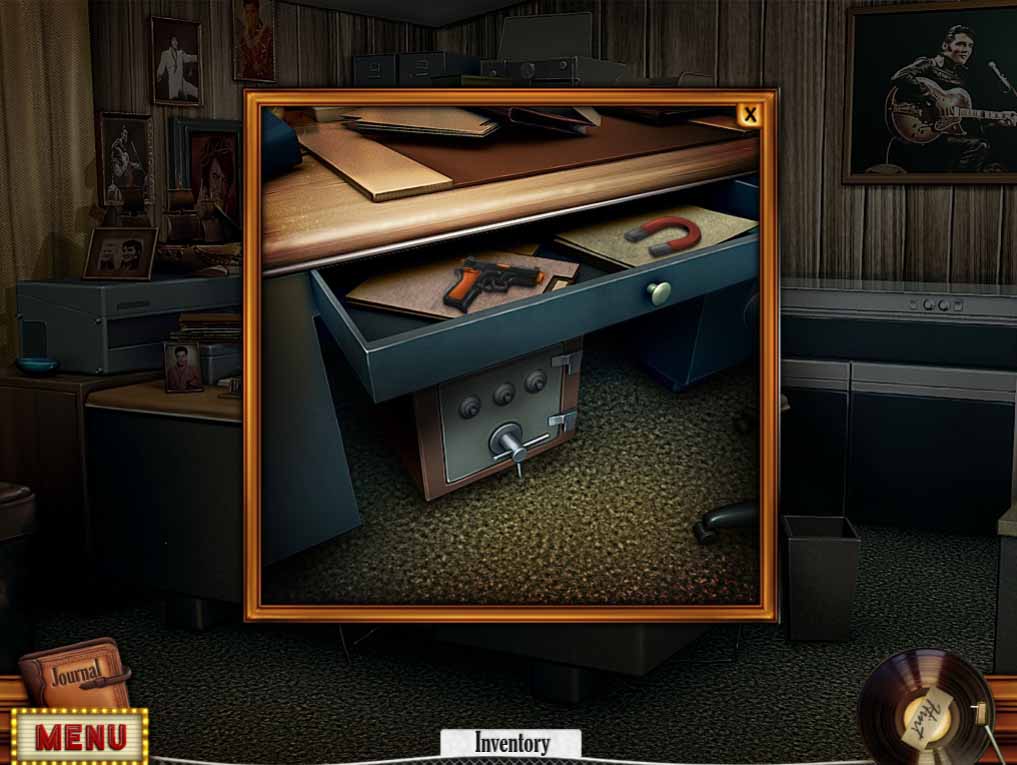
- Zoom in on the desk, open the drawer, and pick up the EMPTY BB GUN and the MAGNET.
- Note the copier and the transistor radio sitting on the filing cabinets.
-
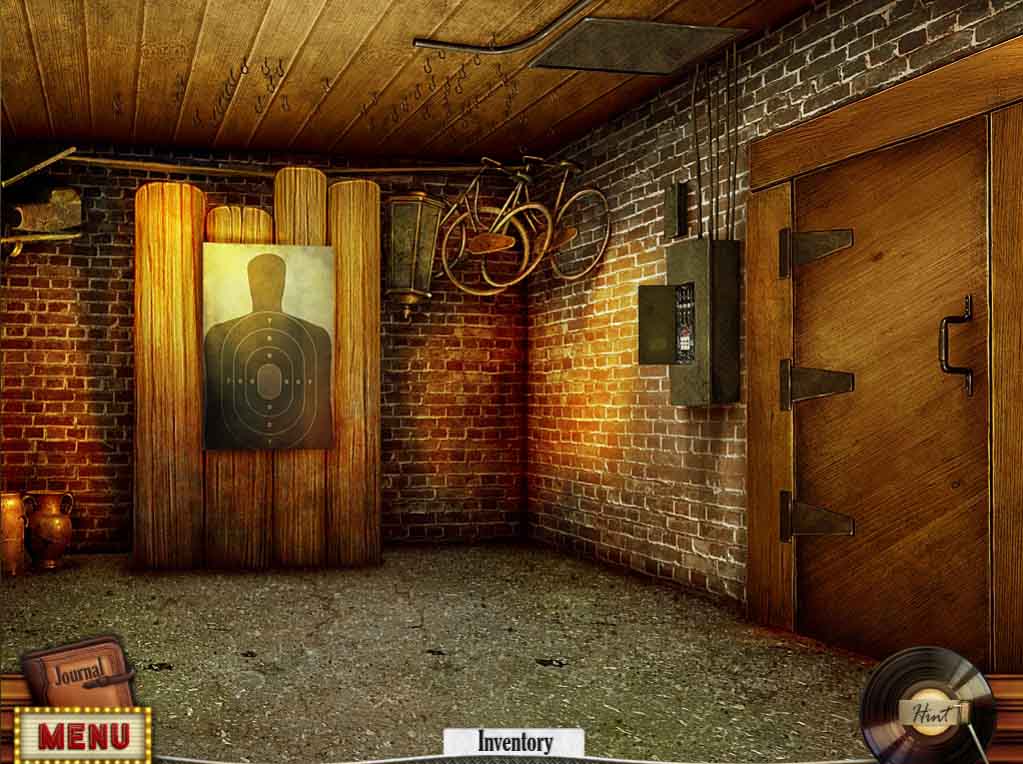
Exit back outside and enter the open doorway on the right.

- Zoom in on the old bike frames hanging up in the corner and take the WIRE HANGER.
- Open the fuse box and note the missing fuses.
- Note the trapdoor above the door.
-
Exit through the doorway on the right to the drive outside the garage.
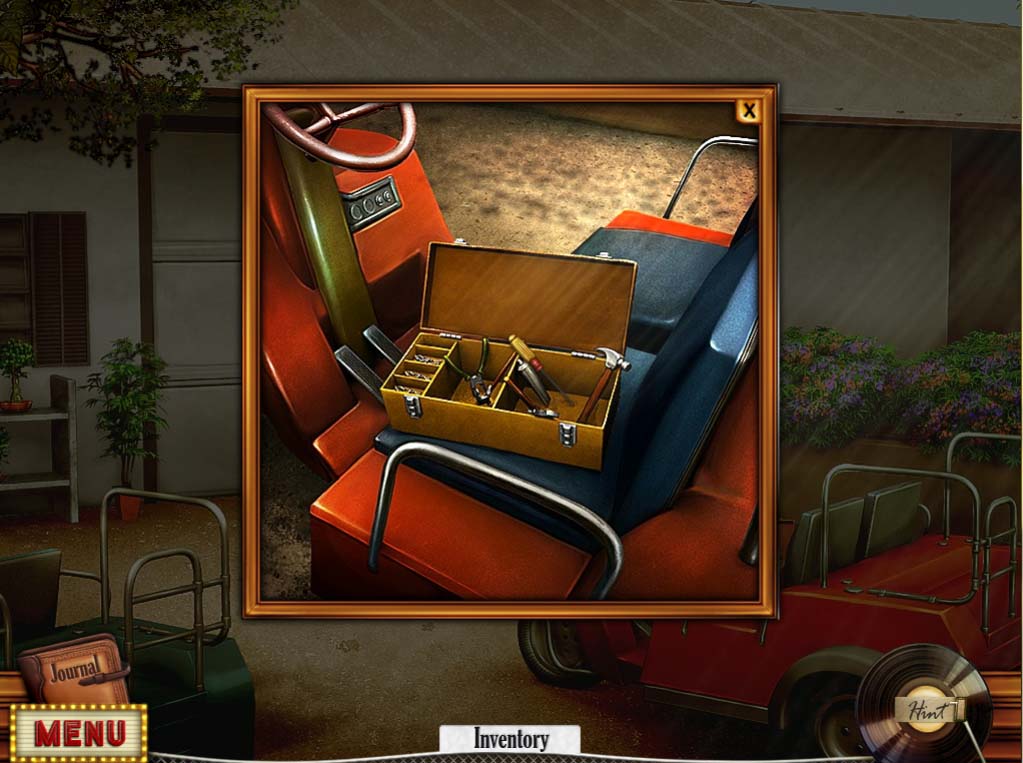
- Zero in on the toolbox sitting in the cart and grab the SCREWDRIVER.
- The garage door has no handle and needs a garage opener – but the one in inventory needs batteries.
- Head back to the pink car.
- Use the WIRE HANGER on the door to open it.
-
This will initiate the next HOA puzzle.
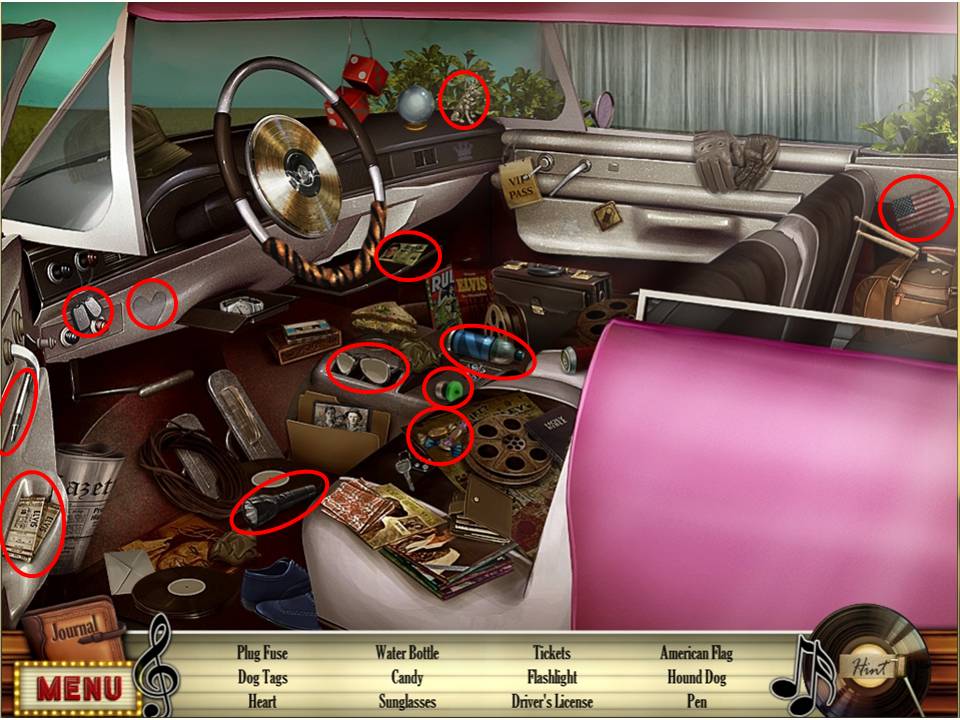
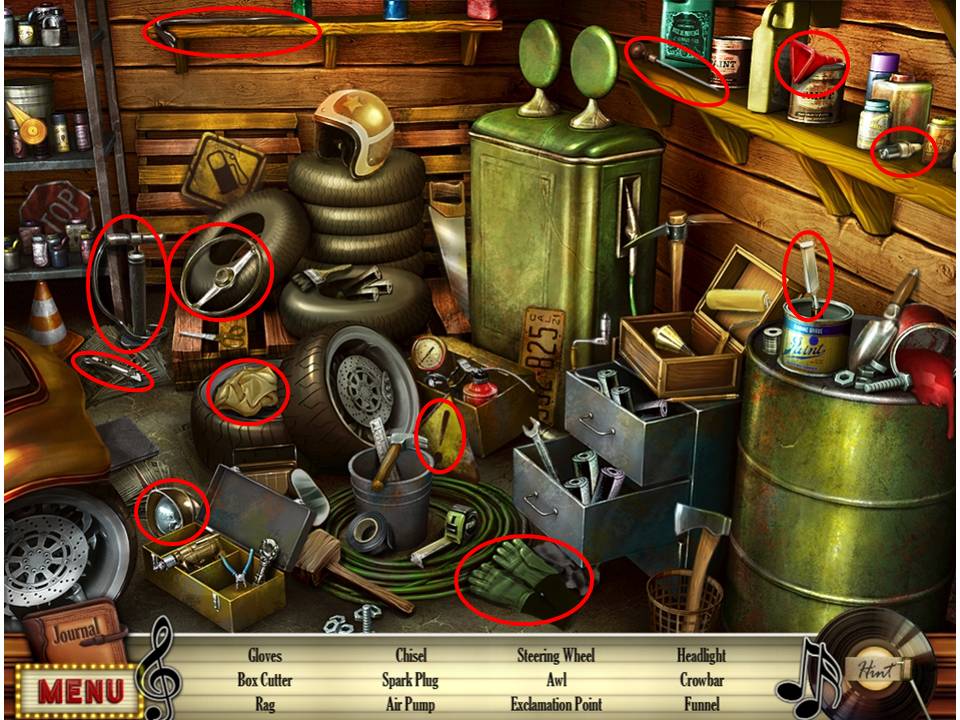
- Wow, was Elvis the world’s biggest slob or what? Okay, acquire all the items circled in red, after which you’ll receive FUSE (2/4).
-
Head back to the outside office by the shooting gallery.
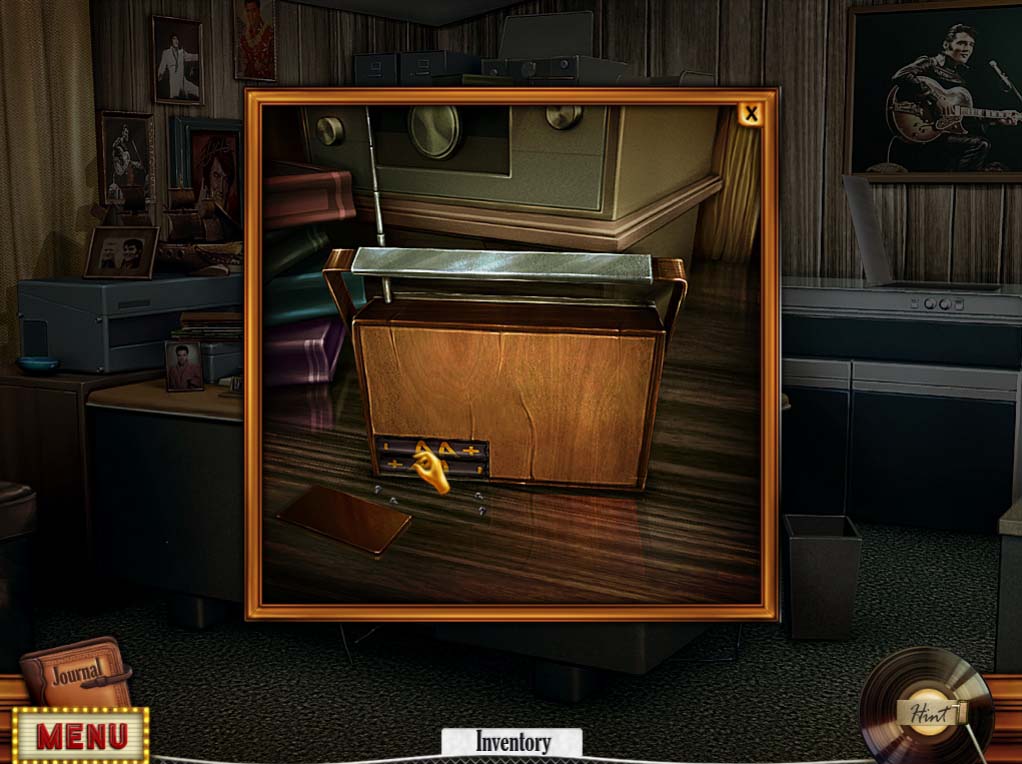
- Use the SCREWDRIVER to open up the back of the transistor radio.
-
Take out the batteries, after which they’ll automatically be inserted into the GARAGE OPENER – guess where you’re headed next!
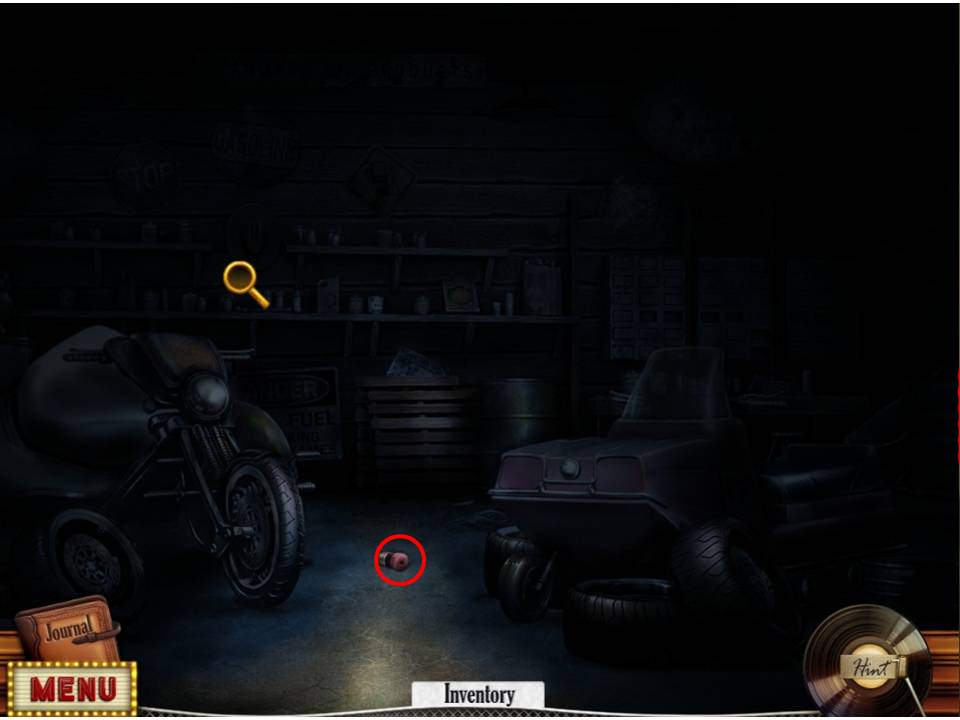
- Use the GARAGE OPENER on the door and enter the dark garage.
- Pick up the FUSE (3/4) and head back outside.
-
Wander back to the garden area by the pink car, and head right to the water sprinkler.
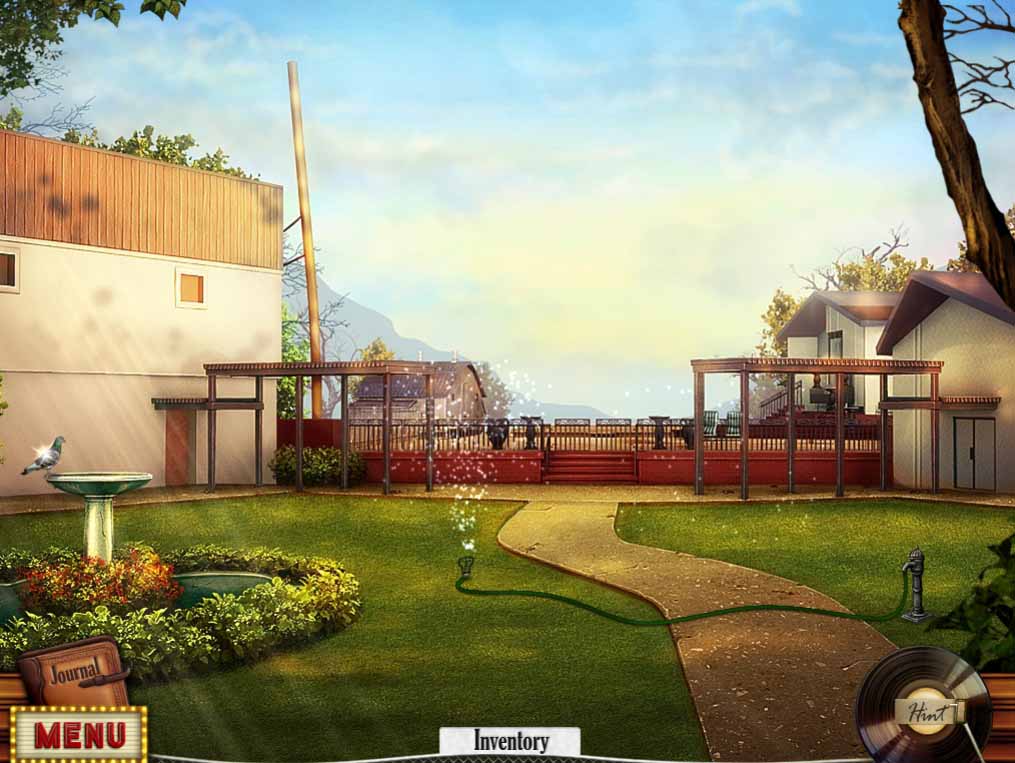
- Click on the birdbath to the left and insert the GOLDFISH, which will draw in a PIGEON – grab it!
-
Note that you can’t get by the sprinkler until you can turn off the tap, which is missing the handle.

- Return back to the main house and the left side of the jungle room.
-
Zero in on the METAL BALLS caught in the shag carpet and use the MAGNET to draw them up, after which they’ll automatically combine with the BB gun to create a LOADED BB GUN.
-
Head back out and over to the shooting range, zoom in on the target and fire away with the LOADED BB GUN. – note the accompanying video clip on guidance.
- You basically have to track backwards and forwards with the crosshairs as they wonder randomly across the target and fire when they approach the centre.
- When completed successfully take the final FUSE (4/4) and zoom in on the fuse box to the right with the four FUSES in inventory.
-
This will initiate the next puzzle.
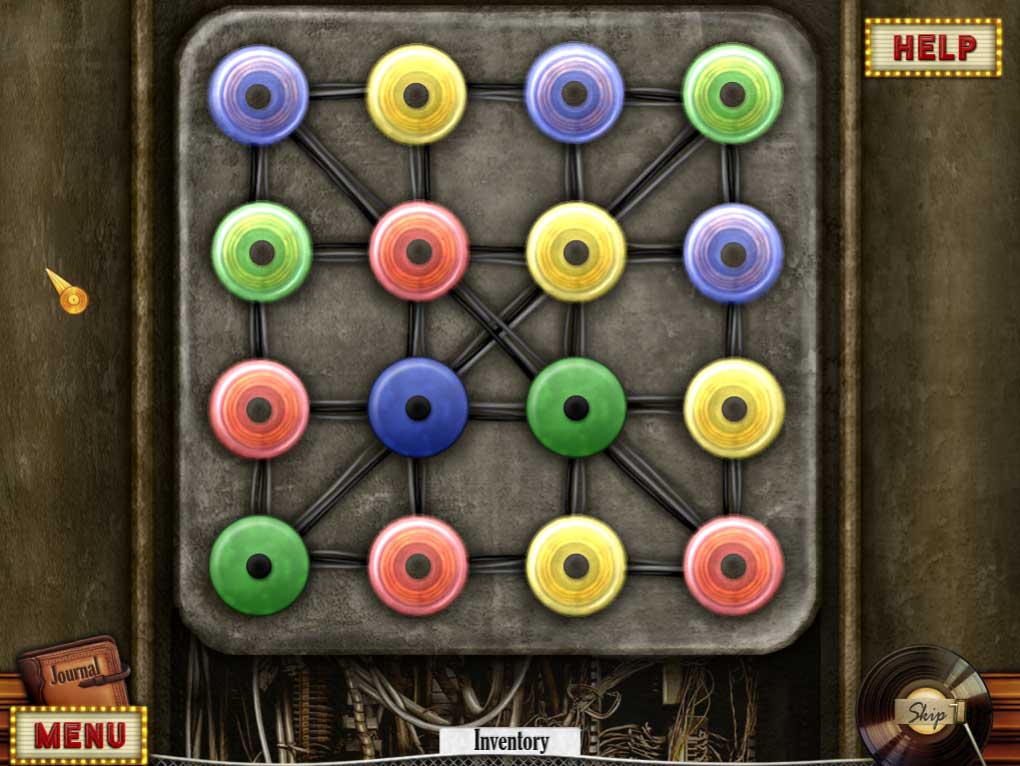
- The basic idea of the puzzle is to position all the fuses so that no two colors are touching – they’re considered to be touching if they’re adjacent to each other and have wires connecting them.
- You know when you’re on the right track when a fuse becomes brighter.
- Note the screenshot for one of numerous potential solutions.
-
Once complete, head over to the garage, enter inside, and zoom in on the bike to the left to initiate the next HOA puzzle
- Collect all the items circled in red.
-
When complete you’ll be given the AWL.

- Zero in on the storage shelves to the right and open the sparkling drawers in order until you find the one with the NAIL in it.
- Next zoom in on the seat of the sled to the right and pick up the reel of film, which will set off the next film sequence of Elvis having fun on the lawn at Graceland with the sled.
-
When complete you’ll see an apparition of the King himself bestriding the sled, after which he’ll leave behind his sunglasses. Great, the ultimate souvenir from a long dead music legend – try telling this story on Ebay when you put them up for sale! Sure, people will believe you – well, at least Nicolas Cage.
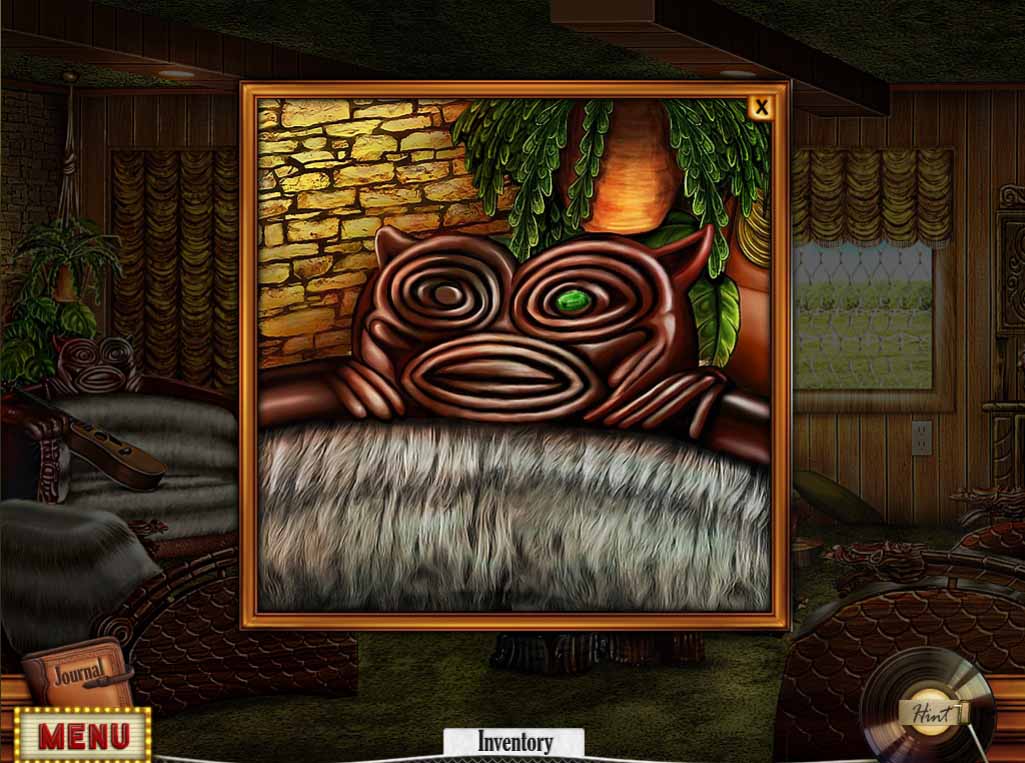
- Head back to the left side of the jungle room and zero in on the carved head on the seat.
-
Use the AWL to pry out the LION’S EYE gem.

- Head back through the house to the living room and zero in on the statue of Elvis.
-
Place the SUNGLASSES on it, and take the other LION’S EYE from the base when the other door opens up.

- Backtrack through the house and out through the foyer to the entry area.
- Zoom in on the lion statue to the left and place the two LION’S EYE’S in place.
- Note the slip of paper that appears in the lion’s mouth and take it, noting that it provides the combination code (16) for the safe in Elvis’ rear office.
-
Head there.

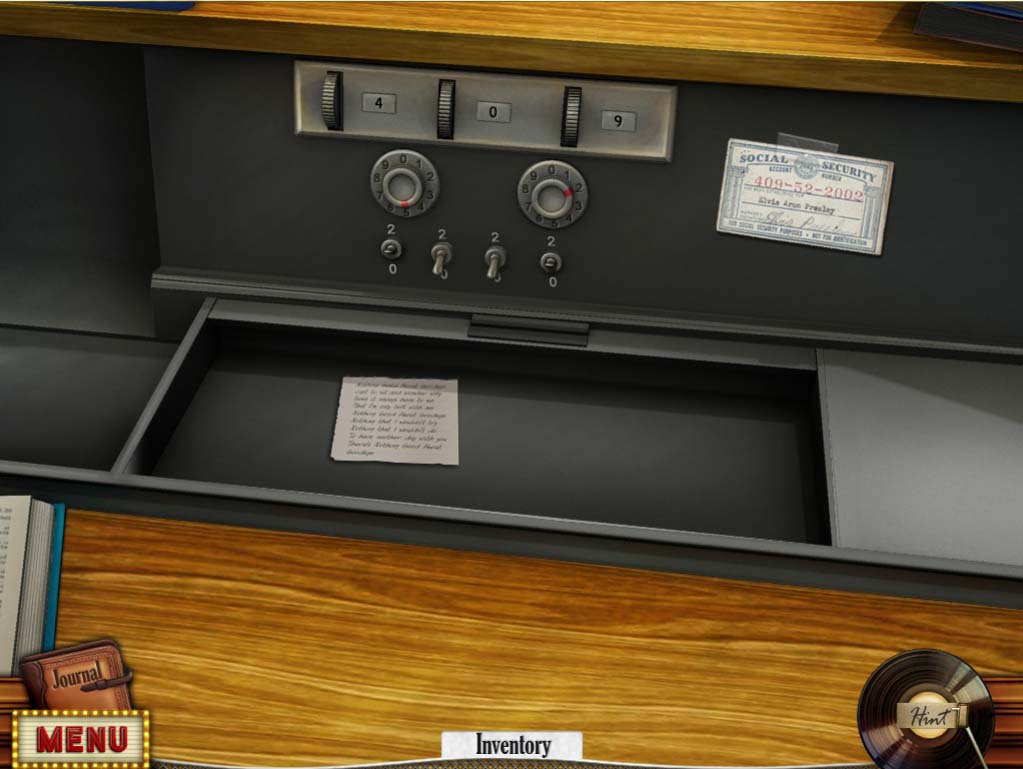
- Zoom in on the safe and note the following instructions. The point to the puzzle is that the three dials create a formula that gives the code as a solution, not as a combination. The first two dials provide a multiplied total which, when divided by a number on the third dial, gives an answer of 16. Example? 4 times 8 equals 32, divided by 2 equals 16.
- So what’s the solution here? The last dial is the clue, because the multiplied figure of the first two dials has to be one of five possible combinations involving 16 multiplied by the five numbers on the third dial – 16, 32, 48, 64 or 80.
- So do any of the number combinations on the first two dials give you a multiplied figure that matches one of those five numbers? Sure. 4 x 12 = 48 or 8 x 6 = 48. I used the latter, divided by 3 on the last dial.
- When the safe opens take the deed to Graceland inside and read the attached note, after which you’ll be whisked back in time again to the period in Elvis’ life when he first bought Graceland.
General Info and Tips
Chapter One: Pop Culture Hall of Fame
Chapter Two: Entering Graceland
Chapter Three: The Sound Stage
Chapter Four: The Jungle Room
Chapter Five: Moving into Graceland
Chapter Six: The Stables
Chapter Seven: Hawaii
Chapter Eight: The TV Room
Chapter Nine: Tupelo
Chapter Ten: The Final Song
Ask for help in the comments below!
Chapter One: Pop Culture Hall of Fame
Chapter Two: Entering Graceland
Chapter Three: The Sound Stage
Chapter Four: The Jungle Room
Chapter Five: Moving into Graceland
Chapter Six: The Stables
Chapter Seven: Hawaii
Chapter Eight: The TV Room
Chapter Nine: Tupelo
Chapter Ten: The Final Song
Ask for help in the comments below!