Hallowed Legends: Ship of Bones: Chapter Eight: The Portal
Depend on our Hallowed Legends Ship of Bones Walkthrough to guide your steps as you attempt to discover the secrets of the cursed village of Erlenbourg. But beware, every step you take is stalked by the woman in white who feeds off the souls of the living. Use our detailed instructions, custom screenshots, and puzzle solutions to reveal the truth behind this chilling mystery.
- Click anywhere in the cabin and the book of fire will prompt a search for 5 more runes – they are located on the ship’s deck, roof, chapel yard, the office and the second floor room.
- Once the book of fire is lit return to the ship’s deck and use the book on the cabin doorway
- Click on the portal and take the CASTLE AMULET and use the BOATHOOK to get the NET
- Click on the chest and take the SCRAPER, zoom in on the hatch to take the BOLT
- Go to the backyard
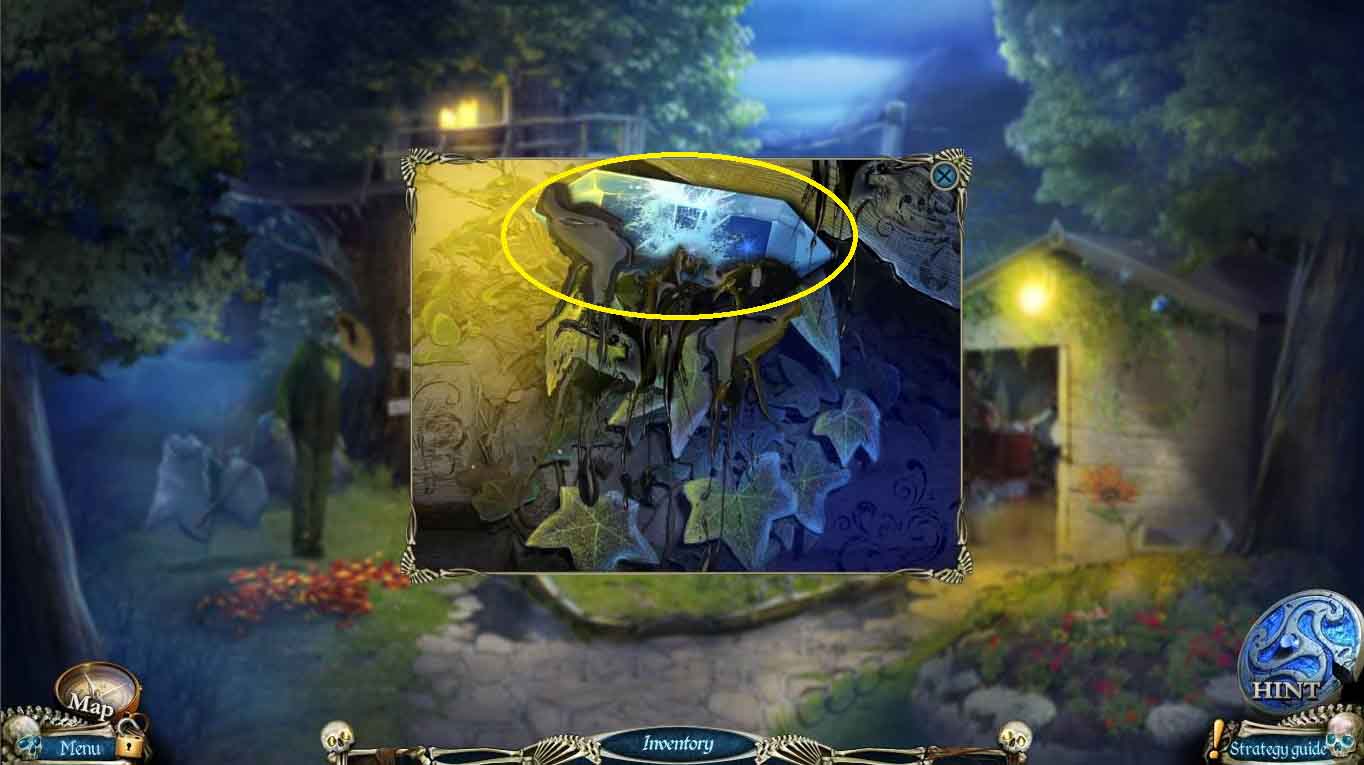
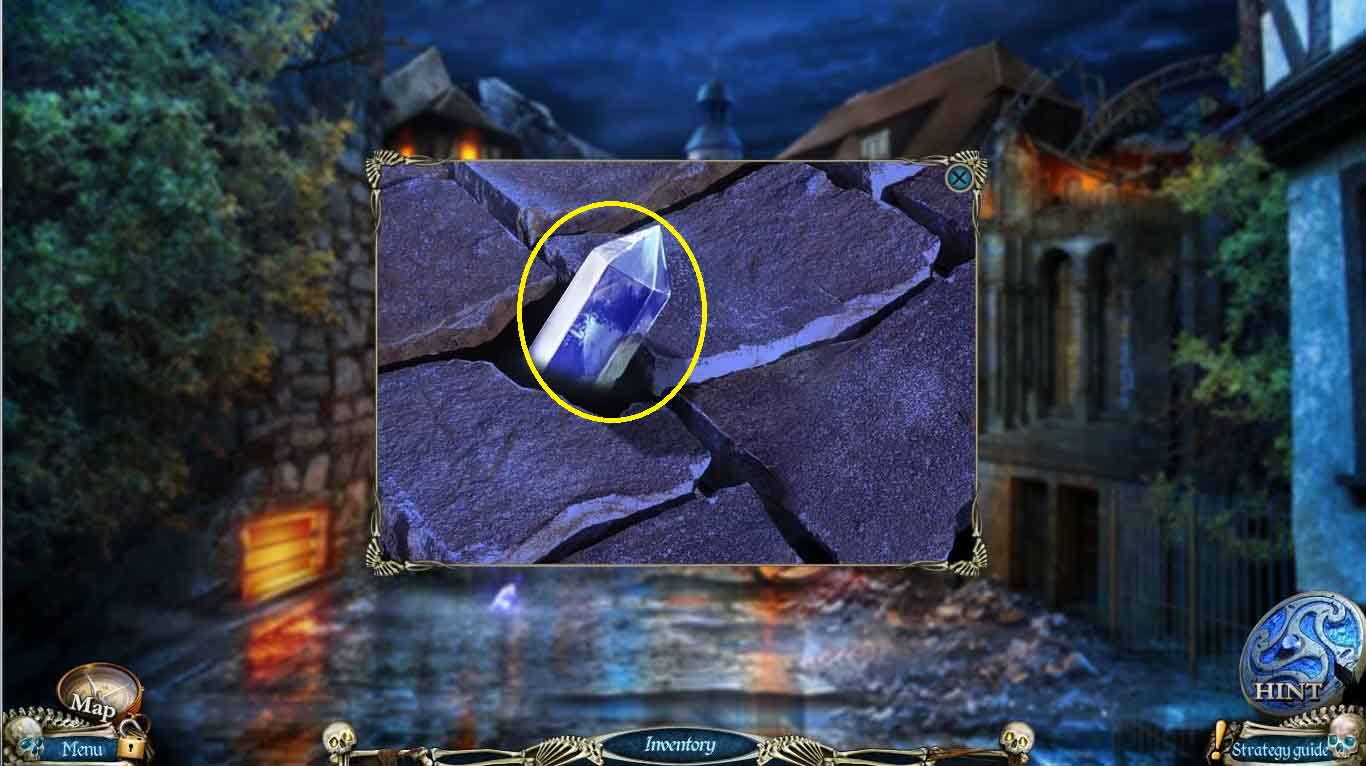
- Click on the roof of the shed and use the SCRAPER to get the CRYSTAL 2/5
- Go to the office
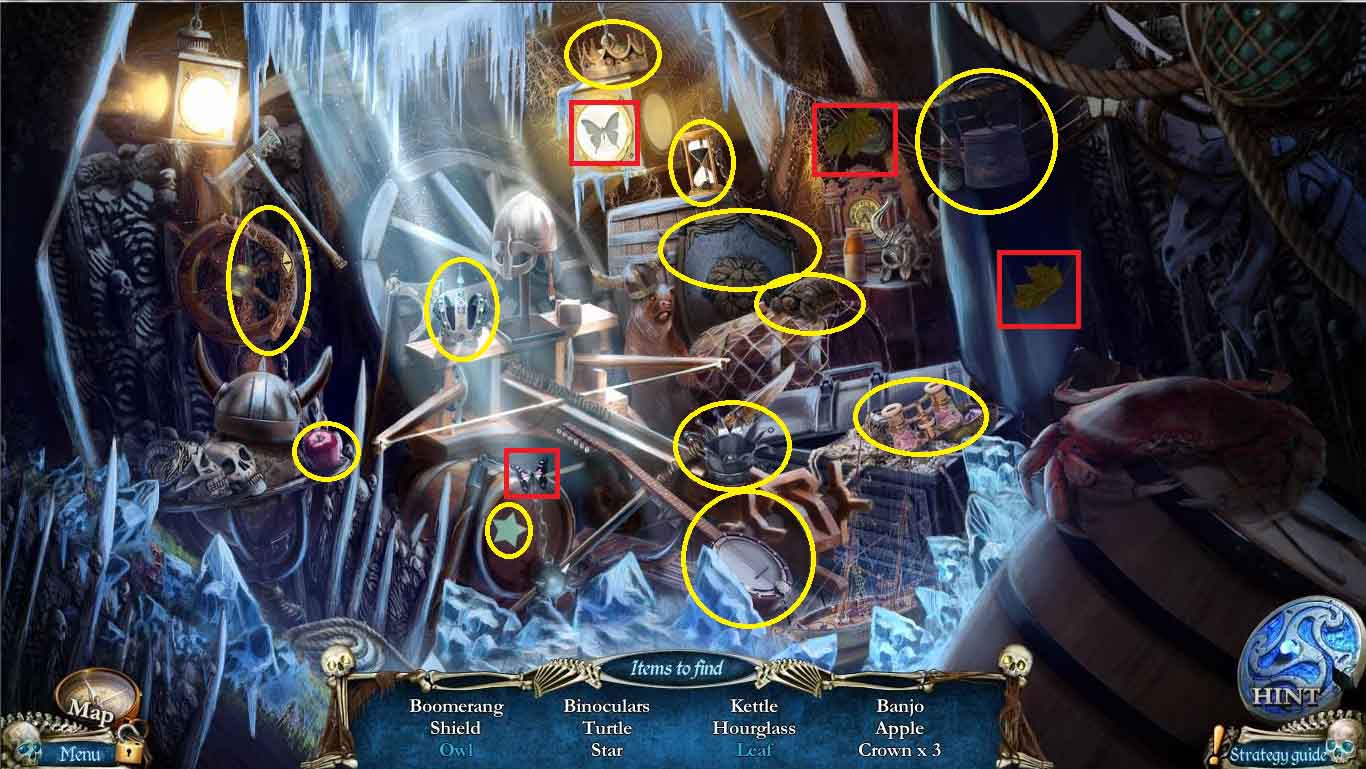
- Click on the cabinet and the BOLT to open the latch and unlock a hidden object scene
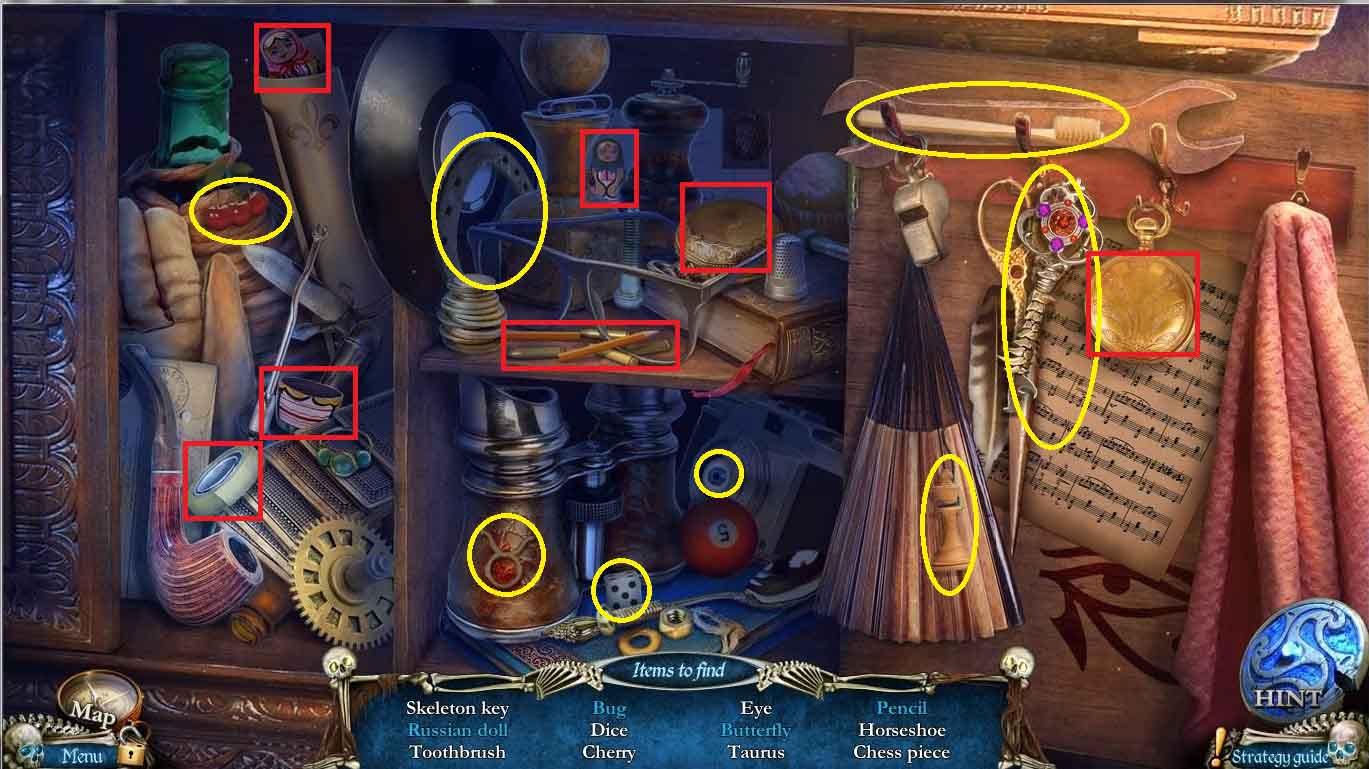
- Find all items listed
- Open the two pocket watches to find the bug and butterfly, use the tape to assemble the pencil and nest the dolls to get the Russian doll.
- Go to the cabin

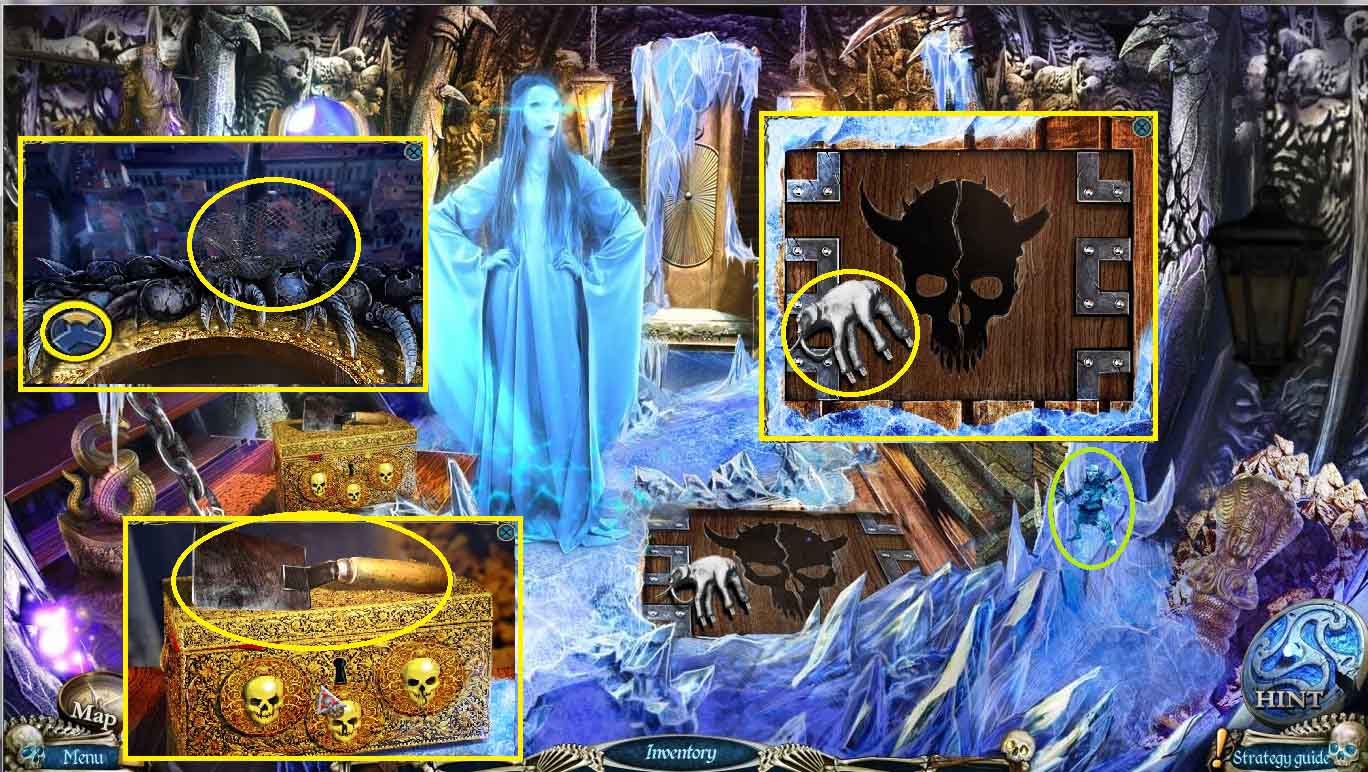
- Click on the chest and use the BONE KEY to unlock and take the MEDALLION OF THE UNDEAD
- Go back to the roof and use the MEDALLION OF THE UNDEAD to calm the skeletons
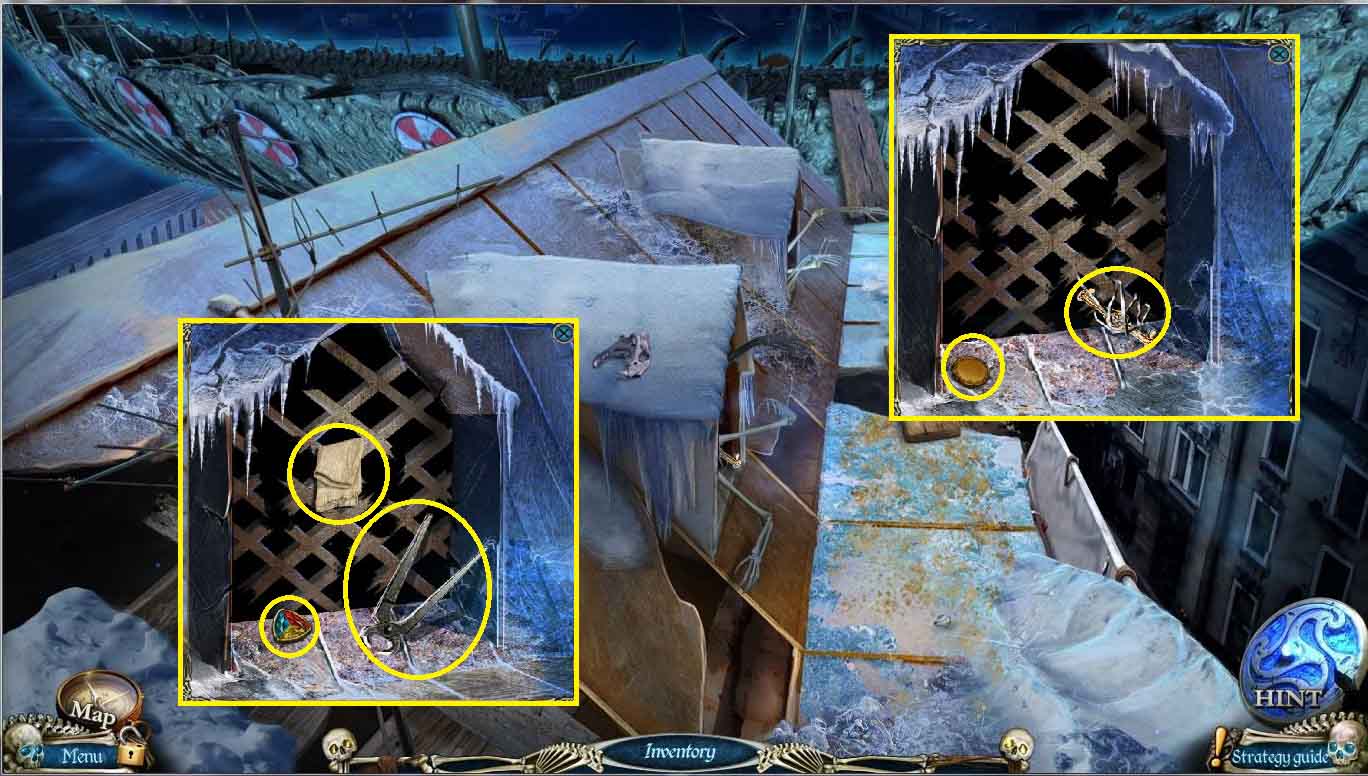
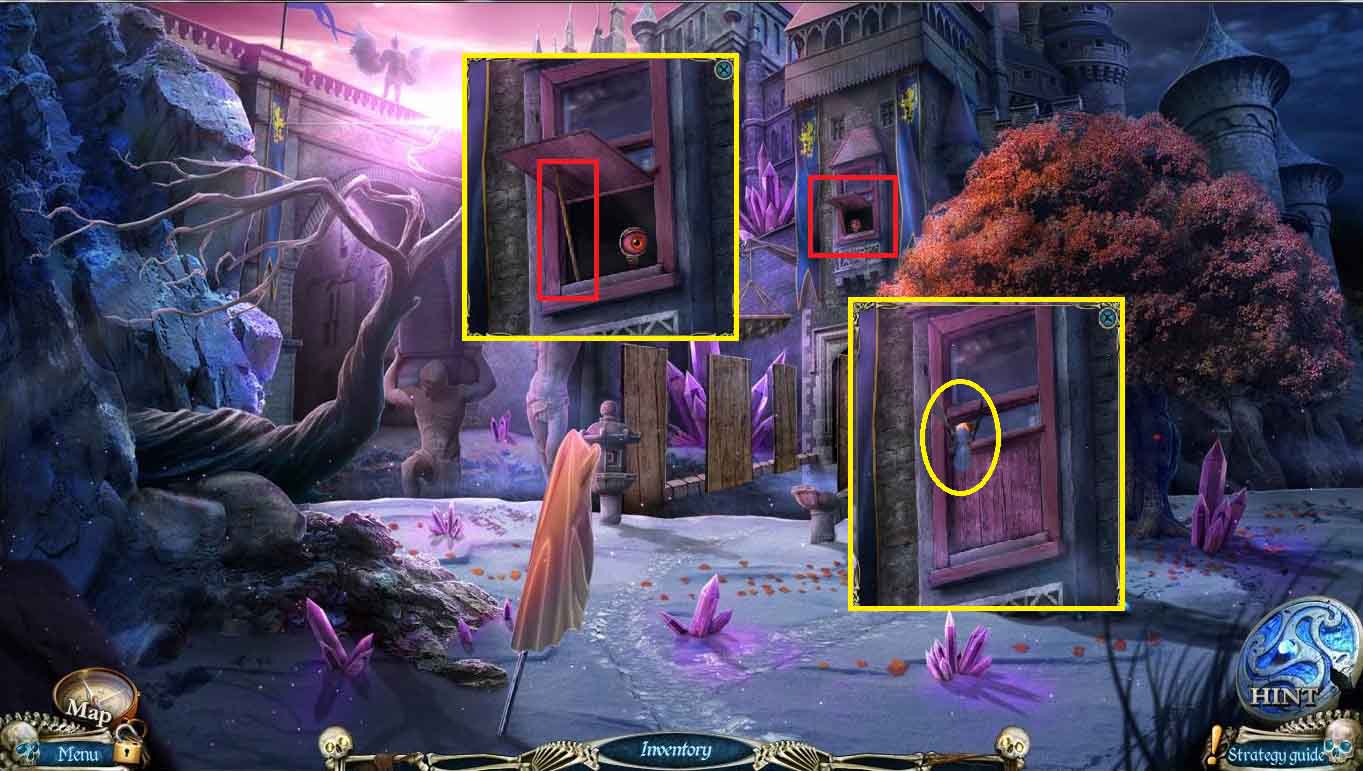
- Zoom in on the near window and take the YELLOW CRYSTAL 3/3 and use the CUTTERS to free the DRAWER HANDLE
- Click on the far window and take the RAG, COLORED CRYSTAL 2/3 and PLIERS
- Go back to the chapel yard
- Click on the crystal and use the PLIERS to take the CRYSTAL 3/5
- Go into the chapel
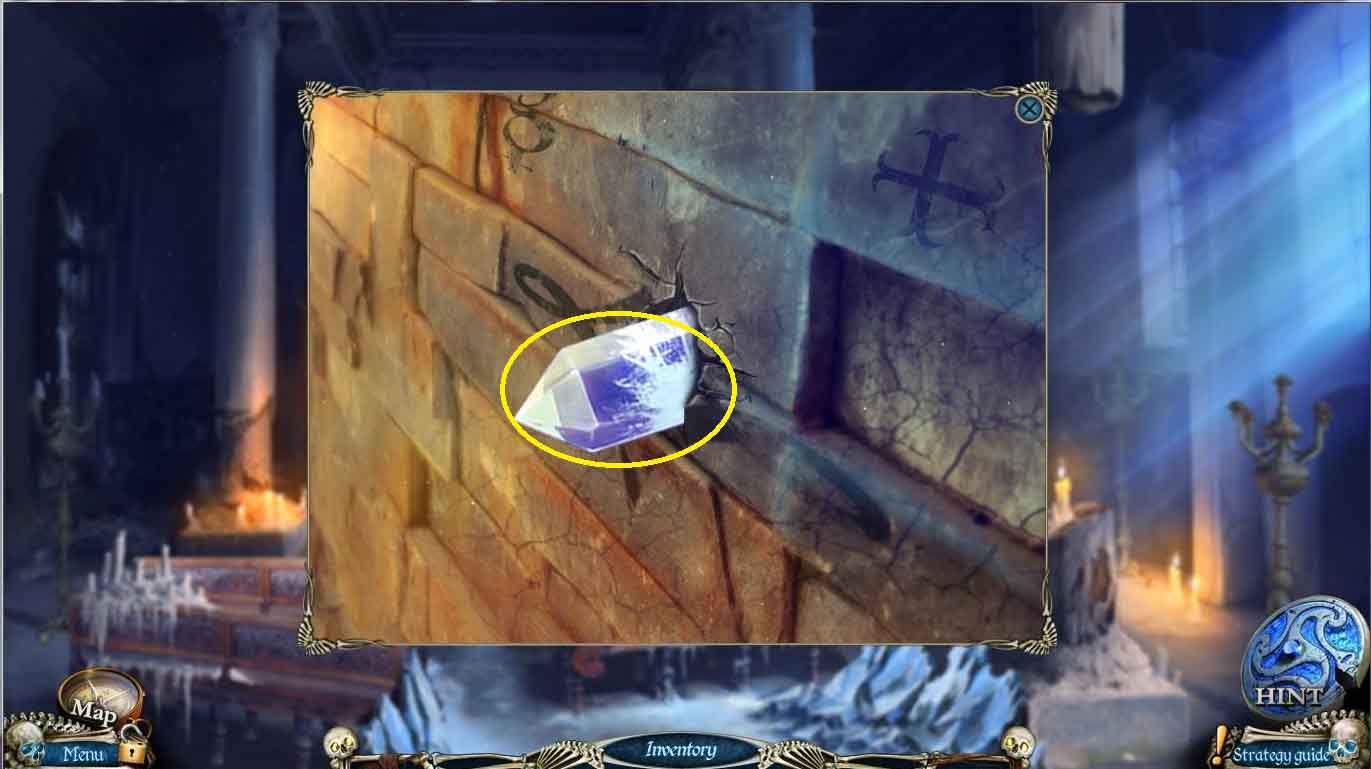
- Zoom in on and use the PLIERS to get the CRYSTAL 4/5
- Use the map to jump back to the souvenir shop
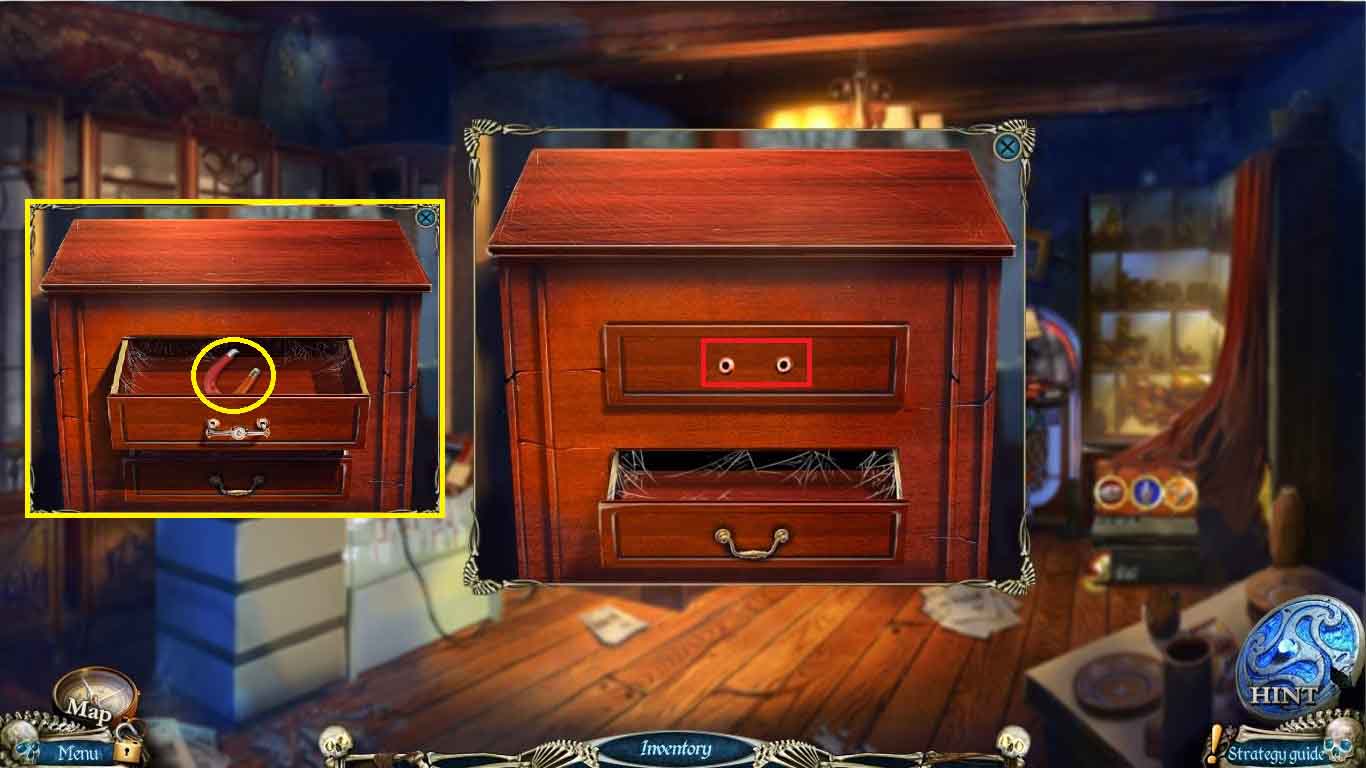
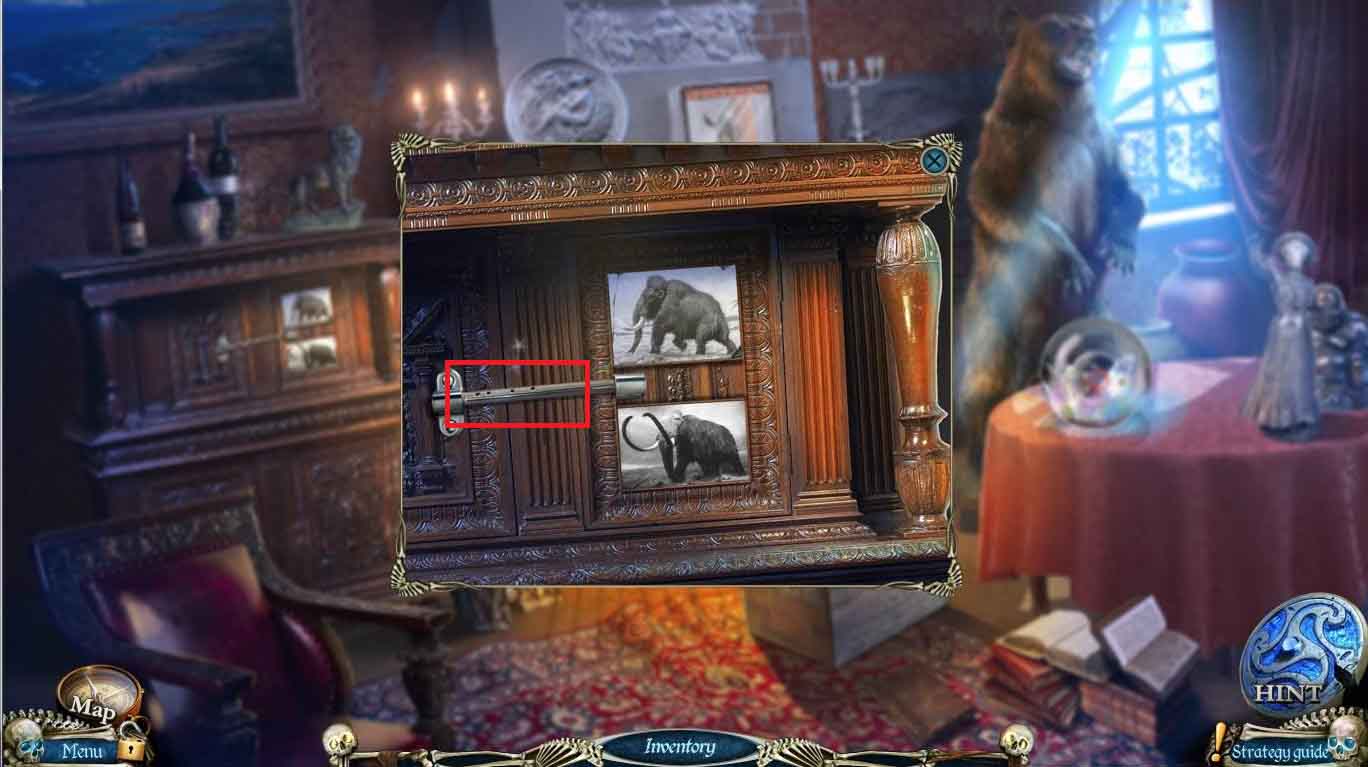
- Click on the chest of drawers and use the DRAWER HANDLE to open the top drawer and take the MAGNET
- Go to the office
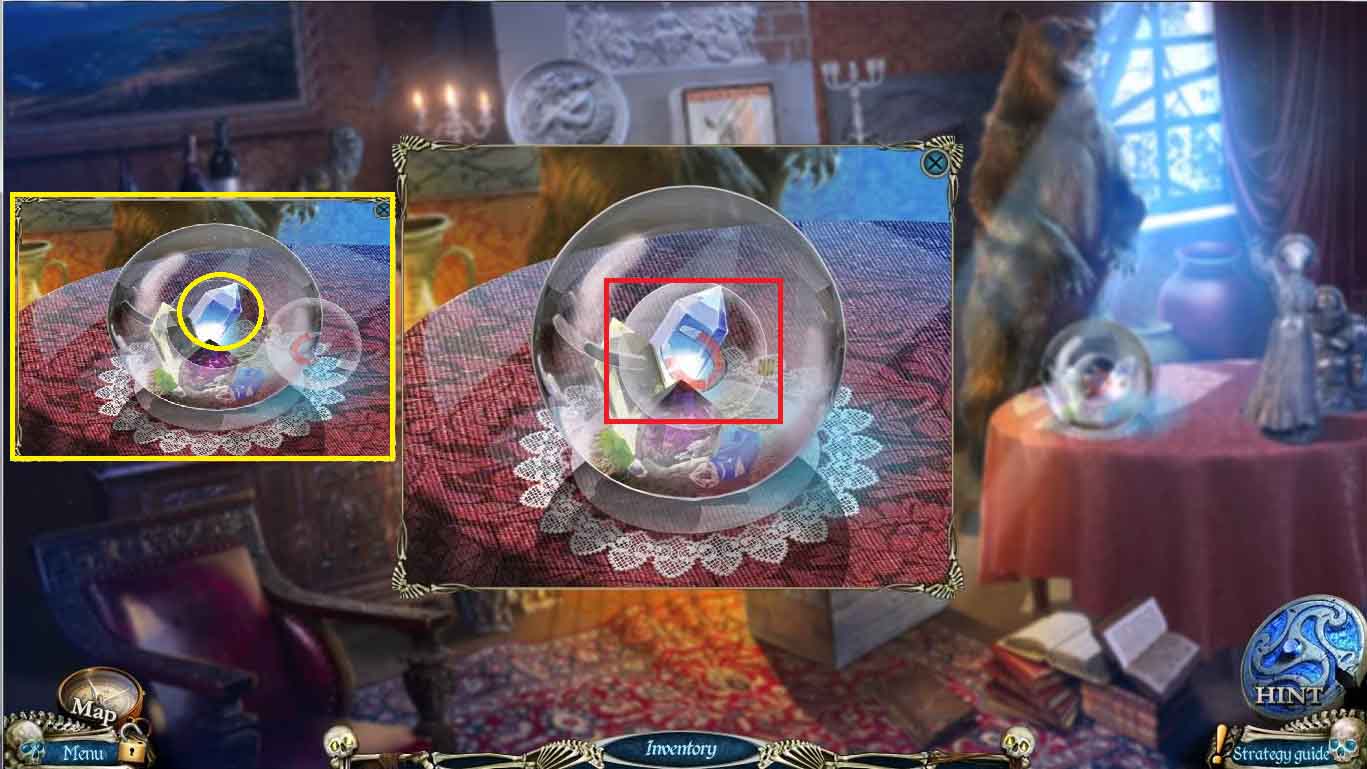
- Click on the globe on the table and use the MAGNET to open it and retrieve CRYSTAL 5/5
- Go back to the ship cabin
- Click on the doorway and put the 5 CRYSTALS on it to open the portal, go through to the bridge
- Click anywhere to trigger the bridge to raise up and the eyeballs will open
- Click on the eyeballs on the stick and cover them with the rag
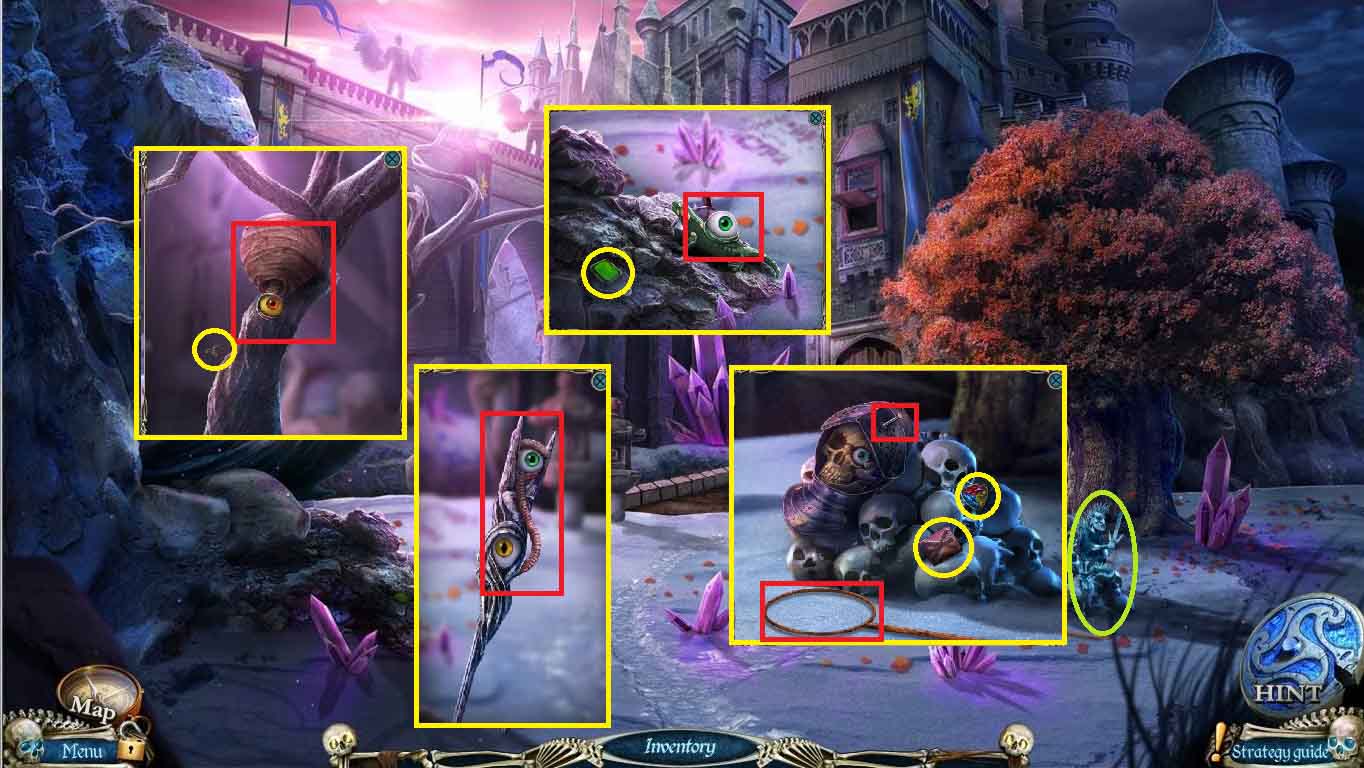
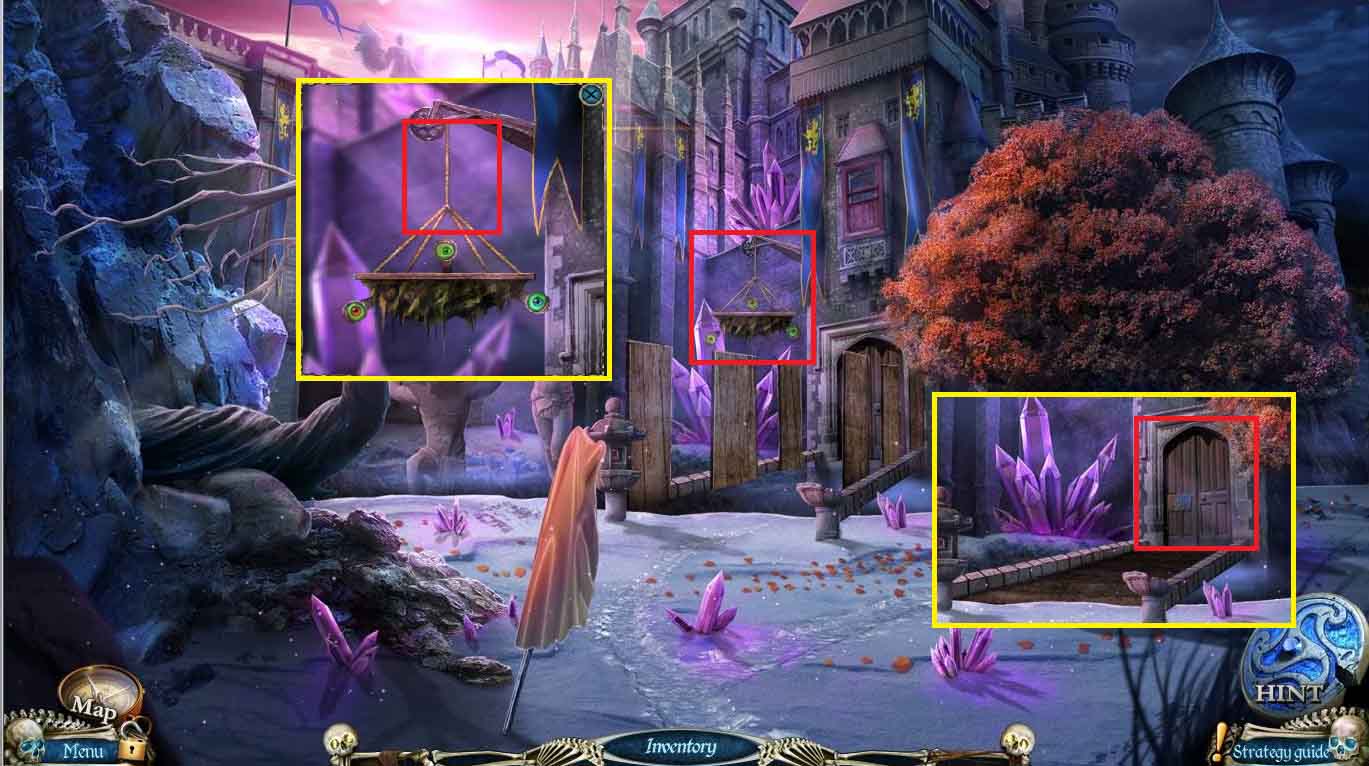
- Zoom in on the pile of skulls and take the MASK RUNE and COLORED CRYSTAL 3/3 and use the PLIERS to remove the nail from the helmet and cover the eye
- Use the NET on the handle to make a SCOOPNET
- Click on the beehive and use the SCOOPNET to knock it down and catch a BEE
- Click on the rocks and use the BEE to close the eye and take the GREEN CRYSTAL 3/3 and SKULL MASK PART
- Go back to the office
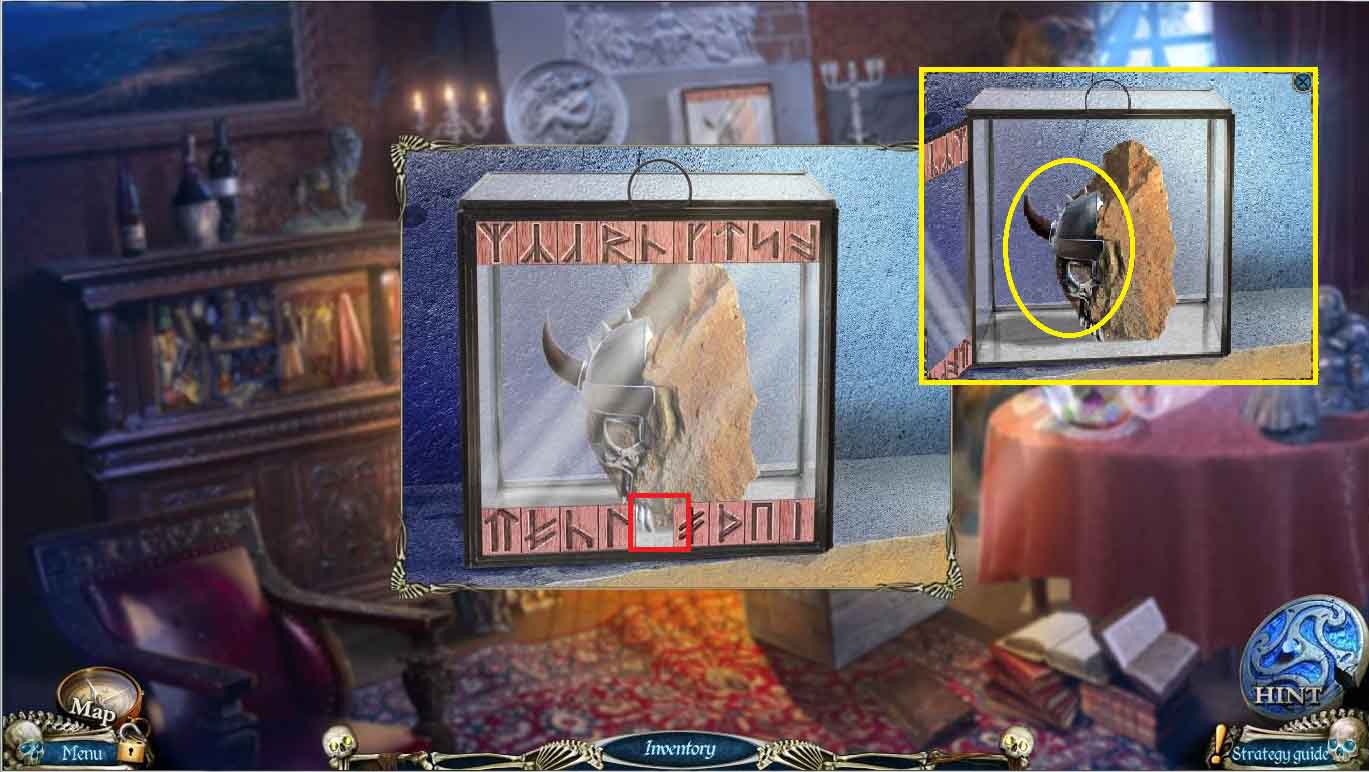
- Click on the display case on the mantel and use the MASK RUNE to open the case and take the SKULL MASK PART
- Use the map to jump back to the cabin
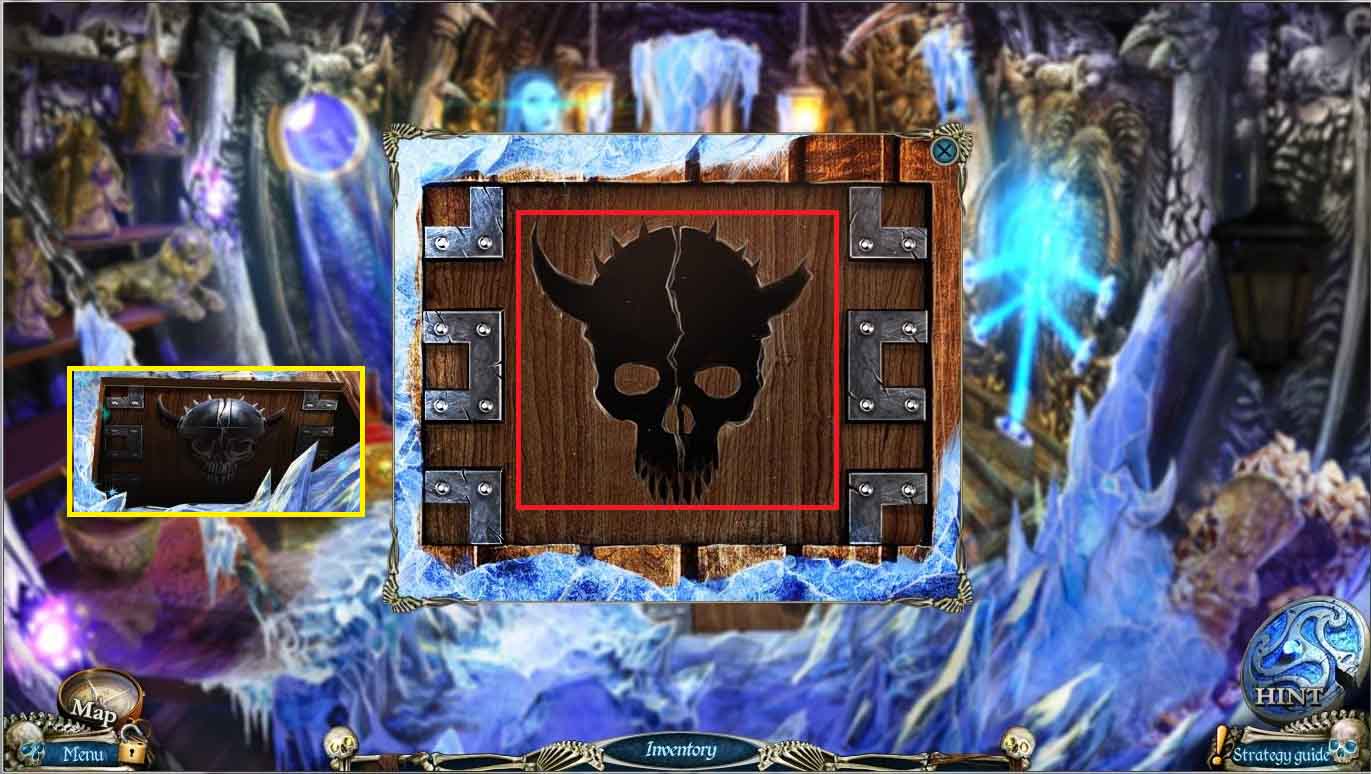
- Zoom in on the hatch and use the 2 SKULL MASK PARTS to unlock and open a hidden object scen
- Find all objects in the list
- Put the two half leaves together to make a leaf, put the butterfly on the lantern to open it and find the owl
- Go back to the bridge
- Click on the window and use the BOOMERANG to knock down the stick and use the RAVEN to get the CORK
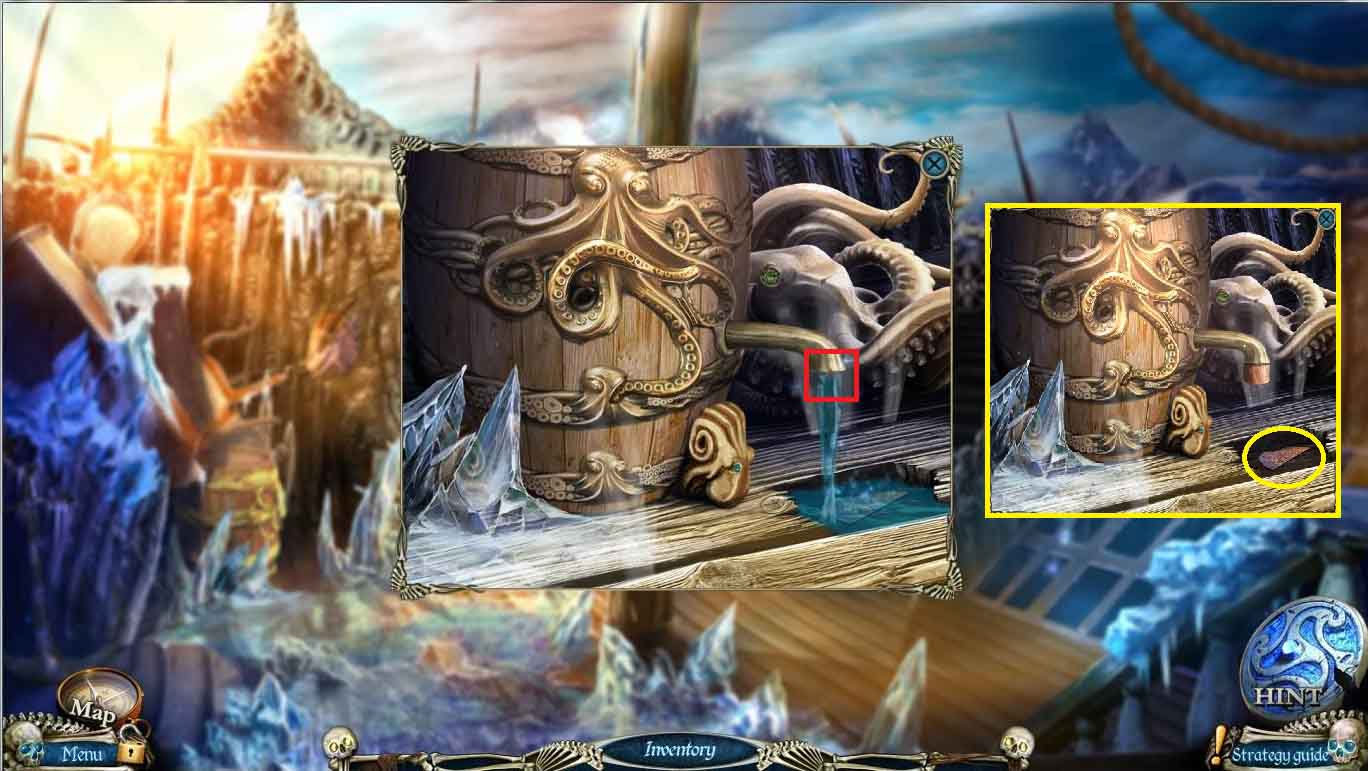
- Go back to the deck and use the CORK on the barrel and take the BAS-RELIEF 2/2
- Use the map to jump back to the office
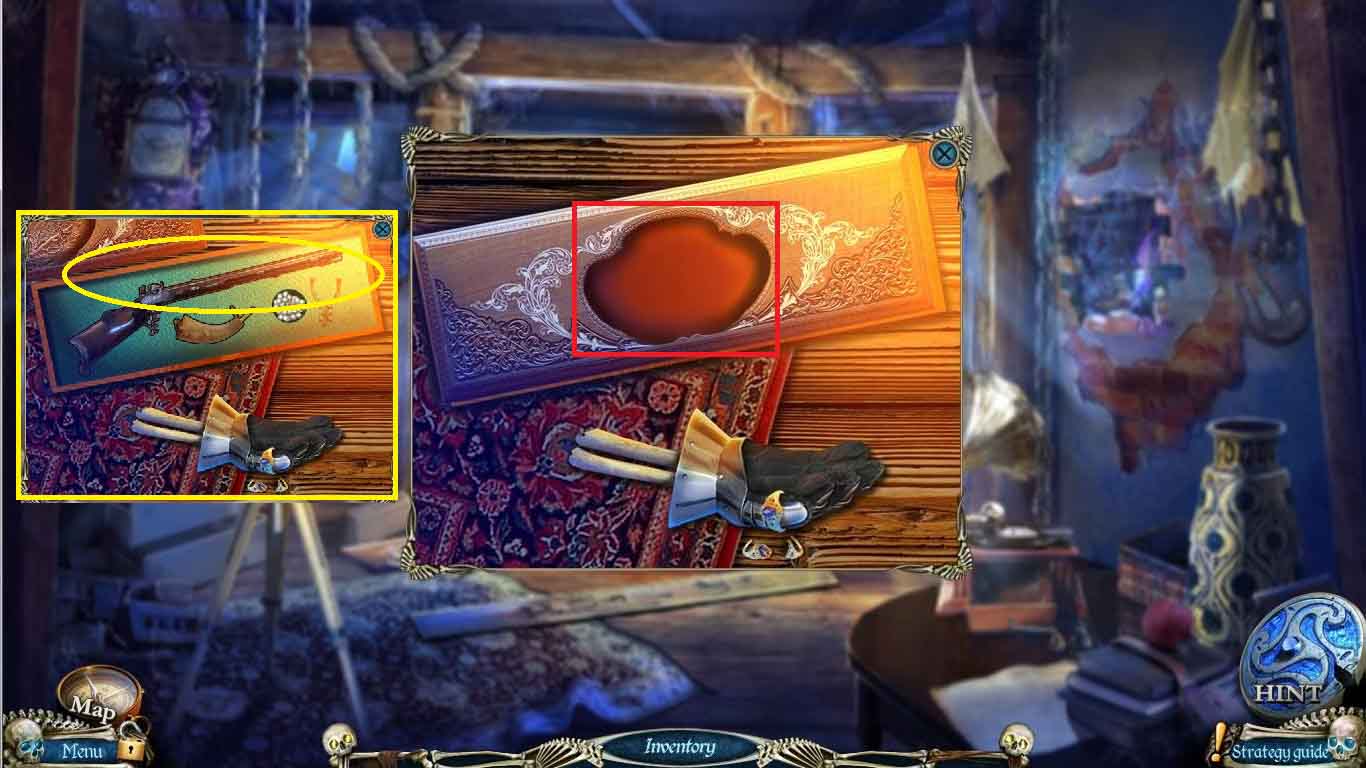
- Click on the case on the floor and place the two BAS-RELIEF on the lid, take the MUSKET
- Go back to the bridge
- Use the MUSKET on the hanging basket to remove the last of the eyeballs and lower the bridge
- Click on the castle door and place the two CASTLE AMULETS on the board to trigger the puzzle.
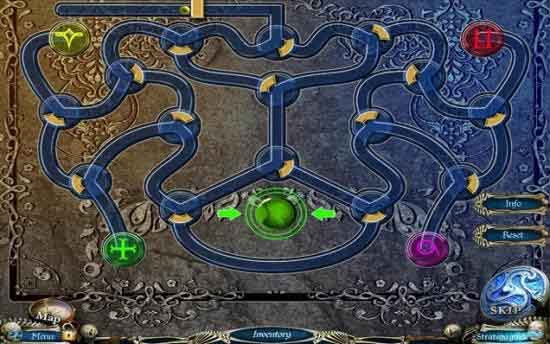
- The object is to guide all marbles to their appropriate colored locations. After each run the bumpers need to be reset as shown above.
- Enter the throne room
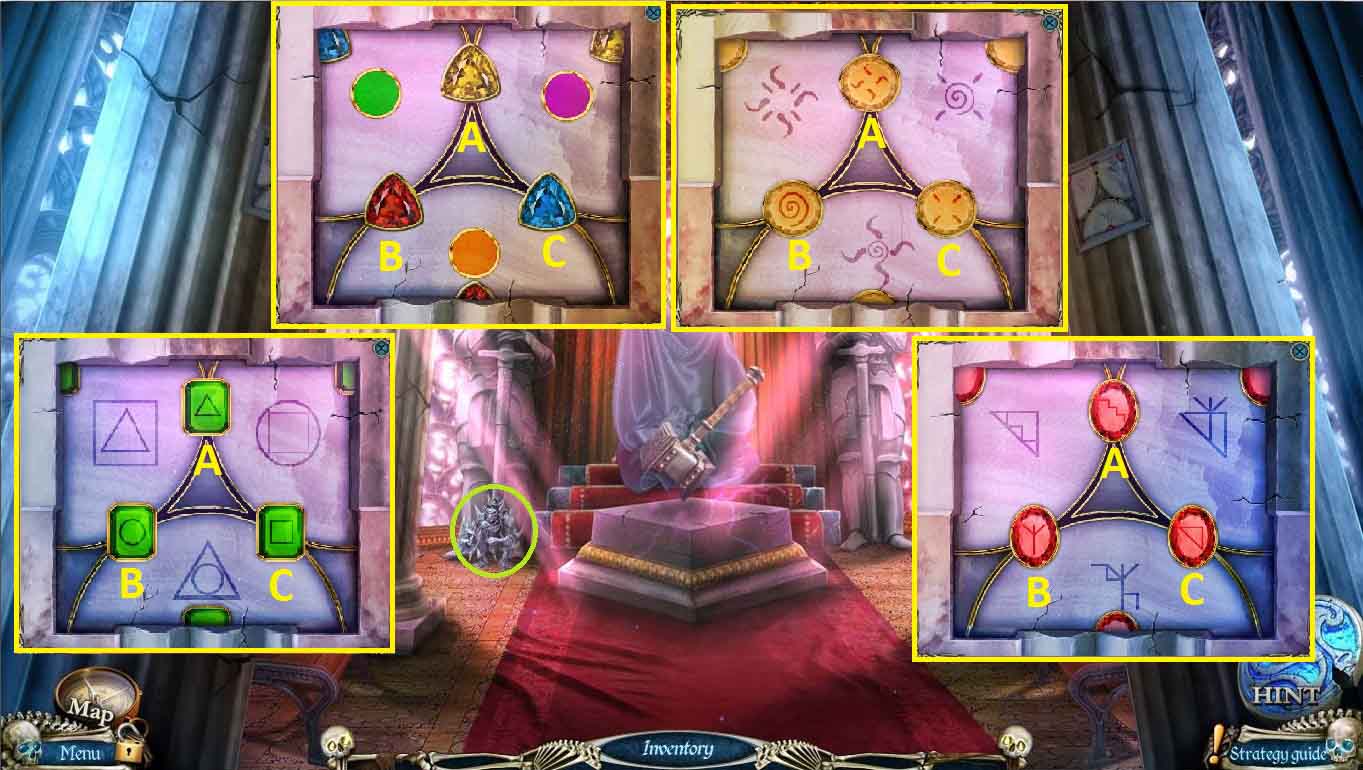
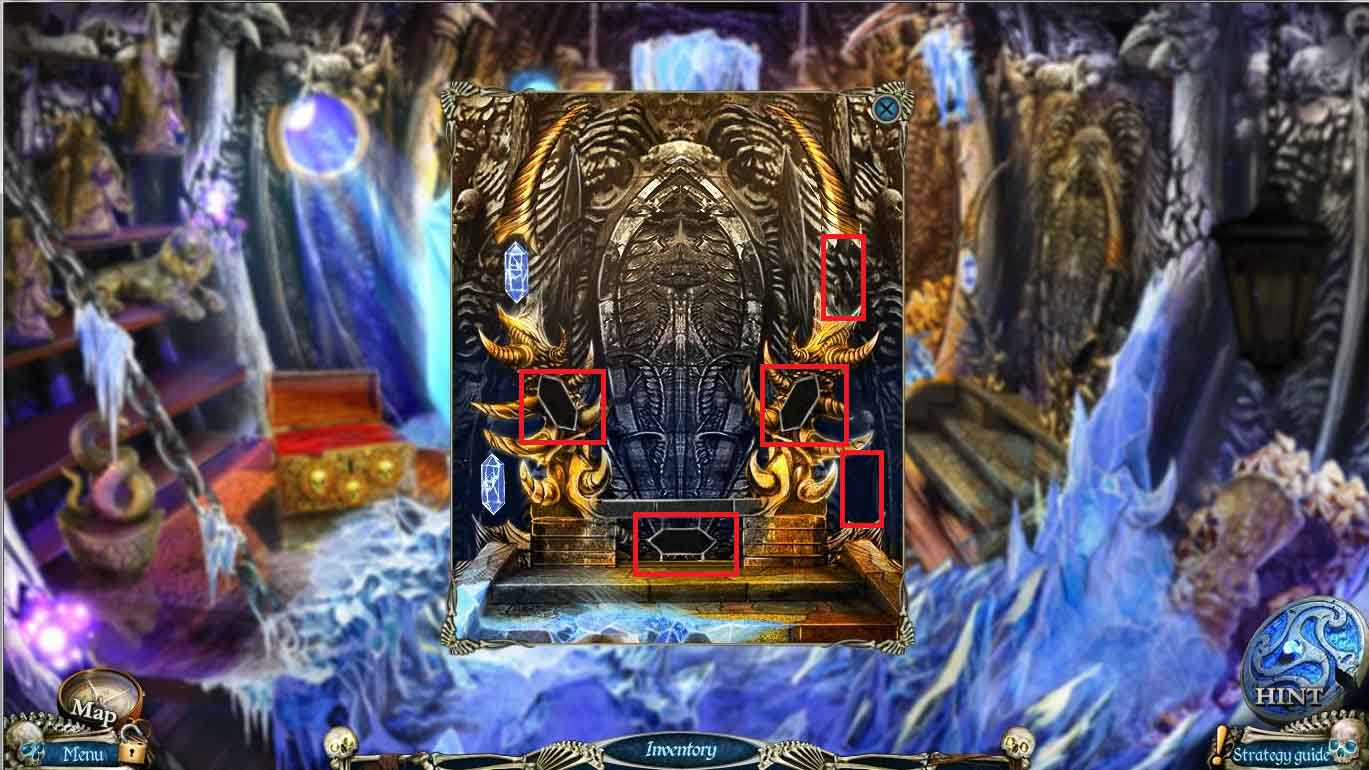
- Click on the first column to the right and place the RED CRYSTALS on the board. Rearrange to the correct spot by choosing:
- A, C, A, B, A, C, A, B
- Move to the next column to the left, place the YELLOW CRYSTALS and follow the same pattern
- Click on the next column to the left use the COLORED CRYSTALS and move in the same pattern
- Click on the furthest column to the left, place the GREEN CRYSTALS and follow the same pattern
- When the hammer raises, take the MAGICAL SAIL
- Go back to the cabin and give the MAGICAL SAIL to Hel and watch the cut scene as Hel frees the souls and Erlenbourg returns to a living city