
Fear For Sale: Nightmare Cinema: Chapter Five: Screenplay Portals
Rely on our Fear for Sale Nightmare Cinema Walkthrough to guide your steps as you face the unthinkable in the dark depths of an abandoned movie theater. Brush off those icy tendrils of terror by using our comprehensive directions and solutions to all the pitfalls and puzzles you'll face as you attempt to put an end to this special feature.
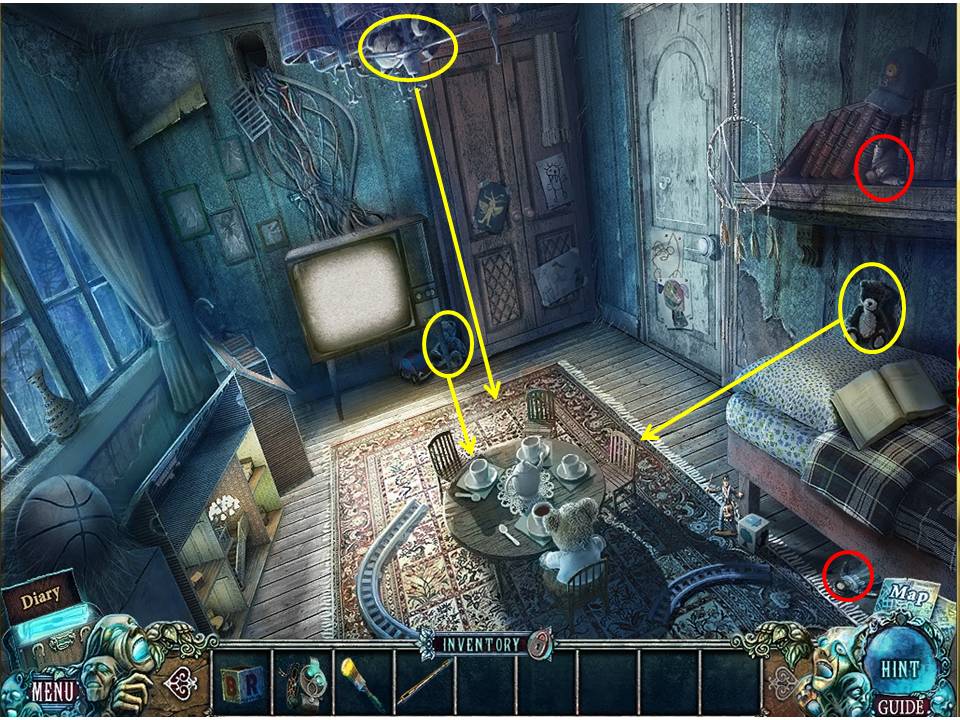
- Take three TEDDY BEARS, the FATHER TOY, and the MOTHER TOY.
- Seat the TEDDY BEARS at the table.
- Take the DAUGHTER TOY.
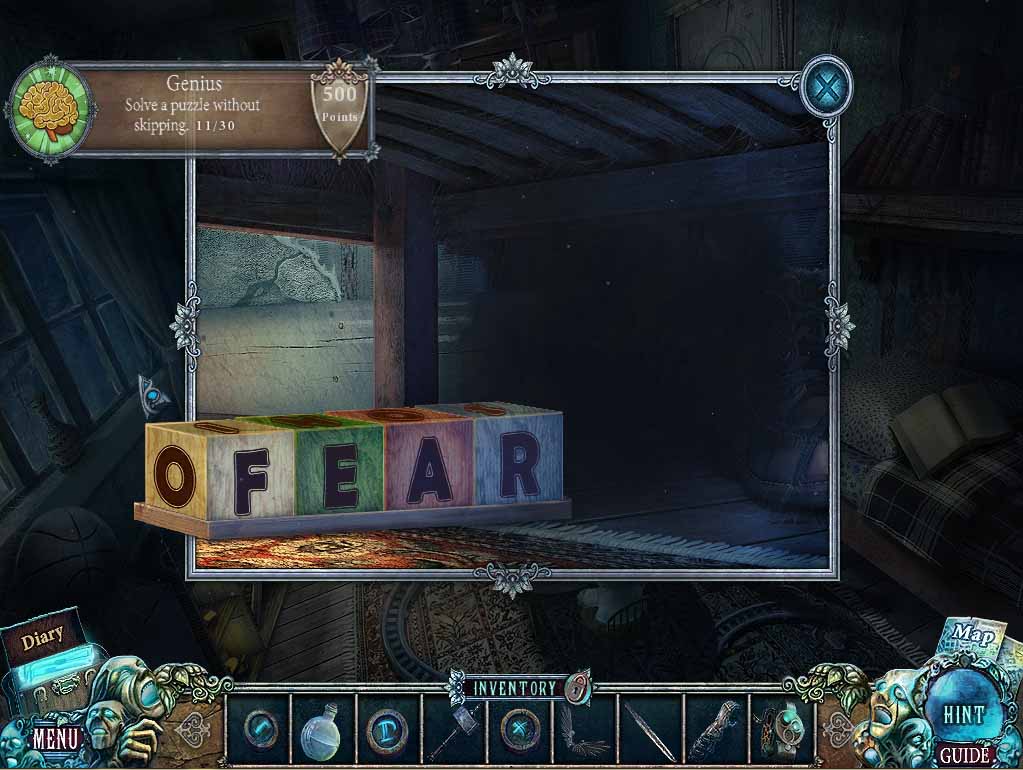
- Zoom under the bed.
- Put the two CUBES on the board to spell FEAR.
- Take the GHOST TOY.
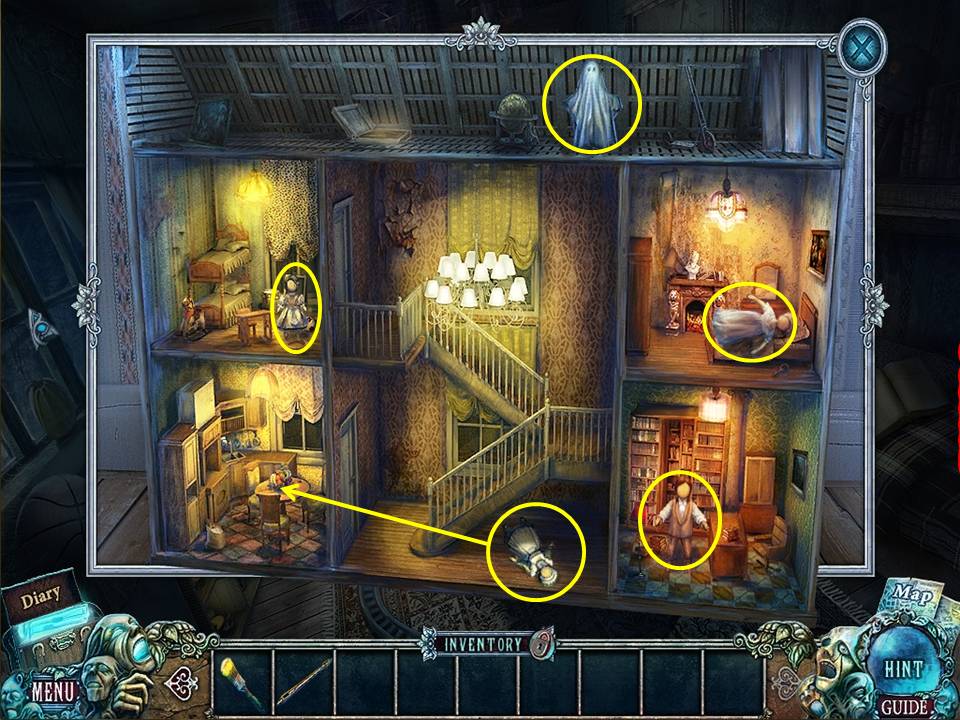
- Zoom into the dollhouse.
- Put the MOTHER TOY in the bedroom.
- Put the FATHER TOY in the study.
- Put the DAUGHTER TOY in the room with the bunk bed.
- Put the GHOST TOY in the attic.
- Take the COOK TOY and place her in the kitchen.
- Take the REMOTE CONTROL.
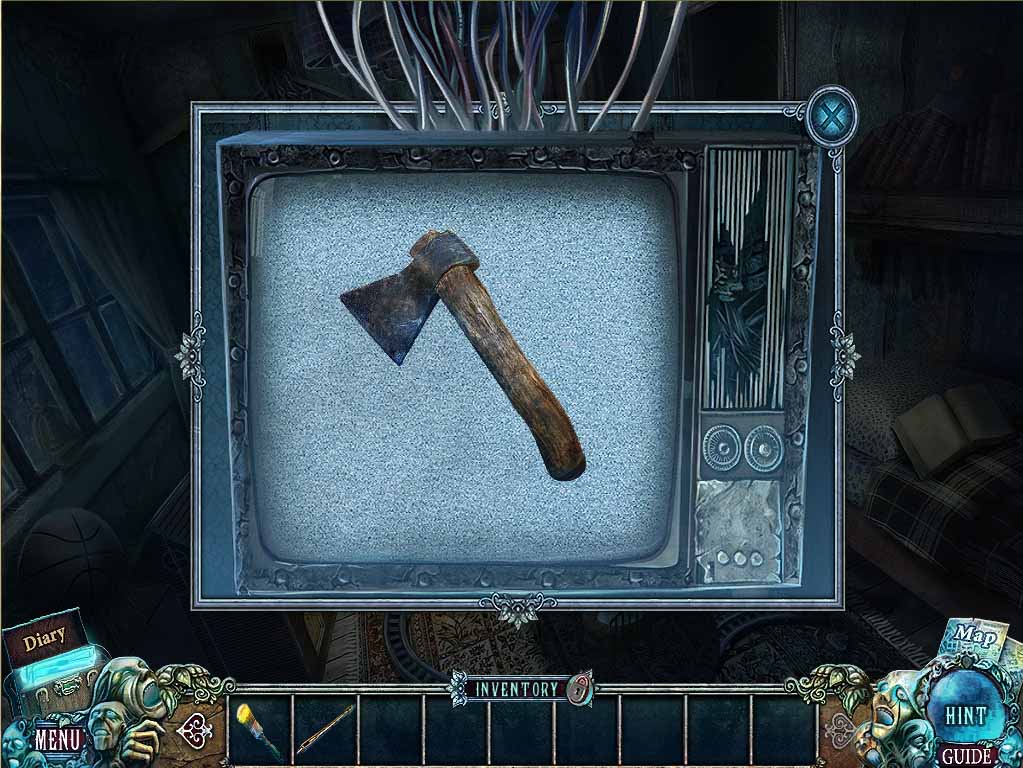
- Zoom into the television.
- Change channels with the REMOTE CONTROL until the AXE appears.
- Take the AXE and smash the screen.
- Take the first DEMON EYE.
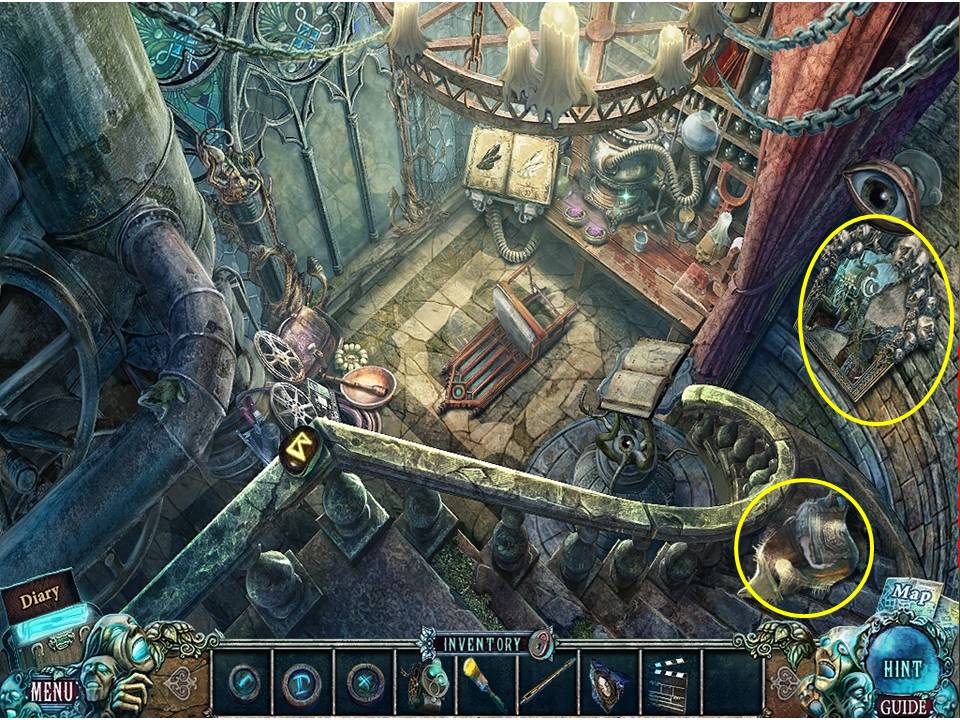
- You will be returned to the writer’s tower.
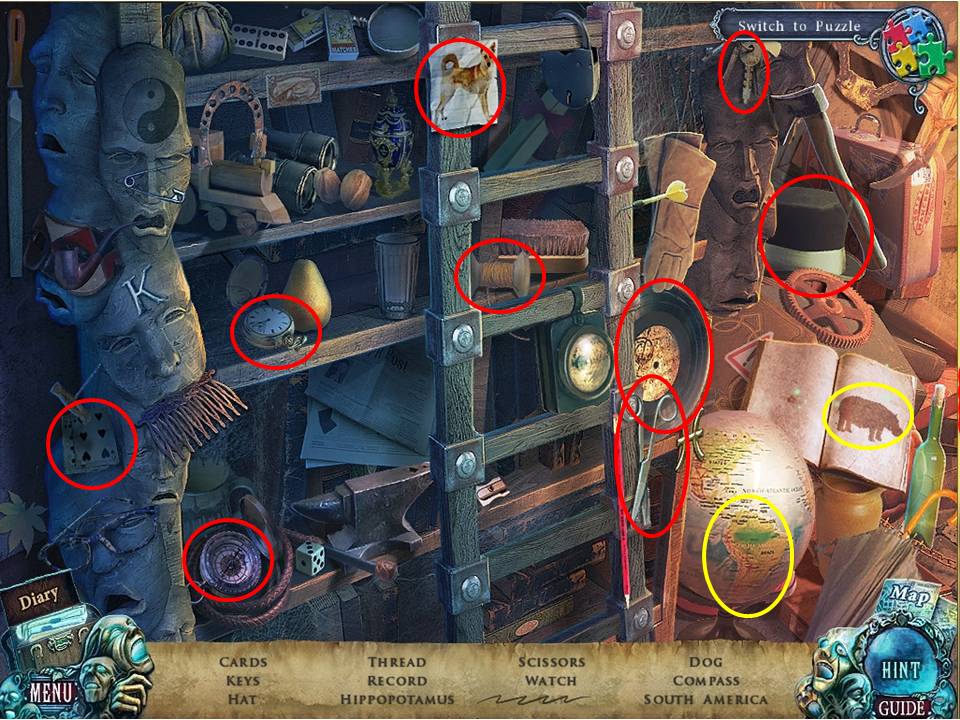
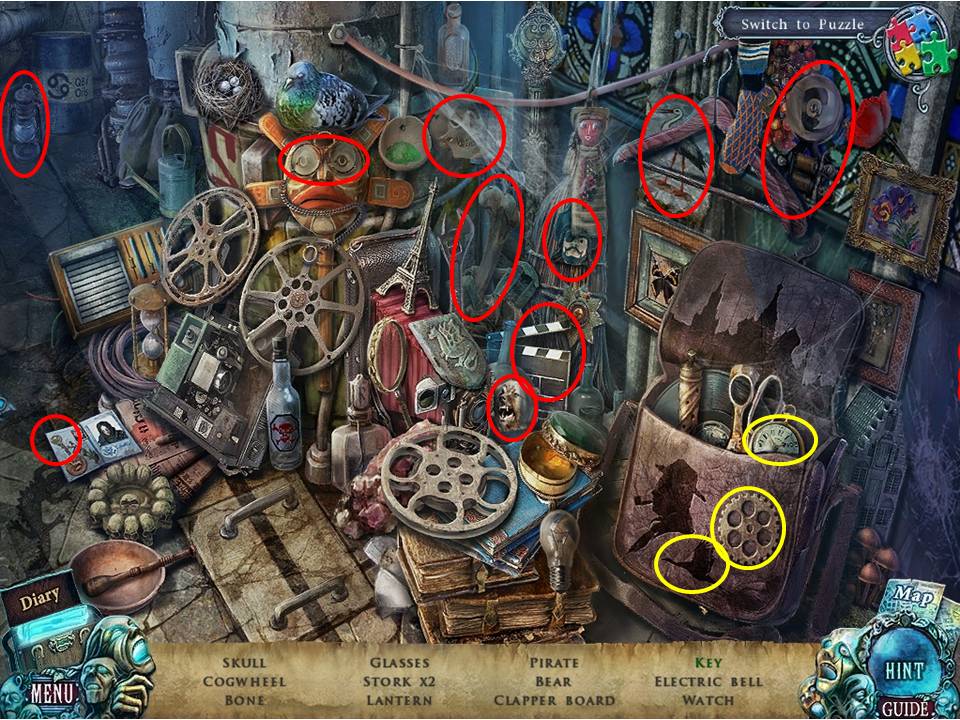
- Click on the sparkles to play an HOA.
- Find the items listed.
- Click the globe to get South America.
- Click the page in the book with the cat and then click to flip two pages and get the Hippopotamus.
- Receive the RECORD. Exit.
- Zoom into the book on the right.
- Put SCREENPLAY PAGE 5 in the book.
- Write on the page with the FILLED INK PEN.
- Travel through the portal.
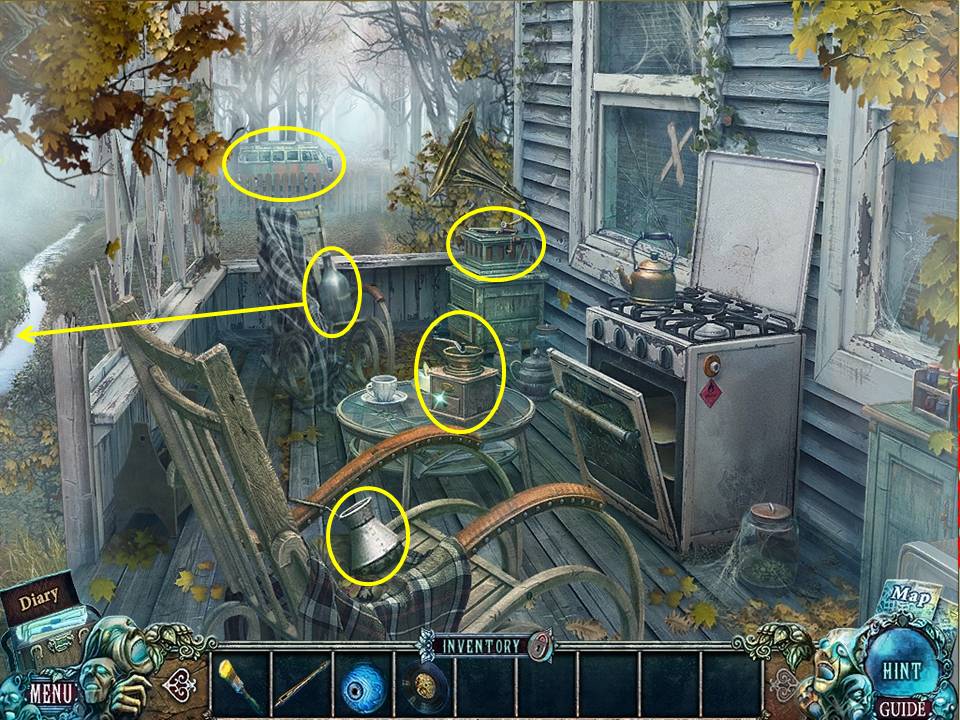
- Take the COFFEE POT and BOTTLE.
- Zoom into the water.
- Fill the BOTTLE to get BOTTLE WITH WATER.
- Zoom into the van.
- Take the GAS CYLINDER.
- Zoom into the record player.
- Take the GAS LIGHTER.
- Put the RECORD on the record player.
- Click the handle.
- Click the needle to move it onto the record.
- Take the COFFEE BEANS.
- Zoom into the table.
- Put the COFFEE BEANS into the grinder.
- Take the GROUND COFFEE.
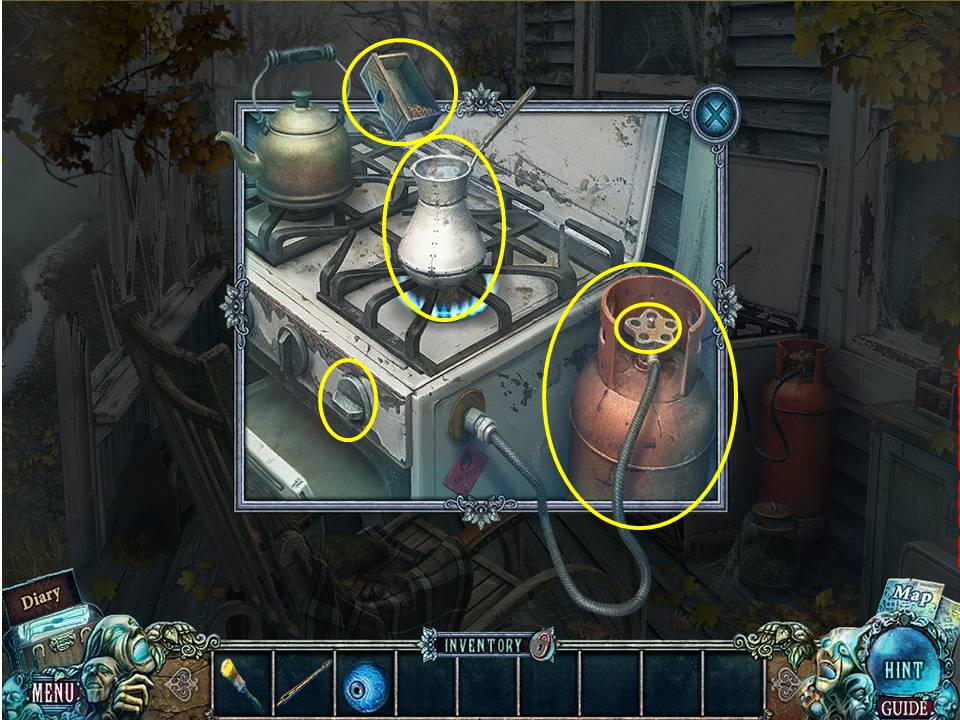
- Zoom into the stove.
- Put the COFFEE POT on the burner.
- Put the GAS CYLINDER next to the stove.
- Click the valve.
- Then click to turn on the burner.
- Fill the COFFEE POT from the BOTTLE WITH WATER.
- Light the burner with the GAS LIGHTER.
- Put the GROUND COFFEE into the coffee pot.
- Take the FULL COFFEE POT.
- Click to turn off the burner.
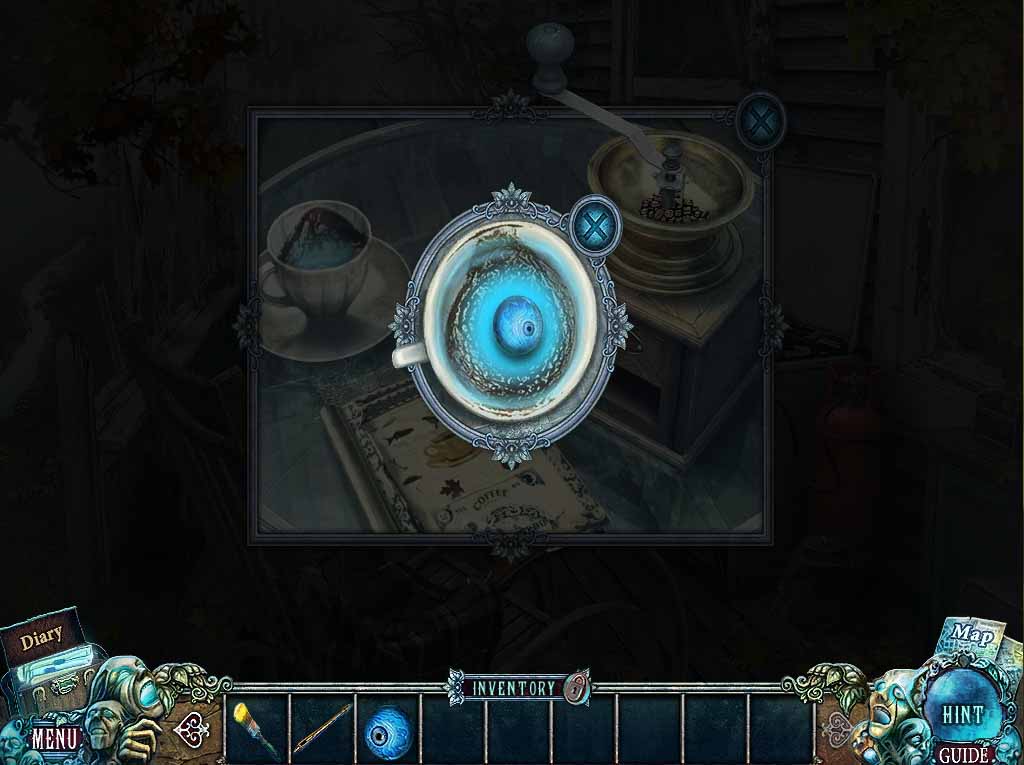
- Zoom into the table.
- Pour the FULL COFFEE POT into the cup.
- Click to drink the coffee.
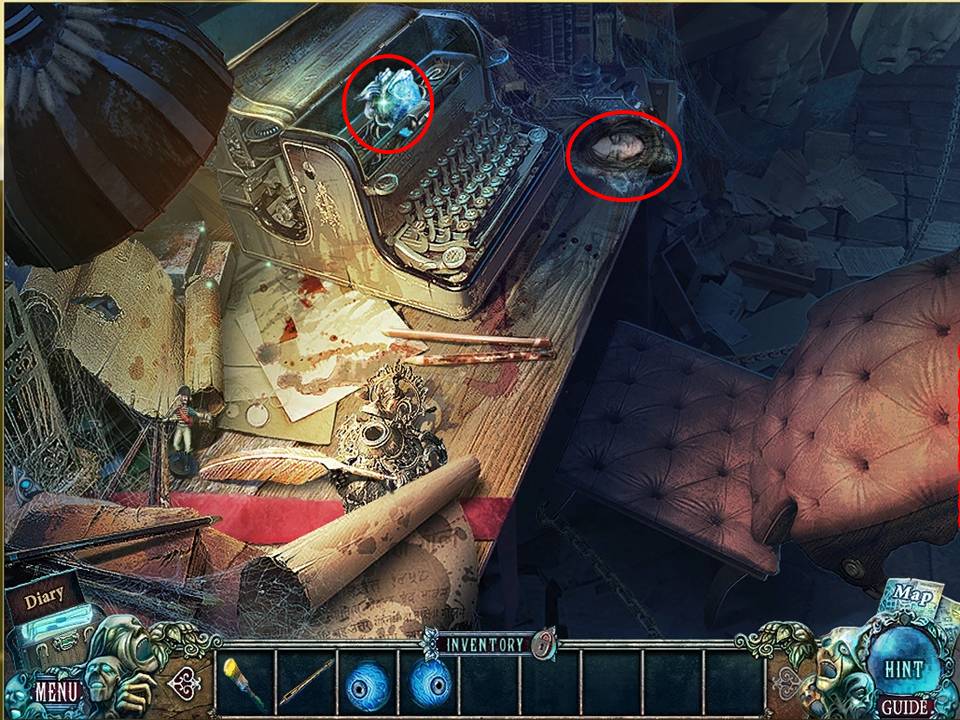
- Zoom into the cup.
- Take the second DEMON EYE.
- You will be returned to the writer’s desk.
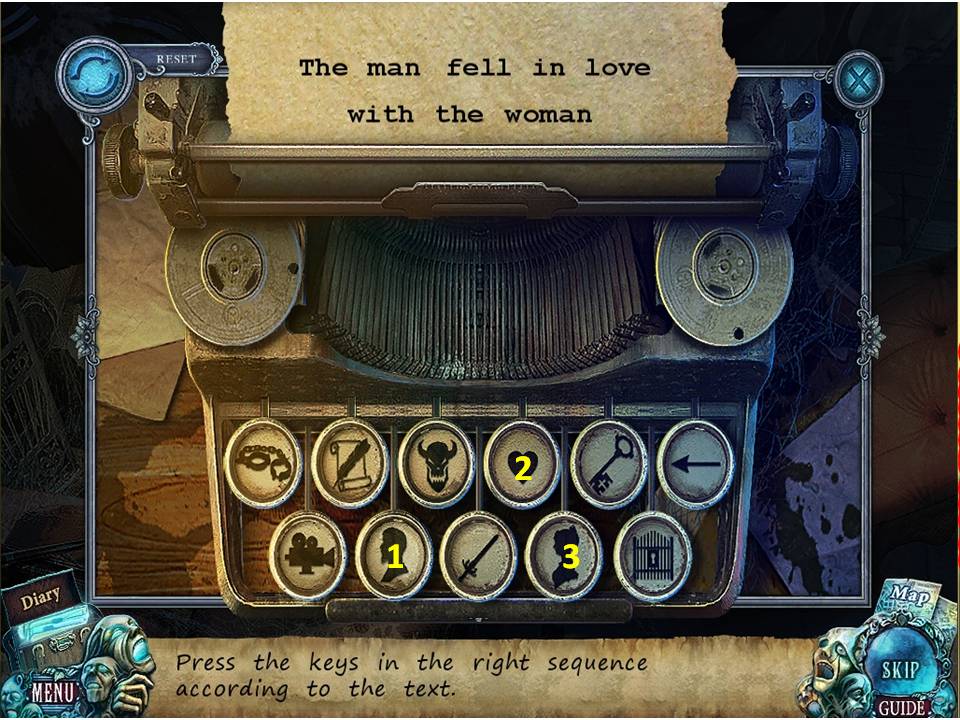


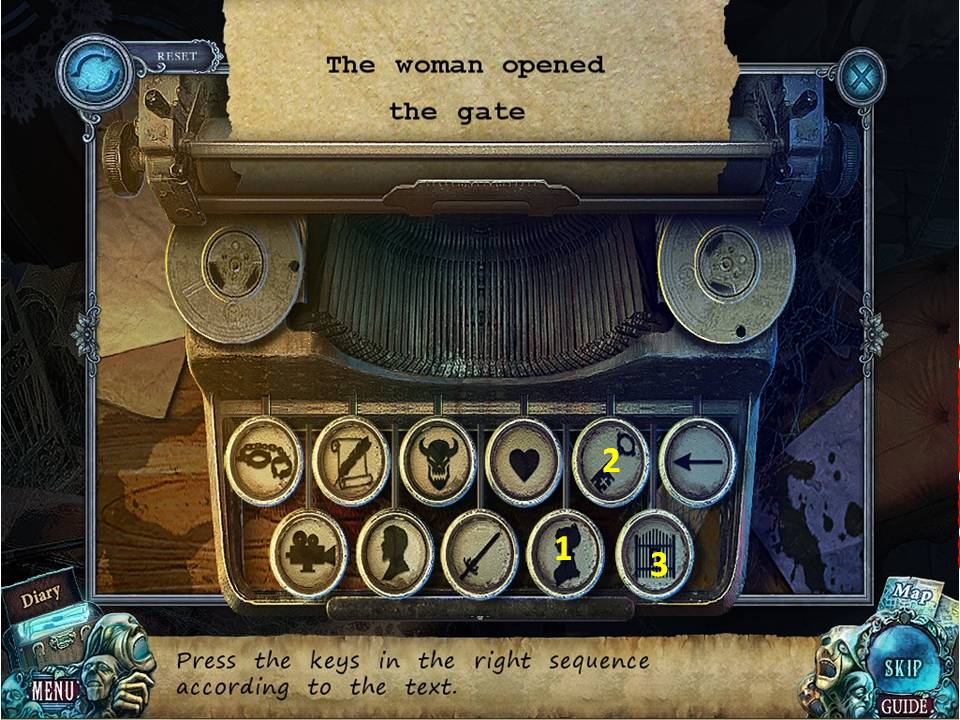

- Zoom into the typewriter.
- Assuming the keys are numbered 1 to 6 from left to right on the top row and 7 to 11 from left to right on the bottom row, click these numbers to type phrases: 8, 4, and 10 (phrase 1), 3, 1, and 8 (phrase 2), 11, 8, and 2 (phrase 3), 10, 5, and 11 (phrase 4), and 10, 9, and 3 (phrase 5).
- Take the FROZEN HEART.
- Take the first PART OF PICTURE.
- Go back to the soul furnace.
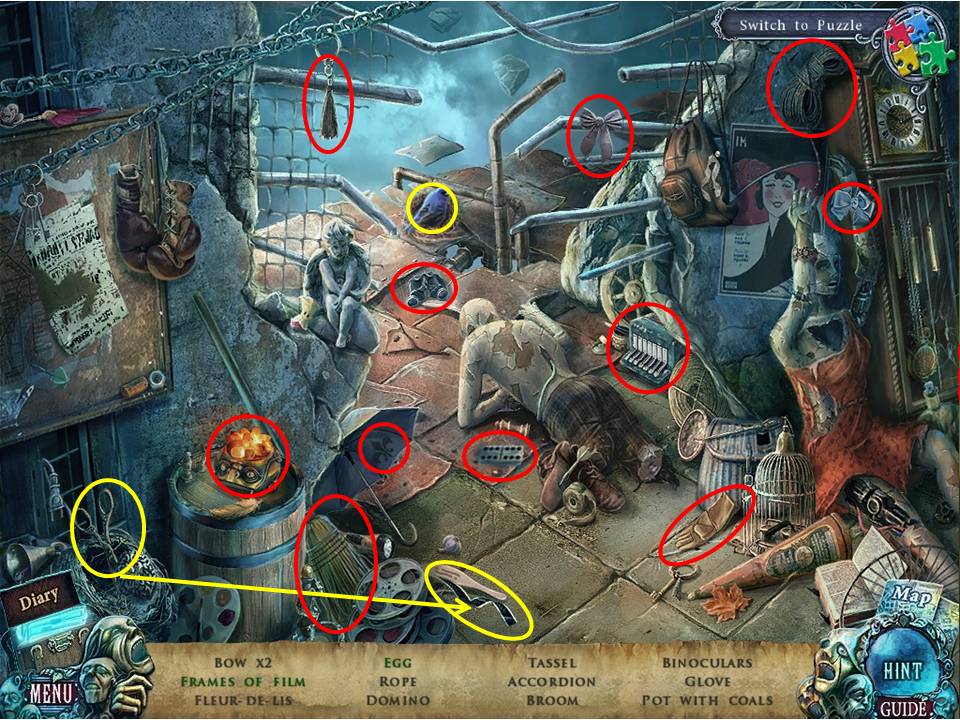
- Click the sparkles to play an HOA.
- Find the items listed.
- Cut the frames of film with the scissors.
- Click the bird to get the egg.
- Receive the POT WITH COALS.
- Go back to the forge.
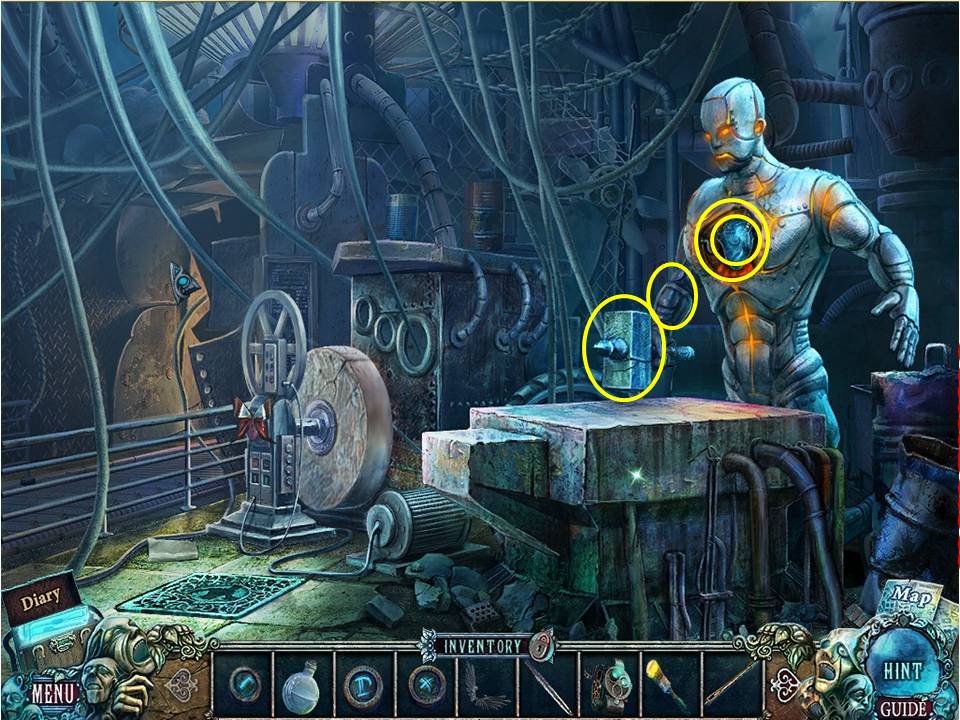
- Put the GOLEM HAND on the statue.
- Then put the HAMMER on the statue.
- Pour the POT WITH COALS into the statue’s chest, followed by the FROZEN HEART.
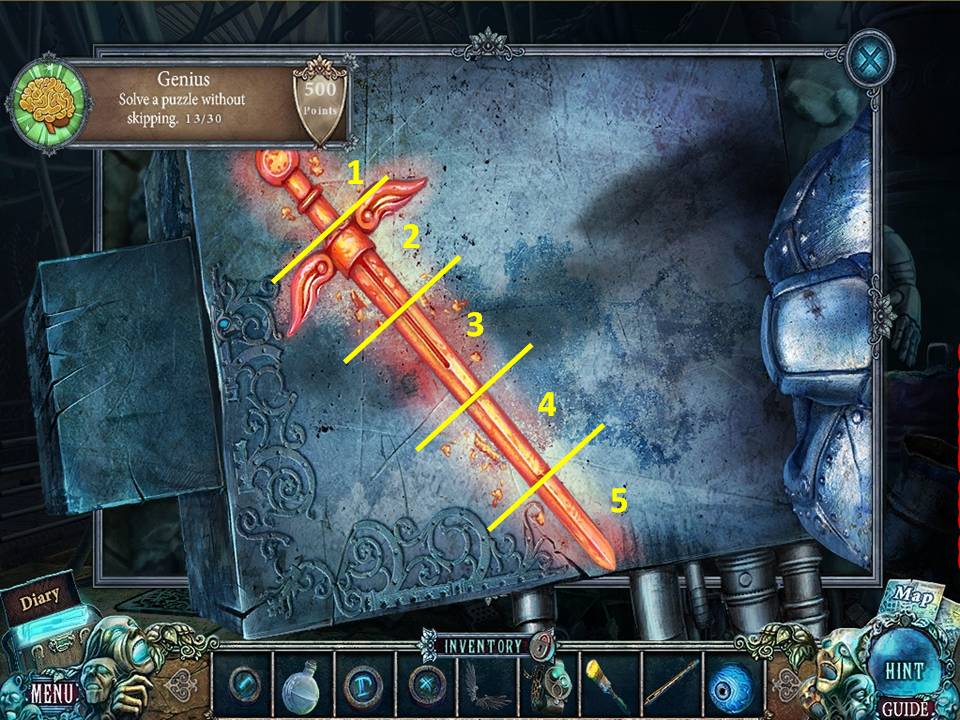
- Zoom into the slab.
- Place the BLANK SWORD on the slab.
- Assuming the sword sections are labeled 1 through 5, beginning at the hilt and moving to the tip, you must hammer the sword sections in this order: 1, 5, 3, 2, 4, and 3 again.
- Cool the sword with the FLASK OF TEARS.
- Take the ANGEL’S SWORD.
- Retrieve the now FLAMING HEART from the chest of the statue.
- Go back to statue park.

- Zoom into the statue.
- Insert the DEMON EYES into the eye sockets and the FLAMING HEART into the chest.
- Zoom into the base of the statue.
- Place the ANGEL’S WINGS and SWORD in the niches to initiate a game.
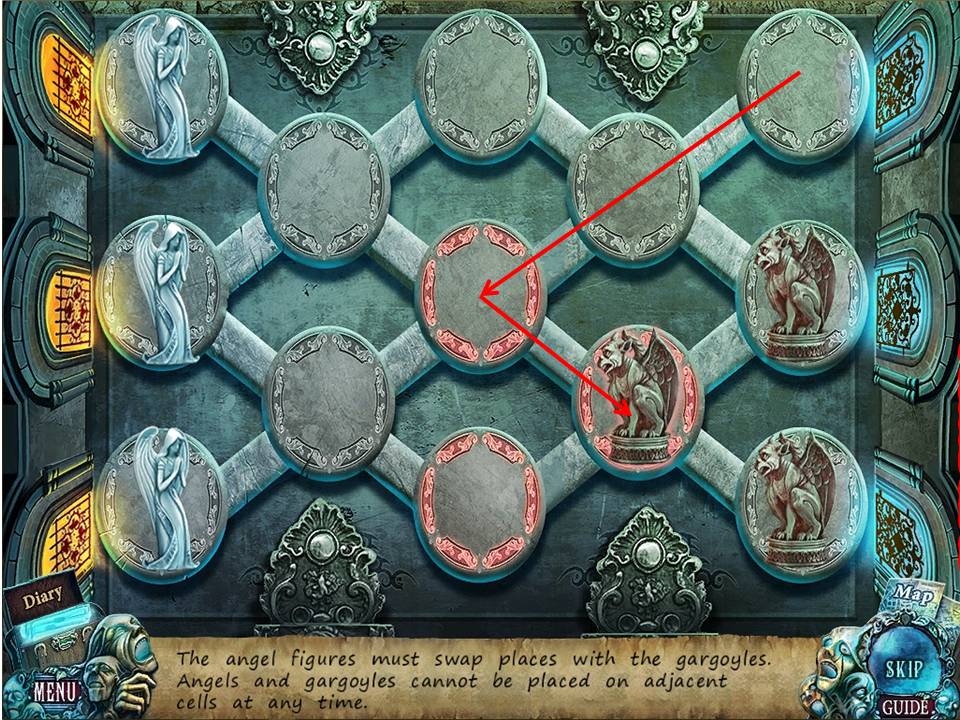
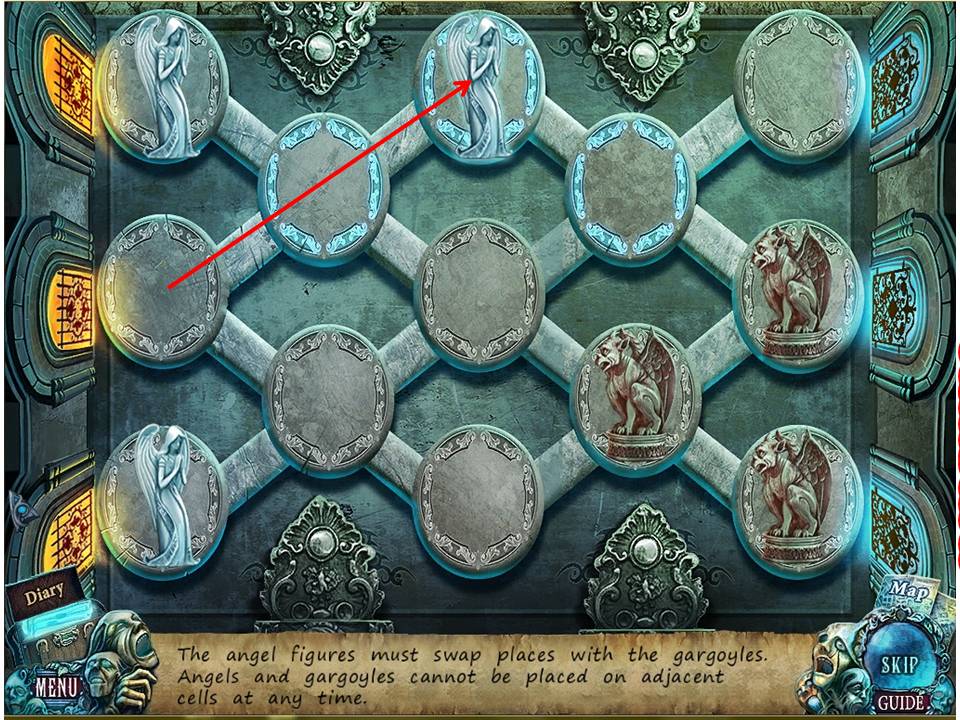
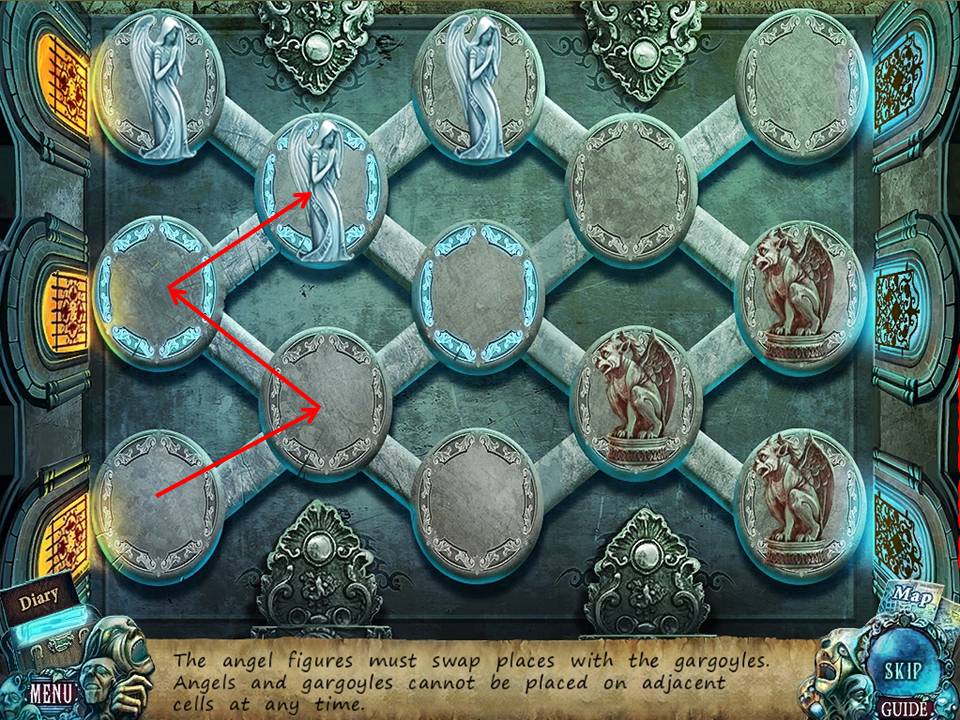
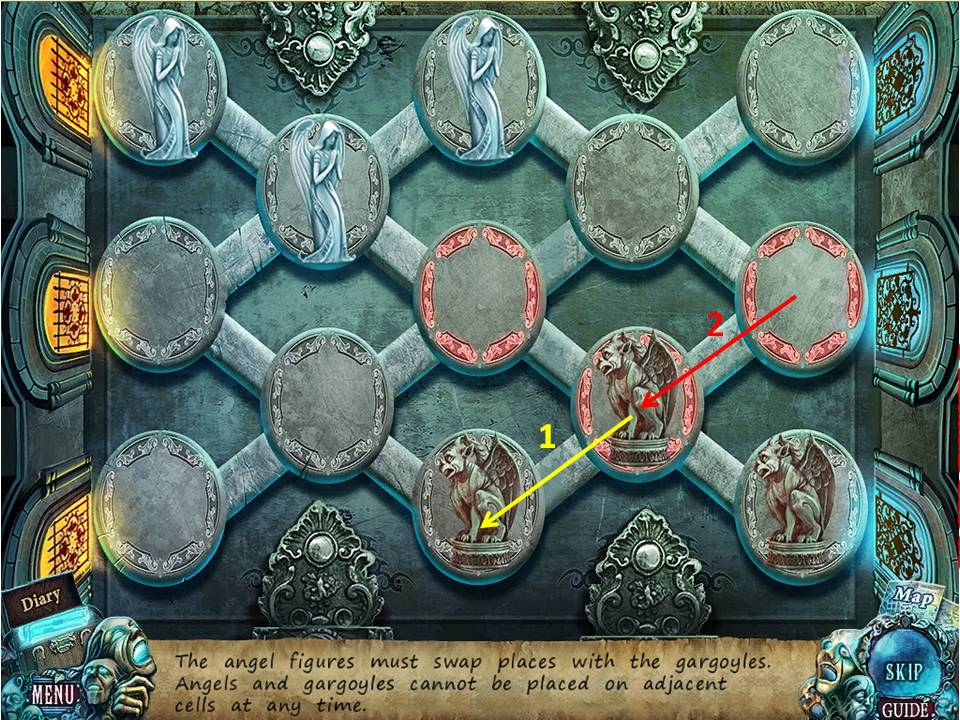
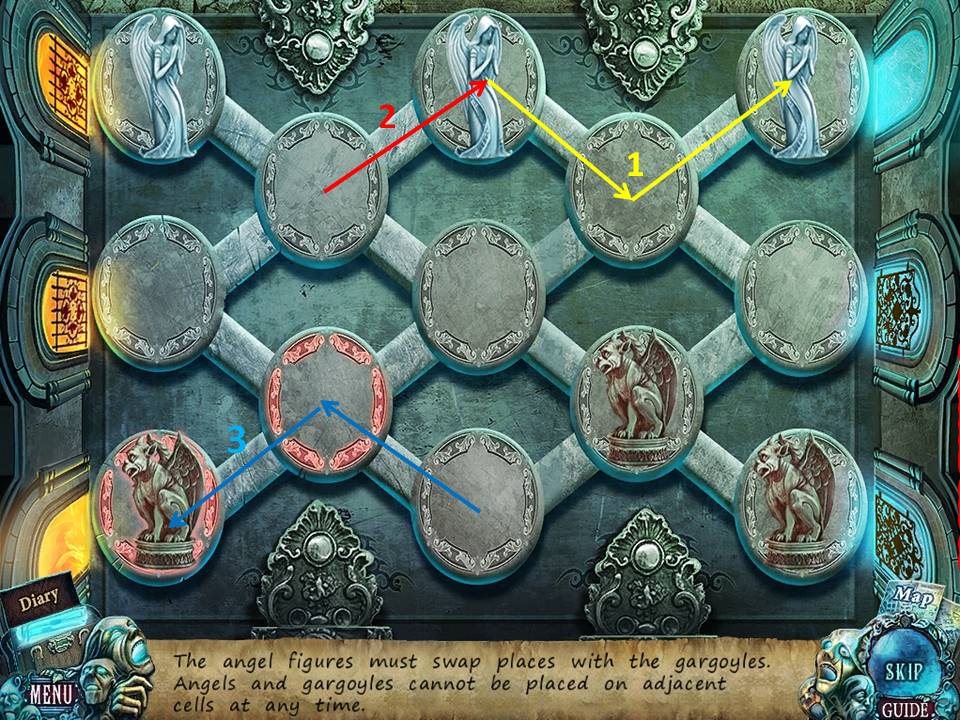
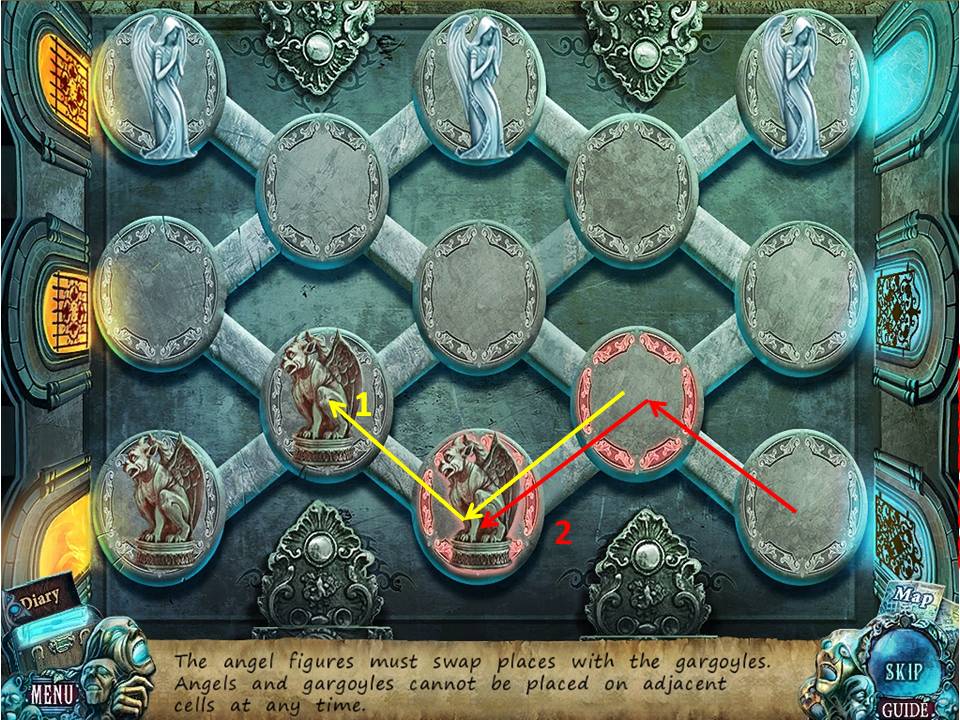
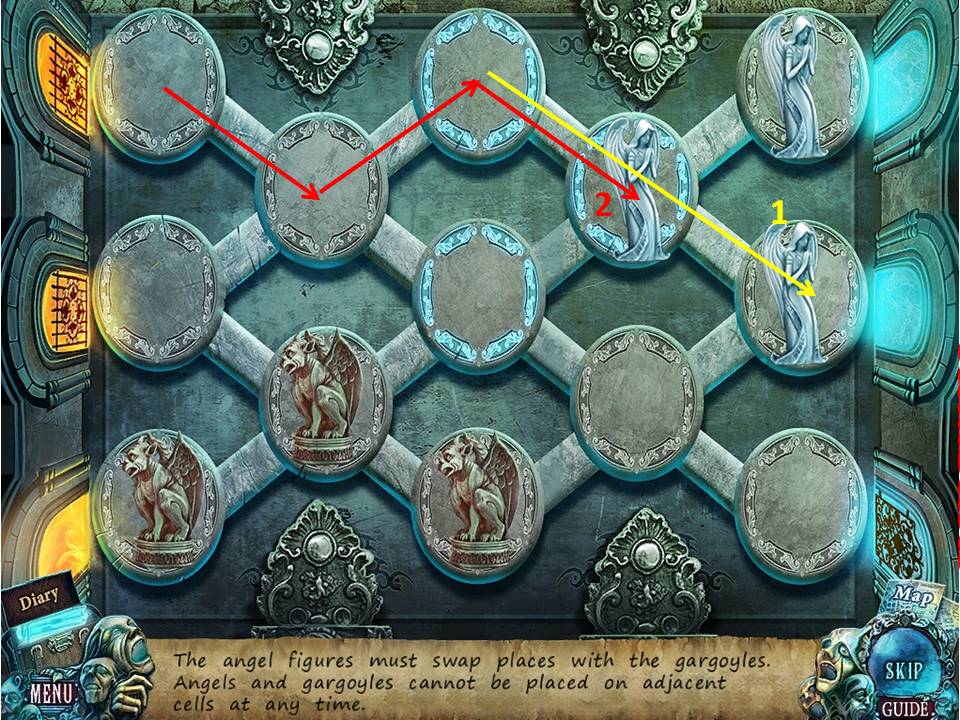
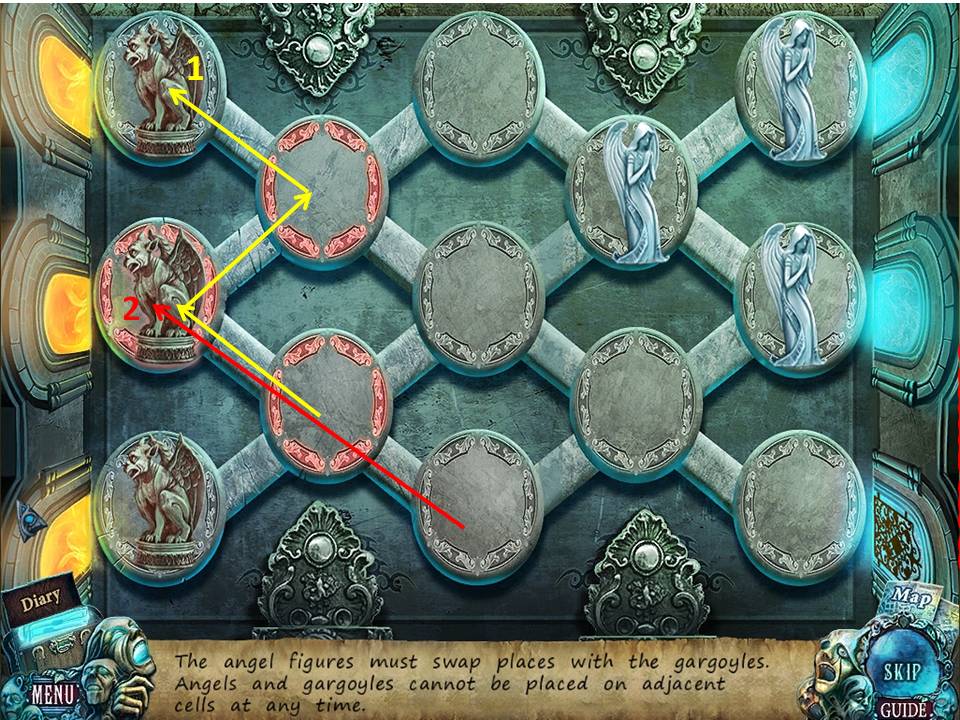

- The object of the game is to move the figures so that they reach the opposite side from where they started.
- Angels and gargoyles cannot be placed on neighboring ovals.
- Note the screenshots for the various steps, and take into account that some screenshots indicate multiple moves.
- When finished, descend the stairs to the chamber.
- Click on the sparkles to play an HOA.
- Find the items listed.
- Click the passport to get the key.
- Click the bag to get the cogwheel, clock and stork.
- Receive the CLAPPERBOARD.
- Take the second PART OF PICTURE.
- Zoom into the painting.
- Place the two PARTS OF PICTURES in the frame.
- Use the BRUSH to swap the pieces to get the image shown in the screenshot.
- Take the fourth RUNE and MANOMETER.
- Go back to the movie temple gates.
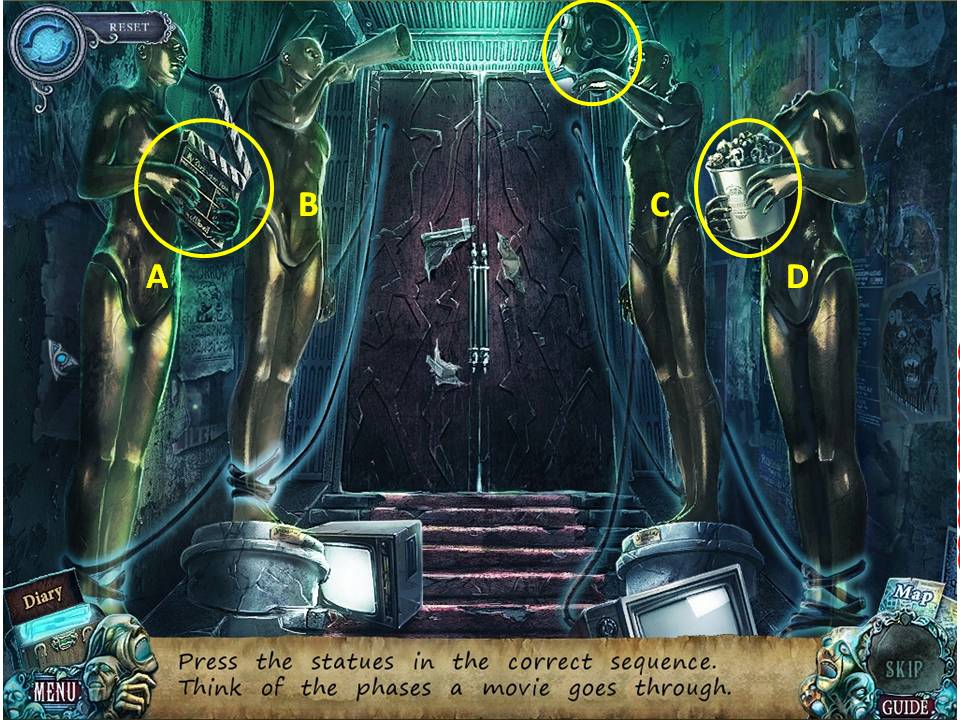
- Assuming the figures on the left are labeled A and B (beginning with the one farthest from the door) and the ones on the right are C and D, place the CAMERA in figure D’s hand and the CLAPPERBOARD in figure A’s hands.
- Then click the figures in the following sequence: B, C, A, D.
- Go into the movie set.