
Botanica: Earthbound: Chapter Five: Volcano
Our Botanica: Earthbound Walkthrough has been lovingly crafted to help you get the most out of this beautifully exotic hidden object adventure game. We've made sure to include carefully written instructions, detailing each step of your journey, as well as amazing custom marked screenshots and puzzle solutions to help you traverse the dangerous lands of Botanica and make your way back home to Earth!

- Select the claw crab to collect the 1/3 edible flowers.
- Collect the 1/5 cylinders.
- Move down the ladder.
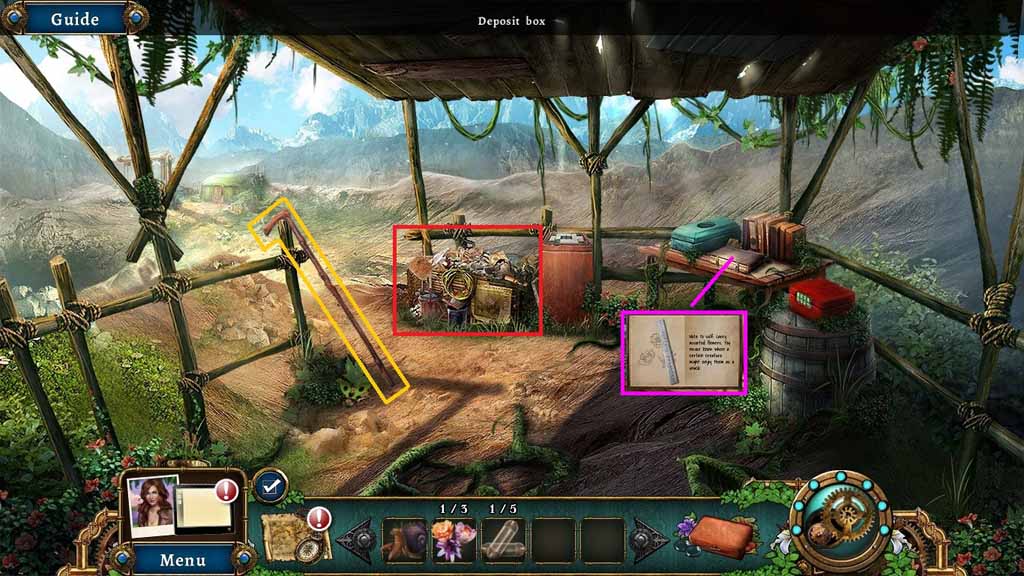
- Click the book and flip the pages to collect the metal ruler.
- Collect the walking stick.
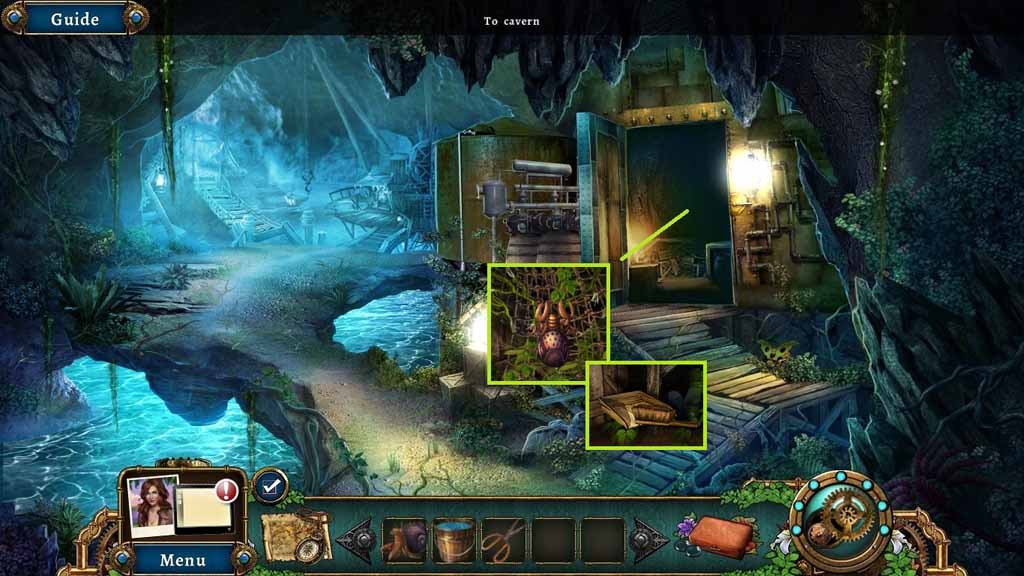
- Zoom into the bin to trigger a hidden objects area.

- Find the listed items.
- Select the glove and place it with the other glove; collect the pair of gloves.
- Select the boot and place it with the other boot; collect the pair of boots.
- Select the shear half and attach it to the other half; collect the shears.
- Collect the 1/4 snake tiles.
- Move up the path.

- Collect the 2/4 snake tiles.
- Select the claw crab to collect the 2/3 edible flowers.
- Collect the 3/4 snake tiles.
- Attempt to enter the hut.
- Move back two times.
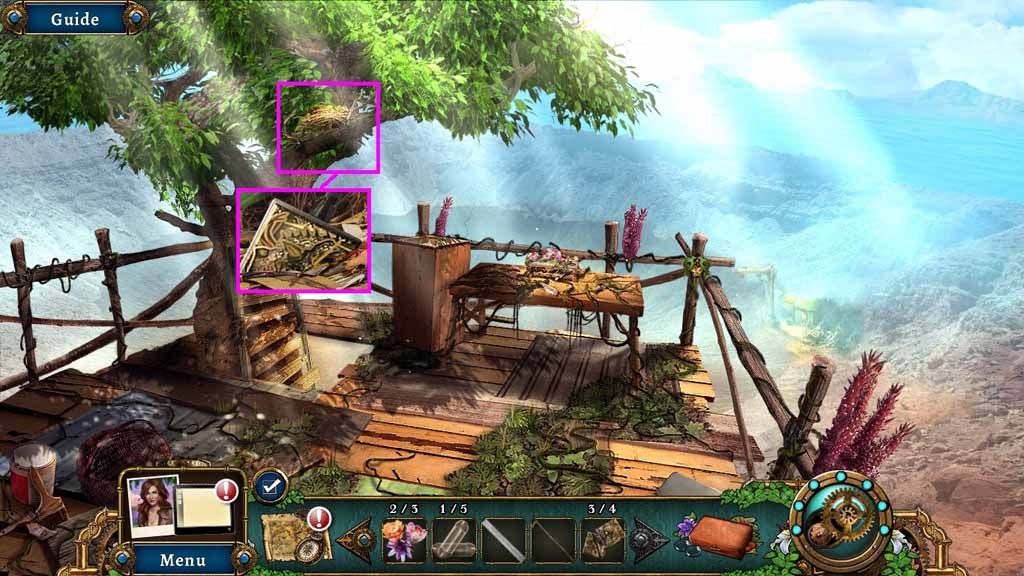
- Select the walking stick to dislodge the nest.
- Collect the 4/4 snake tiles.
- Move down the ladder.
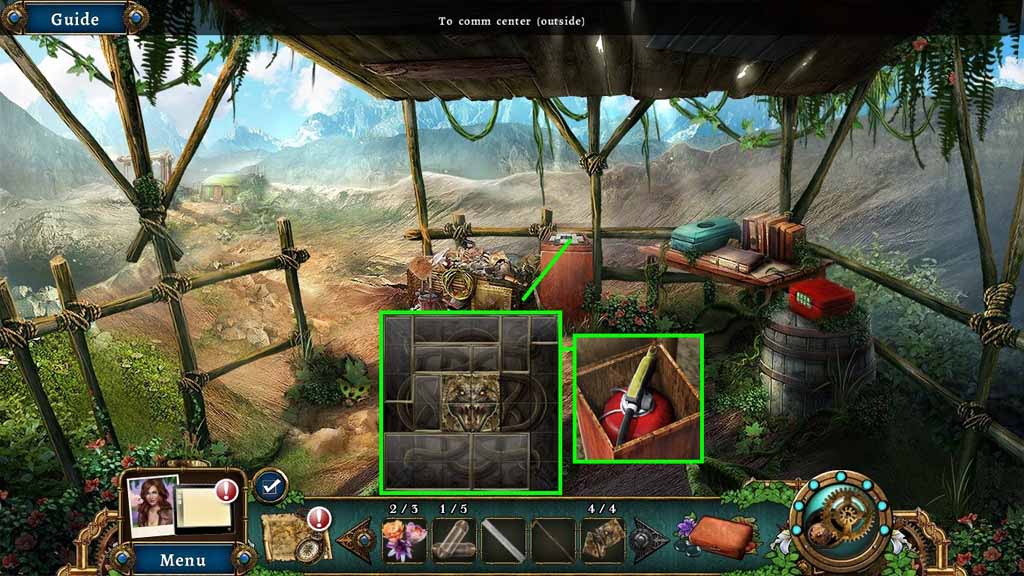
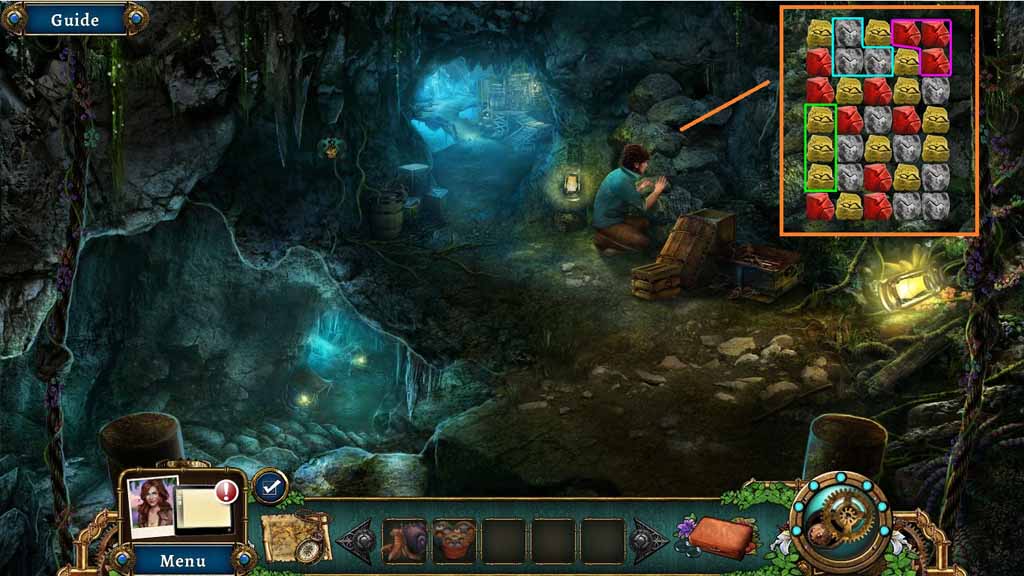
- Insert the four snake tiles into the pedestal to trigger a puzzle.
- Solve the puzzle by completing the image.
- Collect the fire extinguisher.
- Move up the path.
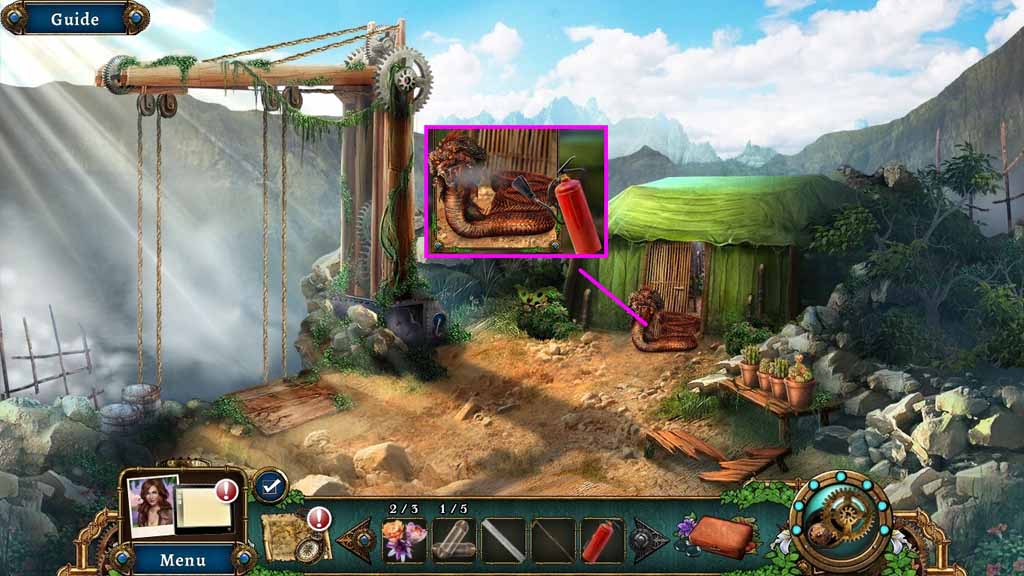
- Select the fire extinguisher to use on the creature.
- Move ahead.
- Collect the recipe.
- Select the claw crab to select the 3/3 edible flowers.
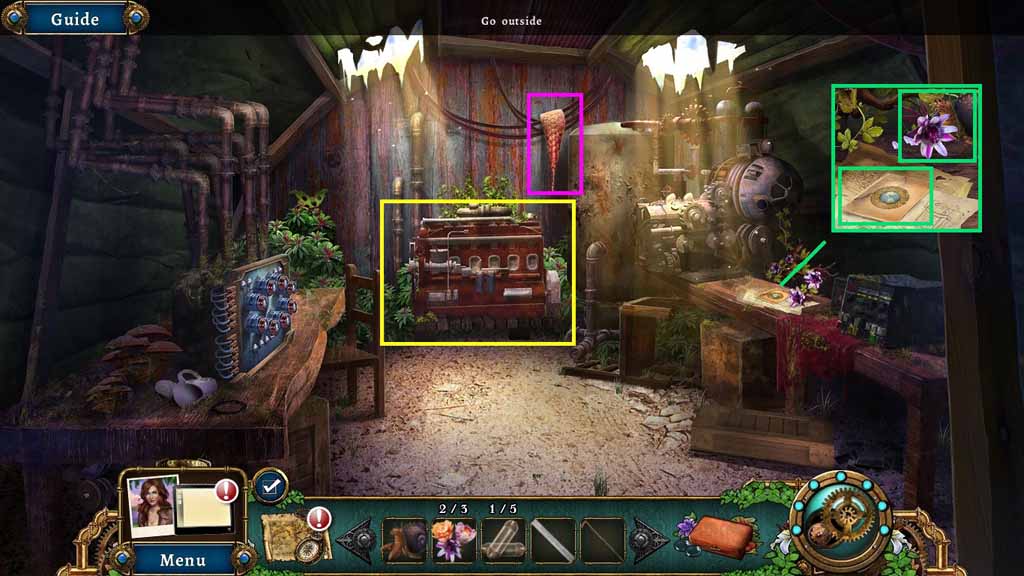
- Select the walking stick to use on the machine.
- Select the metal ruler to scrape the moss three times.
- Collect the snakeskin.
- Move to the Lookout post 2 F.
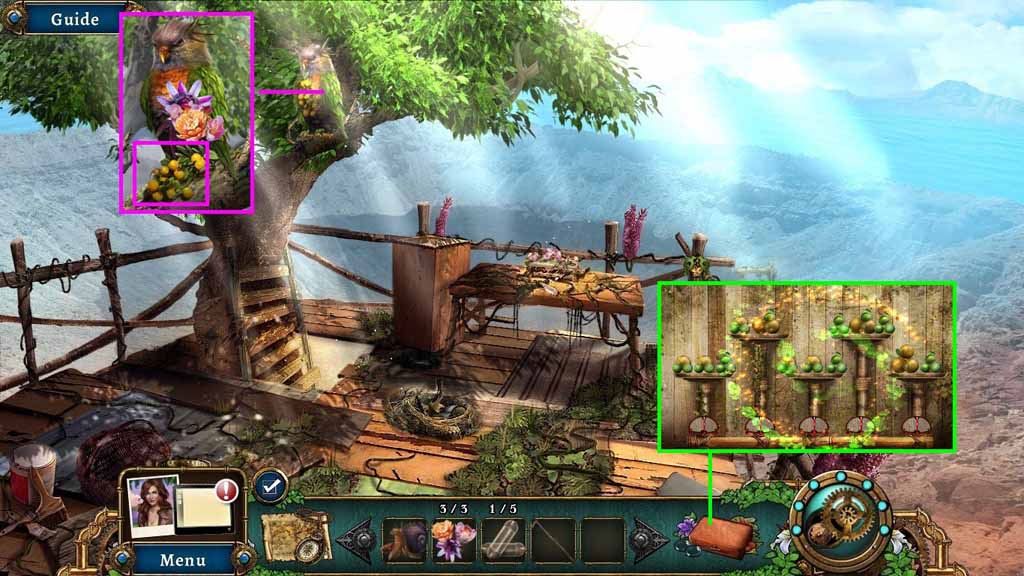
- Give the horned Lorikeet the three edible flowers.
- Select the walking stick to collect the citrus bunch.
- Click the botanist’s kit to trigger a puzzle.
- Solve the puzzle by balancing the fruit on the scale.
- Collect the rust remover.
- Move inside the Comm. Center.
- Select the rust remover to use on the engine.
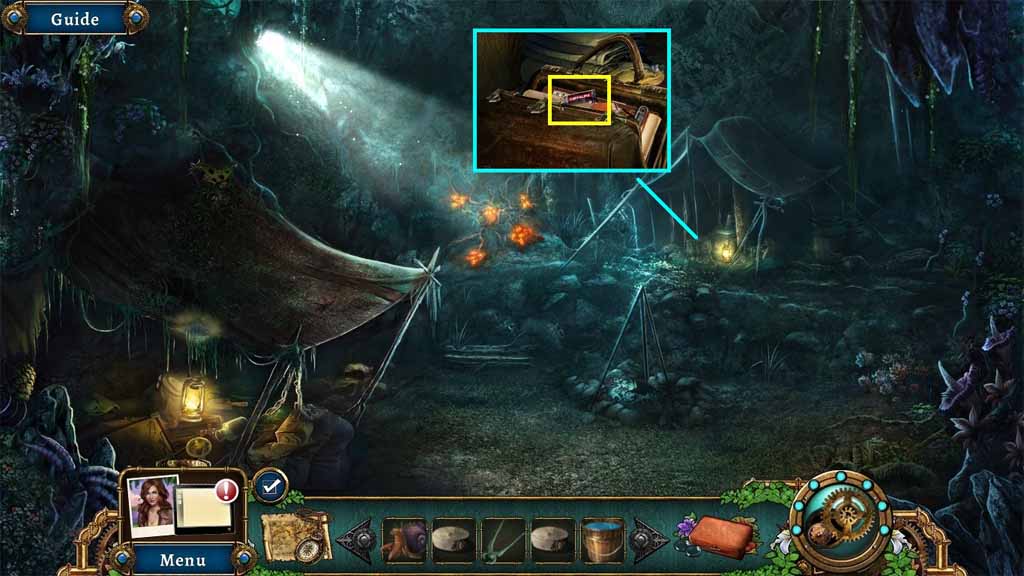
- Collect the aqueux logo.
- Move back two times.
![]()
- Insert the aqueux logo into the toolbox and click the lid.
- Collect the wrench set.
- Move inside the Comm. Center.
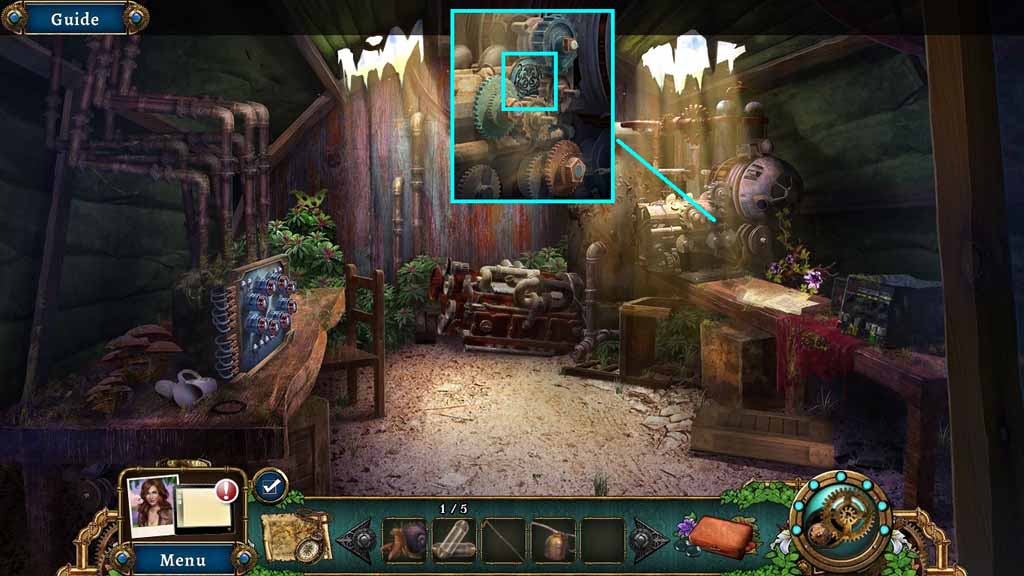
- Select the wrench set to remove all three nuts.
- Collect the three gears.
- Move back once.
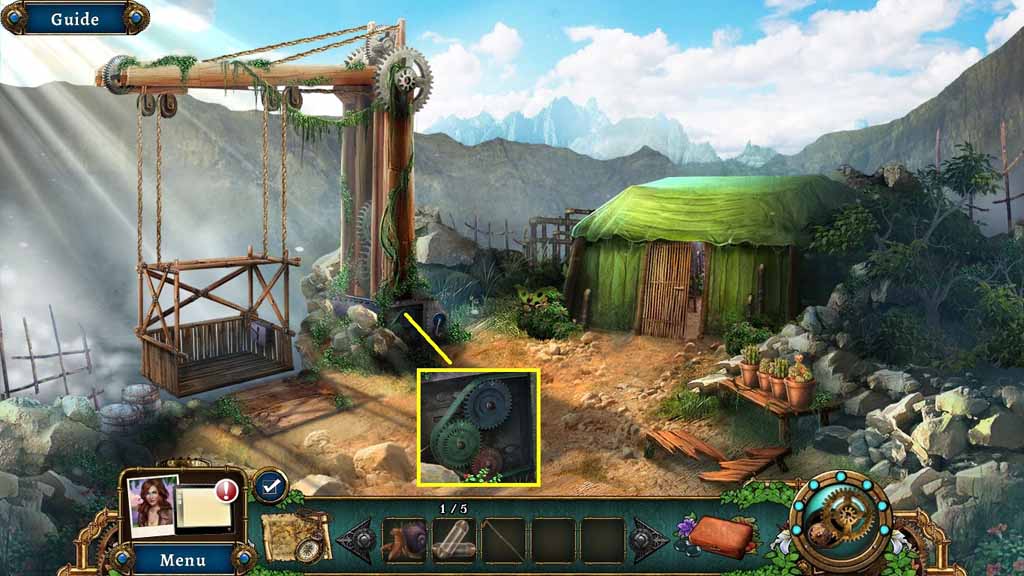
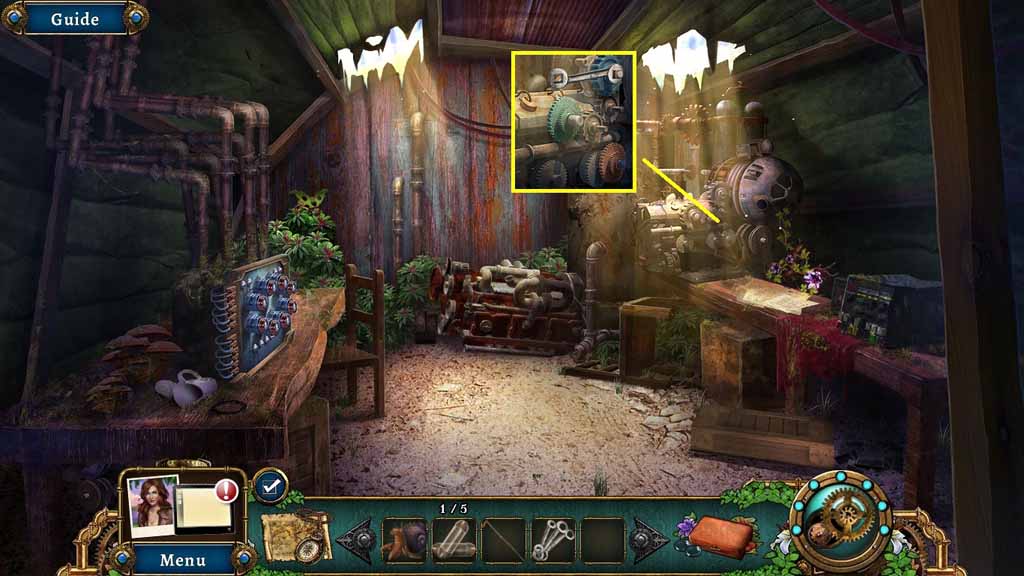
- Click the cover and insert the three gears.
- Click the handle.
- Move down the lift and into the Camp Site.
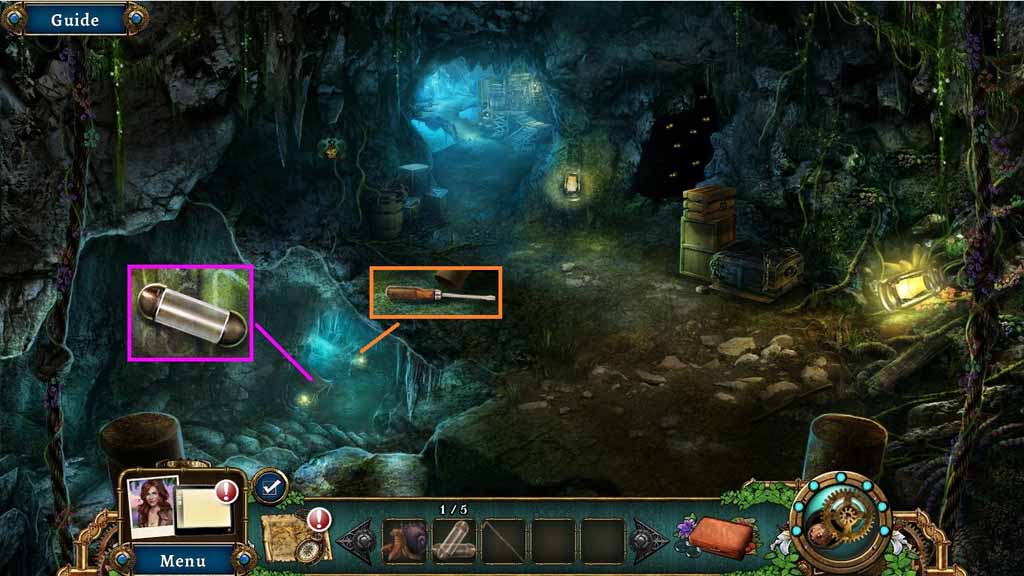
- Click the blanket and collect the 2/5 cylinders.
- Collect the screwdriver.
- Move back once and go forward two times.
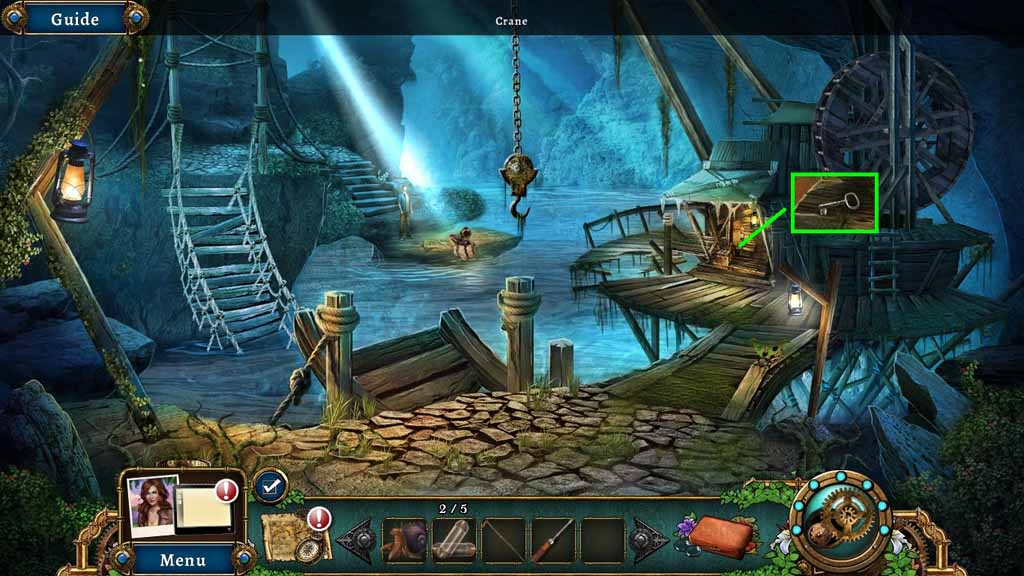
- Collect the key.
- Move inside the Comm. Center.
- Select the screwdriver to remove the screws and collect the lever.
- Move to the Cavern.

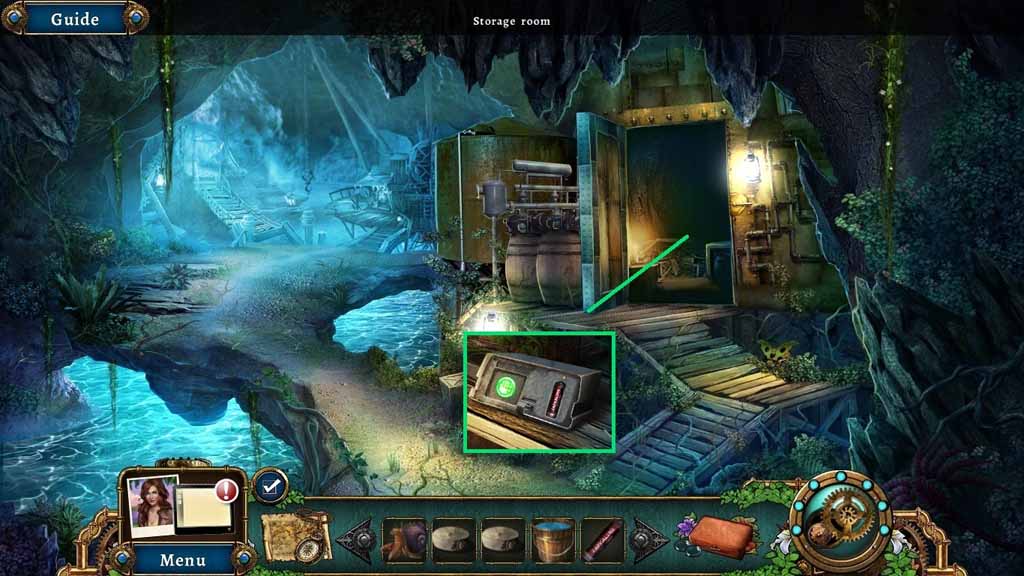
- Insert the key into the padlock.
- Click the lid and collect the 3/5 cylinders and the control panel buttons.
- Click the crate and collect the 4/5 cylinders.
- Collect the dial.
- Move to the Cliff.
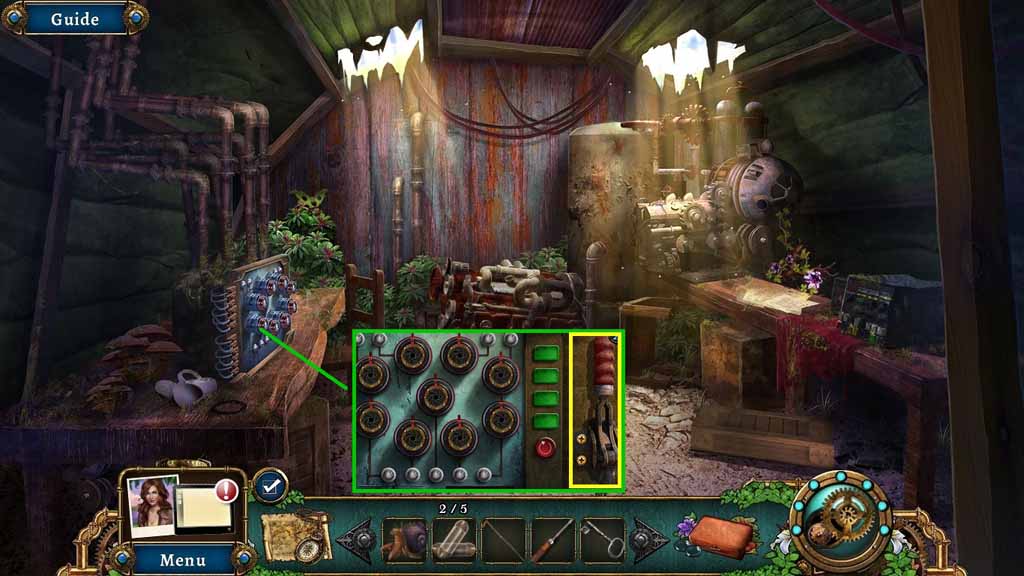
- Place the control panel buttons and the lever onto the mechanism.
- Click the right lever.
- Collect the 5/5 cylinders.
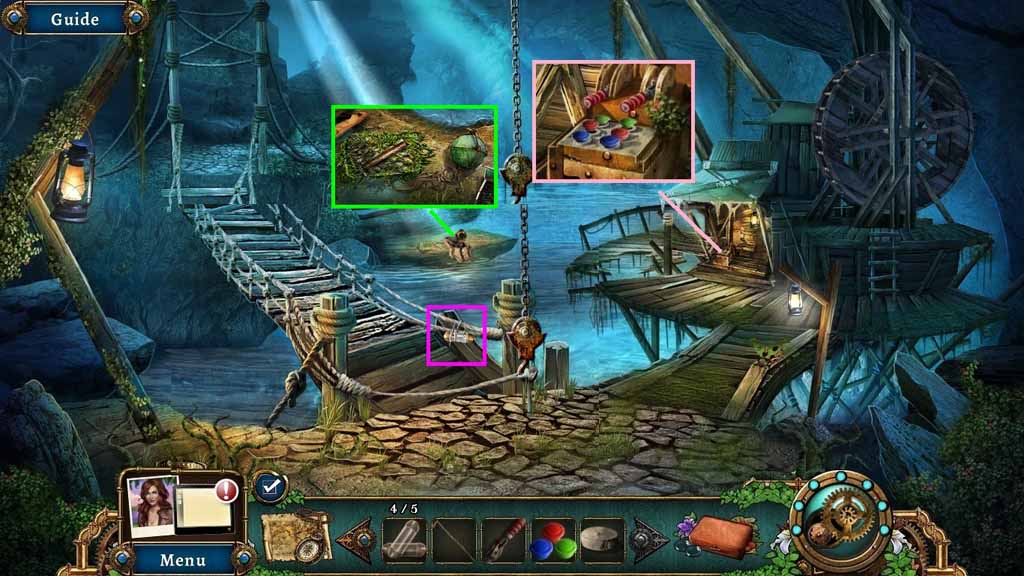
- Select the walking stick to collect the buoy.
- Select the claw crab to use on the moss and collect the pipe and pliers.
- Move back once.
- Insert the pipe into the pipes and collect the 2nd dial.
- Click the broken cylinders and replace them with the five cylinders.
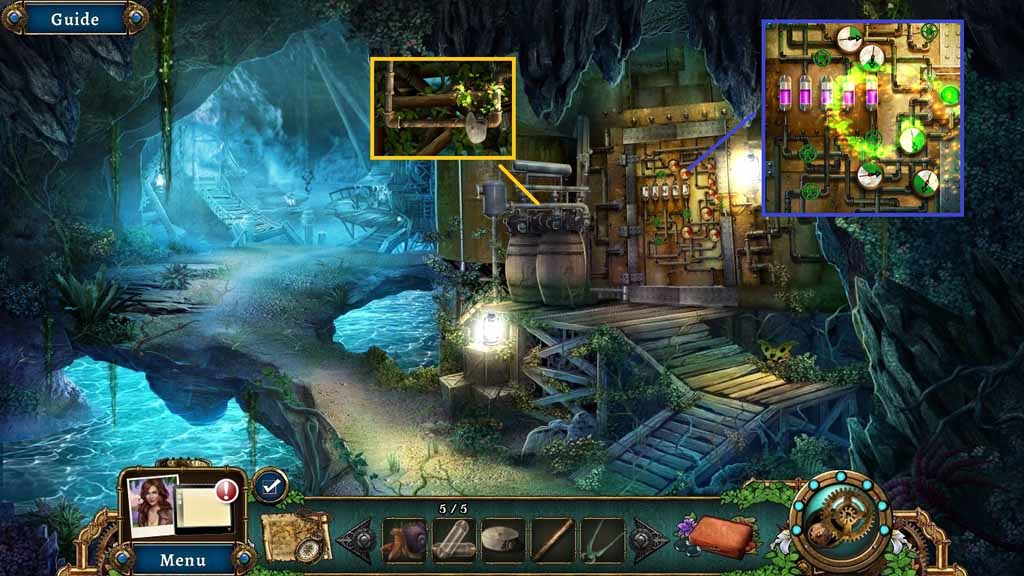
- Click any valve to trigger a puzzle.
- Solve the puzzle by feeling the vials correctly and setting the dials to green.
- Collect the bucket.
- Move to the Cliff.
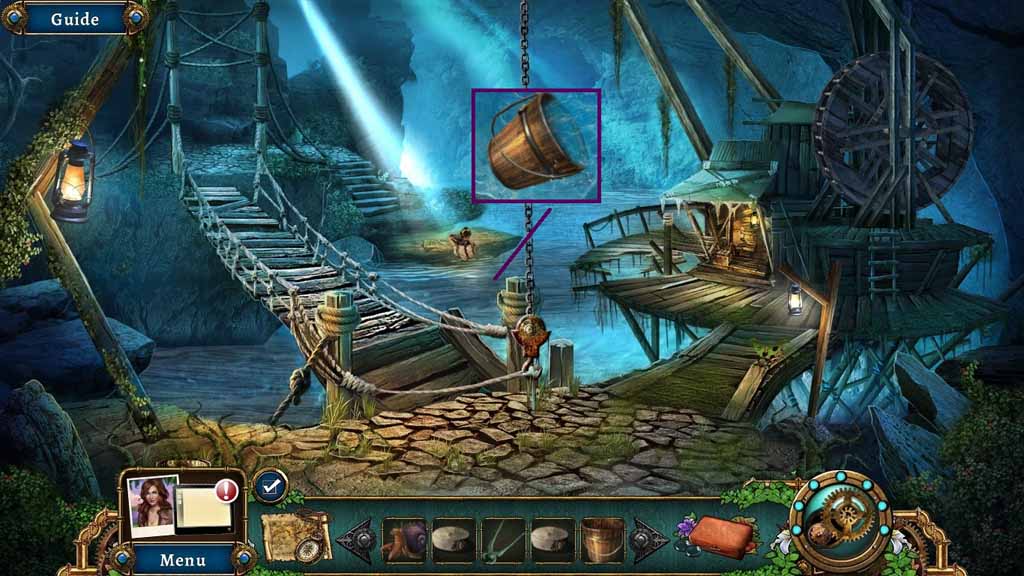
- Dip the bucket into the water and collect the filled bucket.
- Move to the campsite.
- Use the pliers on the bag and click it open.
- Collect the dead battery.
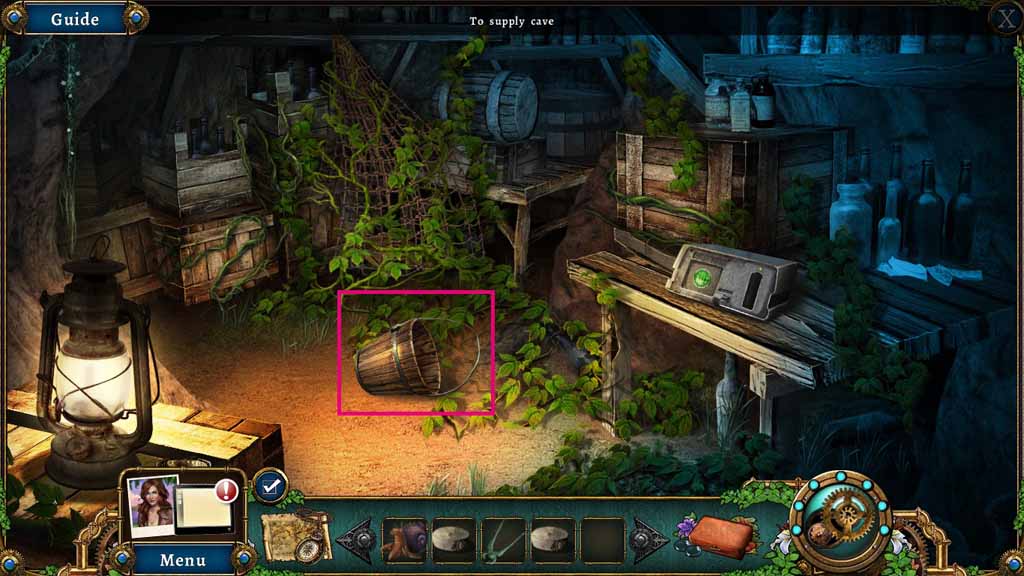
- Move to the supply cave and zoom into the storage room.
- Insert the dead battery into the charger.
- Collect the charged battery.
- Move inside the Comm. Center.
- Speak to Ian.
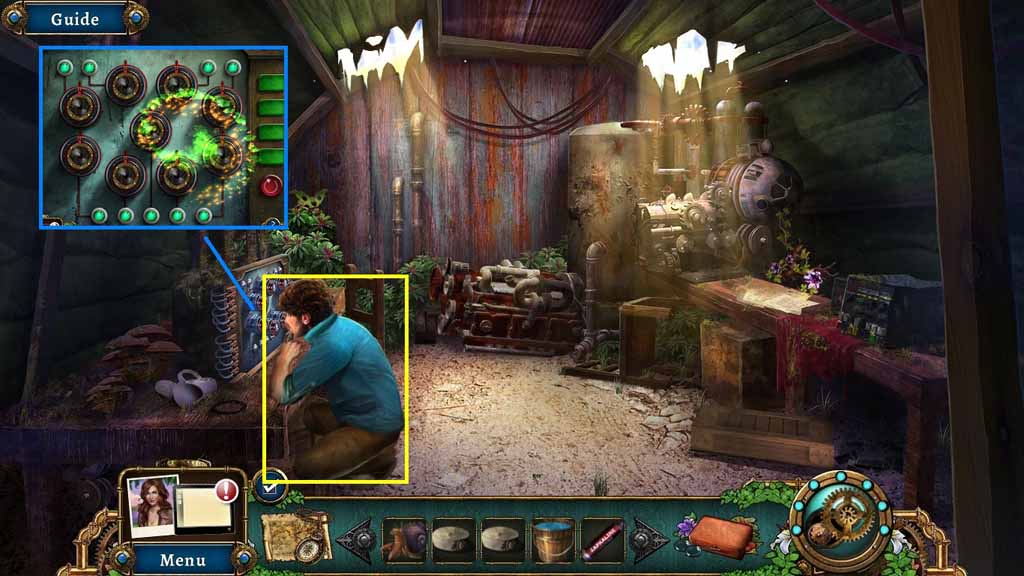
- Insert the charged battery into the slot to trigger a puzzle.
- Solve the puzzle by rotating the dials so they all point up.
- Collect the third dial.
- Click the 2 red cameras.
- Move to Lookout post 1F.
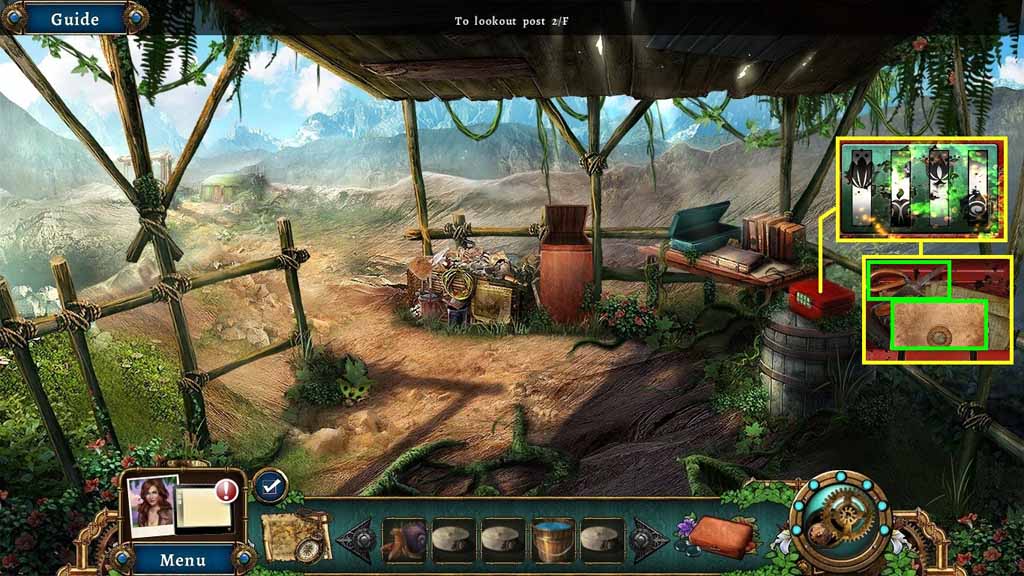
- Attach the three dials onto the box to trigger a puzzle.
- Solve the puzzle by rotating the dials to complete the image.
- Collect the recipe and the shears.
- Move to the supply cave and examine the storage room.
- Select the claw crab and the shears to cut the net and collect the wick.
- Collect the brush and dustpan.
- Move to the campsite.

- Select the filled bucket and the claw crab to use on the lava fruit.
- Collect the lava fruit.
- Use the brush and dustpan to collect the ashes.
- Click the botanist kit to trigger a puzzle.
- Solve the puzzle by placing the ingredients correctly.
- Collect the plant bombs.
- Move back once.
- Place the plant bombs onto the rock wall.
- Move ahead.