
Botanica: Earthbound: Chapter One: Shipwreck Exploration
Our Botanica: Earthbound Walkthrough has been lovingly crafted to help you get the most out of this beautifully exotic hidden object adventure game. We've made sure to include carefully written instructions, detailing each step of your journey, as well as amazing custom marked screenshots and puzzle solutions to help you traverse the dangerous lands of Botanica and make your way back home to Earth!
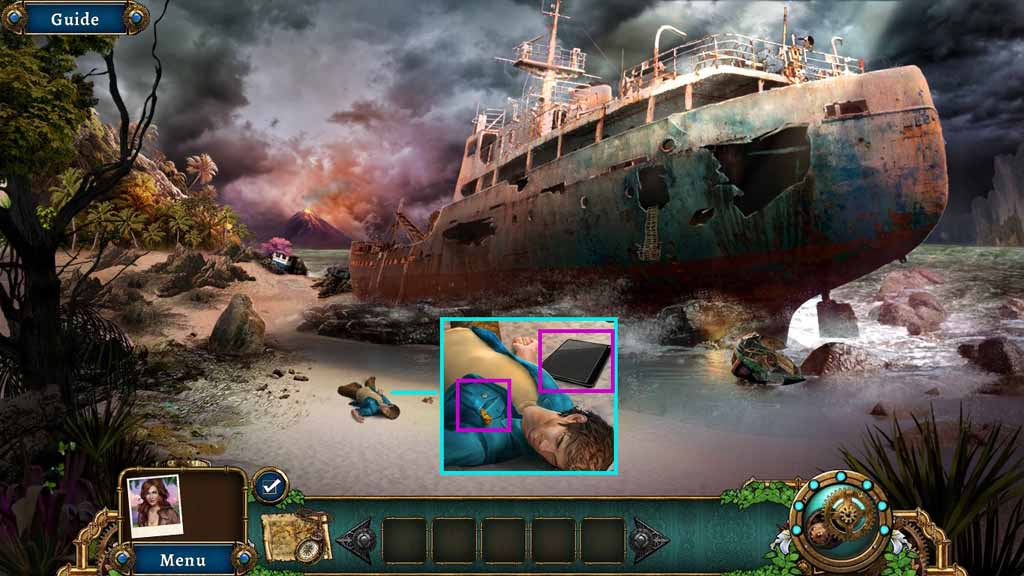
- Collect the Journal.
- Click the pocket and collect the screwdriver.
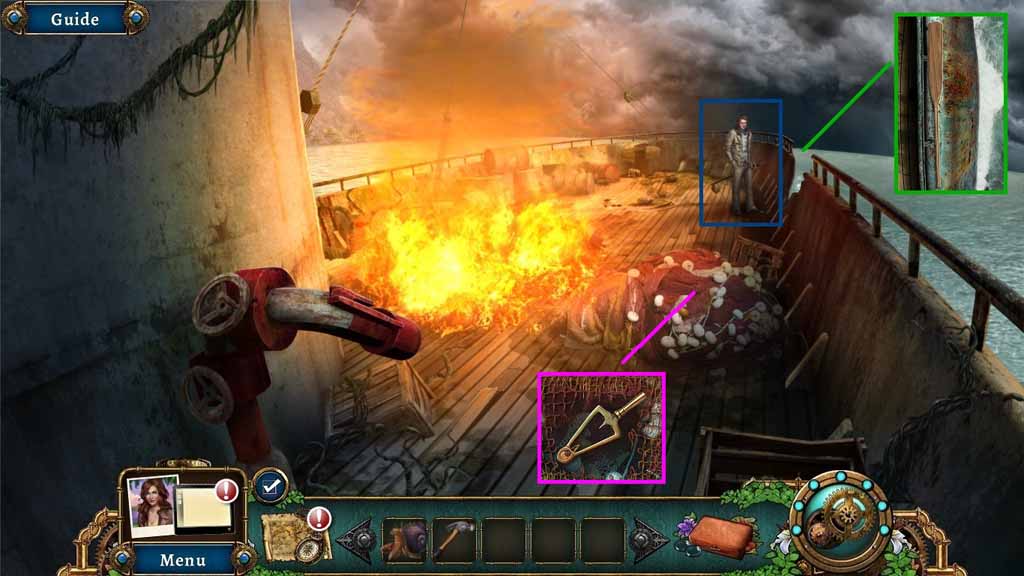
- Speak to Ian.
- Move ahead.
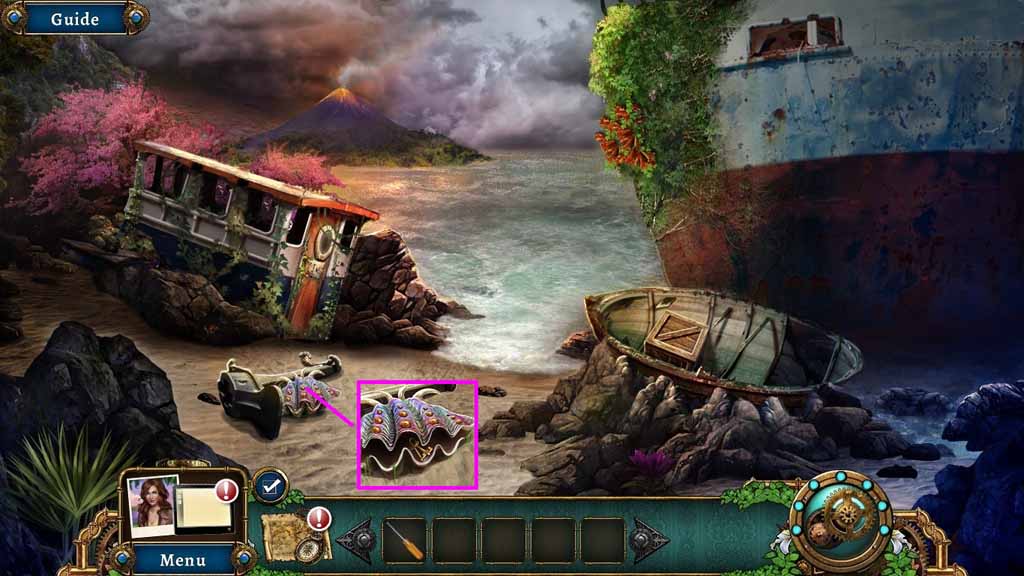
- Select the screwdriver to open the clam and collect the key.
- Move back one time.
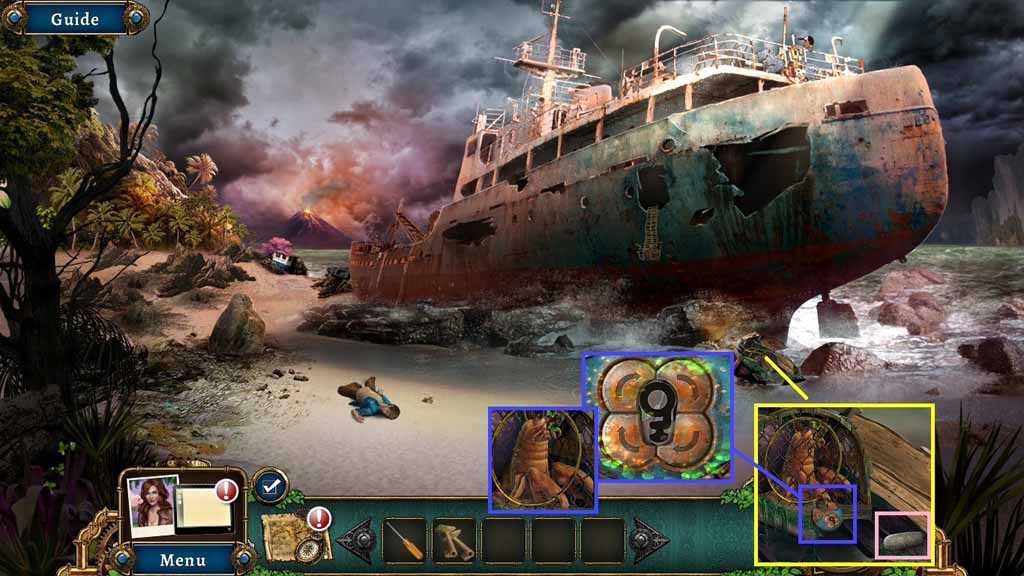
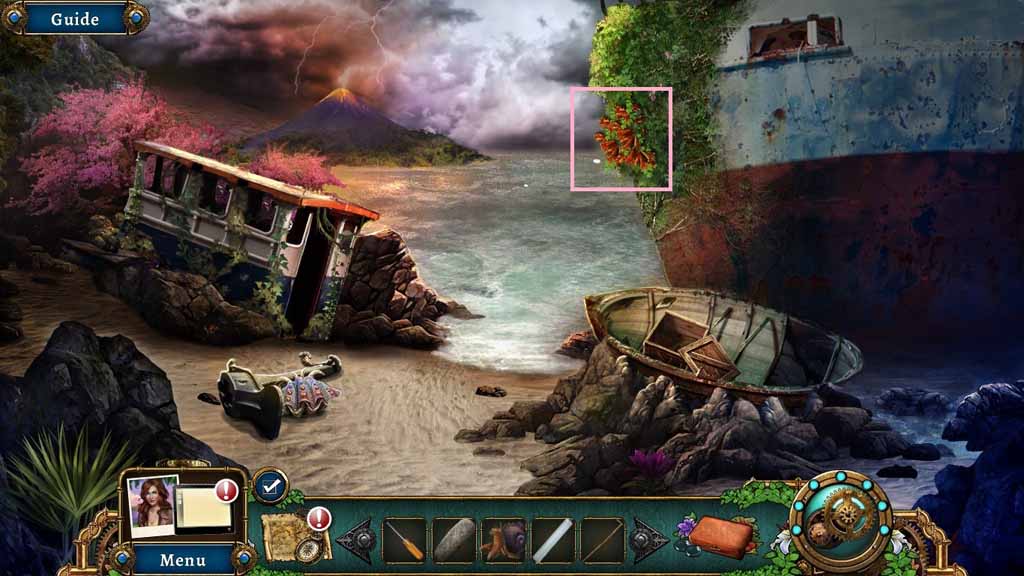
- Collect the stone.
- Insert the key into the lock to trigger a puzzle.
- Solve the puzzle by creating the complete keyhole.
- Collect the claw crab.
- Move ahead.
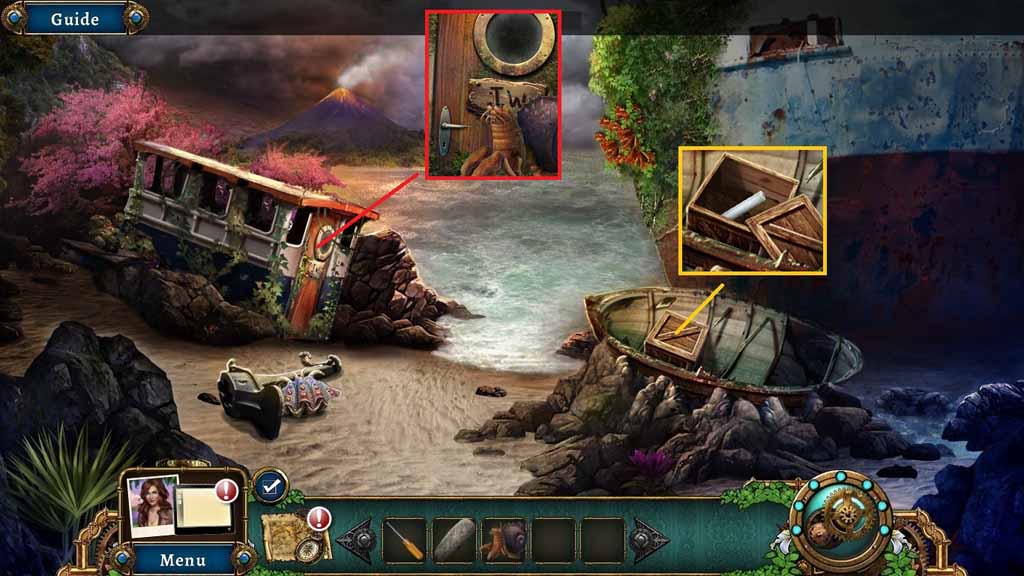
- Click the crate and collect the candle.
- Select the claw crab to remove the vines.
- Click the door handle to trigger a hidden objects area.
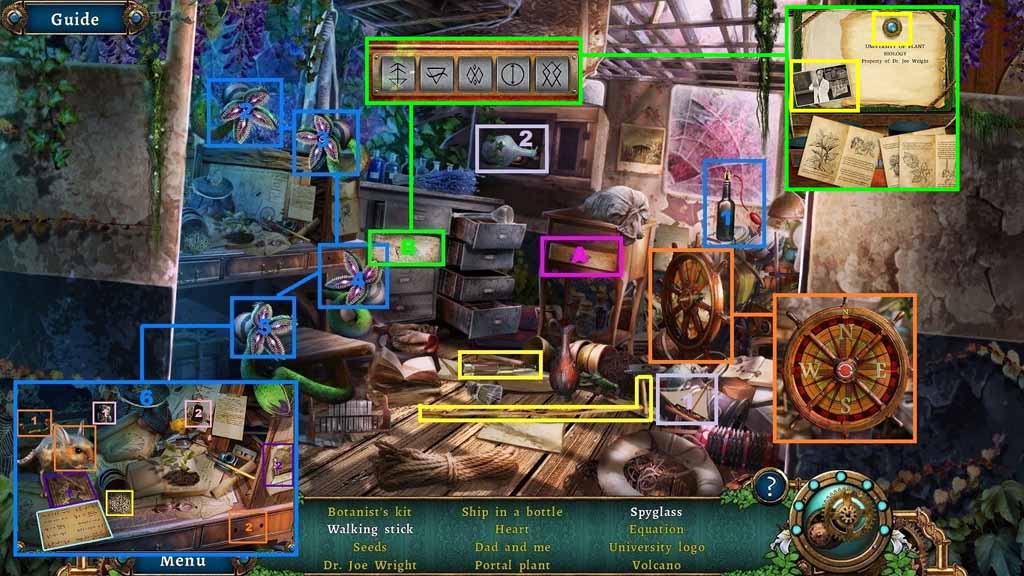
- Find the listed items.
- Select the pesticide and use it on the carnivorous plants; collect the equation the seeds and the cameo part.
- Insert the cameo part into the cameo; collect the heart.
- Select the drawer handle and attach it onto the drawer; collect the mushrooms and feed it to the animal.
- Click the book and collect the photo half.
- Attach the photo half to the other half; collect the picture of dad and me.
- Click drawer A and click the papers to collect the portal plant; click the papers again and collect the volcano.
- Select the ship and place it into the bottle; collect the ship in a bottle.
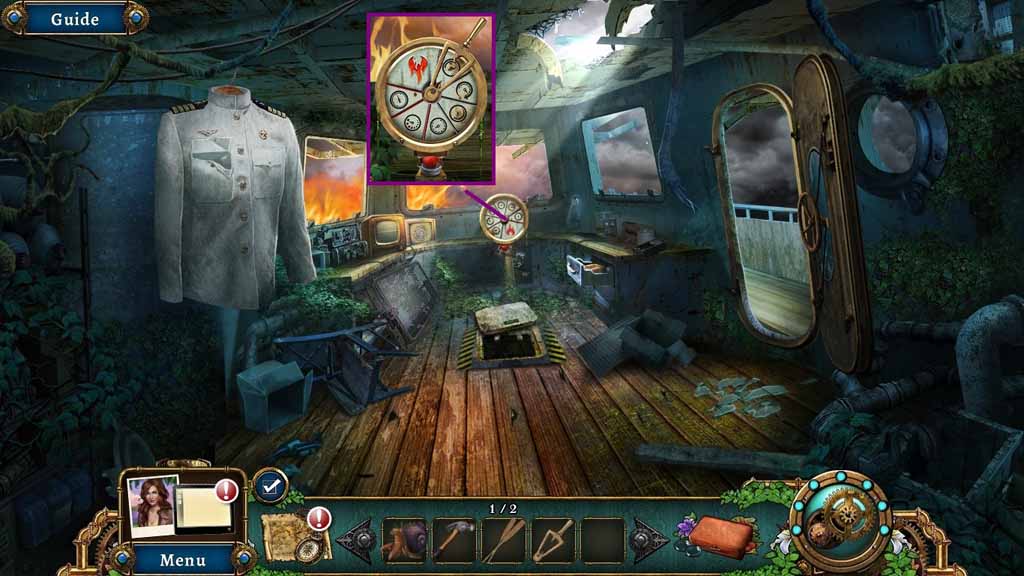
- Click the ship’s steering wheel and align it correctly to reveal and collect the code beneath it.
- Use the code to unlock the box in drawer B; move the papers aside and collect the University logo and Dr. Joe Wright.
- Click drawer B once more to collect the botanist’s kit.
- Collect the walking stick.
- Select the walking stick to collect the trumpet flowers.
- Move back once.
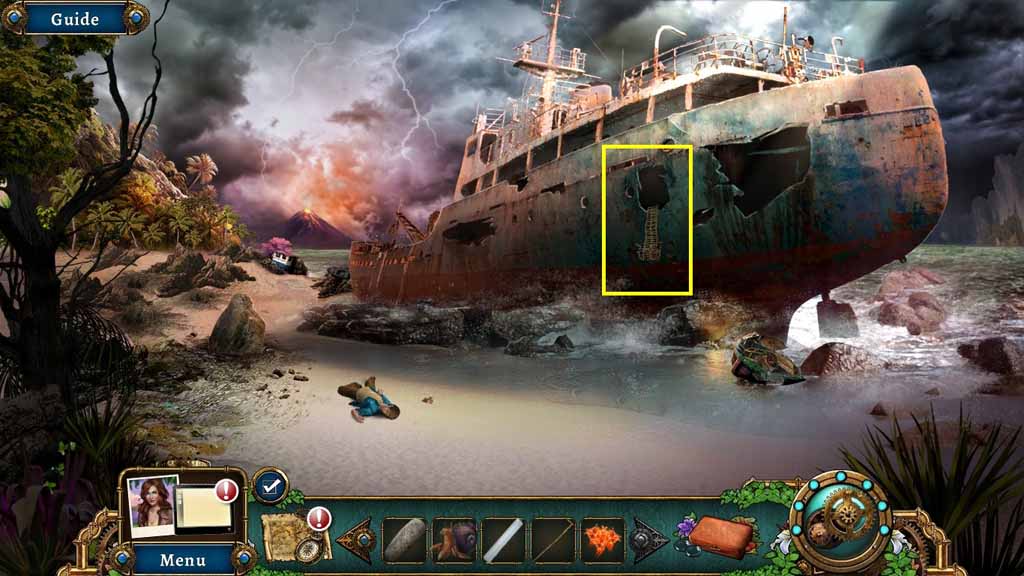
- Select the walking stick to pull down the ladder.
- Move up the ladder.
- Collect the wood and knob.
- Click the poster two times to collect the recipe.
- Move to the right.

- Select the walking stick to tap the bag.
- Select the claw crab to open the bag and collect the lighter.
- Click the panels and collect the circle patch and the empty flask.
- Select the trumpet flowers and the stone to use on the mortar.
- Collect the ground trumpet flowers.
- Move to the back of the ship.

- Dip the empty flask into the water and collect the saltwater.
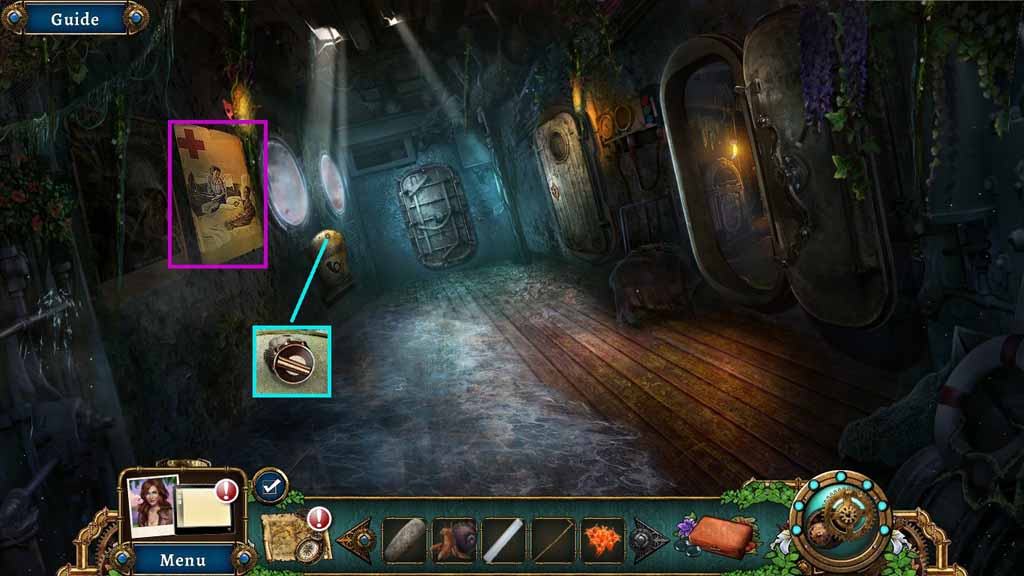
- Move to the Ward room.
- Select the candle and place it into the holder.
- Select the lighter to ignite it.
- Place the saltwater onto the burner and collect the salt.
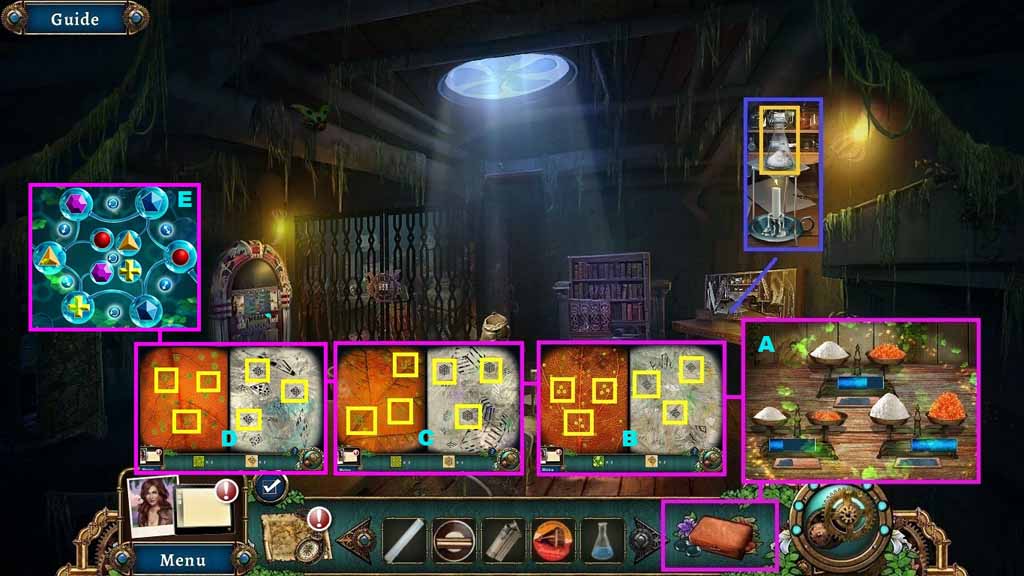
- Click the botanist kit to trigger a puzzle.
- Solve the puzzle by placing the ingredients based on the clues.
- Then find the correct patterns and place the symbols into the correct area.
- Collect the smelling salts.
- Move back 2 times.
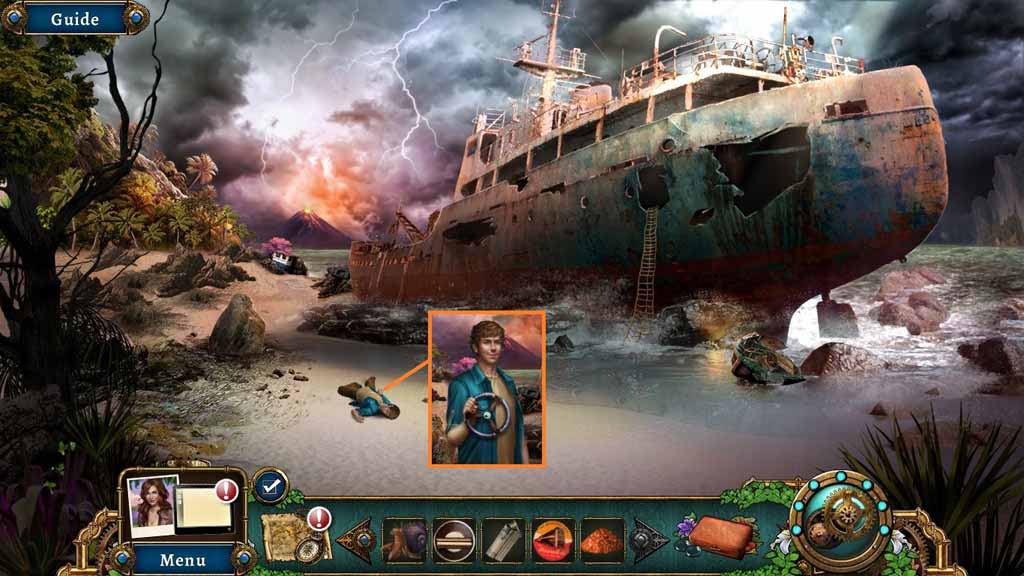
- Select the smelling salts to use on Ian.
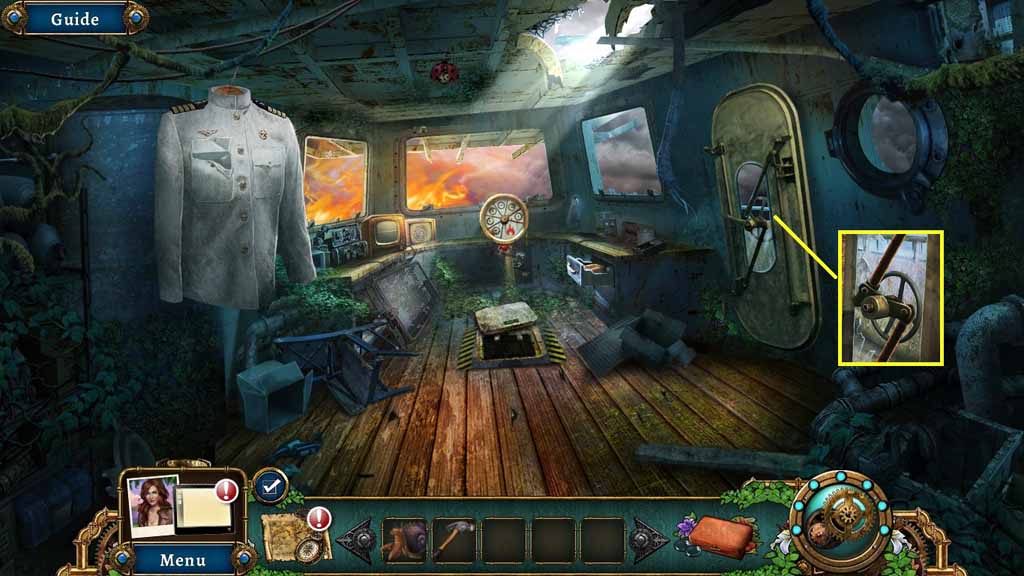
- Collect the wheel.
- Move into the ship.
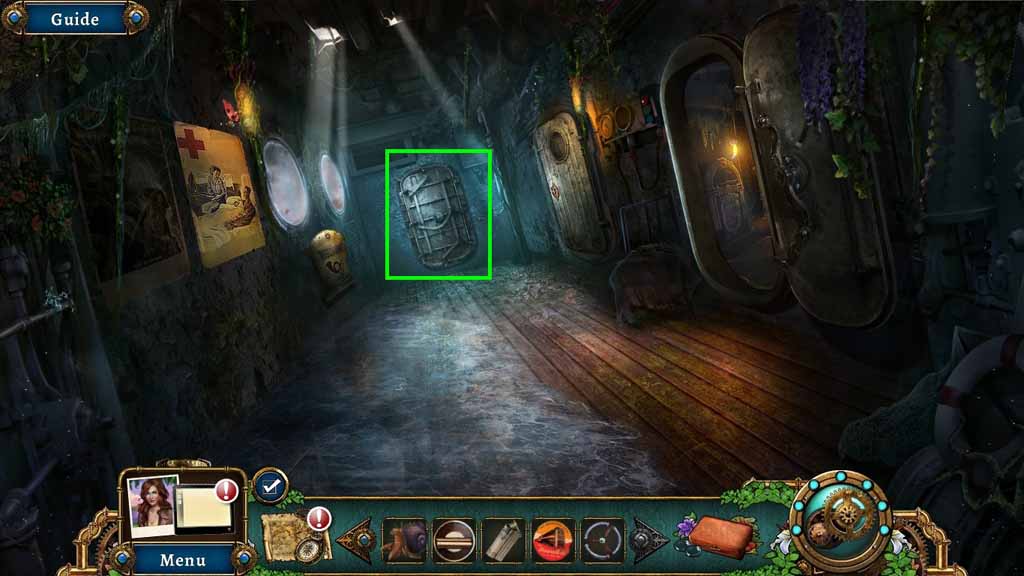
- Attach the wheel onto the door and click it once.
- Move ahead.

- Click the pocket and collect the cabin key.
- Collect the triangle patch.
- Move back one time.
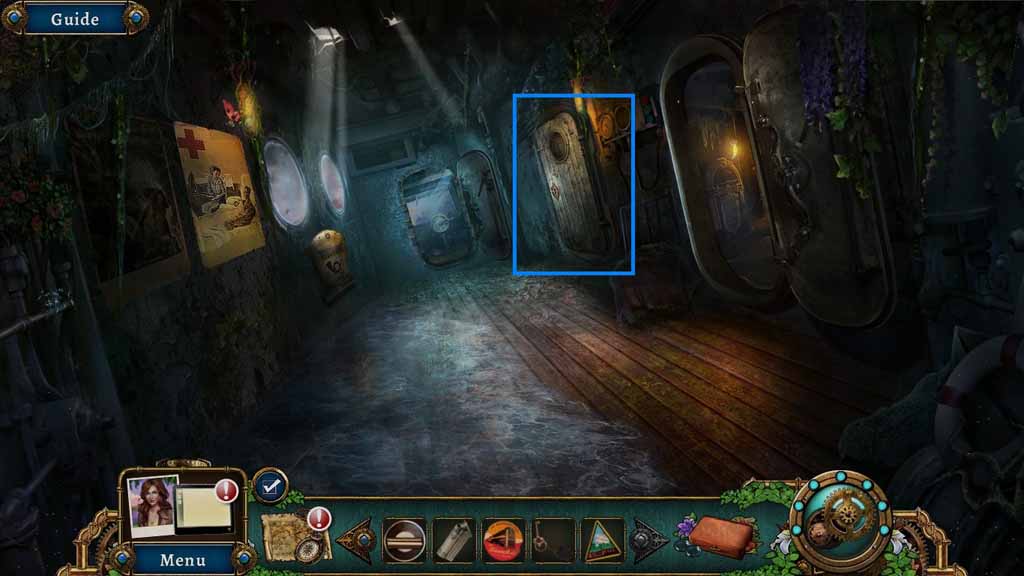
- Insert the cabin key into the lock and enter the Captain’s Cabin.
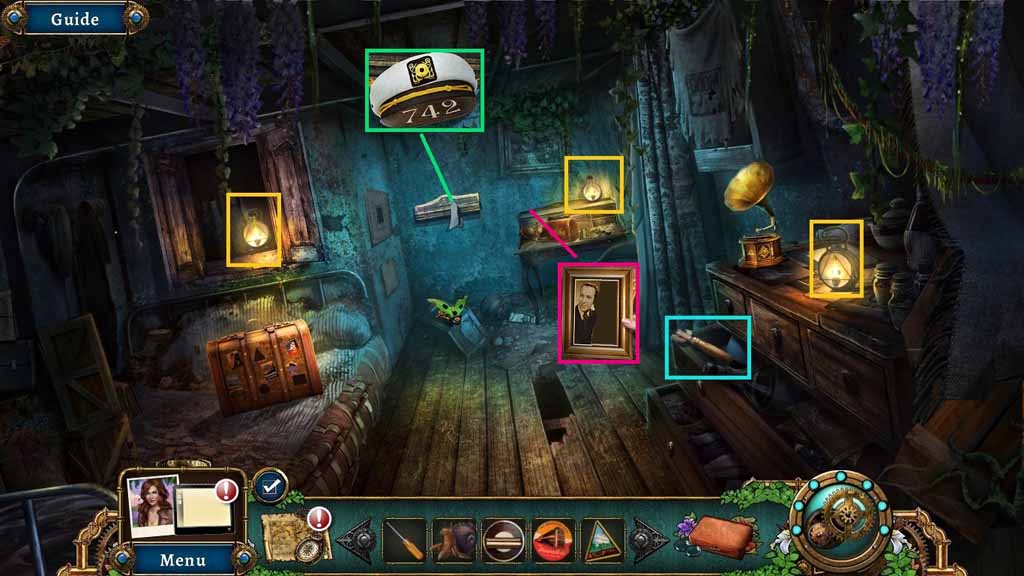
- Select the lighter to ignite the lanterns.
- Collect the can opener.
- Zoom in and collect the photograph.
- Click the hat to collect the code.
- Move to the Ward room.
- Use the code on the lock: 7 4 2 to trigger a hidden objects area.

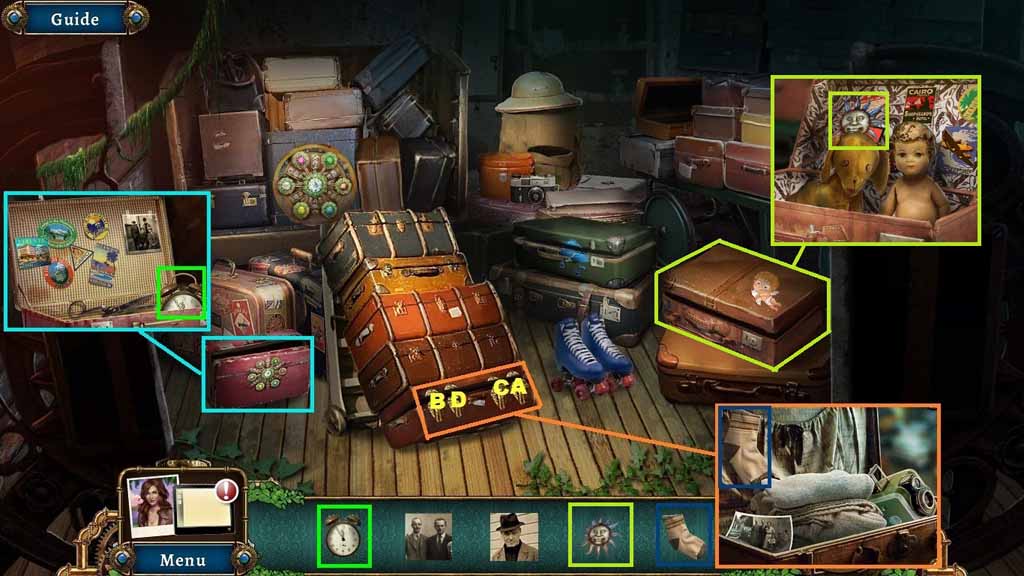
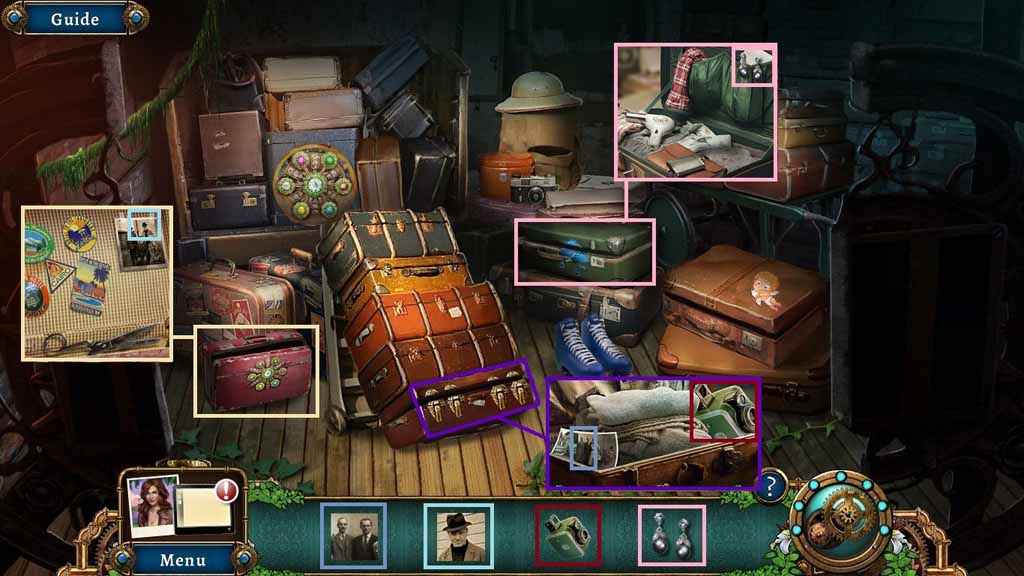
- Find the items shown.
- Click the pocket and reveal the thunderbolt.
- Place the thunderbolt onto the cloud; collect the gloves and place them together to collect the pair of gloves; place the earring halves together to collect the pair of earrings.
- Collect the color wheel parts and insert them into the circular groove.
- Click the suitcase to reveal the final piece of the color wheel and insert it into the space to reveal the key. Insert the key into the suitcase that has the hat on it.
- Click the Russian doll until the top hat is revealed and place it onto the teddy; collect the teddy and the sun.
- Use the completed color wheel pattern as a guide to unlock the suitcase with the color wheel lock; collect the postcard, the alarm clock and the picture of the man in the hat.
- Select the briefcase lock and place them onto the briefcase; then click them in the correct order to reveal and collect the sock, the camera and the picture of the 2 men.
- Collect the square patch.
- Move to the Comm Room.
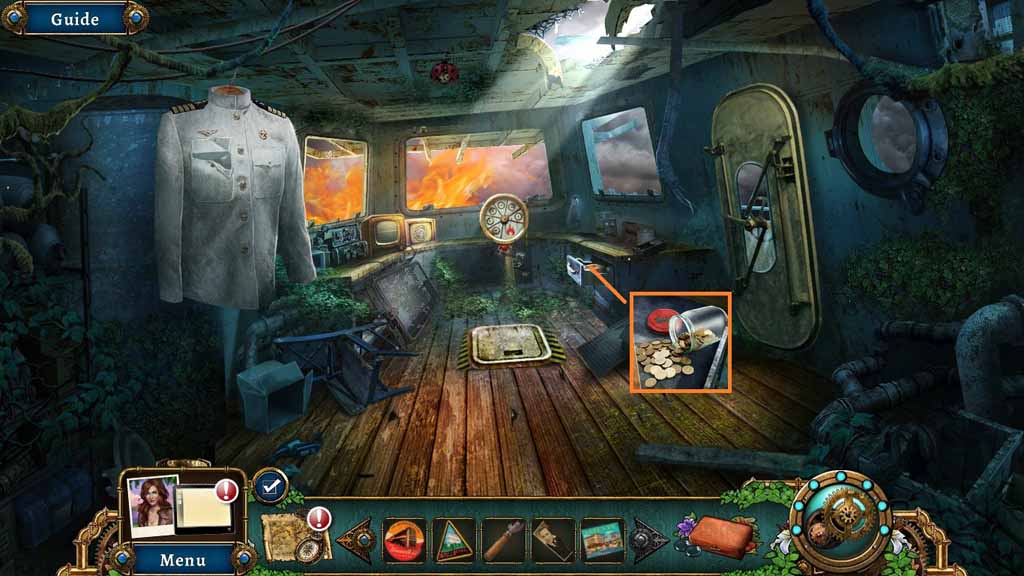
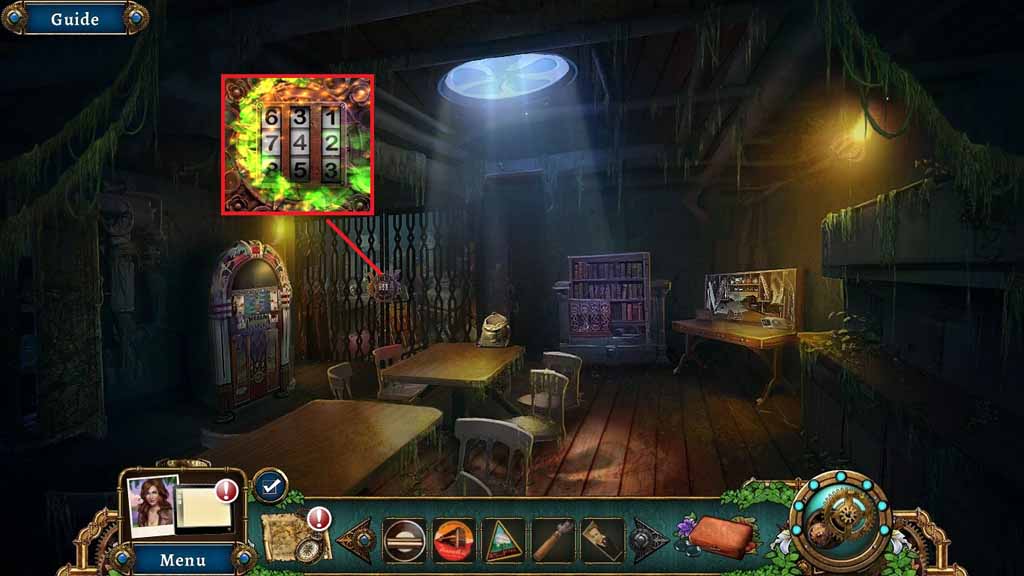
- Select the can opener to open the jar and collect a coin.
- Move to the Ward room.

- Insert the coin into the jukebox to trigger a puzzle.
- Solve the puzzle by moving the bars so that the blue is in the middle.
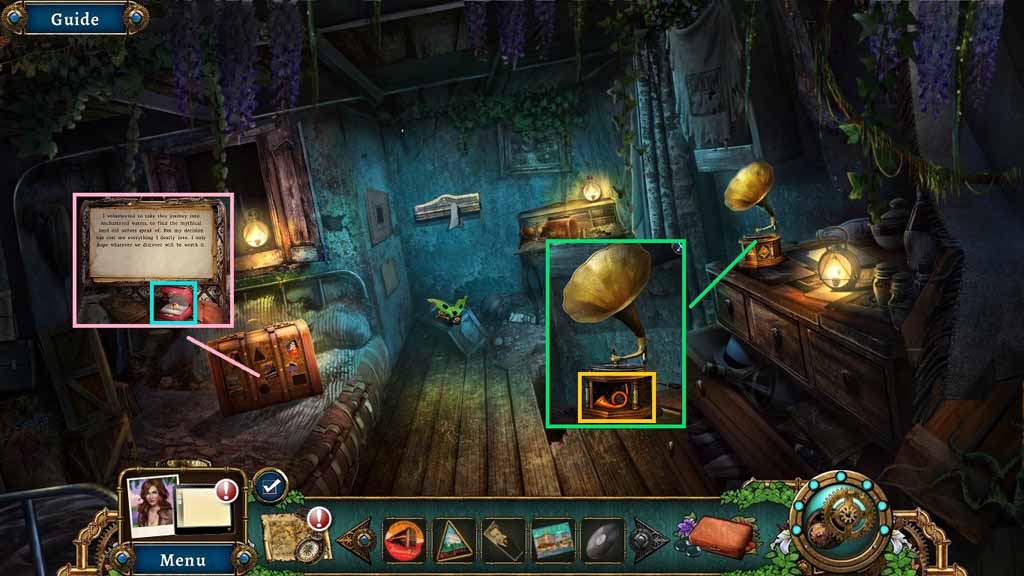
- Collect a record.
- Move to the Captain’s Cabin.
- Place the square, triangle and circle patches onto the suitcase.
- Click the box and collect the 1/2 wedding rings.
- Place the record onto the phonograph and collect the horn ornament.
- Move back once.

- Insert the horn ornament into the letterbox.
- Click the letter and collect the 2/2 wedding rings.
- Move to the Captain’s Cabin.
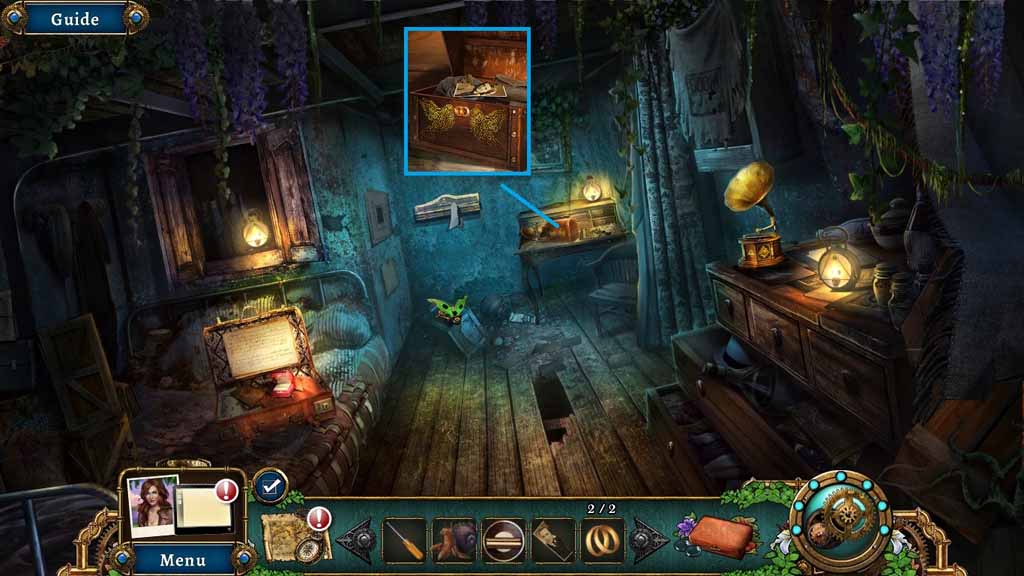
- Insert the two wedding rings into the chest and collect the second photograph.
- Move to the Comm. Room.

- Place the two photographs onto the box.
- Click the book and collect the microphone.
- Attach the wooden knob onto the monitor and the microphone onto the radio.
- Click the radio to trigger a puzzle.
- Solve the puzzle by setting the controls correctly.
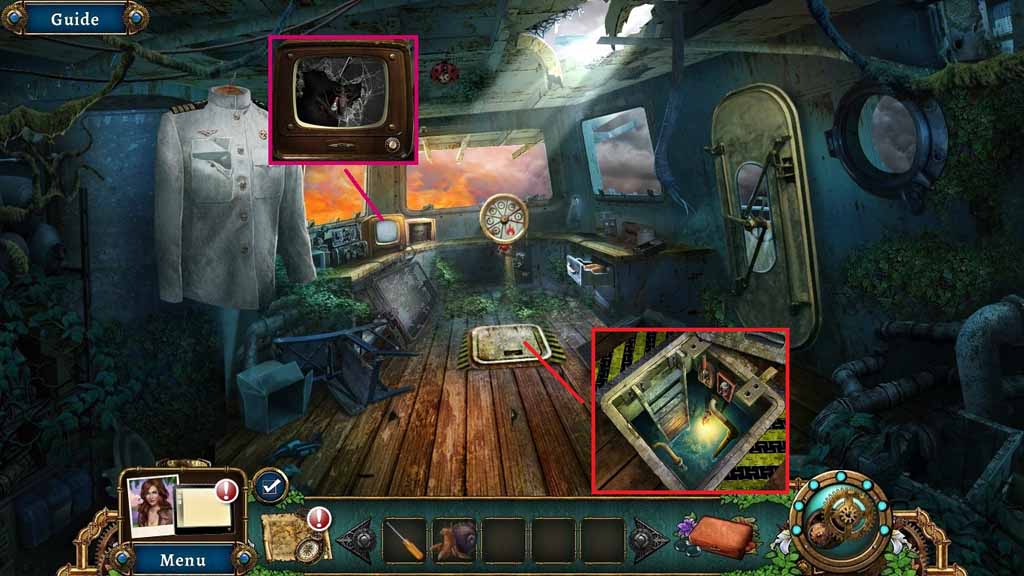
- Click the monitor knob and the screen; collect the fuse.
- Select the screwdriver to open the hatch and insert the fuse into the socket.
- Click the lever and zoom into the bottom of the hatch to trigger a hidden objects area.

- Select the baseball and place it into the glove; collect the baseball in glove.
- Select the air tube and attach it to the mask.
- Click the drawer to uncover and collect the binoculars, the pen and the knife; use the knife to slice open the net and use the mask to explore the area.
- Move the plants aside to uncover and collect the peacock, the coin, the button and the hammer.
- Collect the hammer.
- Select the hammer and use it to smash the glass.
- Click the wheel.
- Move to the Hallway.
- Click Gustav.
- Zoom over the edge and collect the 1/2 paddles.
- Select the claw crab to use three times on the net to collect the lever.
- Move back once.
- Insert the lever into the mechanism.
- Click the correct symbols that click the button.
- Move to the right.

- Select the claw crab to collect the waterproof resin.
- Collect the 2/2 paddles.
- Move to the Captain’s Cabin.

- Select the hammer to collect the nails.
- Move back two times.
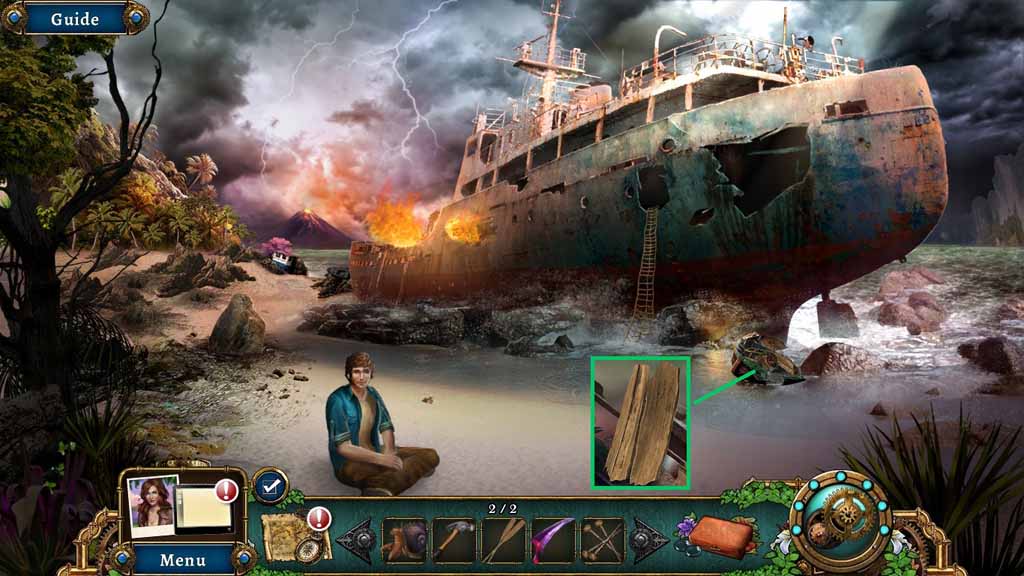
- Select the hammer to use on the boat and collect the wood planks.
- Move ahead.

- Select the wooden planks, the nails, the hammer, the waterproof resin and the two paddles to use on the boat.