
Azada: Elementa: Bonus Chapter
Rely on our Azada: Elementa Walkthrough to see you through this mystery as you journey through magical lands searching for the lost elements of Azada. Use our custom screenshots, detailed instructions, and puzzle solutions in order to rescue this troubled world and learn the truth behind what's really happening in the land of Azada.
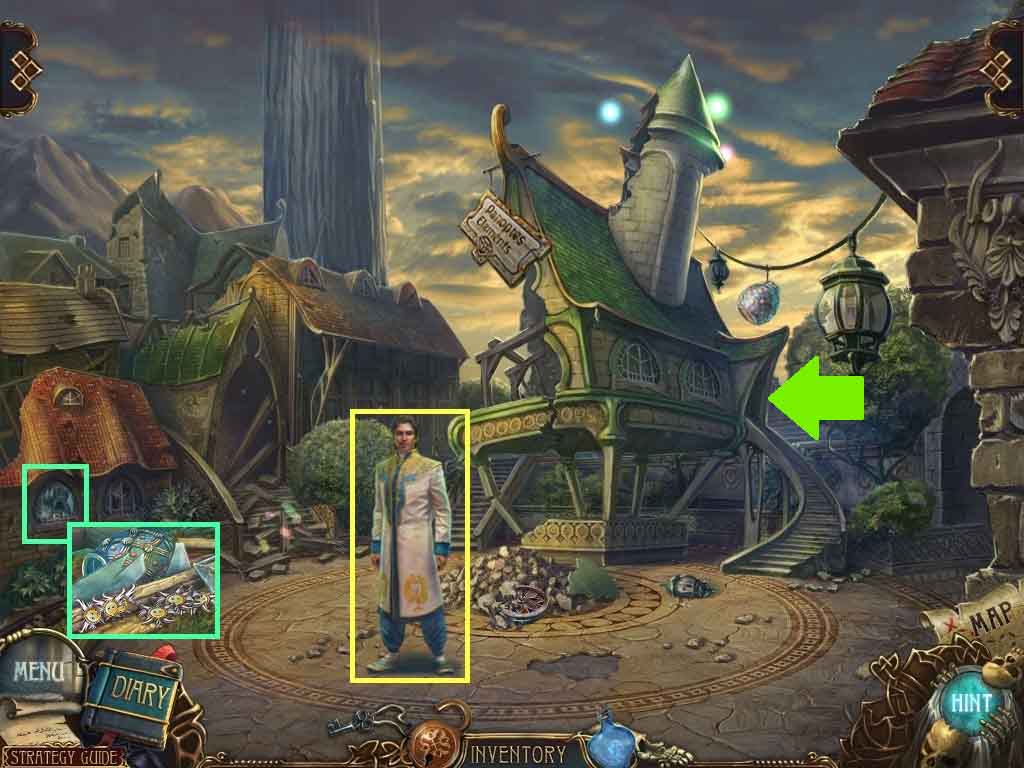
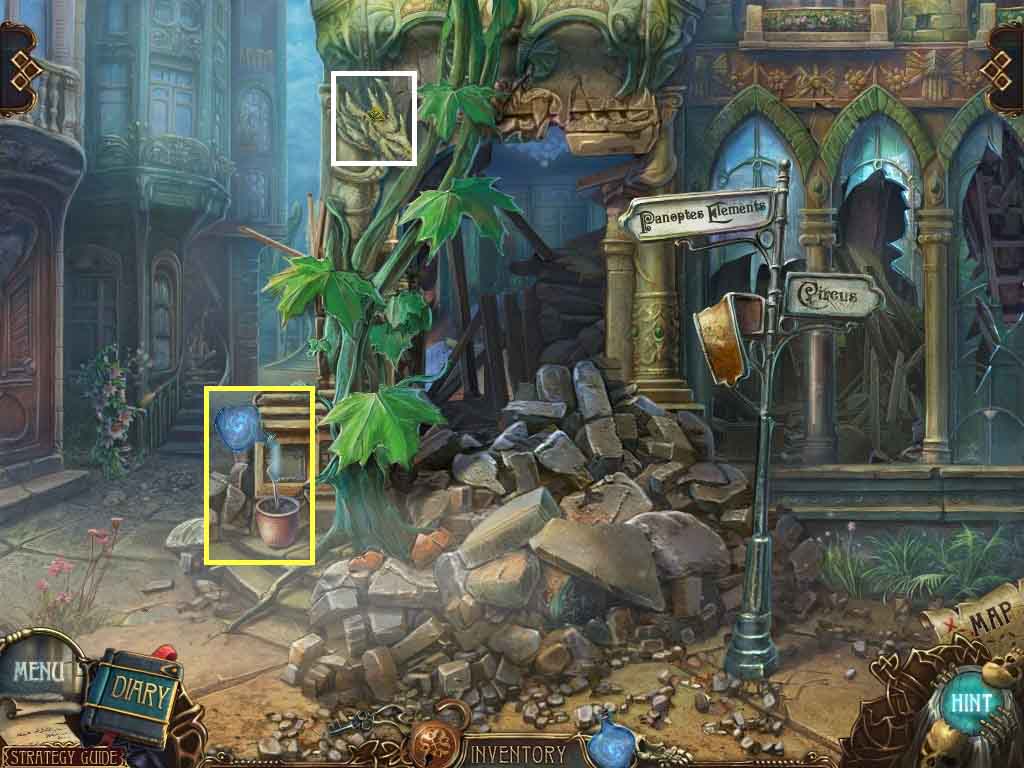
- Speak to Titus; collect Argus’ bead.
- Zoom into the window; collect the empty jar.
- Enter the shop.
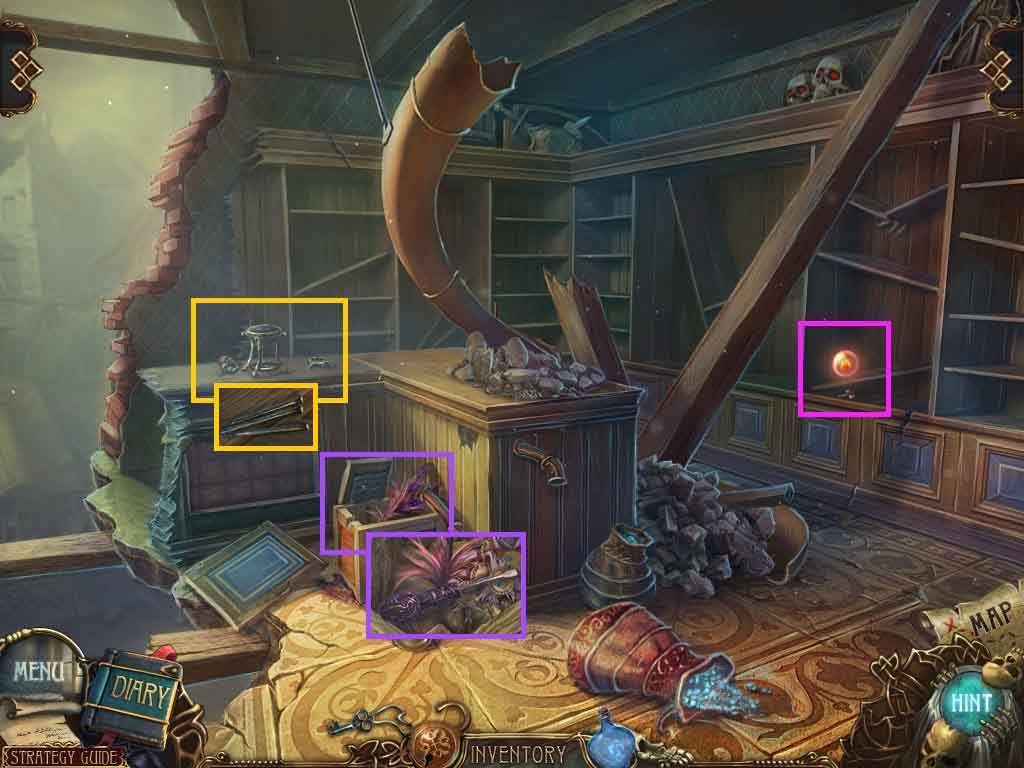
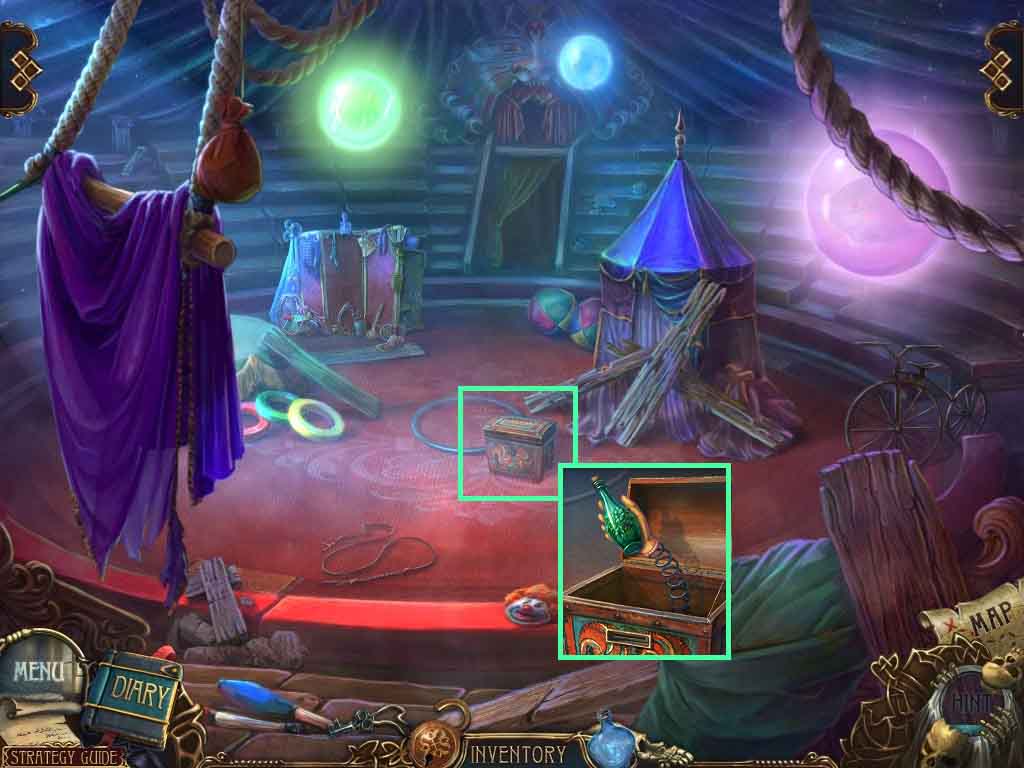
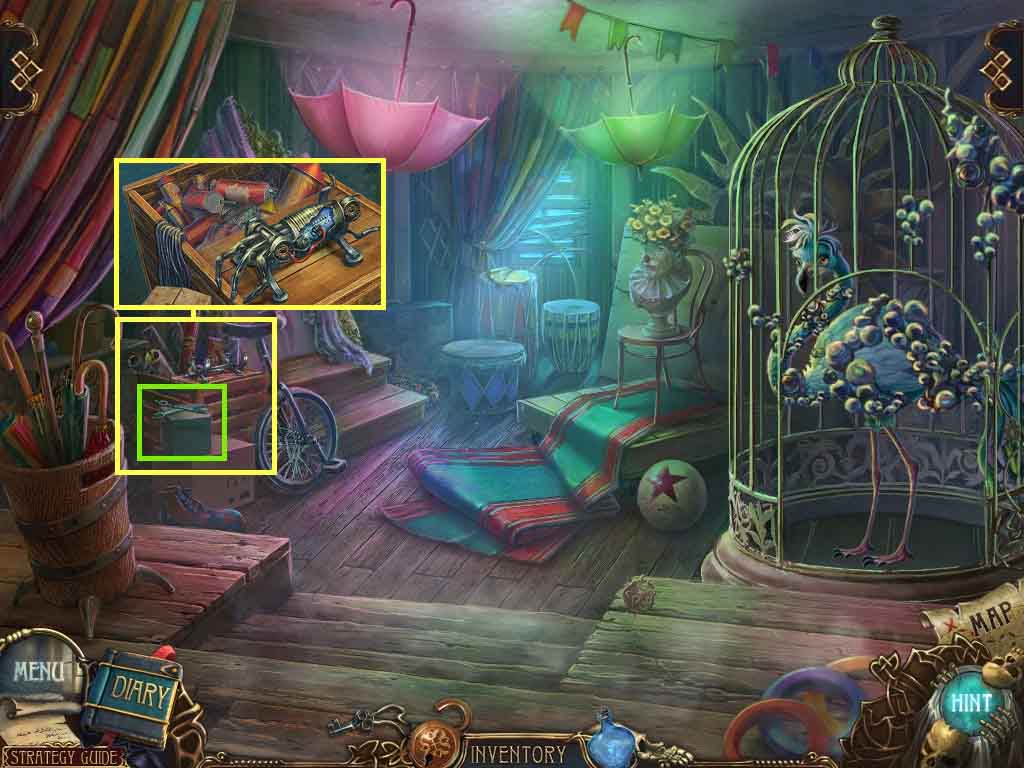
- Examine the shelf; collect the corkscrew and the sphere of fire.
- Examine the crate; collect the screwdriver.
- Examine the desk; collect the nails.
- Move down one time.
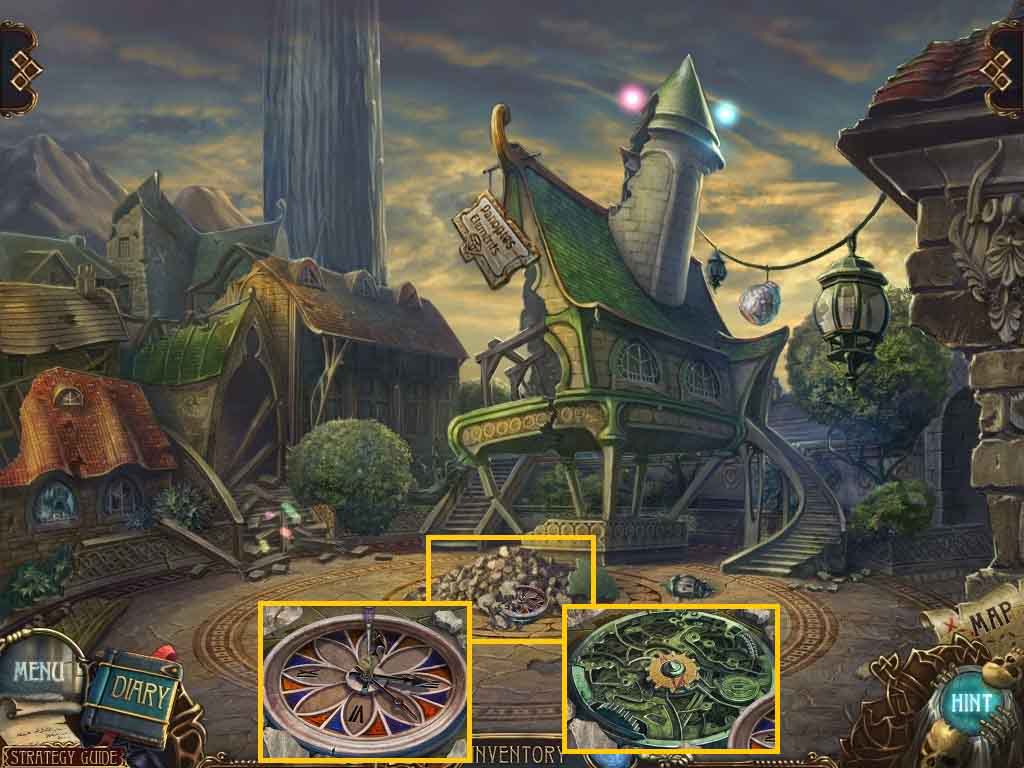
- Examine the ground; clear the debris.
- Remove the screw using the screwdriver; collect the gear.
- Move to the right.
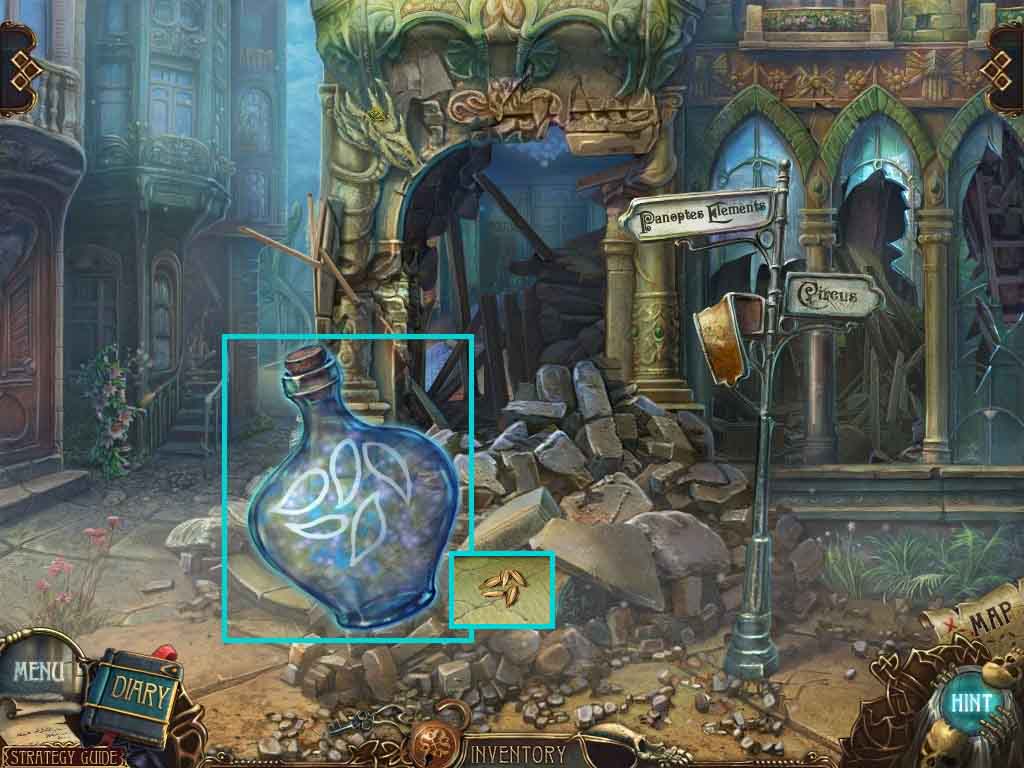
- Place the magic bottle onto the column.
- Collect the seeds.
- Move to the right.
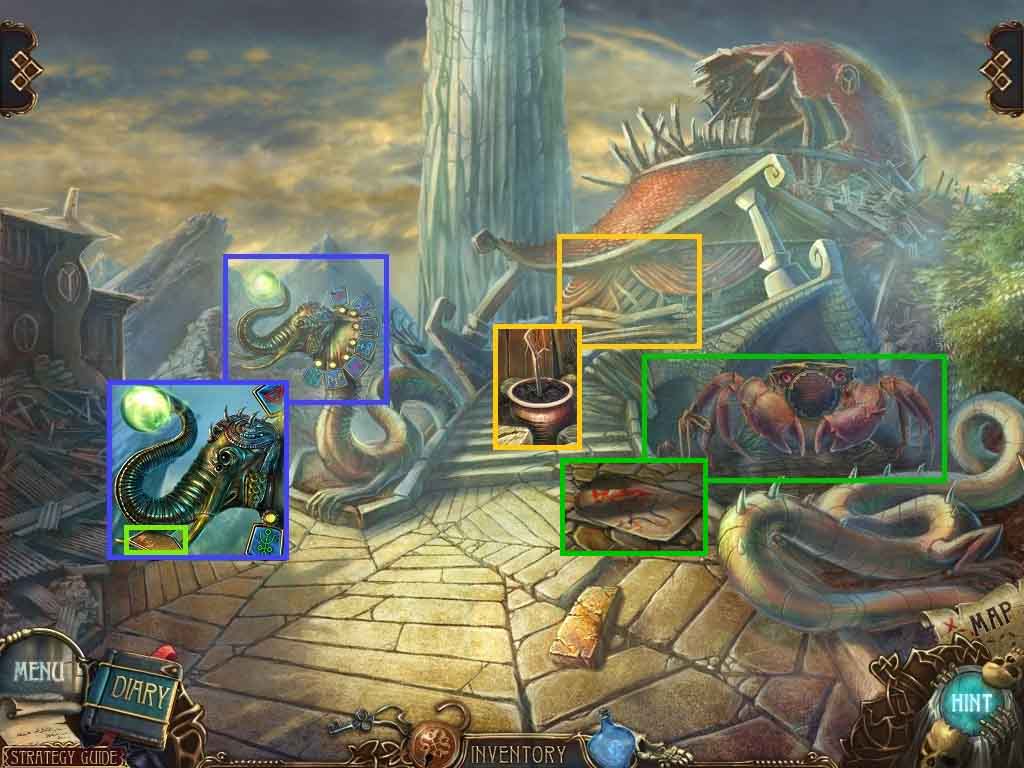
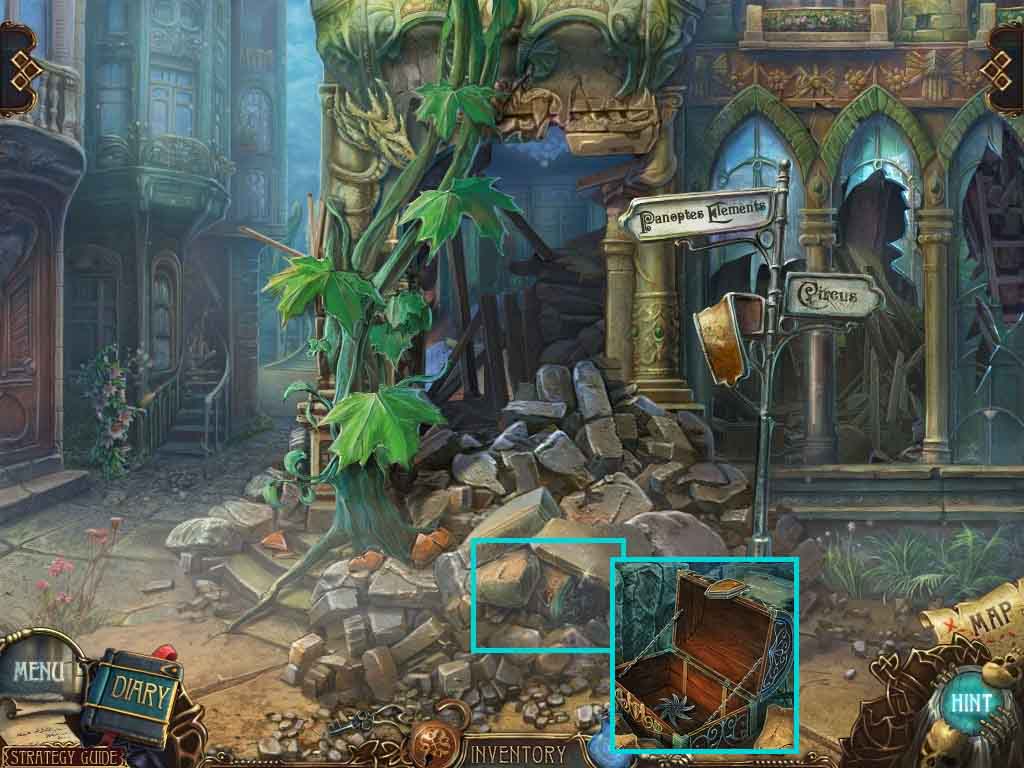
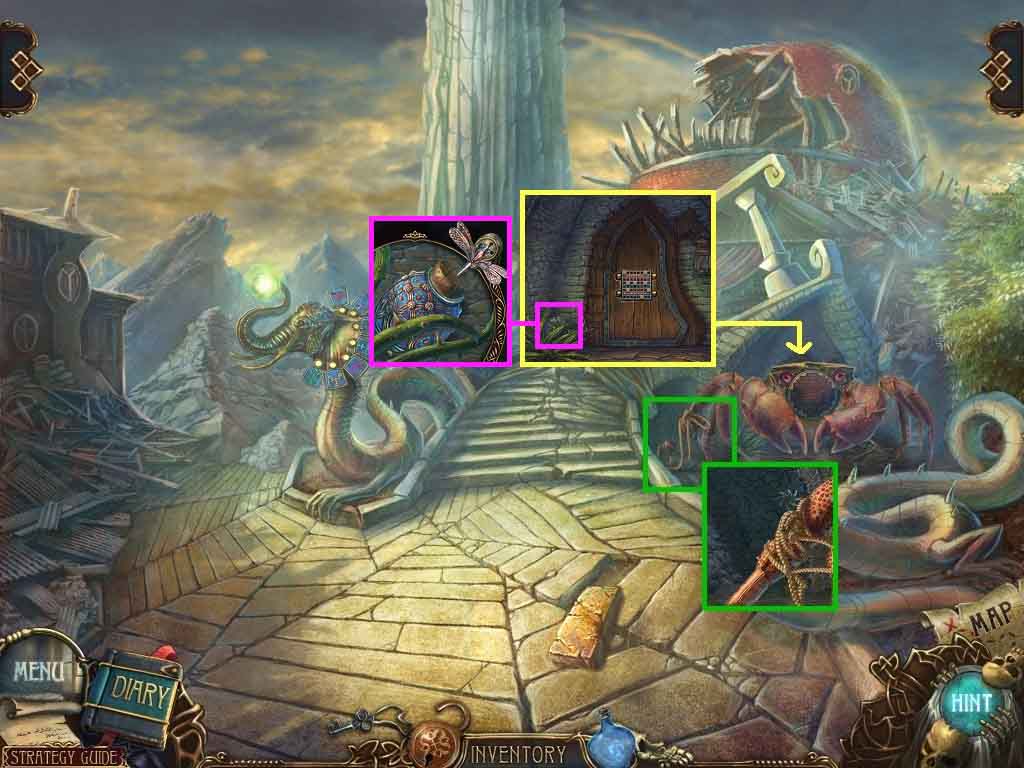
- Zoom into the elephant; collect the lock part.
- Zoom into the top of the steps; collect the dried up plant.
- Zoom into the crab claw; collect the playing card.
- Move down one time.
- Examine the column.
- Place down the dried-up plant and plant the seeds.
- Pour the contents of the magic bottle onto the plant.
- Zoom into the leaves and collect the door tile.
- Move to the mine.
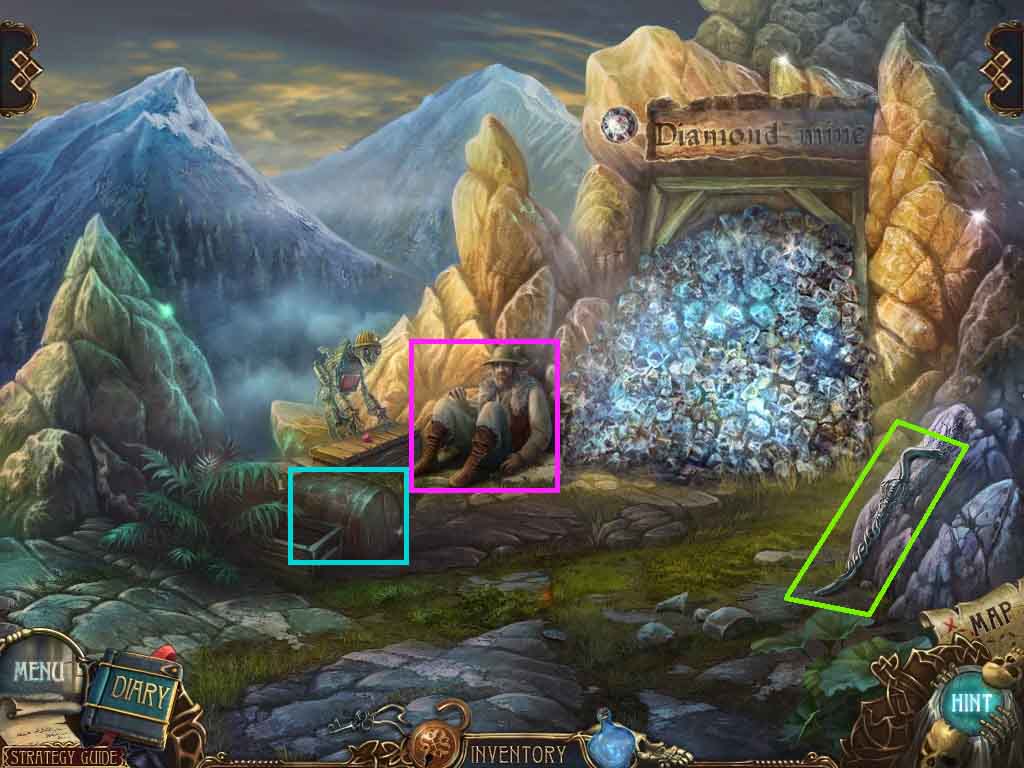
- Collect the scrap metal and the barrel.
- Examine the miner; speak to him.
- Move down one time.
- Place the barrel onto the ground; collect the empty jar.
- Move to the right.
- Examine the stones; scrape them using the scrap metal 3 times.
- Insert the lock part into the chest; collect the sharp star.
- Move to the right.
- Examine the crab’s claw; cut the rope using the sharp star.
- Examine the door.
- Examine the jar.
- Uncork it using the corkscrew; collect the empty jar.
- Move to the mine.
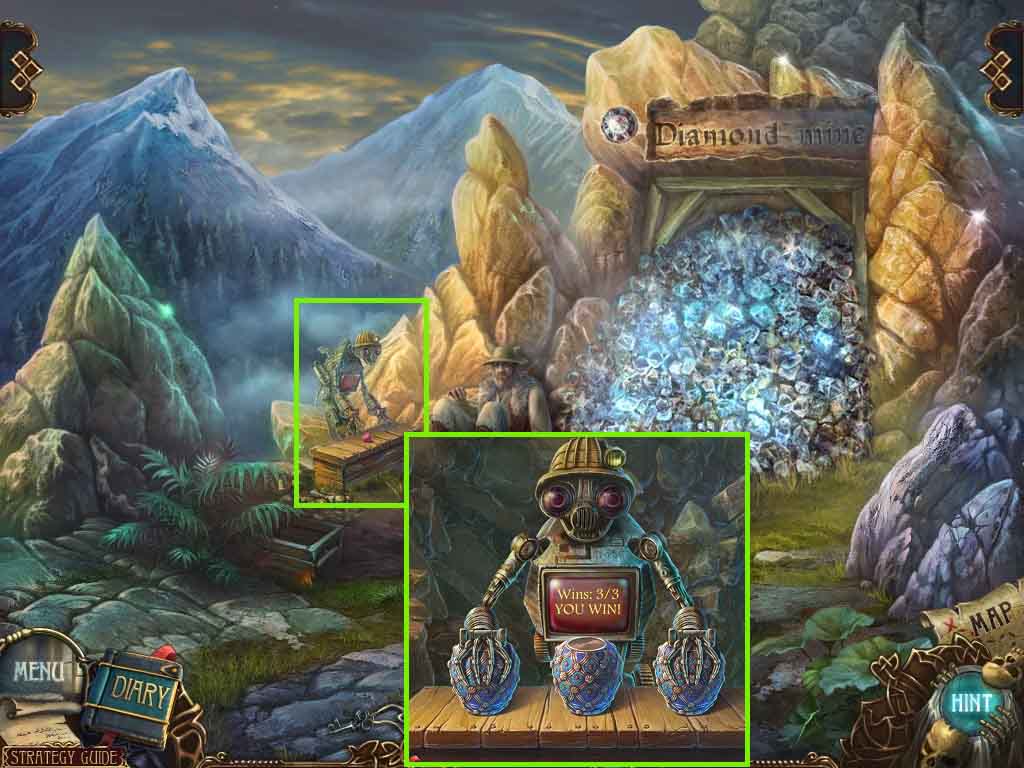
- Examine the robot; place the 3 empty jars onto the table to trigger a puzzle.
- The solution is random.
- Once solved, collect the broken robot hand and the door tile.
- Move to the door the crab was blocking.
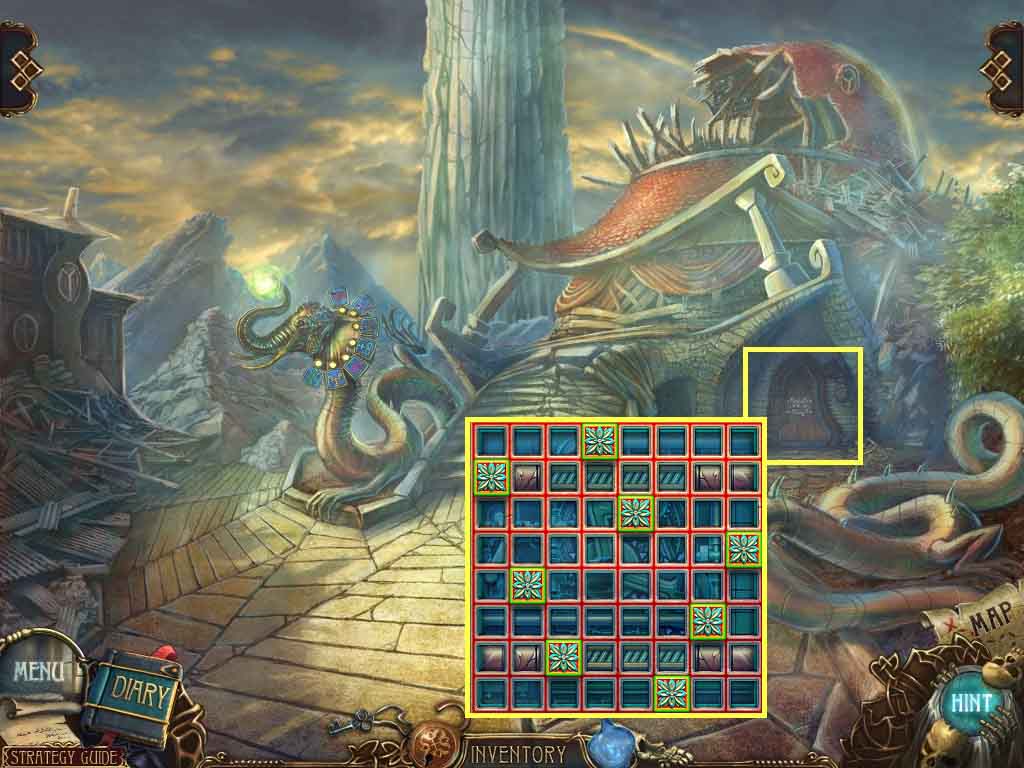
- Examine the door; insert the 2 tiles to trigger a puzzle.
- To solve the puzzle arrange the tiles in a pattern that they do not intersect horizontally, vertically or diagonally.
- Enter the door.
- Click the hidden objects area.
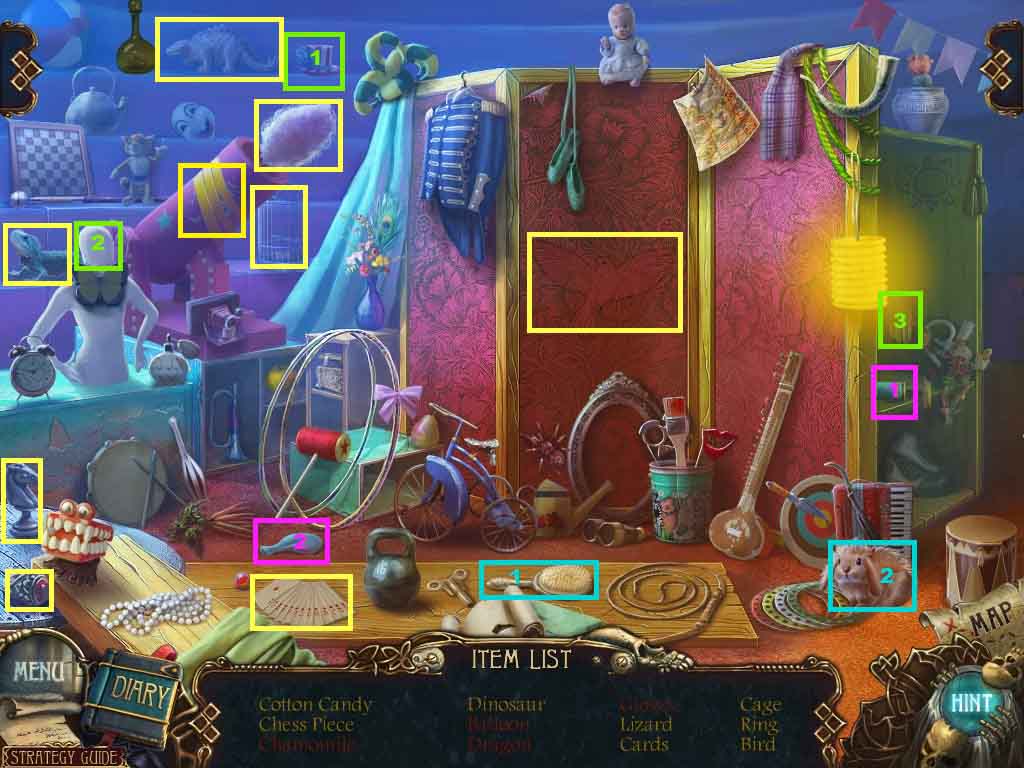
- Find the listed items.
- Select the hat; place it onto the head and collect the gloves.
- Click the tape on the cannon; collect the dragon.
- Select the brush; use it on the rabbit; collect the chamomile.
- Select the pump and attach it to the deflated balloon; collect the balloon.
- Collect the glove.
- Examine the box; insert the playing card.
- Collect the bottle of glue.
- Move ahead.
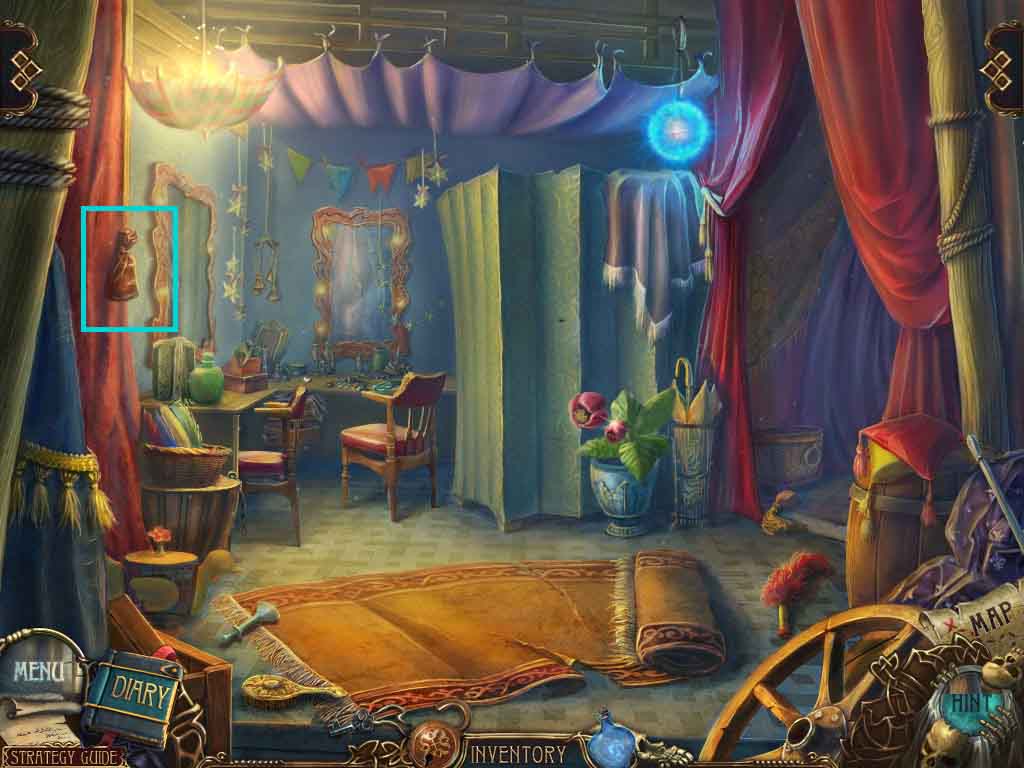
- Zoom into the bag; collect it.
- Move to the right.
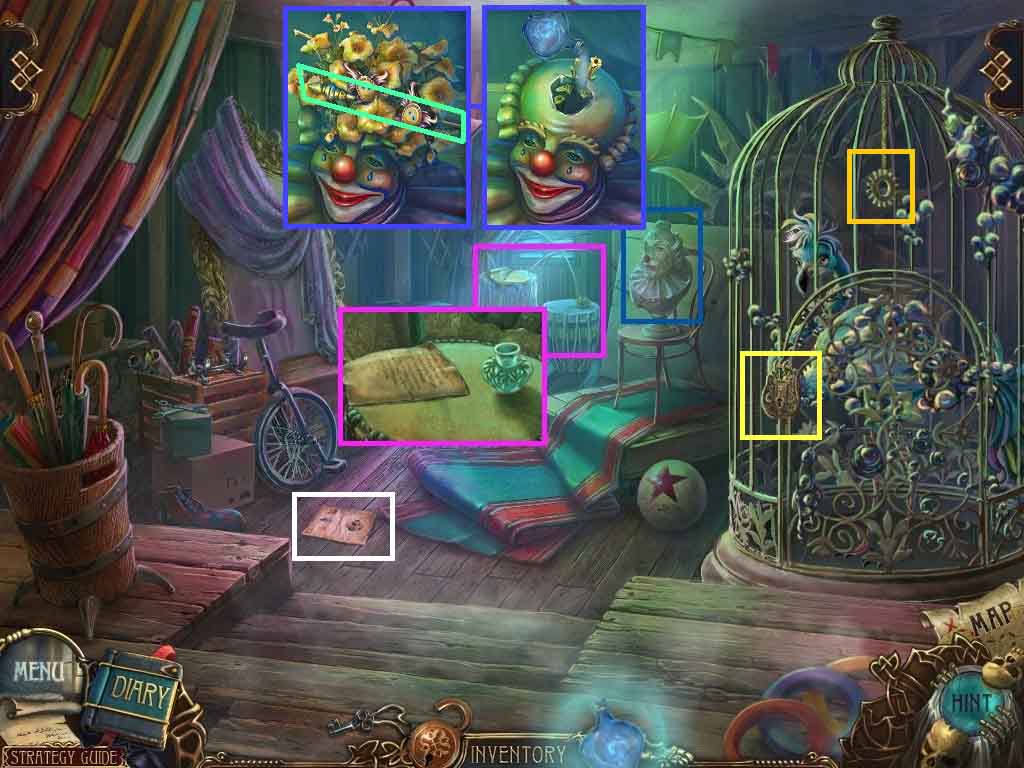
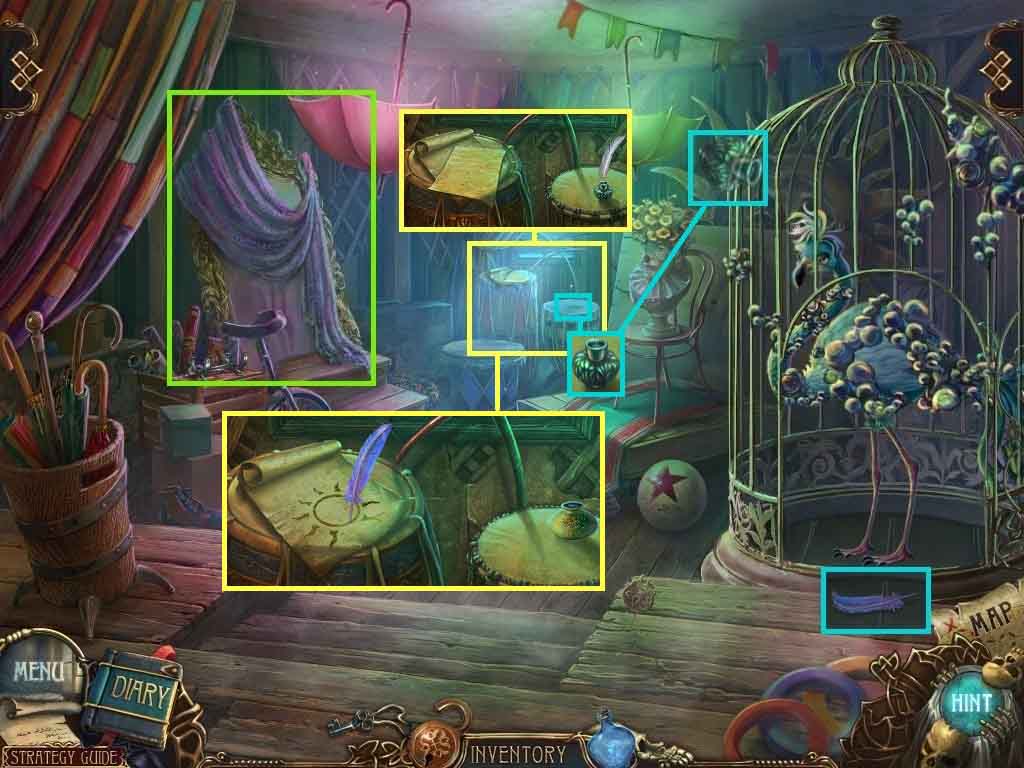
- Collect the note.
- Examine the drums; collect the empty ink bottle and the note.
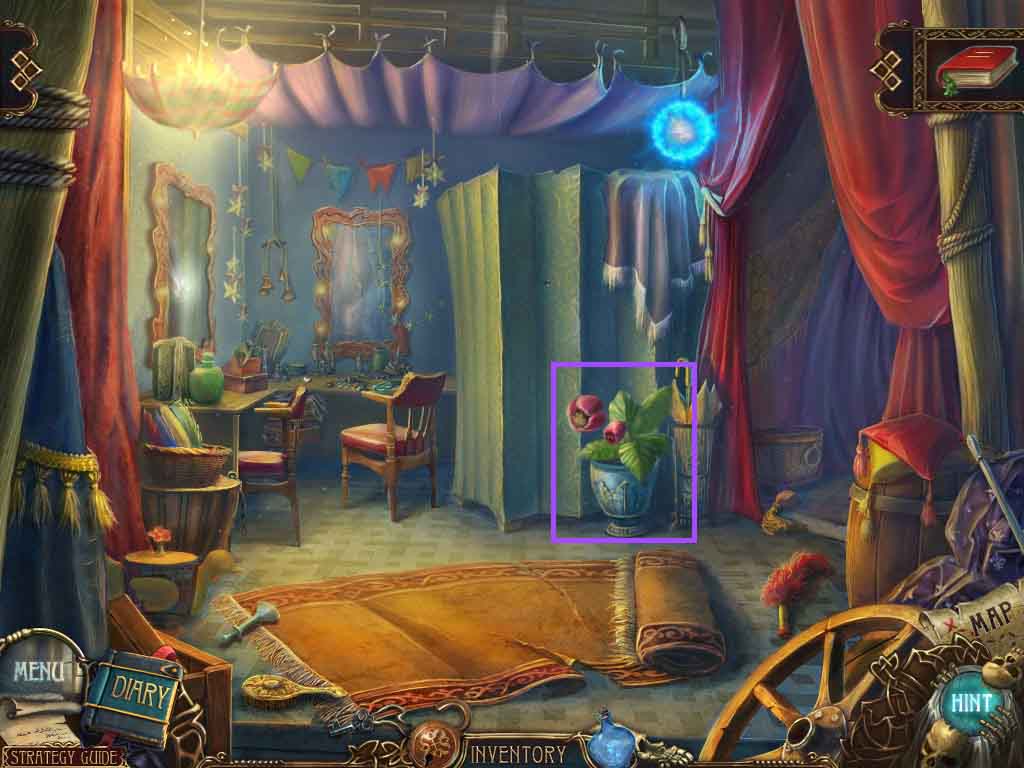
- Place the magic bottle onto the clown head.
- Pour the content of the magic bottle onto the plant.
- Collect the magician’s wand.
- Open the cage lock using the scrap metal.
- Collect the gear.
- Examine the crate; collect the scissors.
- Lay the broken robot hand onto the crate.
- Click and drag a wire to the broken robot hand.
- Repair the hand using the 2 gears; collect the repaired robot hand.
- Move down one time.
- Examine the plant.
- Select the scissors to cut the flower bud.
- Move down one time.
- Click the hidden objects area.
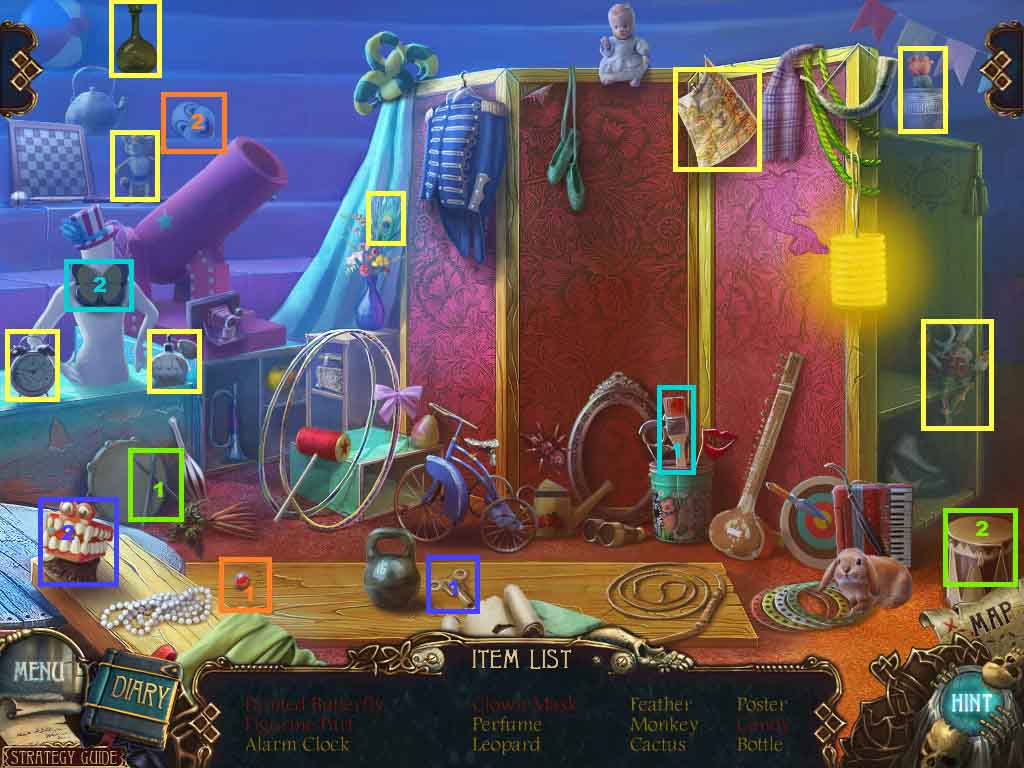
- Find the listed items.
- Select the brush; use it to scrub the battery and collect the painted butterfly.
- Select the drumsticks to use on the drum; collect the figurine part.
- Insert the wind up key into the teeth; collect the candy.
- Attach the red nose to the mask; collect the clown mask.
- Collect the figurine part.
- Move down two times and move ahead.
- Zoom into the steps.
- Use the gloves and click the debris twice; collect the feathery fan.
- Move to the mine.
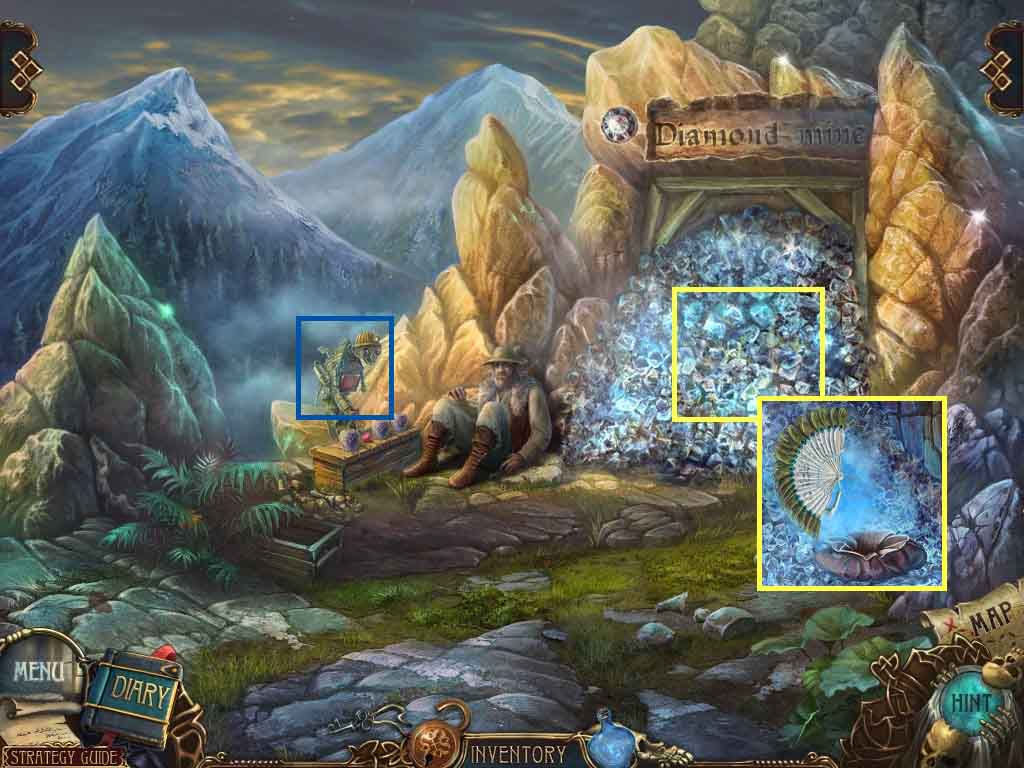
- Examine the diamond dust; place down the bag.
- Sweep the dust using the feathery fan; collect the bag of diamond dust.
- Examine the robot; give the robot the repaired robot hand and collect the figurine part.
- Move to the circus.
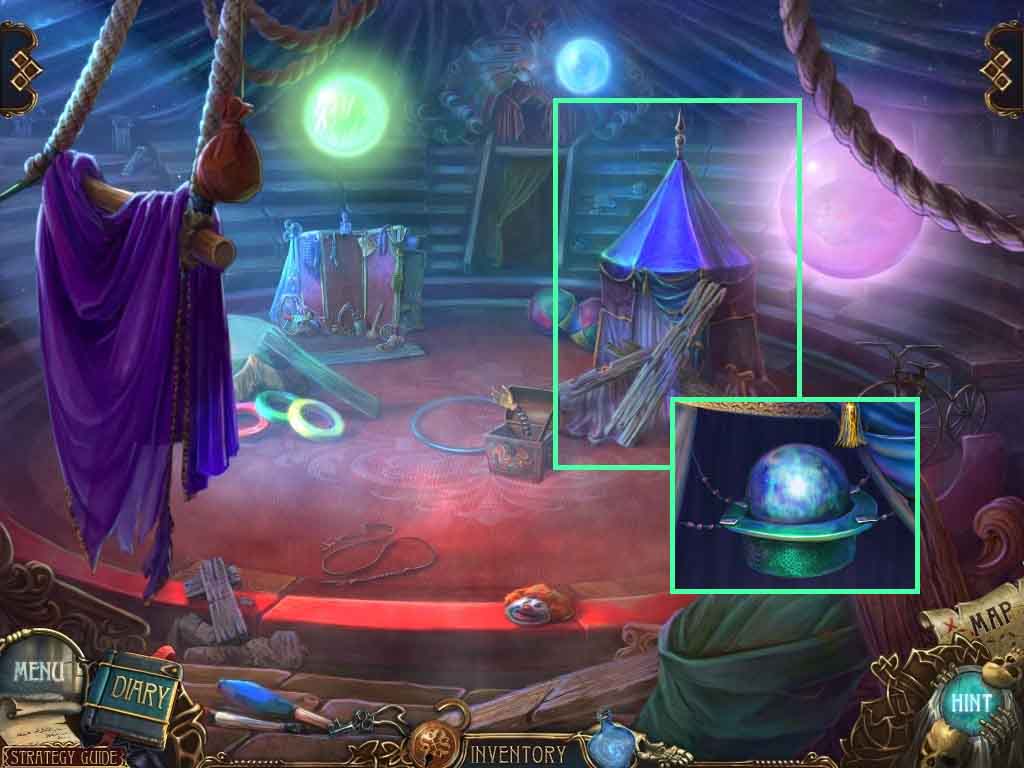
- Examine the tent.
- Fan the dirt using the feathery fan.
- Remove the boards using the scrap metal.
- Click the crystal ball.
- Collect the magician’s hat.
- Move ahead.
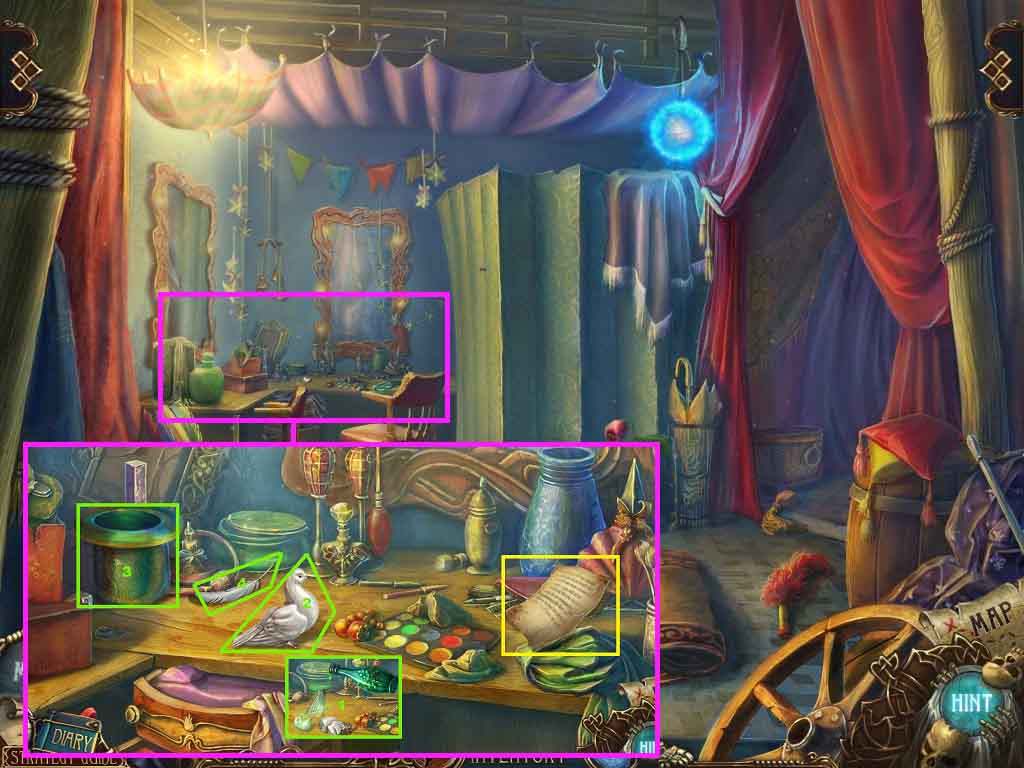
- Zoom into the table; collect the note.
- Lay the 2 figurine parts down; pour the bottle of glue onto them and collect the dove figurine.
- Place the magician’s hat down; insert the dove figurine into it.
- Tap the hat using the magician’s wand; collect the dove feather.
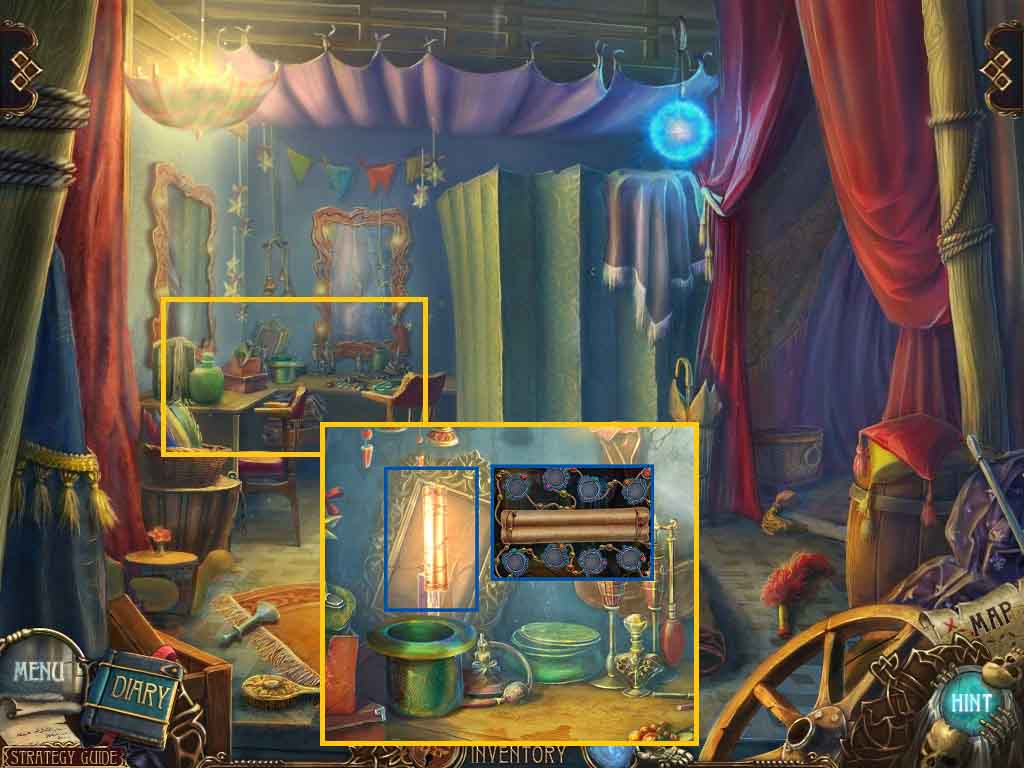
- Move to Penopte’s shop.
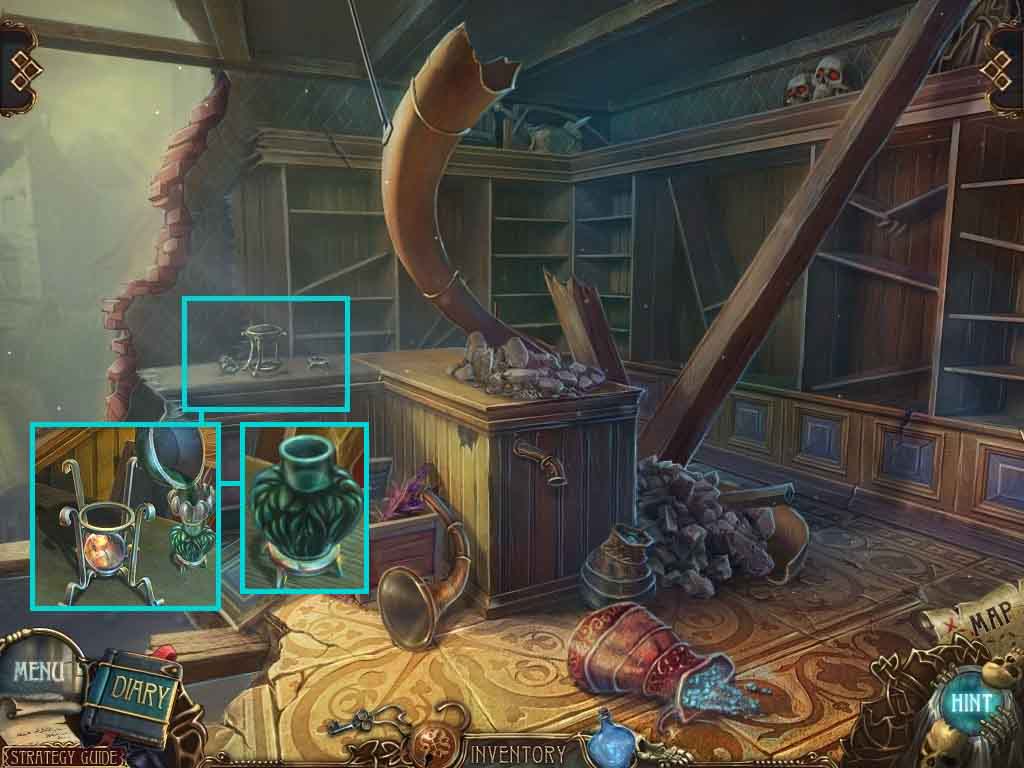
- Examine the table; place down the empty ink bottle.
- Place the bag of diamond dust into the bowl.
- Insert the funnel onto the empty ink bottle.
- Insert the flower bud into the dust.
- Insert the sphere of fire onto the stand; click the bowl.
- Collect the ink.
- Move to the tent.
- Examine the drums; place the ink down.
- Dip the feather duster into the ink; use it on the paper.
- Speak to Titus; collect the magic ink.
- Click the cloth.
- Examine the drums; collect the toxin.
- Pour the toxin onto the birdcage; collect the bluebird feather.
- Examine the drums.
- Place the ink down and place the bluebird feather into the ink.
- Use the feather on the parchment.
- Collect the parchment with symbol.
- Move down one time.
- Examine the table.
- Insert the parchment with symbol into the hat.
- Use the magician’s wand over the hat; collect Sansanna’s sacred scroll.
- Click it. Your goal is to find the 8 seals.
- Move to the right and enter into the portal.
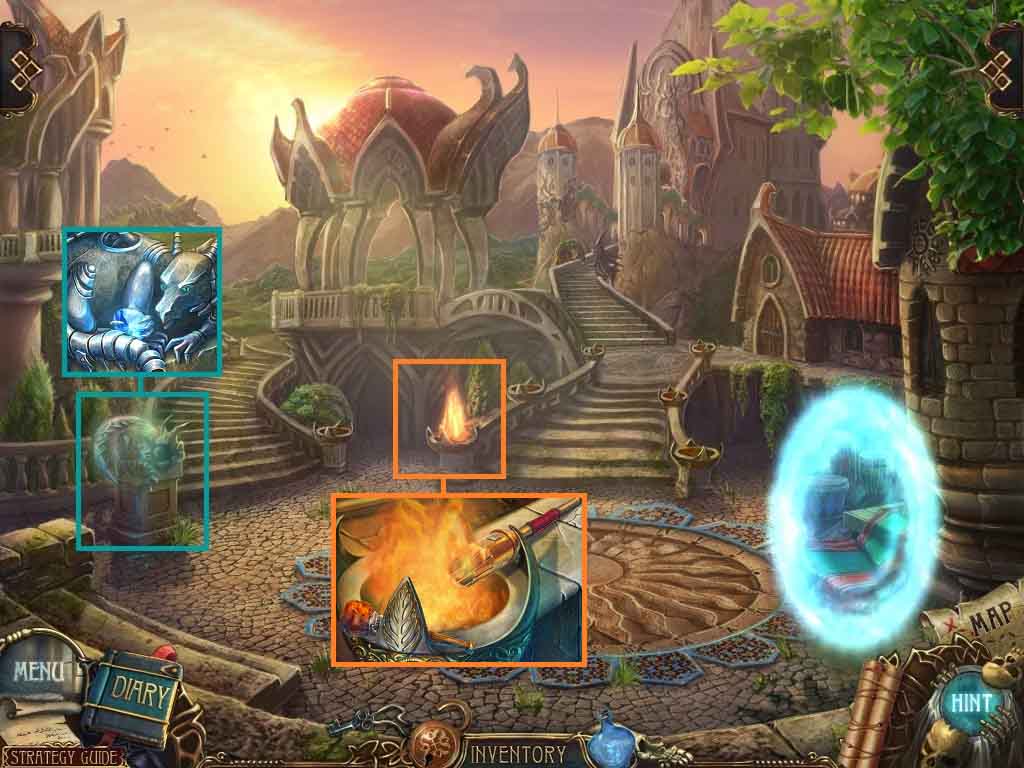
- Zoom into the pedestal; collect the sapphire.
- Zoom into the fire; collect the burning gong stick and the torch.
- Move ahead on the steps on the right.
- Click the hidden objects area.
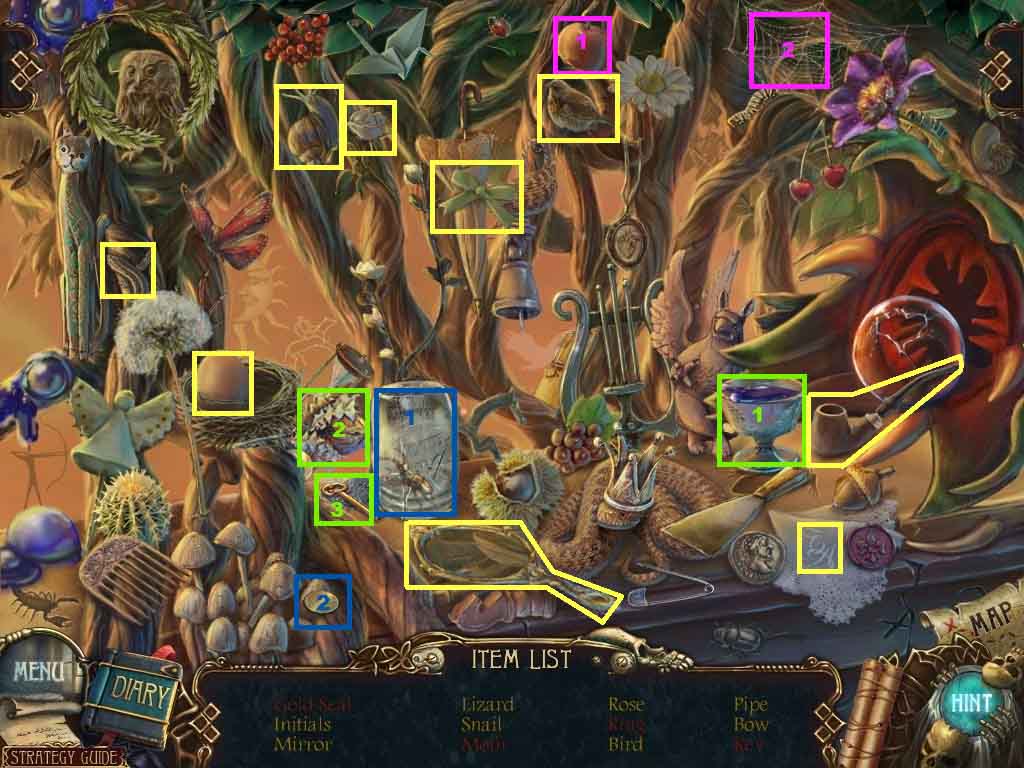
- Find the listed items.
- Click the egg; collect the moth.
- Click the glass; collect the gold seal.
- Select the apple and lay it onto the spider web; collect the ring.
- Pour the cup of water onto the dried flower; collect the key.
- Collect the earth seal.
- Move down once and move up the steps on the left.
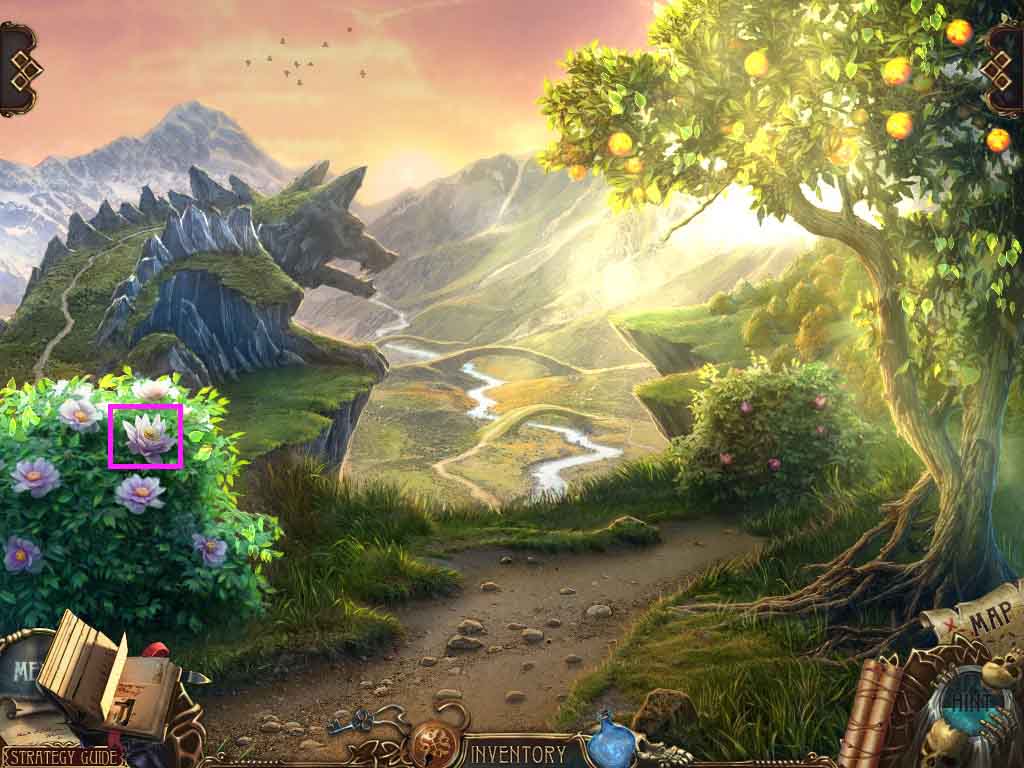
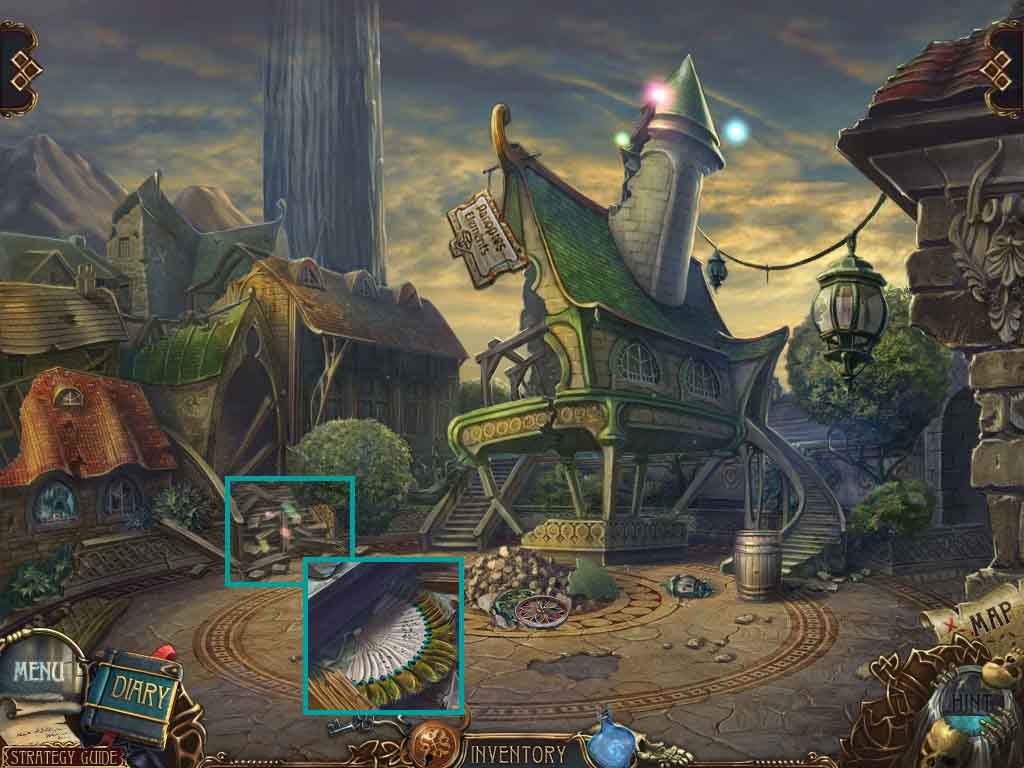
- Examine the flower; collect the water lily.
- Move ahead.
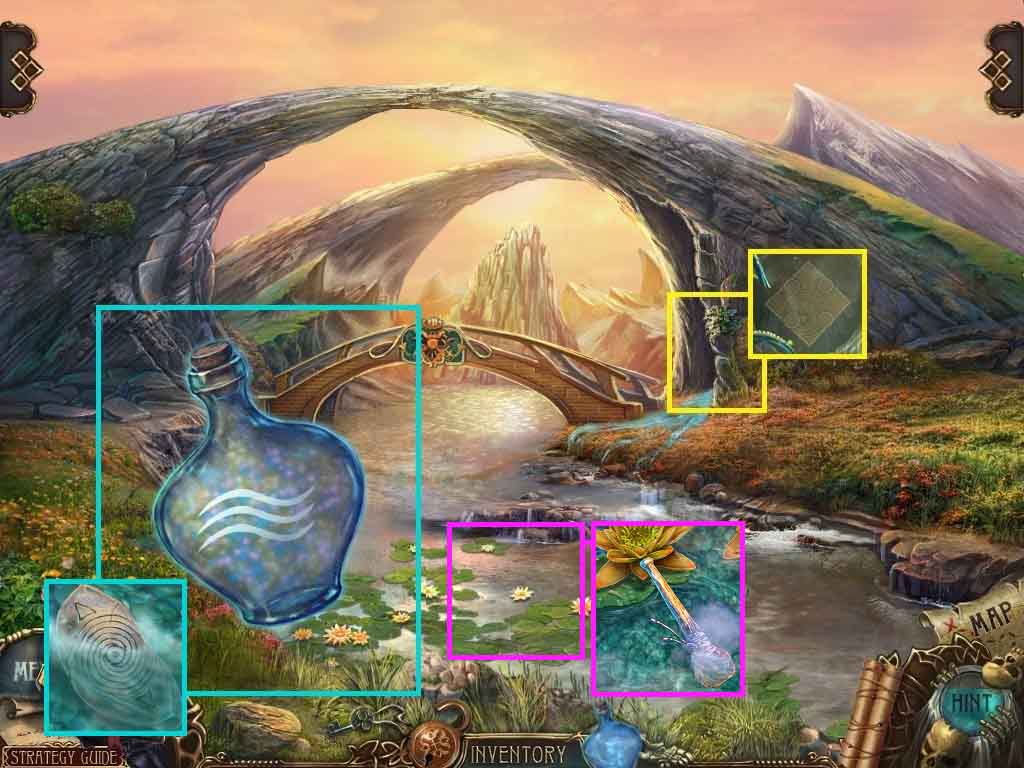
- Examine the rock on the right side of the bridge; collect the magic platform.
- Place the magic bottle onto the pond; collect the stone.
- Put the burning gong stick into the water; collect the gong stick.
- Move down two times.
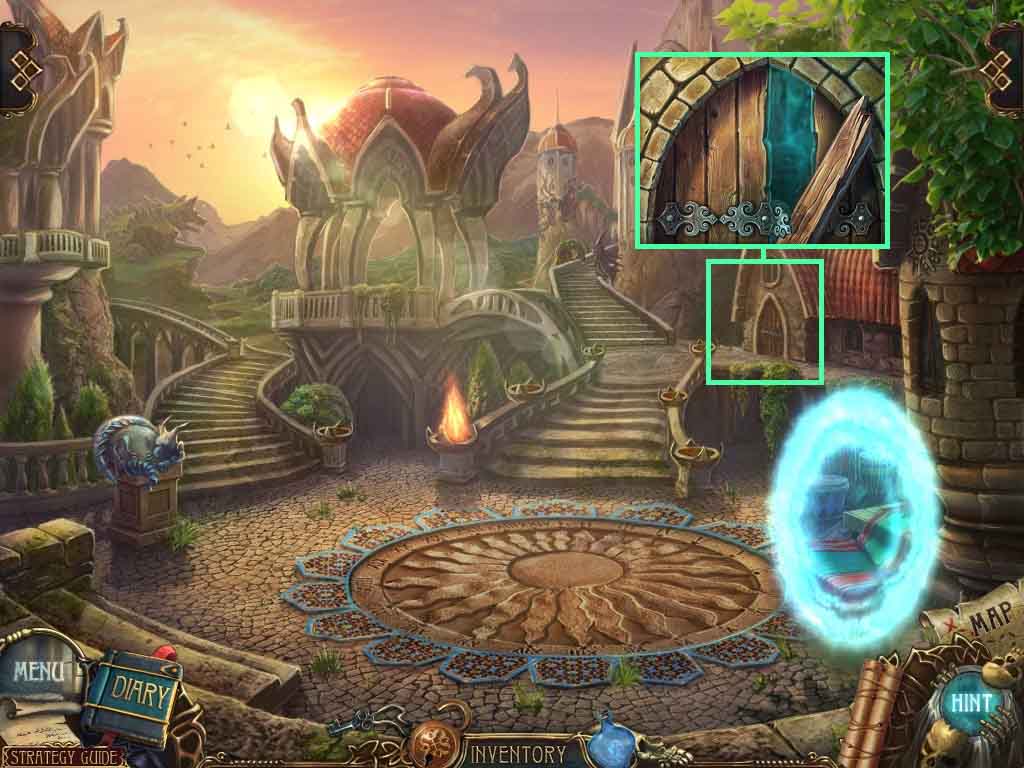
- Examine the door.
- Hit the door using the stone; collect the small plank.
- Go up the steps on the left and move to the cliff on the left.
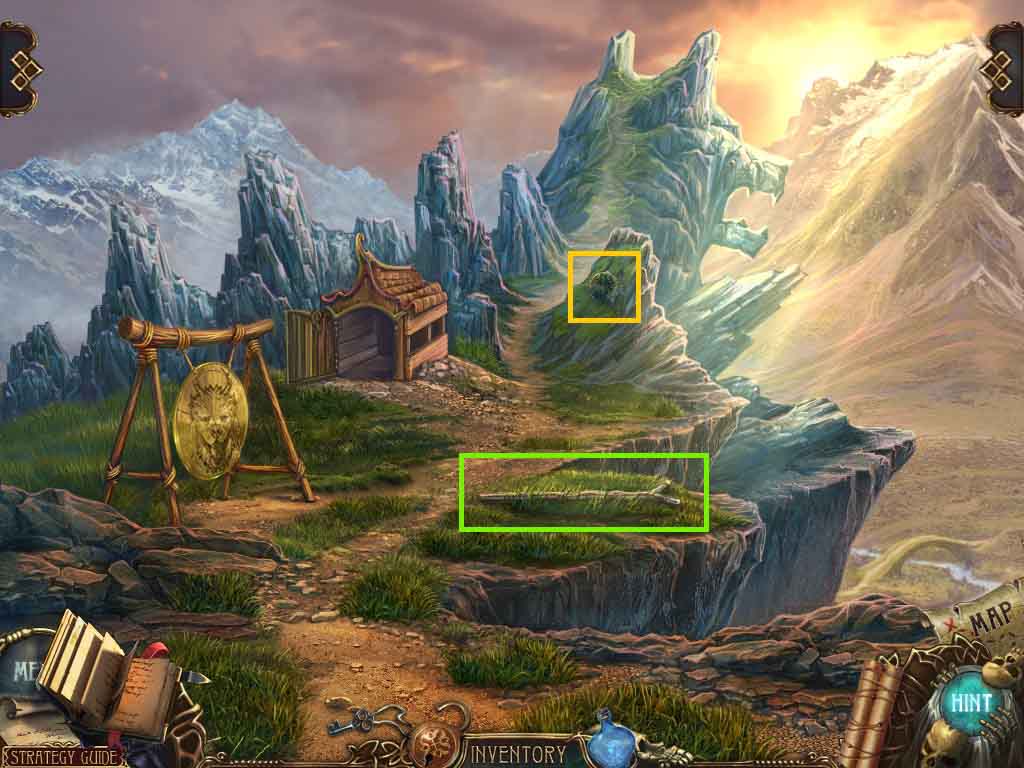
- Collect the long stick.
- Examine the cliff; clear the debris and collect the sieve.
- Move down one time.
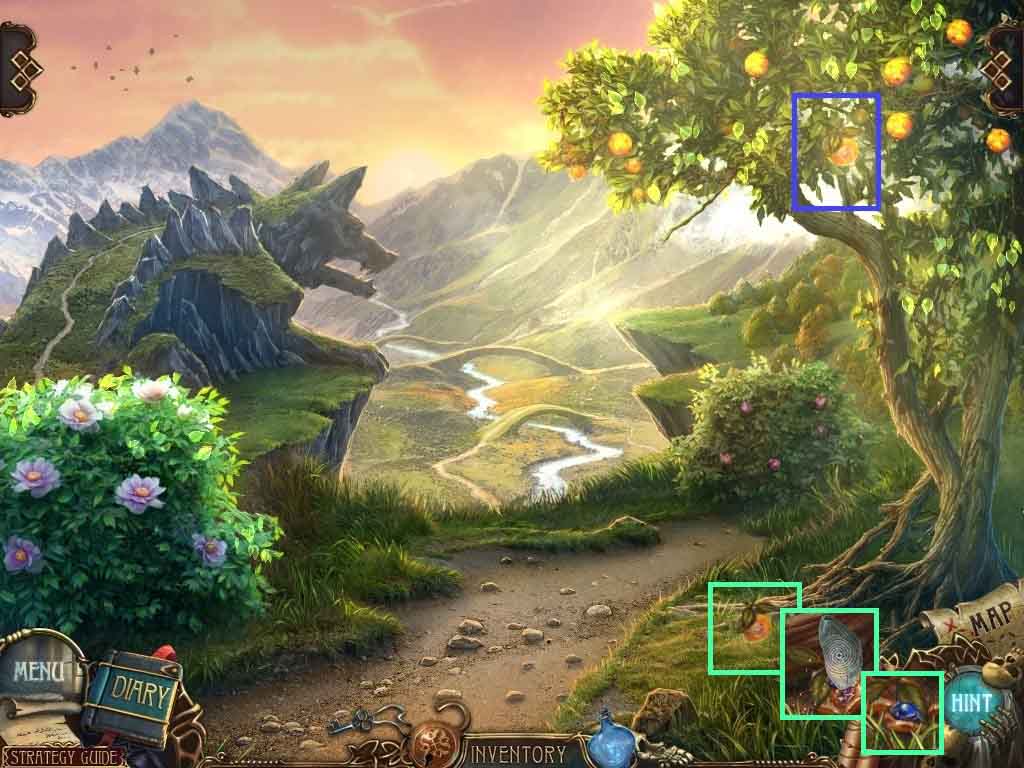
- Examine the tree; select the long stick to remove the orange.
- Examine the orange; break it using the stone.
- Collect the sapphire.
- Move ahead.

- Examine the left side of the water; dunk the sieve.
- Pour the magic bottle onto the sieve; collect the sapphire.
- Move down and move to the left.
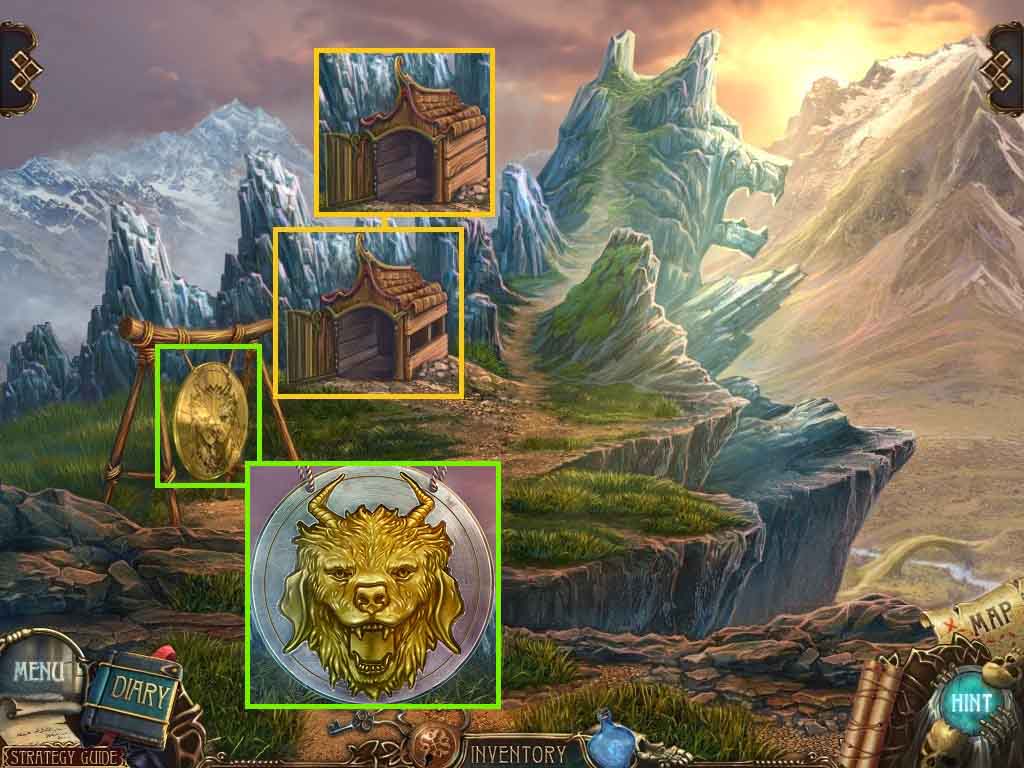
- Examine the dog house.
- Lay the small plank against the side of the house and insert the nails.
- Select the stone and use it to drive in the nails.
- Select the gong stick and use it to hit the gong to trigger a puzzle.
- Complete the gong by switching the pieces.
- Hit the gong using the gong stick.
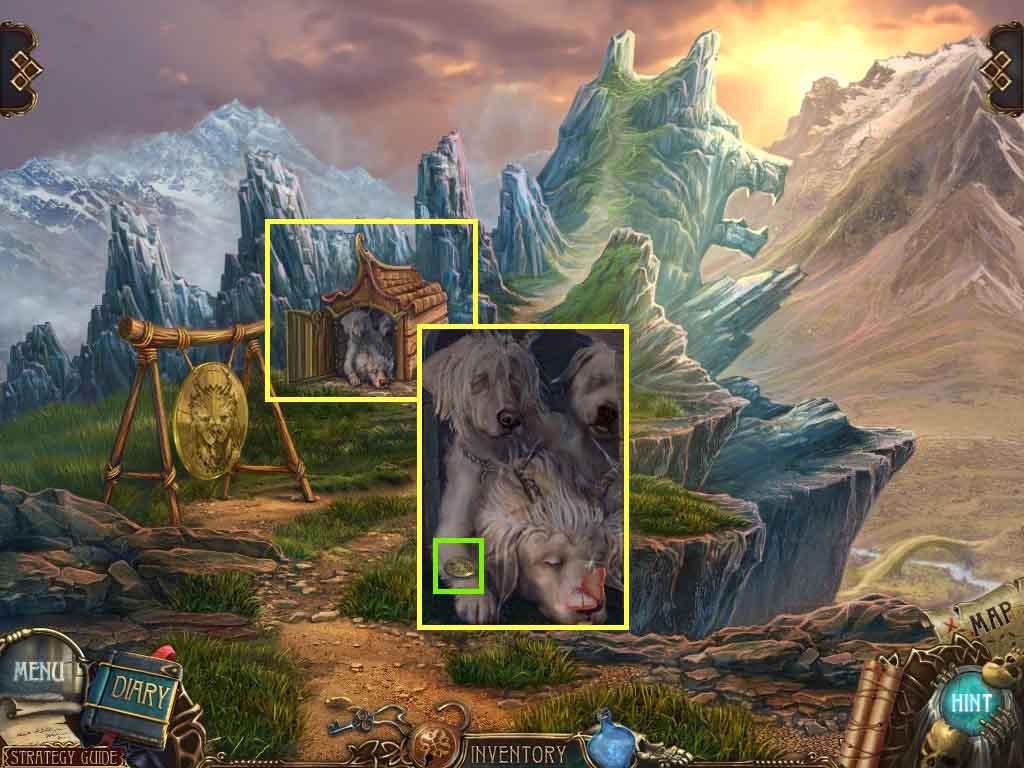
- Examine the dog house.
- Collect the lion seal.
- Move down two times and enter through the steps on the right.
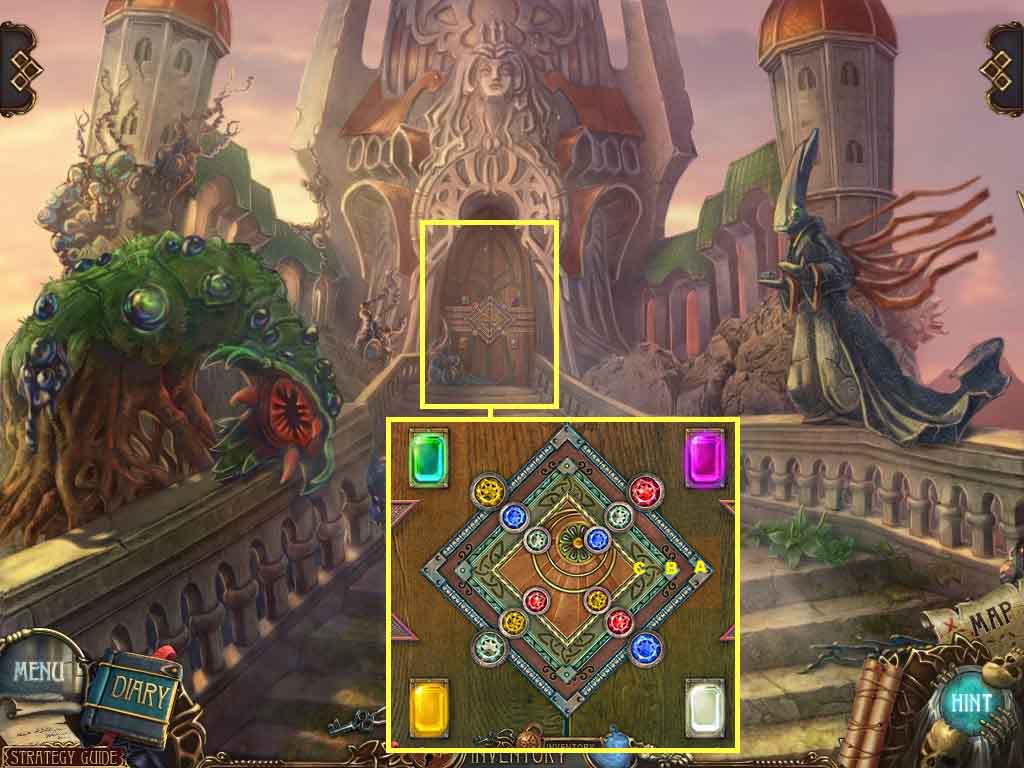
- Examine the door; insert the magic platform and the 3 sapphires.
- A puzzle will trigger.
- Create the color scheme shown using the gemstones.
- Click the squares as follows to solve.
- A – C – C – B – B – B
- Enter the doorway.

- Examine the window; collect the stone wolf tail.
- Examine the statue base; collect Sansanna’s seal.
- Enter the doorway on the right.
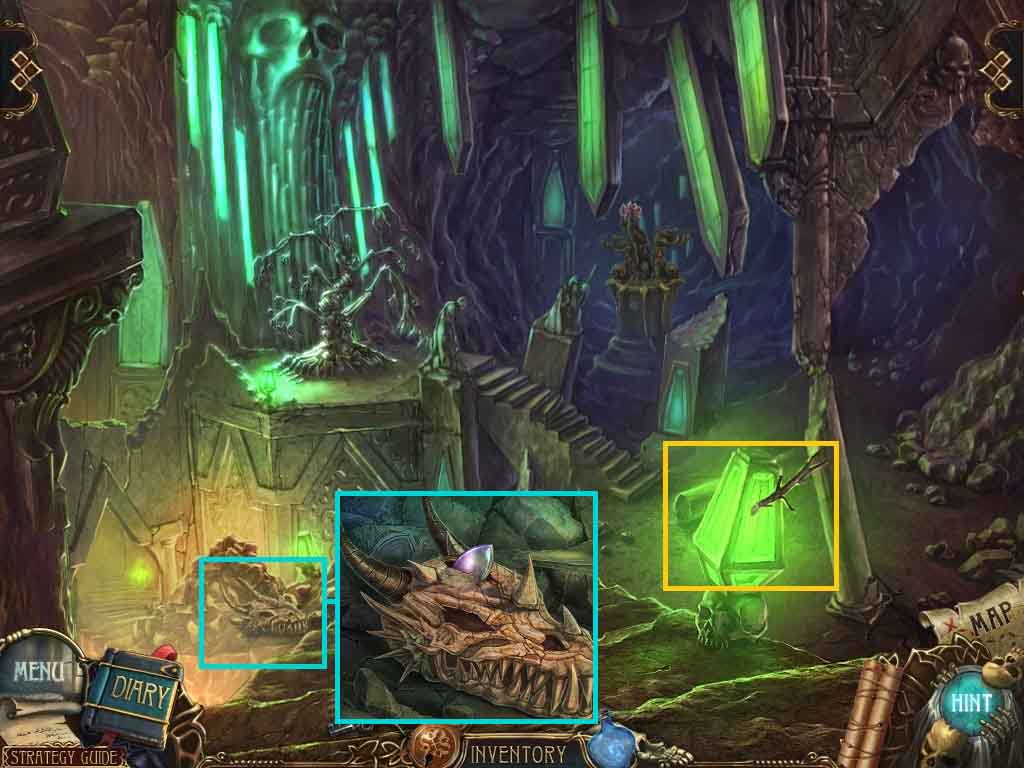
- Zoom into the lamp; collect the dead root.
- Zoom into the skull; collect the window part.
- Move down one time.
- Using the magic bottle examine the casket.
- Place the dead root onto it and pour the magic bottle onto the root.
- Collect the skeleton hand and the sundial pointer.
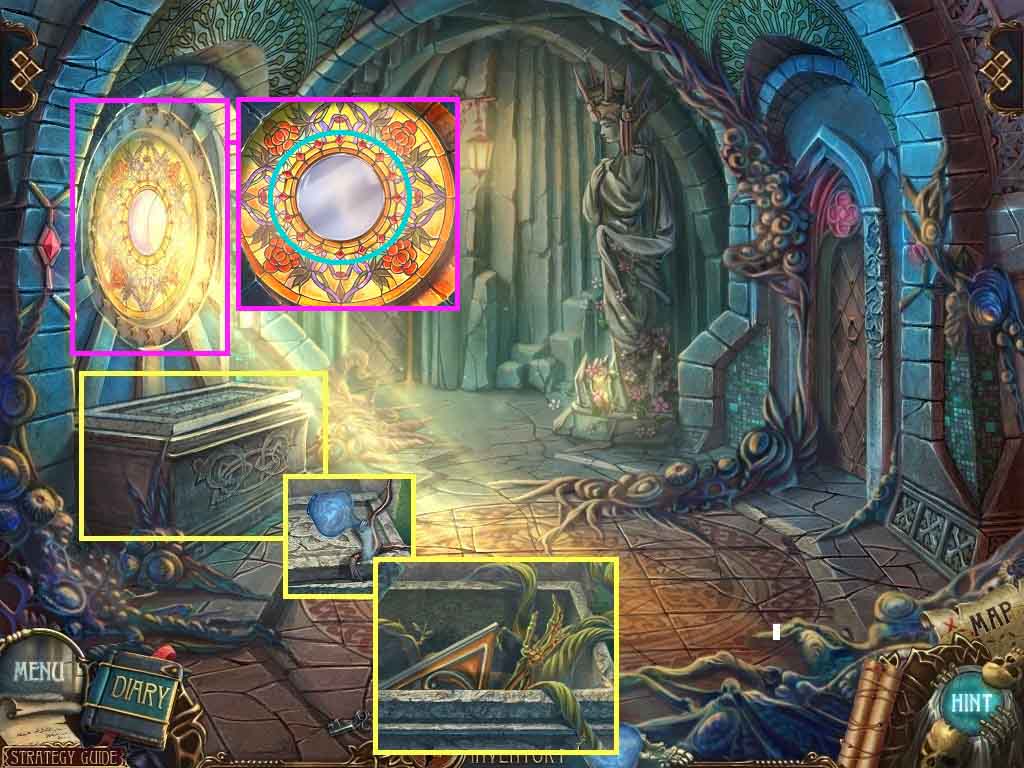
- Examine the window; insert the window part.
- Collect the mirror of dawn.
- Move to the right.
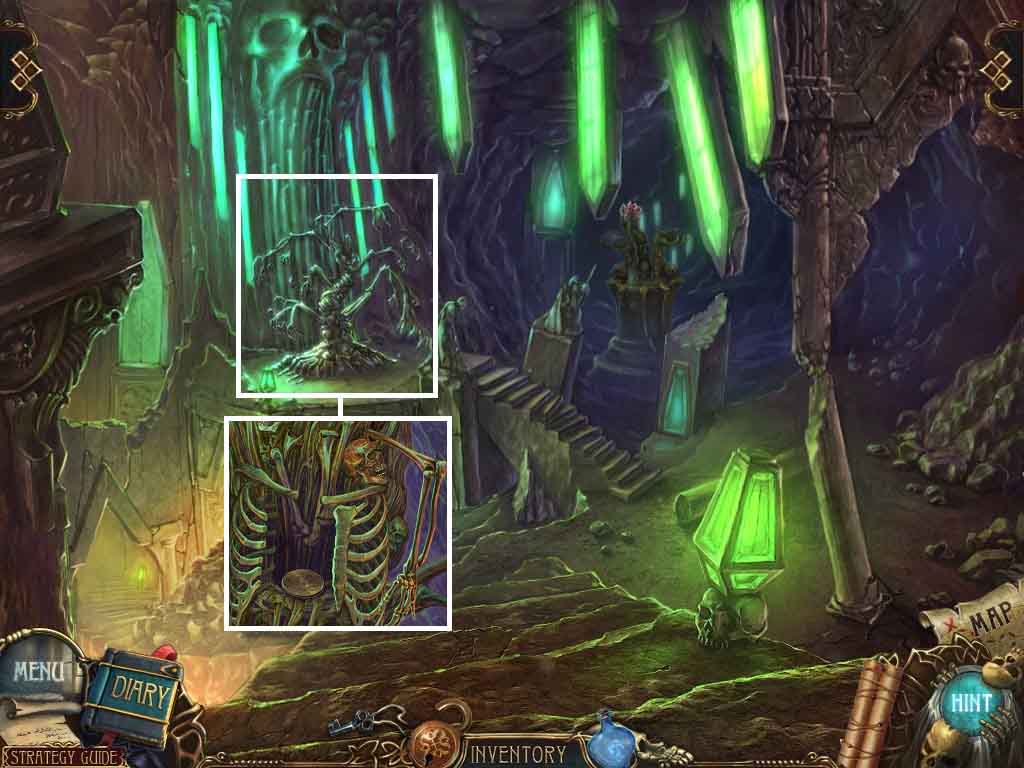
- Examine the skeleton; attach the skeleton hand and click it.
- Collect the Panoptes’ seal.
- Move down once and enter the back door into the temple.

- Examine the sphere.
- Place the magic bottle onto the wall.
- Pour the magic bottle contents onto the frame; collect the frame part.
- Examine the structure; collect the magic wisp.
- Move down once.
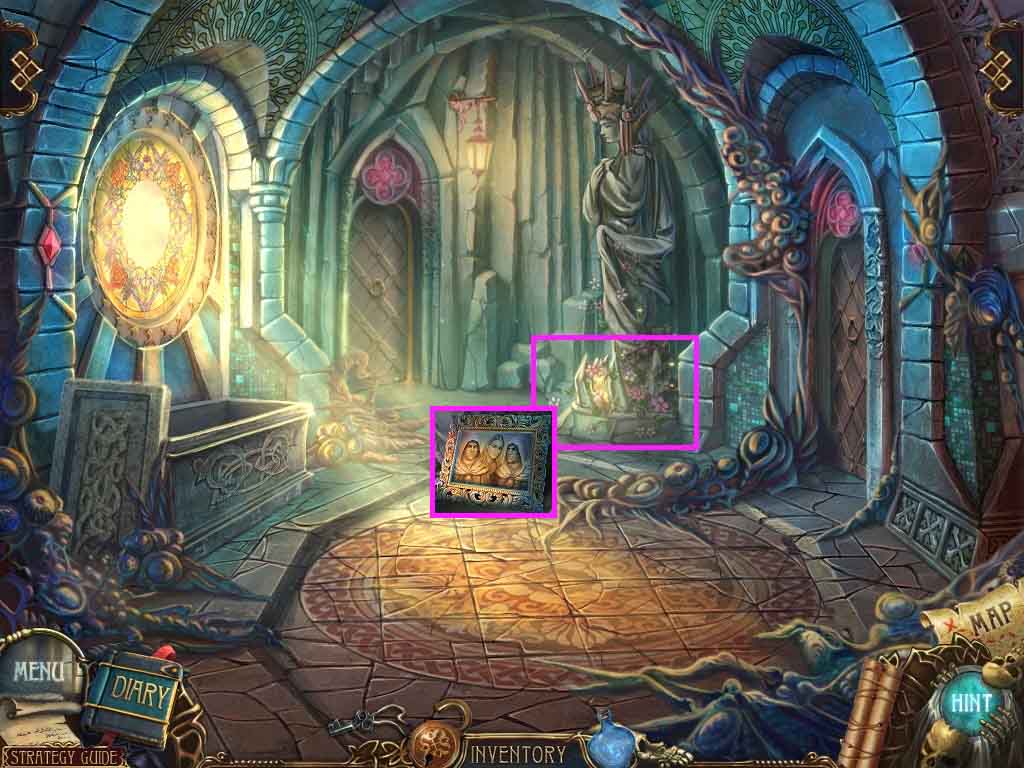
- Examine the statue base.
- Lay the frame part onto the picture; collect the family photo.
- Move to the right.

- Examine the hands.
- Insert the torch into the holder.
- Insert the magic wisp into one hand and the mirror of dawn into the other.
- Collect Panoptes’ bead.
- Move to the temple.
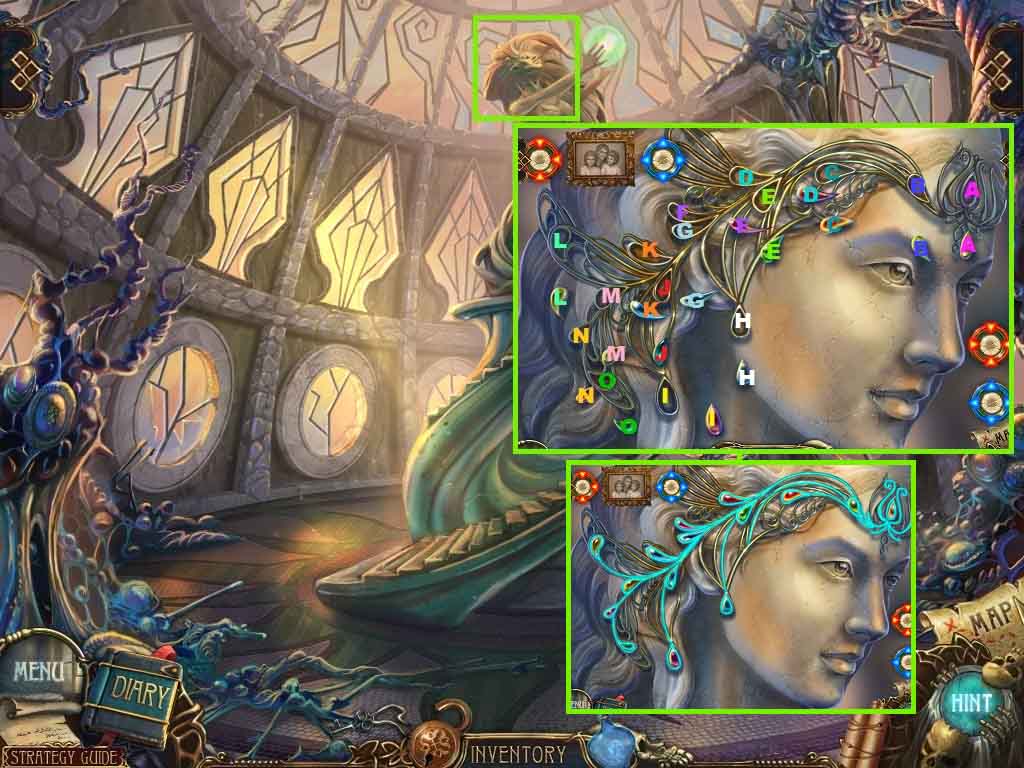
- Examine the statue’s head.
- Insert the family photo, Argus’ bead and Panoptes’ bead to trigger a puzzle.
- Arrange the magnets into the correct areas to place the gems into the correct slots.
- Speak to Titus and collect Argus’s seal.
- Move down two times.
- Click the hidden objects area.

- Find the listed items.
- Select the putty knife to use on the tree; collect the heart.
- Prick the balloon with the safety pin; collect the water lily.
- Click the dandelion; collect the chicken foot.
- Click the flower; collect the paw print.
- Collect the water lily.
- Move down one time.
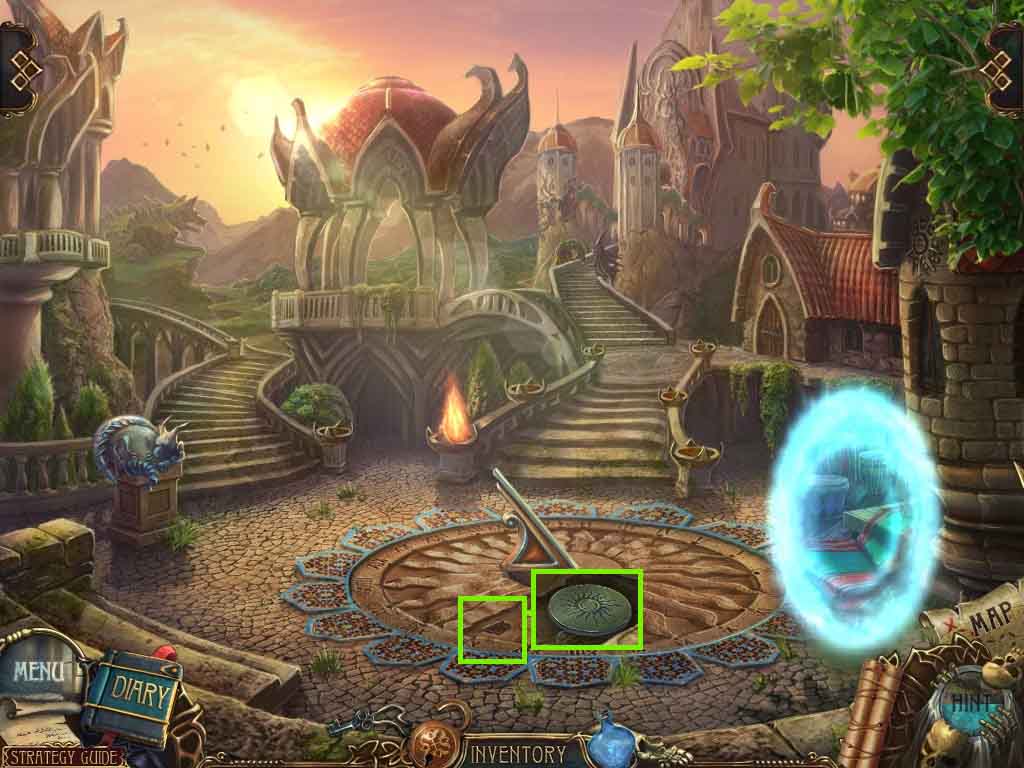
- Lay the sundial pointer onto the ground; click it.
- Zoom into the ground; collect the sun seal.
- Move up the left steps; and continue to move to the left.

- Examine the mountain.
- Insert the stone wolf tail into the niche.
- Collect the moon seal.
- Move down and move ahead.

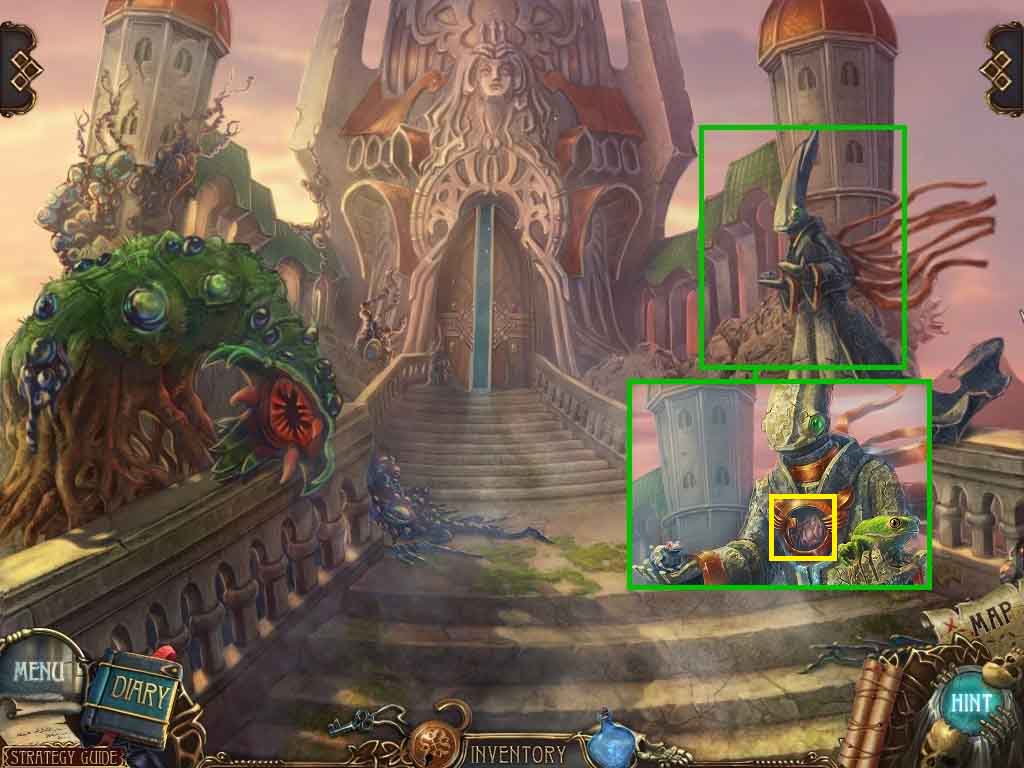
- Examine the frog.
- Lay down the 2 water lilies to trigger a puzzle.
- To solve the puzzle Forge a path using the solid green leaves.
- Once solved; collect the frog.
- Move down twice and go up the steps on the right.
- Examine the statue.
- Lay the frog into the statue’s hand and collect the flower.
- Move down once and go up the left steps.
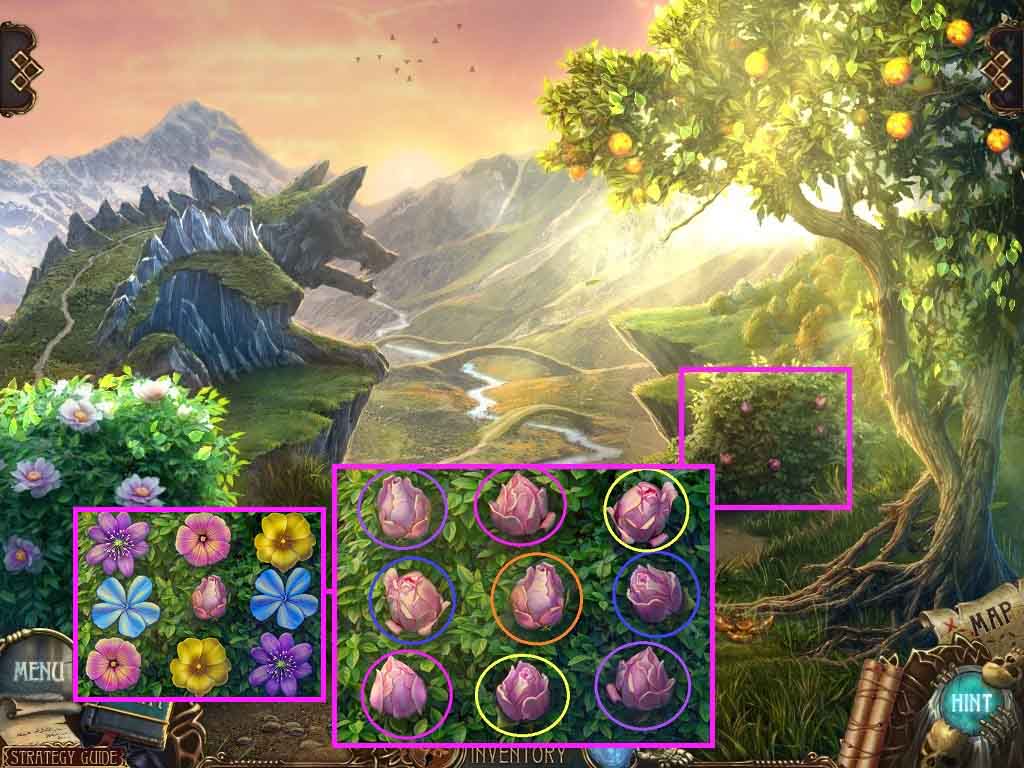
- Examine the roses.
- Put the flower alongside the others to trigger a puzzle.
- Click the matching flower pairs.
- Collect the tree seal.
- Move to the temple.
- Click the scroll.
- Insert the seals as follows:
- Earth seal, lion seal, Sansanna’s seal, Panoptes’ seal, Argus’ seal, sun seal, moon seal and the tree seal.
- Place the scroll onto the scene.
- Congratulations! You have successfully completed Azada: Elementa Collector’s Edition!