
Amaranthine Voyage: The Living Mountain: Chapter Three: Inside the Dressing Room
Depend on our Amaranthine Voyage: The Living Mountain Walkthrough as you prepare yourself for a journey beyond your wildest imagination. Track down the missing Johnathon through a beautiful, exotic world using our custom marked screenshots, detailed step-by-step instructions, and solutions to all the puzzles you'll encounter as you play this gorgeous hidden object adventure game.
General Information & Tips
Chapter One: Traversing the Tavern
Chapter Two: Passing Through the Palace
Chapter Three: Inside the Dressing Room
Chapter Four: Wander the Golden Palace
Chapter Five: Moving Around the Market Place
Chapter Six: Searching Turret Hall
Chapter Seven: Hunting Through the Kitchen
Ask for help in the comments below!
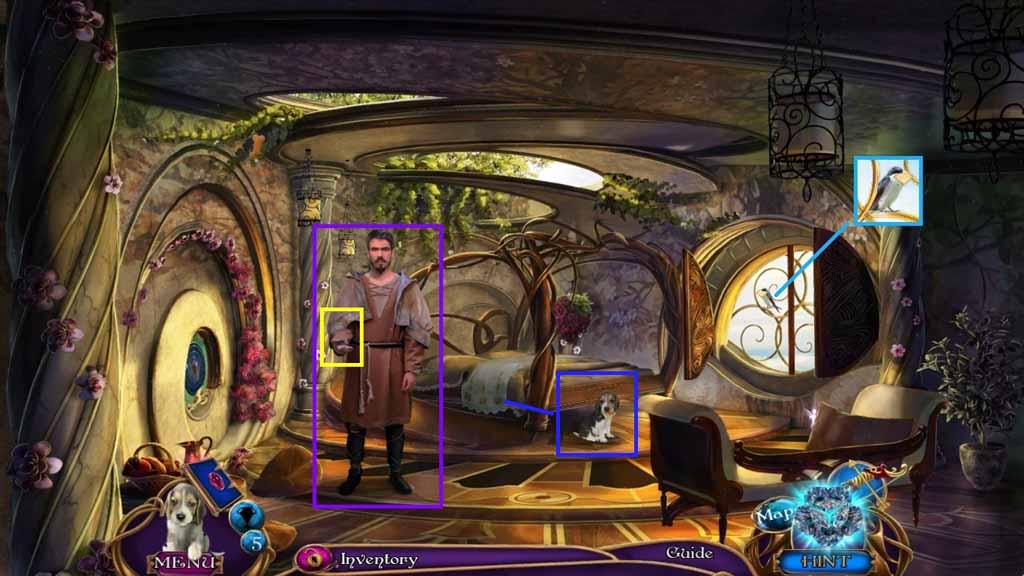
- Select the dagger to open the shutters and collect the message.
- Speak to Jonathan.
- Give Jonathan the message and take the dressing room key.
- Click the covers on the bed.
- Place Bonnie beneath the bed and collect the amber crystal.
- Move down once.
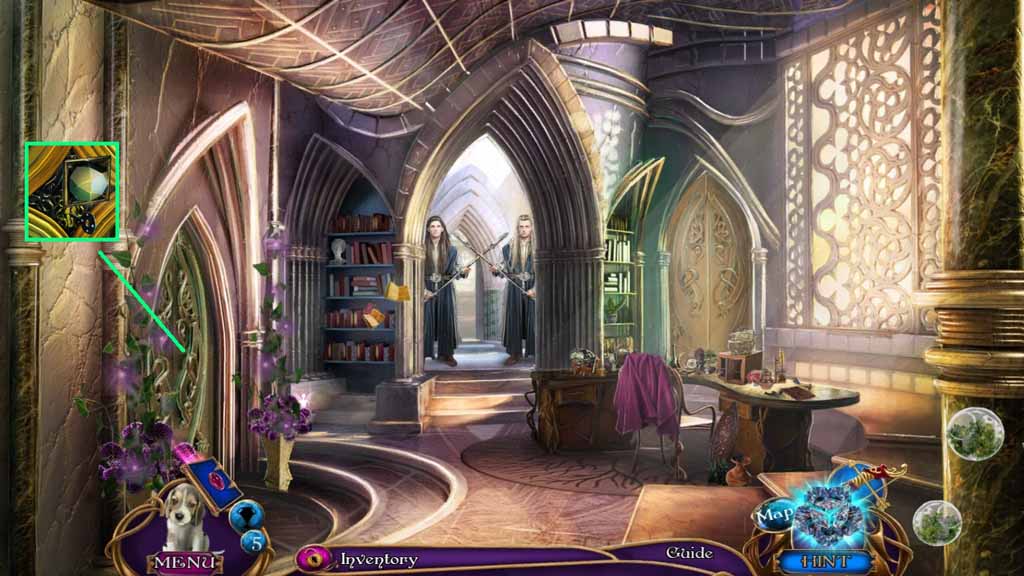
- Insert the dressing room key into the lock and click it once.
- Move into the Dressing Room.
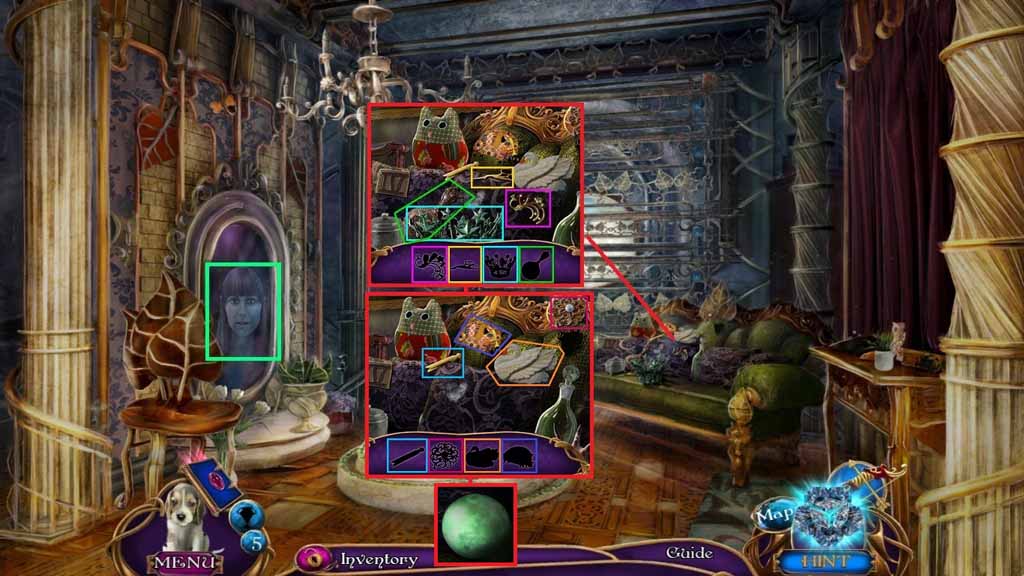
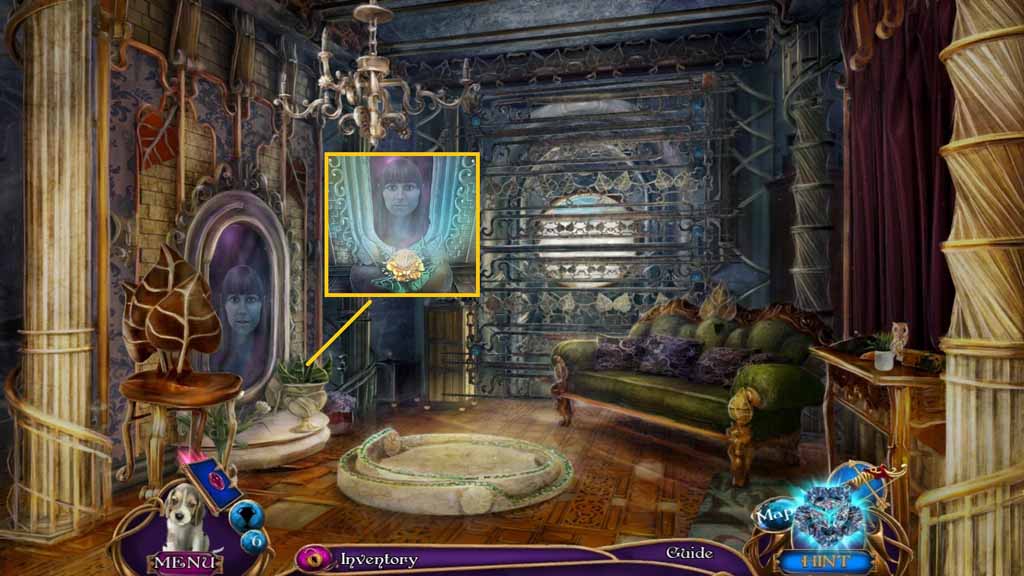
- Click the mirror and speak to the Lady in Waiting.
- Click the hidden objects area.
- Find the silhouetted items.
- Collect the green moon model.
- Move to the Bed Chamber.
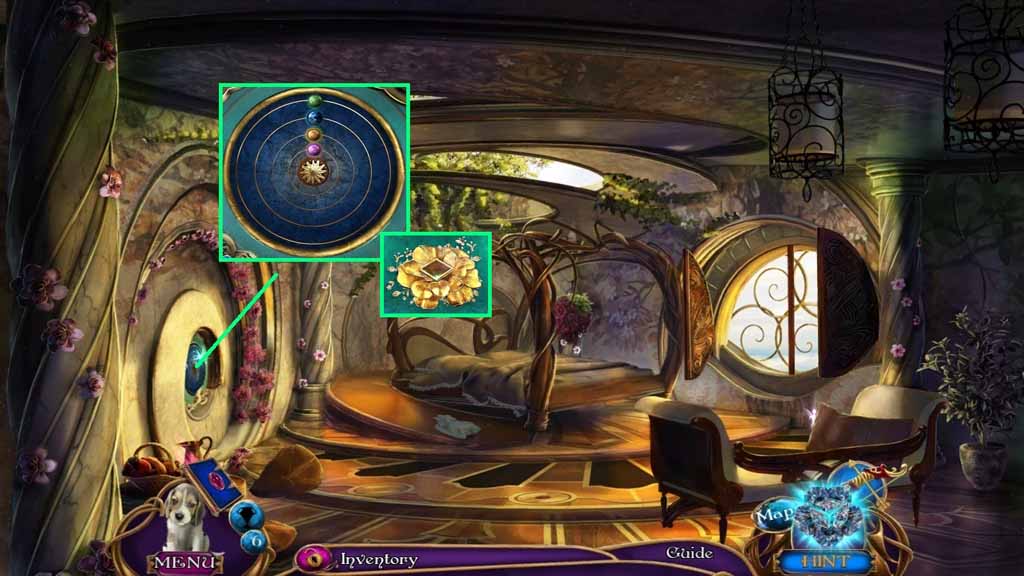
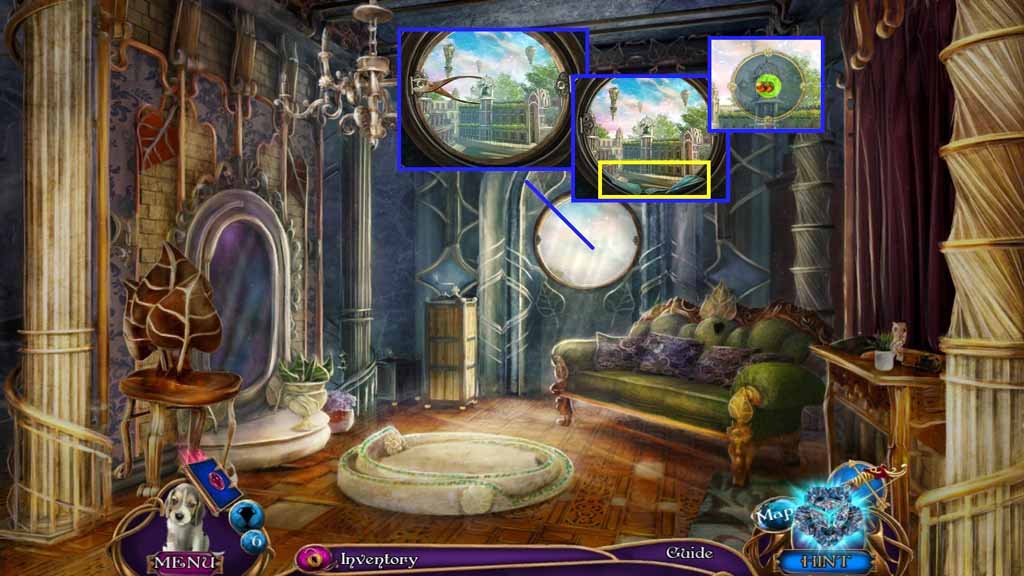
- Insert the sun emblem, orange moon model and the green moon model to trigger a puzzle.
- Solve the puzzle by aligning the planets in the correct order.
- Collect the golden flower.
- Move to the Dressing Room.
- Insert the golden flower in the amber crystal into the grooves to trigger a hidden objects area.
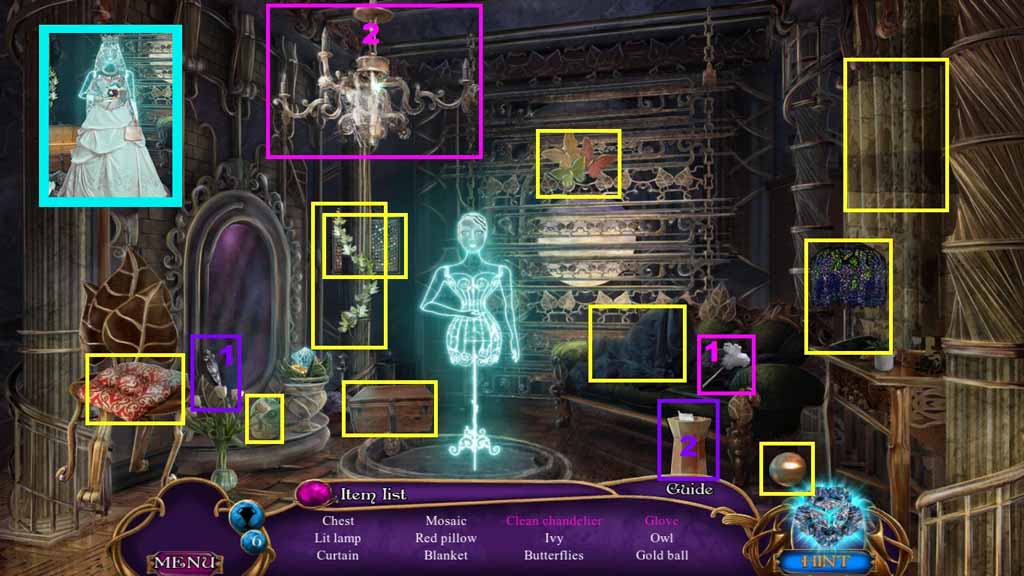
- Find the listed items.
- Select the duster and use it to clean and collect the clean chandelier.
- Select the pincher and use it to collect the glove.
- Completing the game allows you to get dressed.
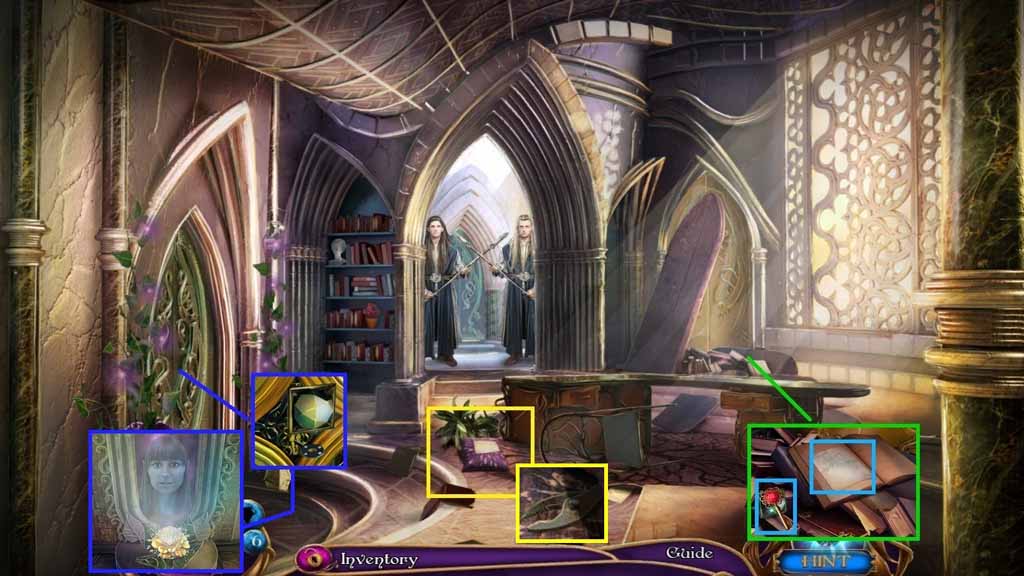
- Read the note.
- Click the items aside.
- Collect the door knob and 1 / 4 small keys.
- Attach the door knob onto the door and click it once.
- Move into the Dressing Room and speak to the Lady in Waiting.
- Move down once.
- Click the clue open.
- Collect the needle and thread beneath it.
- Click the pillow and attach the pincher halves together; collect the pincers.
- Move to the Dressing Room.
- Select the pincers to use on the screws and remove the glass.
- Collect the glass shard.
- Shoot the bow and arrow toward the target.
- Move down once and enter the back door to gain access to the Entrance Hall.
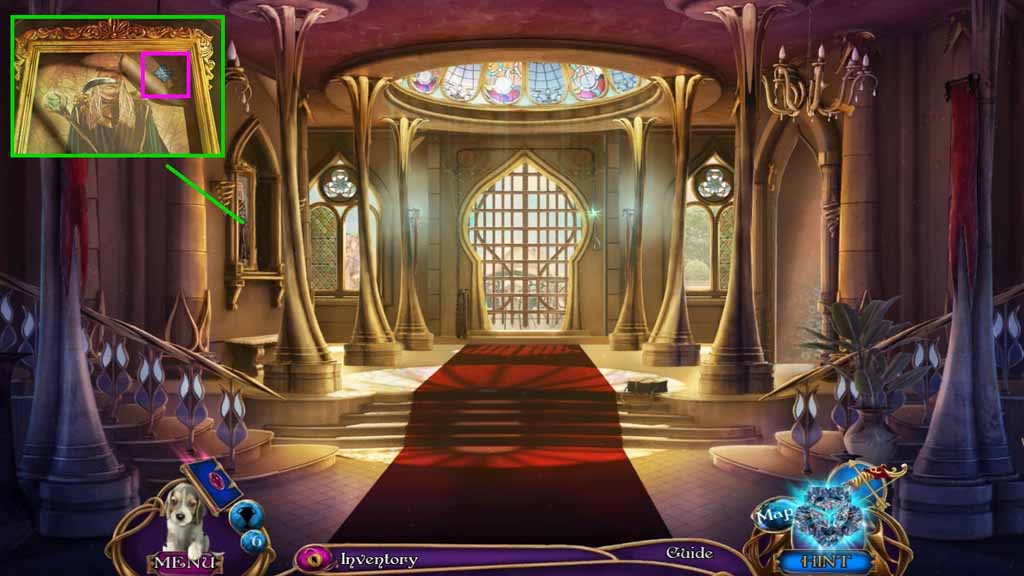
- Select the glass shard to slice the painting and collect the water medallion.
- Move through the doorway on the right then click the hidden objects area.
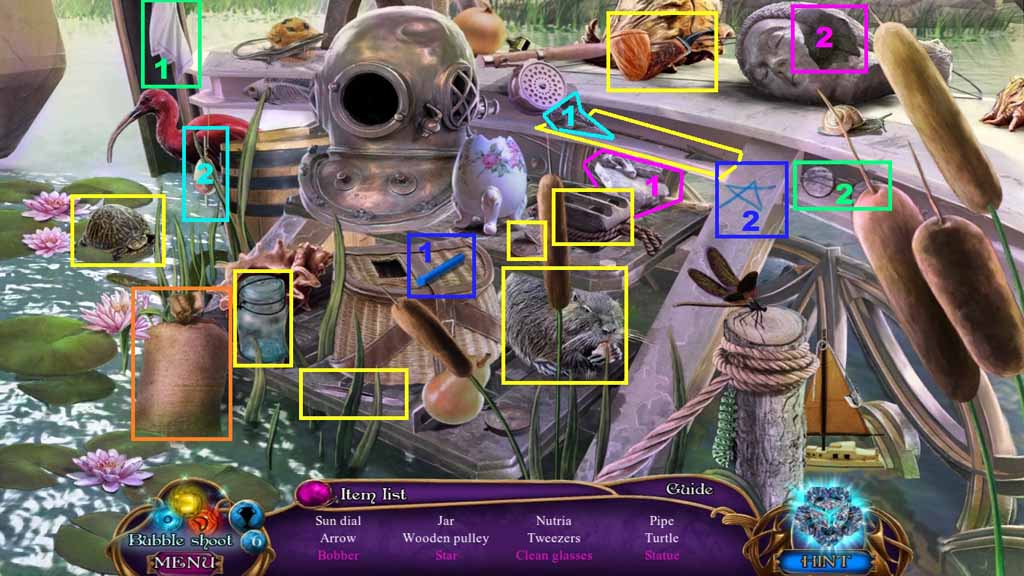
- Find the listed items.
- Select the scissors to cut and collect the bobber.
- Select the chalk to complete and collect the star.
- Select the handkerchief and use it to clean and collect the clean glasses.
- Select the statue piece and place it into the broken statue; collect the statue.
- Collect the sandbag.
- Click the leaves aside and collect the 2/4 small keys and the buckle part.
- Move down one time.
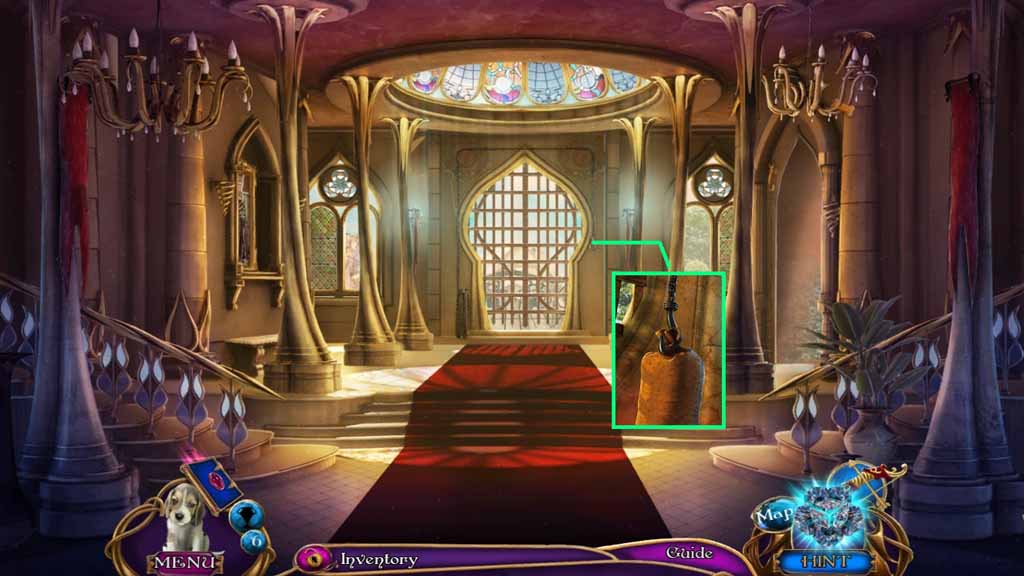
- Hang the sand bag onto the hook.
- Move ahead.
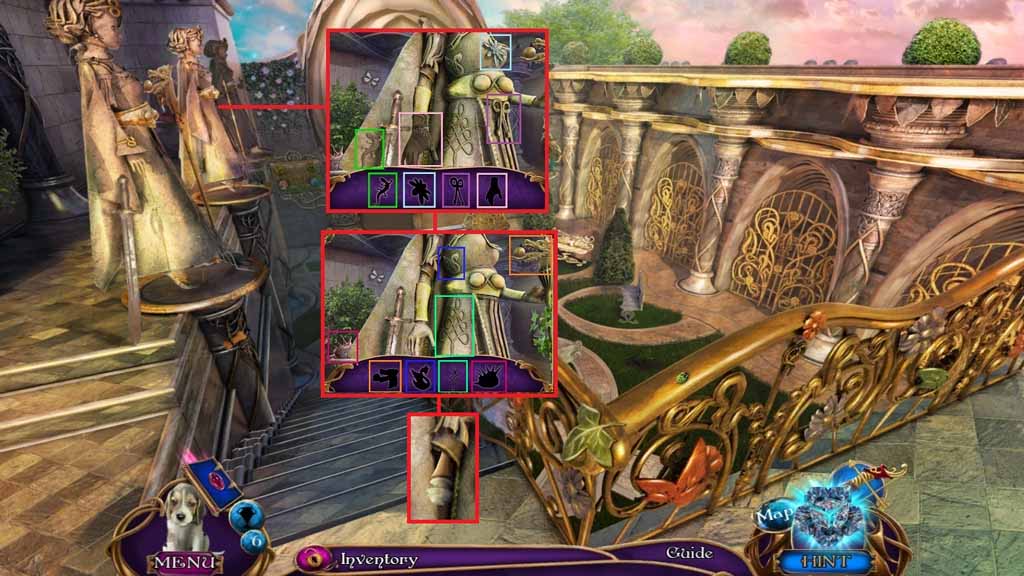
- Click the hidden objects area.
- Find the silhouetted items.
- Collect the lever.
- Move down once.
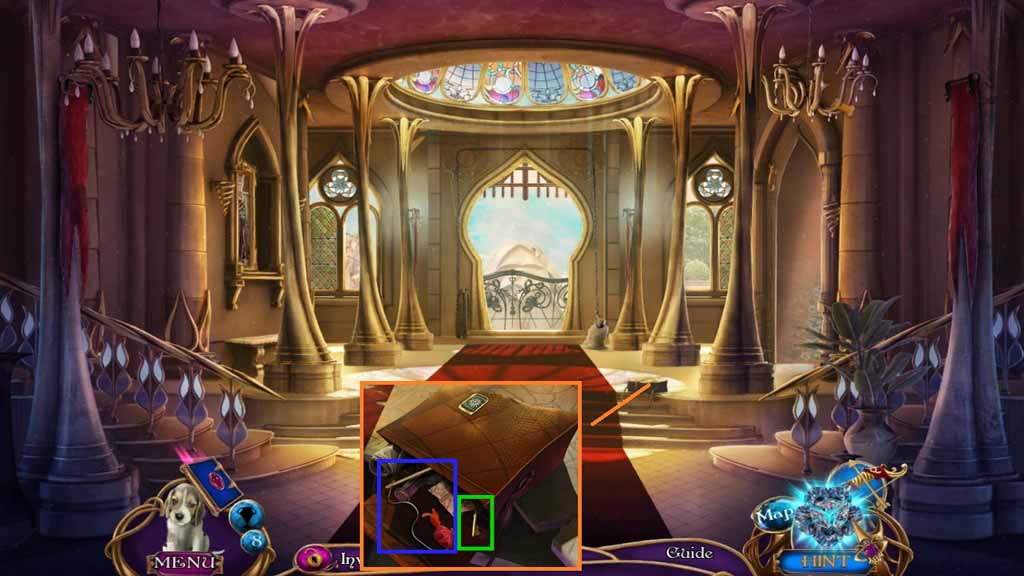
- Insert the buckle part into the lock and click it once.
- Collect the cat toy.
- Click the paper and collect the 3/4 small keys.
- Move ahead.
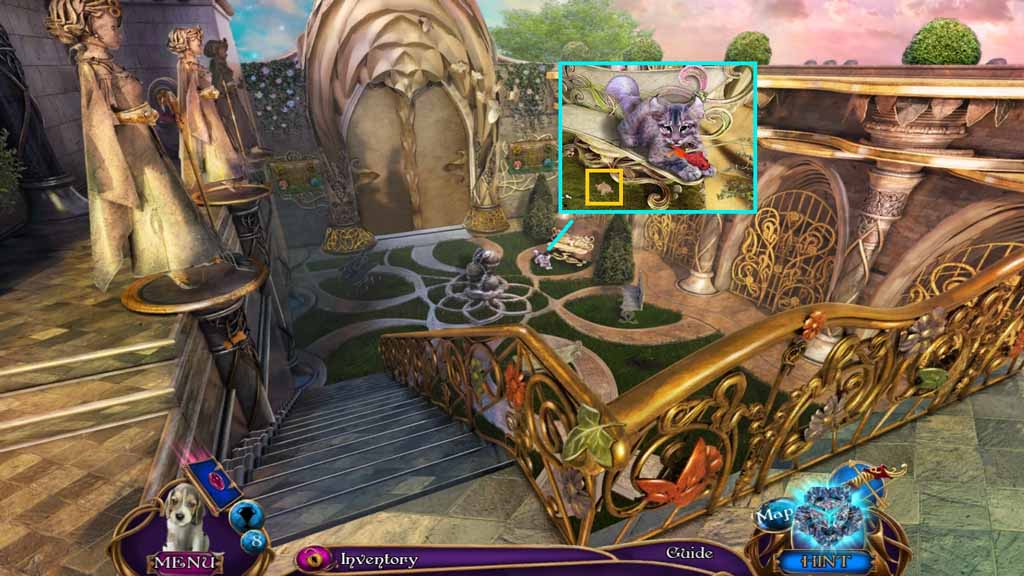
- Give the cat the cat toy; collect the wood medallion.
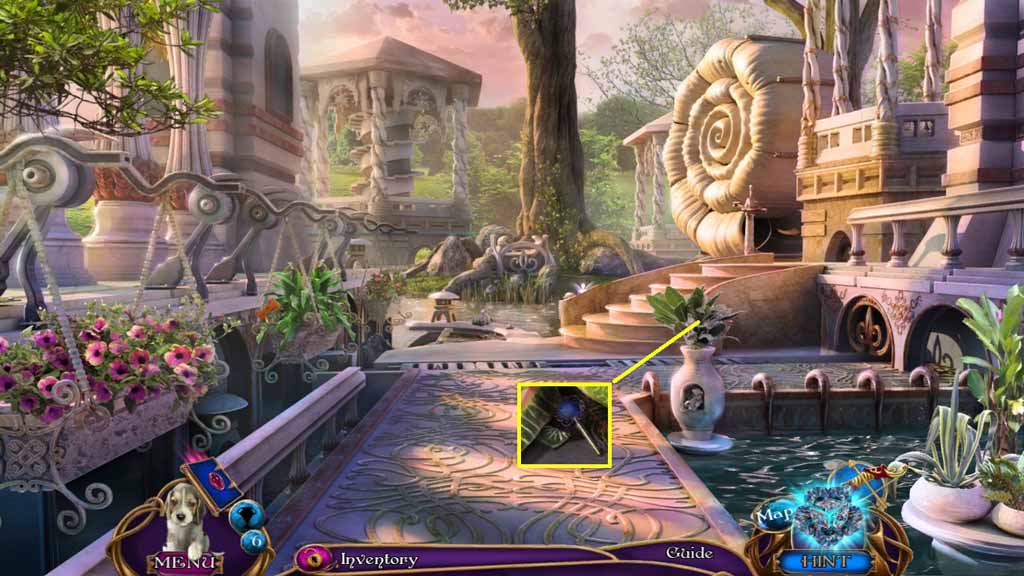
- Move to the Pond.
- Insert the water and would medallions along with the lever into the correct slots.
- Click all of the levers into the down position.
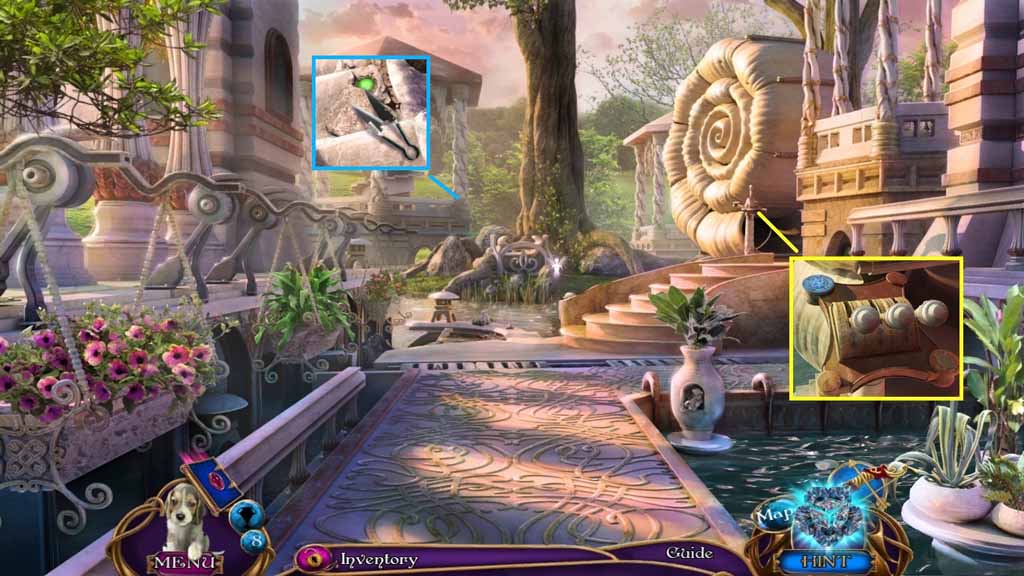
- Collect the garden pruners.
- Click the stone and collect the 4/4 small keys.
- Move to the Courtyard.
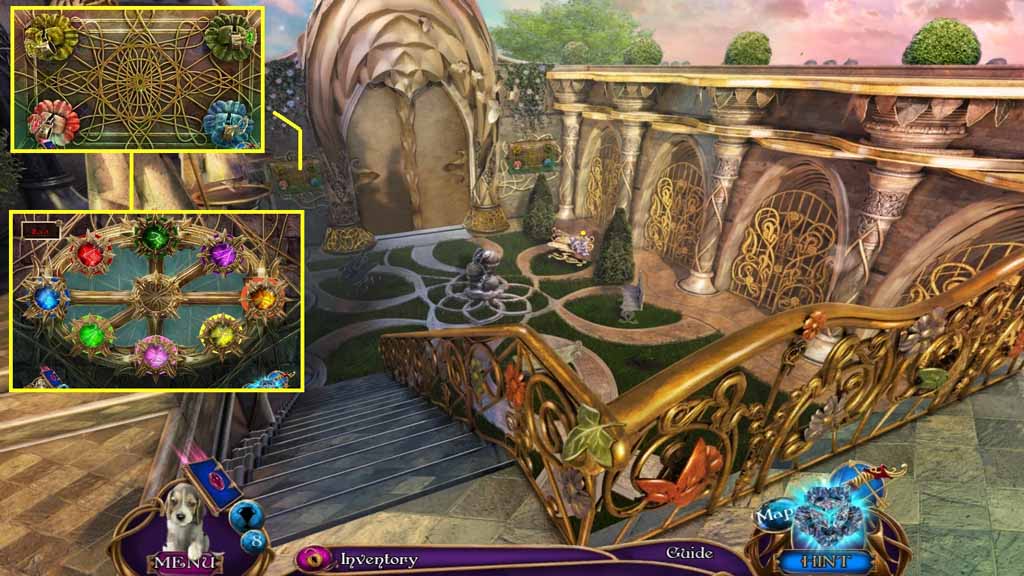
- Insert the 4 small keys into the lock to trigger a puzzle.
- Solve the puzzle by placing the gems into the correct areas.
- Move ahead.
General Information & Tips
Chapter One: Traversing the Tavern
Chapter Two: Passing Through the Palace
Chapter Three: Inside the Dressing Room
Chapter Four: Wander the Golden Palace
Chapter Five: Moving Around the Market Place
Chapter Six: Searching Turret Hall
Chapter Seven: Hunting Through the Kitchen
Ask for help in the comments below!
Chapter One: Traversing the Tavern
Chapter Two: Passing Through the Palace
Chapter Three: Inside the Dressing Room
Chapter Four: Wander the Golden Palace
Chapter Five: Moving Around the Market Place
Chapter Six: Searching Turret Hall
Chapter Seven: Hunting Through the Kitchen
Ask for help in the comments below!