
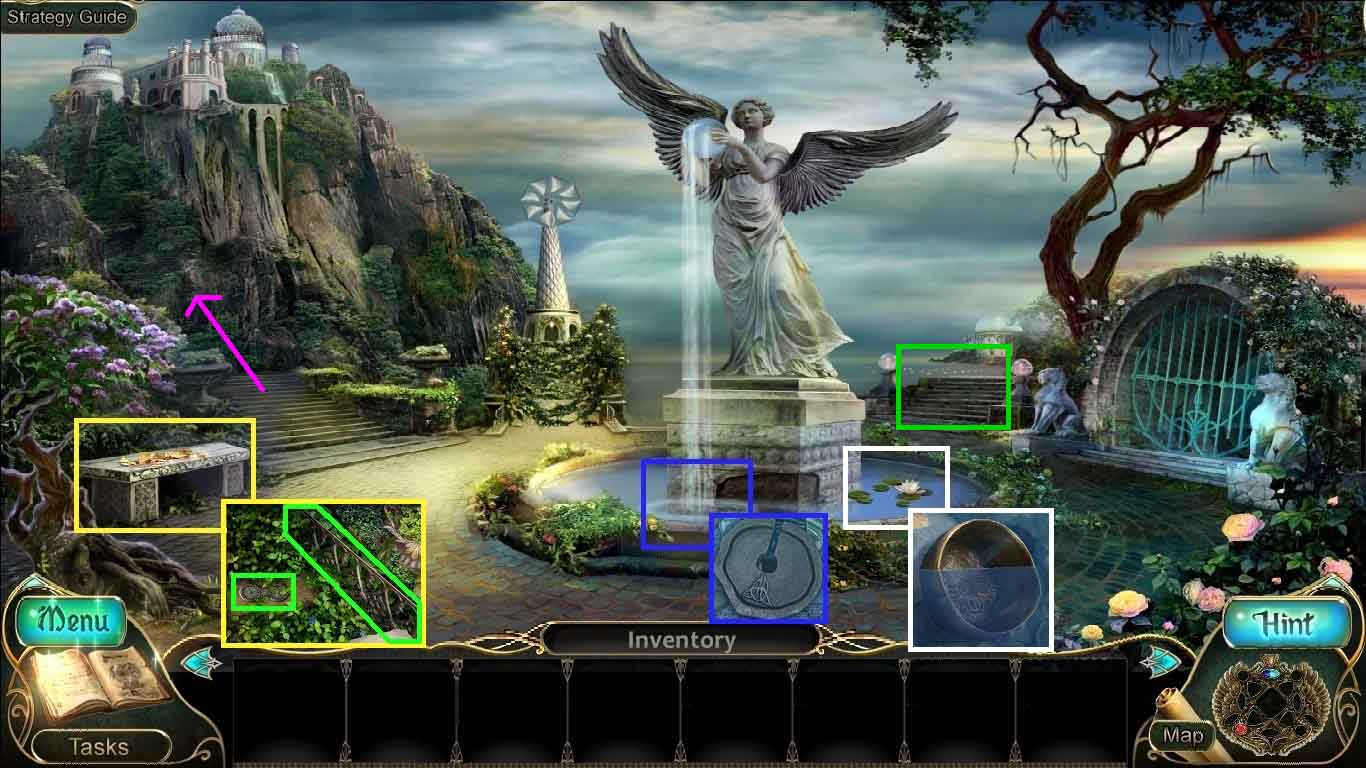
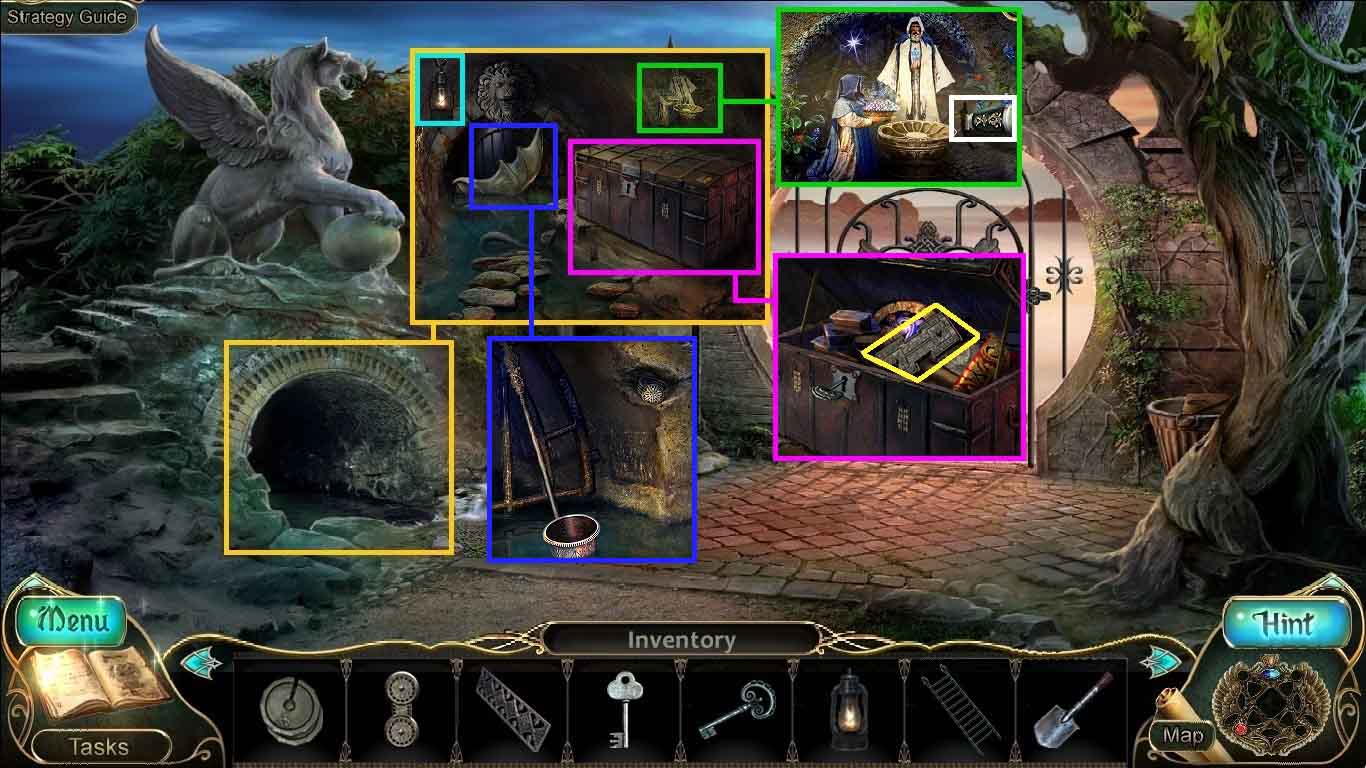
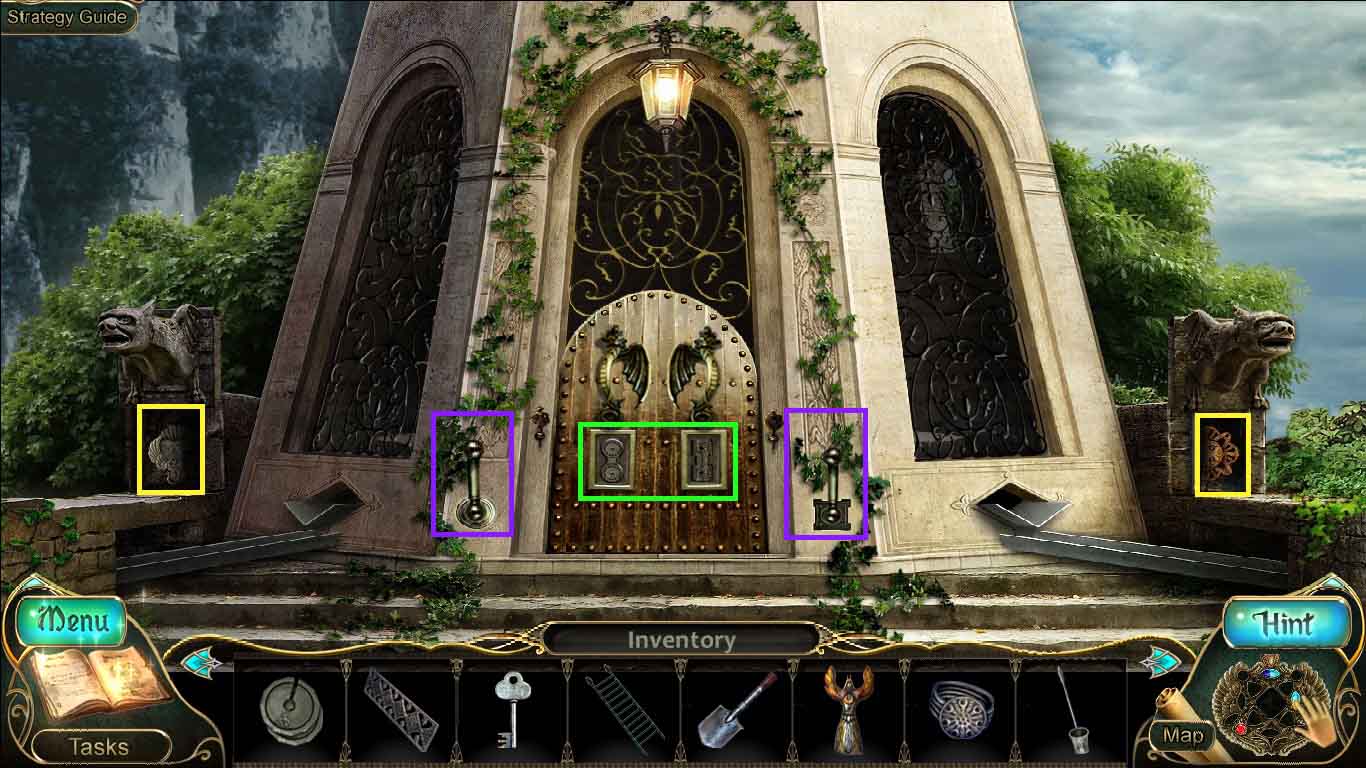
- Zoom into the bench; collect the pump station decoration and the grill.
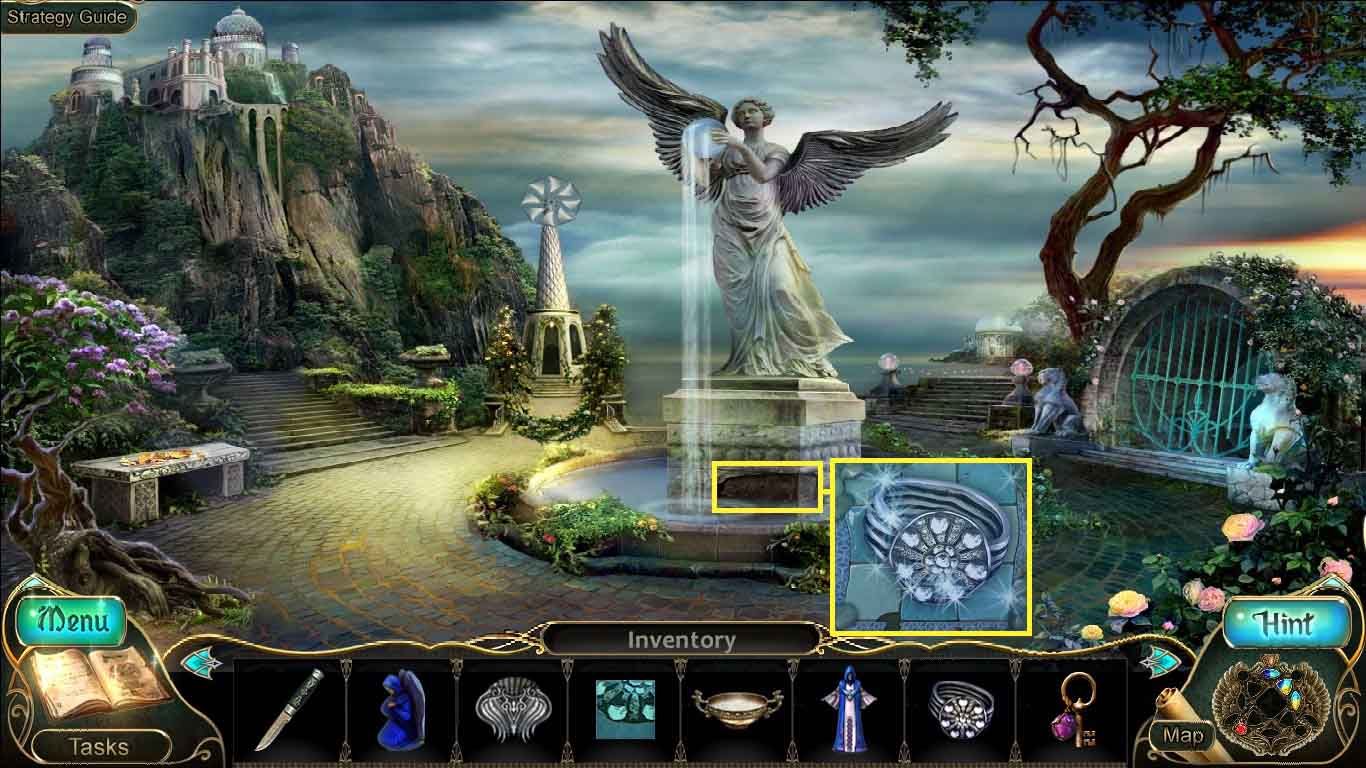
- Zoom into the fountain; collect the 1 / 3 disks.
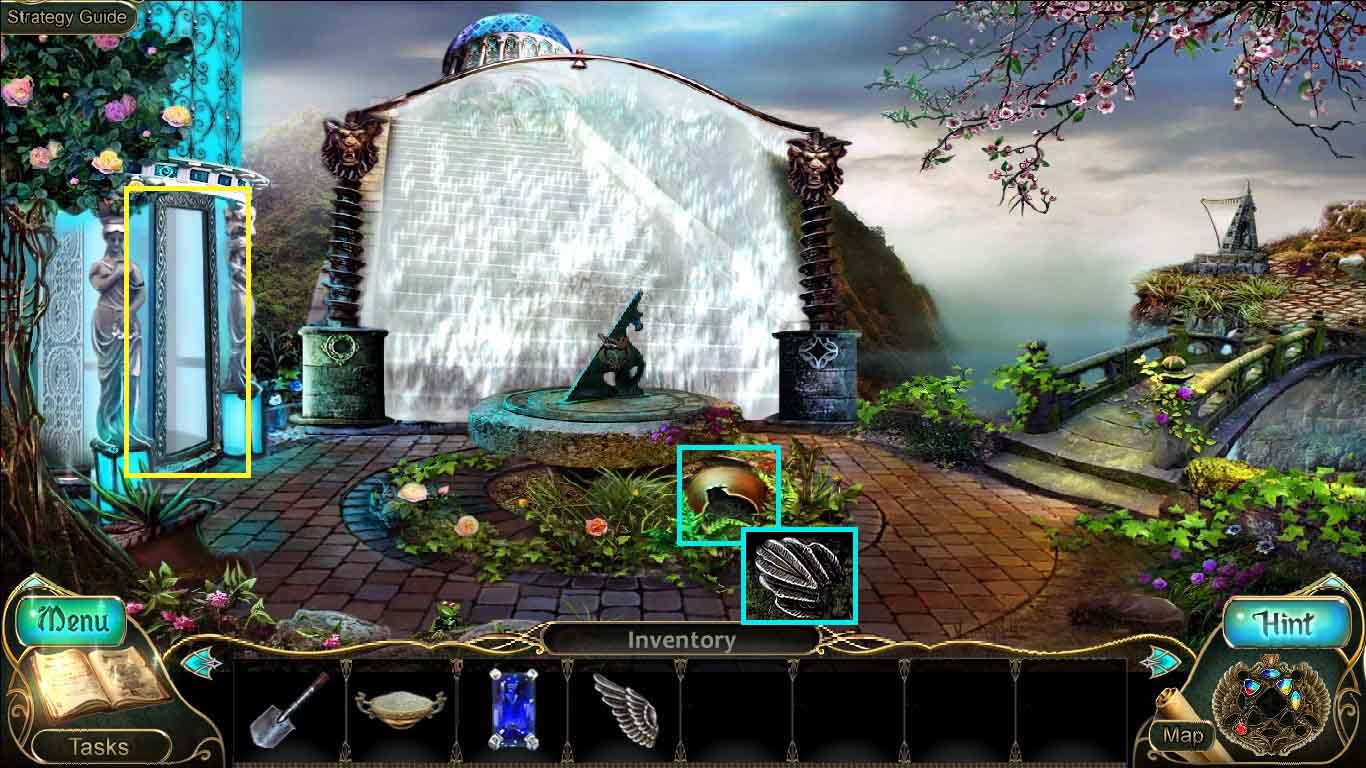
- Zoom into the lilies; collect the plain bowl.
- Take note of the stairs to the sea.
- Move left to the temple entrance.
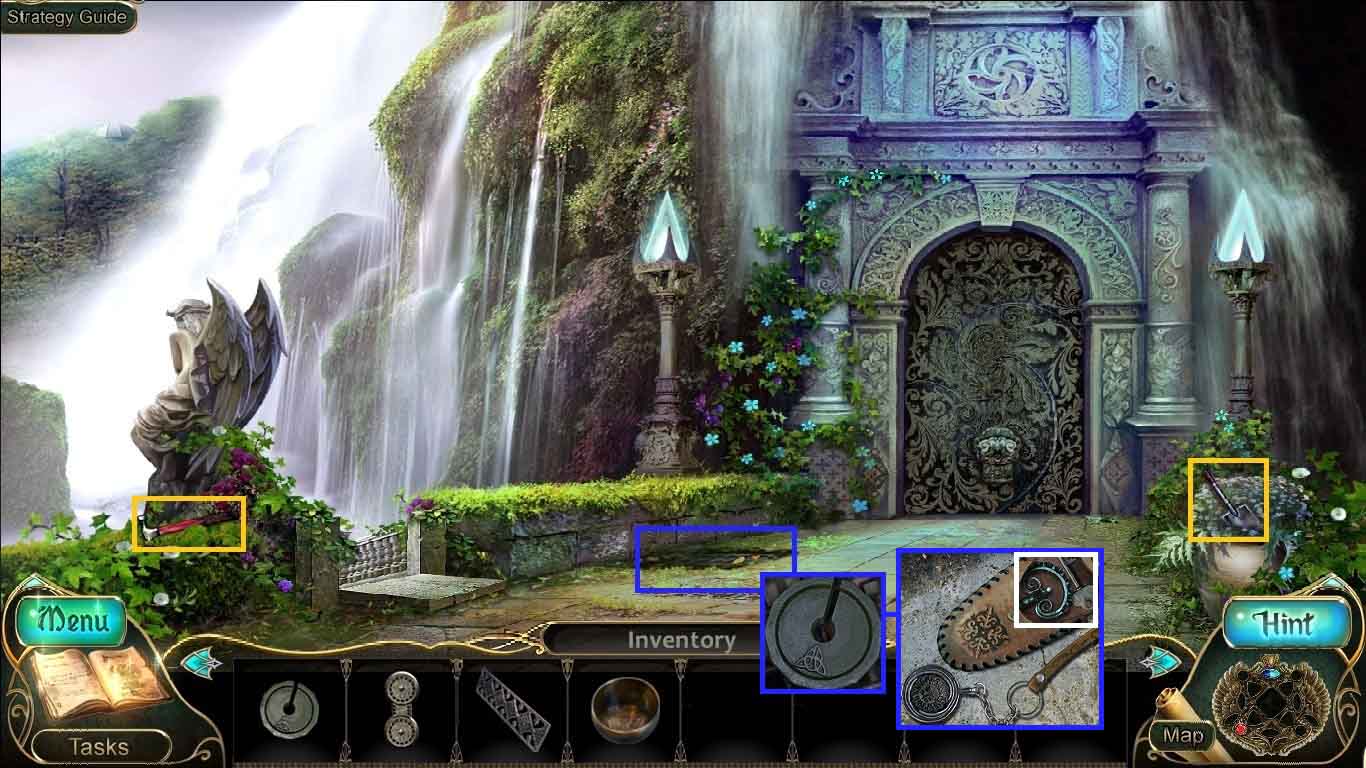
- Collect the hammer and the small shovel.
- Zoom into the drain; collect the 2 / 3 disks.
- Collect the pouch underneath the disk and click it open.
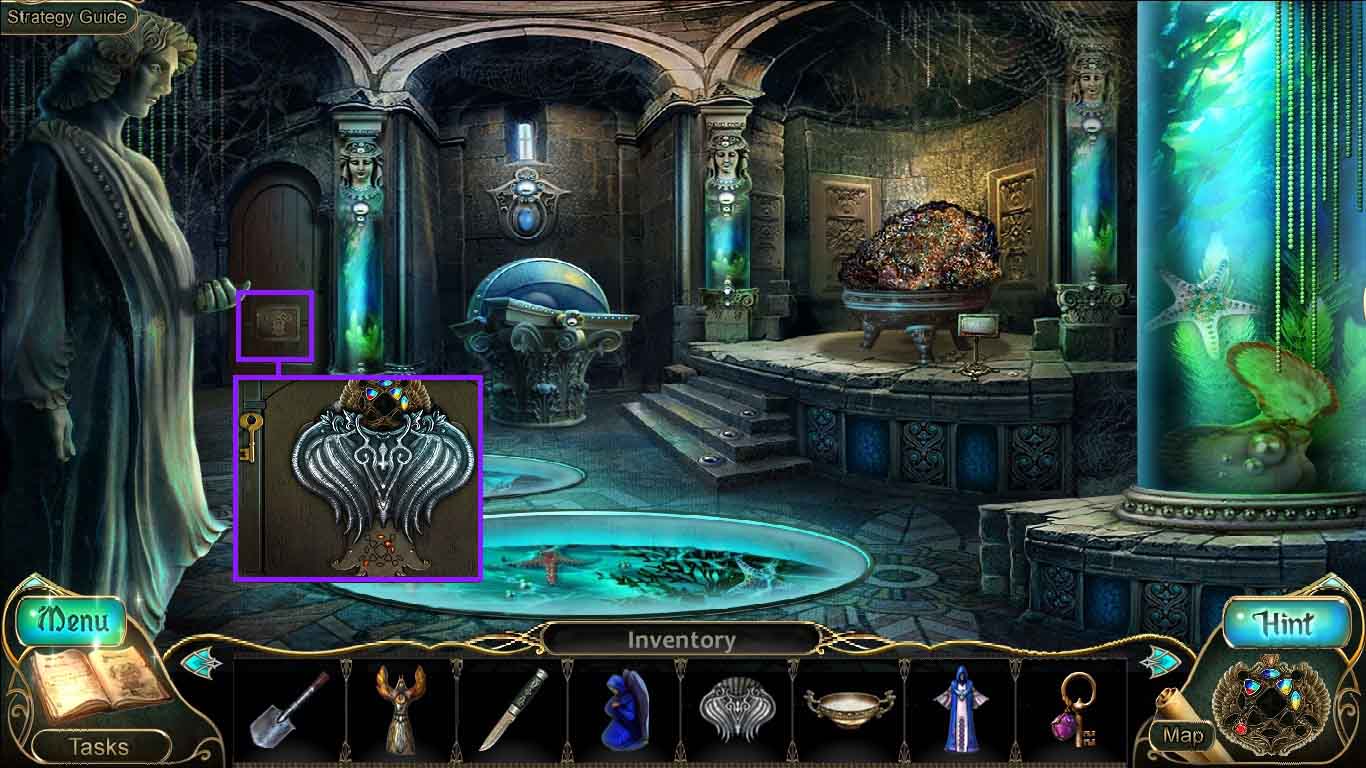
- Collect the chest key and the showcase key.
- Move to the left to go downstairs.
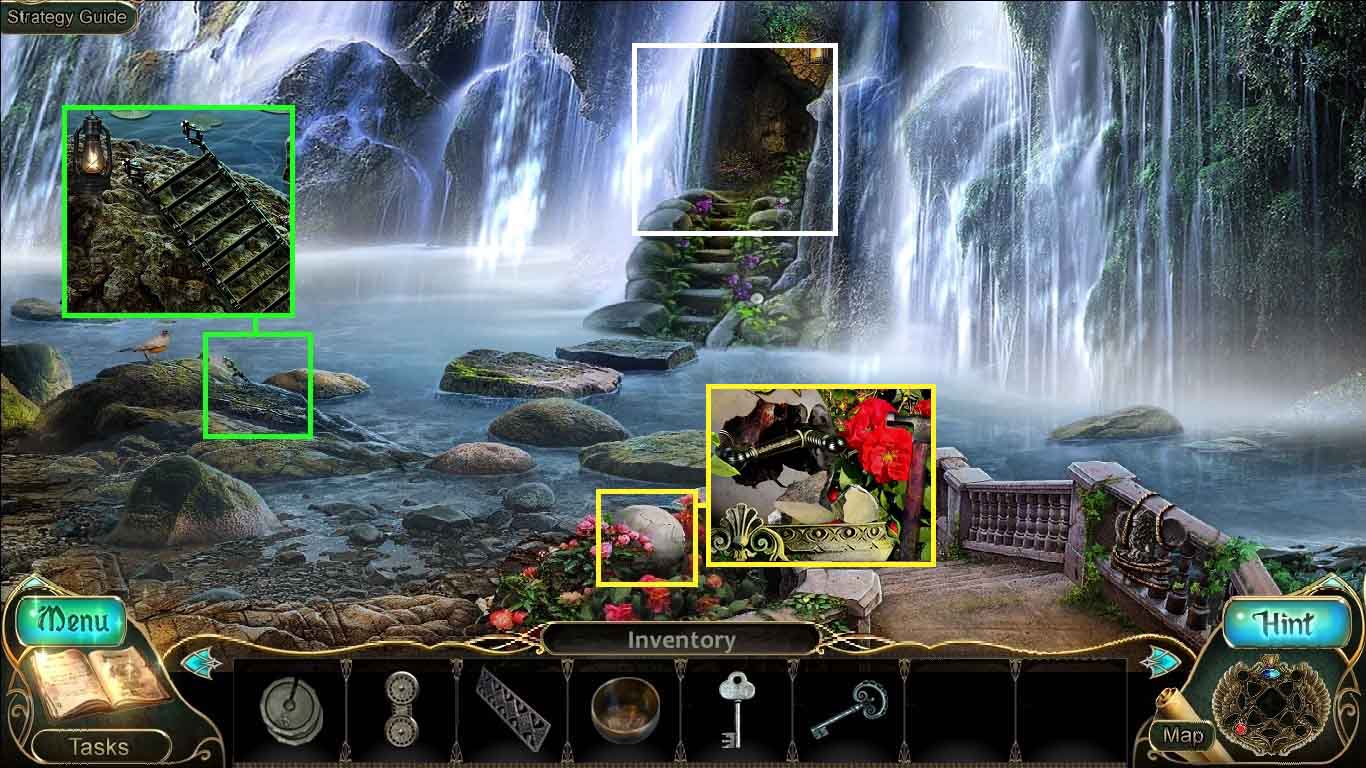
- Zoom into the plaster ball.
- Select the hammer and use it to crack the ball; collect the 1st lever.
- Zoom in behind the stone; collect the lamp and ladder.
- Move ahead to the cave entrance.
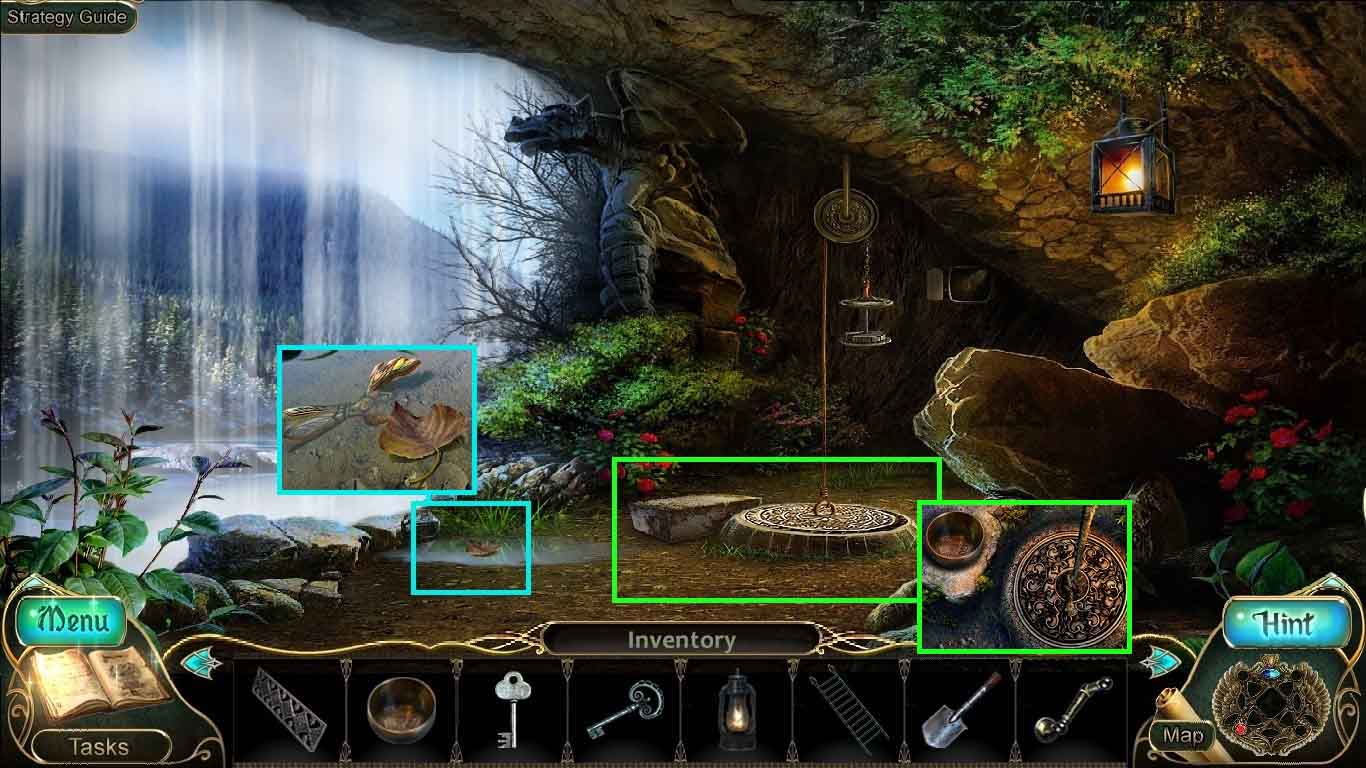
- Zoom into the puddle and click the leaf; collect the 1st doll.
- Zoom into the trapdoor and lay the plain bowl down onto the rock.
- Move down 3 times and go right to the stairs to the sea.
- Examine the tunnel; hang the lamp onto the hook.
- Zoom into the painting; collect the knife.
- Zoom into the chest; insert the chest key.
- Collect the 2nd pump station decoration.
- You will earn the ability to control water and earth.
- Zoom into the drain grill; collect the ring without jewels and the ladle.
- Move down once and go to the left twice.
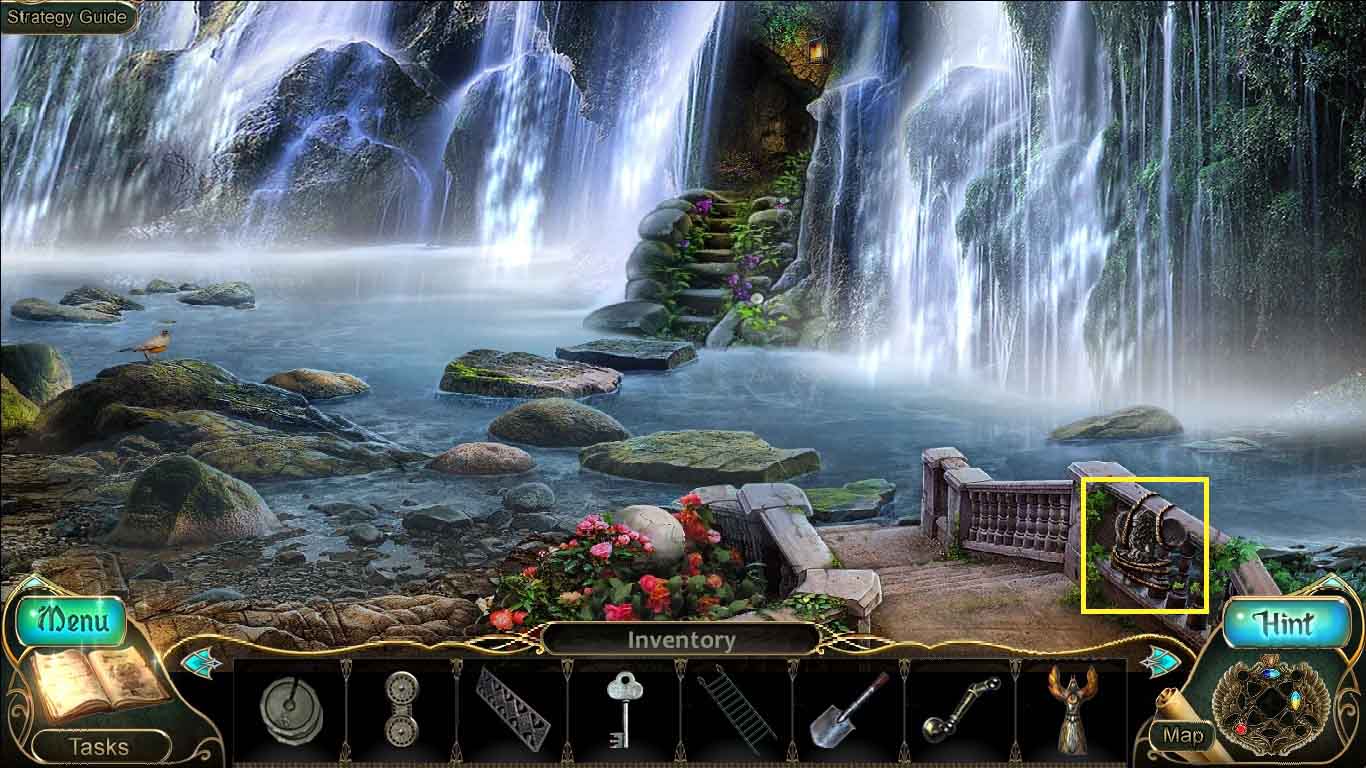
- Select the knife; use it to slice the rope on the railing.
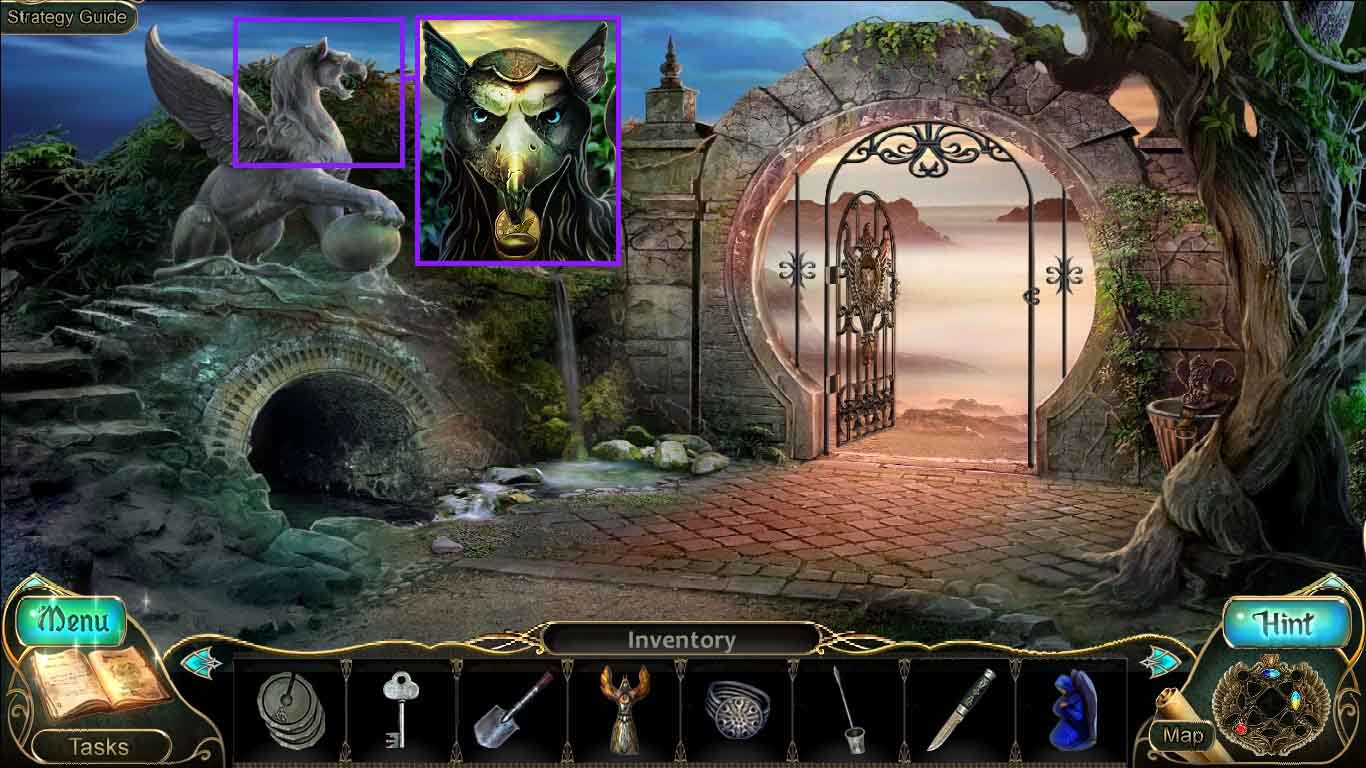
- Collect the griffin.
- Move down two times and go to the stairs to the sea.
- Examine the garbage can; insert the griffin into the top.
- Collect the shears and the 2nd lever.
- Move down one time.
- Zoom into the rose bush.
- Select the shears to clip the roses bush.
- Move to the pumping station.
- Insert the 1st lever into the niche and the 2nd lever into the other niche.
- Collect the controller and the pendant.
- Insert the 1st pump decoration into the left door.
- Insert the 2nd pump decoration into the right door.
- Move down once and go to the stairs to the sea.
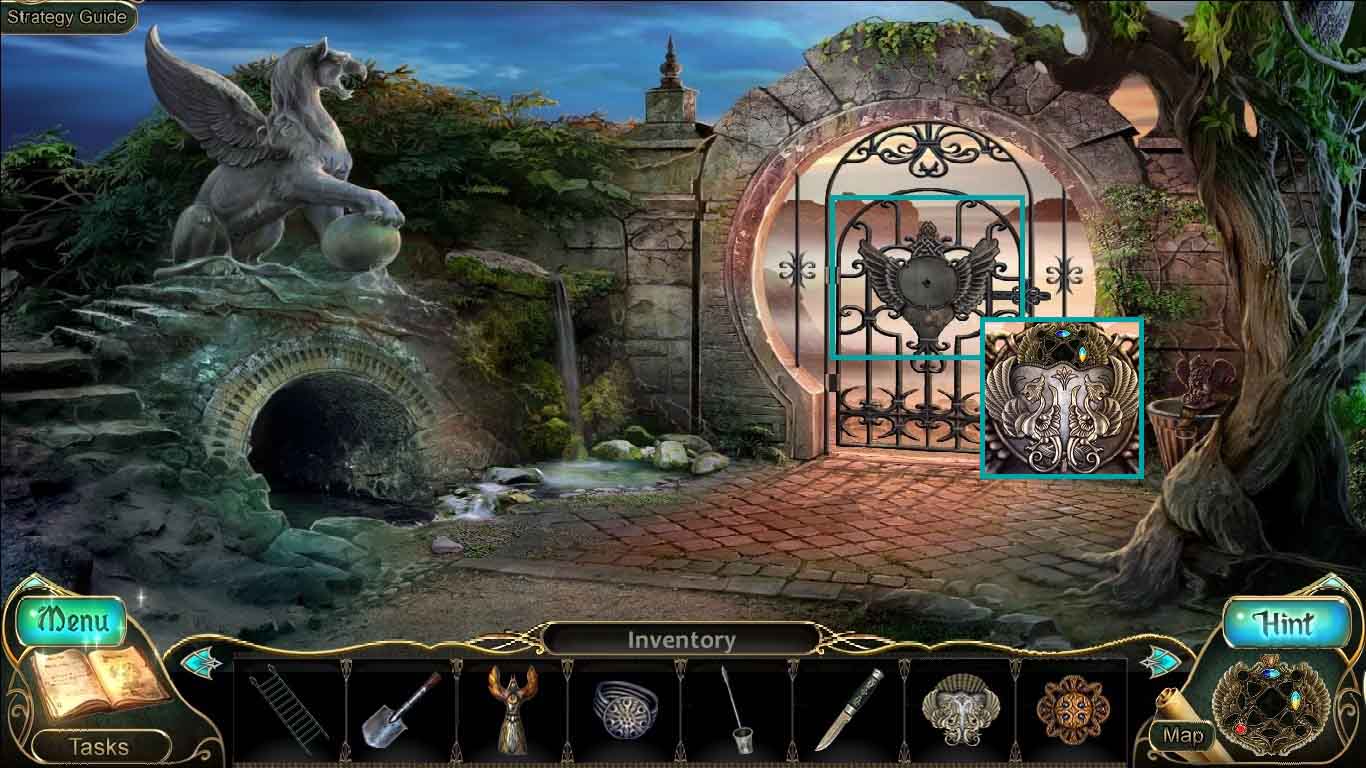
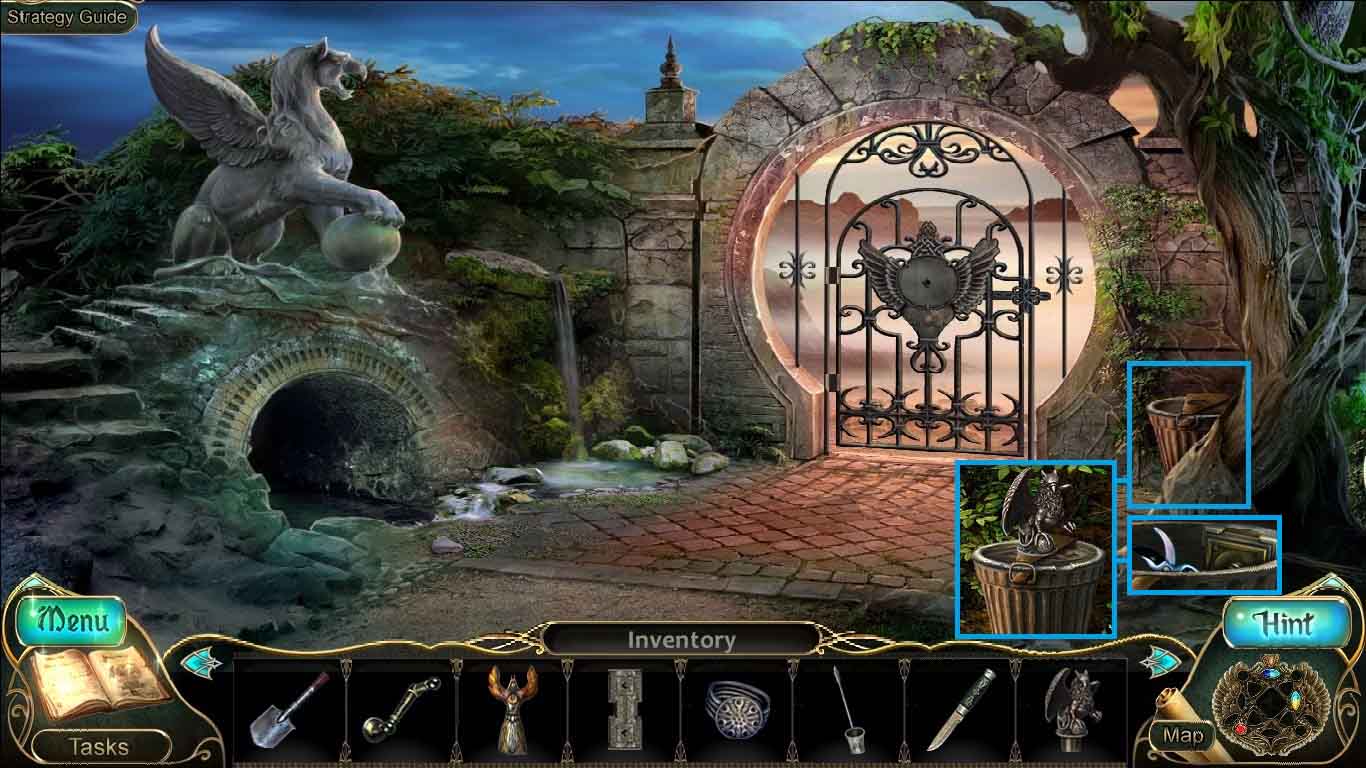
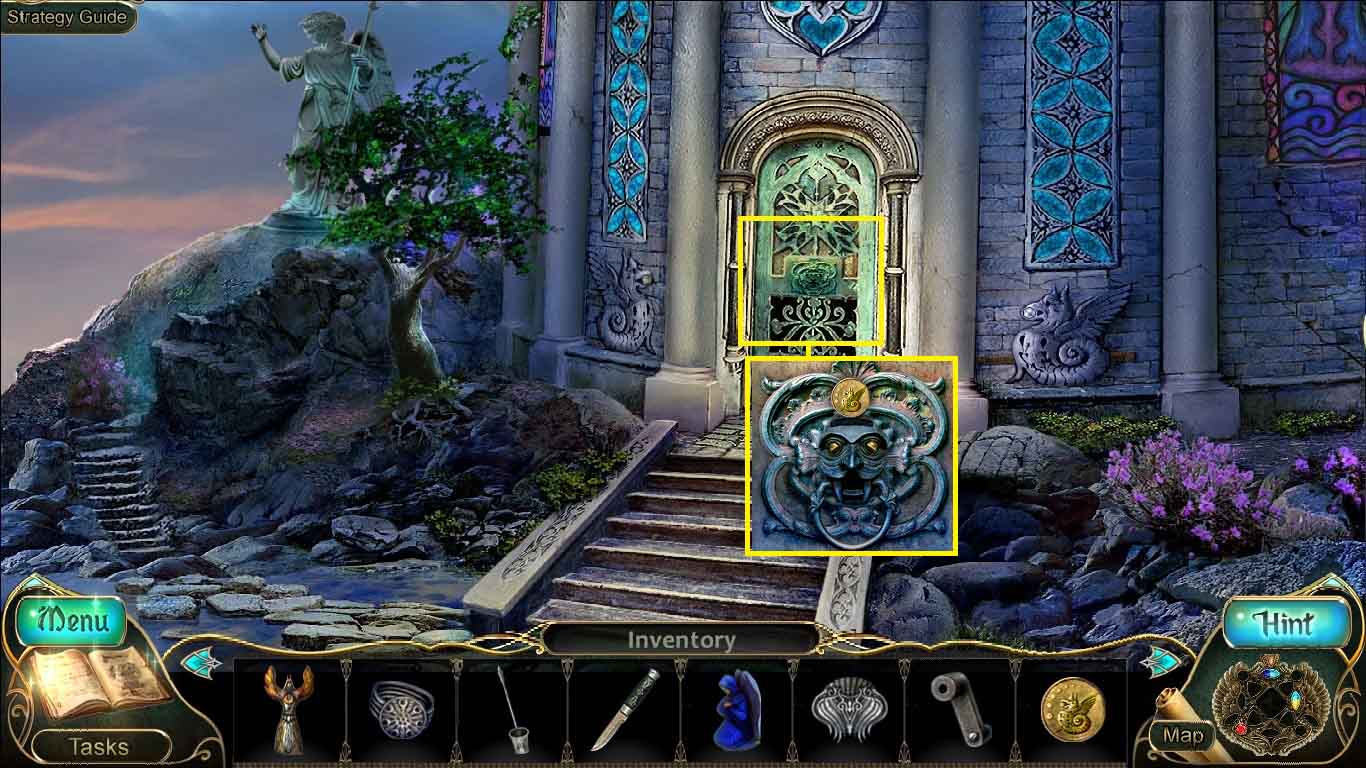
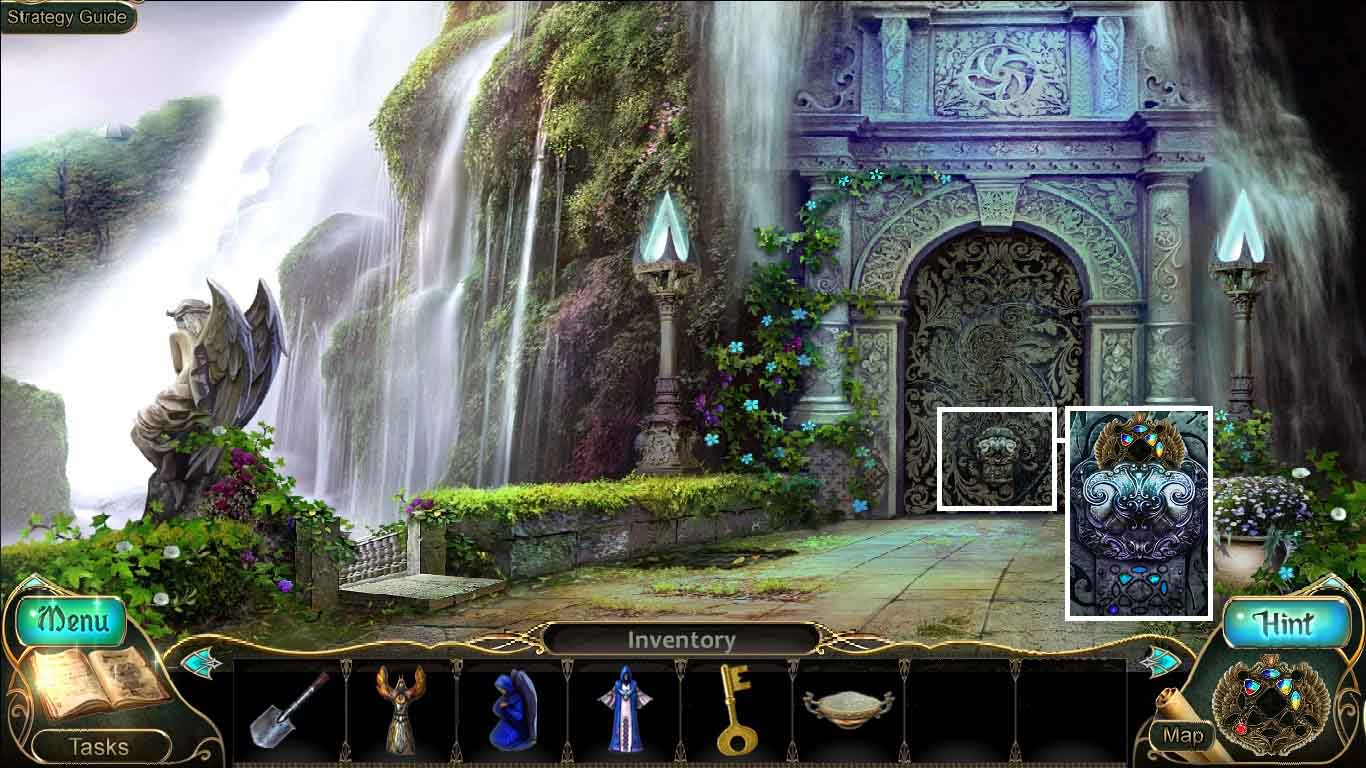
- Zoom into the gate.
- Insert the controller and place the amulet into the controller.
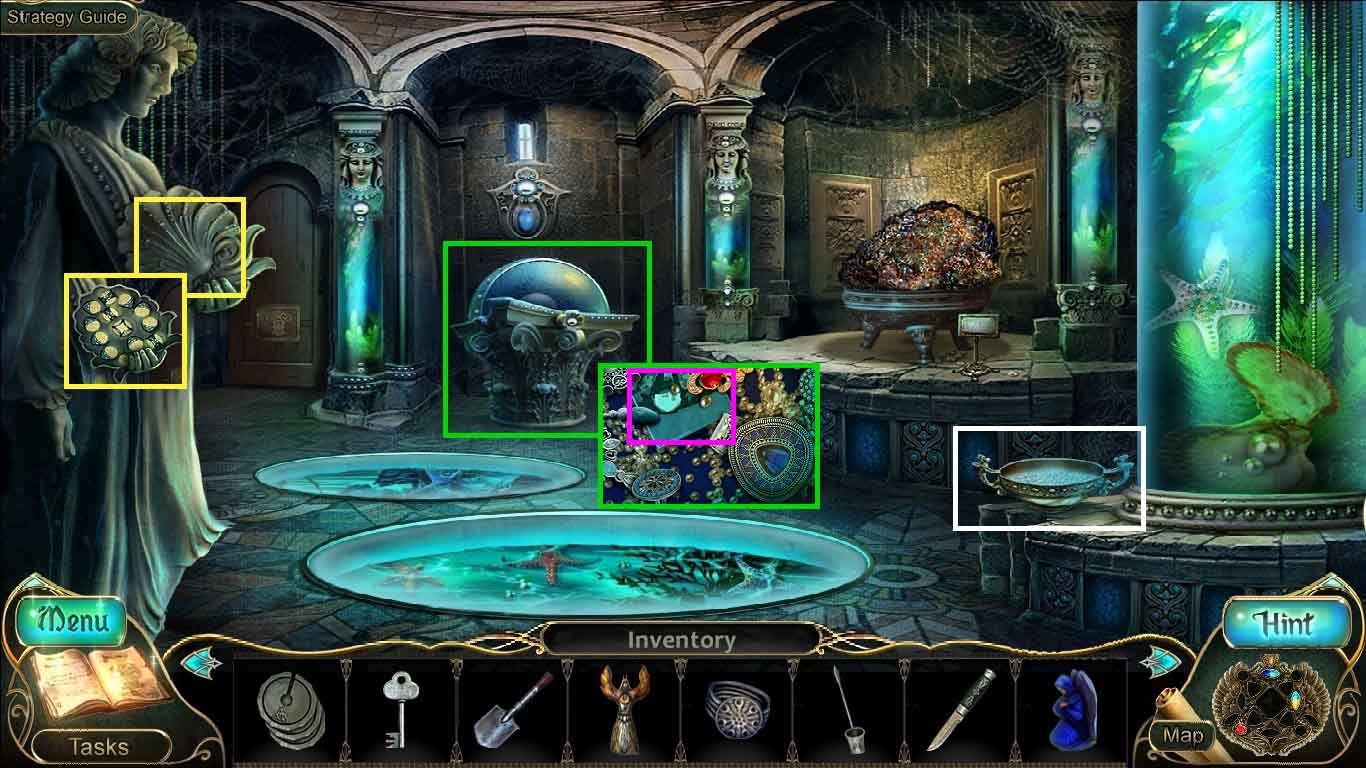
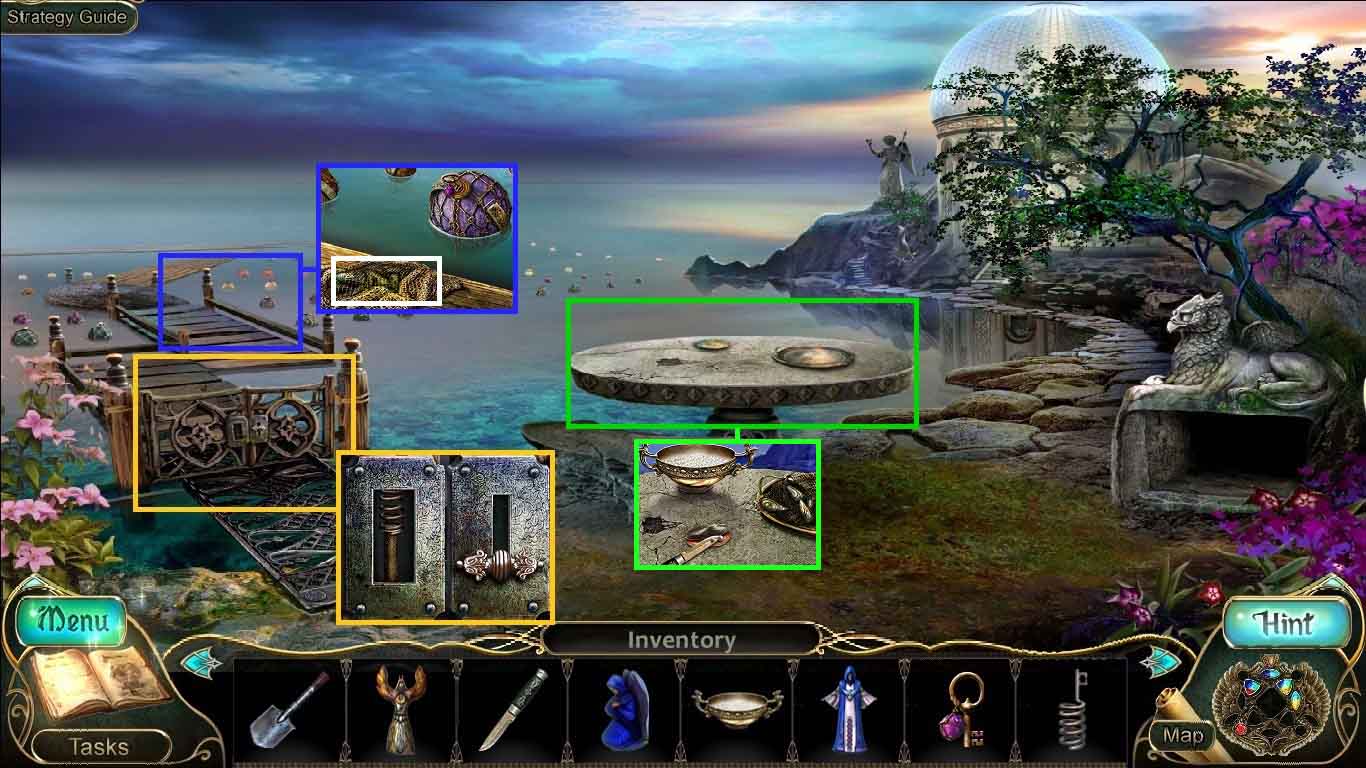
- Move ahead.
- Lay the grill over the water.
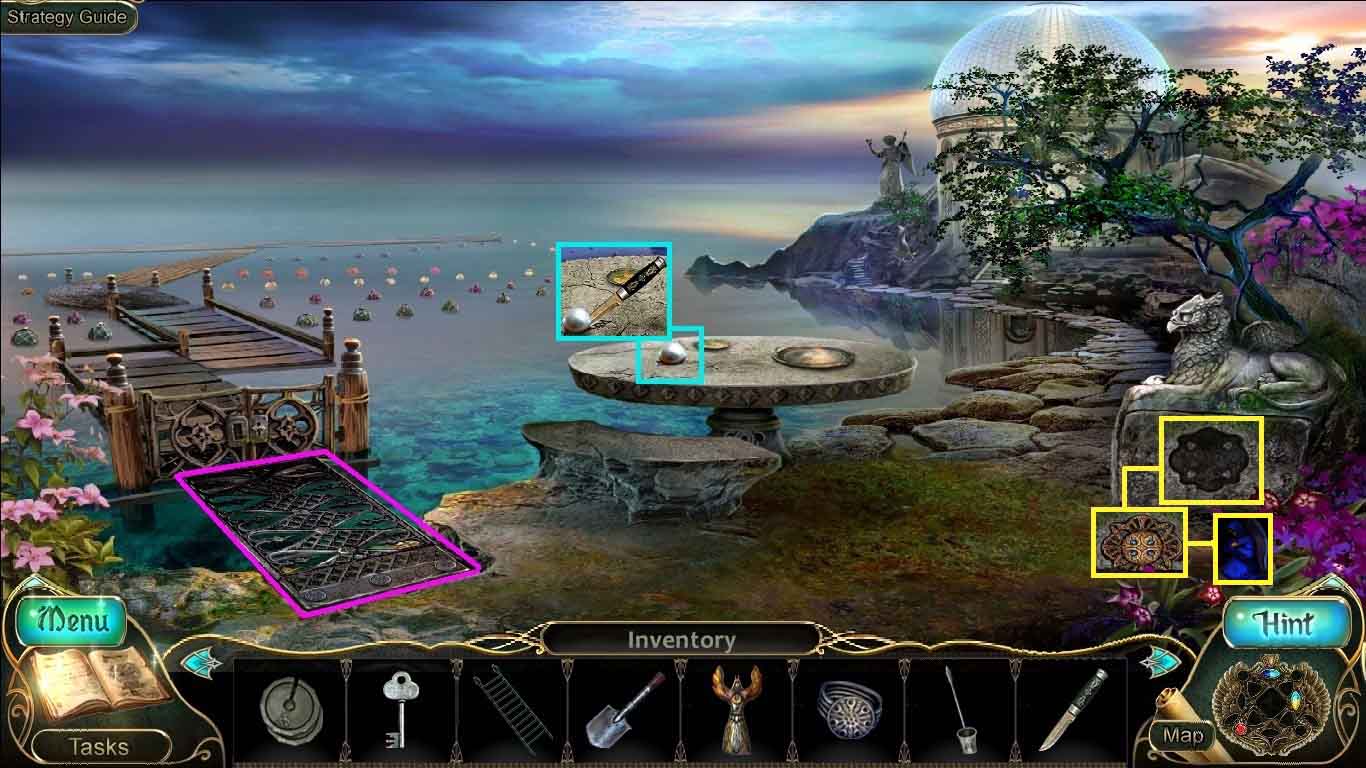
- Zoom into the table.
- Select the knife to collect the big pearl.
- Insert the pendant into the groove; collect the 2nd doll.
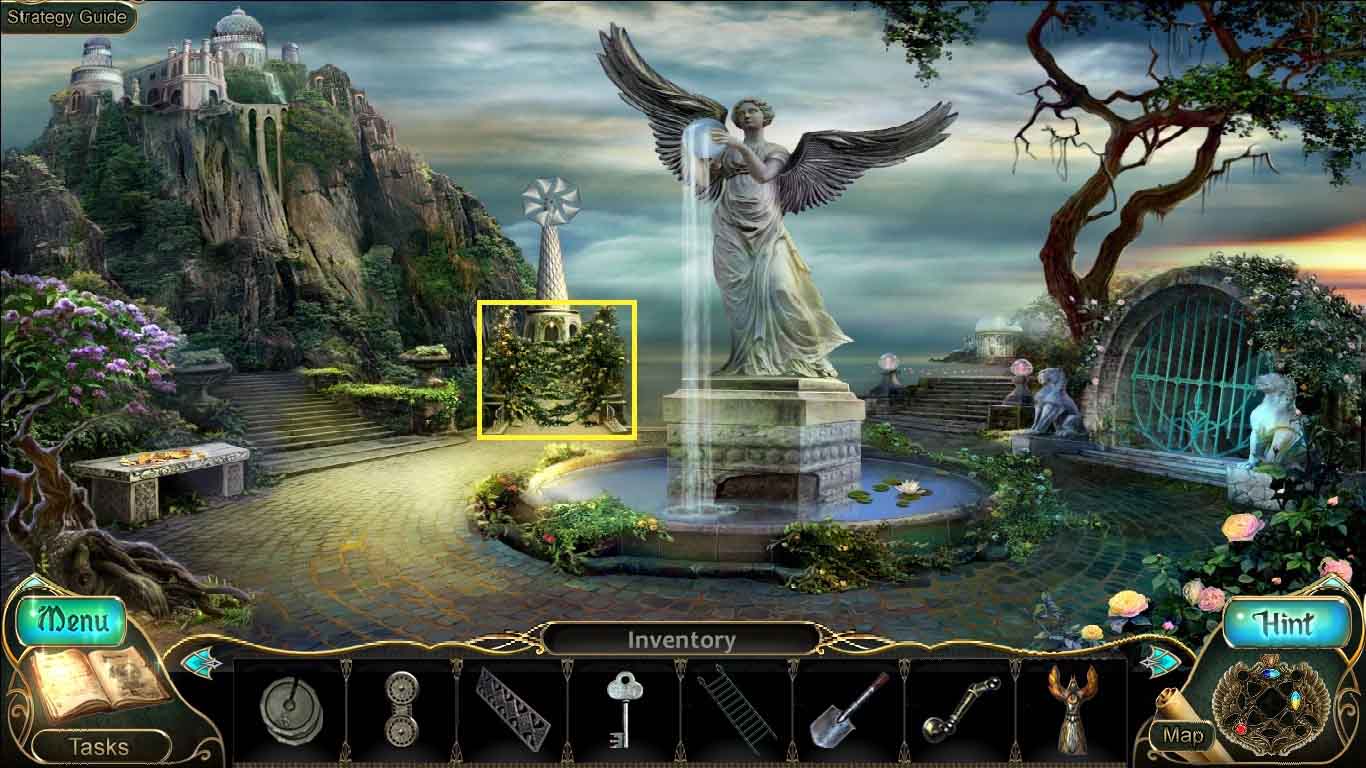
- Move ahead to the pearl museum.

- Zoom into the seahorse; insert the pearl into its mouth.
- Collect the controller.
- Examine the stairs.
- Collect the ear and the crank.
- Place the ladder onto the wall.
- Examine the statue; collect the 3 / 3 disk.
- Move down two times.
- Zoom into the monster and attach the ear to his head.
- Collect the coin.
- Move ahead two times.
- Zoom into the door; insert the coin.
- Go into the pearl museum.
- Click the shell; collect the panel with lanterns.
- Zoom into the museum showcase and insert the showcase key into the lock.
- Collect the mosaic piece.
- Collect the bowl for pearls.
- Move down 4 times and move to the pumping station.
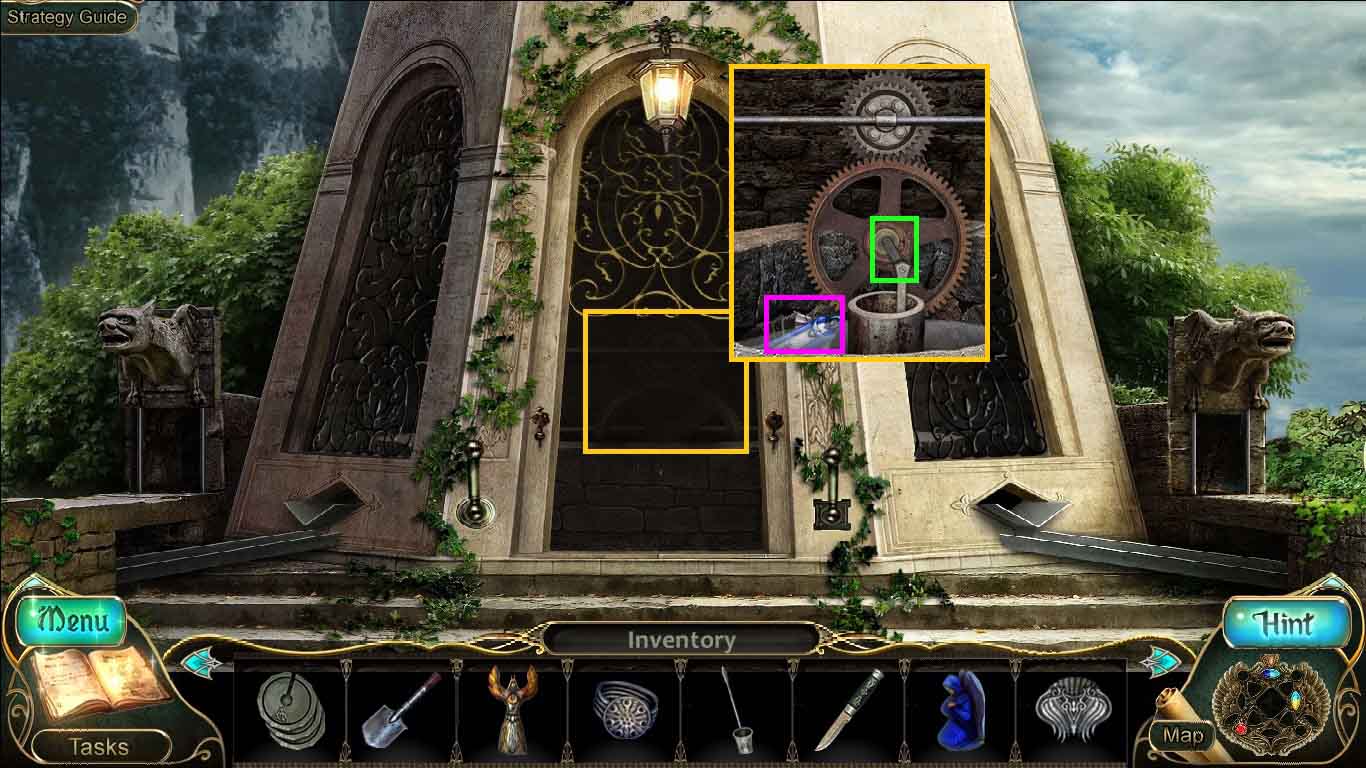
- Zoom into the machinery and insert the crank into the gears.
- Earn the ability to control air, water and earth.
- Collect the 3rd doll.
- Move down once go left two times and move ahead to the cave entrance.
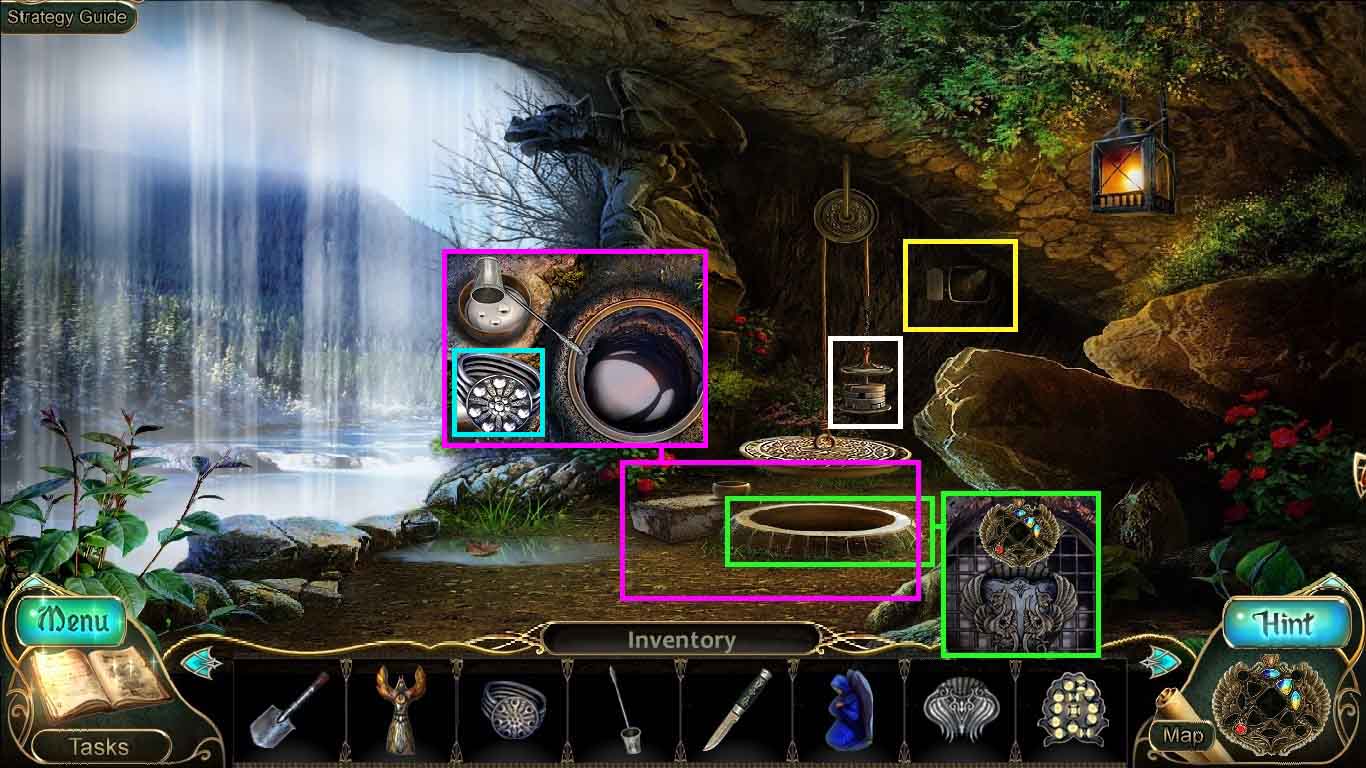
- Lay the 3 disks onto the rope.
- Zoom into the trapdoor; use the amulet on the controller.
- Select the ladle and ladle quicksilver into the bowl.
- Place the ring without jewels into the bowl; collect the quicksilver ring.
- Zoom into the lantern panel; insert the panel with lanterns to trigger a mini-game.
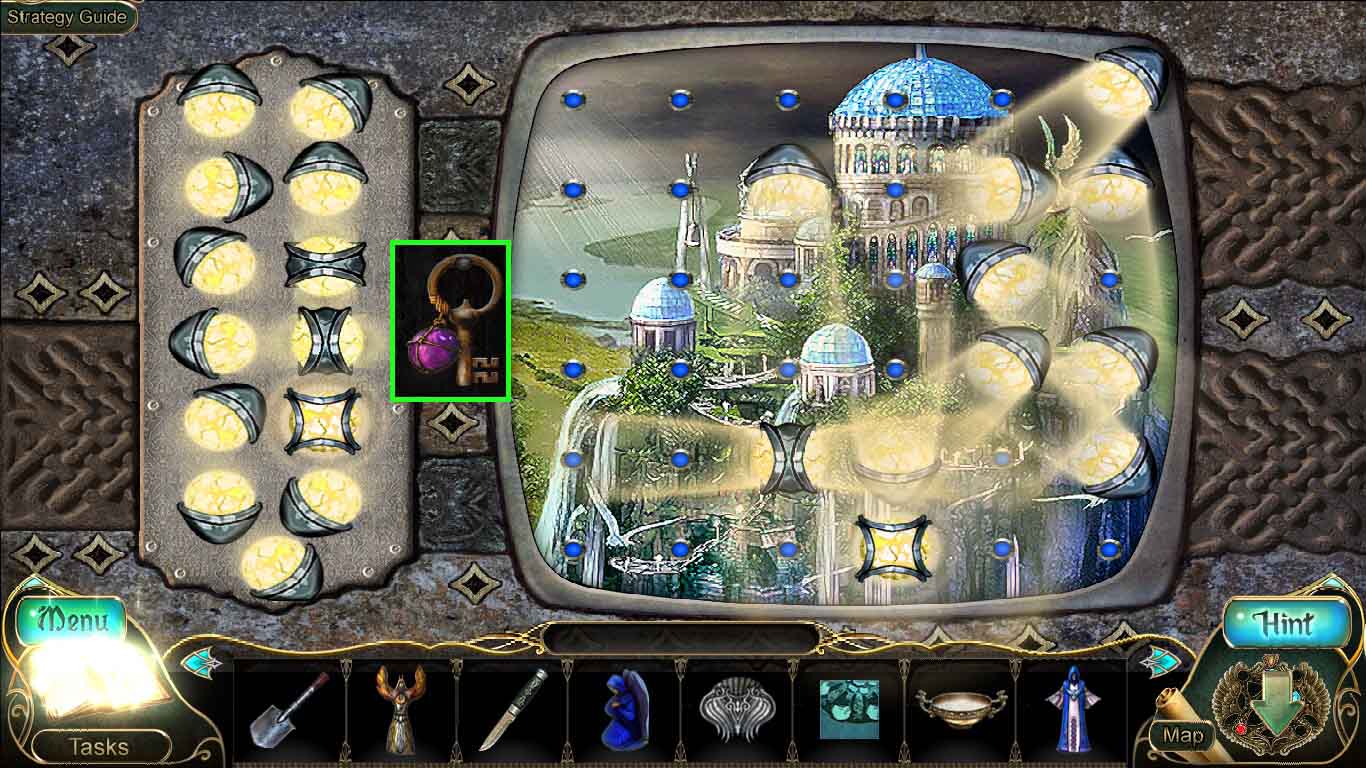
- Light the picture by arranging the lights as shown
- Collect the float key.
- Move down 3 times.
- Zoom into the fountain; insert the mosaic piece.
- Insert the quicksilver ring onto the mosaic.
- Earn the ability to control air, water and fire.
- Move to the stairs to the sea and move ahead 3 times.
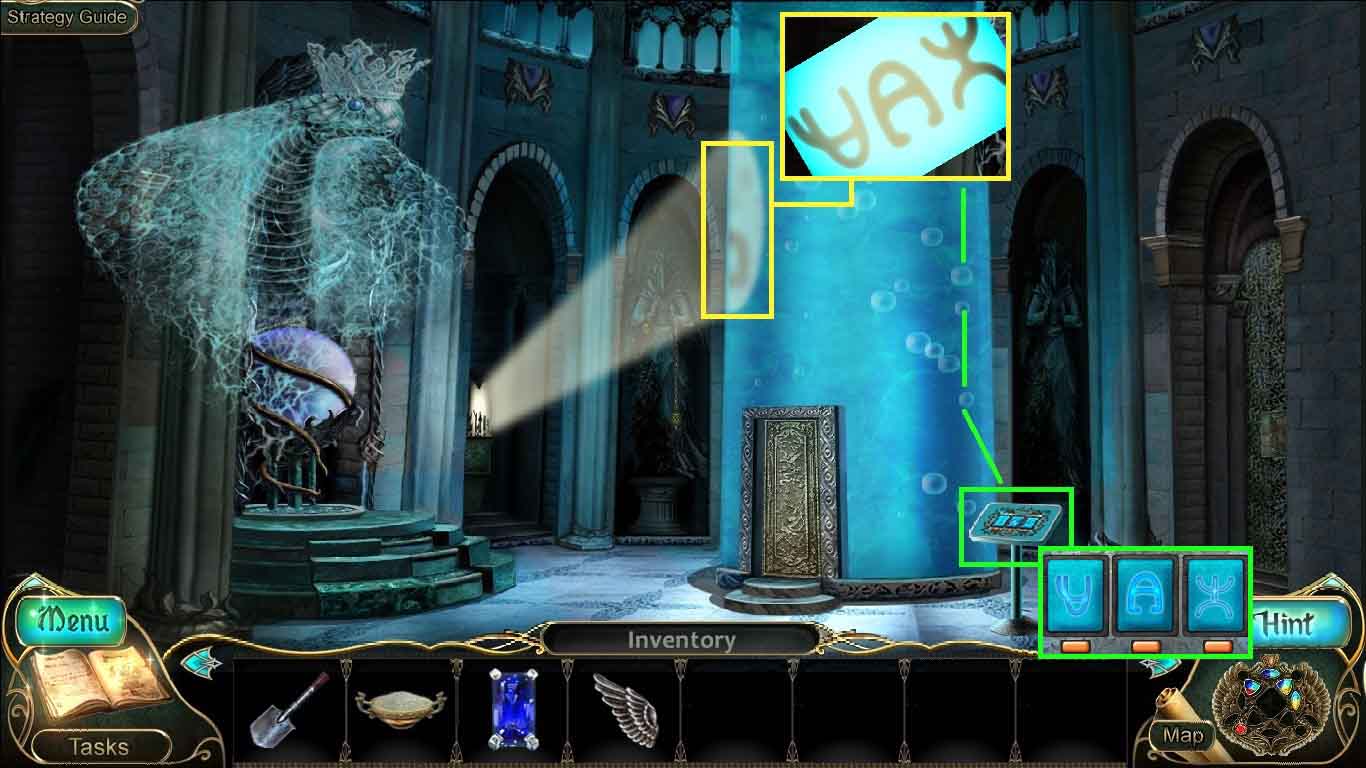
- Zoom into the door.
- Insert the controller and collect the diary key.
- Select the amulet and use it on the controller.
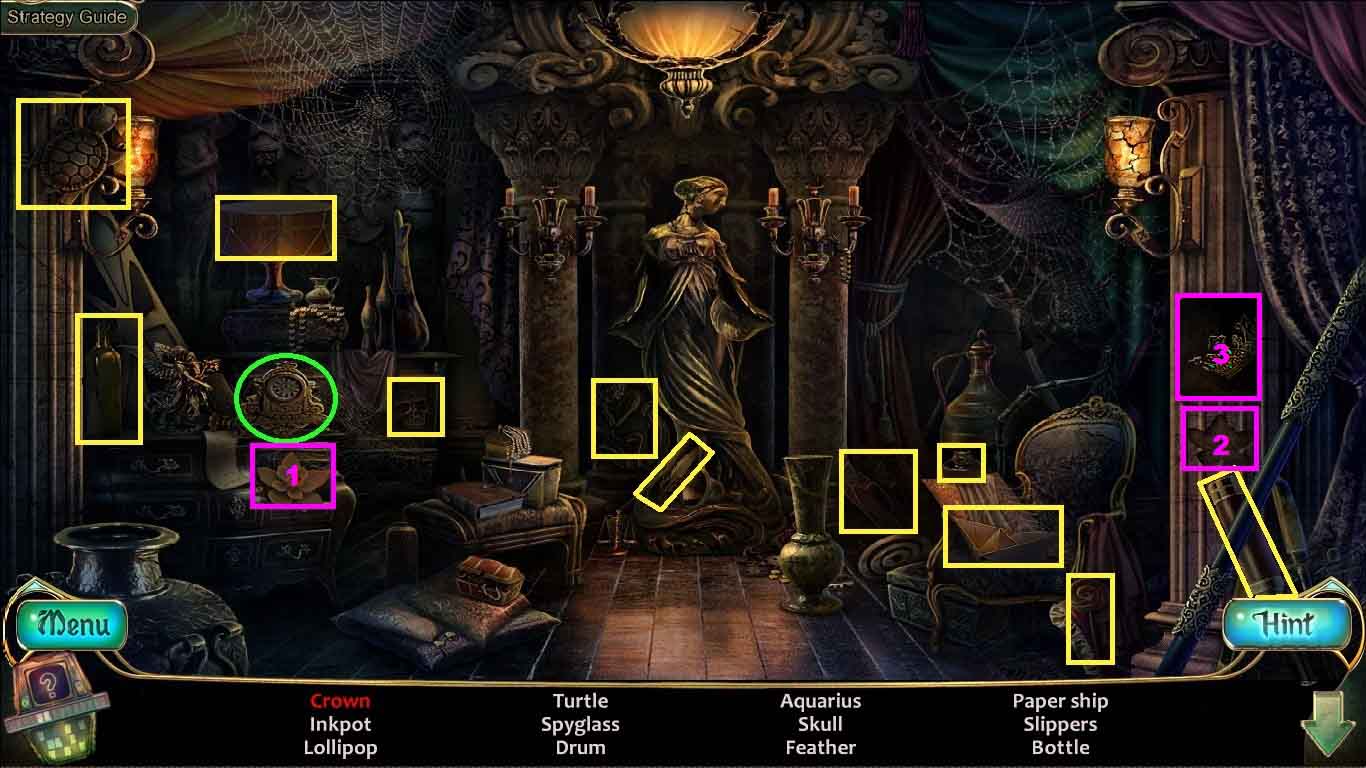
- Zoom into the rear of the room to access a hidden objects area.
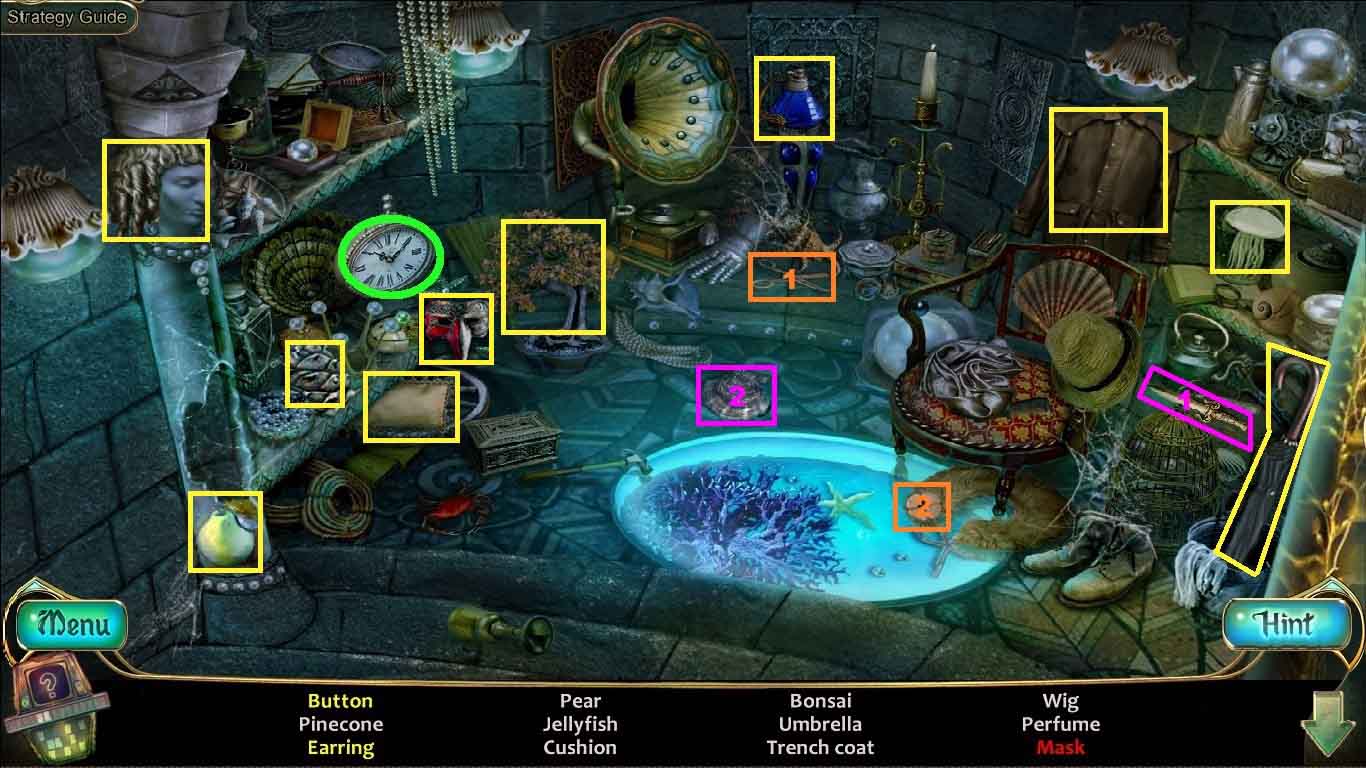
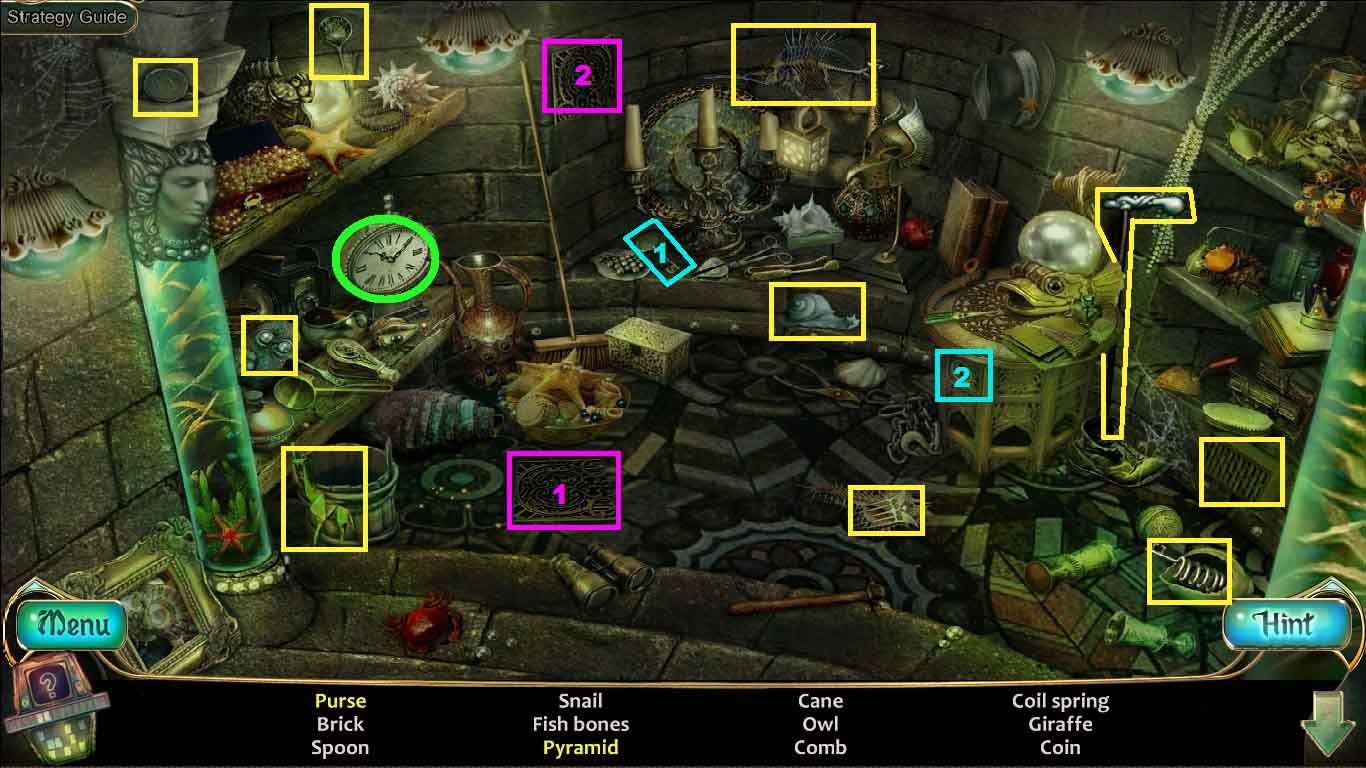
- Select the knife and use it on the shell; collect the earring.
- Select the scissor and use it to cut off the button.
- Find the remaining items.
- Click the clock (green circle) to enter the time portal.
- Attach the metal onto the wall; collect the pyramid.
- Insert the key into the drawer; collect the purse.
- Find the remaining items.
- Click the clock (green circle) to enter the time portal.
- Collect the mask.
- Collect the coil spring.
- Move down 2 times.
- Zoom into the gate lock; insert the coil spring.
- Click the lever.
- Examine the bamboo walkway.
- Insert the float key into the float; collect the net with the pearl shells.
- Zoom into the table.
- Place the bowl for pearls onto the circle.
- Lay the net with pearls onto the tray.
- Cut the net using the knife.
- Collect the bowl of pearls.
- Move down two times and move to the left.
- Examine the door.
- Insert the amulet into the controller.
- Move into the temple.
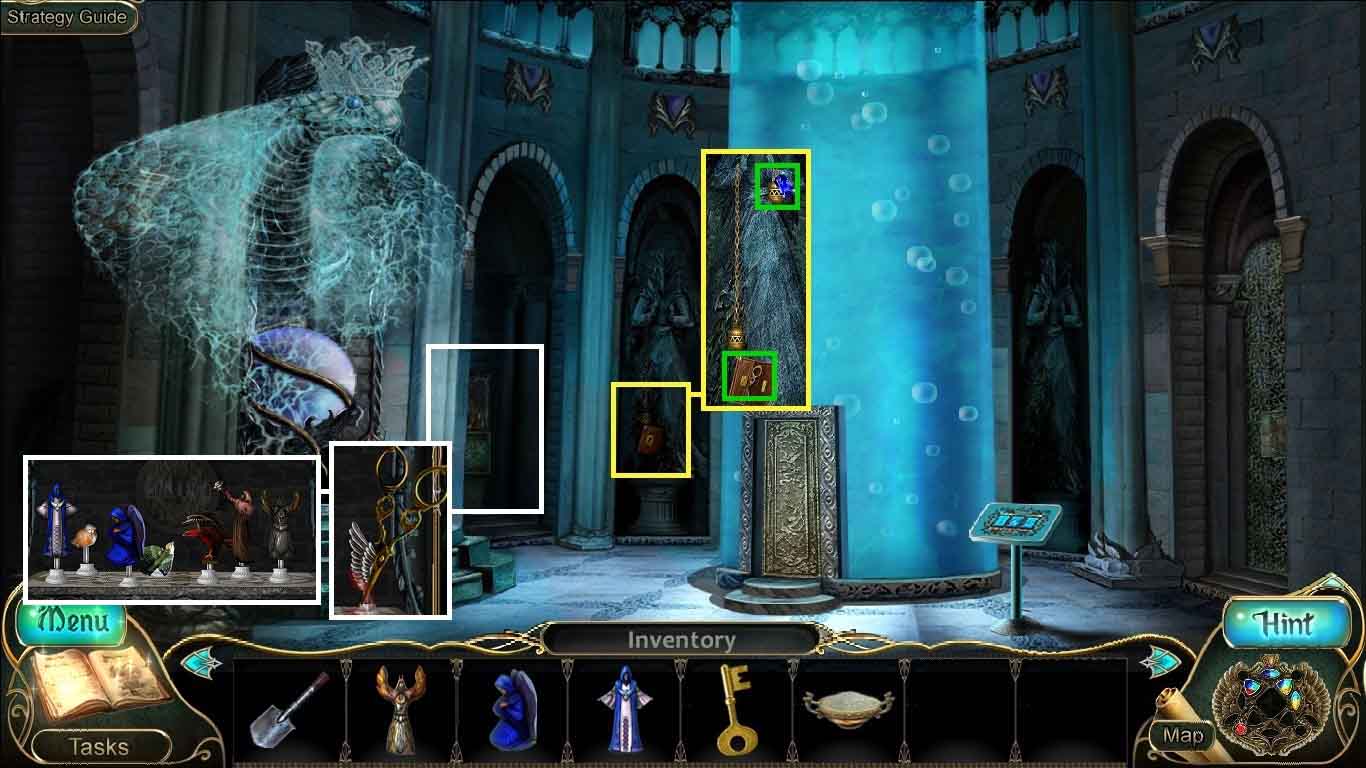
- Examine the statue.
- Insert the diary key into the lock.
- Collect the scissors from the pouch.
- Collect the sapphire.
- Examine the shadow play; select the scissors to collect the 1st wing.
- Place the 3 dolls onto the stand.
- Examine the shadow codes.
- Examine the elevator controls; enter the shadow codes.
- Move into the elevator.
- Examine the pot; select the small shovel to uncover the tail.
- Notice the elevator entrance.
- Move across the bridge.
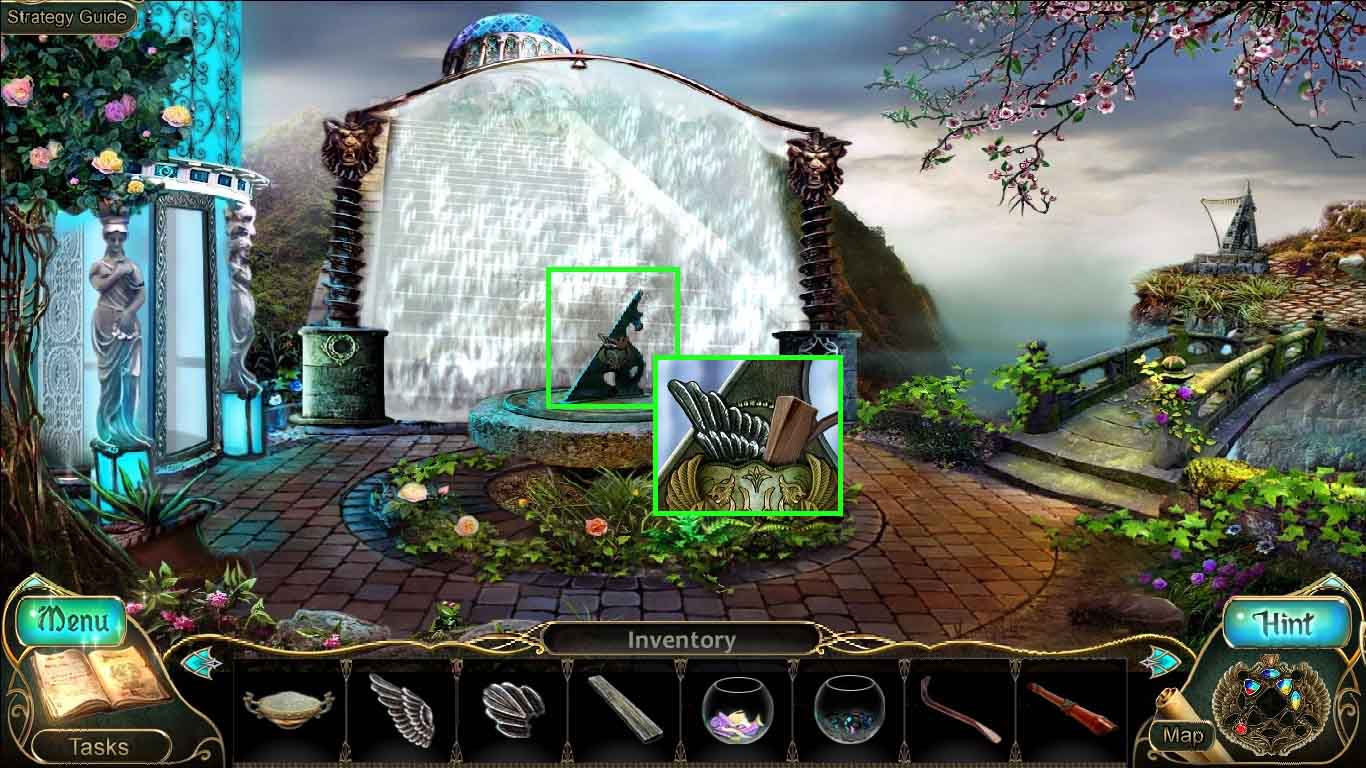
- Collect the plank.
- Collect the 2 bowls with glass parts.
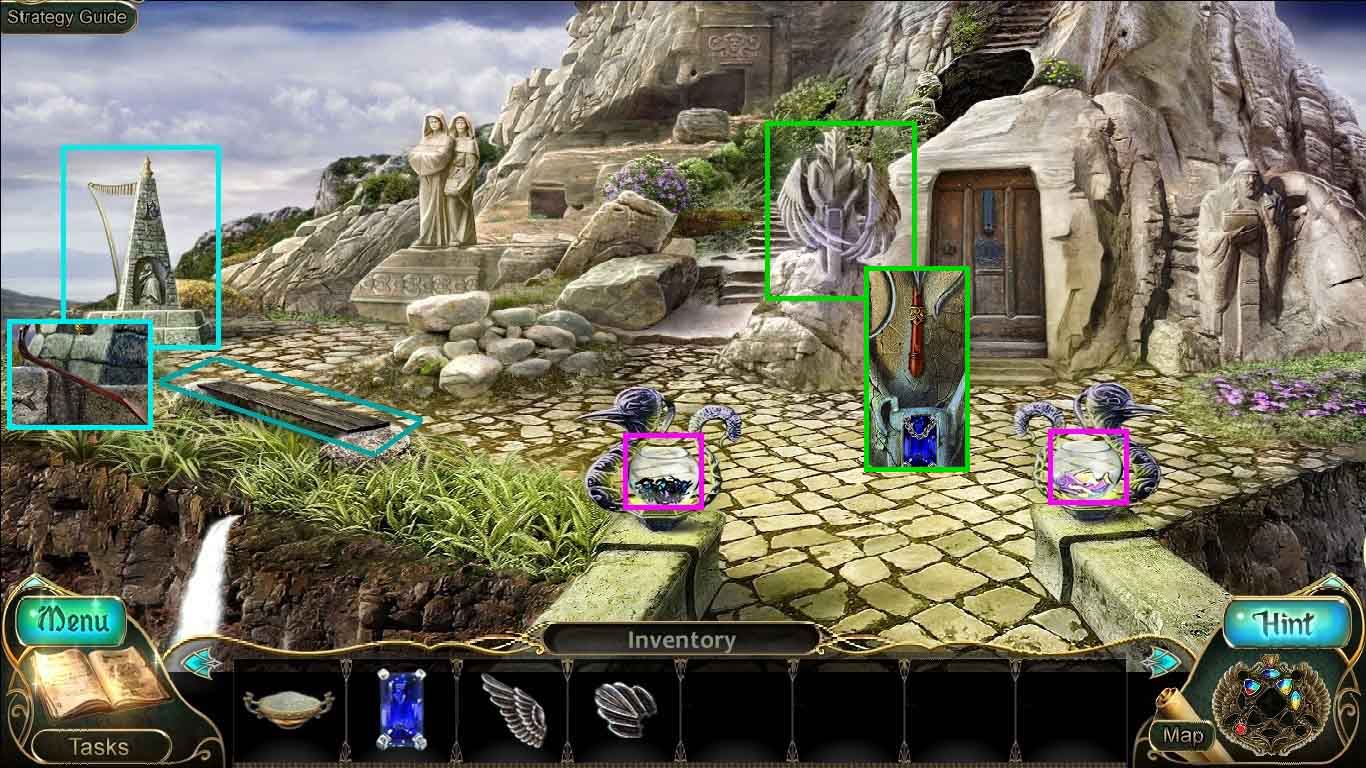
- Zoom into the Aeolian harp; collect the crowbar.
- Zoom into the guard.
- Insert the sapphire and collect the reed pipe and the amphora.
- Move down one time.
- Examine the sundial.
- Select the crowbar to collect the 2nd wing.
- Move into the elevator.

- Zoom into the door; insert the 2 wings and the tail.
- Place the 2 bowls with glass parts down to trigger a mini-game.
- Insert the pieces to form a picture.
- Once the picture is completed click the hidden objects area.

- Find the listed items.
- Click the clock (green circle) to enter the time portal and click the clock again to return.
- Insert the flowers into the niche; collect the crown.
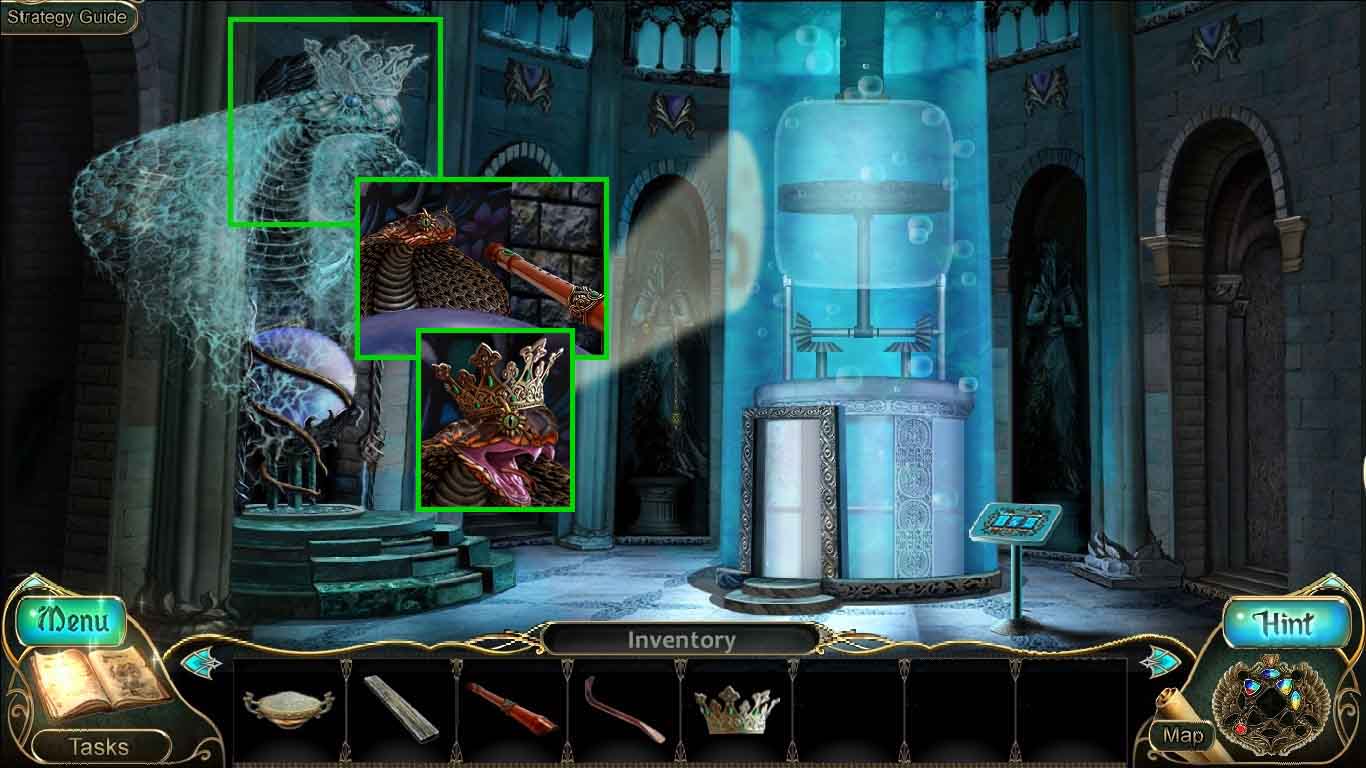
- Zoom into the altar.
- Select the reed pipe to charm the snake.
- Place the crown onto the snake.
- Earn the ability to control water.
- Move into the elevator.
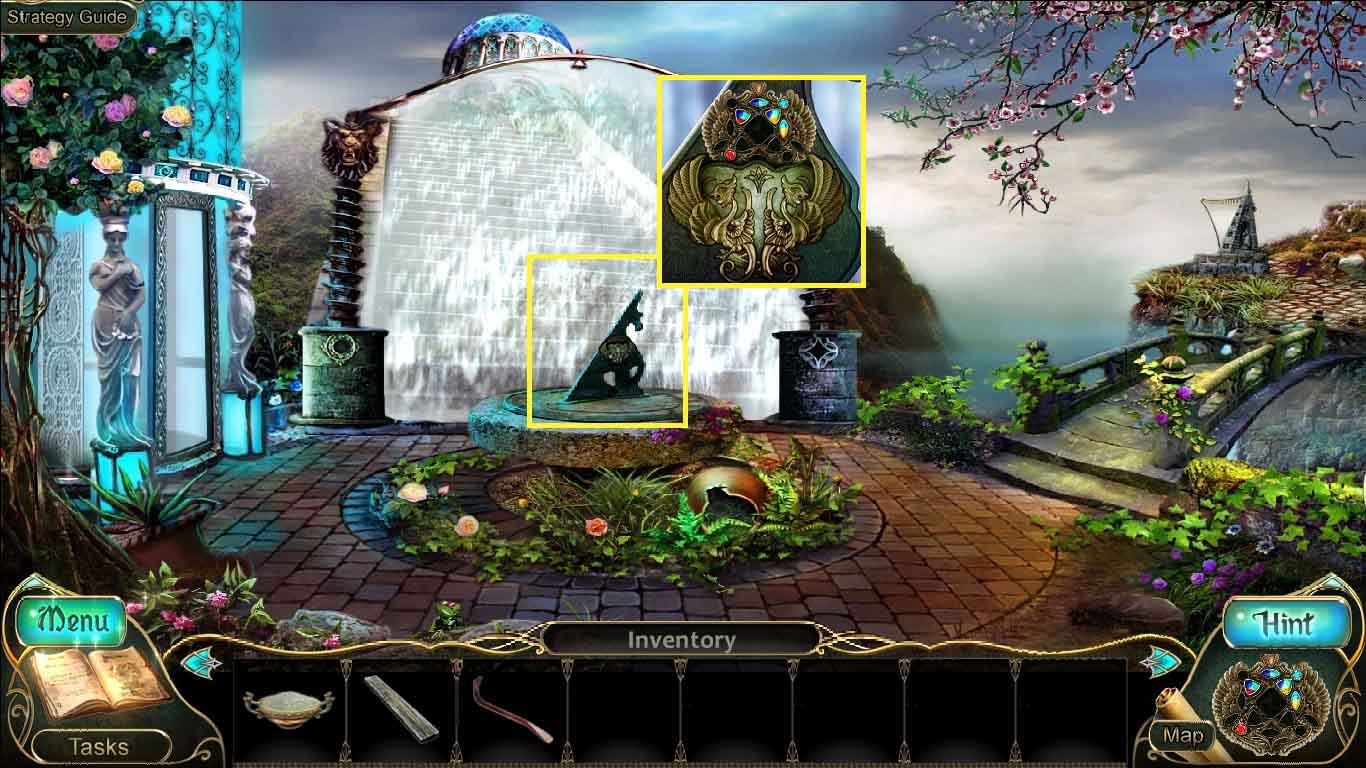
- Zoom into the sundial.
- Insert the amulet into the controller.
- Move up the staircase.