
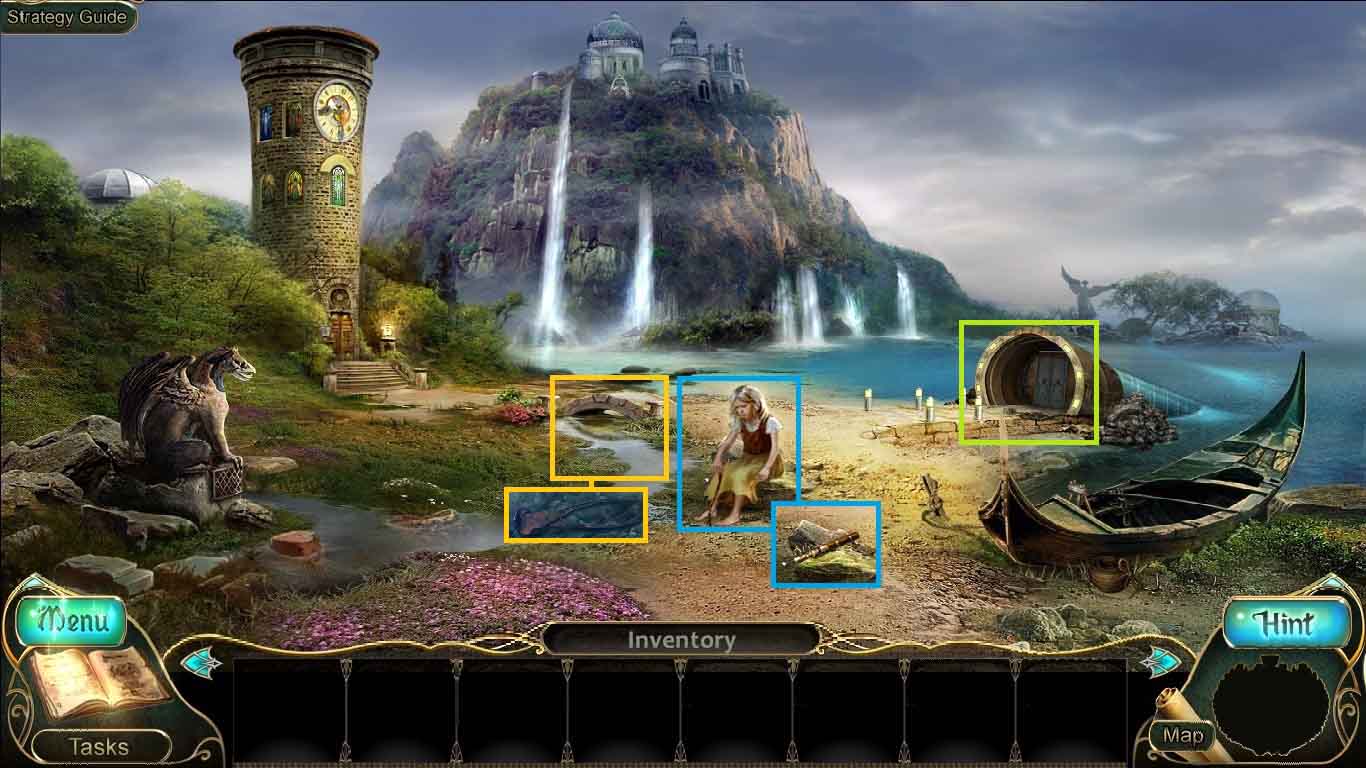
- Speak to Gloria.
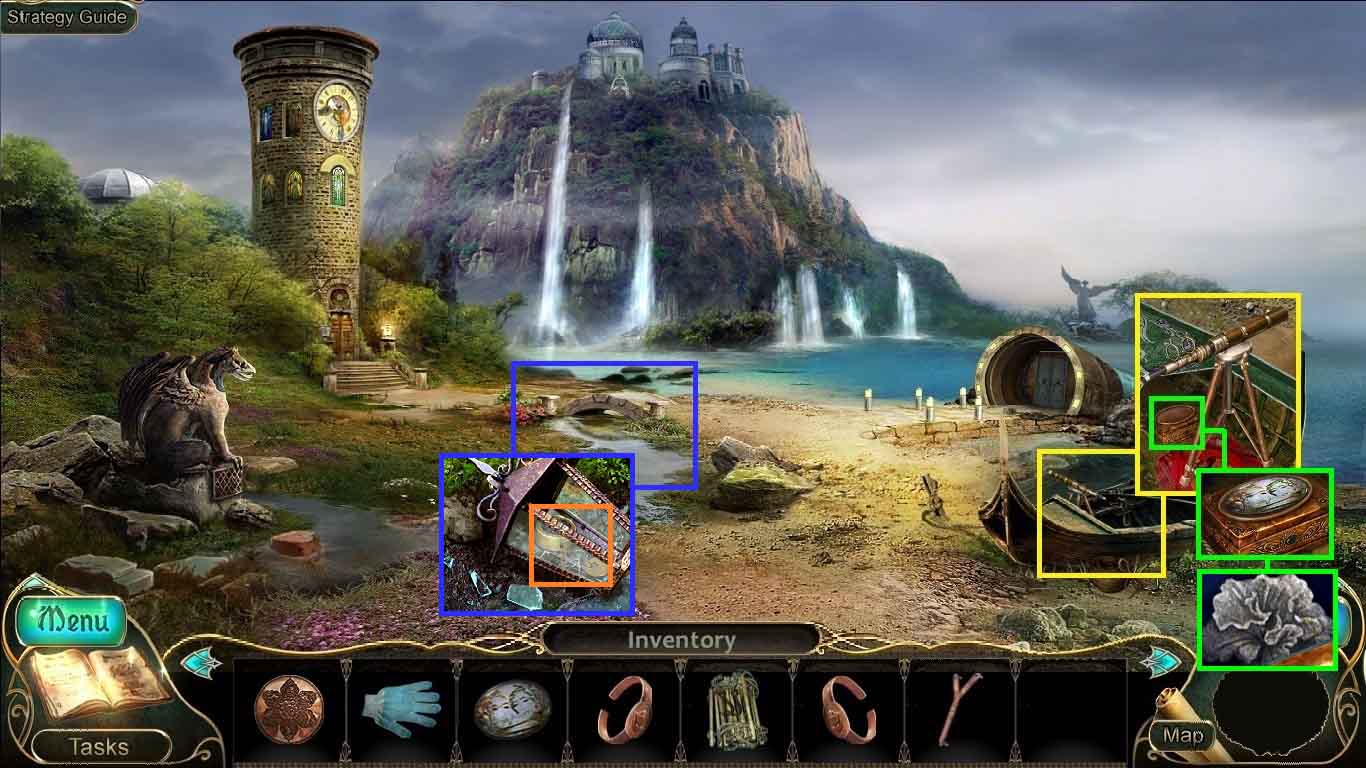
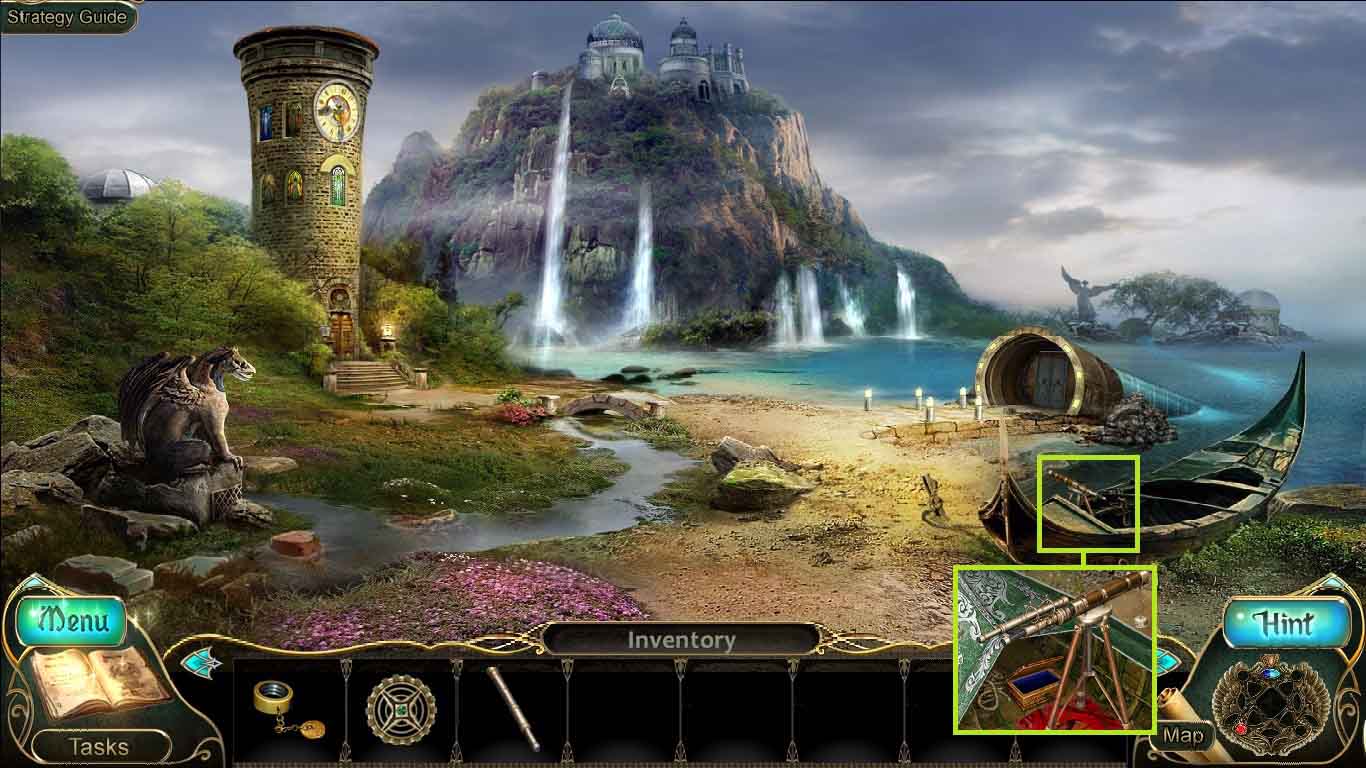
- Collect the telescope body.
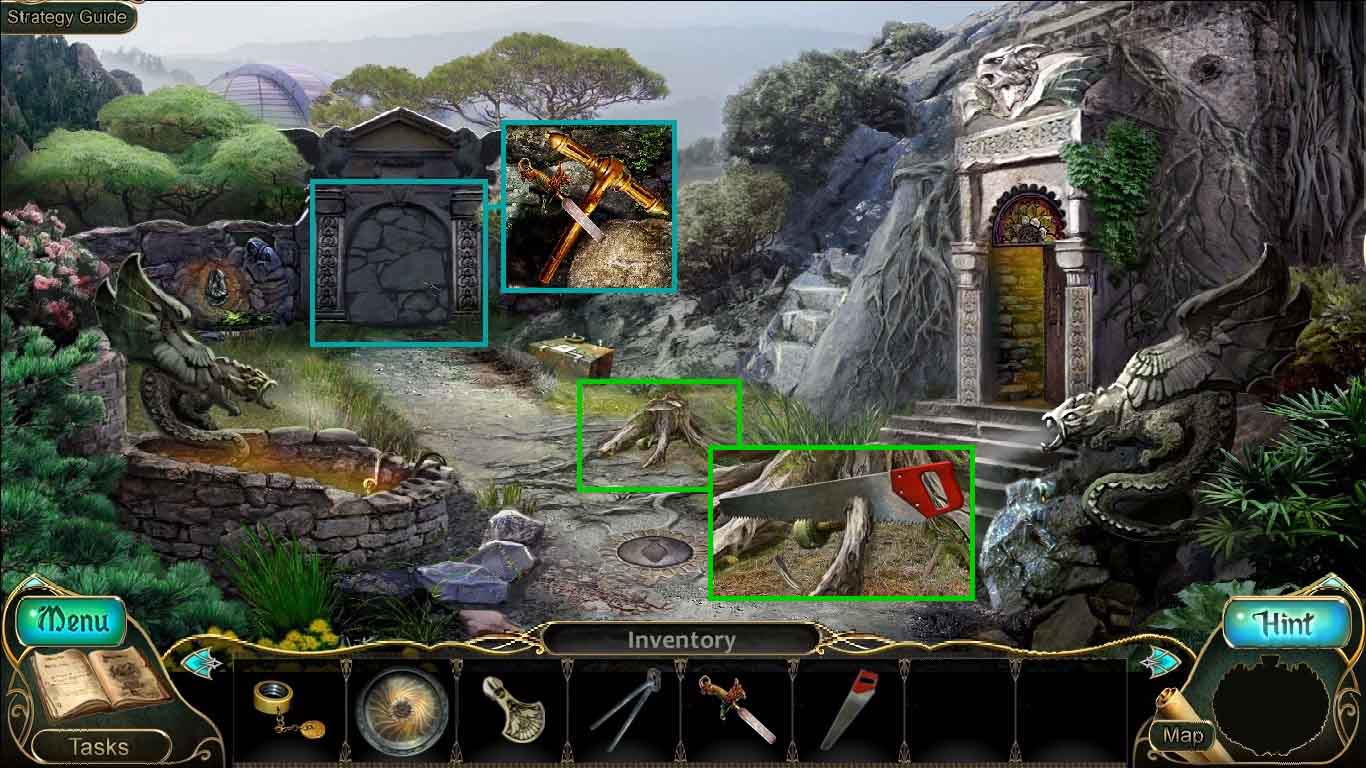
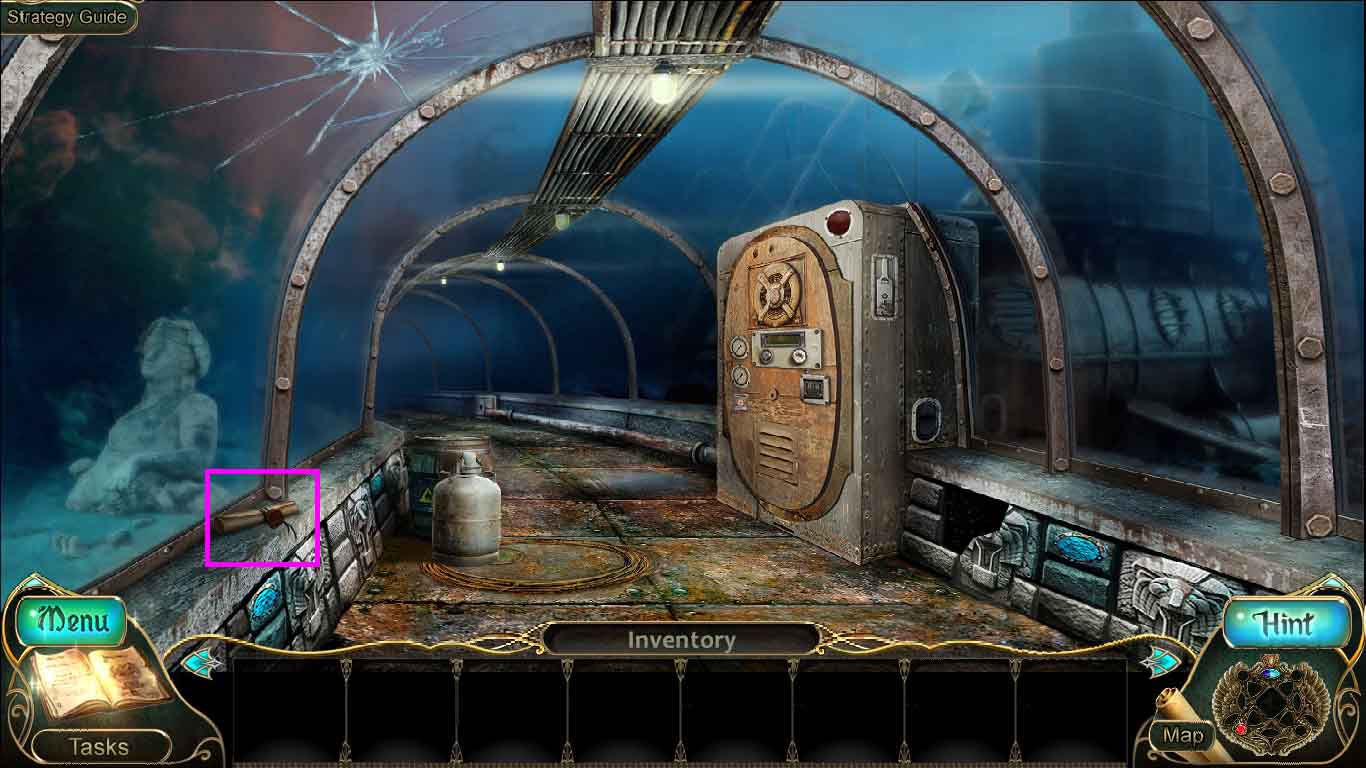
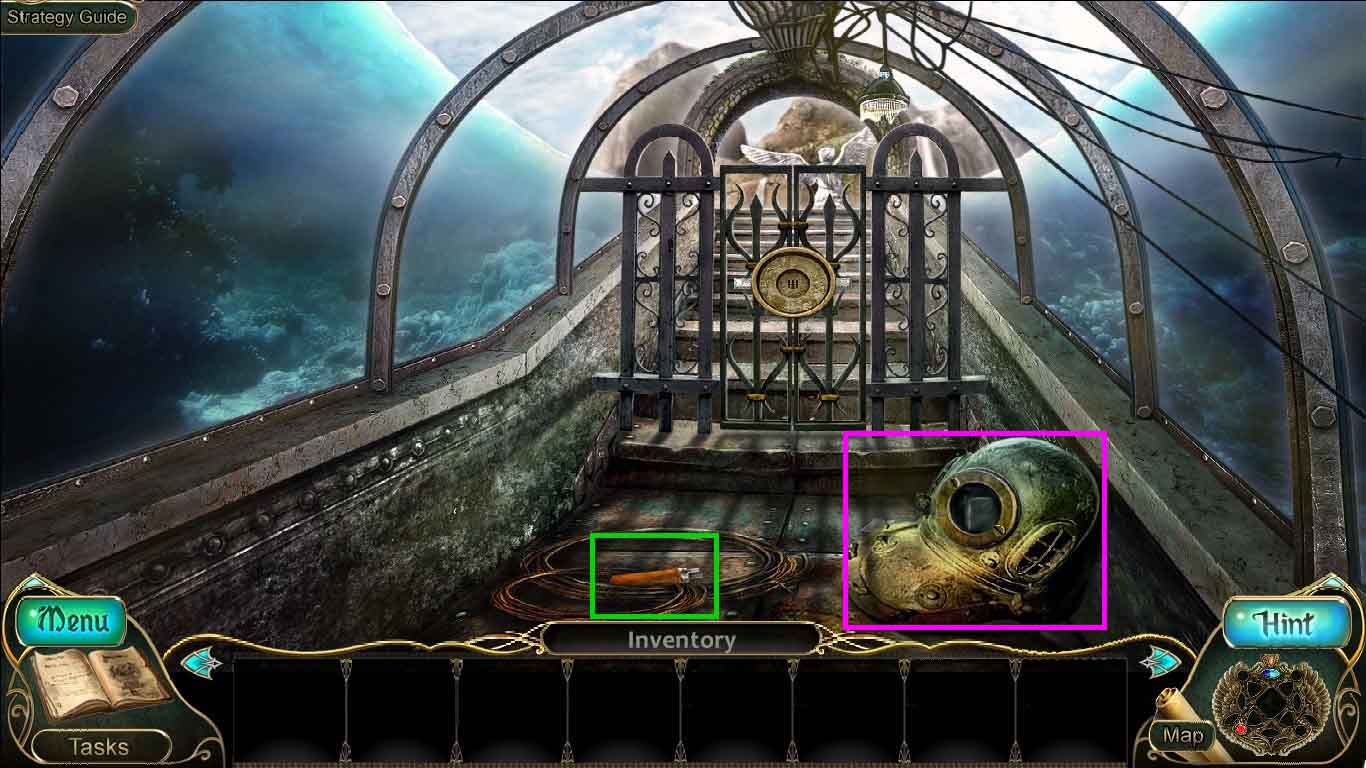
- Examine the bridge area; collect the nippers.
- Take notice of the underwater tunnel.
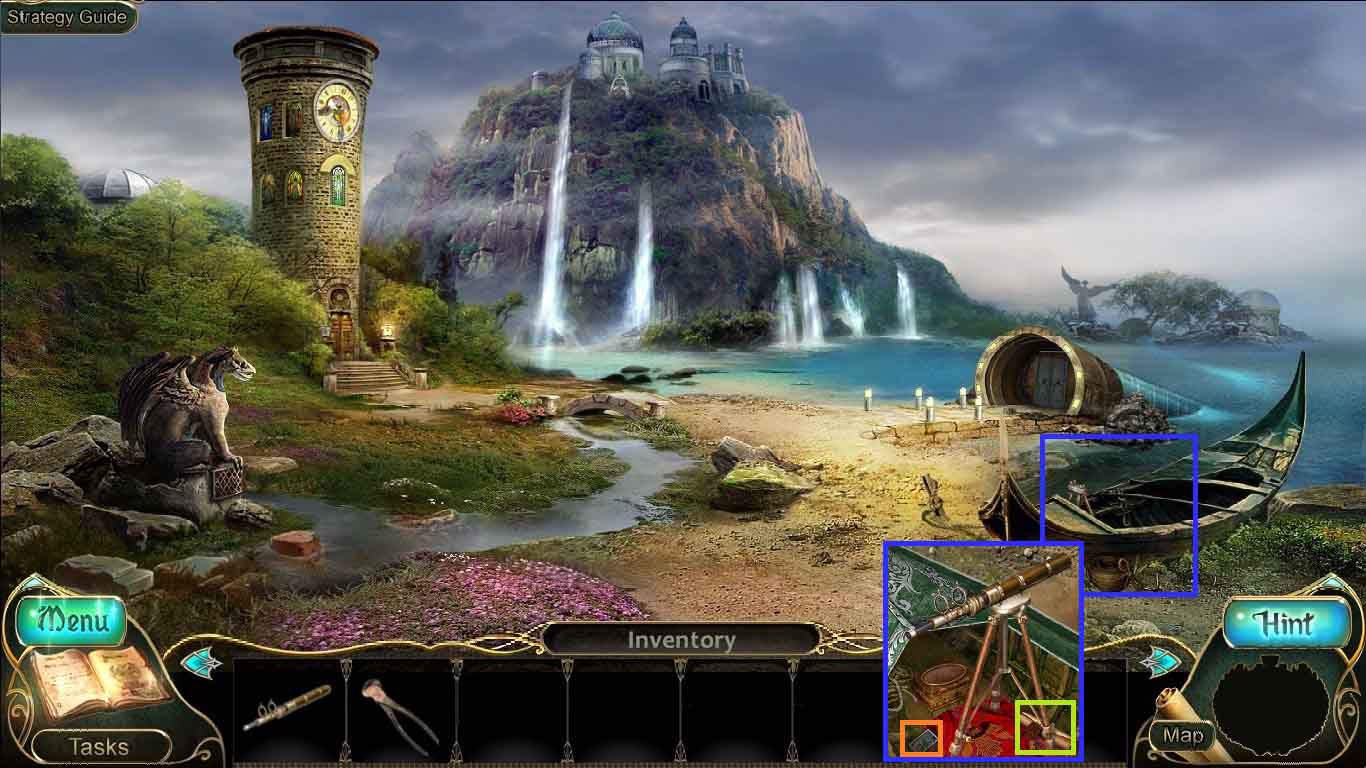
- Examine the gondola.
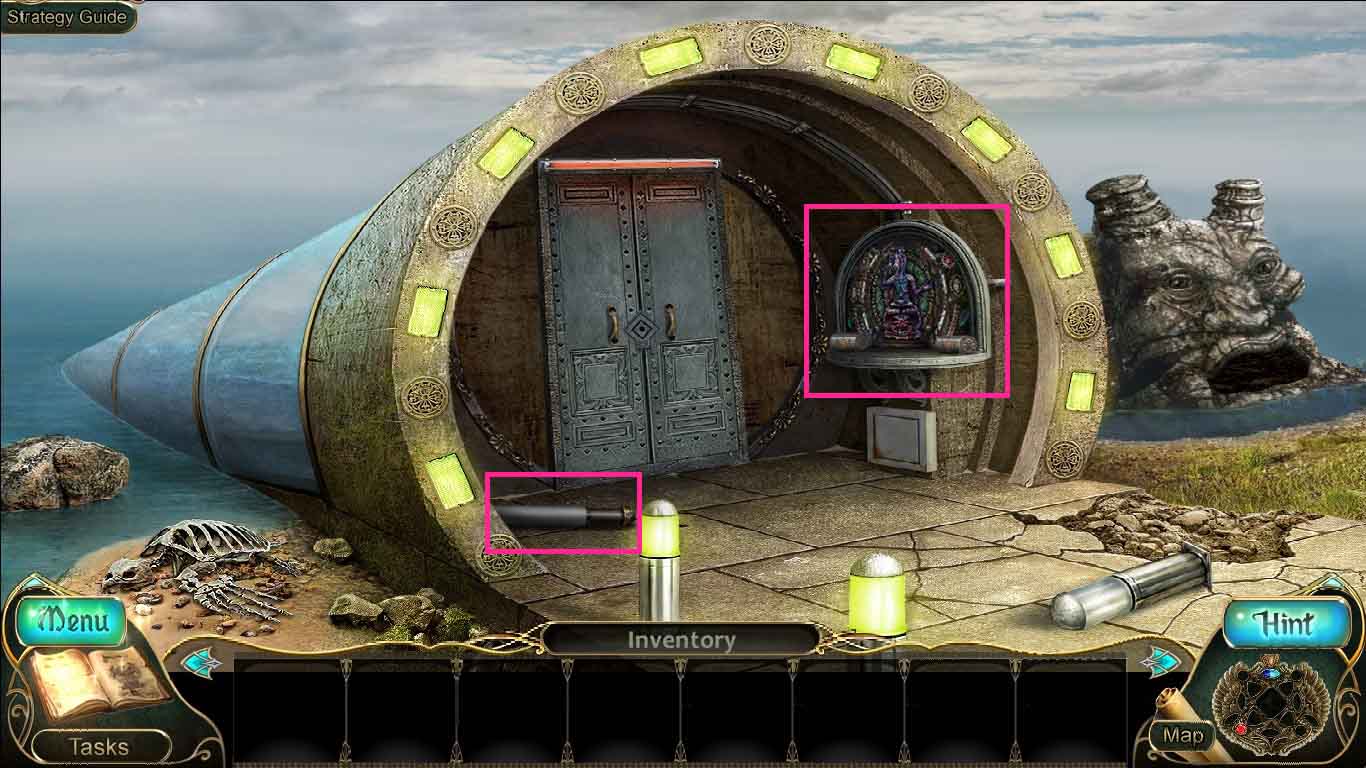
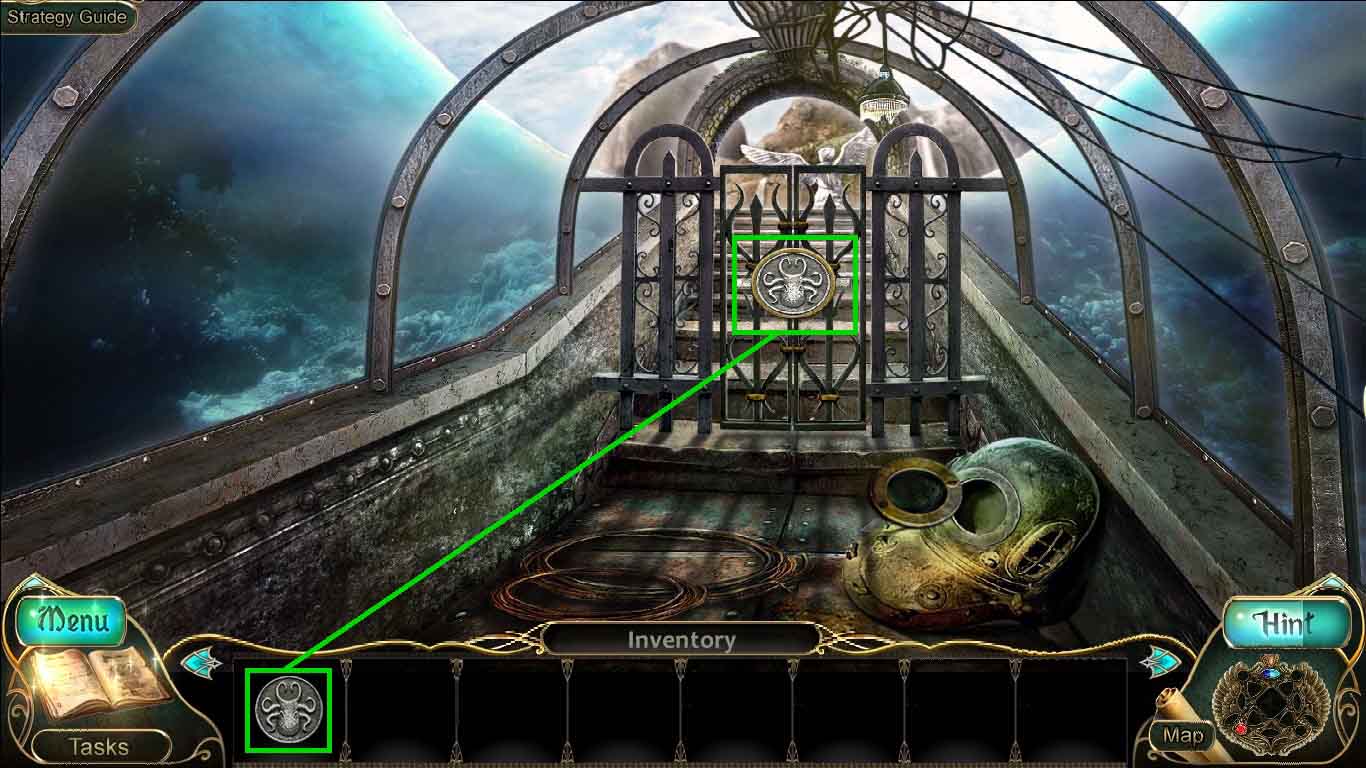
- Place the telescope body onto the stand.
- Collect the matches and the scroll.
- Move to the clock tower.

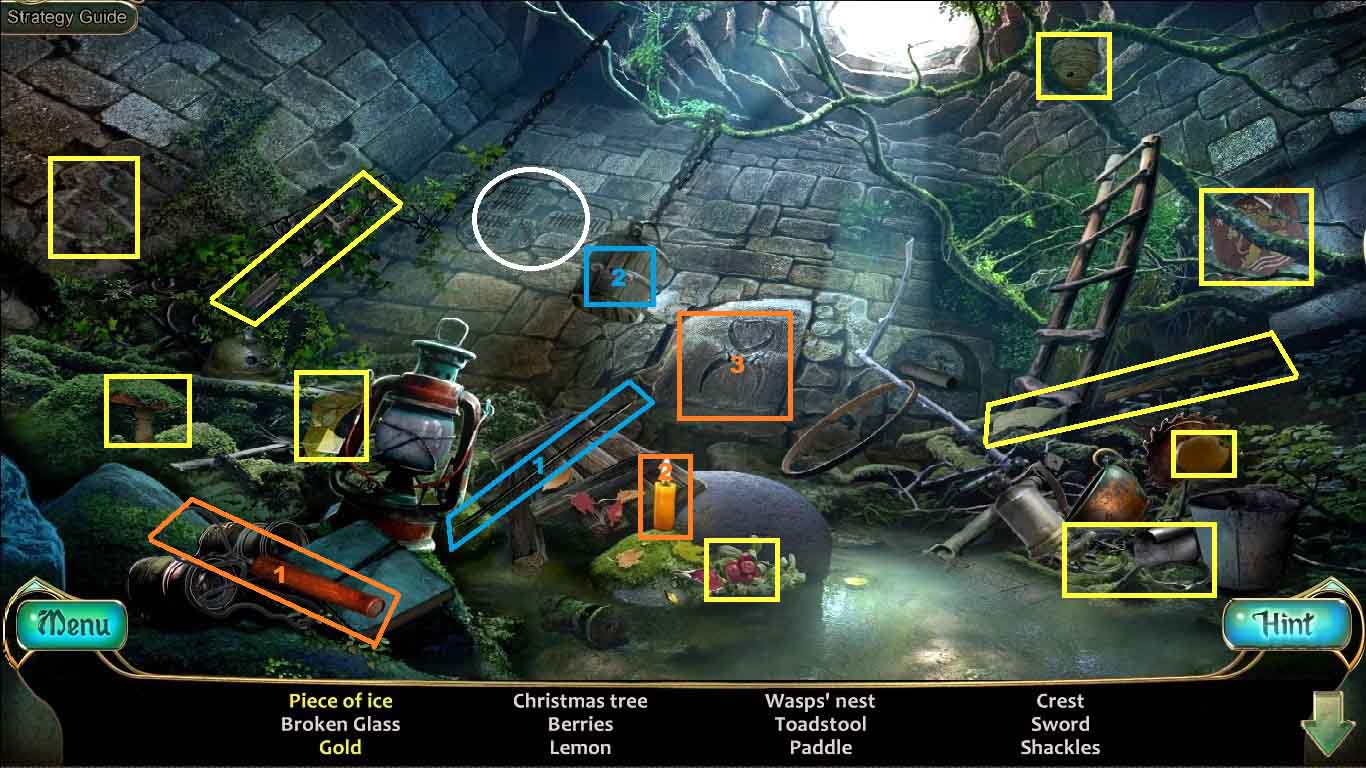
- Examine the tree.
- Cut the barbed wire using the nippers.
- Collect the left bracelet and the monster’s horn.
- Examine the lamp, click the cover and light the wick using the matches.
- Collect the glove, disk and the pinecone.
- Move toward the rear of the tower.
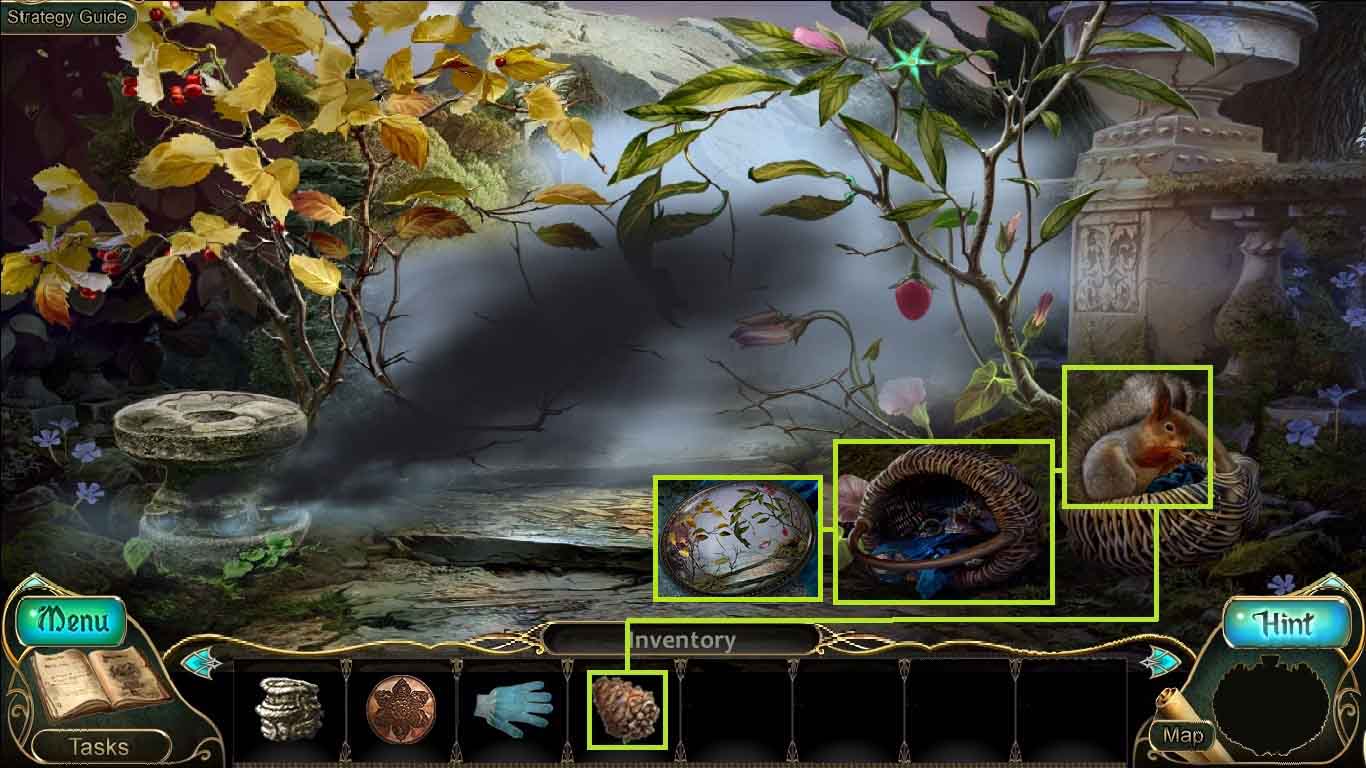
- Give the squirrel the pinecone.
- Examine the basket and collect the ornament.
- Move down two times and move to the underwater tunnel.
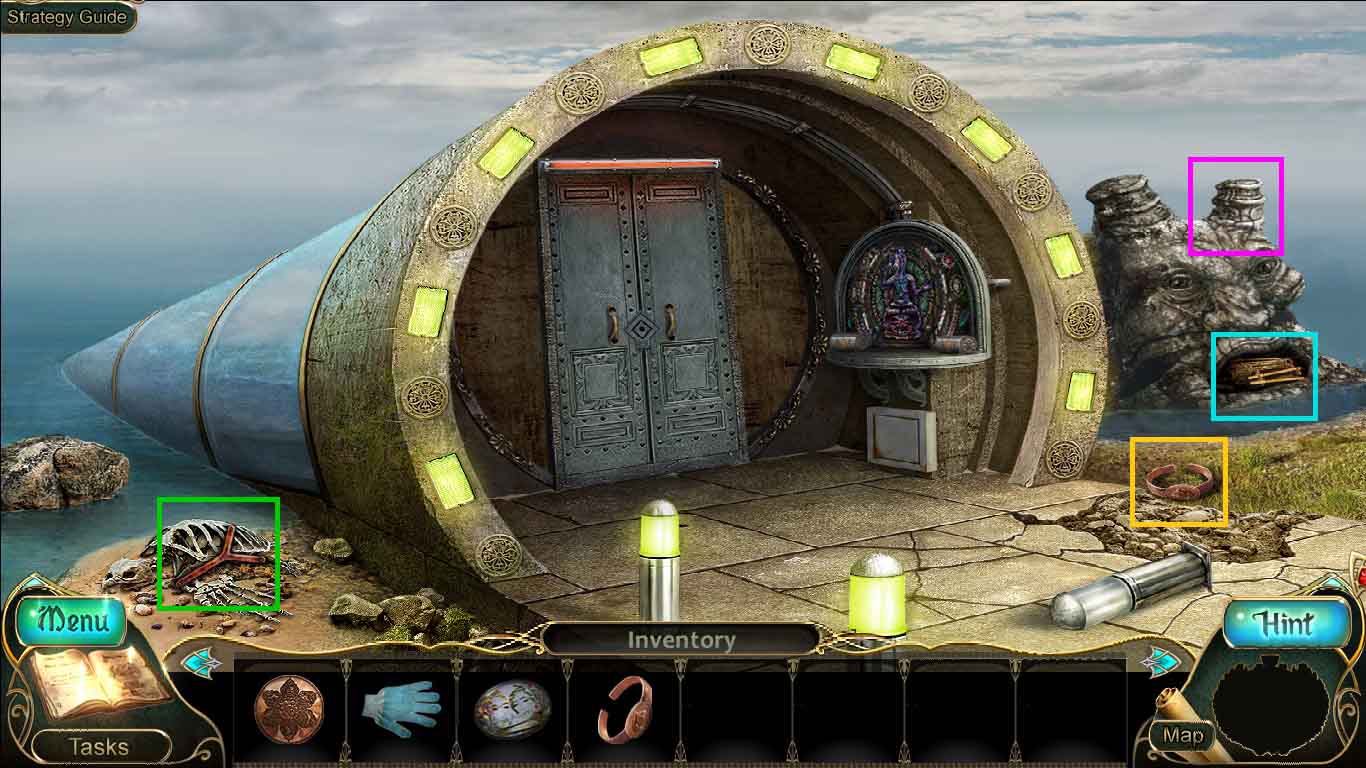
- Attach the monster’s horn onto the monster.
- Collect the rope ladder.
- Collect the 1st bracket.
- Collect the right bracelet.
- Move down one time.
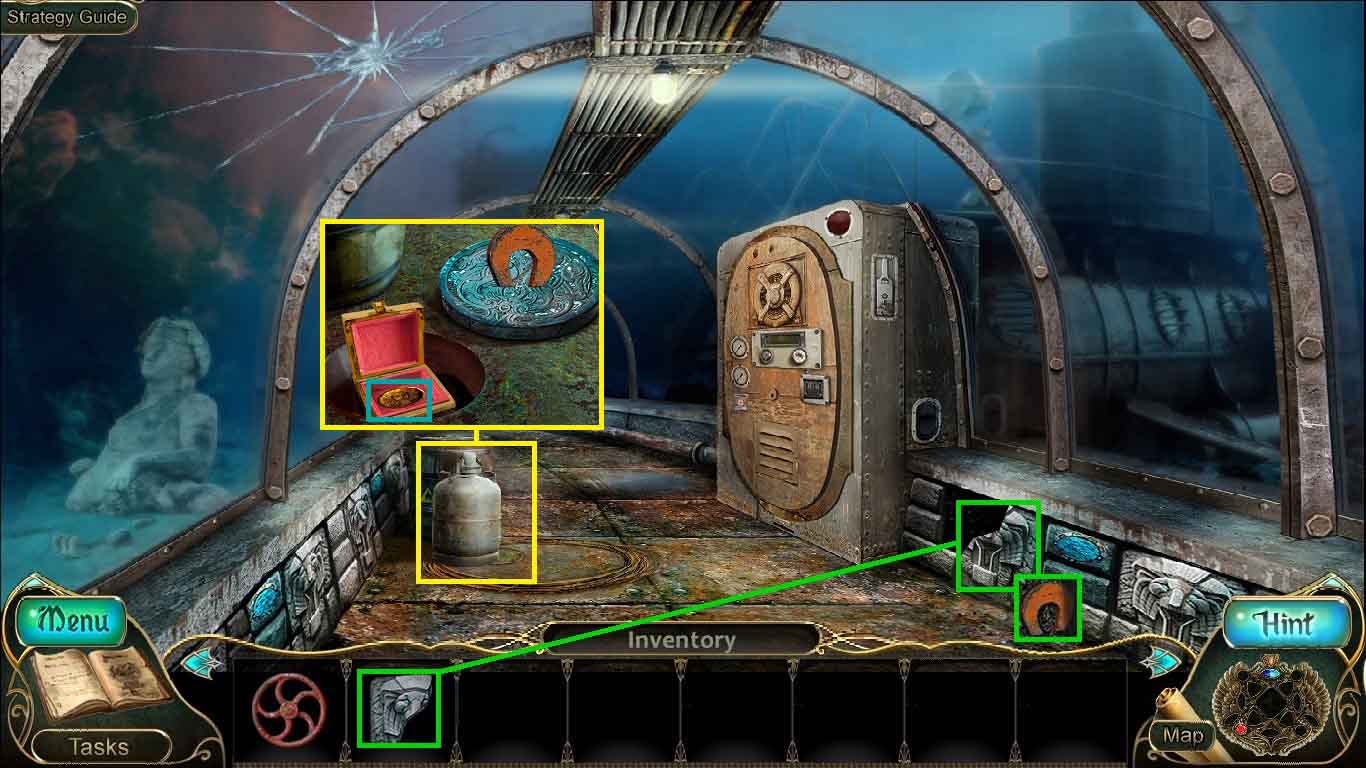
- Examine the gondola and zoom into the box.
- Insert the ornament and collect the stone flower.
- Examine the area near the bridge.
- Select the glove to clear the glass.
- Collect the eyepiece.
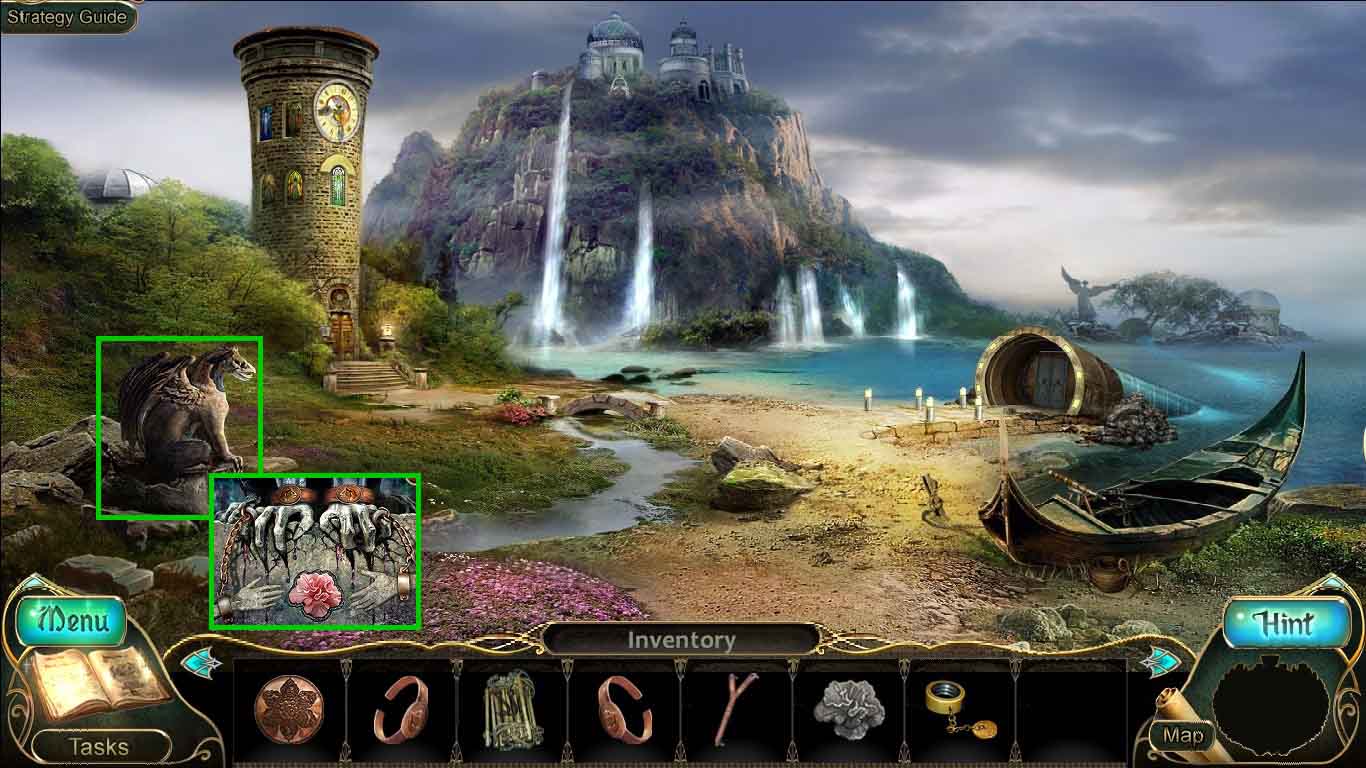
- Examine the gargoyle.
- Attach the bracelets on each arm of the gargoyles.
- Insert the stone flower and collect the pink flower.
- Move to the rear of the clock tower.
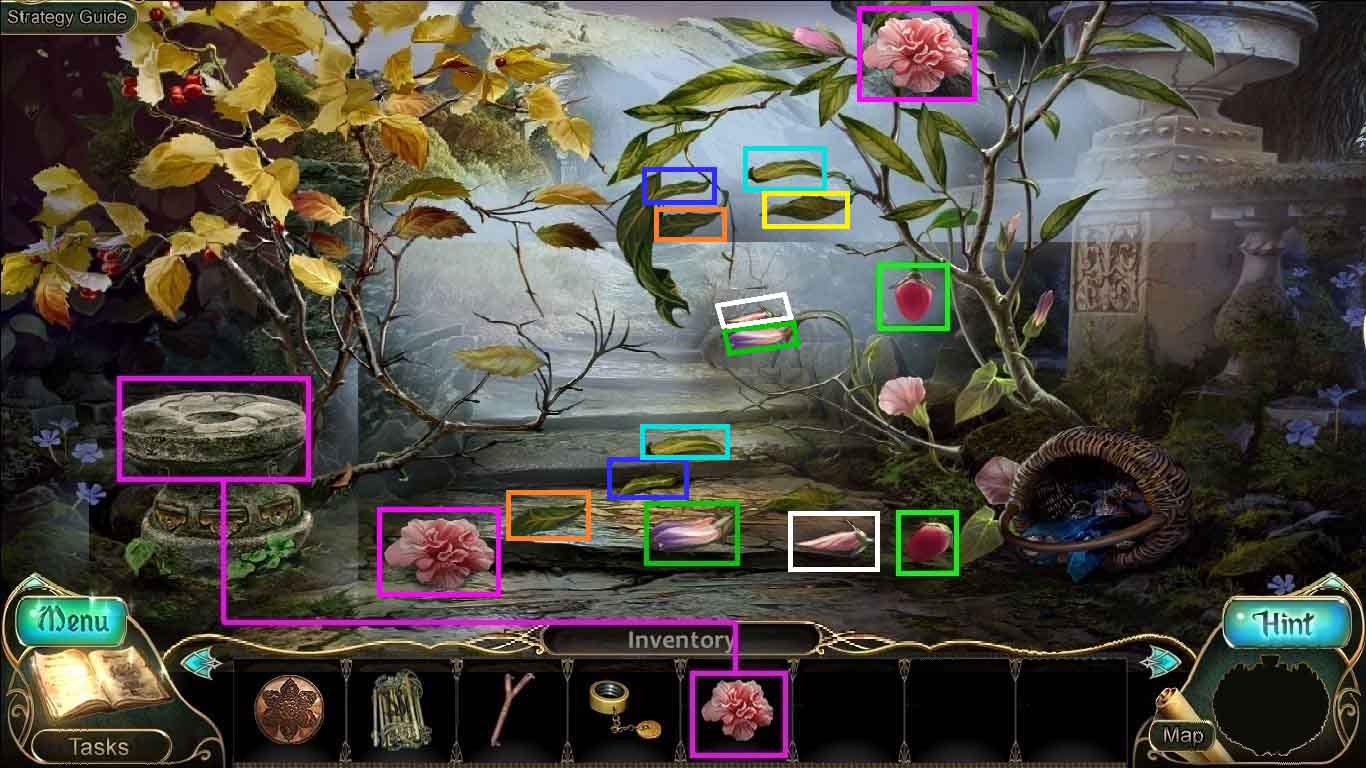
- Insert the ink flower into the flowerpot.
- Return the fallen leaves and flowers to the bush.
- Click an object to view to the possible locations.
- Speak to Gloria.
- Move ahead.
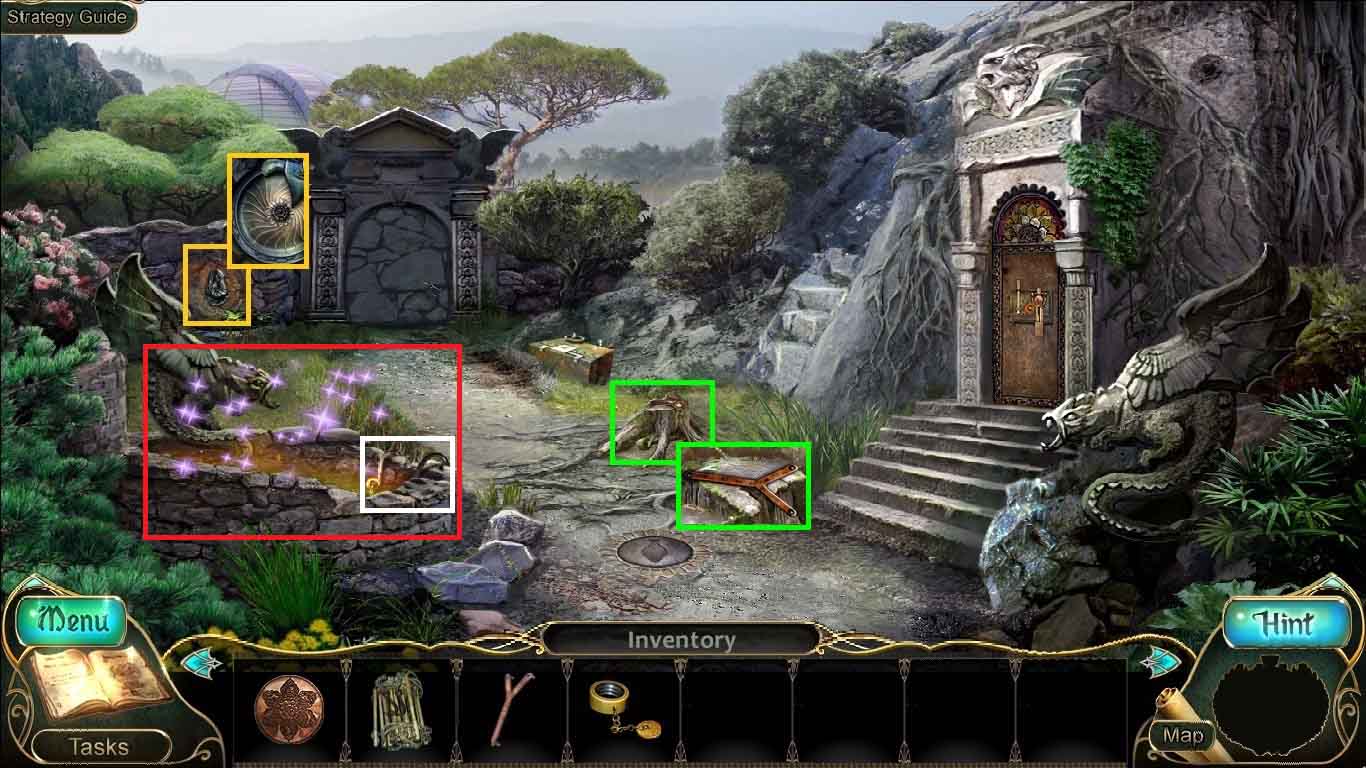
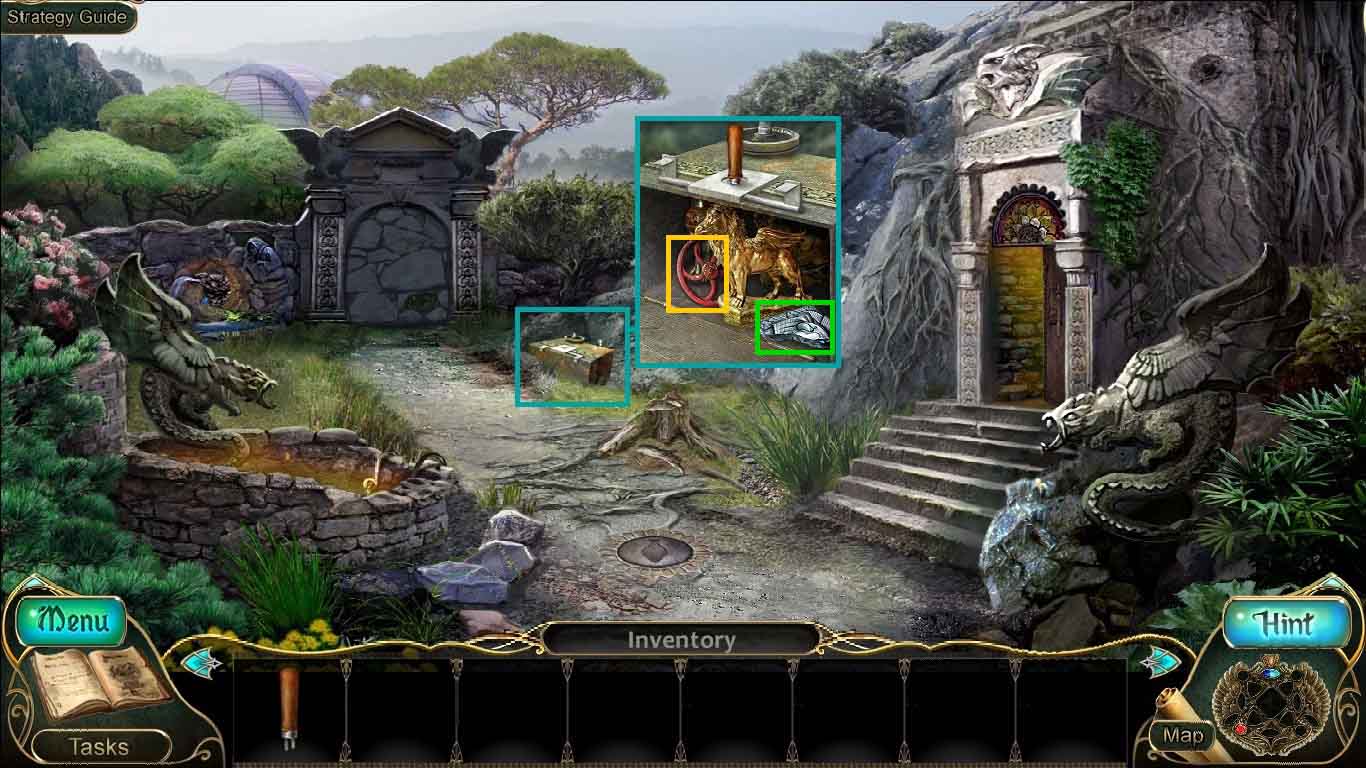
- Examine the fountain; collect the plate.
- Examine the tree stump; collect the 2nd bracket.
- Place the rope ladder onto the well.
- Click the hidden objects area.
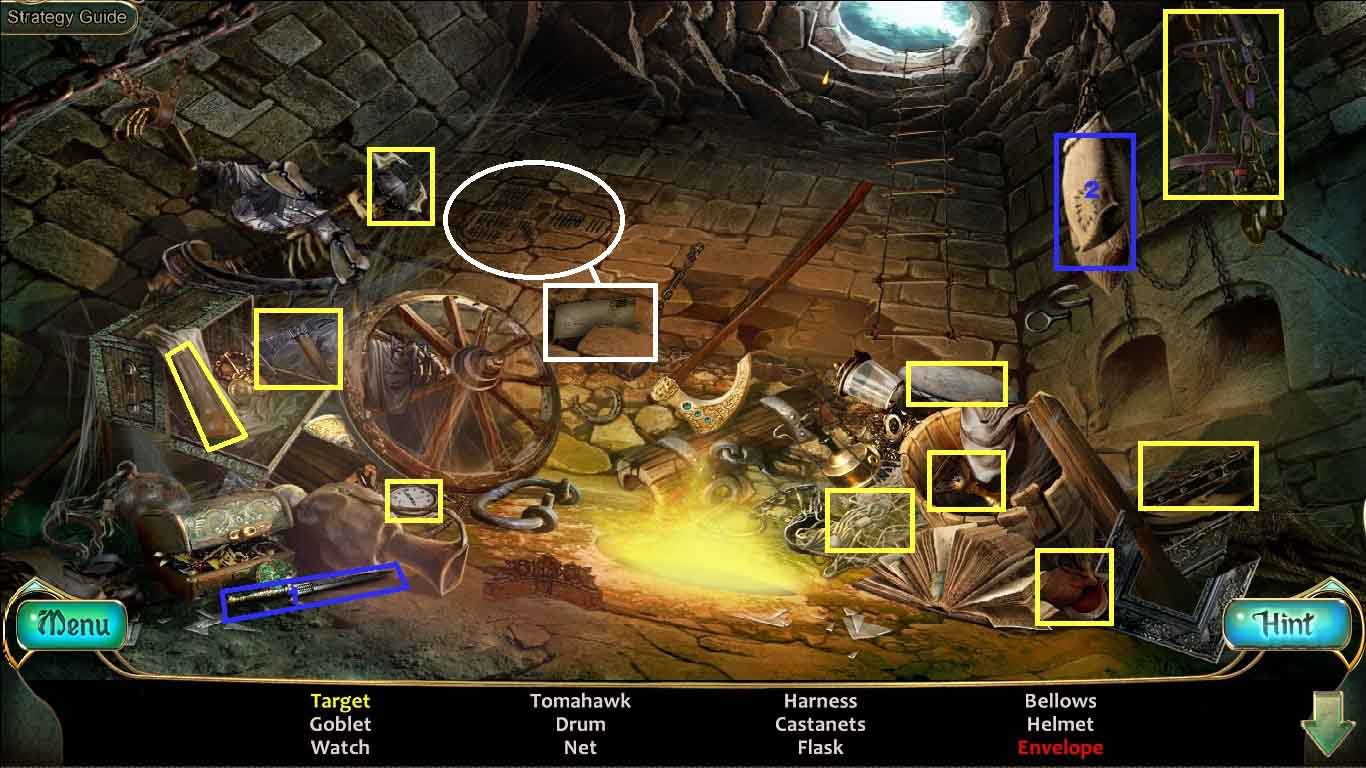
- Find the listed items.
- Select the knife and slice the burlap sack; collect the target.
- Click the hash marks (white circle) to access the time portal.
- Insert and ignite the dynamite into the stone wall; collect the gold.
- Select the crowbar and hit the bucket; collect the ice.
- Find the remaining listed items.
- Click the hash marks to return to the present.
- Collect the envelope from the wall.
- Collect the bellows.
- Move down two times.
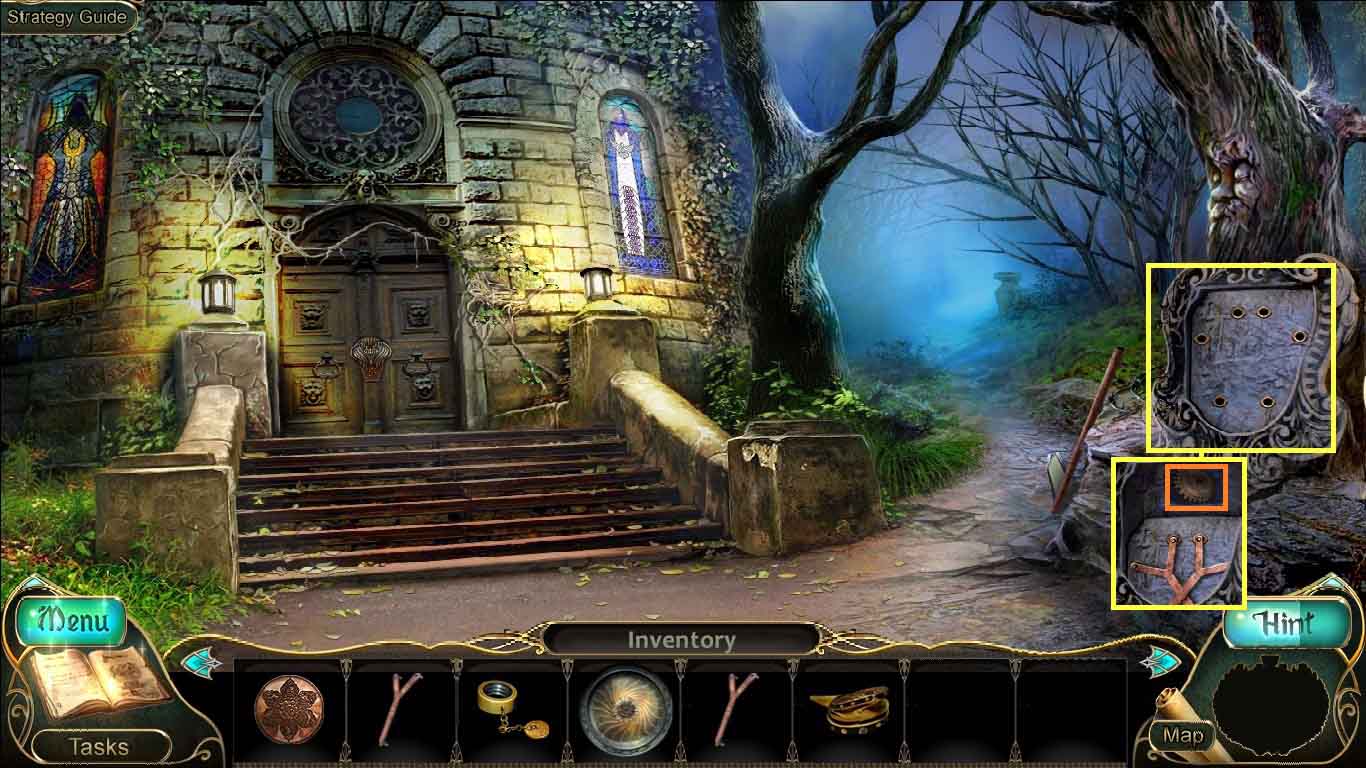
- Attach the 2 brackets onto the panel.
- Collect the gear.
- Move to the rear of the tower and move ahead.

- Examine the door.
- Attach the gear to the peg and insert the disk onto the circle to trigger a mini-game.
- Beginning at the green arrow, click and drag the line through all the lights ending at the green arrow on the right.
- Move into the crypt.

- Examine the furnace and place the bellows into the opening.
- Examine the water control valve; collect the zipper pull.
- Collect the tongs.
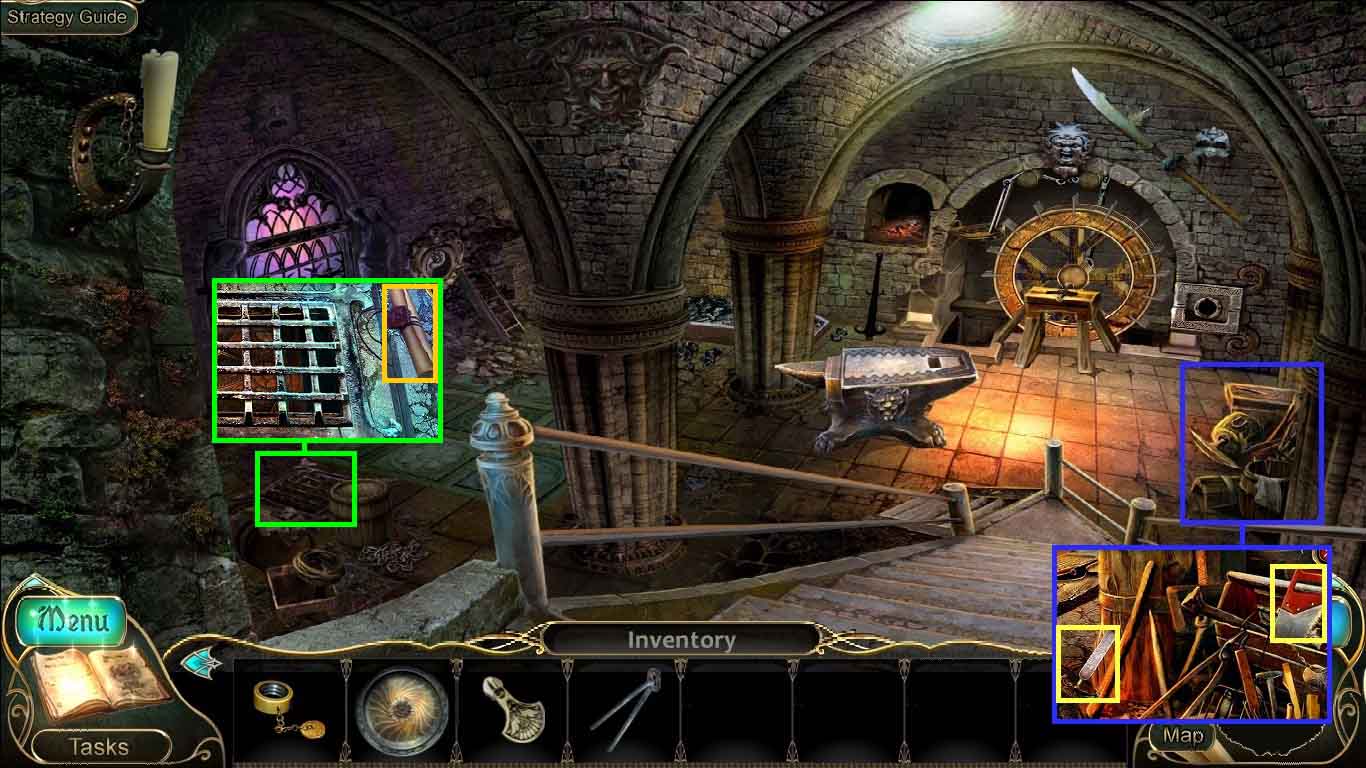
- Examine the tool bench and collect the saw and chisel.
- Examine the secret hatch; collect the scroll.
- Move down one time.
- Examine the walled up gate.
- Select the chisel to chip away the rock; collect the lever.
- Examine the tree stump; select the saw to use on the root.
- Collect the mallet.
- Move down two times.
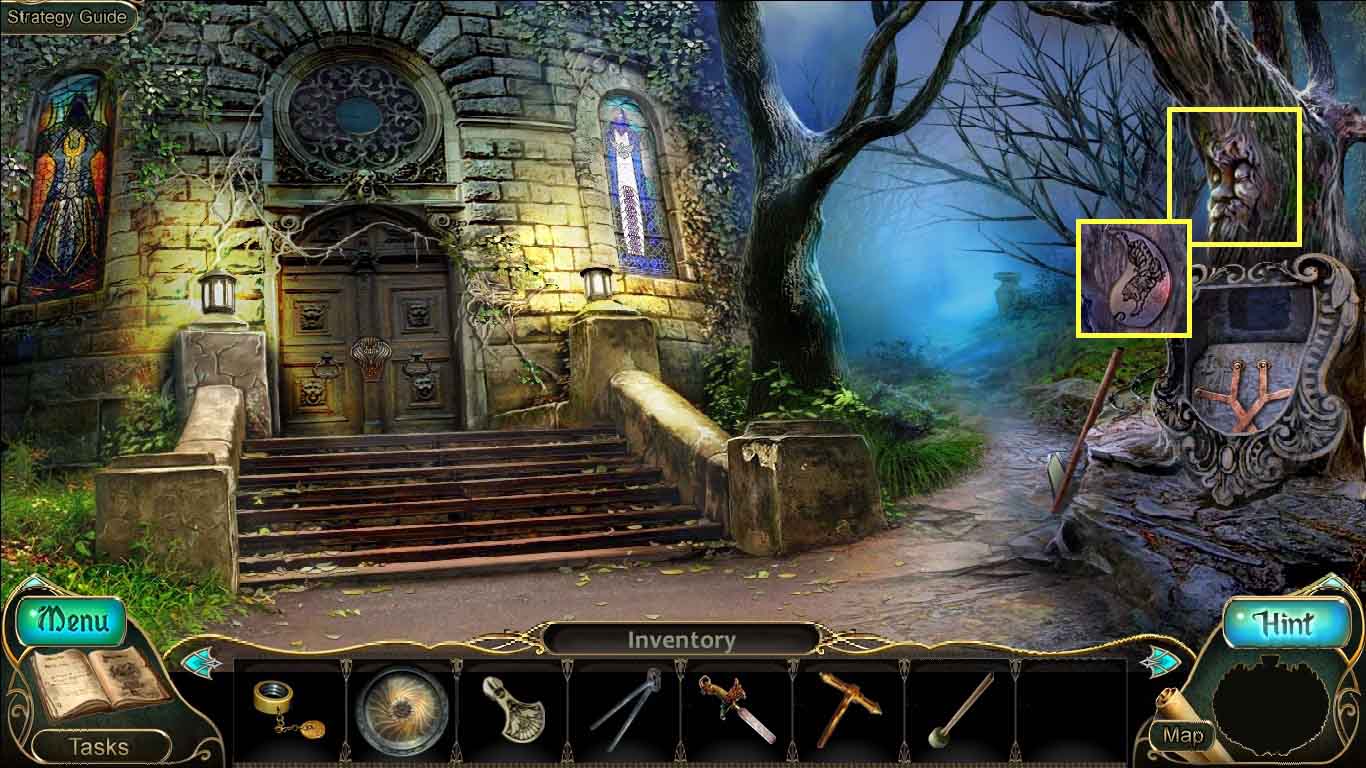
- Examine the carved tree; select the chisel to use on the bark.
- Collect the tiger tear.
- Move to the rear of the tower and go into the crypt.
- Examine the water control valve and attach the lever.
- Examine the gate mechanism and attach the tiger tear.
- Collect the amulet of the elements.
- Move left to the secret room.
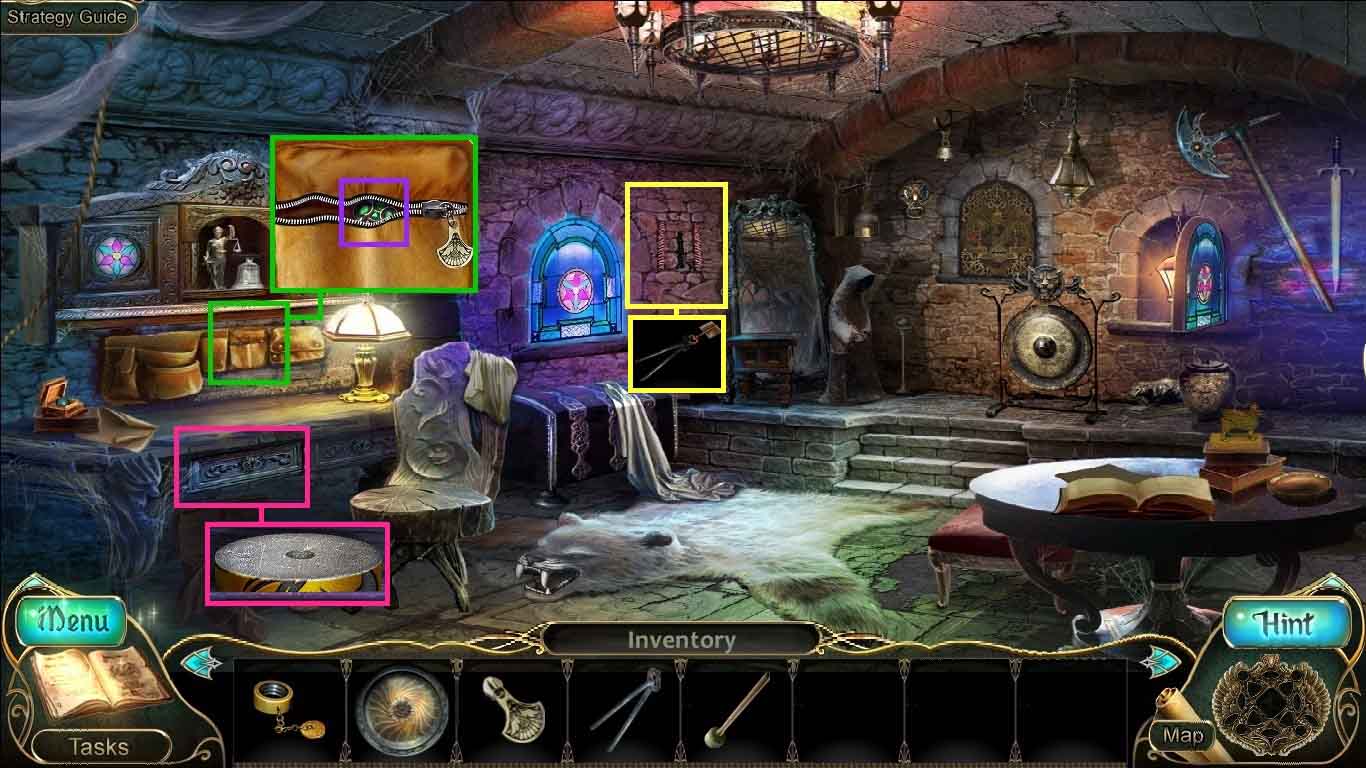
- Examine the zipped pocket.
- Click the zipper pull and collect the desk key.
- Examine the drawer and insert the desk key into the lock.
- Collect the cylinder.
- Examine the crack in the wall.
- Insert the tongs into the crack and collect the tongs with blank key.
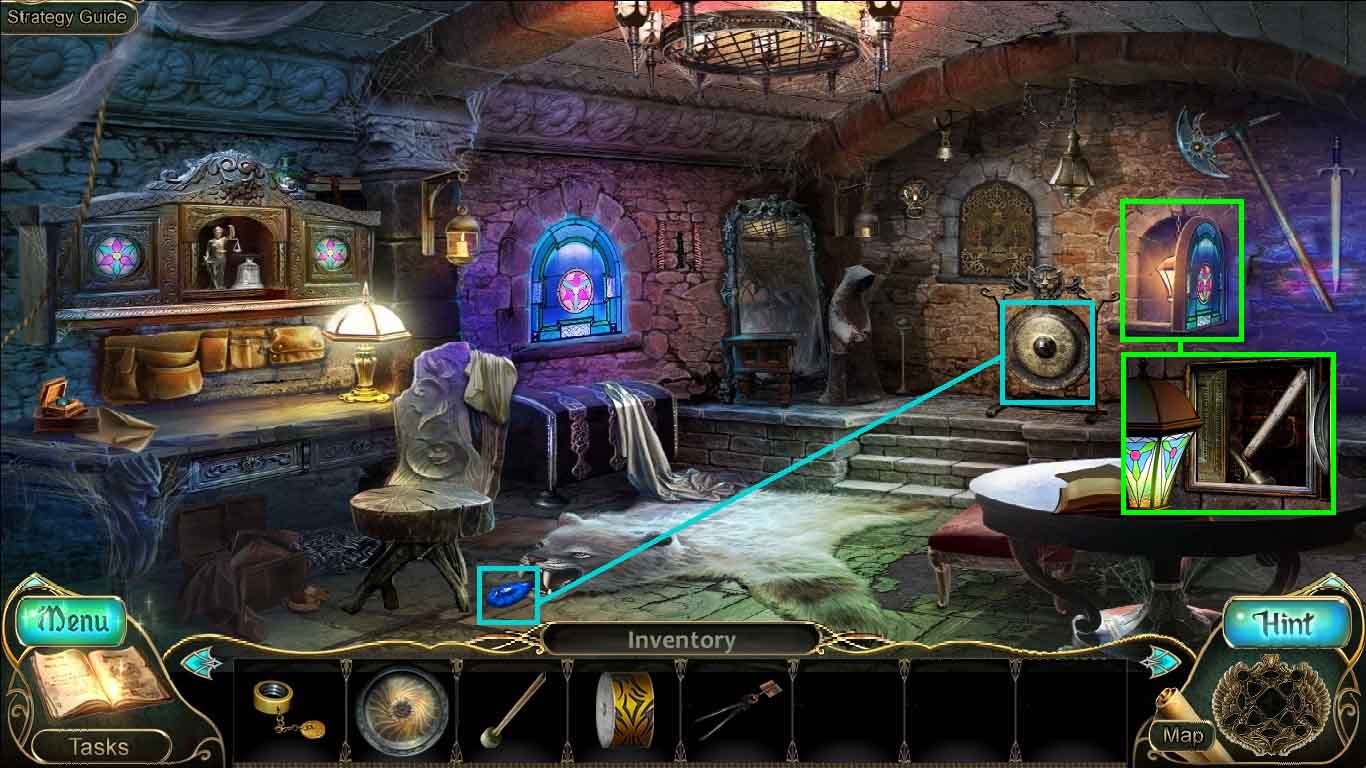
- Hit the gong with the mallet.
- Collect the crystal tear.
- Examine the niche and insert the plate into the slot.
- Collect the hammer.
- Move down one time.

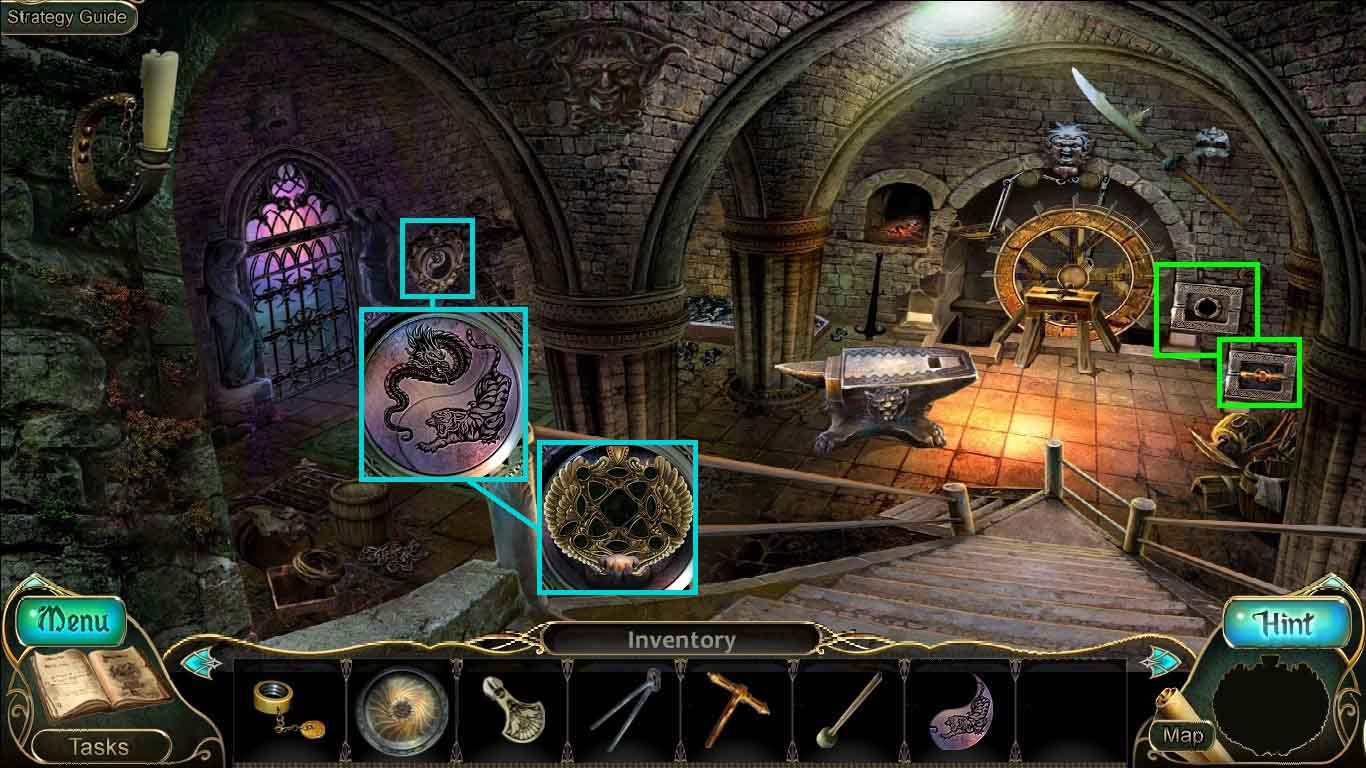
- Use the tongs with blank key in the furnace.
- Pound the anvil using the hammer.
- Earn the ability to control fire.
- Collect the key to the secret compartment.
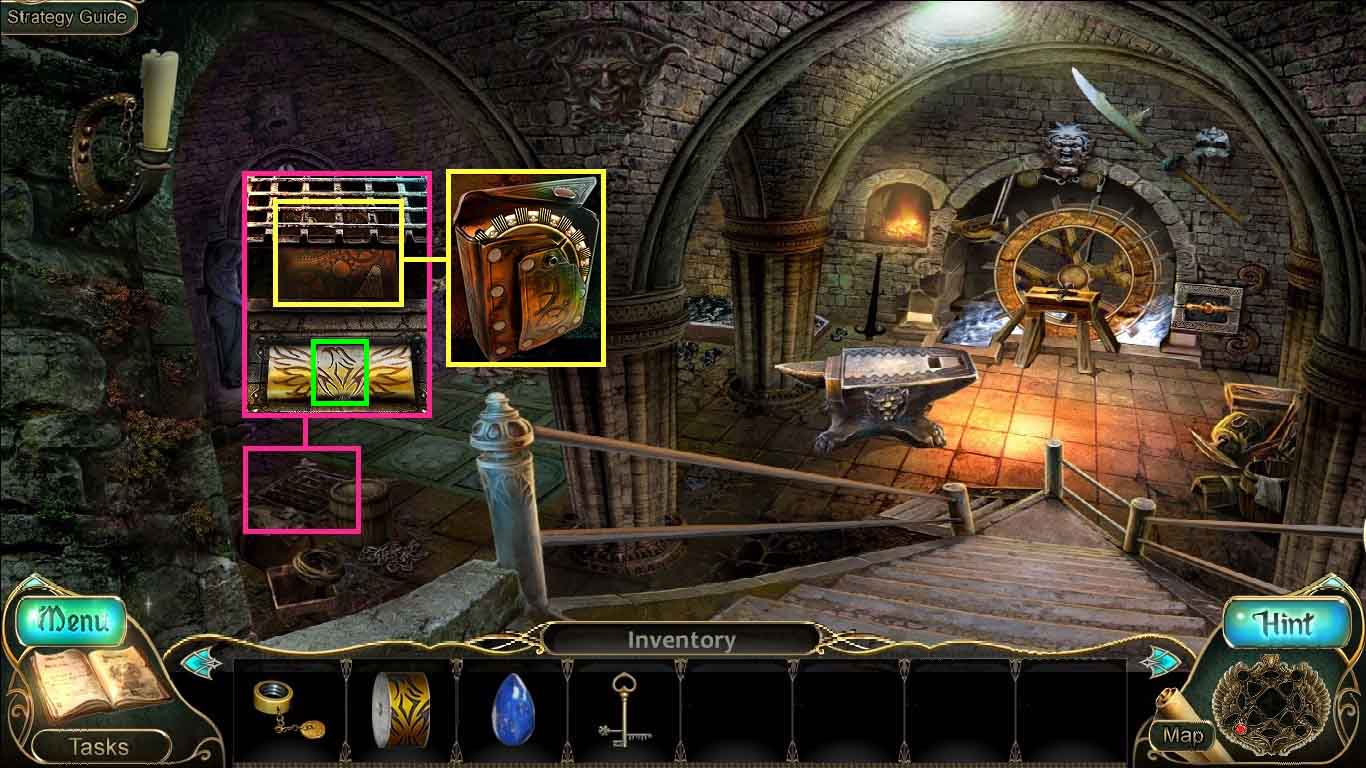
- Examine the secret hatch; put the cylinder into the opening.
- Click the middle cylinder to create the completed bird symbol.
- Examine the satchel
- Click it open and collect the wheel of time.
- Move to the left.
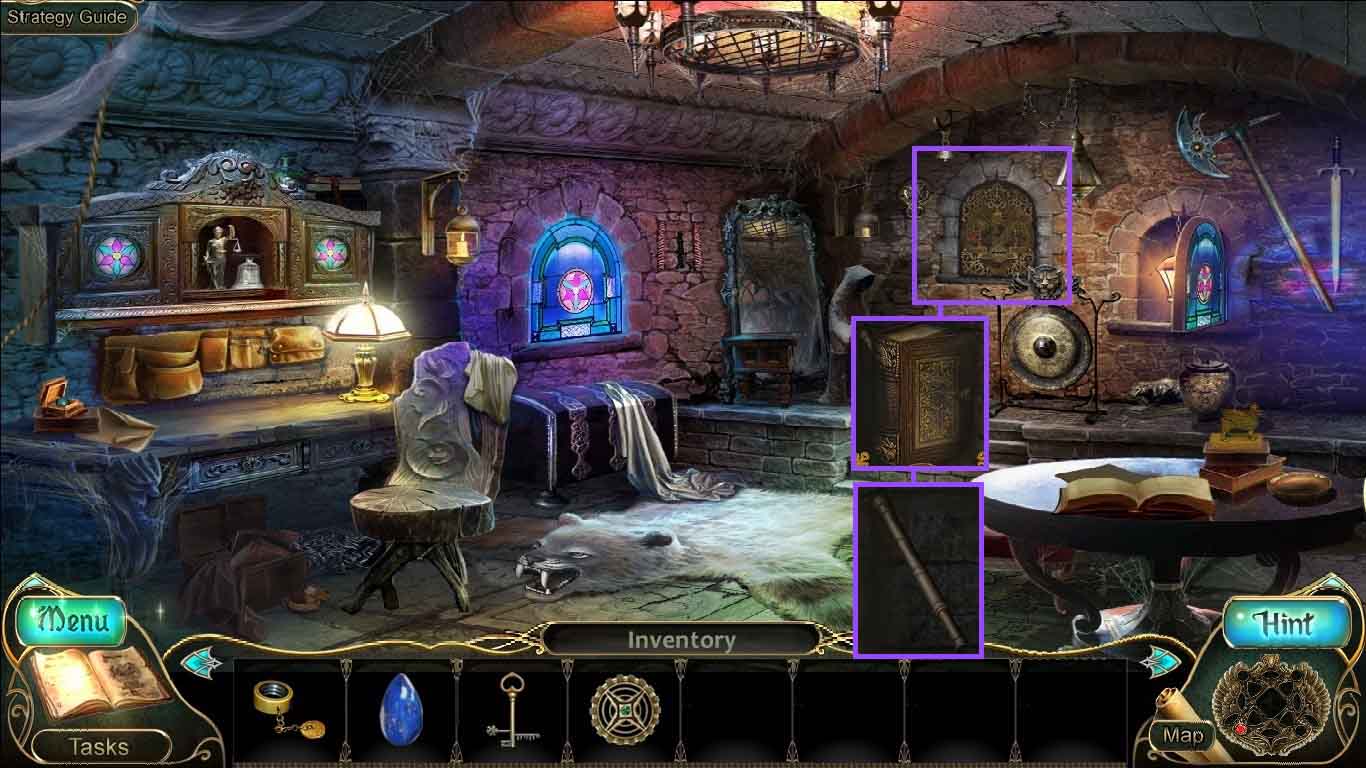
- Examine the compartment; insert the key to the secret compartment.
- Read the book and collect the telescope.
- Move down two times.
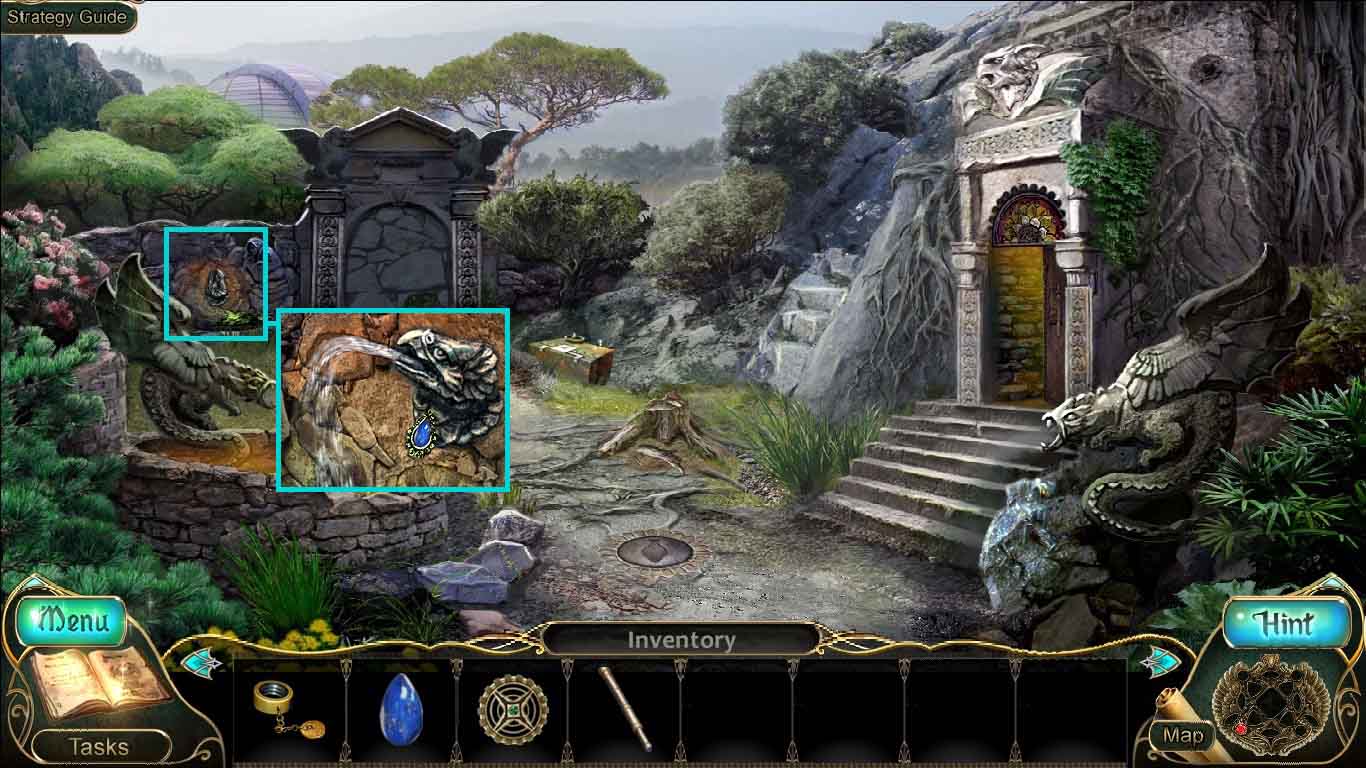
- Examine the spring with fountain; insert the crystal tear.
- Earn the ability to control air and water.
- Move down 3 times.
- Examine the gondola.
- Place the telescope and the eyepiece onto the base of the telescope.
- Attach the wheel of time onto the telescope.
- Collect the cryptex.
- Examine the deity altar and insert the cryptex.
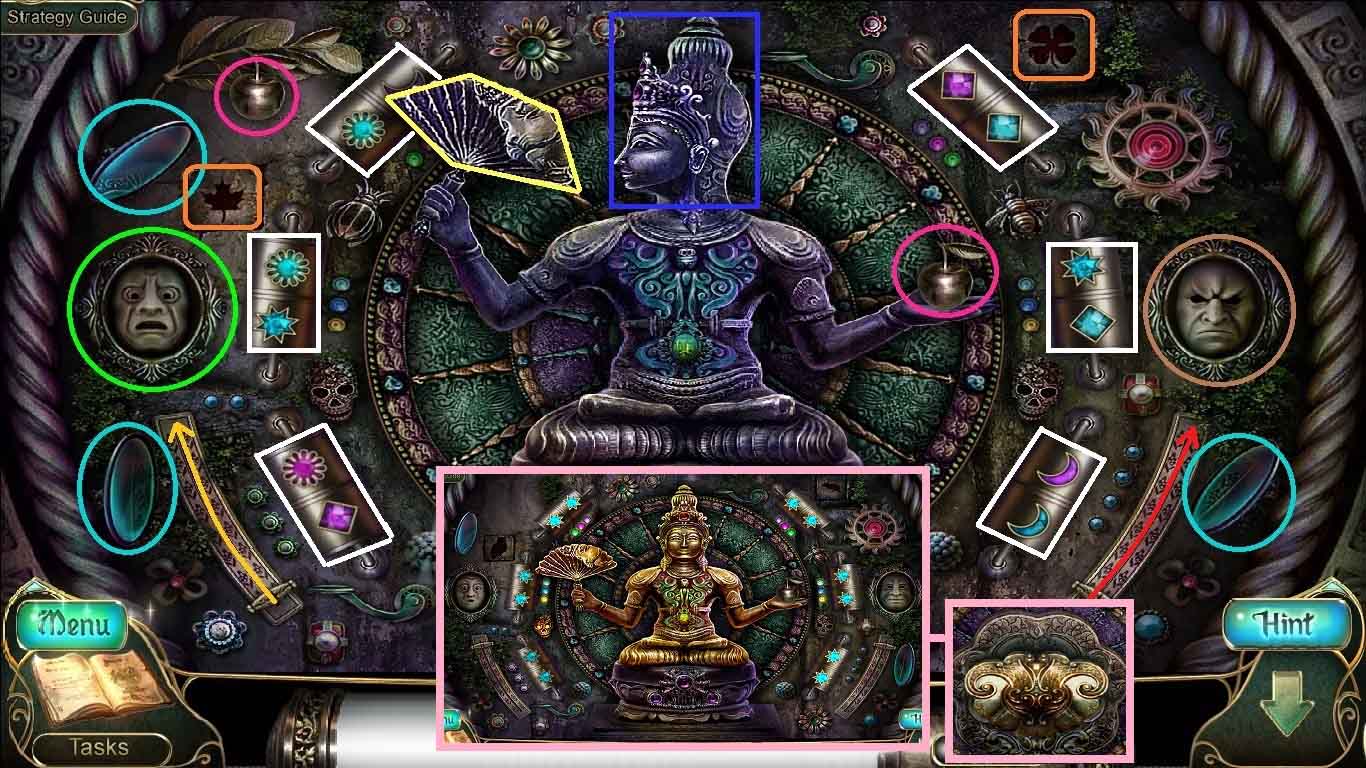
- Follow the instructions to move through the device.
- Click the fan (yellow) 2 times to reveal the deity’s face.
- Click the apple (pink) until it lands into the deity’s hand.
- Click the left mask (green) 3 times.
- Click the deity’s face (blue).
- Click the fan (yellow) 2 times.
- Click each of the 3 mirrors (light blue) two times.
- Click the deity’s face (blue).
- Click the left lever (gold arrow) up.
- Click the left square (orange) for the owl to appear and click the right square (orange) for the mouse to become visible.
- Click the 6 cylinders (white) until each one reflects 2 stars each.
- Click the right mask (brown) 3 times.
- Click the right lever (red arrow).
- Collect the controller for the amulet of elements from behind the deity.
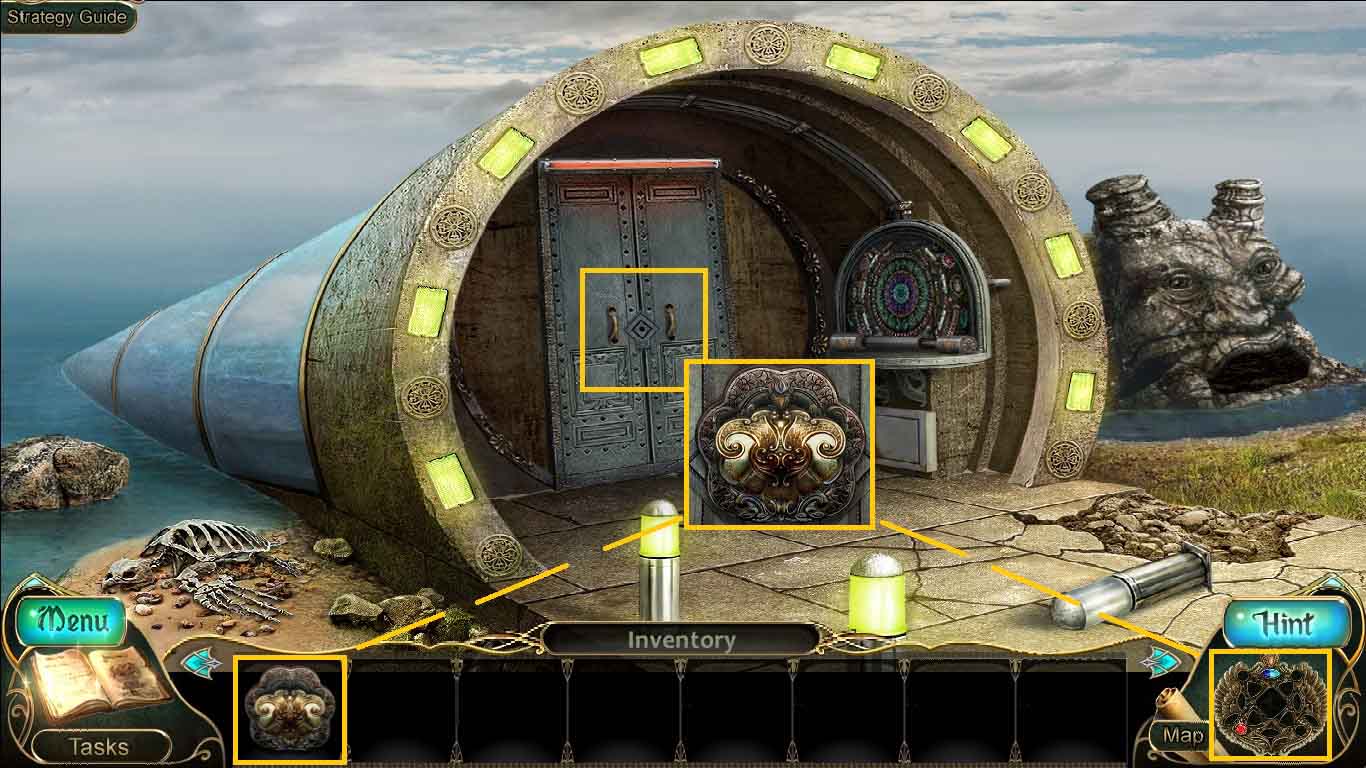
- Examine the door.
- Attach the controller for the amulet of the elements onto the lock.
- Insert the amulet from the menu bar into the controller.
- Move into the tunnel.
- Collect the scroll.
- Move ahead two times.
- Collect the lock pick.
- Notice the diving helmet.
- Move down 4 times, go to the rear of the tower and move ahead.
- Examine the trolley and insert the lock pick into the lock.
- Collect the valve and the lion carving fragment.
- Move down 3 times, move ahead to the underwater tunnel and go into the tunnel.
- Insert the lion carving fragment into the wall.
- Collect the magnet.
- Click the canister and examine the floor.
- Select the magnet to remove the hatch.
- Click the box and collect the token.
- Move ahead.
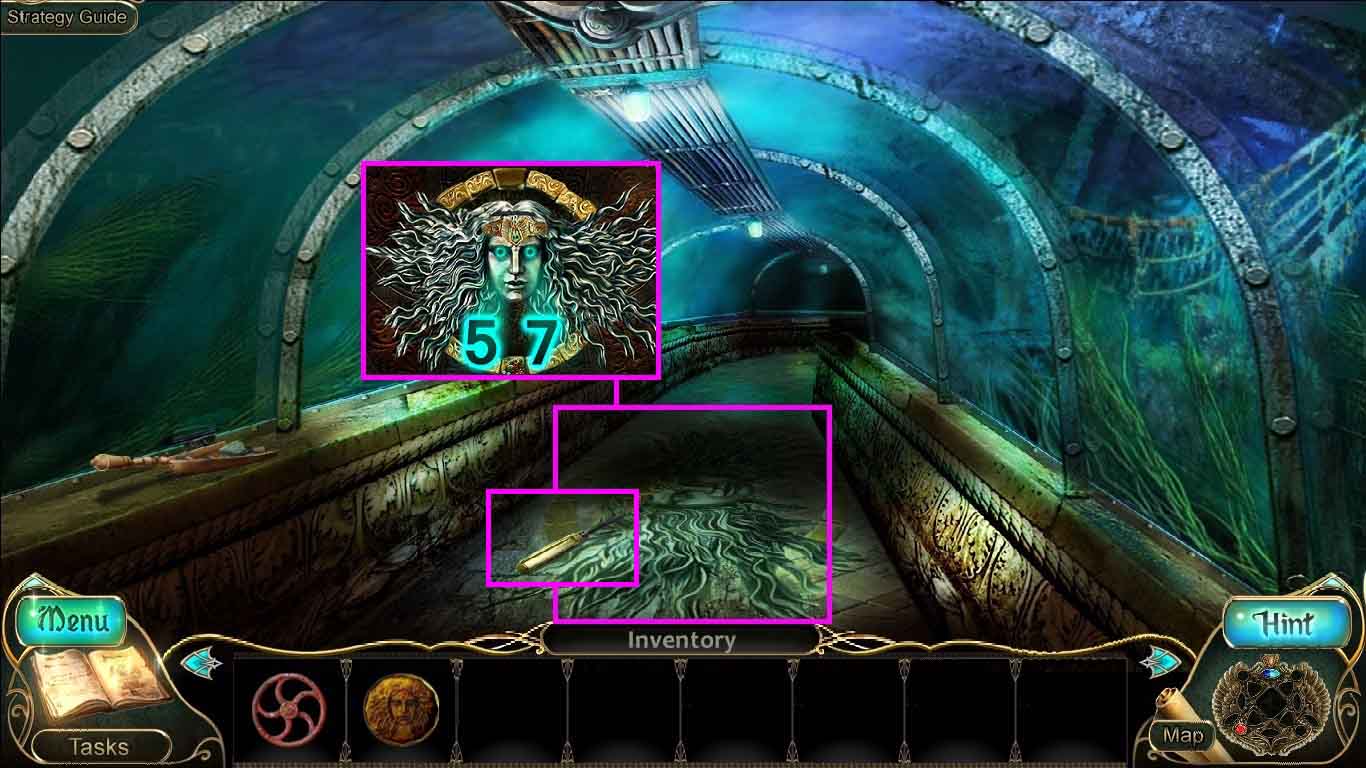
- Examine the floor mosaic; insert the token.
- Notice the number 57 that flashes.
- Collect the screwdriver.
- Move ahead.
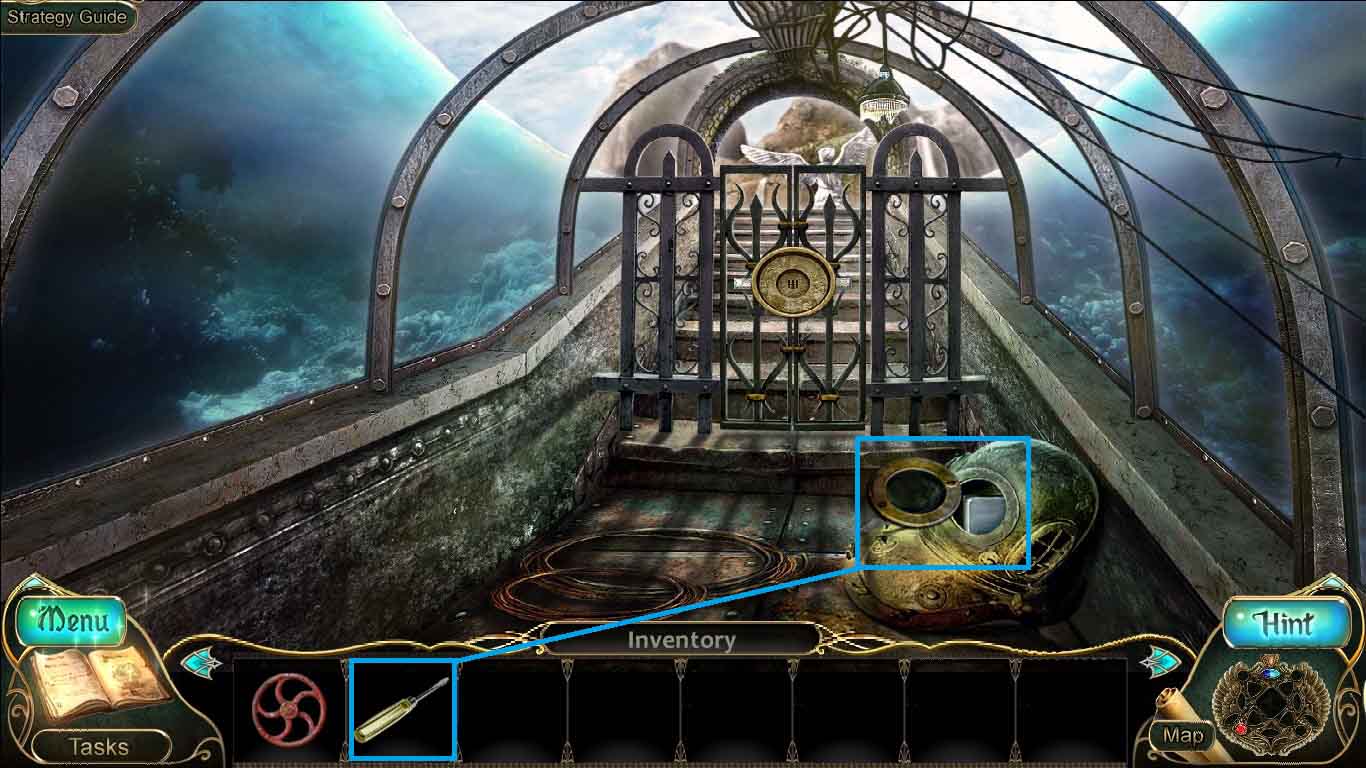
- Select the screwdriver and use it on the diving helmet.
- Collect the chip.
- Move down two times.
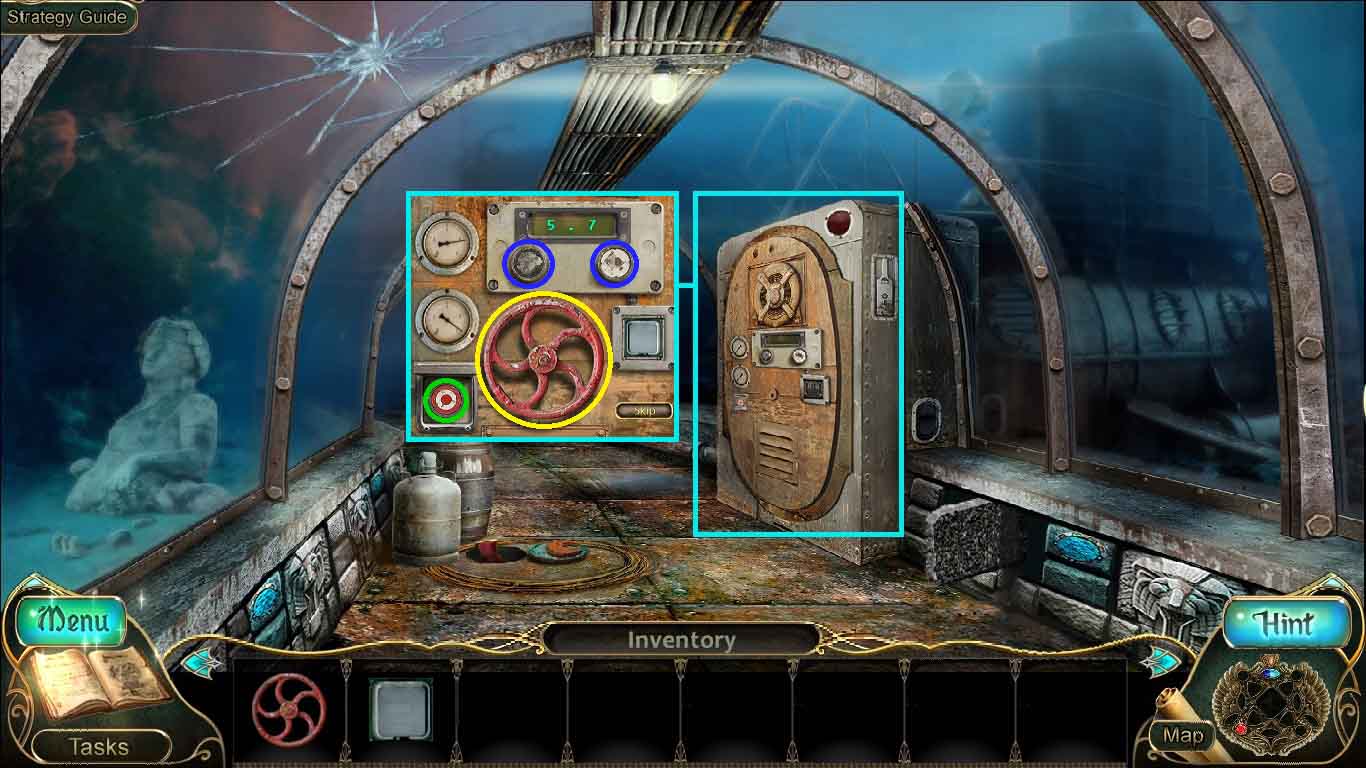
- Examine the bathyscaphe door and insert the valve.
- Put the chip into the holder.
- Click the buttons to change the number to 57.
- Click the red button on the top dial to any number.
- Click the red button again and set the bottom dial to the same number.
- Click the hidden objects area.

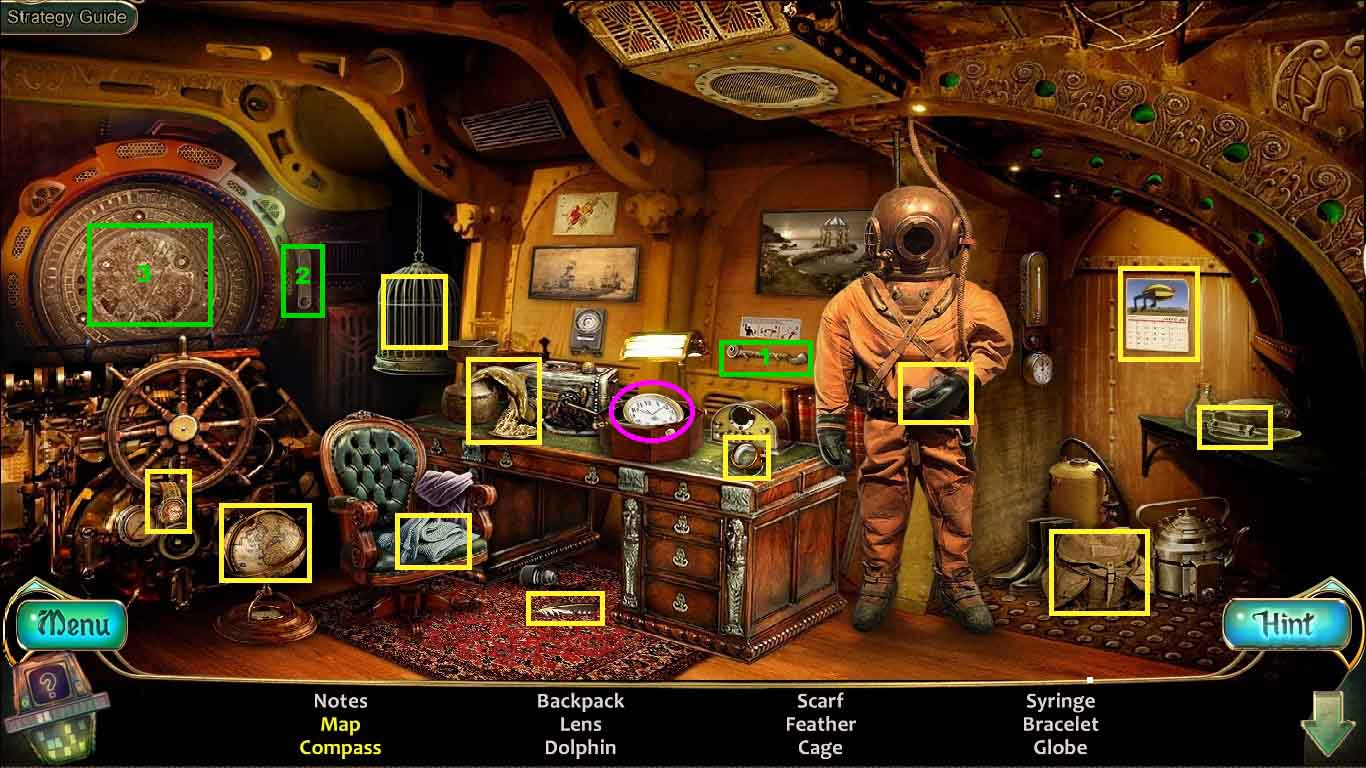
- Find the listed items.
- Insert the key into the drawer and collect the flashlight.
- Click the painting and insert the key card; collect the gate key.
- Find the remaining listed items.
- Click the clock (pink circle) to access the time portal.
- Click the lever on the window control; collect the map.
- Click the glove; collect the compass.
- Find the remaining listed items.
- Click the clock (pink circle) to access the time portal.
- Click the diver’s mask; collect the key to the tunnel exit.
- Move forward 2 times.
- Insert the key to the tunnel exit into the lock.
- Move ahead.