
Chapter 2: Statue Park and Cemetery
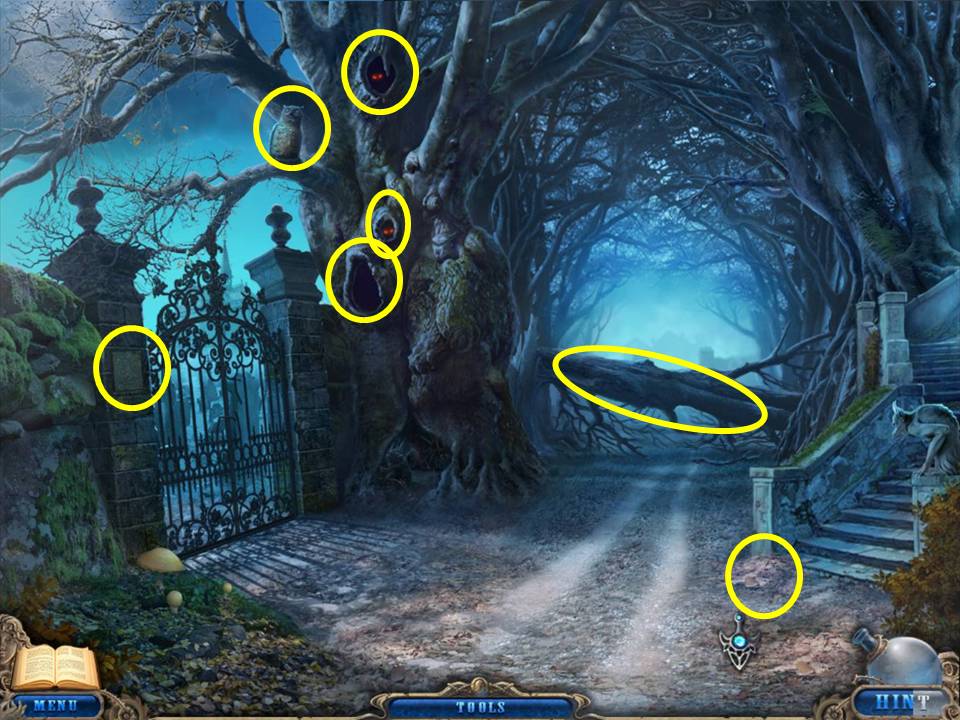
- Zoom into the ground by the bottom of the steps.
- Take the LEVER.
- Click on the owl, the fallen tree, and three knotholes in the tree.
- Zoom into the plaque on the left of the gates.
- Move right to the statue park.
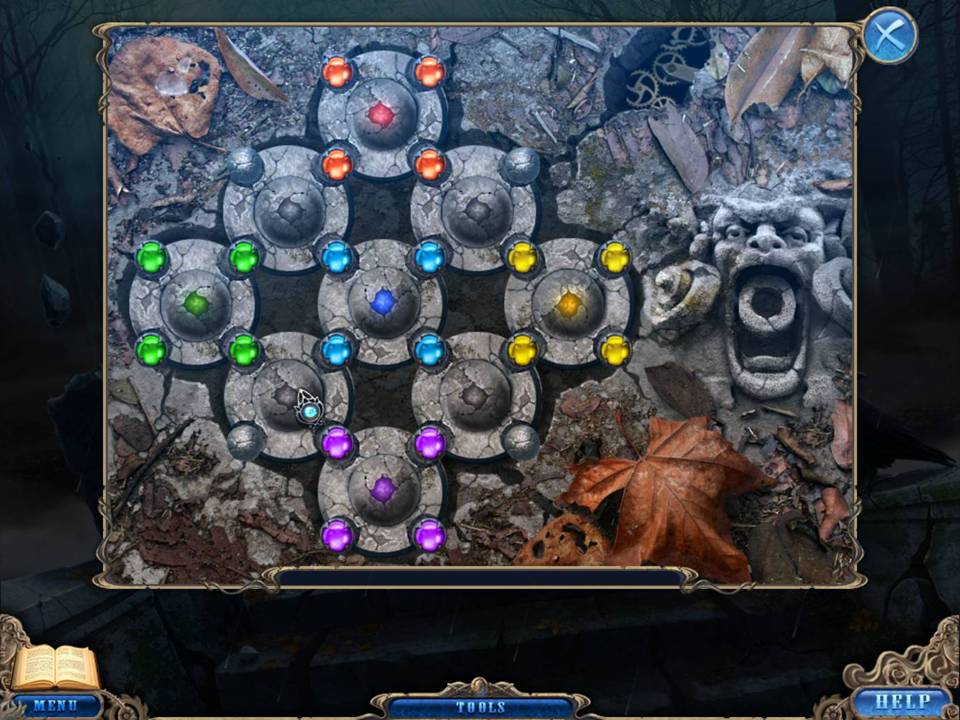
- Click on the area between the two front pillars to initiate a puzzle.
- The object of the puzzle is to surround the central gem with the same colored gems around the edges.
- To do this, click on the center of the circle that you want to rotate.
- Puzzle starting points vary.
- The best strategy is to focus on one color at a time.
- When finished, insert the LEVER in the mouth and click.
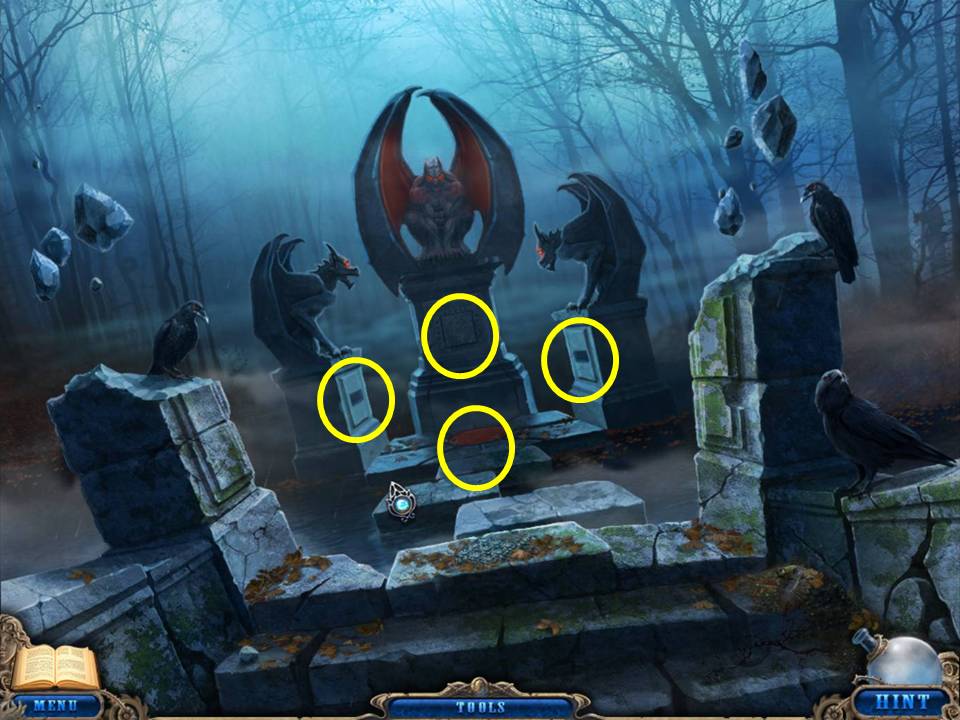
- Zoom into the front of the middle statue.
- Take the CROSS KEY. Click on the base of the pedestal on the left and see that a piece is missing.
- Click on the base of the middle statue and note missing angels.
- Click on the base of the pedestal on the right and place the DIE in the empty slot to initiate a puzzle.
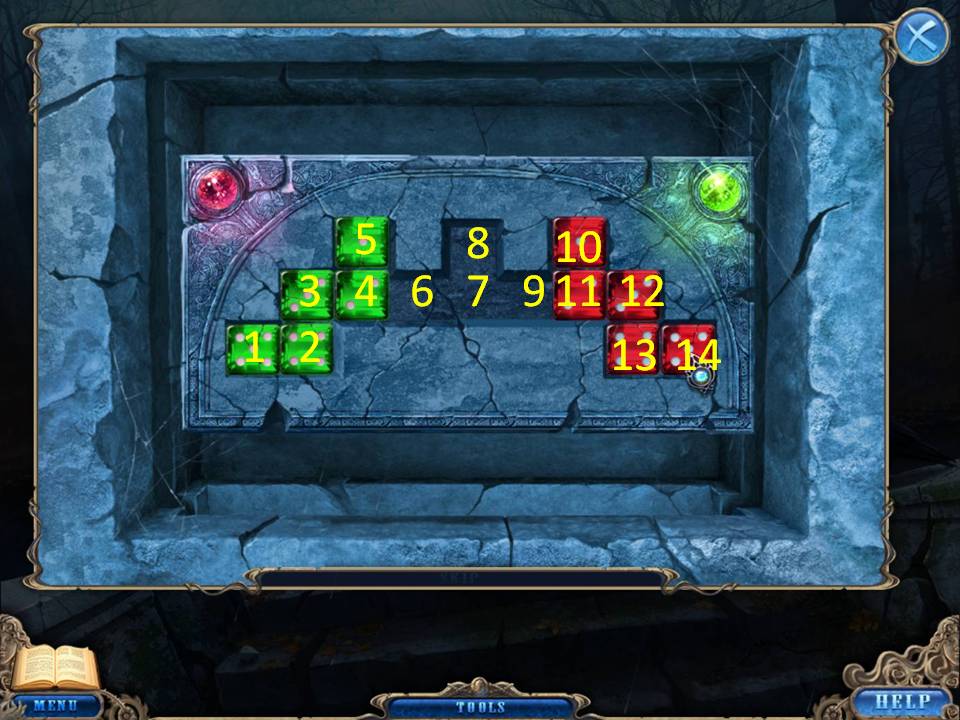
- The object of the puzzle is to switch the positions of the red and green dice, while maintaining their same numerical order.
- Assuming the slots are numbered as in the screenshot, the following moves must be made.
- Green die 2 to position 8
- red die 2 to position 4
- red die position 1 to 6
- green die 2 to position 10
- red die 3 to position 8
- red die 4 to position 7
- red die 5 to position 9
- green die 2 to position 14
- red die 5 to position 10
- red die 4 to position 13
- red die 3 to position 12
- red die 5 to position 8
- red die 3 to position 7
- red die 4 to position 10
- red die 3 position 13
- red die 1 position 12
- red die 2 position 11
- green die 1 position 9
- red die 5 position 5
- green die 1 position 8
- red die 2 position 4
- red die 4 position 6
- green die 1 position 10
- red die 4 position 8
- red die 1 position 6
- red die 3 position 7
- green die 1 position 13
- red die 3 position 10
- red die 1 position 12
- red die 2 position 11
- green die 3 position 9
- green die 4 position 7
- green die 5 position 6
- red die 5 position 1
- green die 5 position 5
- green die 4 position 2
- red die 4 position 3
- green die 5 position 8
- red die 4 position 5
- green die 4 position 7
- red die 4 position 2
- green die 4 position 5
- green die 3 position 3
- red die 2 position 4
- red die 3 position 6
- green die 5 position 10
- red die 1 position 8
- green die 1 position 7
- green die 2 position 9
- green die 5 position 14
- green die 2 position 13
- green die 1 position 10
- red die 1 position 12
- red die 3 position 8
- red die 2 position 11
- green die 4 position 9
- red die 3 position 5
- green die 3 position 8
- red die 3 position 3
- green die 3 position 5
- green die 4 position 8
- red die 2 position 4
- red die 1 position 6
- green die 1 position 12
- green die 4 position 10
- red die 1 position 8
- red die 2 position 11
- green die 3 position 9
- red die 1 position 5
- green die 3 position 8
- red die 2 position 4
- green die 3 position 6
- green die 1 position 8
- green die 2 position 7
- green die 4 position 13
- green die 2 position 10
- green die 3 position 12
- green die 2 position 6
- green die 1 position 10
- and green die 2 position 11
- When finished a compartment will open, take the PHOTO PLATE.
- Return to the Hotel Lobby.
- Play the Hidden Object Area in the chest in the center of the room.

- Find the items listed.
- Receive the DOOR KNOCKER.
- Return to the Hotel Lobby.
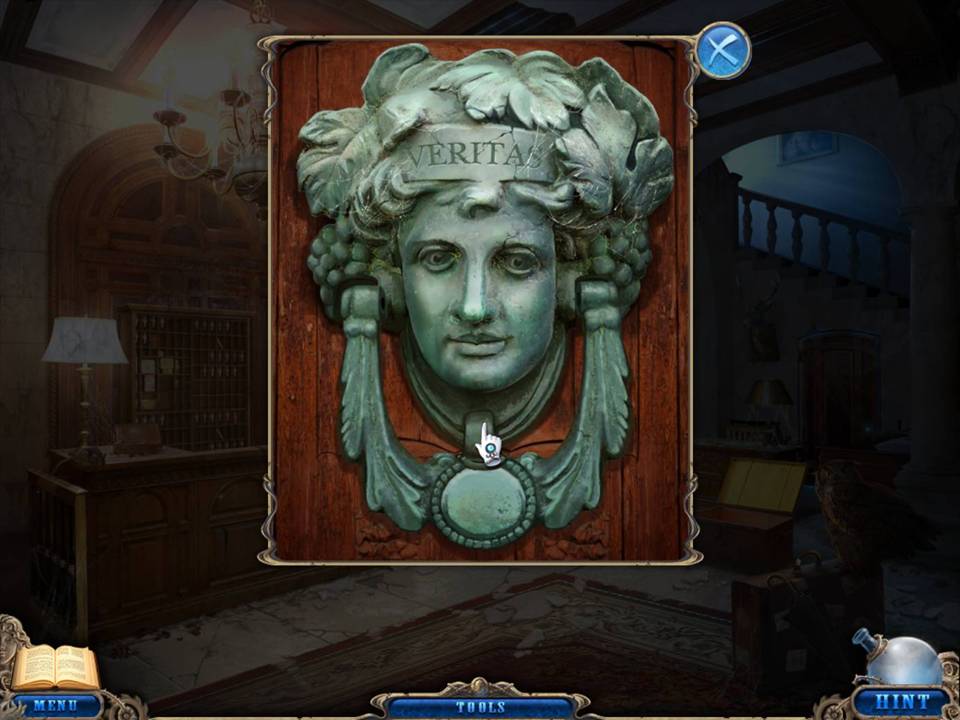
- Zoom into the door to the bar.
- Place the DIONYSUS HEAD and the DOOR KNOCKER on the door.
- Open the door and move into the bar.

- Move the rag on the closest barstool.
- Take the ZIGZAG KEY.
- Take the LADDER.
- Zoom into the jukebox.
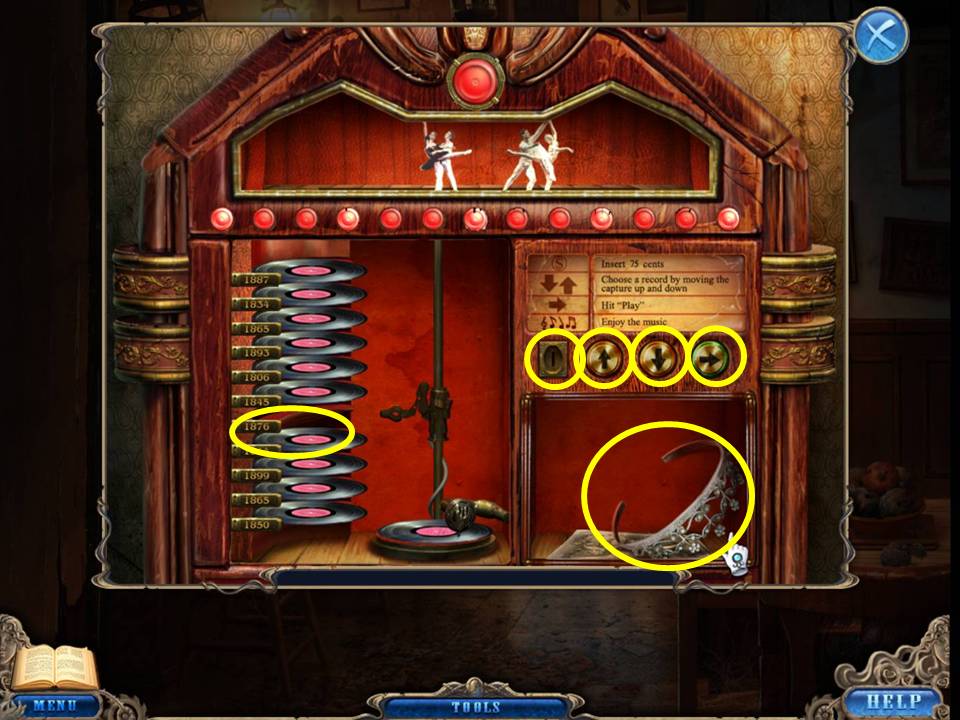
- Insert the three 25 CENTS into the Jukebox. Select the record “1876” (this corresponds to the year from behind the bedroom mirror that is recorded in the journal).
- To choose, use the up and down arrows on the right.
- Arrows may move more than one space at a time and the solution varies.
- You can try this combination: down, up, up, down, up and down.
- Click on the right arrow to play.
- Take the TIARA from the compartment on the right.
- Zoom into the pictures under the TIARA to get a journal update.
- Return to the fountain and move through the arched passageway.
- Place the ladder against the tree to examine the owl.
- Click on the base of the tree to initiate a Hidden Object Area.

- Find the items listed.
- Take the honeycomb with the glove.
- Blow the horn on the place the bat is hiding to get the bat.
- Cut the wooden log several times with the knife to get the wooden cup.
- Dig the “X” with the shovel to uncover the chest and take the treasure.
- Receive a STRAIGHT-CUT GEAR, BEVEL GEAR, SPIRAL BEVEL GEAR, and HELICAL GEAR.
- Move out of the Hidden Object Area.
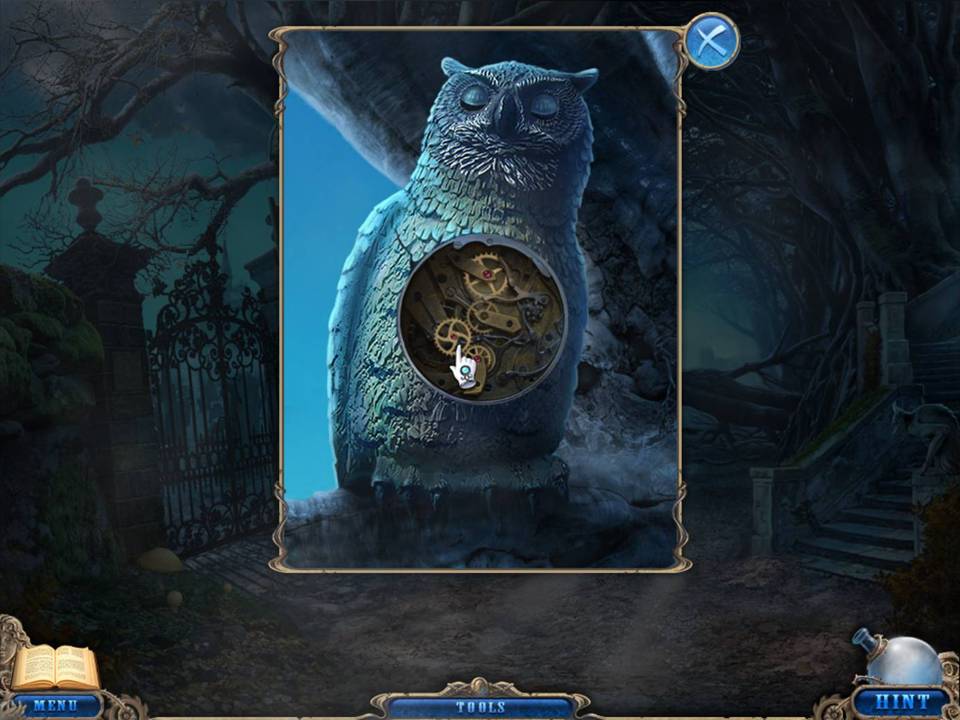
- Prop the ladder against the tree just below the owl.
- Zoom into the owl and place the SPIRAL KEY, CIRCLE KEY, CROSS KEY, and ZIGZAG KEY into the matching four keyholes. Turn each key to open a compartment.
- Place the STRAIGHT-CUT GEAR, BEVEL GEAR, SPIRAL BEVEL GEAR, and HELICAL GEAR within the opened compartment.
- Take the LADDER.
- Move through the gate on the left and into the cemetery.
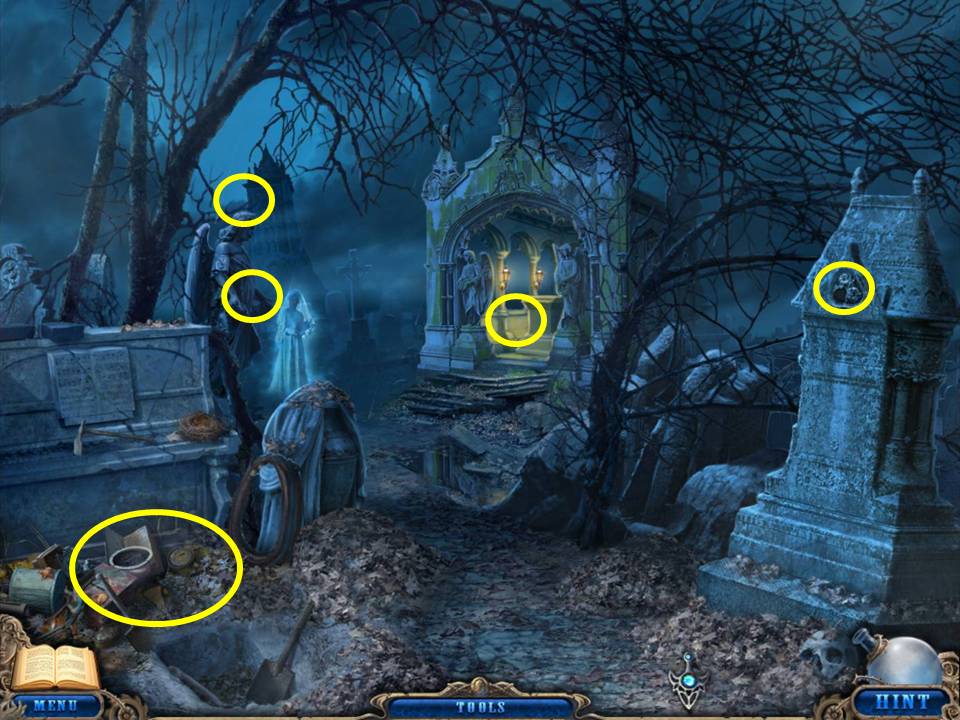
- Zoom into the angel statue and place the TIARA on her head.
- Take the SHINING STAR from the angel’s hands.
- Zoom into the gravestone to the right and note its missing rose.
- Click on the lighted mausoleum. Note you still need pieces to complete its puzzle.
- Click on the area in front of the stone piano to initiate a Hidden Object Area.

- Find the items listed.
- Place the two wings on the statue to get an angel.
- Light the candle with the matches to get the candle flame.
- Water the seed with the watering can to get the lily.
- Place the wheel on the wheelbarrow to get the wheelbarrow.
- Place the heel on the shoe to get the high-heeled shoe.
- Receive a KNIFE.
- Go down two times and move right to the area in front of the train station.
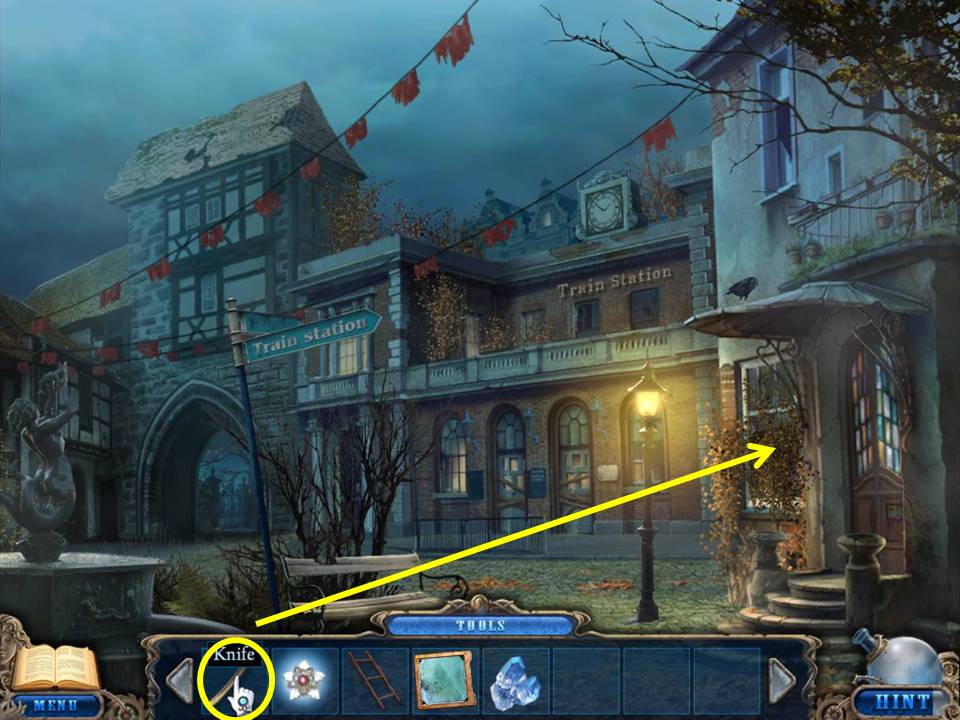
- Cut back the vines covering the window with the KNIFE.
- Play the Hidden Object Area at the window.

- Find the items listed.
- Tape the broken glasses to get the glasses.
- Attach two chess pieces to get the Queen.
- Use pliers on the ring to get the diamond.
- Cut the sachet with scissors to get an amulet.
- Reattach the nutcracker’s arm to get the nut.
- Receive an ARROW.
- Move right through the arched passageway and go right to the statue park.
- Zoom into the statue base at the far left and place the ARROW on the left slot to initiate a puzzle.
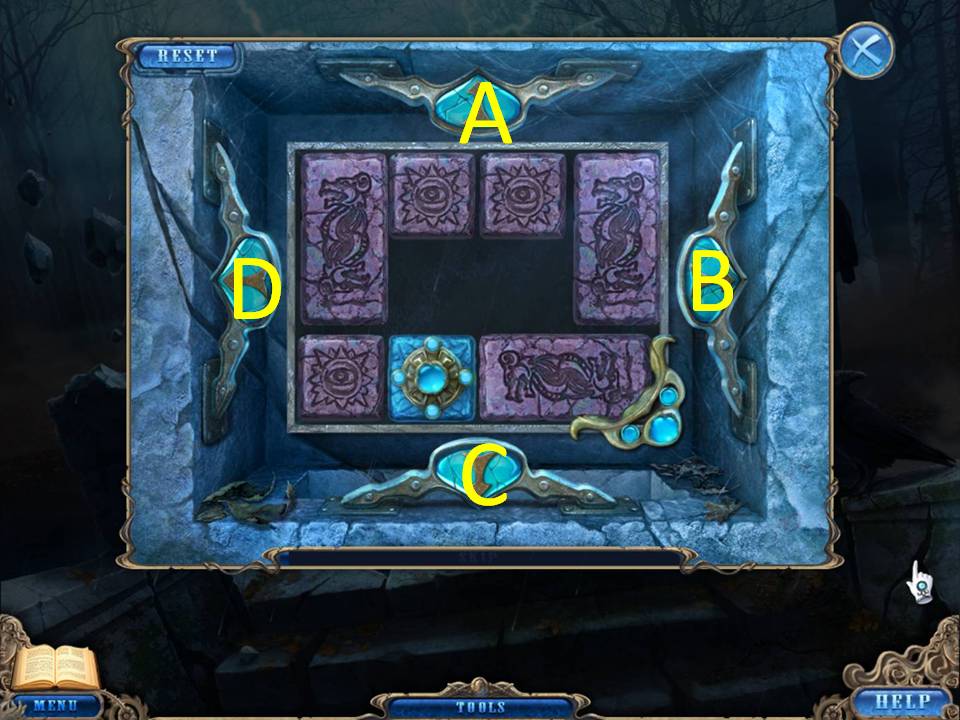
- The object of this puzzle is to move the decorated blue tile to the lower right corner by using the arrows.
- Any unblocked tile will slide in the direction of the arrow when clicked.
- Assuming that the arrows are marked A, B, C, and D, beginning at the top and moving clockwise, use the following to solve: A, D, C, B, A, B, C, D, A, B, C, B, A, D, C, B, A, D, C, B, C, B, A, D, C.
- When finished, a compartment will open.
- Take the HIGH-POWERED FAN.
- Return to fountain square.