
Chapter 1: Fountain Square
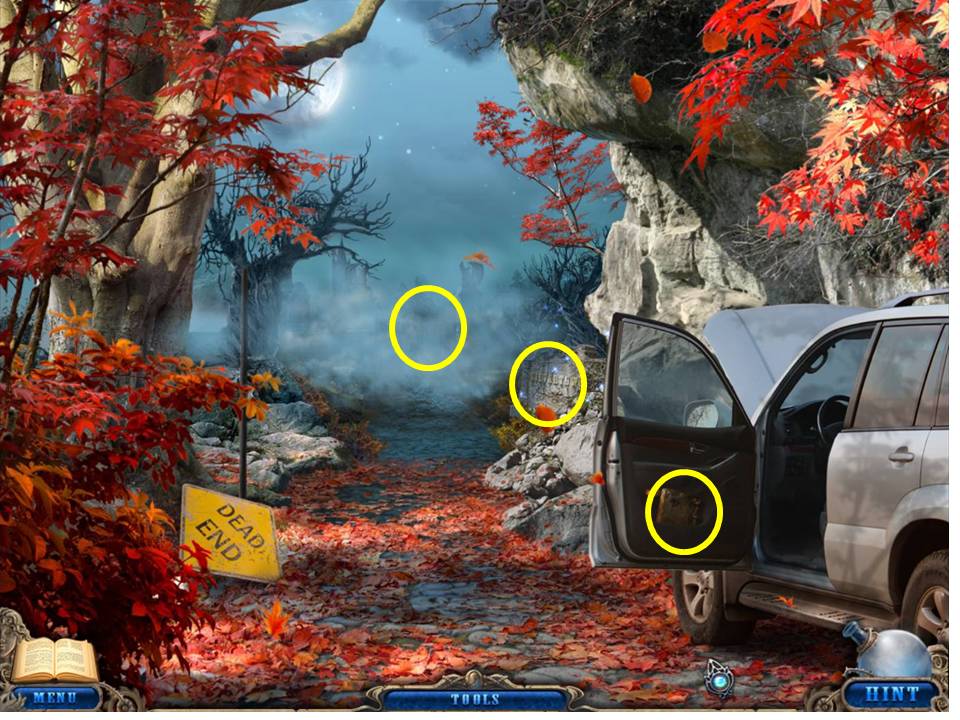
- Click on the book in the car door.
- Click on a page within the book to get a journal update.
- Click on the town marker on the right side of the path past the car.
- Take the GEM. Use the hammer to smash the bottle.
- Zoom into the gate at the back.
- Click on the area to the left to initiate a Hidden Object Area.
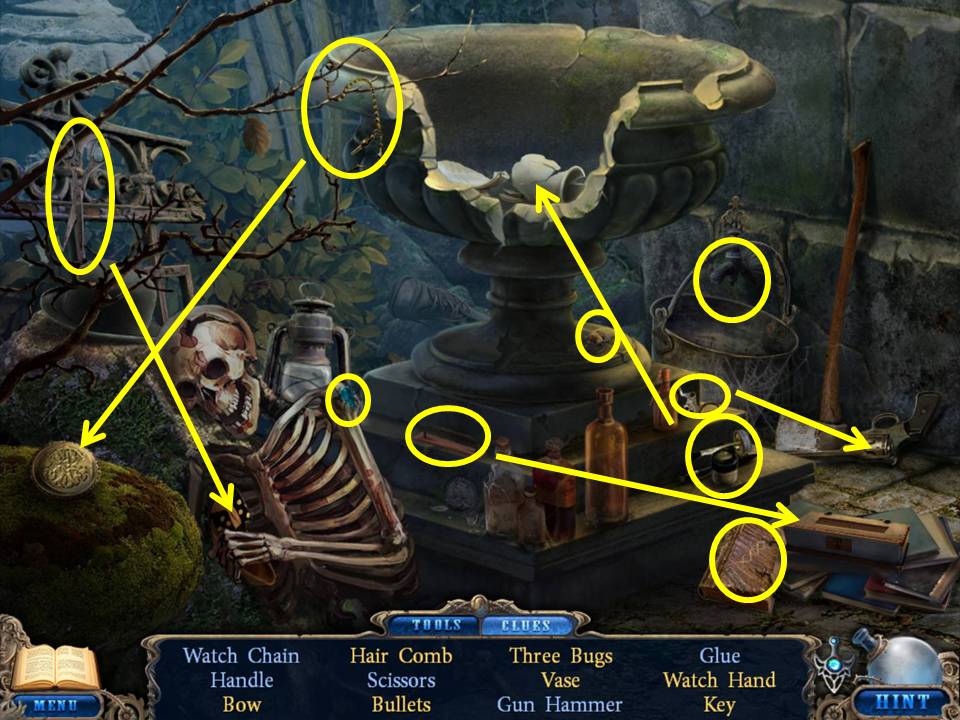
- Find the items listed.
- Open the book to find the hair comb.
- Snip the bow off the shoe.
- Fill the bucket under the spigot to get a bug.
- Repair the broken pottery with the glue to get the vase.
- Place the watch chain on the watch to get the watch hand.
- Place the handle on the chest to get the key.
- Use the gun hammer on the gun to get the bullets.
- When finished, receive the KEY.
- Click on the gate to initiate a puzzle.
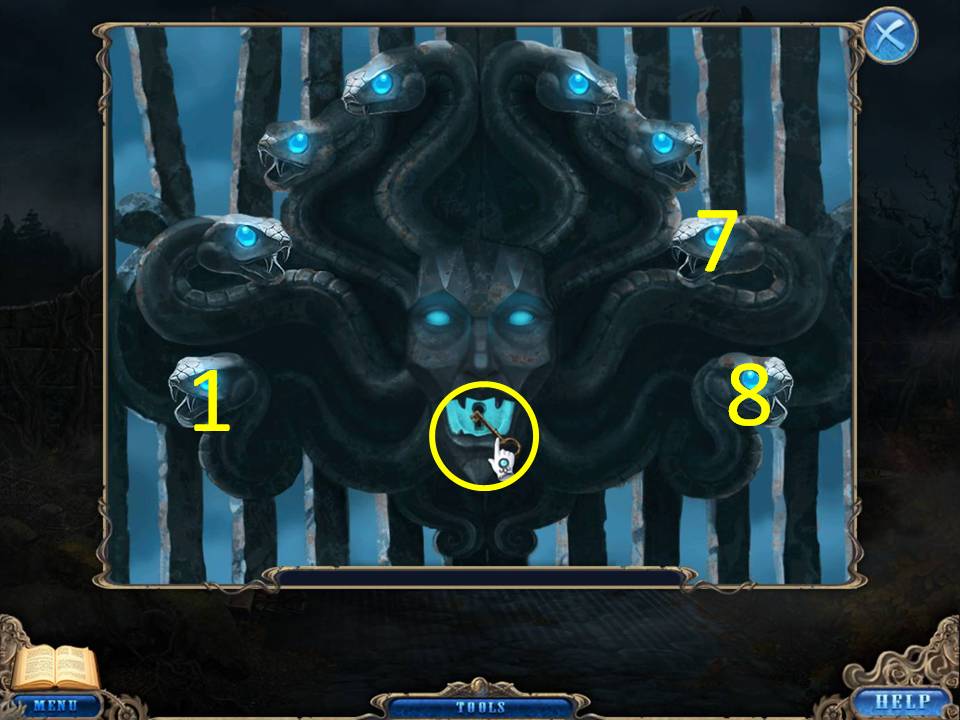
- The object of the puzzle is to change the red eyes to blue.
- If you click on one eye, it will turn other eyes off/on.
- Beginning on the lower left of the half circle and assuming the eyes are numbered one to eight, click in the following sequence: One, seven, and eight.
- When finished, place and turn the key in the lock located in the open mouth.
- Proceed through the open gates.

- Click on the dog.
- Click on the building to add a map to your journal.
- Try to move through the arched opening on the right.
- Zoom into the fountain.
- Click on the leaves to move them.
- Take 25 CENTS.
- Click on the fog behind the lamppost and to the right of the hotel.
- Enter the hotel.
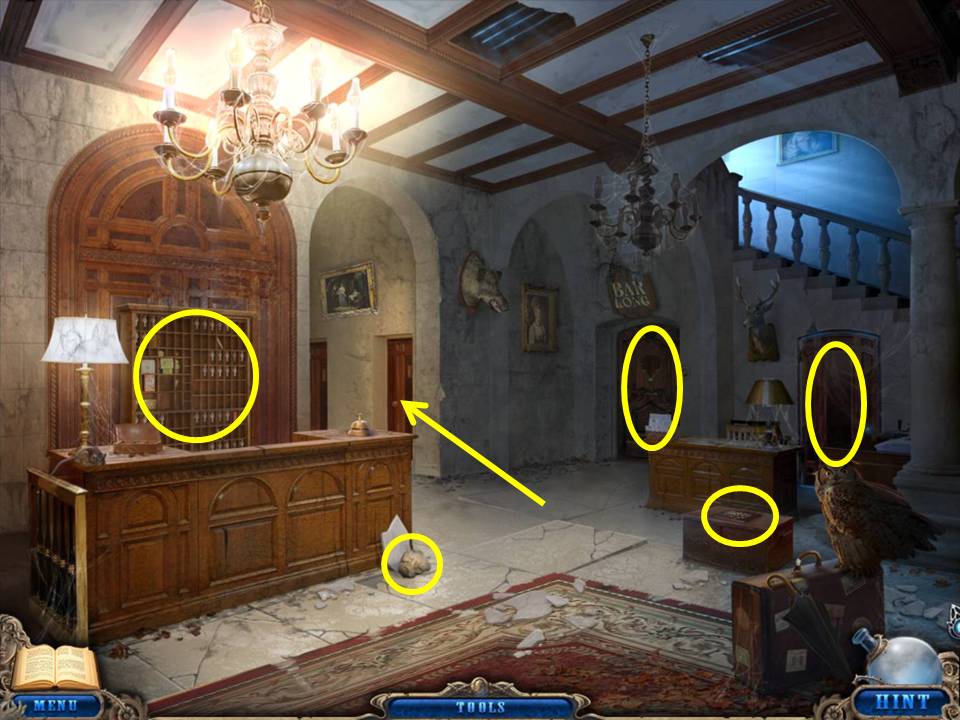
- Take the STONE to the bottom right of the front desk.
- Zoom into the mail slots behind the front desk.
- Take the SPIRAL KEY. Read the letter to get a journal update.
- Click on the door under the stairs.
- Click on the chest and note the missing puzzle piece.
- Click on the door under the bar sign and note the missing pieces.
- Enter the room on the right side of the hall.
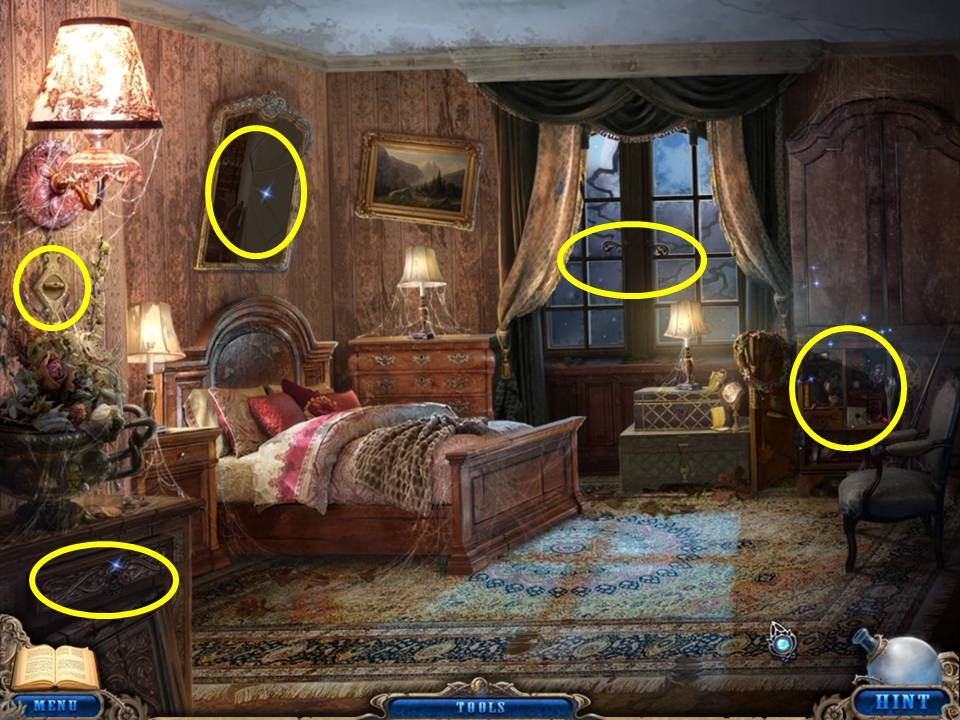
- Turn on the light switch on the left wall under the lamp.
- Use the stone on the mirror above the bed.
- Zoom into the note that fell on the bed.
- The code on the paper updates your journal.
- Take the second 25 CENTS.
- Click on the window.
- Click on the drawer beneath the lamp and take the PUZZLE PIECE.
- Click on the cabinet to the right of the window to initiate a Hidden Object Area.

- Find the items listed.
- Receive a DIE.
- Leave the room and click on the puzzle chest in the lobby.
- Insert the PUZZLE PIECE to initiate a puzzle.
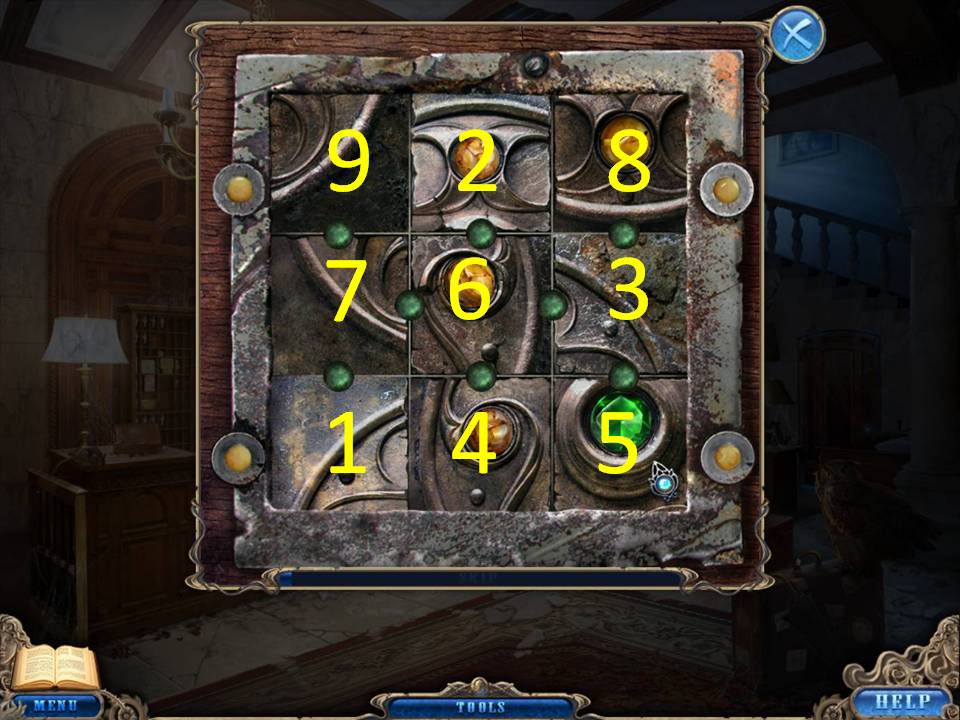
- The object of the puzzle is to unscramble the picture by switching squares.
- To switch adjacent squares, click on the green dot between them.
- Pieces in the middle row may only be switched left-right or right-left, not up and down.
- Starting positions vary.
- See screenshot for the positions of one solution.
- When finished, the chest opens a Hidden Object Area.

- Find the items listed.
- Pry open the oyster with the screwdriver to get the pearl.
- Slit open the letter with the knife to get the photo.
- Break the piggybank with the hammer to get the three coins.
- Open the jewelry box with the key to get the ring.
- Use the corkscrew on the bottle to get the cork.
- Receive the third 25 CENTS.
- Back out of this screen and note the fog has dissipated from the arched opening.
- Move right to the train station.
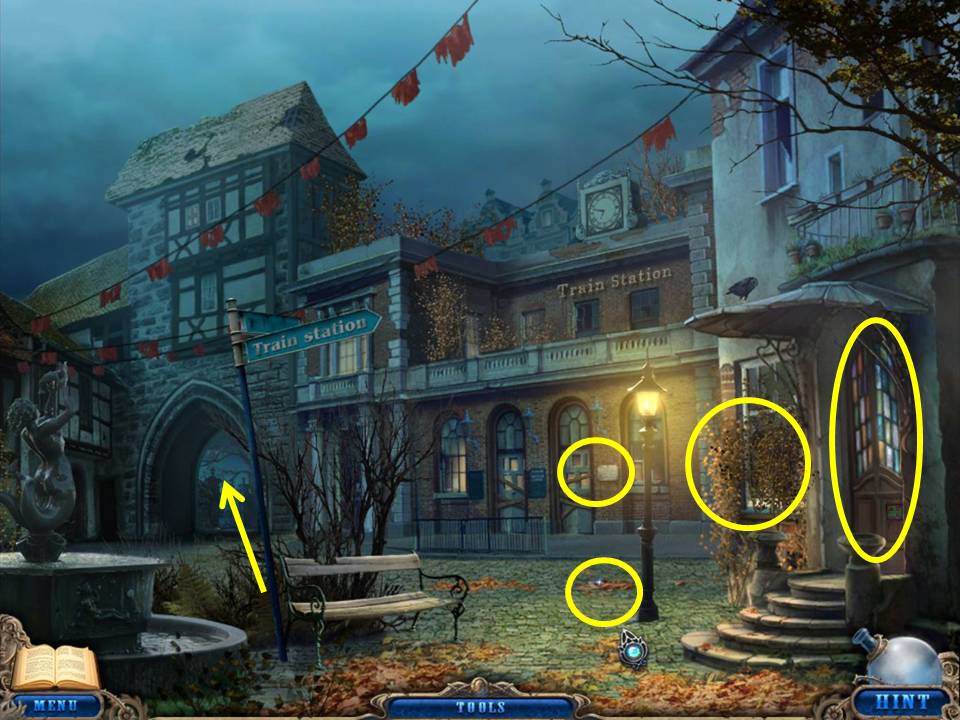
- Pick up the CIRCLE KEY from the ground near the street lamp.
- Click on the bushes covering the window on the building to the right.
- Zoom into the door to the right. See a missing tile.
- Read the sign on the wall outside the train station.
- Move through the archway on the left.
- Play the Hidden Object Area by the tree trunk.

- Find the items listed.
- Place the ham on the bread to get the sandwich.
- Place the mailbox flag on the mailbox to get the letter.
- Pry open the crate with the crowbar to get the rum.
- Put the playing cards together to get blackjack.
- Light the cigar to get the ash.
- Receive the DIONYSUS HEAD.