
Witches' Legacy: The Ties that Bind: Chapter Five: In the City
Our Witches' Legacy: The Ties that Bind Walkthrough is your one-stop source for assistance as you and your daughter, Lynn, attempt to rescue her beloved Edward from a dark force determined to destroy your family. Rely on our detailed directions, our custom marked game screenshots, and our easy-to-understand puzzle solutions to save you from frustration in this exciting new hidden object adventure game!
General Information & Tips
Chapter One: Visit the Orphanage
Chapter Two: The Bell Tower
Chapter Three: The Station
Chapter Four: The Caves
Chapter Five: In the City
Ask for help in the comments below!
Chapter One: Visit the Orphanage
Chapter Two: The Bell Tower
Chapter Three: The Station
Chapter Four: The Caves
Chapter Five: In the City
Ask for help in the comments below!
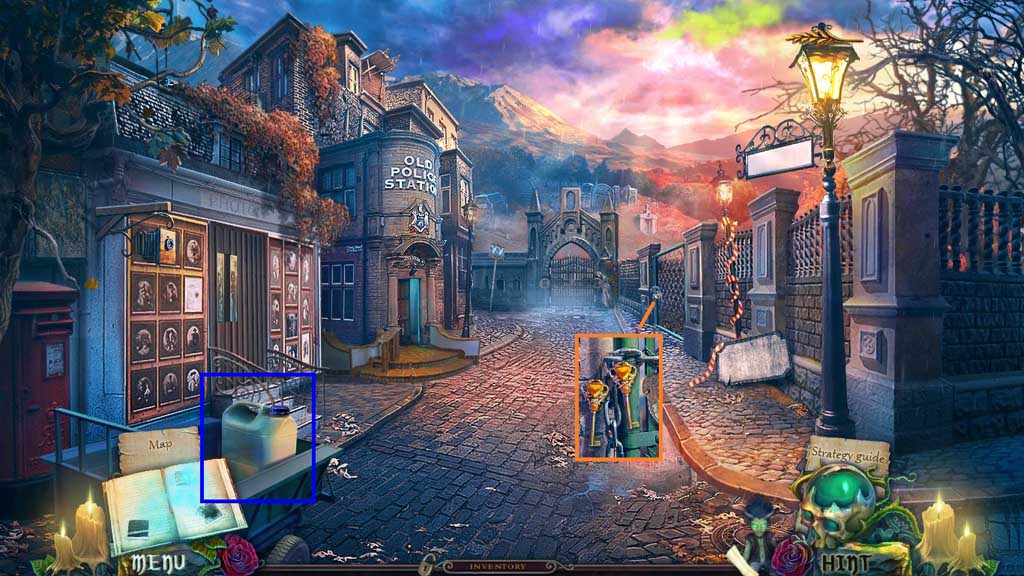
- Collect the gasoline and the electronic keys.
- Move into the Police Station.
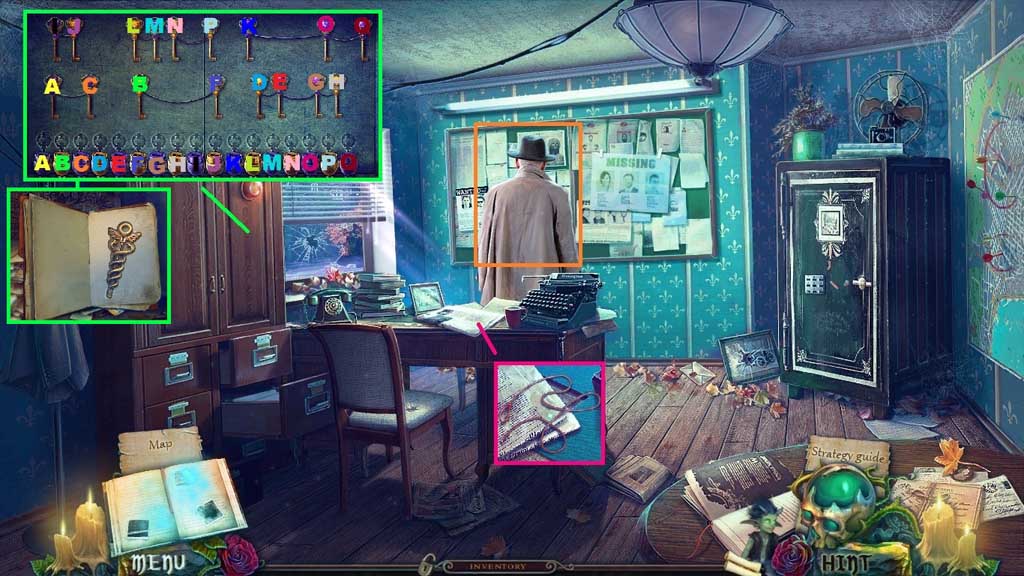
- Speak to Jonathan.
- Collect the shoelace.
- Click the cupboard and insert the electronic keys to trigger a mini game.
- Solve the game by inserting the keys into the correct locks.
- Read the file; collect the caduceus.
- Move to the Station Square.
- Insert the caduceus; collect the funnel and the magnet.
- Click the magnet and attach the shoelace; collect the magnet on a shoestring.
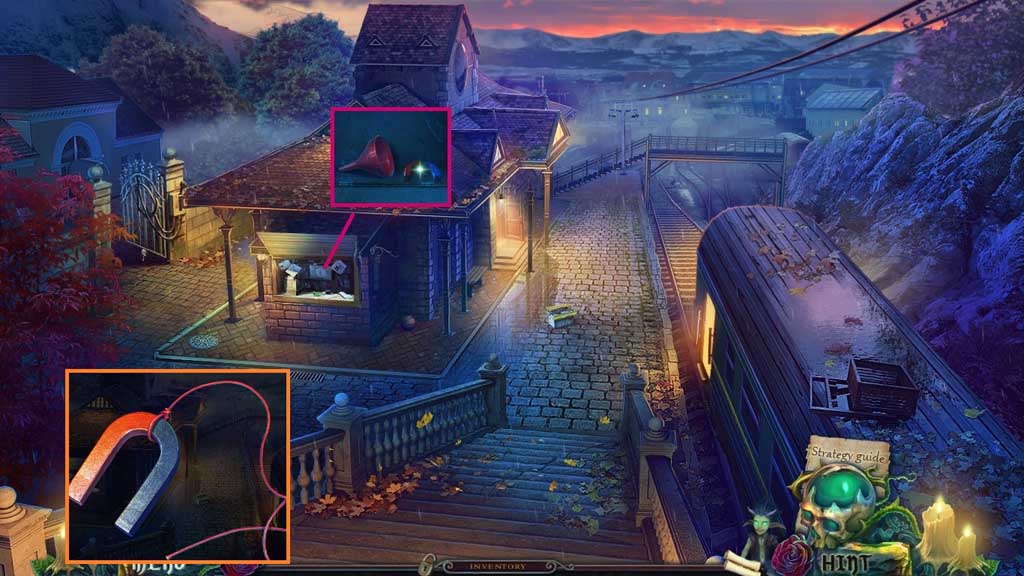
- Move into the Station Building and click the hidden objects area.
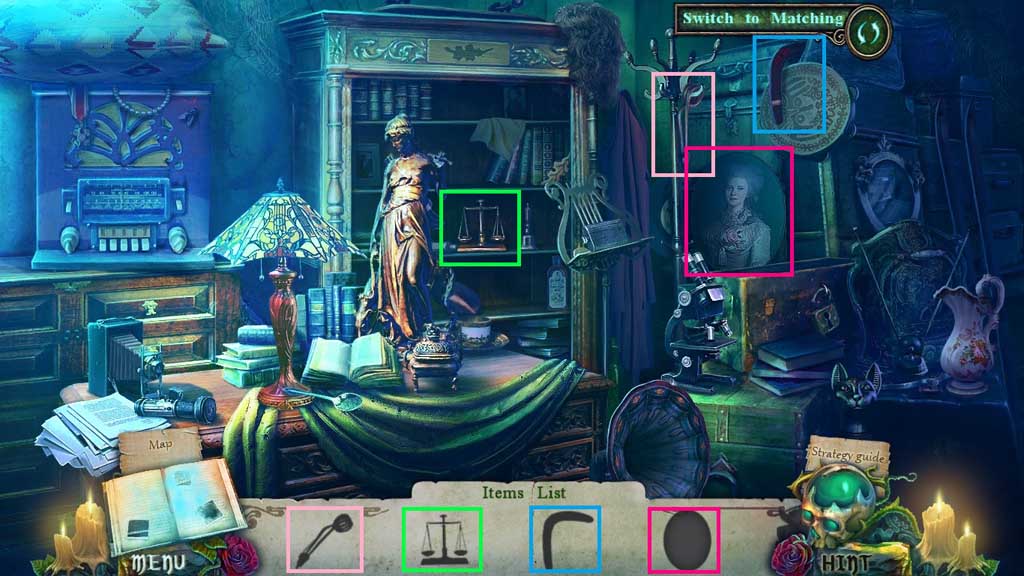
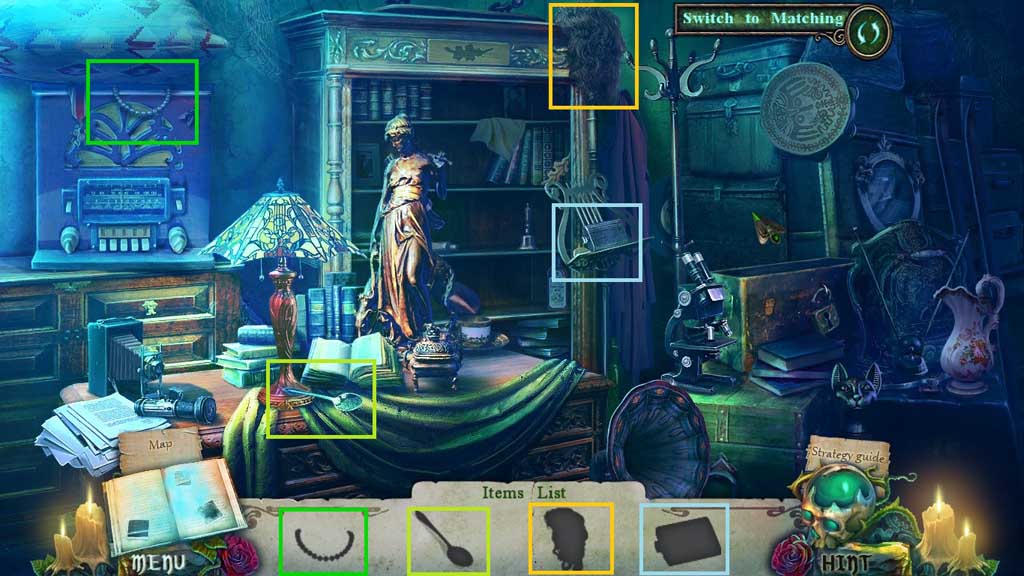
- Find the items.
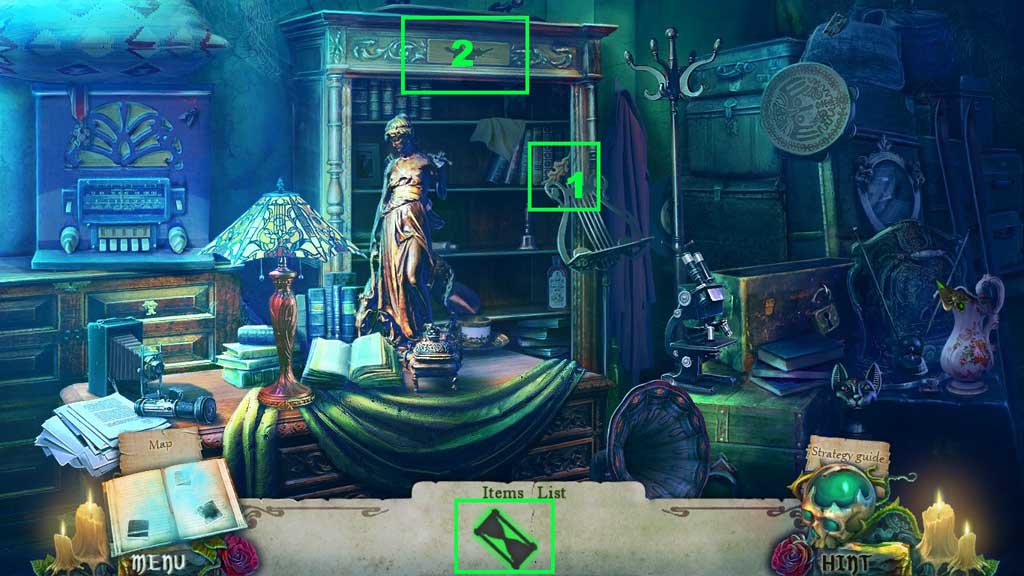
- Collect the hourglass.
- Select the magnet on a shoestring to collect the sheriff’s badge.
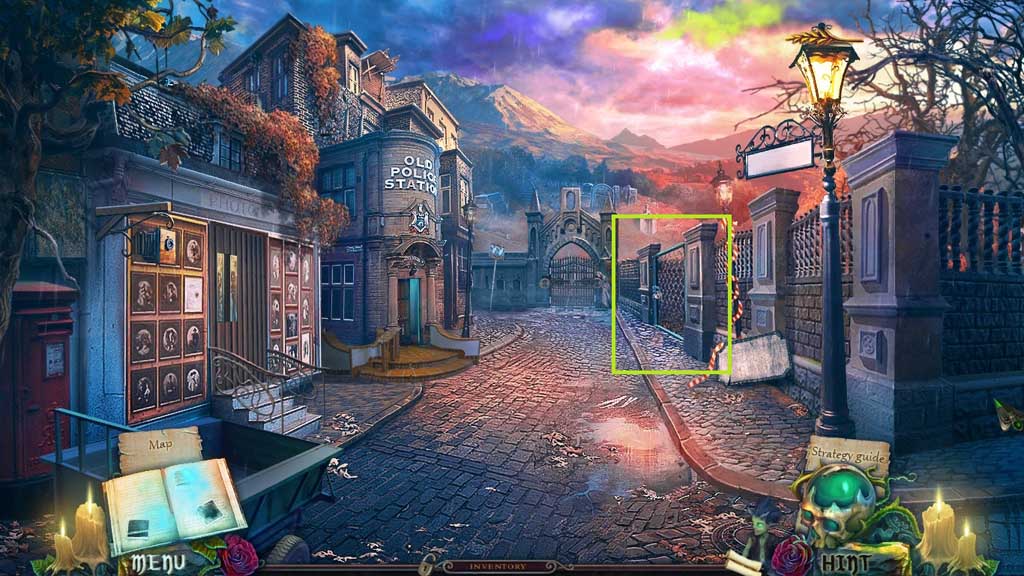
- Move to the Police Station.
![]()
- Click the newspaper; insert the sheriff’s badge.
- Read the note; collect the film and the unloaded revolver.
- Click the unloaded revolver and insert the bullet; collect the revolver.
- Move down once.
- Shoot the revolver toward the lock.
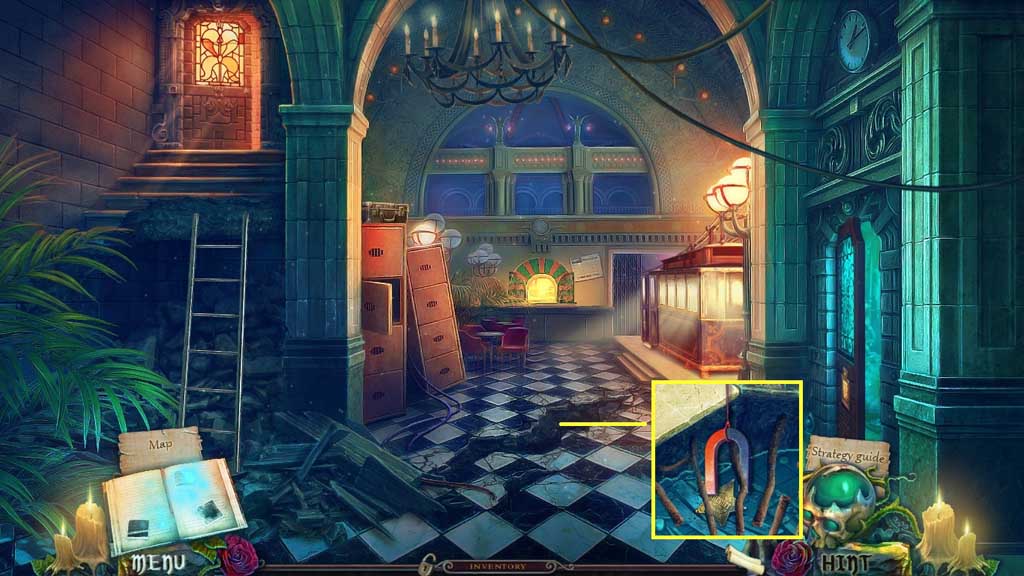
- Move into the Watson House Ruins.
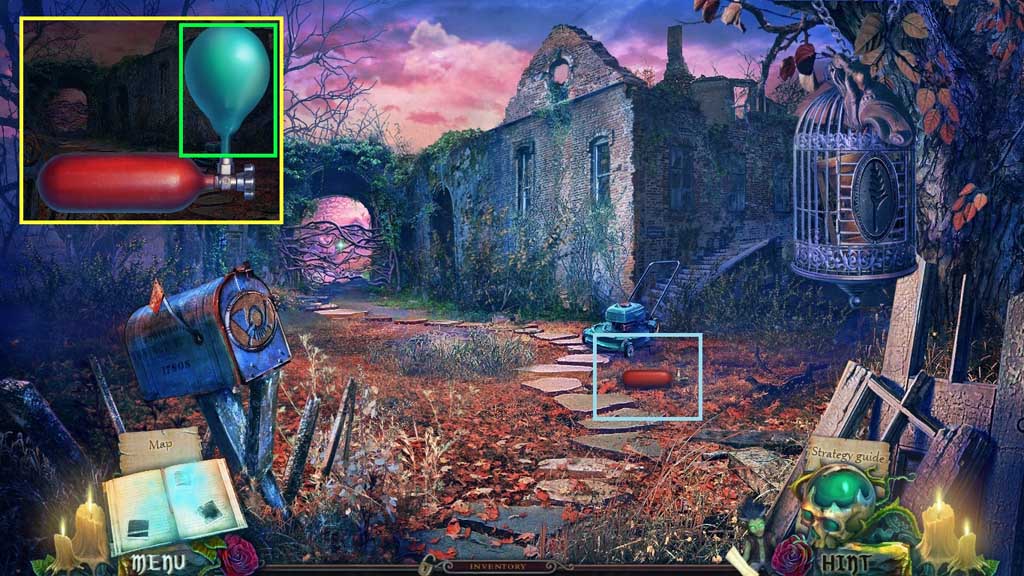
- Collect the helium tank.
- Click the helium tank and place the balloon; collect the balloon.
- Move down once.
- Select the balloon to aid the Imp and collect the spike.
- Move to the Watson House Ruins.

- Place the spike into the birdcage.
- Collect the hourglass and the ship’s prow.
- Move down once.
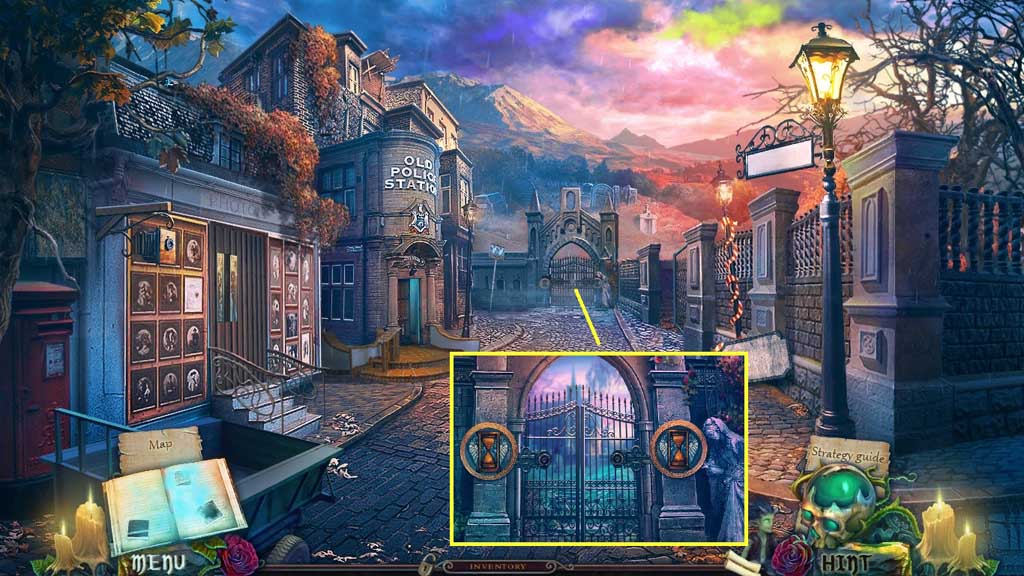
- Insert the hourglasses.
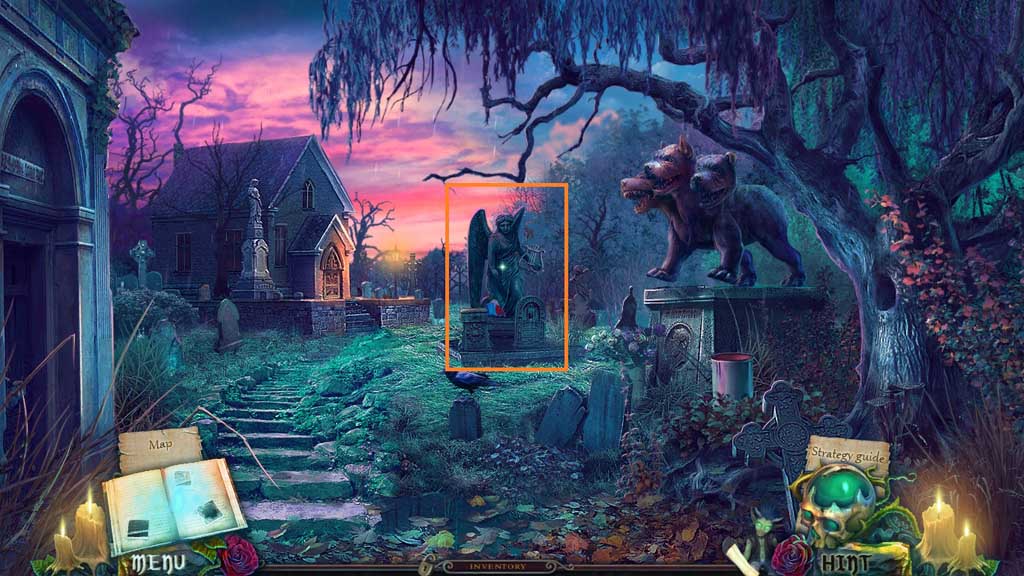
- Move into the Oldhills City Cemetery.
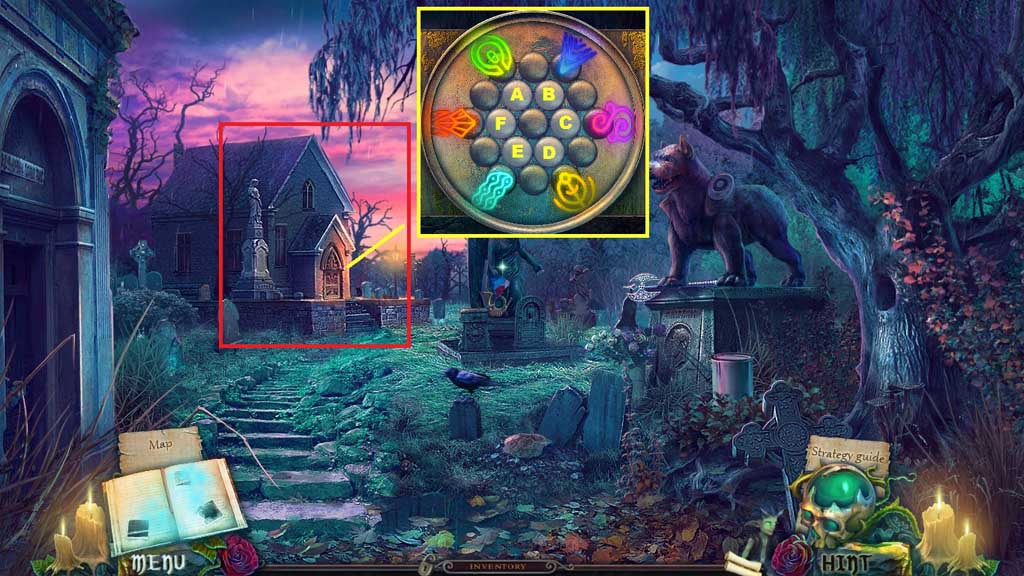
- Click the church entrance to trigger a mini game.
- Solve the game by aligning the chips in the correct places.
- Use the following sequence to solve: A x 2 – E x 3 – A x 4 – C x 2 – A – B x 3 – A x 3 – B x 4 – F x 3 – B x 4 – D x 3 – B x 3
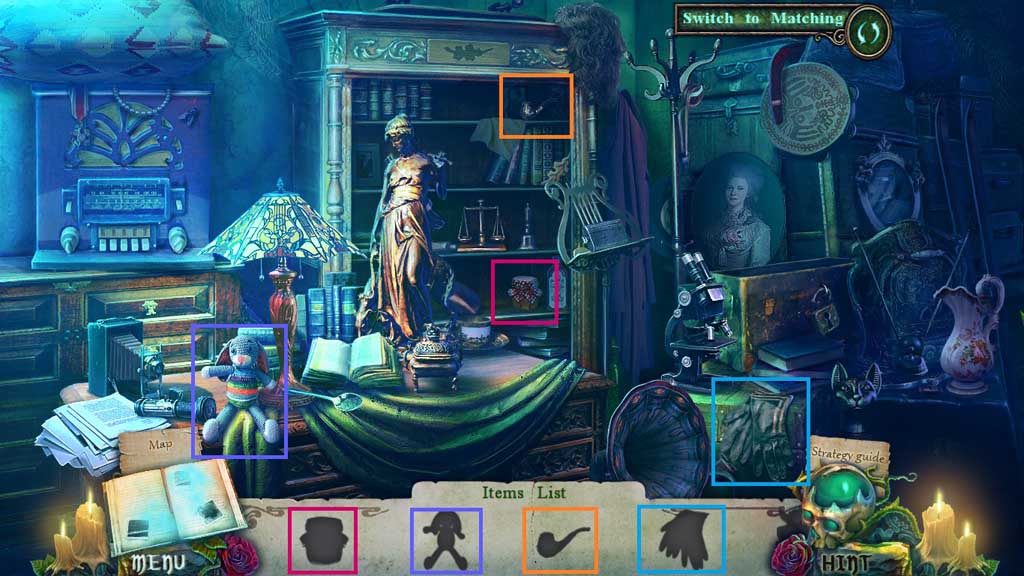
- Click the hidden objects area.
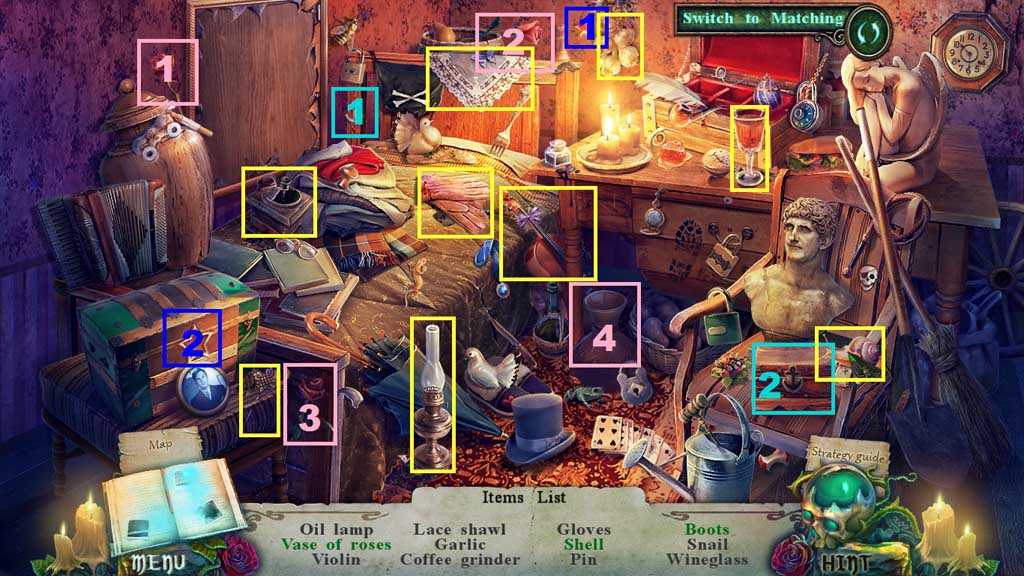
- Find the items.
- Select the roses and place them into the vase; collect the vase of roses.
- Select the anchor and place it into the box; collect the shell.
- Select the star and insert it into the trunk; collect the boots.
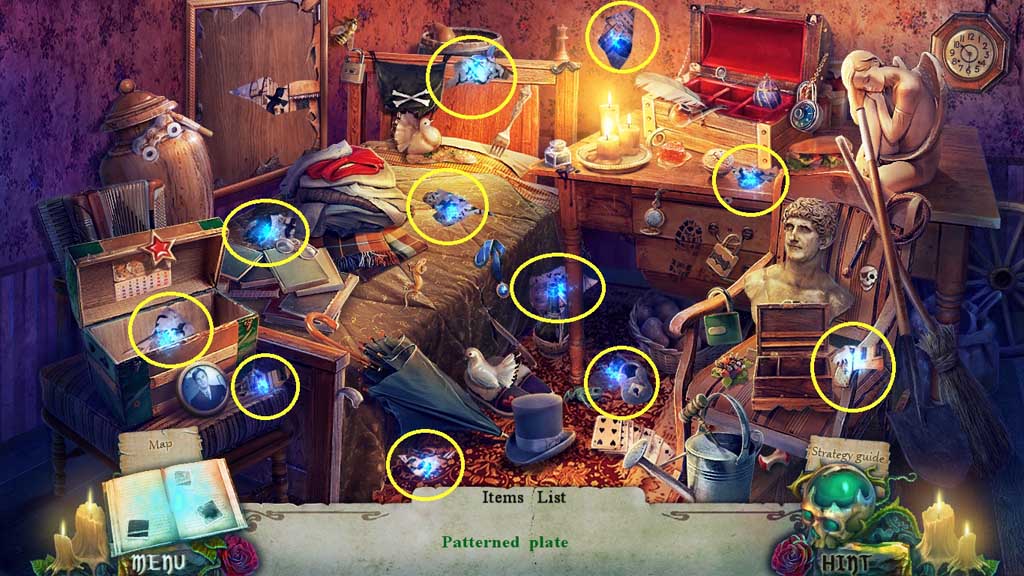
- Click the glowing fragmented pieces.
- Collect the patterned plate.
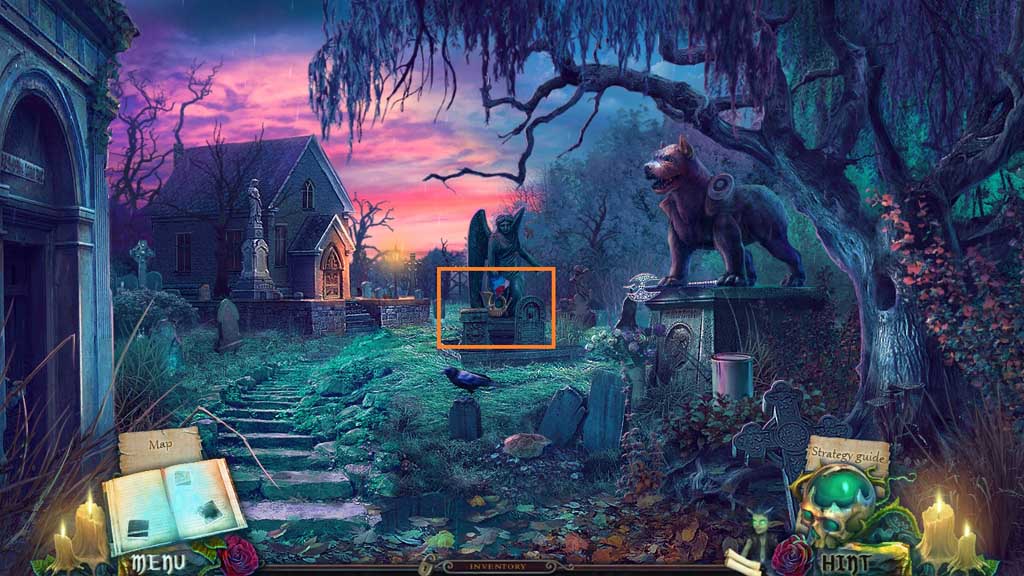
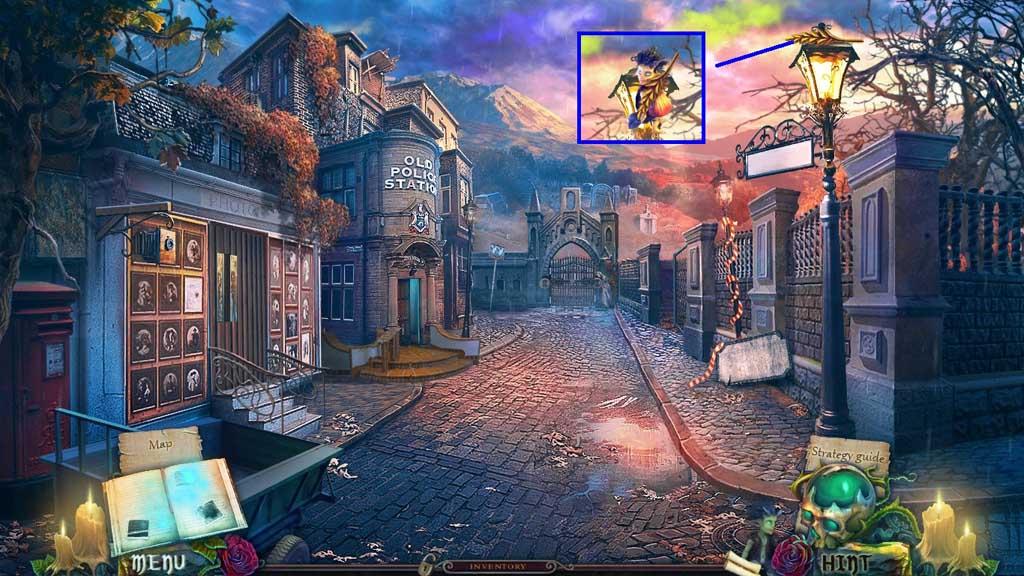
- Collect the post horn.
- Move down once.
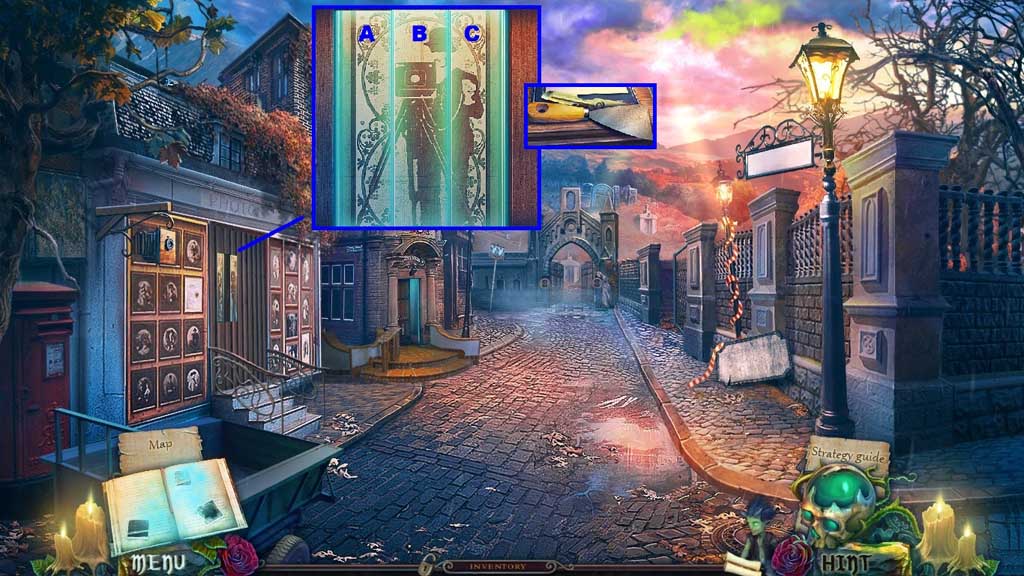
- Insert the patterned plate.
- Click the boards in the following sequence: B – A – C – B
- Zoom in and collect the putty knife.
- Move to the Watson House Ruins.
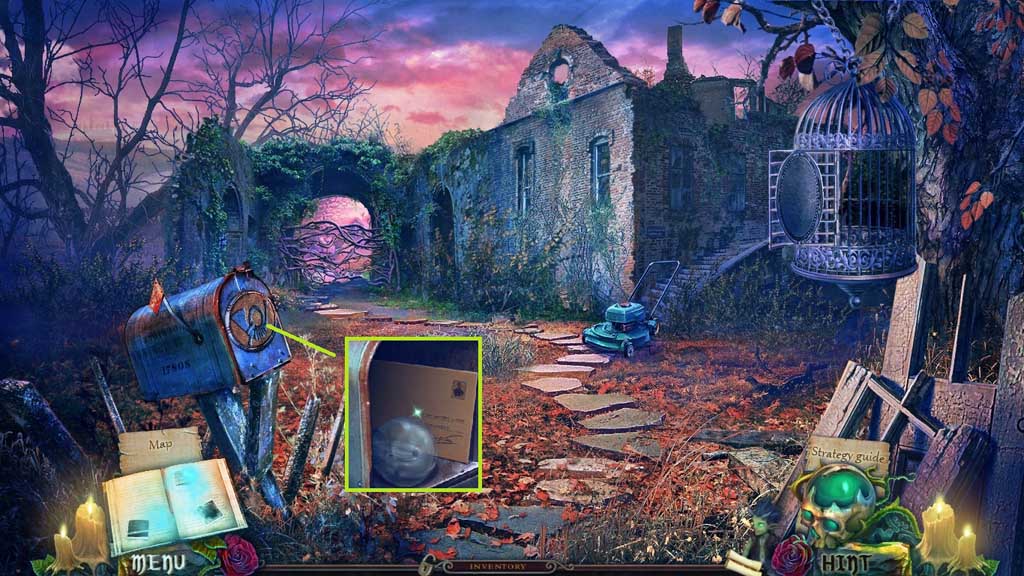
- Insert the post horn into the post box; read the letter and collect the light bulb.
- Move to the Oldhills City Cemetery.
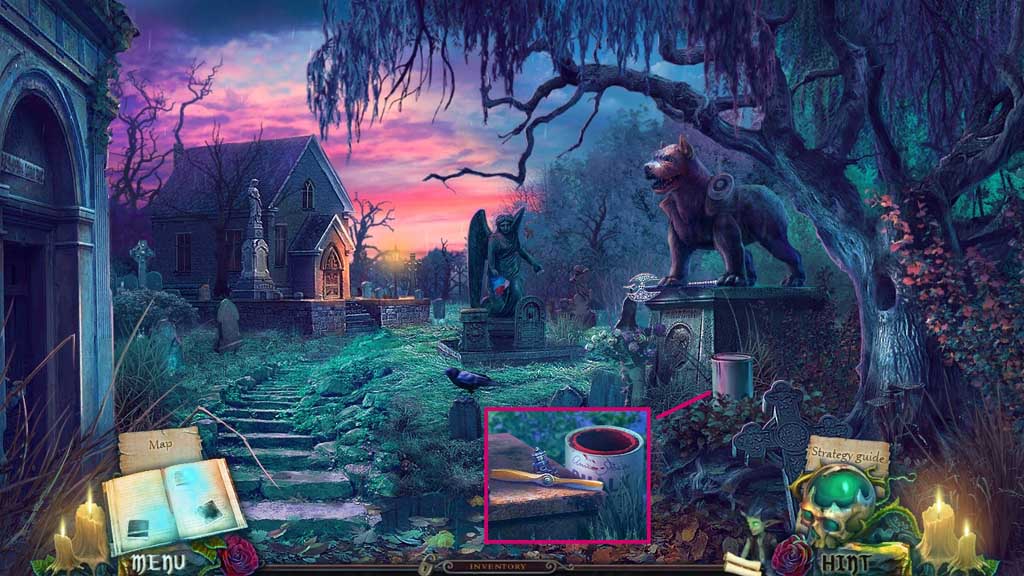
- Collect the airplane propeller.
- Select the putty knife to open the paint can; dip the light bulb into the paint and collect the red light.
- Move down once.
- Insert the red light and the film.
- Click the cover closed.
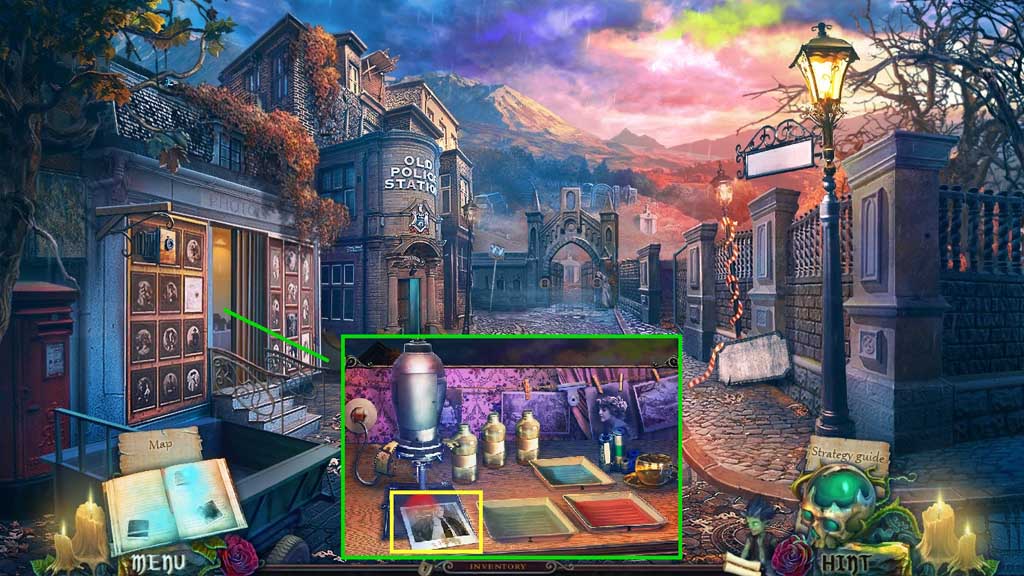
- Click each colored bottle and place the photo into the pans using the tweezers.
- Collect the photo with code.
- Move to the Police Station.
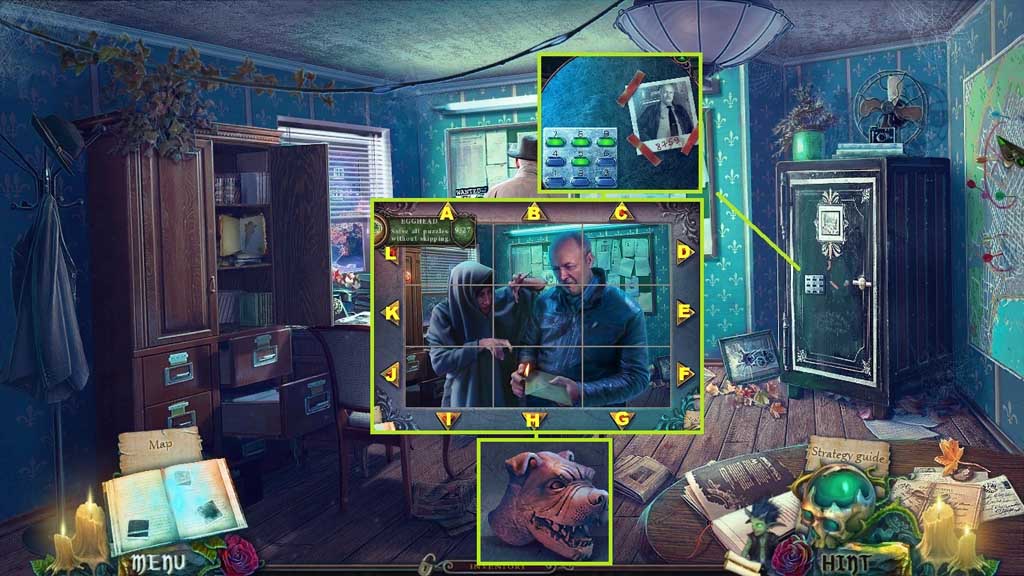
- Place the photo code; enter the code 8759 into the keypad to trigger a mini game.
- Solve the game by re-arranging the tiles to complete the image.
- Use the following sequence to solve: B – L – K – J – B – B – F – C – C- F – F
- Collect the Cerberus head.
- Move to the Oldhills City Cemetery.

- Attach the Cerberus heads; collect the axe.
- Move to the Watson House Ruins.
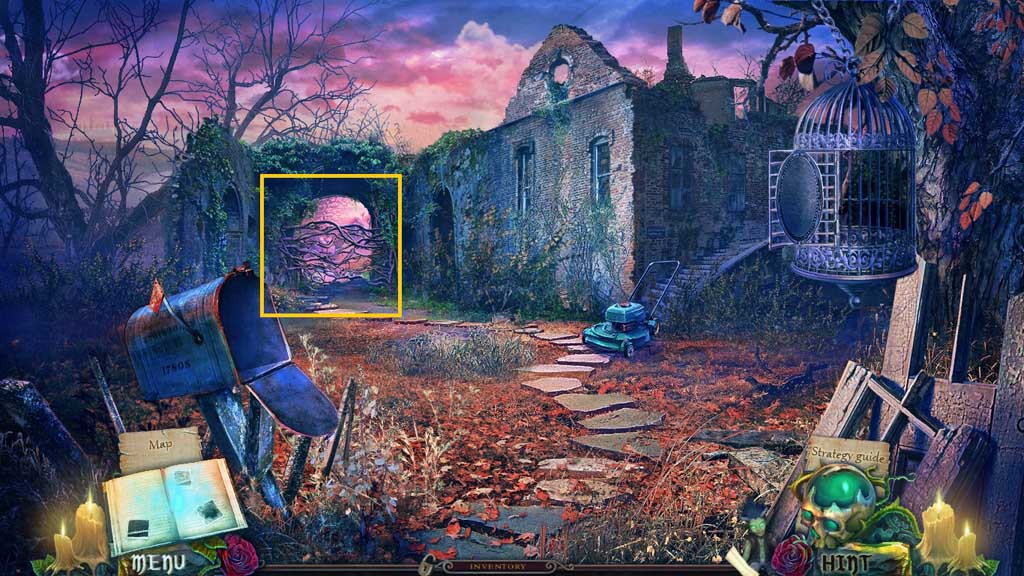
- Select the axe to chop the branches.
- Move into the Abandoned Garden and click the hidden objects area.

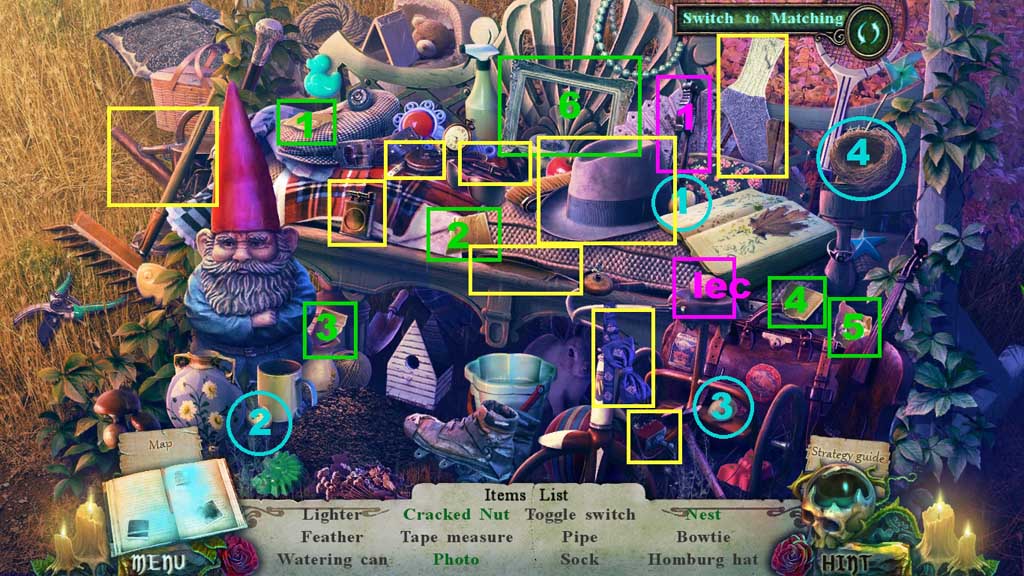

- Find the items.
- Select the nutcracker to crack the walnut; collect the cracked nut.
- Place the eggs into the nest; collect the nest.
- Select the phot fragments and place them into the frame; collect the photo.
- Collect the toggle switch.
- Move down once.

- Attach the toggle switch.
- Click the cover.
- Place the funnel and pour in the gasoline.
- Click the cover, click the toggle switch.
- Collect the half of medallion.
- Move ahead.
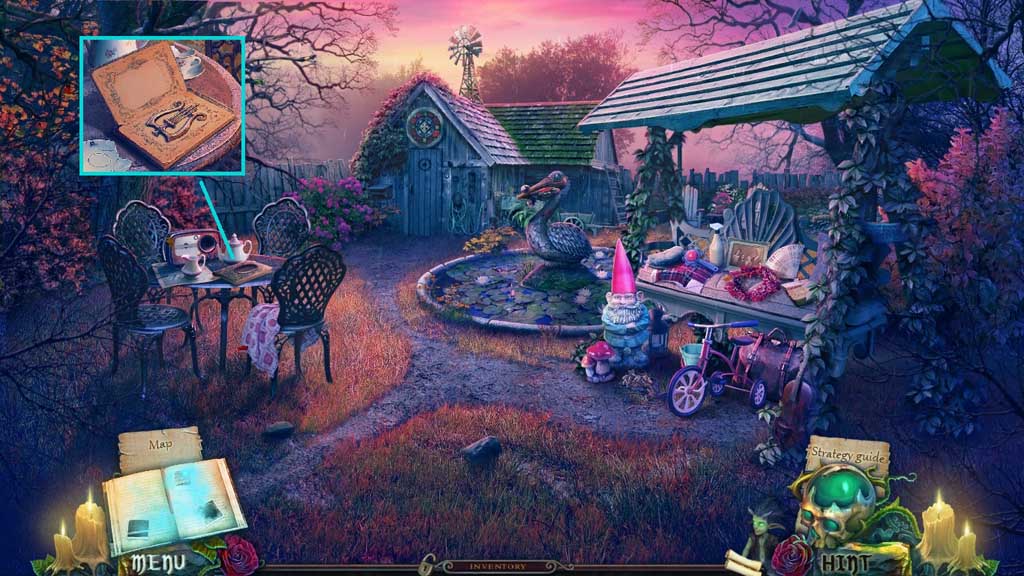
- Insert the medallion halves.
- Click the book, read the note and collect the harp.
- Move to the Oldhills City Cemetery and click the hidden objects area.
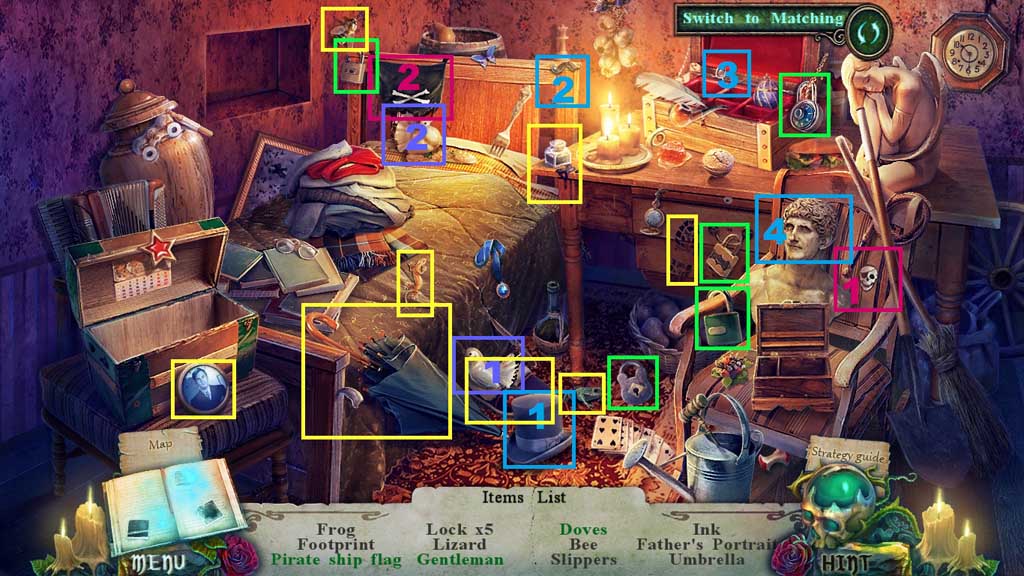
- Find the items.
- Select the skull and place it onto the flag; collect the pirate ship flag.
- Select the top hat, the mustache and the monocle and place them onto the bust; collect the gentleman.
- Select the dove and place it with the other; collect the doves.
- Collect the father’s portrait.
- Place the harp; collect the stained glass.
- Move to the Abandoned Garden.
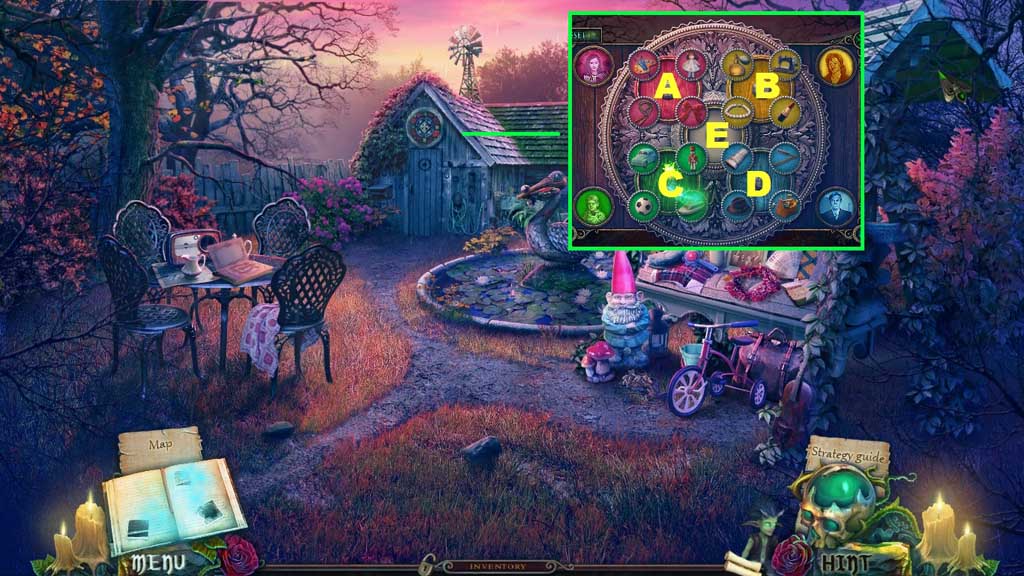
- Insert the daughter and father portraits to trigger a mini game.
- Solve the game by moving the items to the correct positioning.
- Use the following sequence to solve: D – E – D – D – E – D – B – C – E – A – E – A – E – A – E – C – B – B – E – B – C - E
- Move into Father’s Workshop.
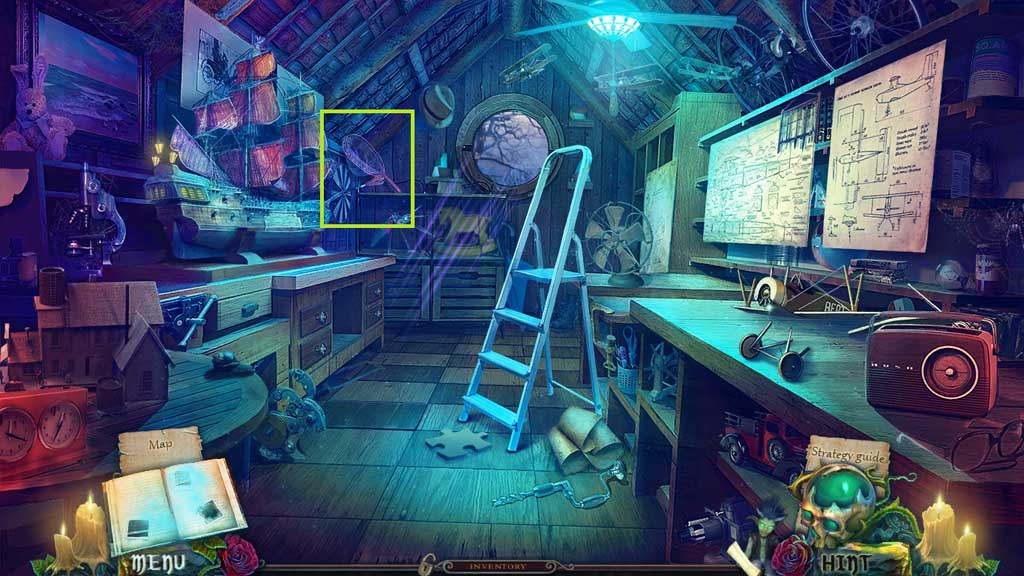
- Collect the skimmer net.
- Move down once and click the hidden objects area.
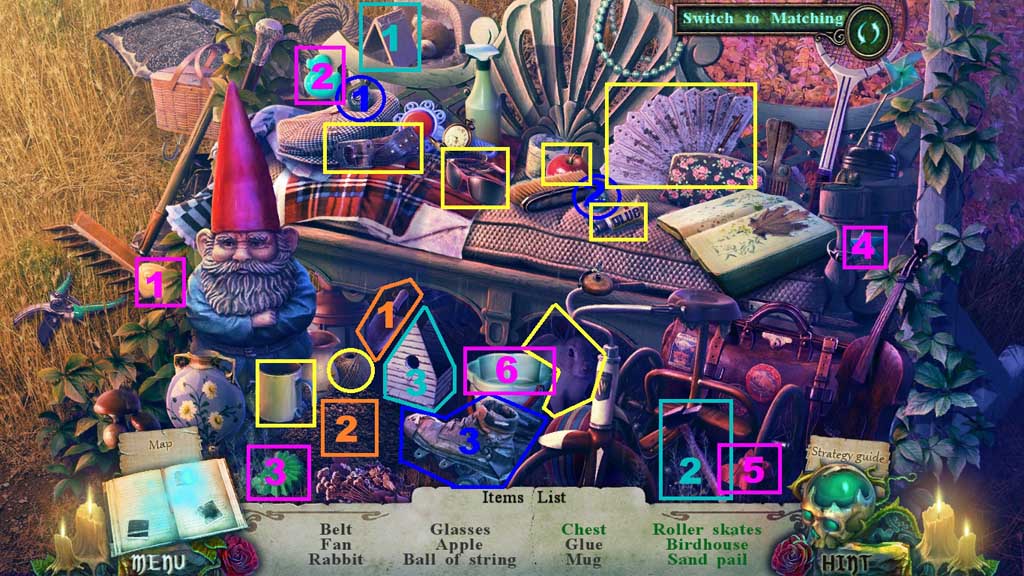
- Find the items.
- Select the trowel to dig the dirt and collect the chest.
- Select the wheels and place them onto the skates; collect the roller skates.
- Select the roof and secure it on the house using the hammer; collect the birdhouse.
- Select the molds and place them into the pail; collect the sand pail.
- Collect the glue.

- Select the skimmer to collect the corkscrew.
- Move ahead.
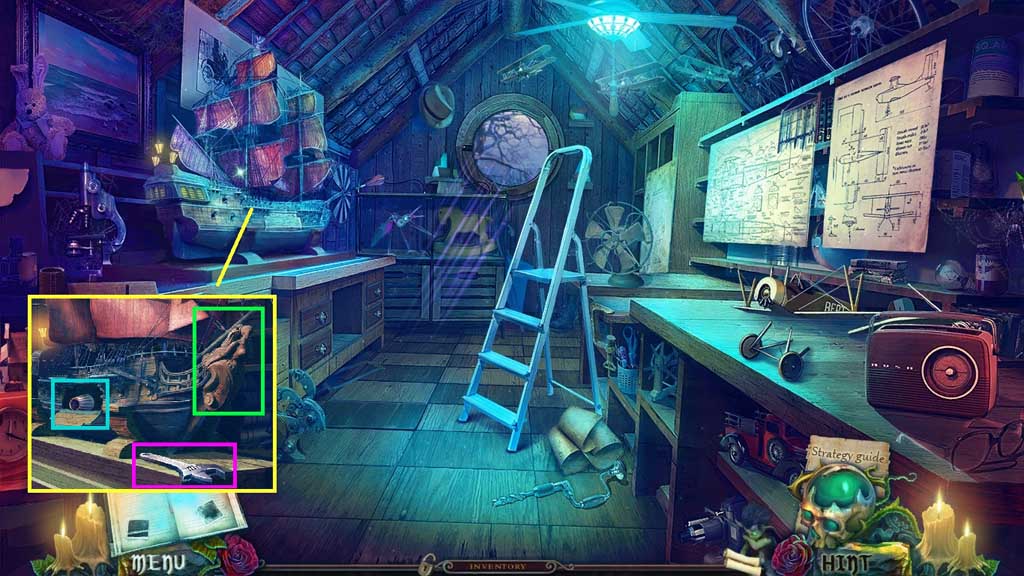
- Collect the wrench.
- Select the corkscrew to remove the cork.
- Attach the ship’s prow; collect the radio knob.
- Move down once.
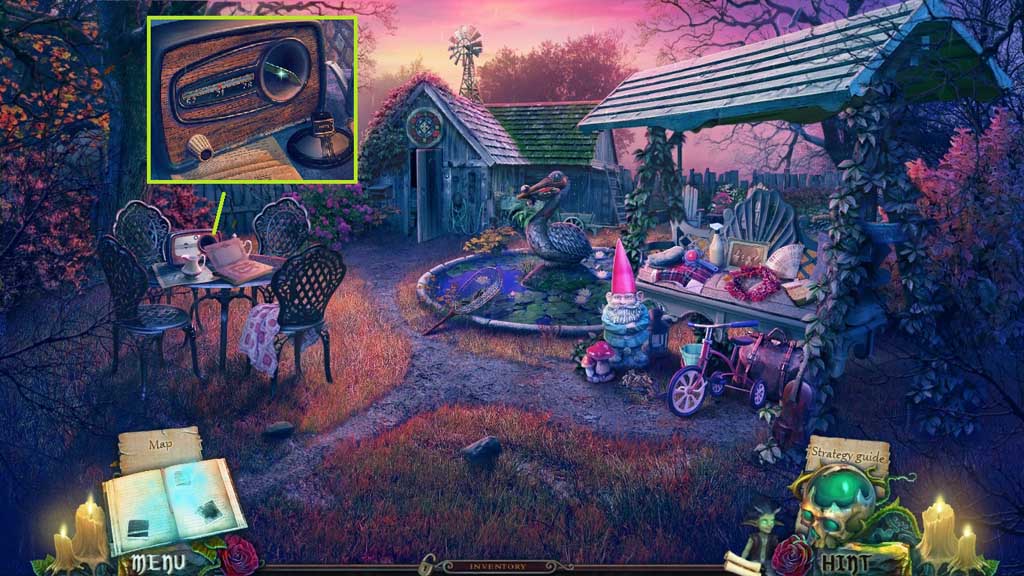
- Attach the radio knob; click it once.
- Collect the airplane wing.
- Move ahead.
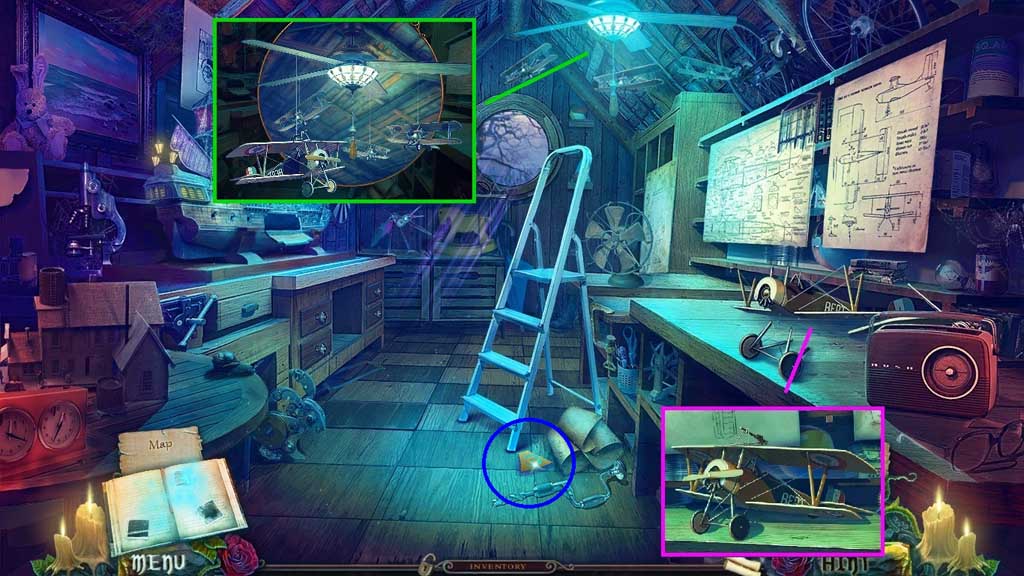
- Place the airplane propeller wing and glue onto the table and use the items to assemble and collect the airplane.
- Attach the airplane onto the fan and click the cord.
- Collect the yellow plate.
- Move down 2x’s.
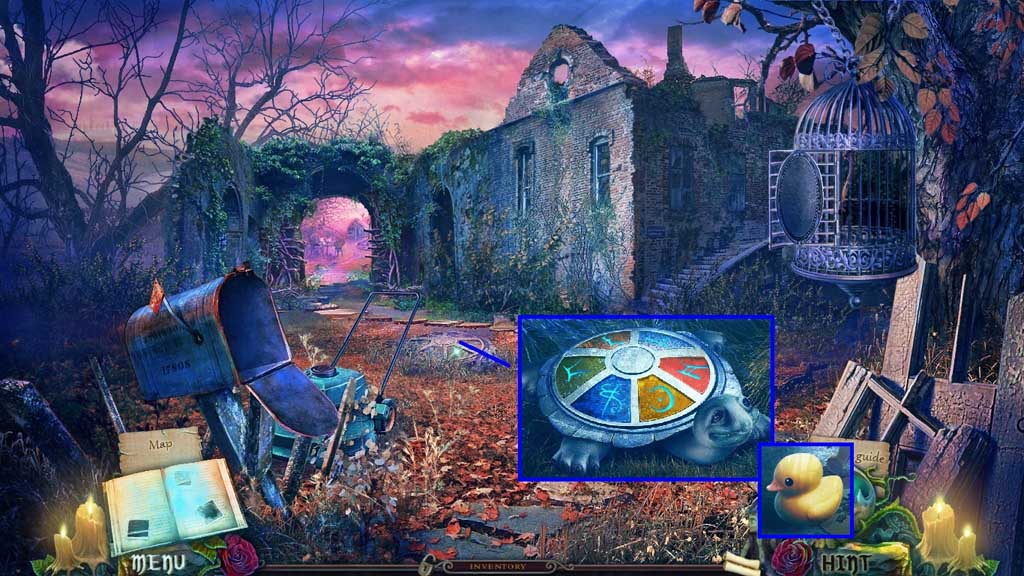
- Insert the green and yellow plates.
- Collect the rubber ducky.
- Move ahead.
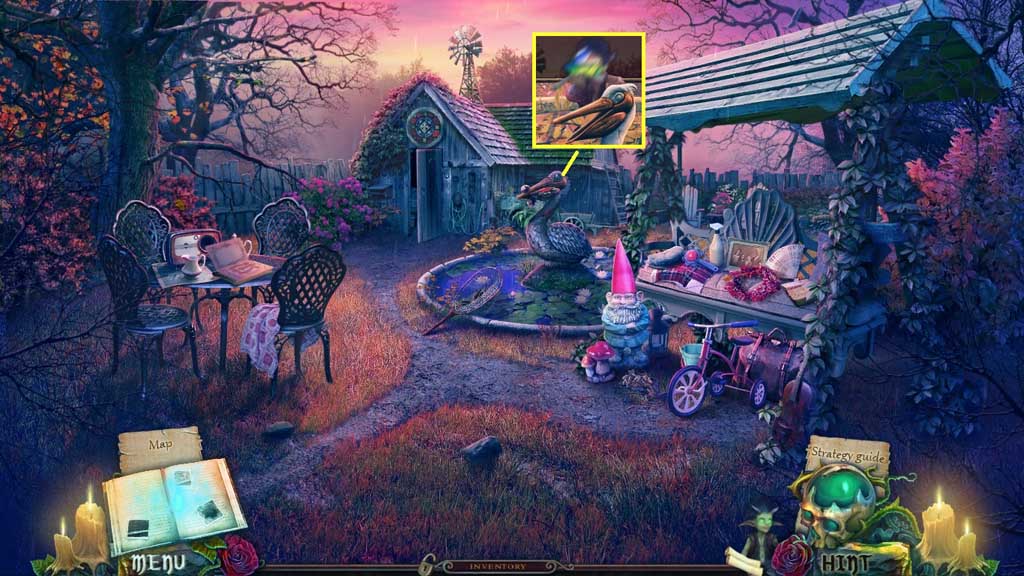
- Click the bird.
- Give the Imp the rubber ducky and the wrench.
- Collect the stained glass.
- Move ahead.
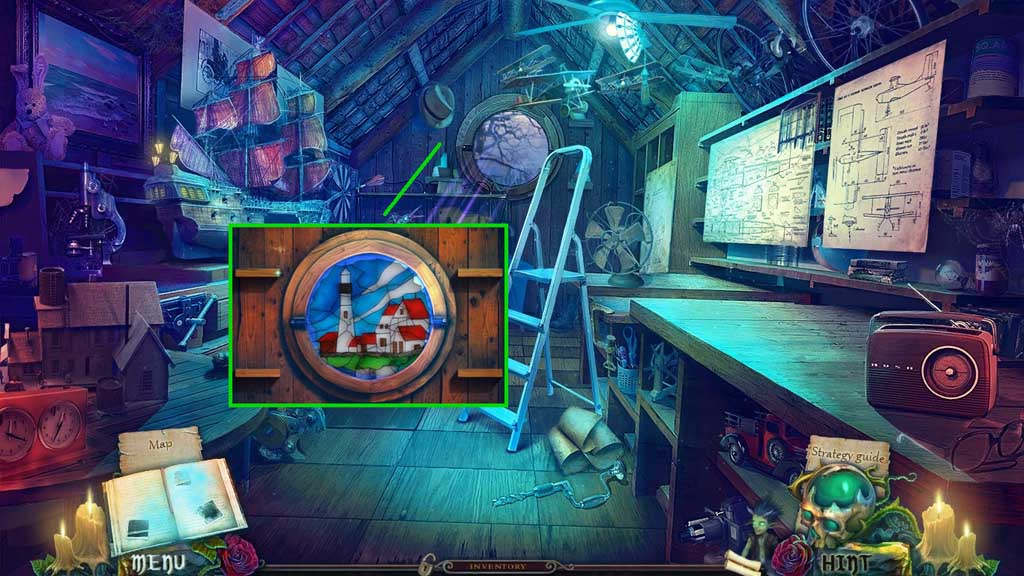
- Click the hat.
- Insert the stained glass to trigger a mini game.
- Solve the game by arranging the pieces to complete the image.

- Click the floor panel then click the package.
- Read and collect Elizabeth’s letter.
- Move to Abigail’s House.
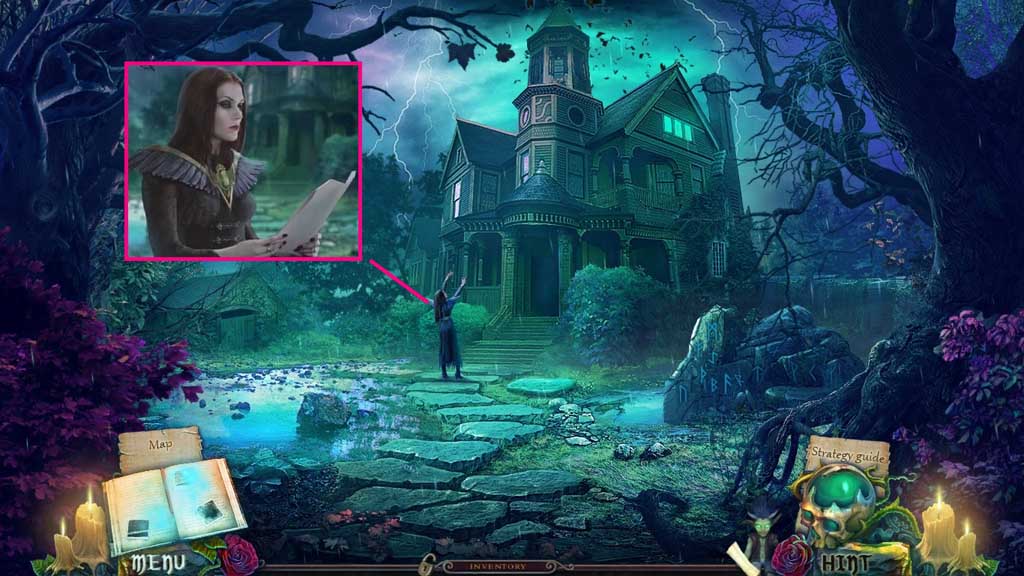
- Give Elizabeth’s letter to Abigail.
- Congratulations! You have successfully completed the main game of Witches Legacy: The Ties That Bind C. E.
General Information & Tips
Chapter One: Visit the Orphanage
Chapter Two: The Bell Tower
Chapter Three: The Station
Chapter Four: The Caves
Chapter Five: In the City
Ask for help in the comments below!
Chapter One: Visit the Orphanage
Chapter Two: The Bell Tower
Chapter Three: The Station
Chapter Four: The Caves
Chapter Five: In the City
Ask for help in the comments below!