
Whispered Secrets: The Story of Tideville: Chapter Eight: The Hidden Room
Our Whispered Secrets The Story of Tideville Walkthrough will be your trusty assistant as you search for the mysterious blue crystals that are your only link to finding your missing son. Packed full of custom screenshots and easy to understand instructions for every aspect of the game, you'll be sure to unravel the dark secret this sleepy town has been hiding for years. Just who is behind these mysterious disappearances? Find out with our Whispered Secrets The Story of Tideville Walkthrough.
General Info and Tips
Chapter One: Missing
Chapter Two: Mr. Miller’s Medallion
Chapter Three: Ferryman
Chapter Four: The Island
Chapter Five: The Cemetery
Chapter Six: The Orphanage Courtyard
Chapter Seven: Inside the Orphanage
Chapter Eight: The Hidden Room
Bonus Game
Ask for help in the comments below!
Chapter One: Missing
Chapter Two: Mr. Miller’s Medallion
Chapter Three: Ferryman
Chapter Four: The Island
Chapter Five: The Cemetery
Chapter Six: The Orphanage Courtyard
Chapter Seven: Inside the Orphanage
Chapter Eight: The Hidden Room
Bonus Game
Ask for help in the comments below!
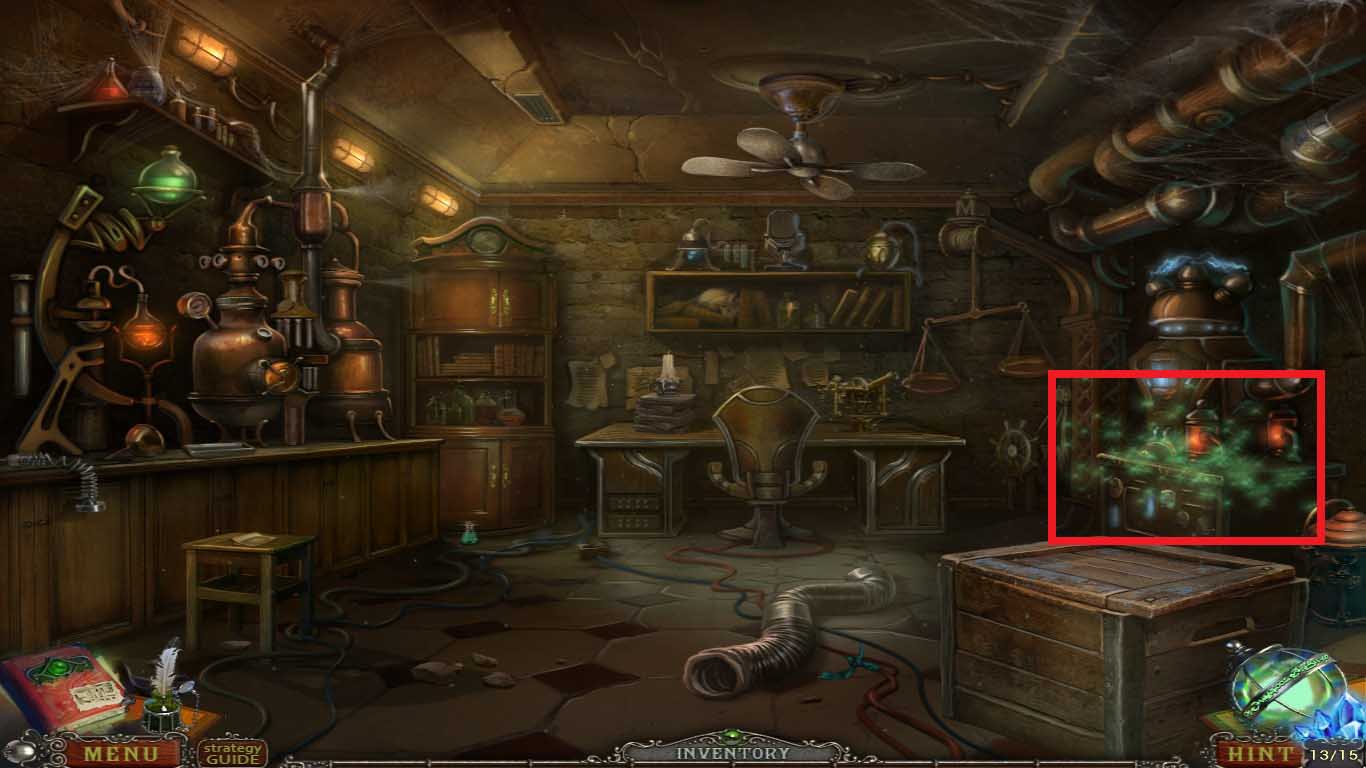
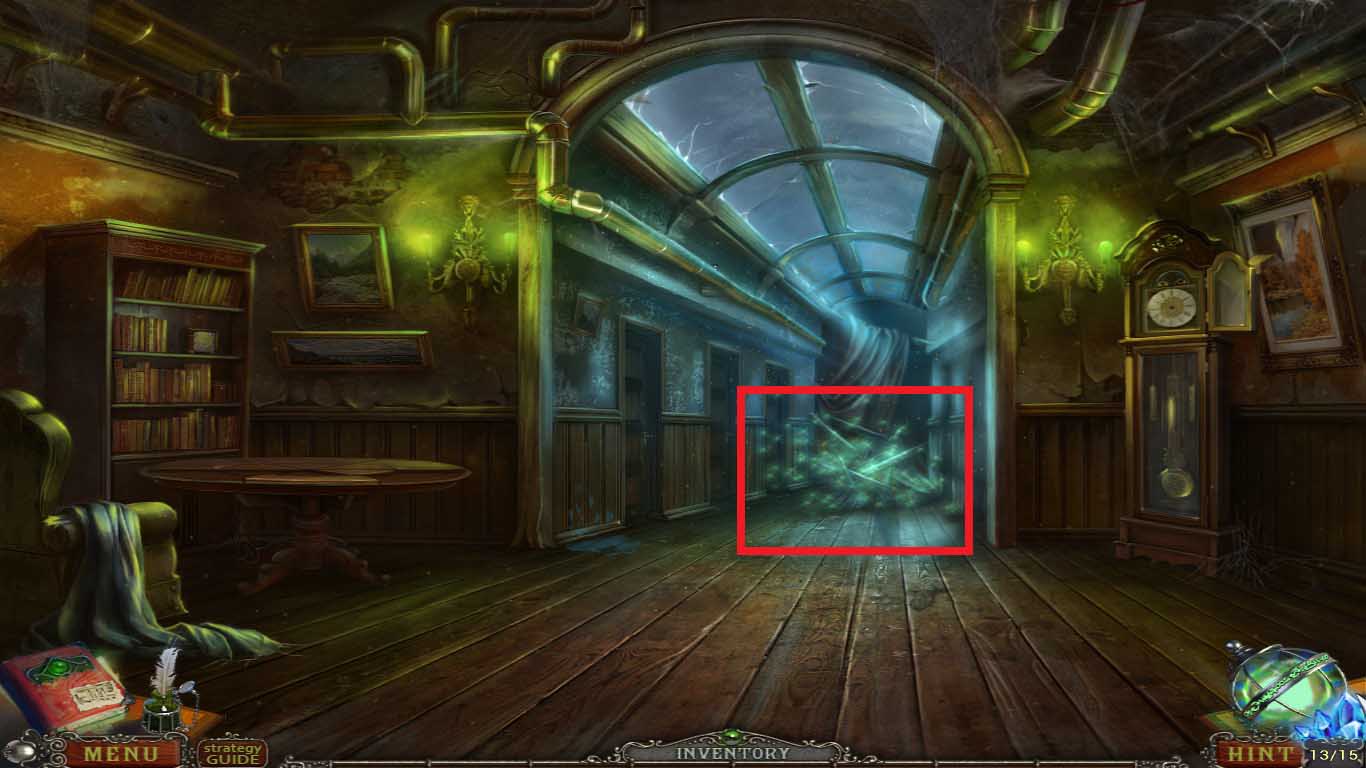
- Zoom into the mechanism (red rectangle) to access the hidden objects area.

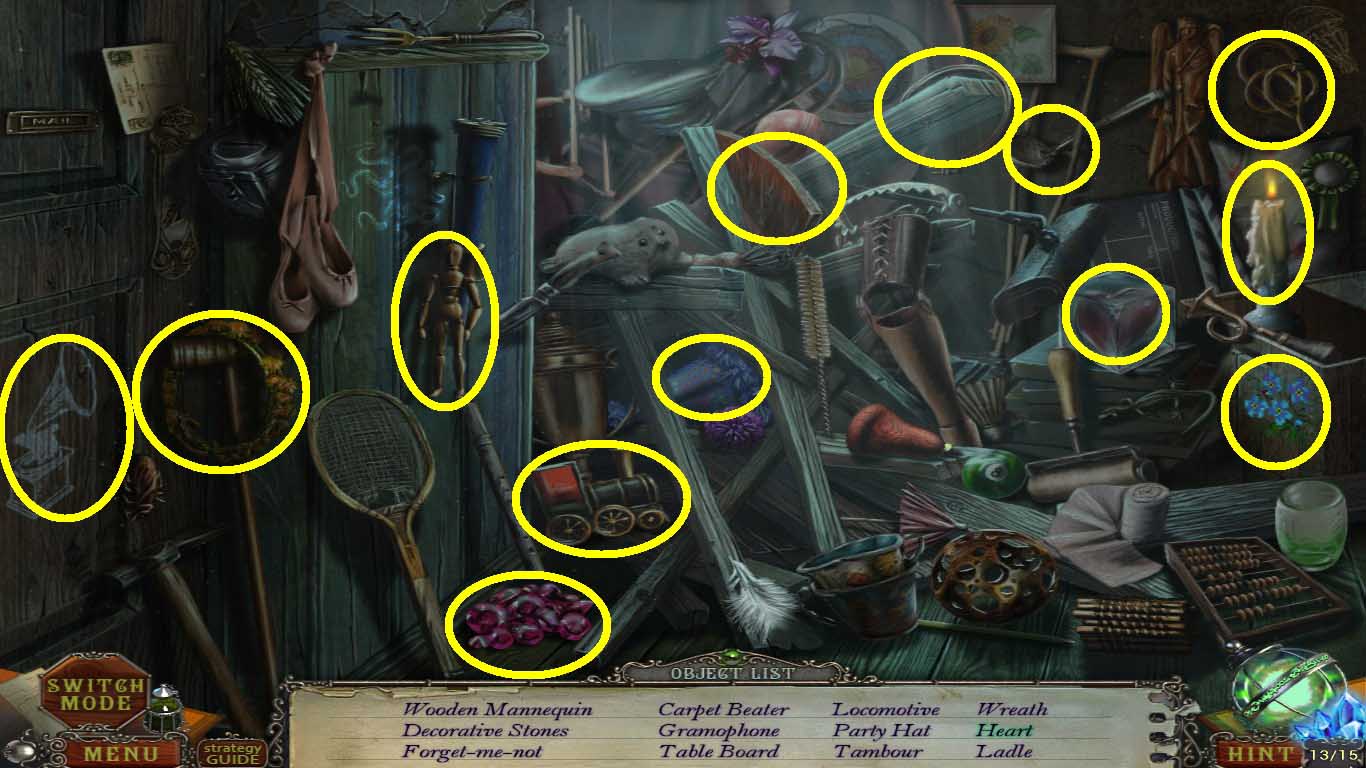
- Find the listed items (yellow circles).
- Collect the table board.
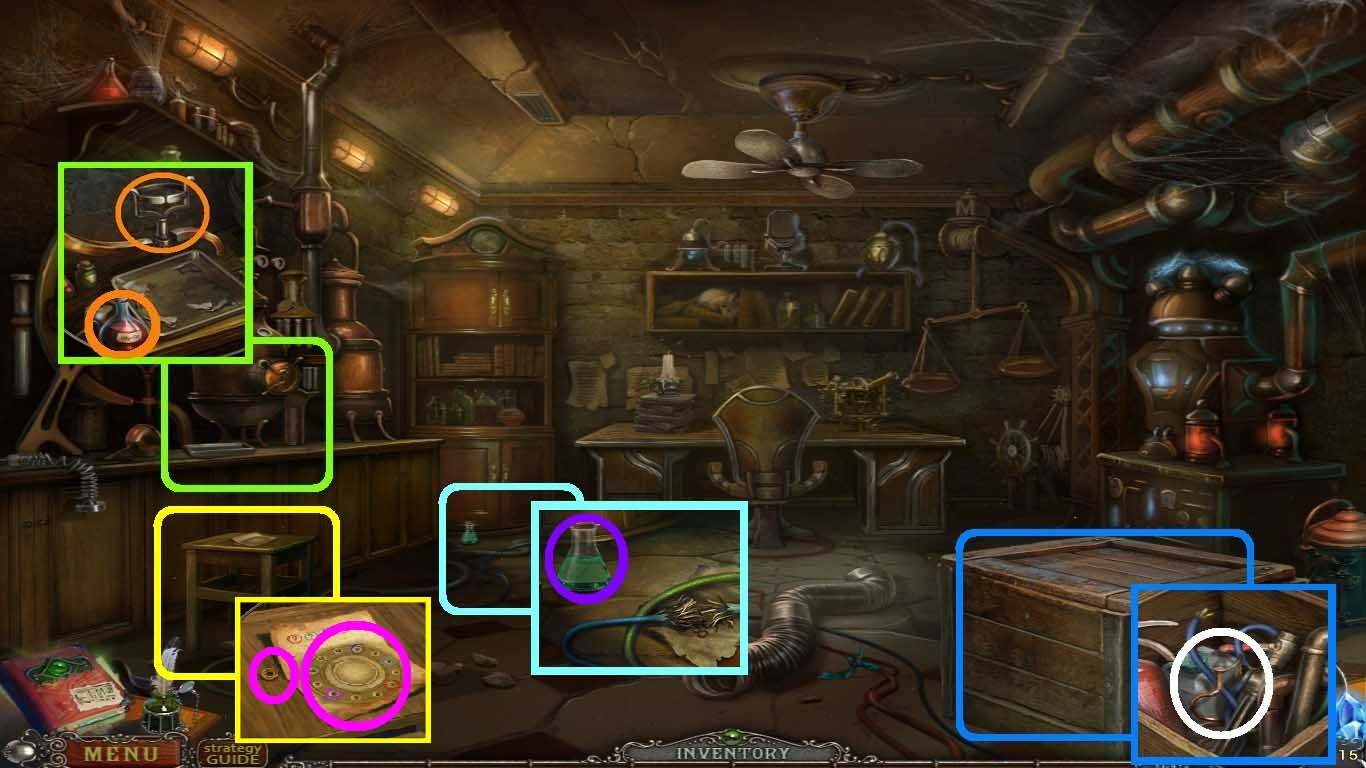
- Move into the bar (green square).
- Place the jar in the stand (orange circles).
- Move into the crate (blue square).
- Click the lid with the crowbar.
- Take the wires (white circle).
- Move into the wires (aqua square).
- Take the rust remover (purple circle).
- Move into the stool (yellow square).
- Take the note and the hour hand (pink circle).
- Move into the secret room: workplace.
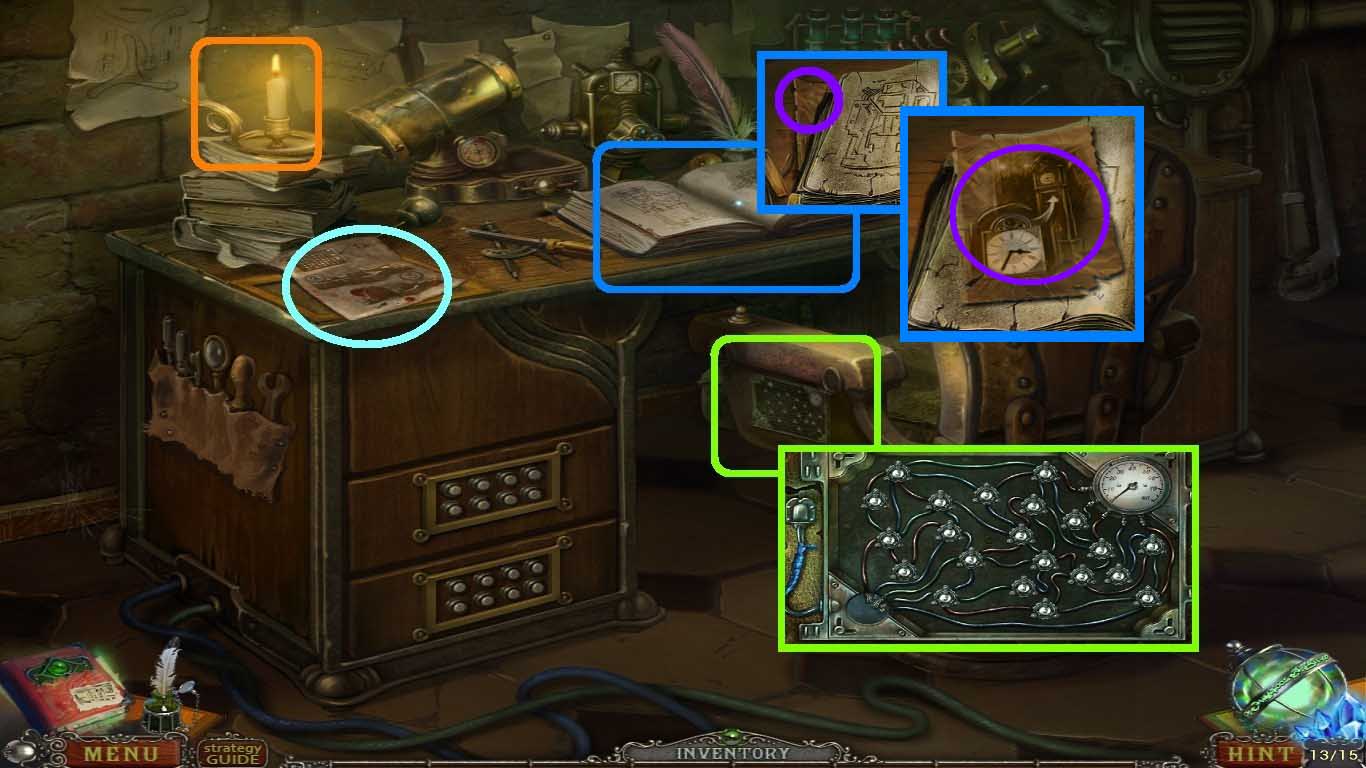
- Use the lighter to light the candle (orange square).
- Take the note (aqua circle).
- Move into the chair panel (green square).
- Use the insulating tape to fix the wires and place them on the puzzle.
- Move into the book (blue square).
- Click the page and take the note (purple circle).
- Go to the orphanage: downstairs.
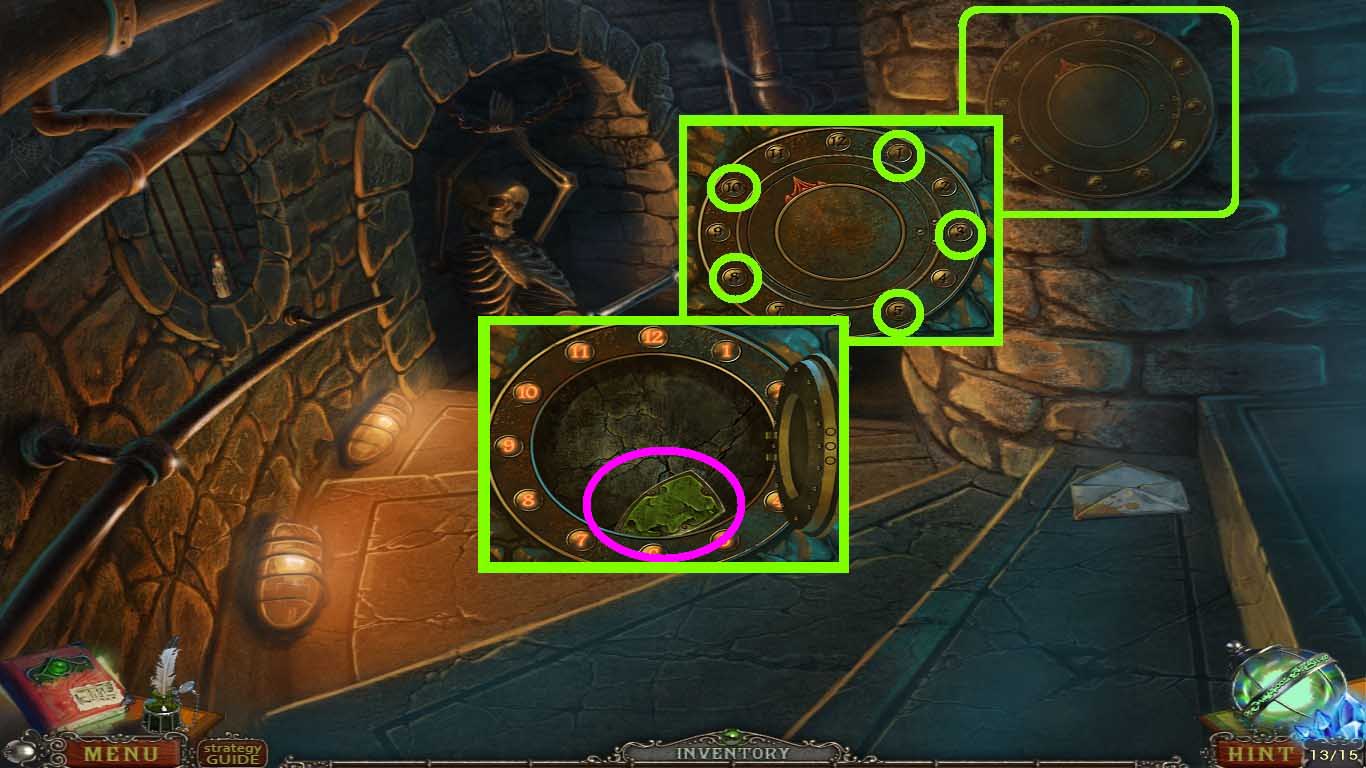
- Move into the wall panel (green square).
- Use the rust remover on the panel.
- Click the buttons as follows: 5 -10 – 3 – 8 – 1.
- Take the fountain puzzle piece (pink circle).
- Go to the orphanage: hall.
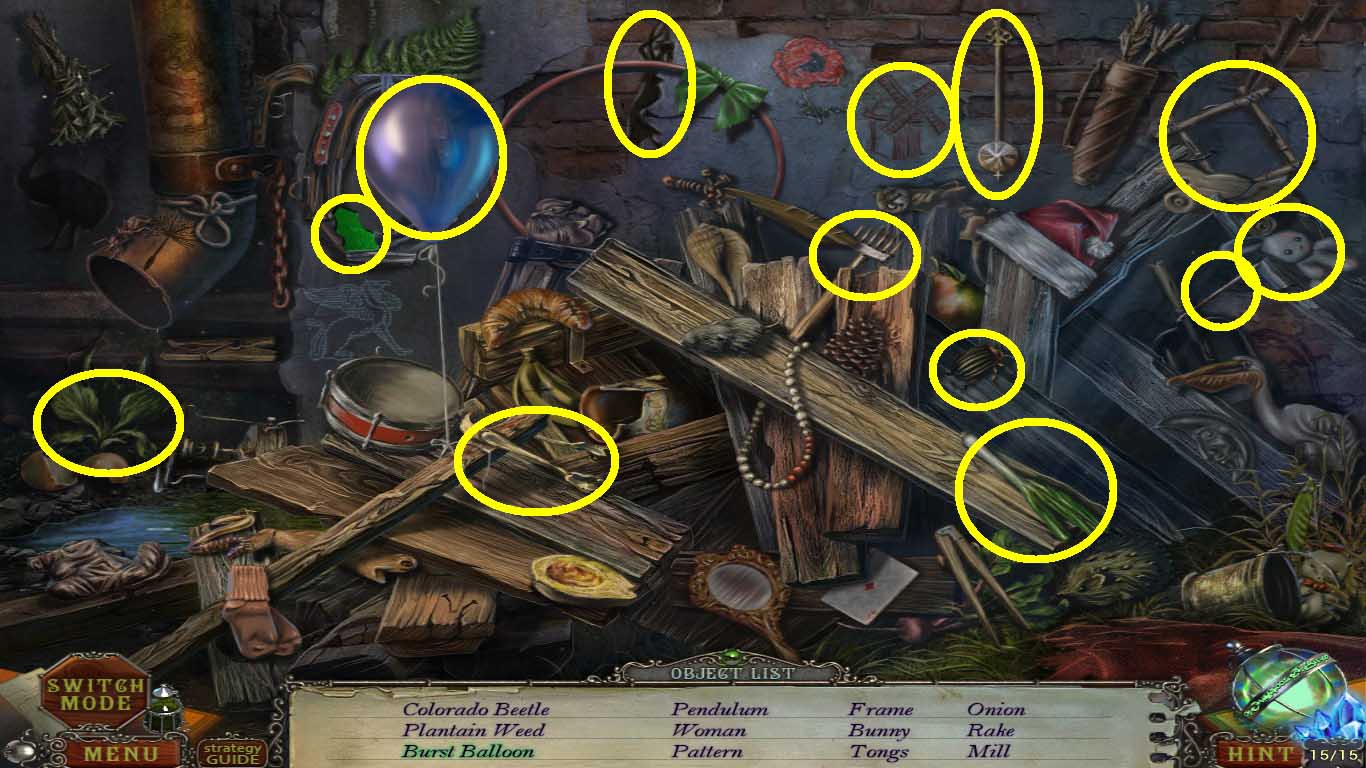
- Move into the debris (red rectangle) to access the hidden objects area.
- Find the listed items (yellow circles).
- Collect the table board.
- Move into the table (white square).
- Insert the table boards.
- Click the top and then the hatch.
- Take the armchair mechanism piece (pink circle).
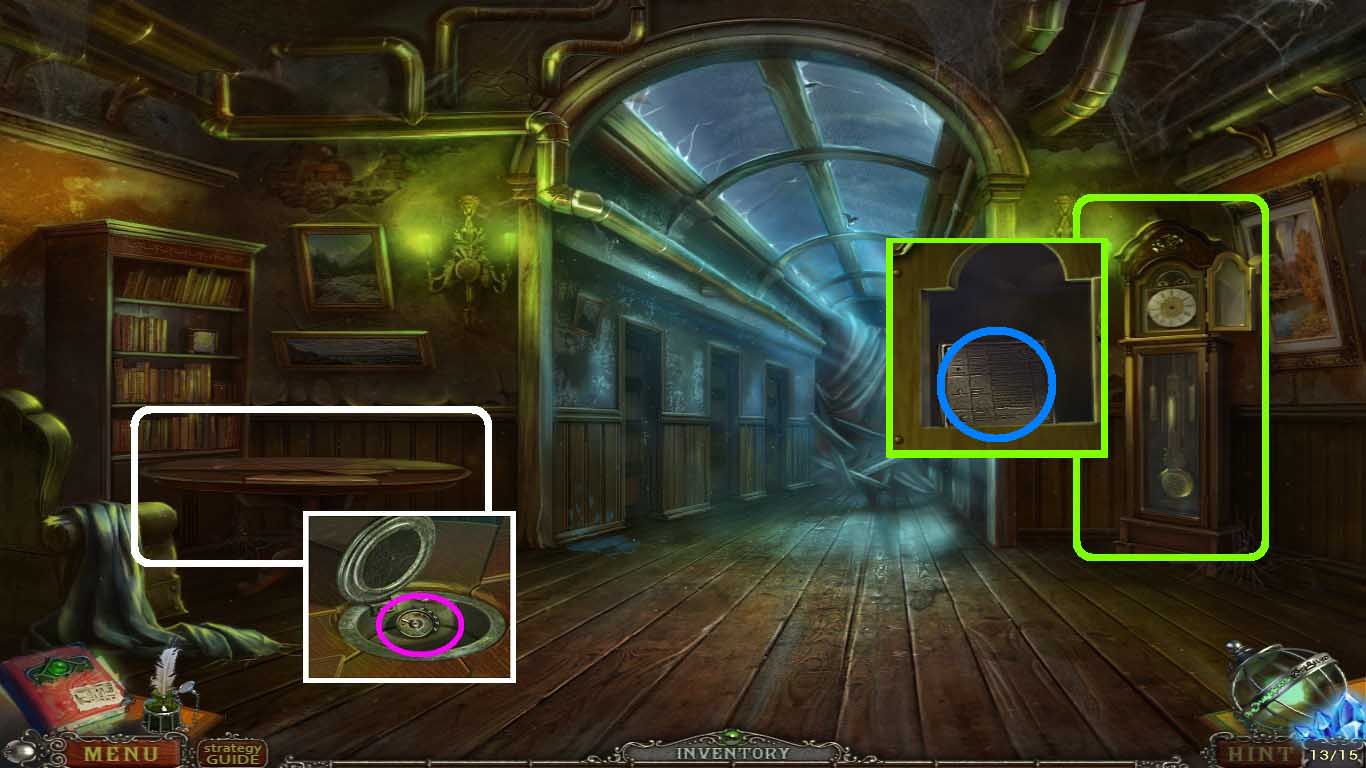
- Move into the clock (green square).
- Insert the minute hand and hour hand onto the clock face.
- Set the time to 3:35.
- Click the face.
- Take the portal instruction plate (blue circle).
- Go to the secret room: workplace.
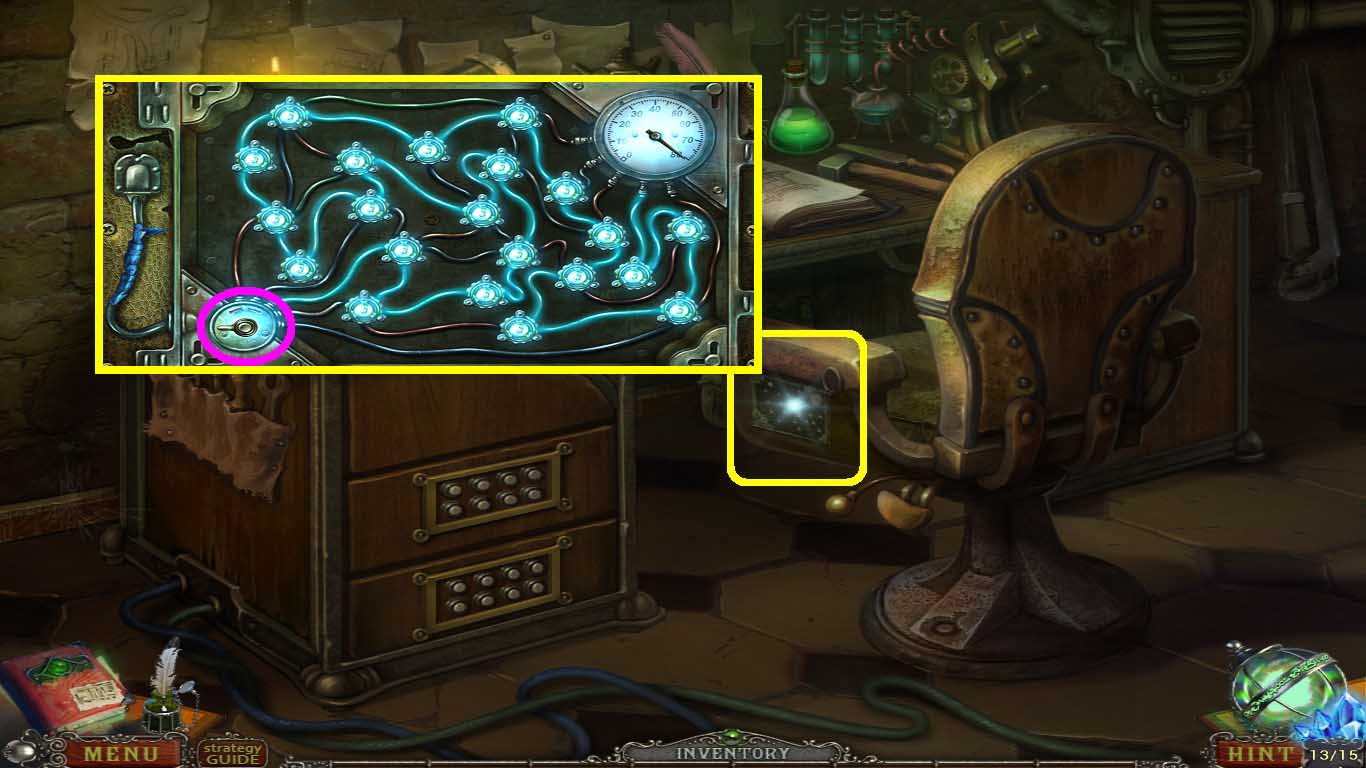
- Move into the chair (yellow square).
- Insert the armchair mechanism part (pink circle) into the slot.
- Solve as shown above to illuminate the lights.
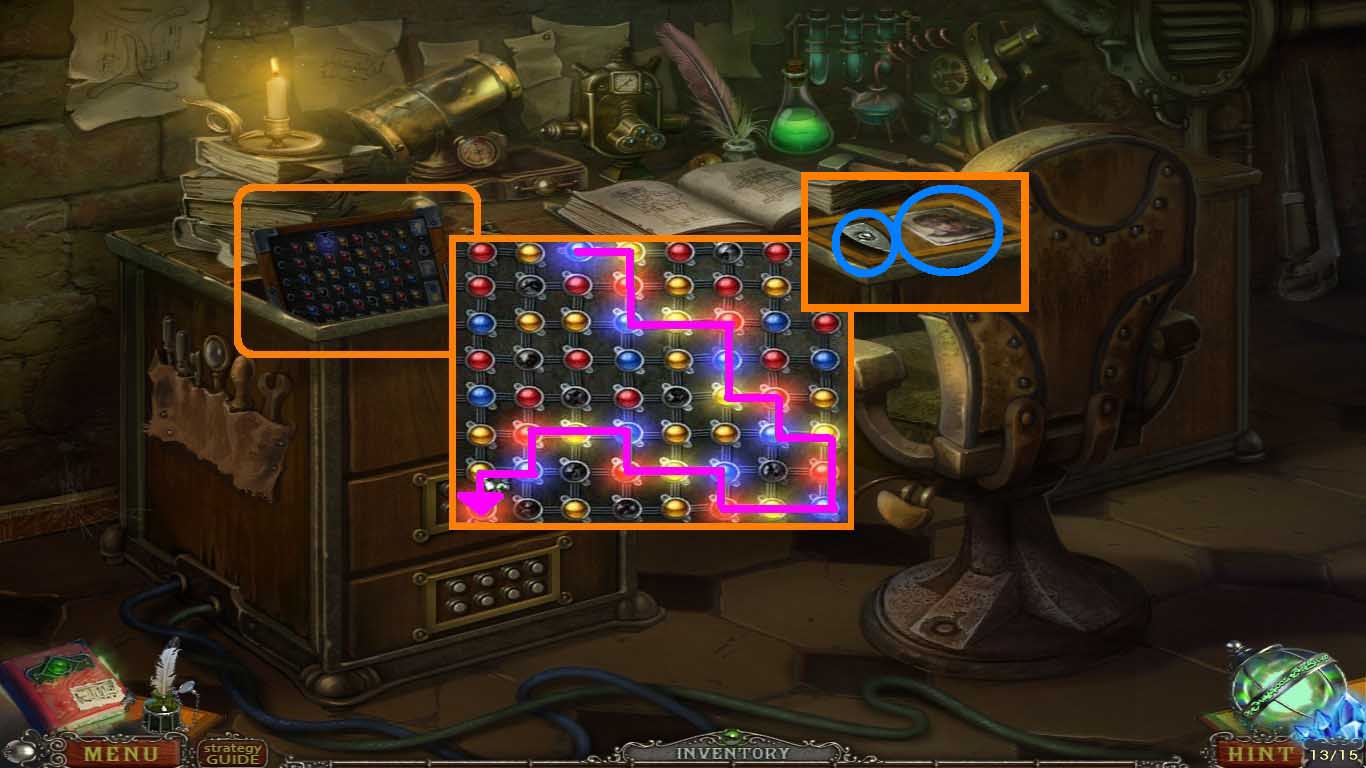
- Move into the panel (orange square).
- Follow the pink line to illuminate the lights.
- Take the fountain puzzle piece and the Tim photo (blue circles).
- Go to orphanage: secret room.
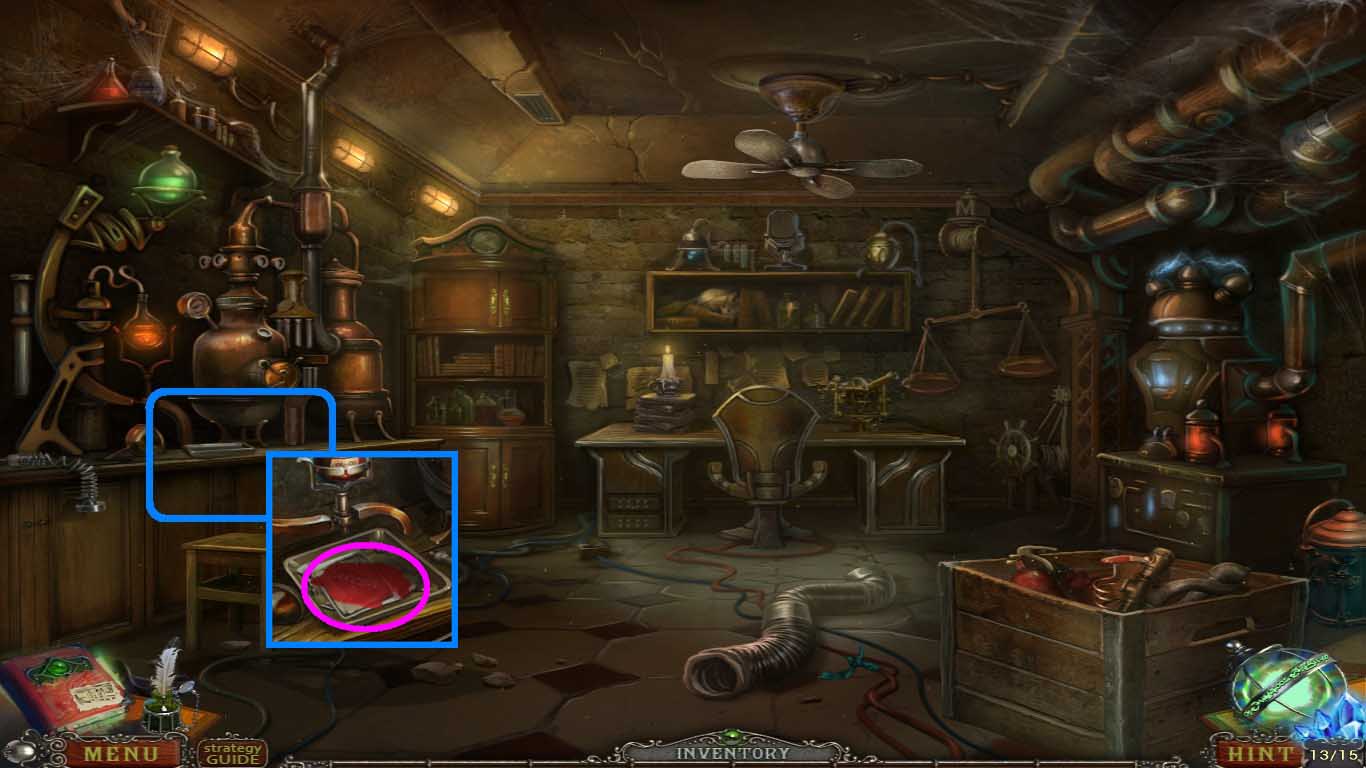
- Move into the bench (blue square).
- Insert the Tim photo into the pan.
- Take the Tim photo (pink circle).
- Go to the orphanage: near old fountain.

- Move into the fountain panel (green square).
- Use the insulating tape to fix the wires (yellow circle).

- Insert the fountain puzzle pieces into the lock.
- To set the pattern, follow the sequence below:
- C – D – D- A – B.
- Go into the secret room: under old fountain.
- Take the blue crystal (blue circle).
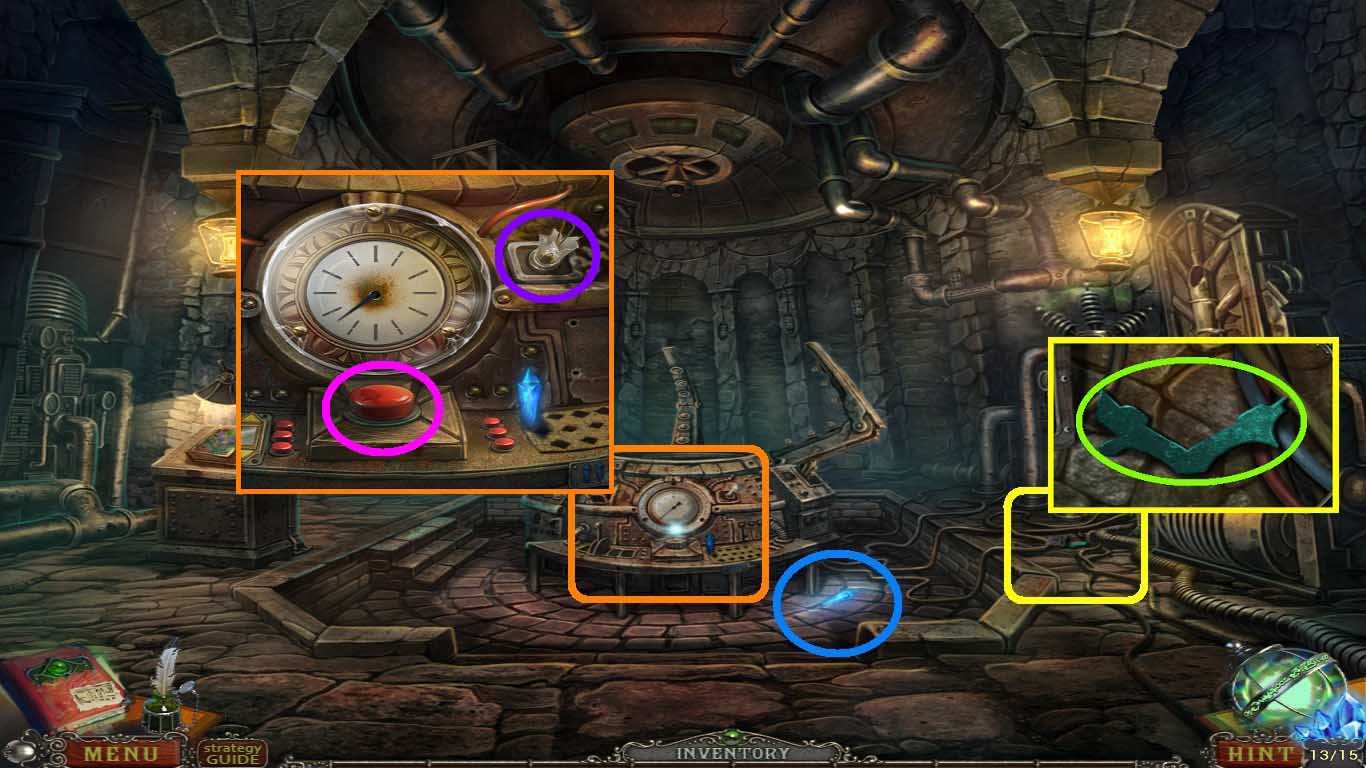
- Move into the ground (yellow square).
- Click the panel.
- Take the second pattern (green circle).
- Move into the machine (orange square).
- Click the red button (pink circle).
- Click the broken bulb (purple circle).
- Go to the orphanage: secret room.
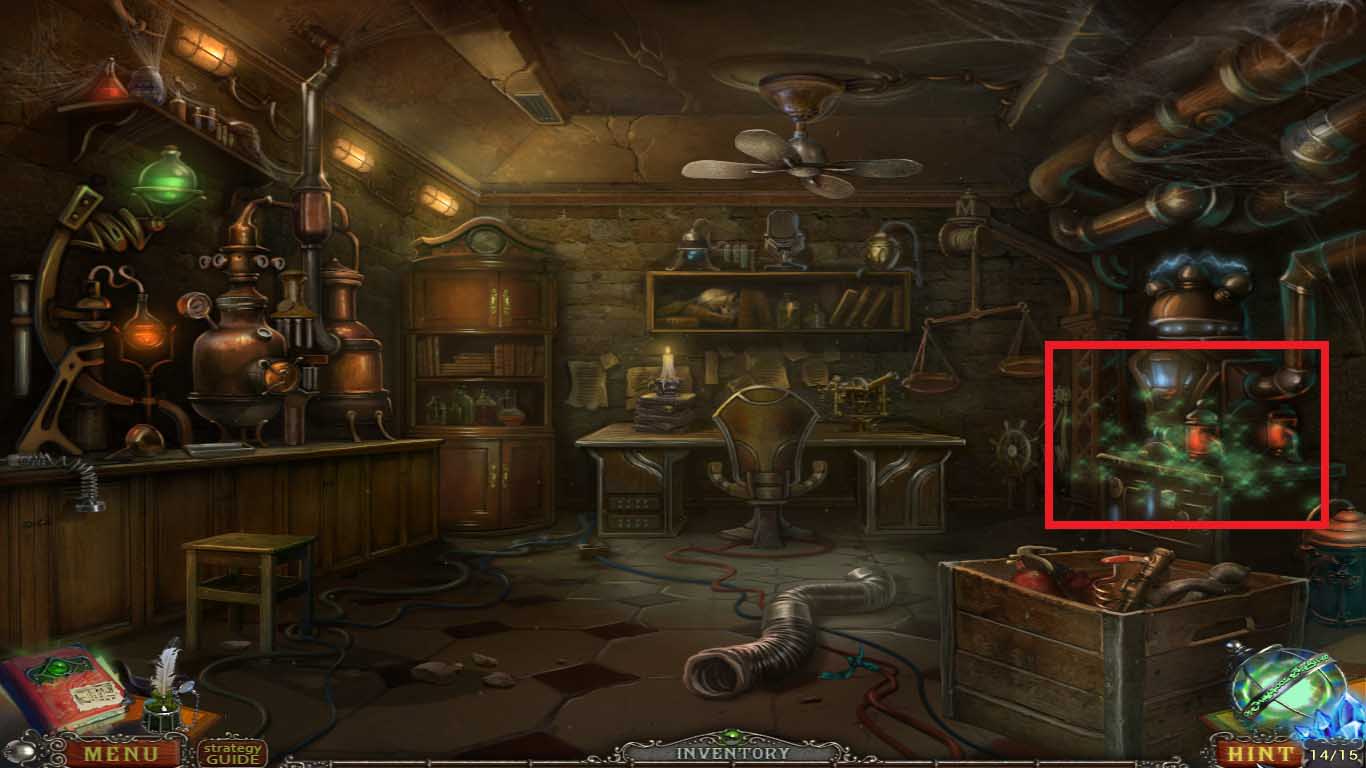
- Move into the mechanism (red rectangle) to access the hidden objects area.
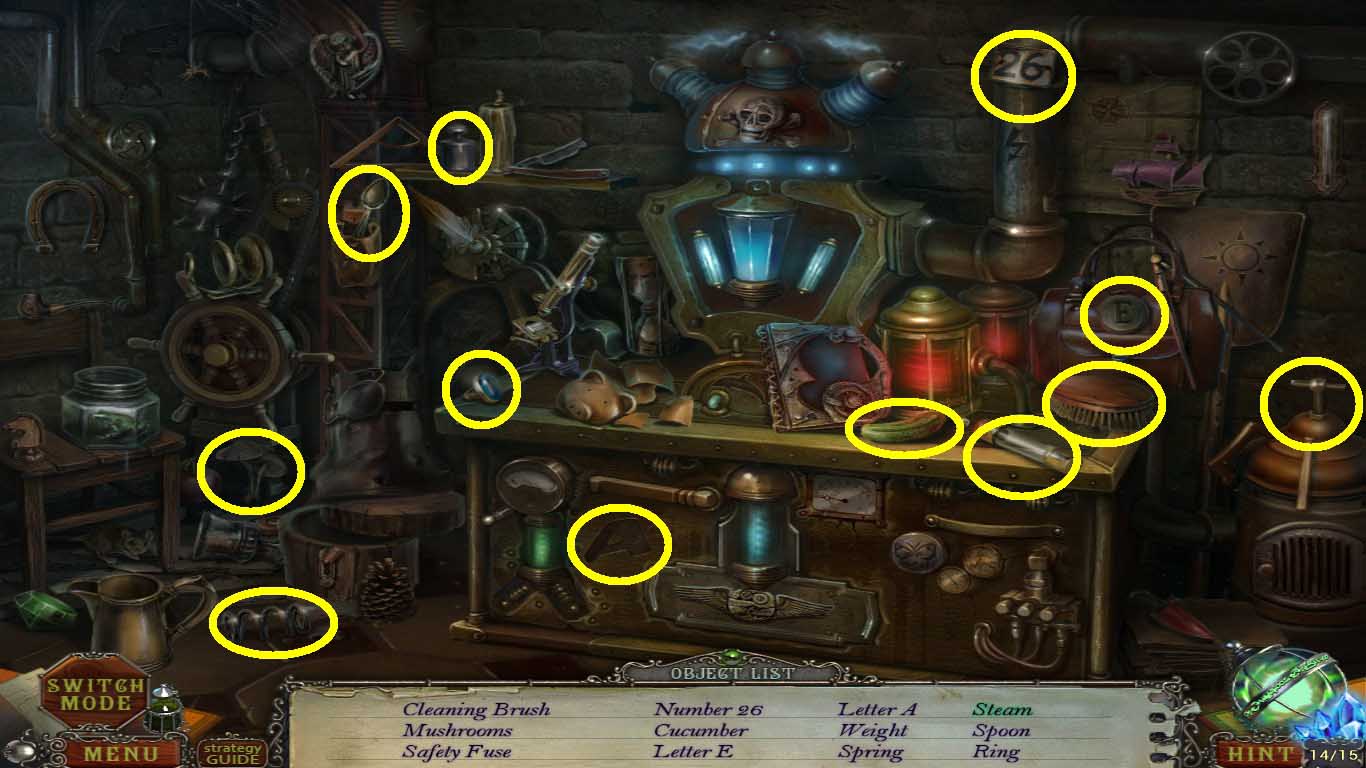
- Find the listed items (yellow circles).
- Collect the safety fuse.
- Move into the secret room: workplace.
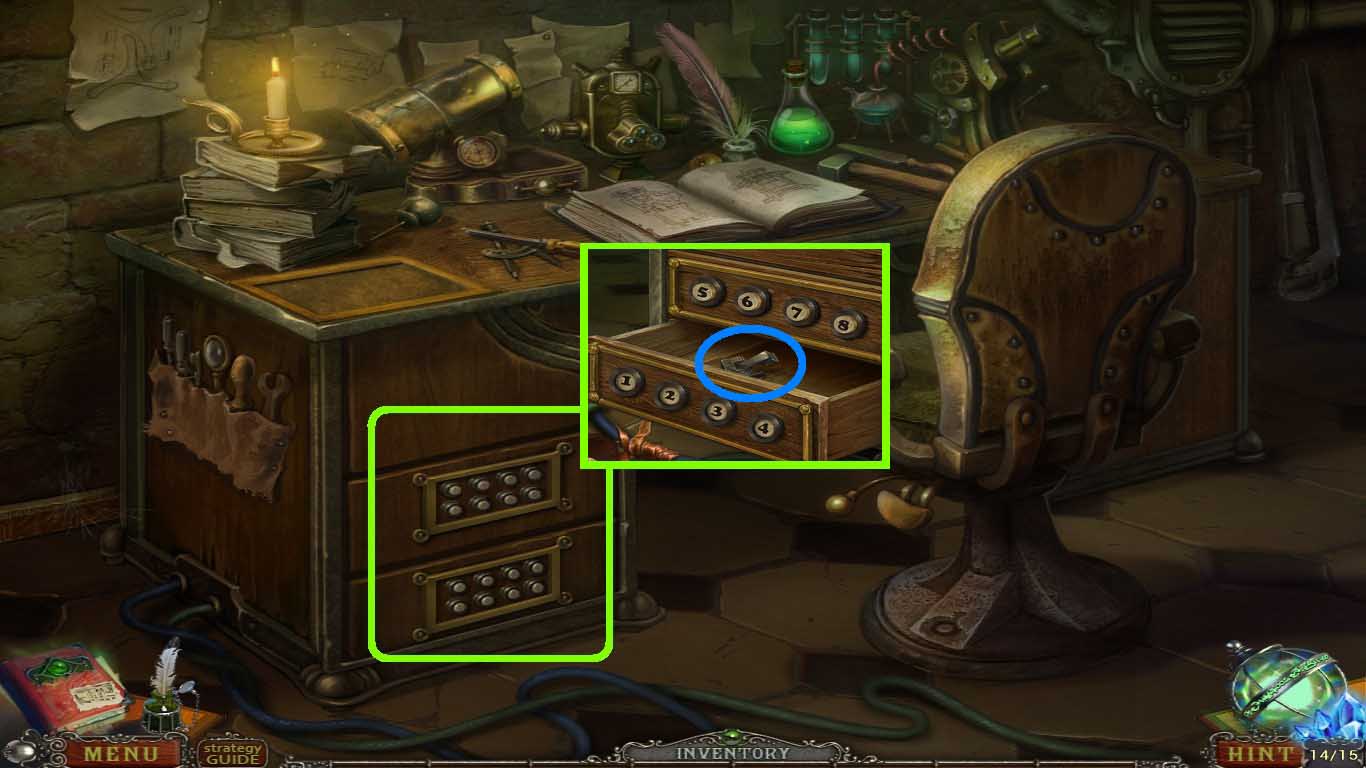
- Move into the drawer (green square).
- Click the code: 3- 4 – 1 – 2.
- Take the switch part (blue circle).
- Go to the orphanage: secret room.
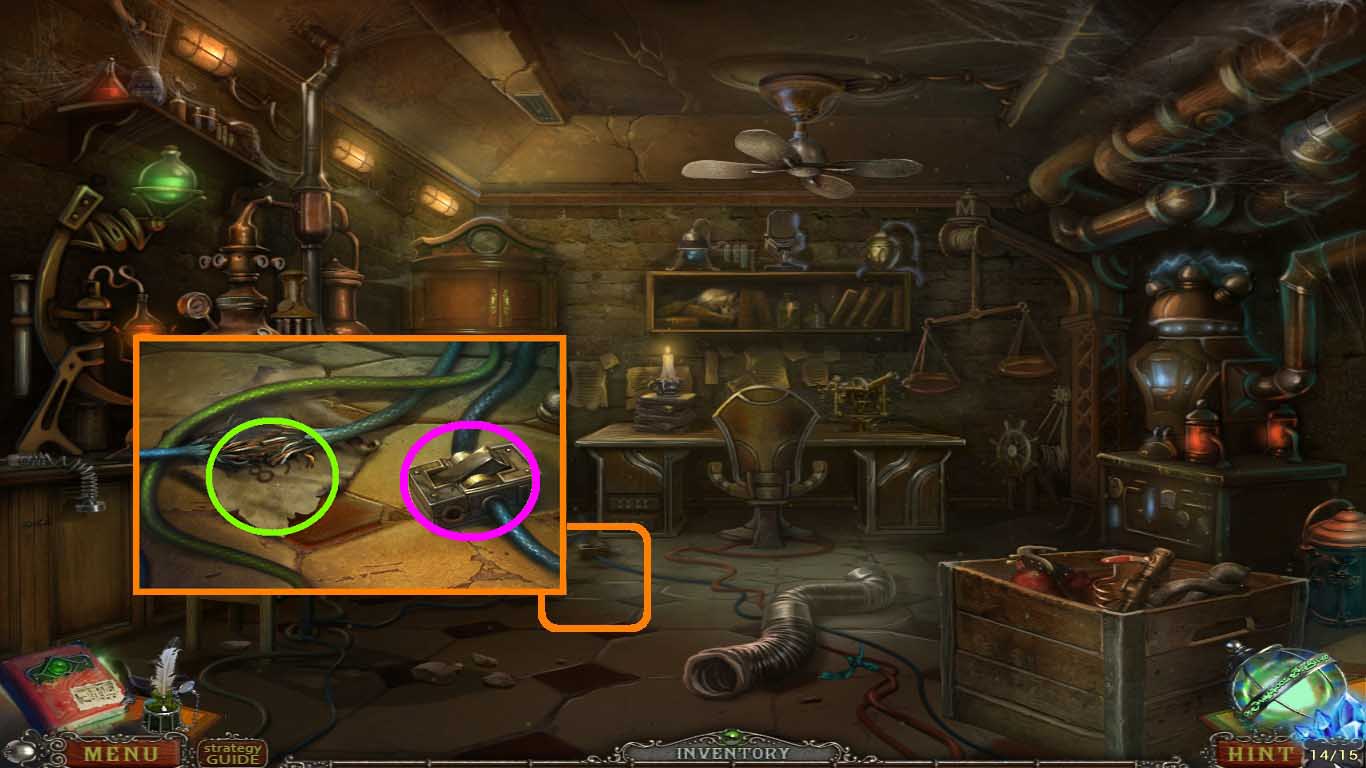
- Move into the wires (orange square).
- Insert the switch (pink circle) part into the slot.
- Click the switch.
- Take the note (green circle).
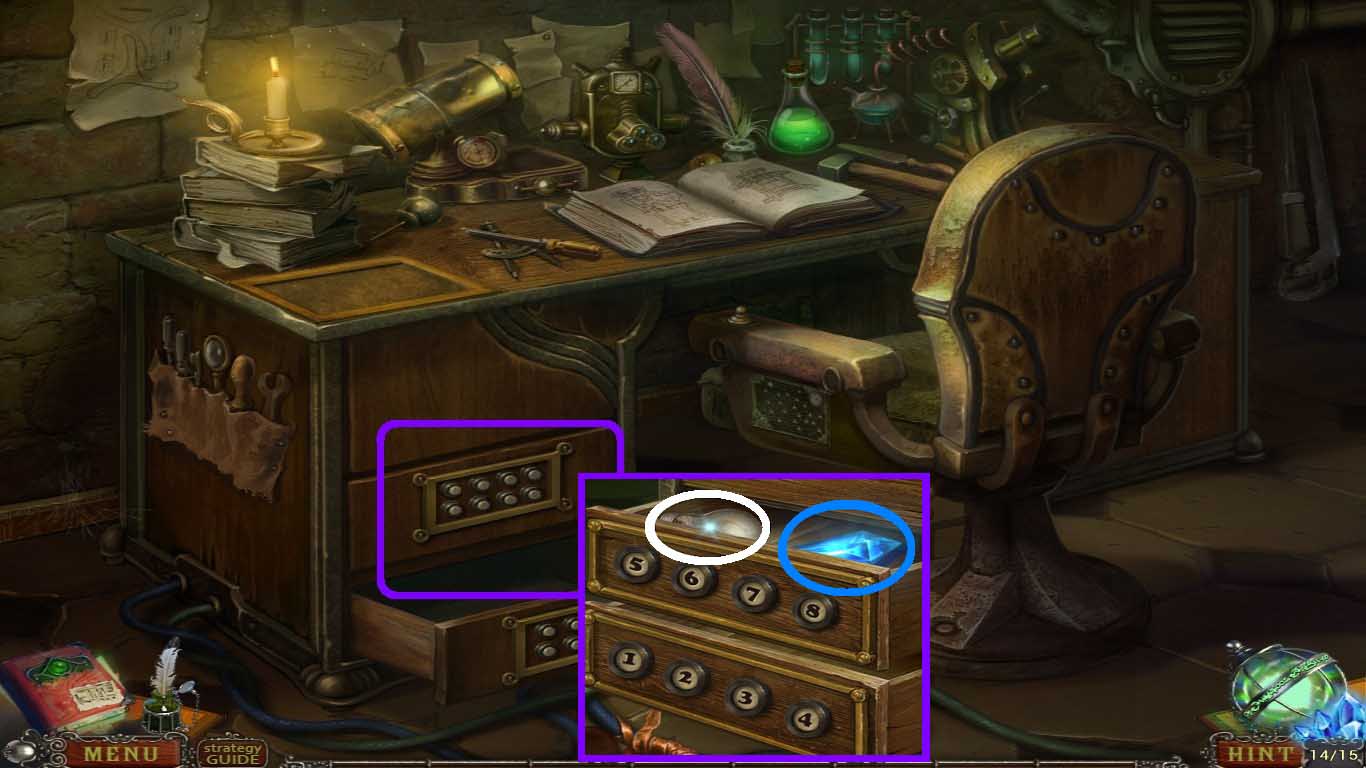
- Move into the secret room: workplace.
- Move into the drawer (purple square).
- Enter the following code: 8 – 5 -7 – 6.
- Take the blue crystal (blue circle).
- Take the bulb (white circle).
- Go to the orphanage front porch.

- Move into the debris (red rectangle) to access the hidden objects area.
- Find the listed items (yellow circles).
- Collect the pattern.
- Go to the secret room: under old fountain.
- Move into the book (green square).
- Insert the patterns onto the cover.
- Take the safety fuse (yellow circle).
- Move into the fuse panel (pink square).
- Click the old fuses.
- Insert the 3 safety fuses.
- Use the insulating tape to fix the wires (white circle).
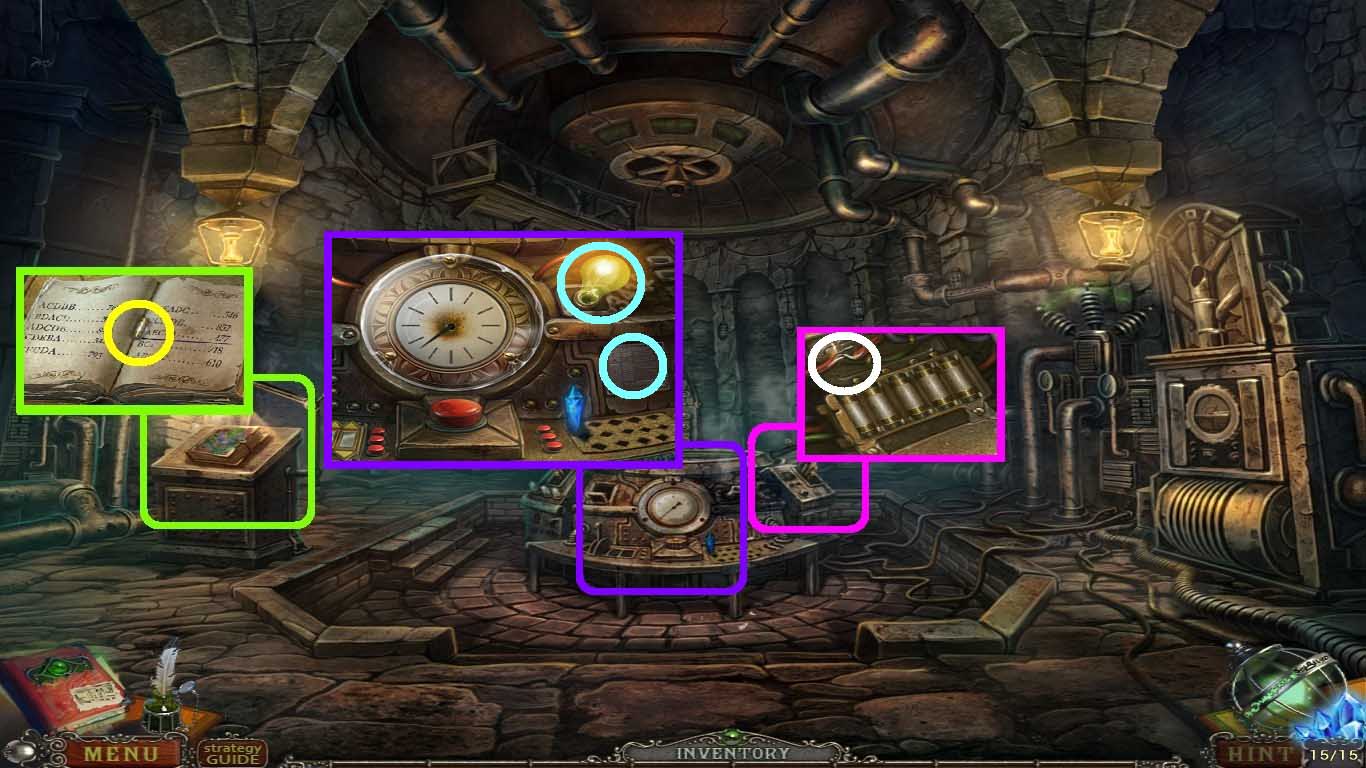
- Move into the machine (purple square).
- Insert the portal instruction plate and bulb into the panel (aqua circles).
- Click the blue crystals (pink square).
- Move them to the panel (green square).
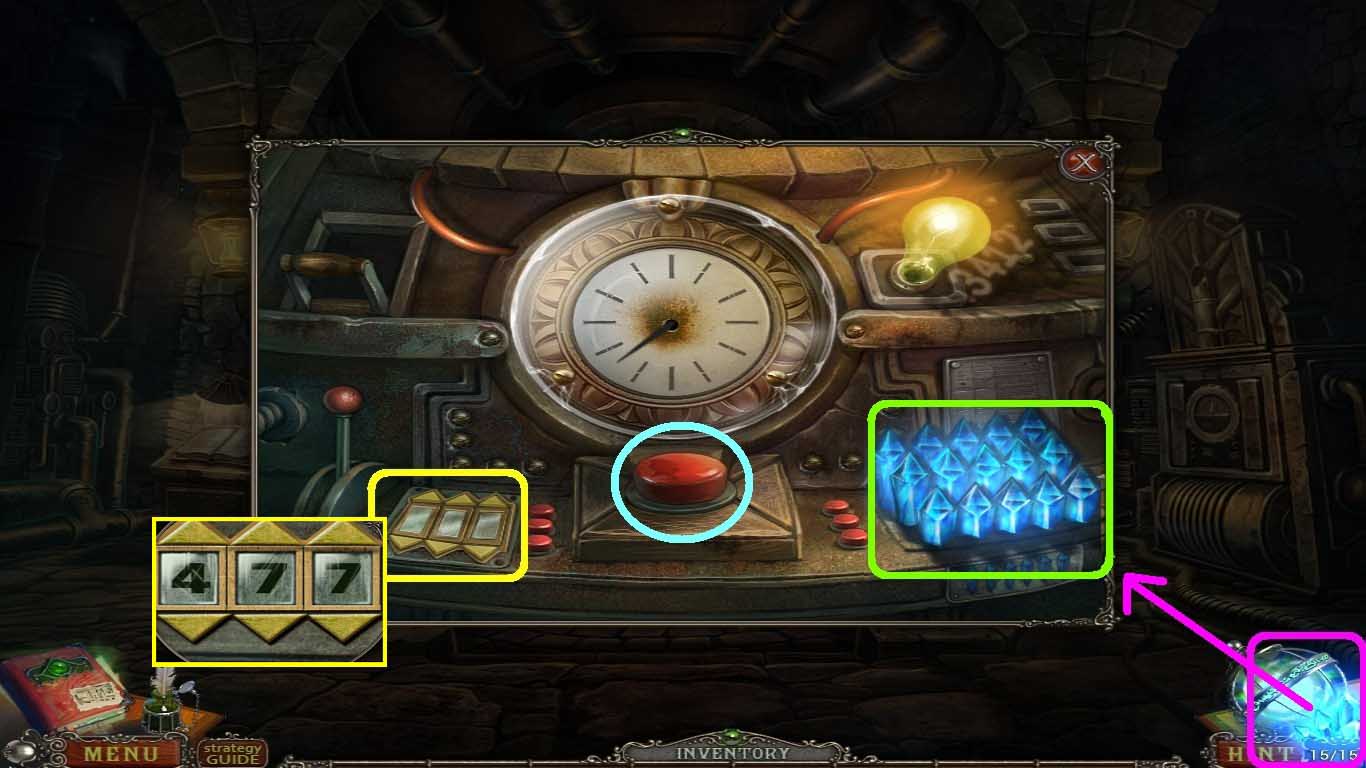
- Move into the code bar (yellow square).
- Insert code: 4-7-7.
- Click the red button (aqua circle).
General Info and Tips
Chapter One: Missing
Chapter Two: Mr. Miller’s Medallion
Chapter Three: Ferryman
Chapter Four: The Island
Chapter Five: The Cemetery
Chapter Six: The Orphanage Courtyard
Chapter Seven: Inside the Orphanage
Chapter Eight: The Hidden Room
Bonus Game
Ask for help in the comments below!
Chapter One: Missing
Chapter Two: Mr. Miller’s Medallion
Chapter Three: Ferryman
Chapter Four: The Island
Chapter Five: The Cemetery
Chapter Six: The Orphanage Courtyard
Chapter Seven: Inside the Orphanage
Chapter Eight: The Hidden Room
Bonus Game
Ask for help in the comments below!