
Redemption Cemetery: Salvation of the Lost: Bonus Chapter
Use our Redemption Cemetery Salvation of the Lost Walkthrough as your personal survival guide to another long night trapped in a haunted cemetery. Rely on our custom screenshots, puzzle solutions, and detailed step-by-step instructions to right the wrongs of the past for three lost souls, save your beloved dog, and get back to the land of the living.
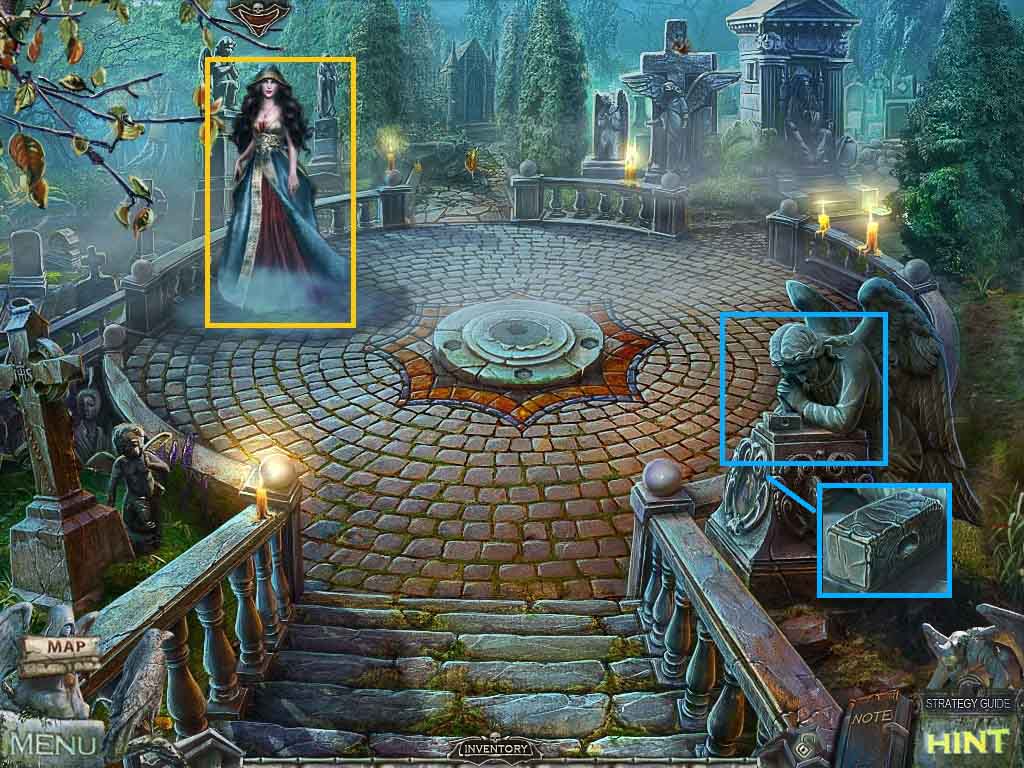
- Speak to Hina.
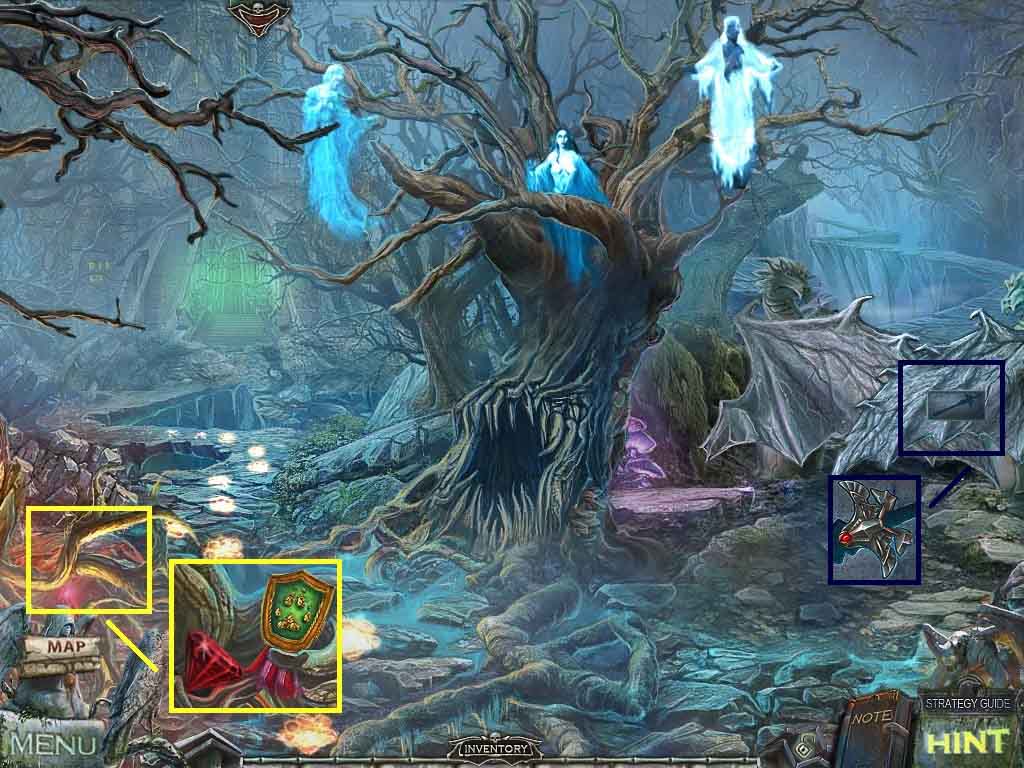
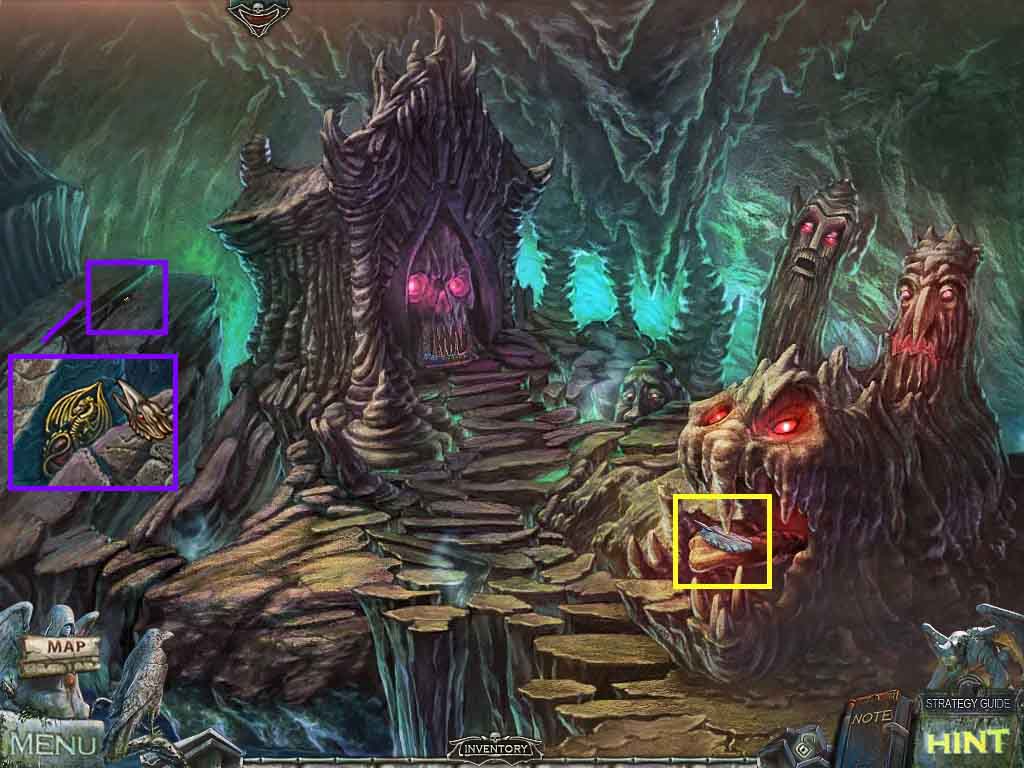
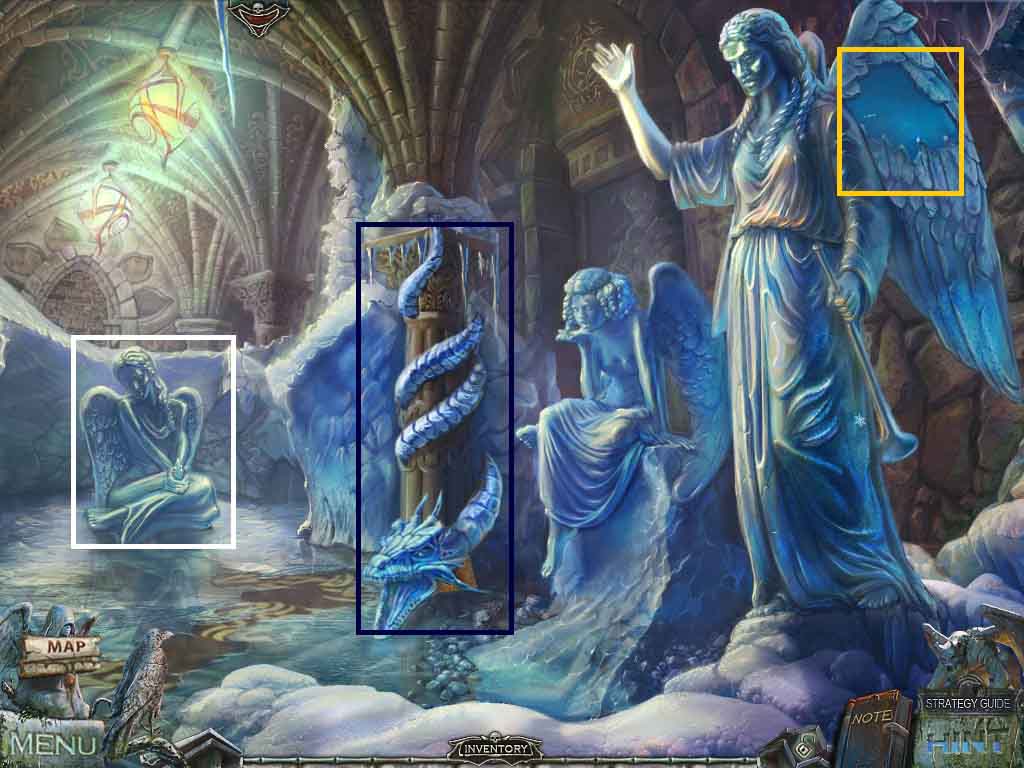
- Click the angel; collect the hammerhead.
- Move ahead.

- Click the tree and collect the nut.
- Collect the collar.
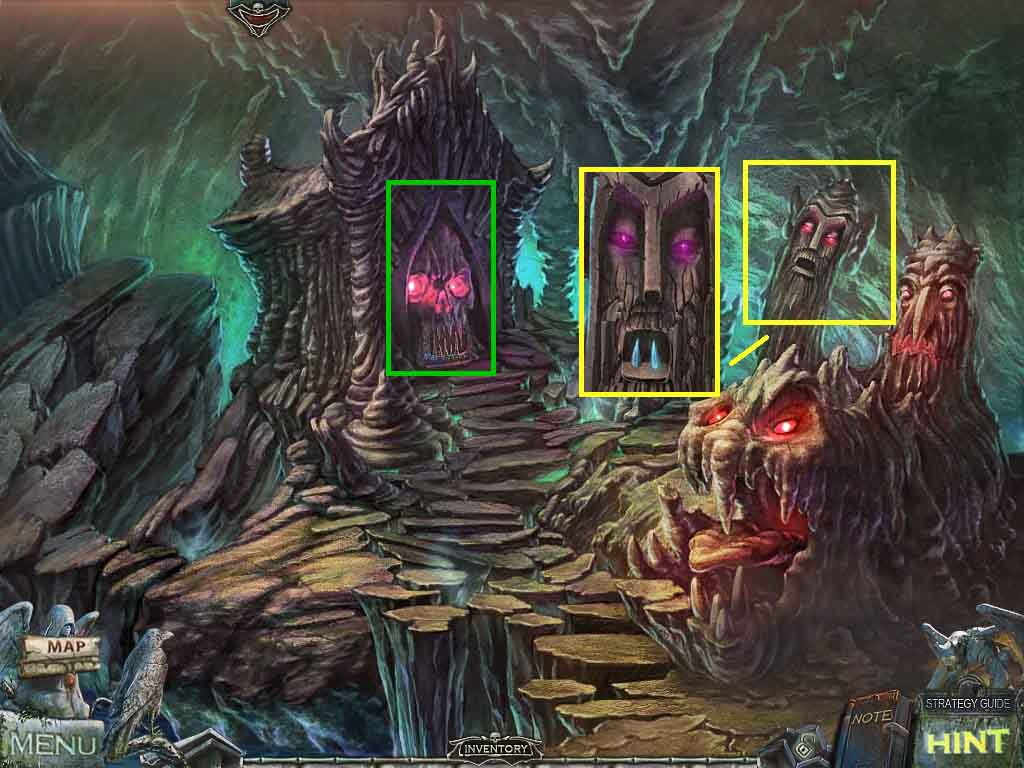
- Notice the mini-game on the crypt door.
- Click the gate.
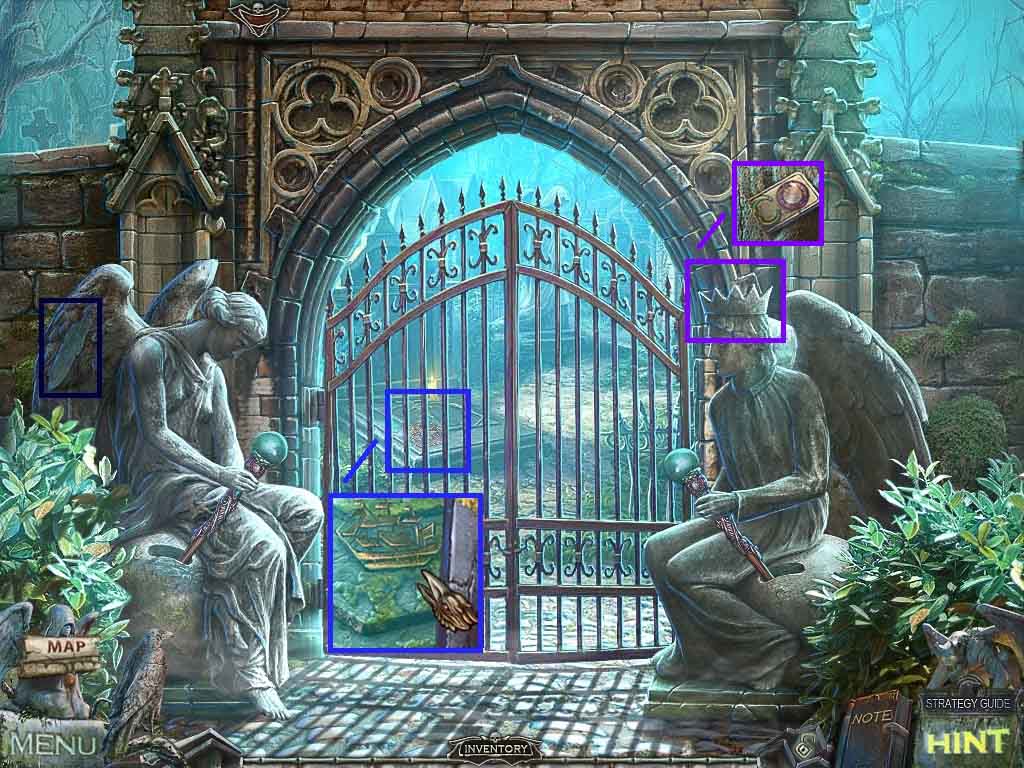
- Collect the 1 / 4 feathers.
- Look through the gate.
- Select the raven’s power of air to collect the ship symbol.
- Click the crown and collect the 1 / 3 chips.
- Move down 2 times.
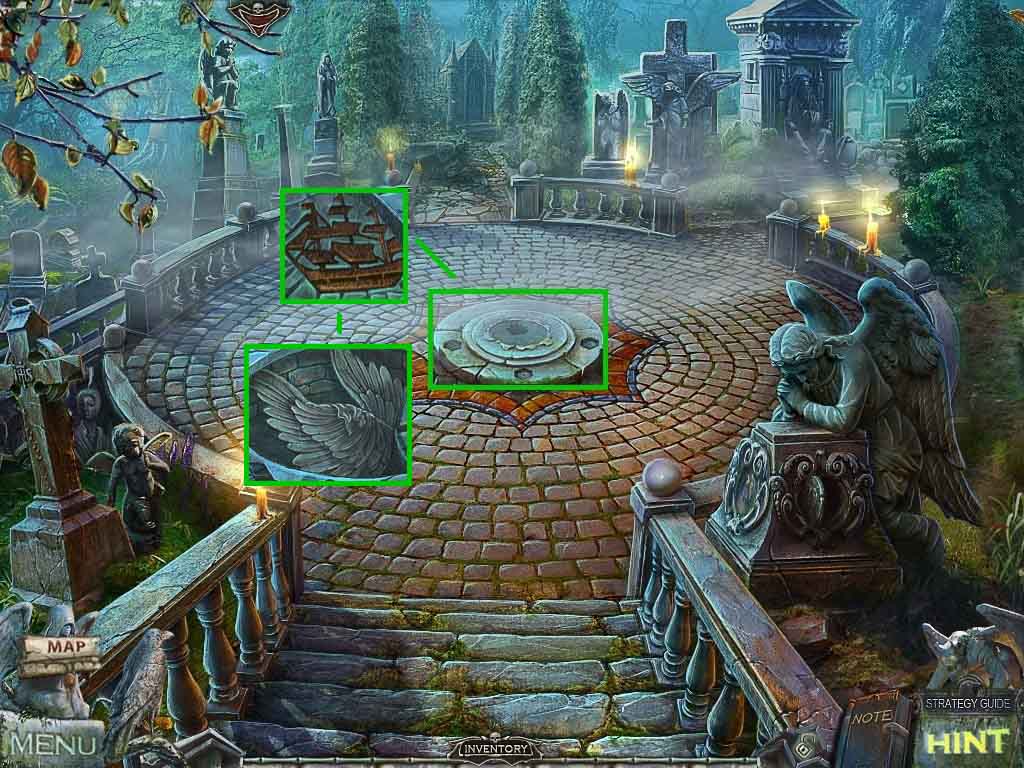
- Click the platform; insert the ship symbol.
- Collect the angel wings.
- Move ahead.

- Click the angel; hand her the angel wings.
- Click the ground; collect the chisel.
- Move down and go to the left.
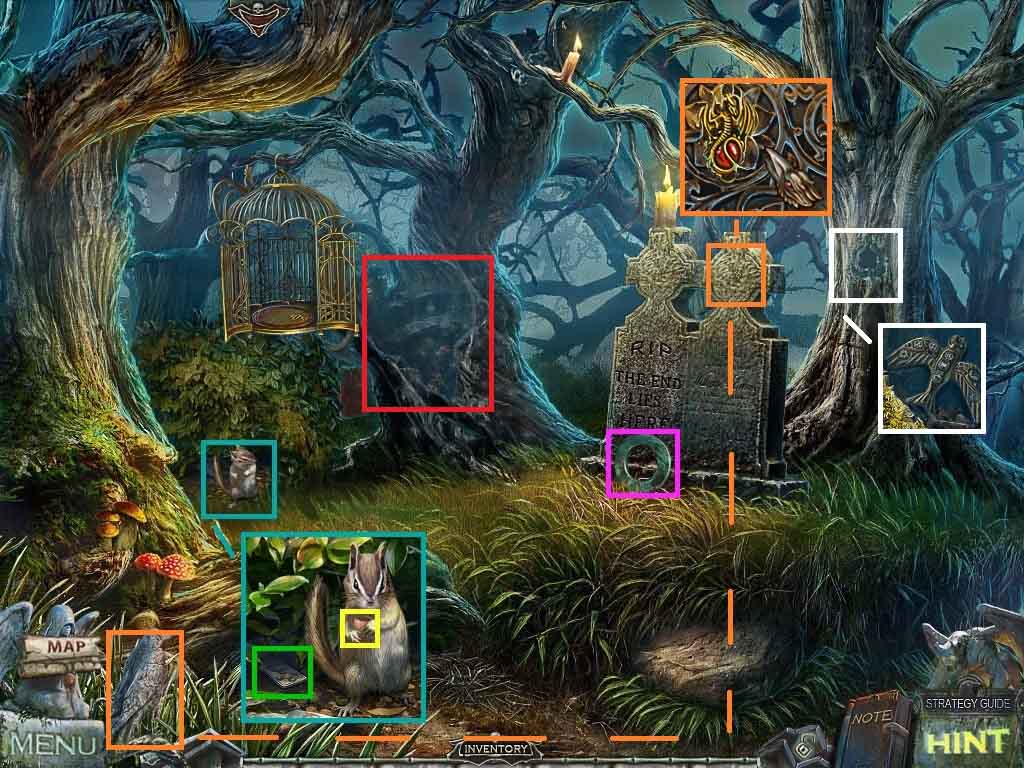
- Click the chipmunk; hand him the nut.
- Collect the 2 / 3 chips and the nutshell.
- Collect the round part of the gate lock.
- Click the tombstone; select the raven’s power of earth to collect the gold 1 / 2 part of a gate lock.
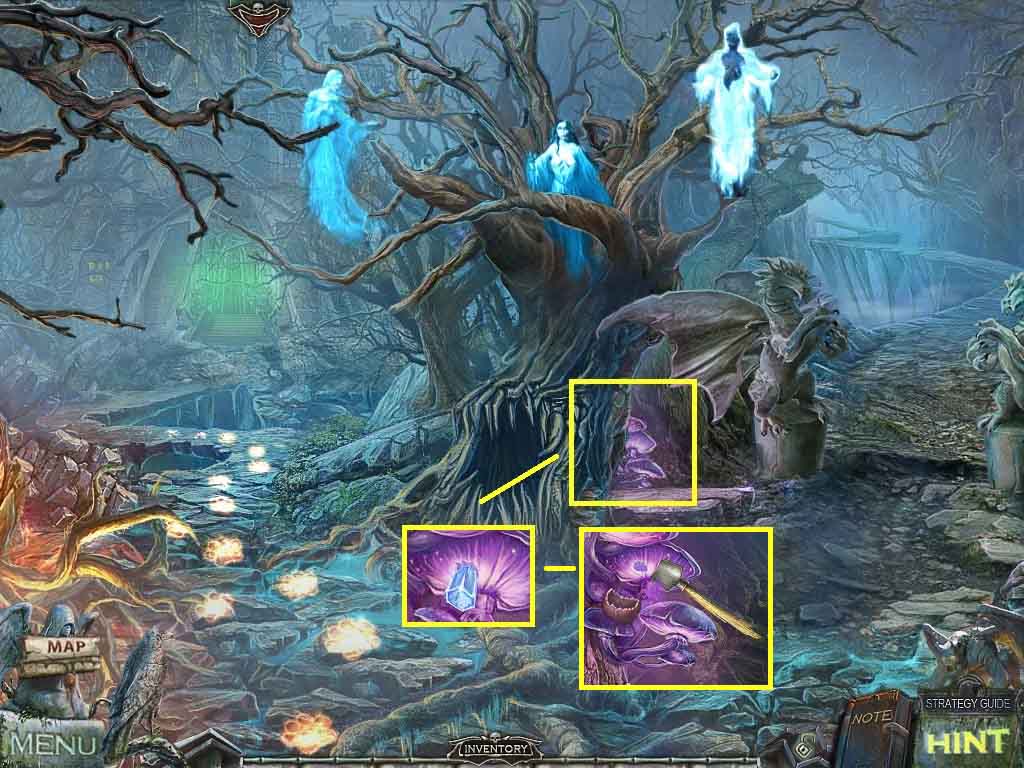
- Click the tree hollow.
- Collect the 1st part of the bird key.
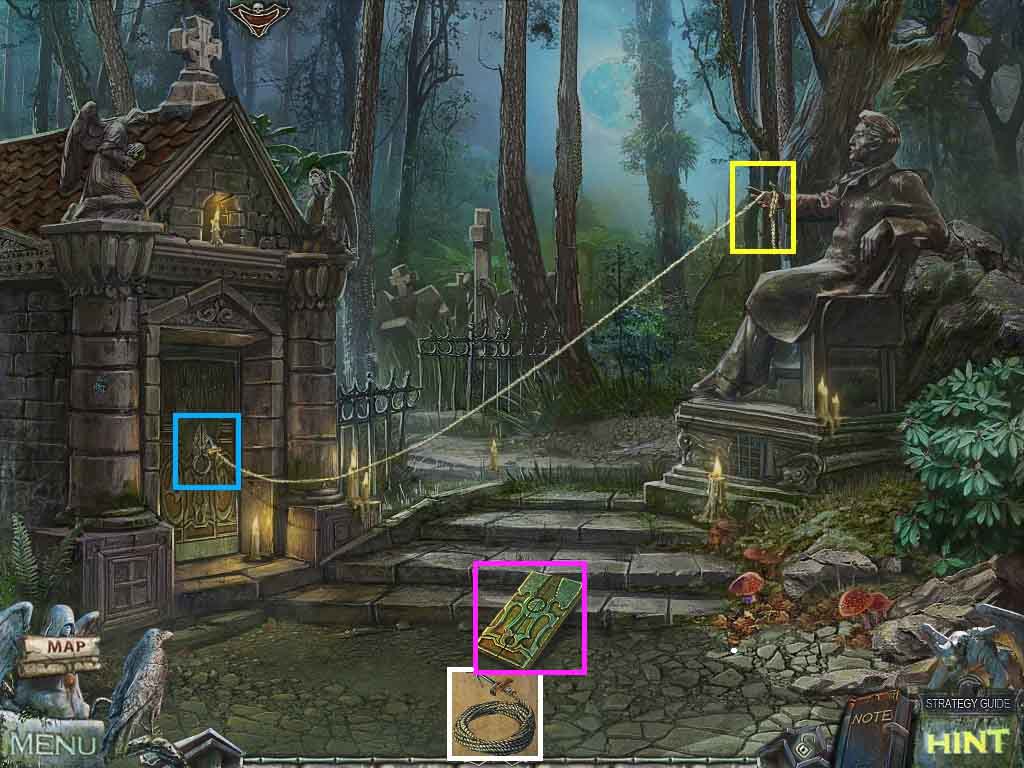
- Click the center tree to access a hidden objects area.
- Find the listed items.
- Select the stick and use it on the moth to uncover the rope.
- Collect the long rope.
- Move down and go to the right.

- Click the crypt; collect the magic ribbon.
- Notice the mini-game at the statue base.
- Click the gate and collect the medal and the wooden handle.
- Move down once.
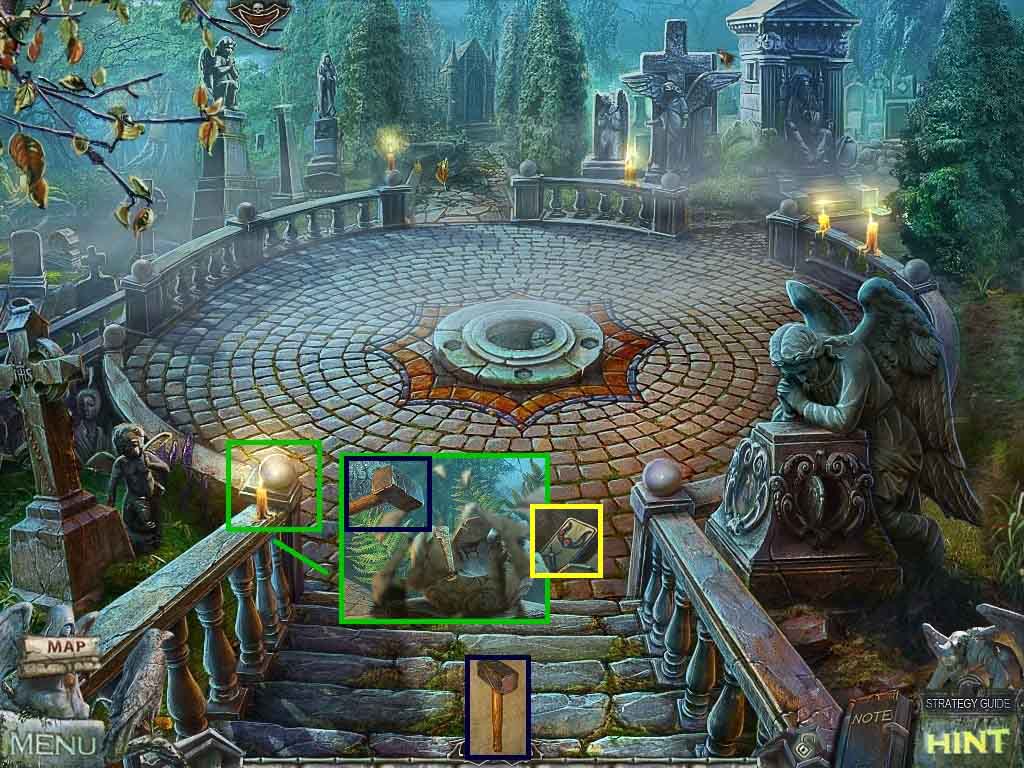
- Combine the wooden handle and the hammerhead to create the hammer.
- Click the railing.
- Place the chisel onto the stone ball and select the hammer to pound the chisel.
- Collect the 3 / 3 chips.
- Move ahead and click the crypt door to access a mini-game.
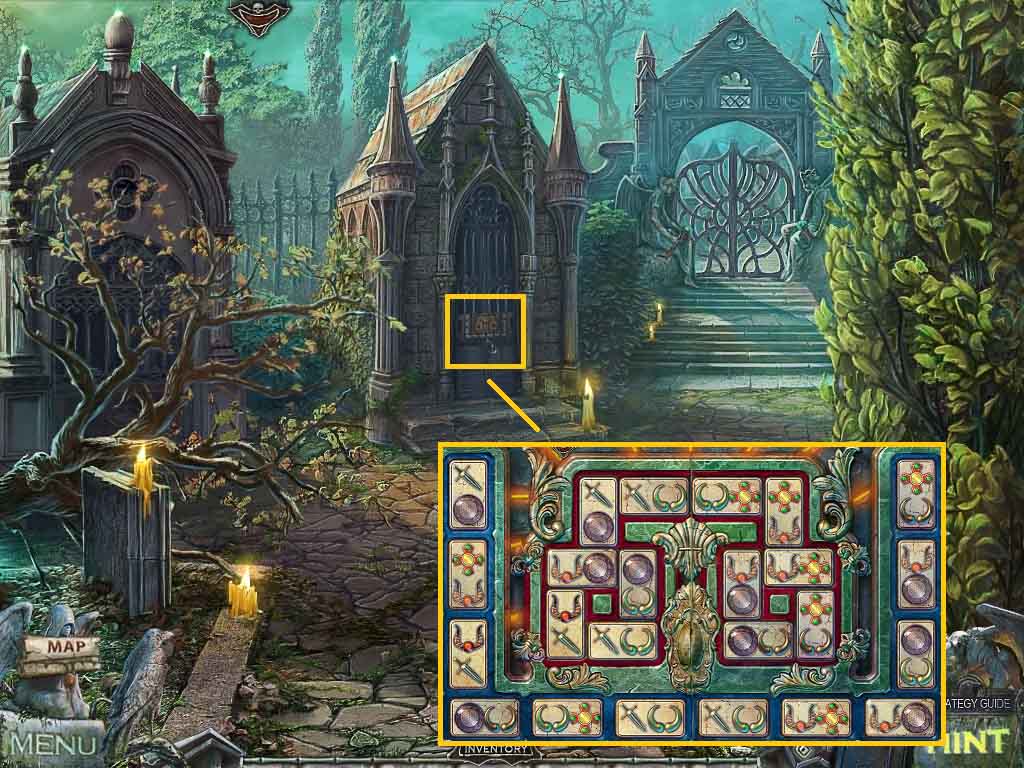
- Insert the 3 chips to trigger the game.
- Move the tile so that the adjacent tiles match.
- Go into the crypt.
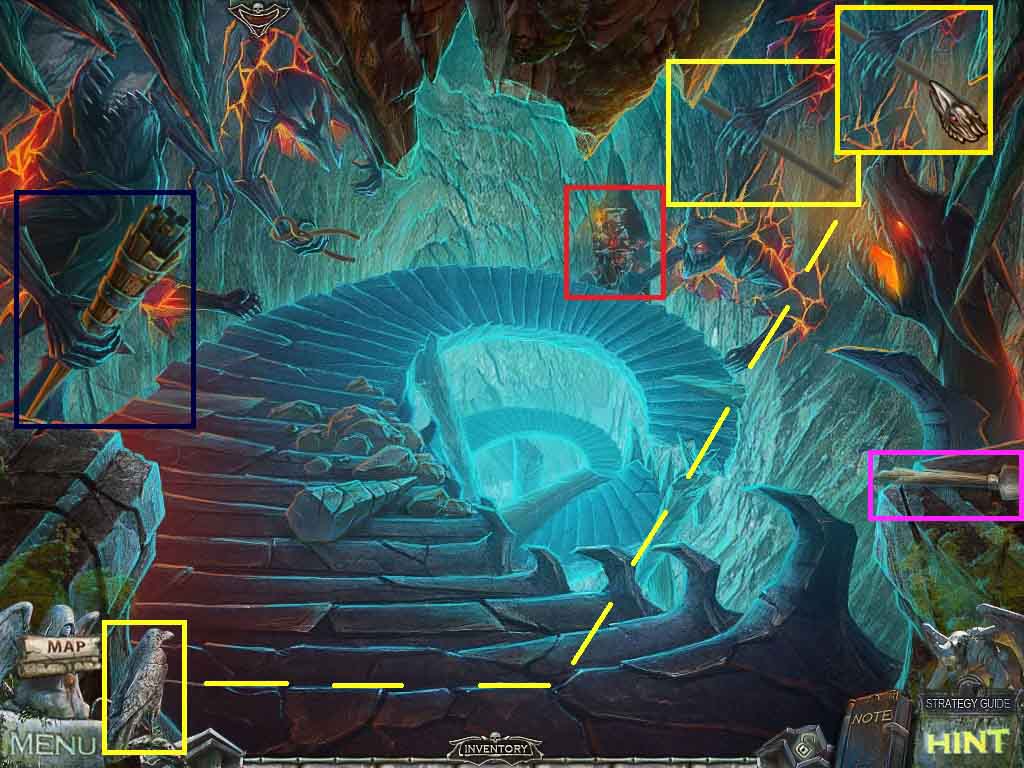
- Collect the extinguished torch.
- Collect the scraper.
- Select the raven’s power of air to collect the stick.
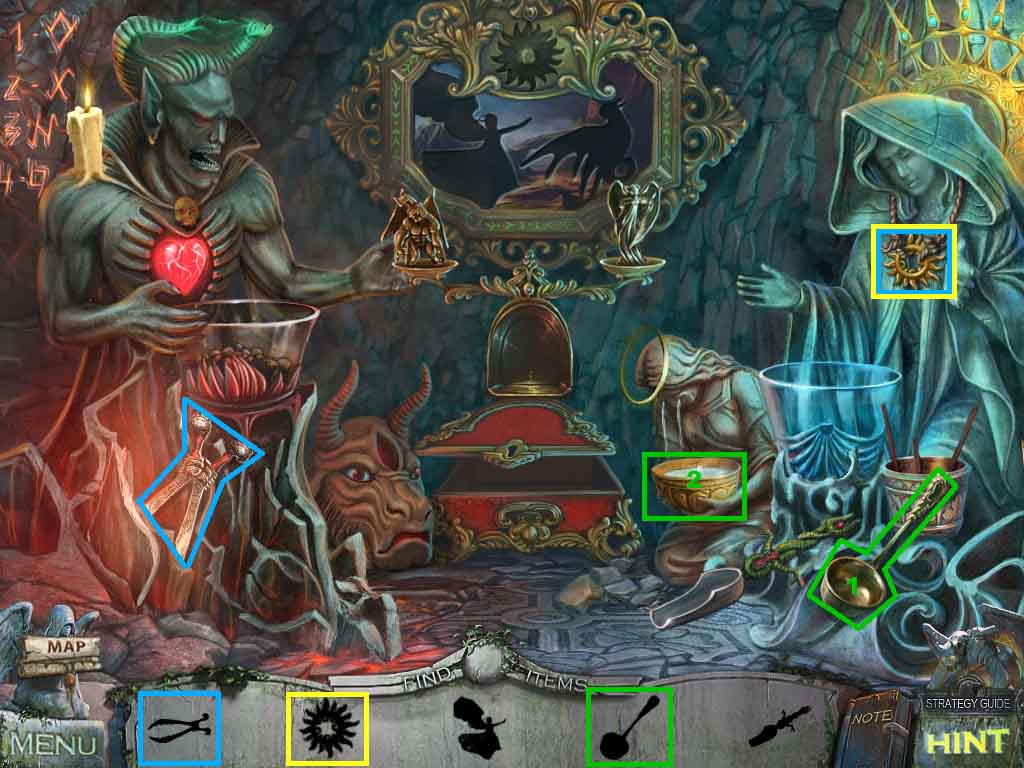
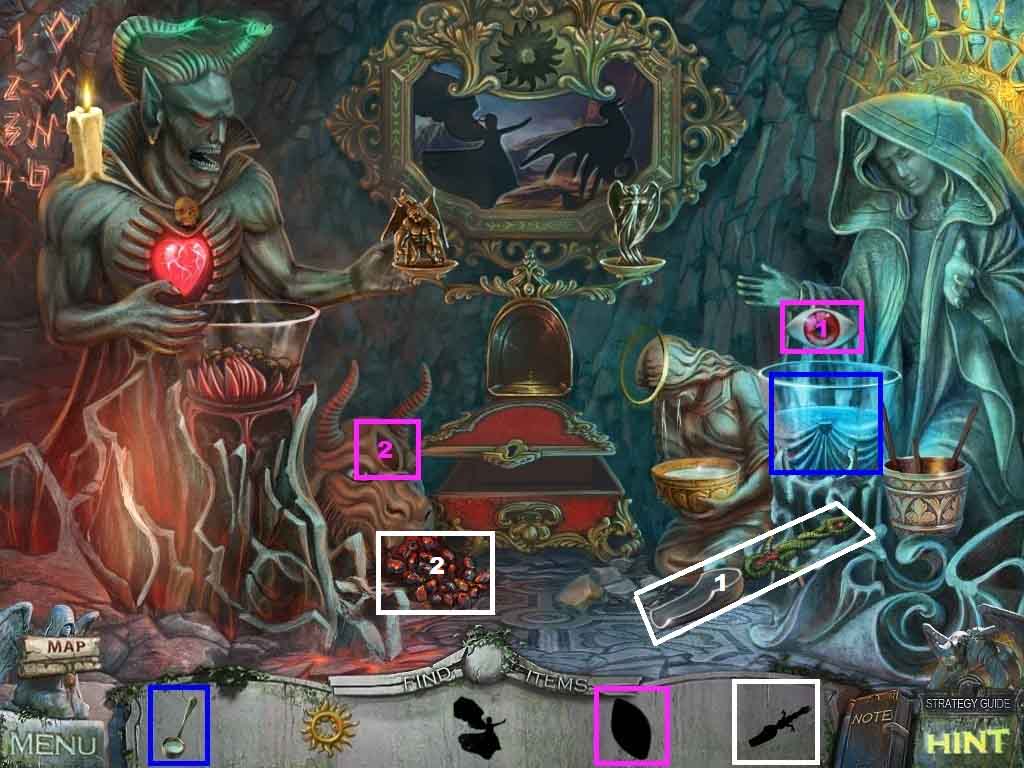
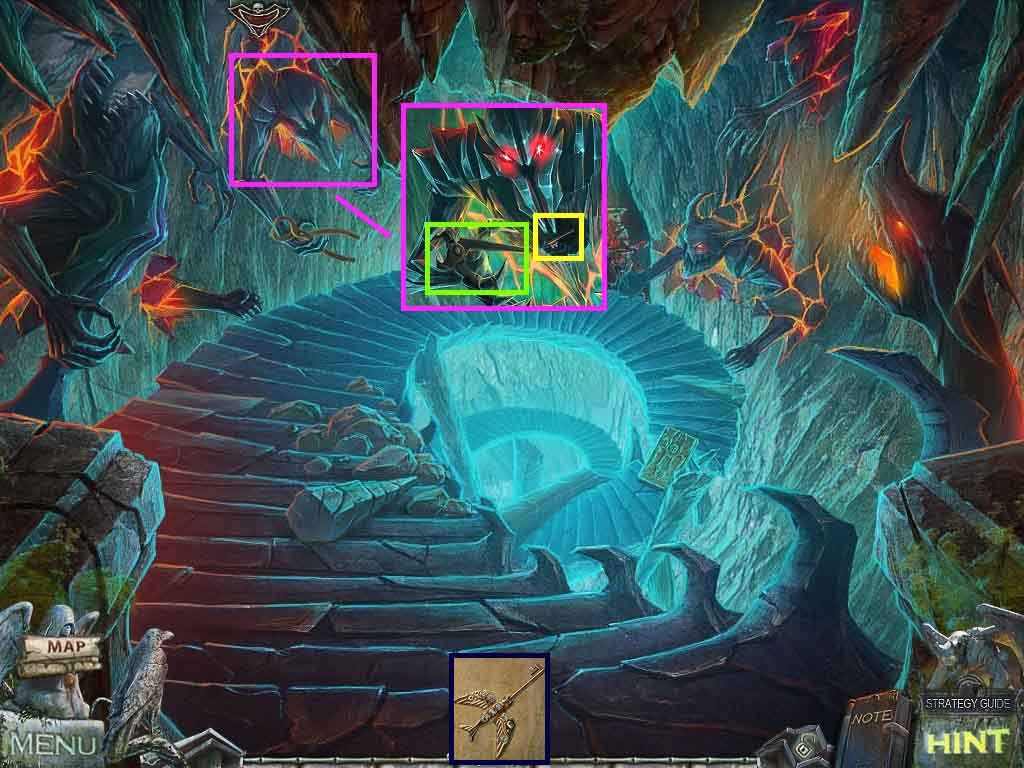
- Click the cave to access the hidden objects area.
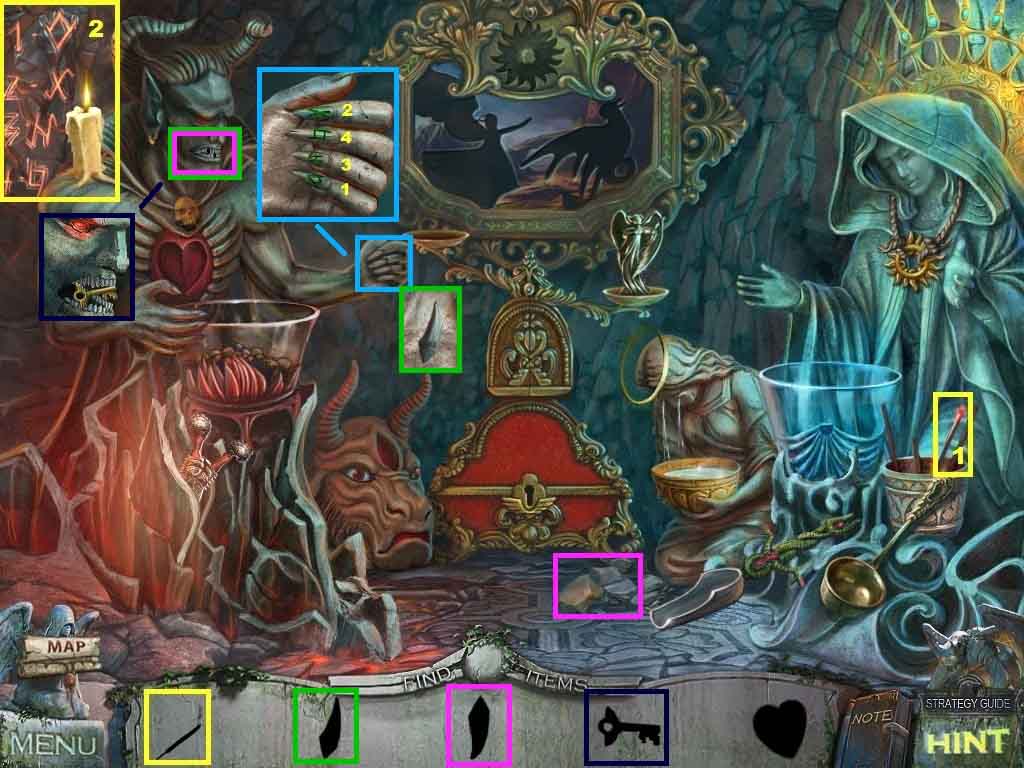
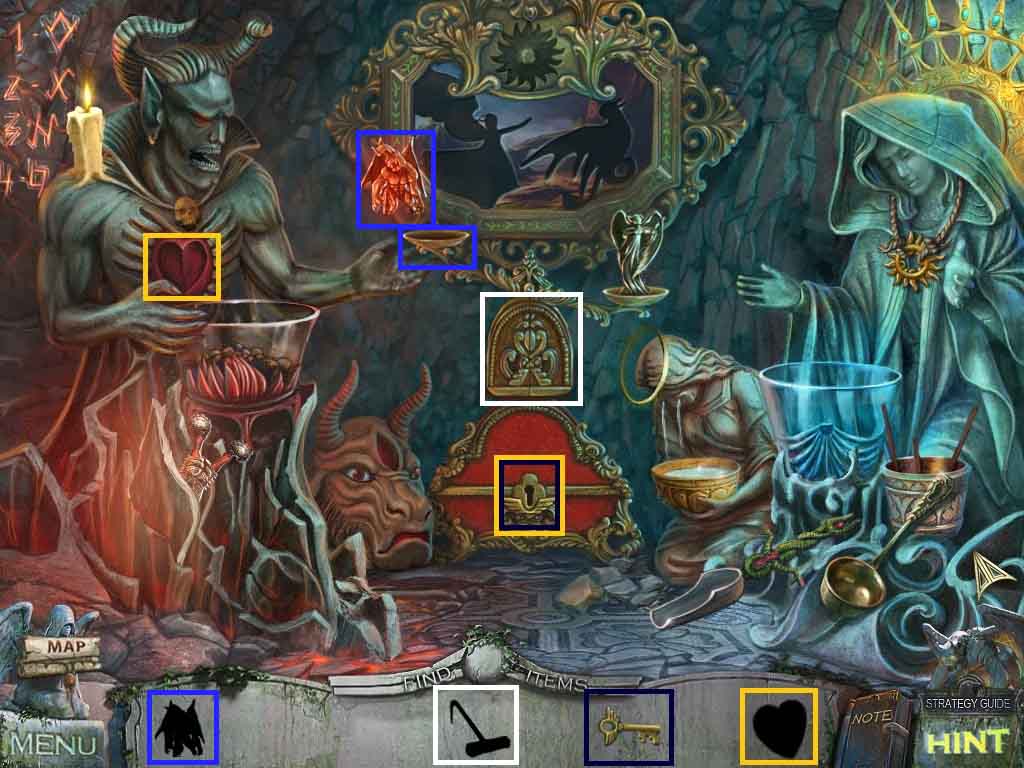
- Find all the items based on their silhouettes.
- Select the burning ember and use it on the candle to reveal the symbols.
- Click the demons hand; click the symbols in numerical order.
- Collect the 1st stone tooth from the hand.
- Click the rock to collect the 2nd stone tooth.
- Click the demon’s mouth and insert the 2 stone teeth.
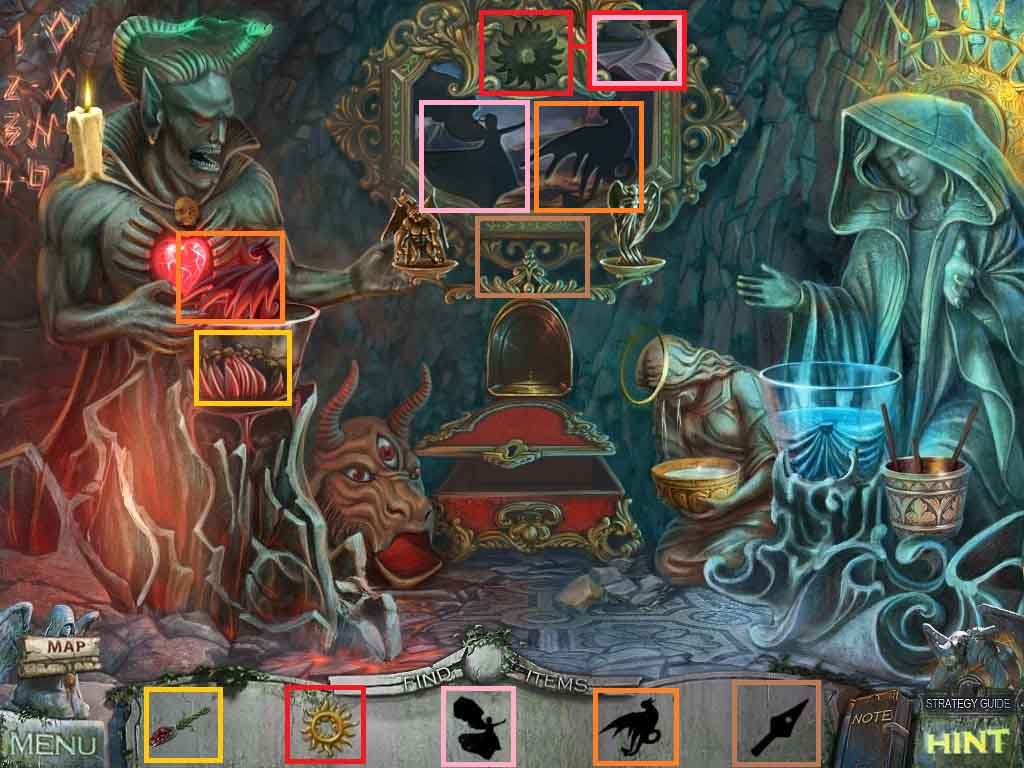
- Collect the metal key from the demon’s mouth; insert it into the chest.
- Collect the heart from the chest and insert it into the demons heart.
- Collect the metal demon figurine and place it onto the scales.
- Collect the hook.
- Move down 2 times and move to the right.
- Combine the hook with the long rope to create the hook.
- Click the door and attach the hook.
- Attach the rope end to the statue.
- Click the statues arm.
- Collect the tomb plate.
- Move down once, go forward and go into the tomb.
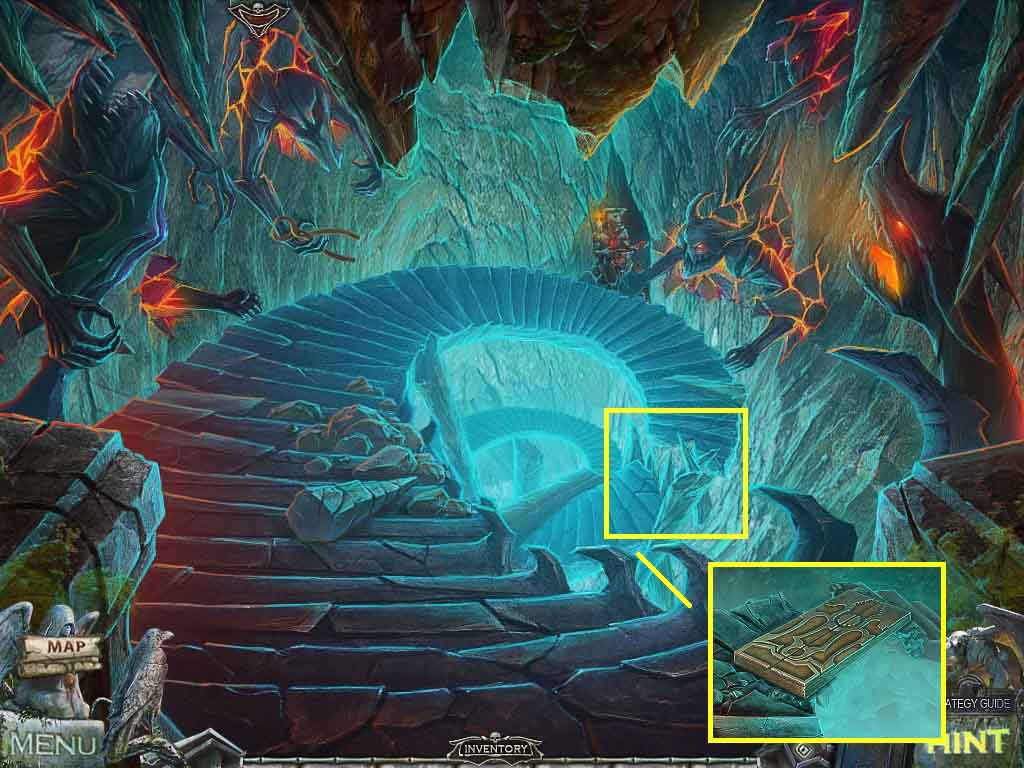
- Click the broken stairs and place the tomb plate down.
- Move down the stairs.
- Click the roots and branches.
- Collect the medal and the 1st ruby eye.
- Click the wings; collect the sword hilt.
- Move ahead on the left side.
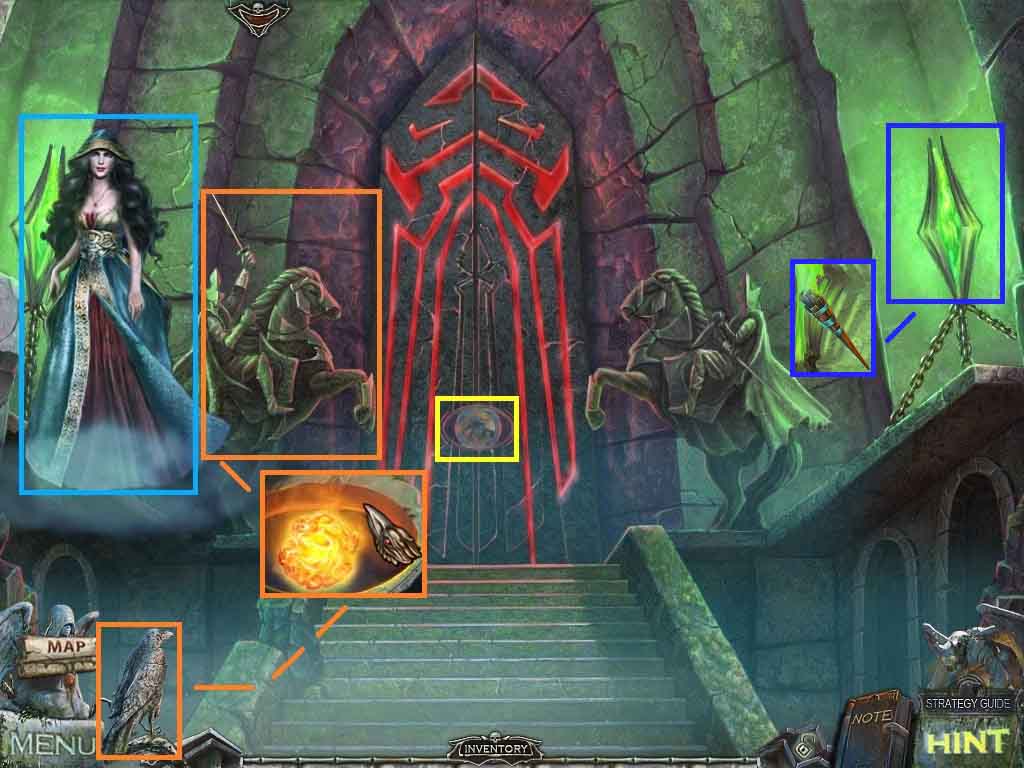
- Speak to Hina.
- Click the left statue and select the raven’s power of fire to collect the fireball.
- Click the green flame; insert the extinguished torch into the flame to collect the burning torch.
- Notice the mini-game on the door.
- Move down one time.
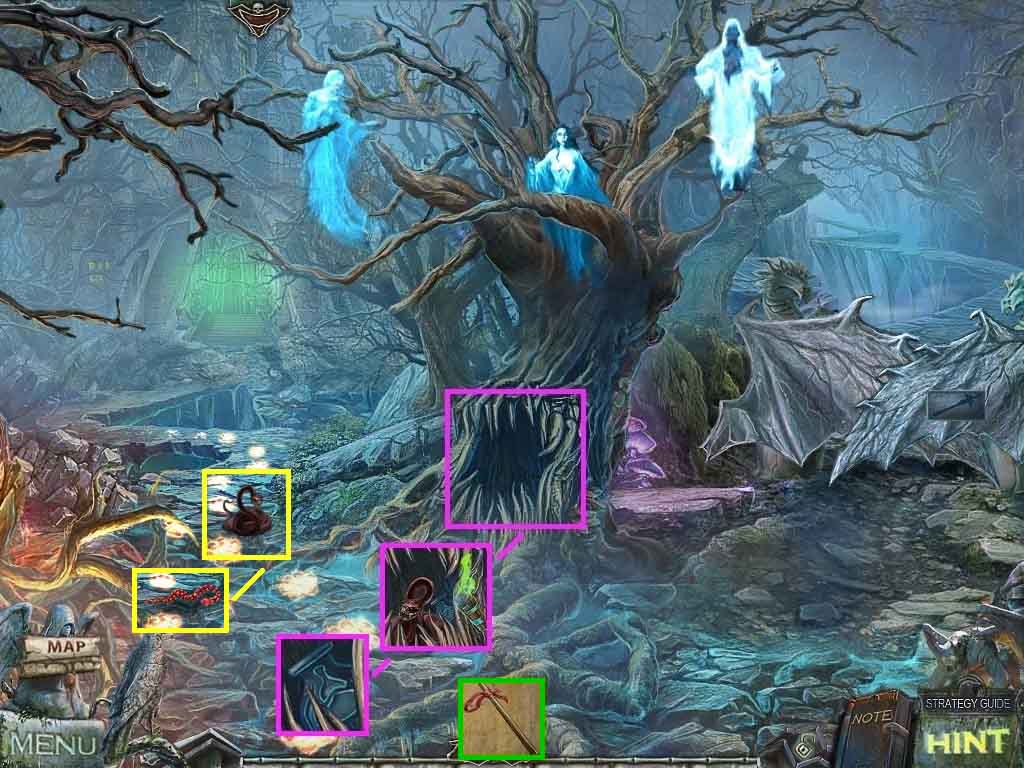
- Click the tree hollow.
- Select the burning torch and use it on the snake.
- Collect the 1 / 2 jars.
- Combine the magic ribbon and the stick to create the magic ribbon on a stick.
- Select the magic ribbon on a stick to use on the snake; collect the snake sign.
- Move ahead on the left side.
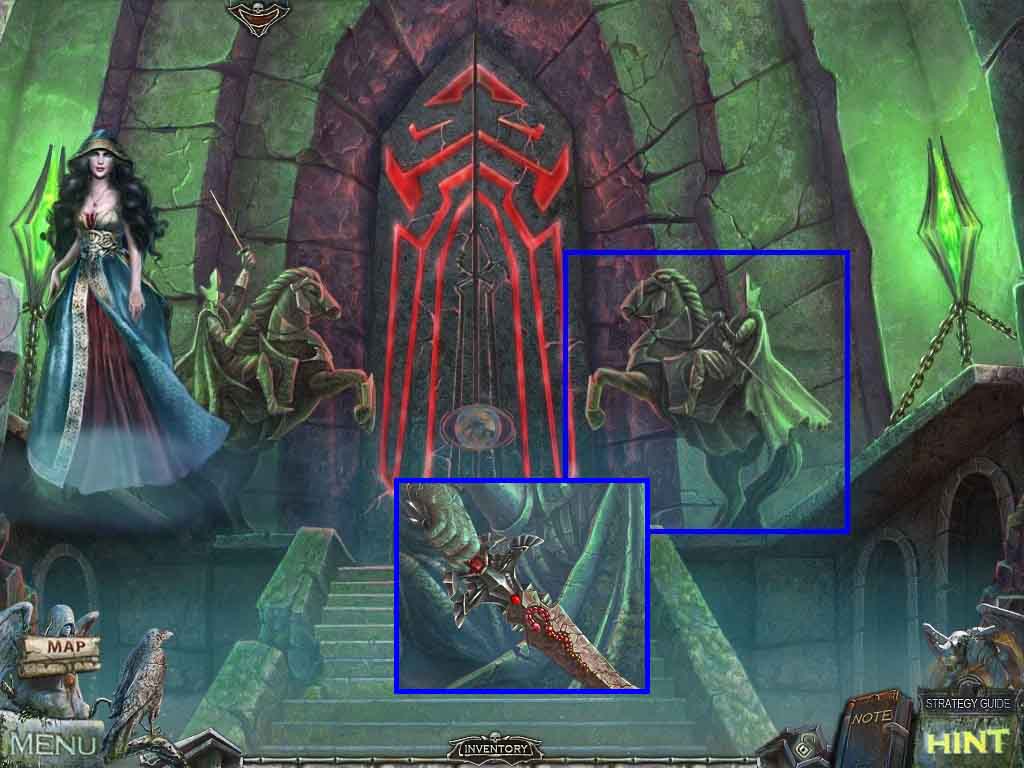
- Click the right statue; insert the snake sign and the sword hilt.
- Collect the sword.
- Move down once.
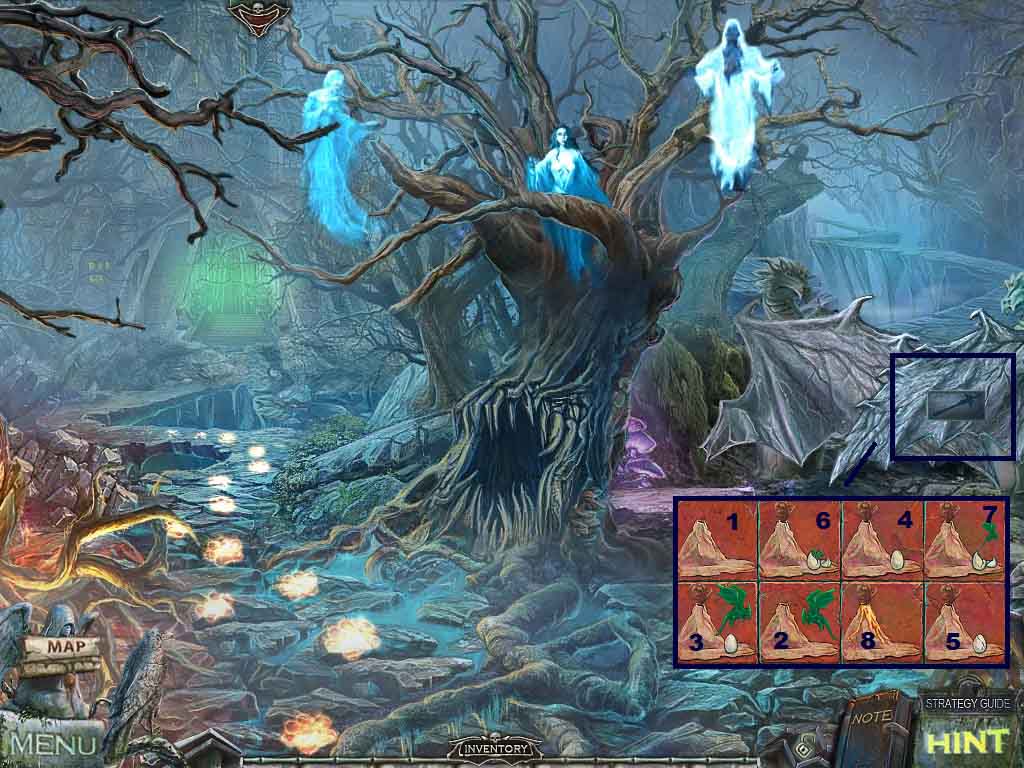
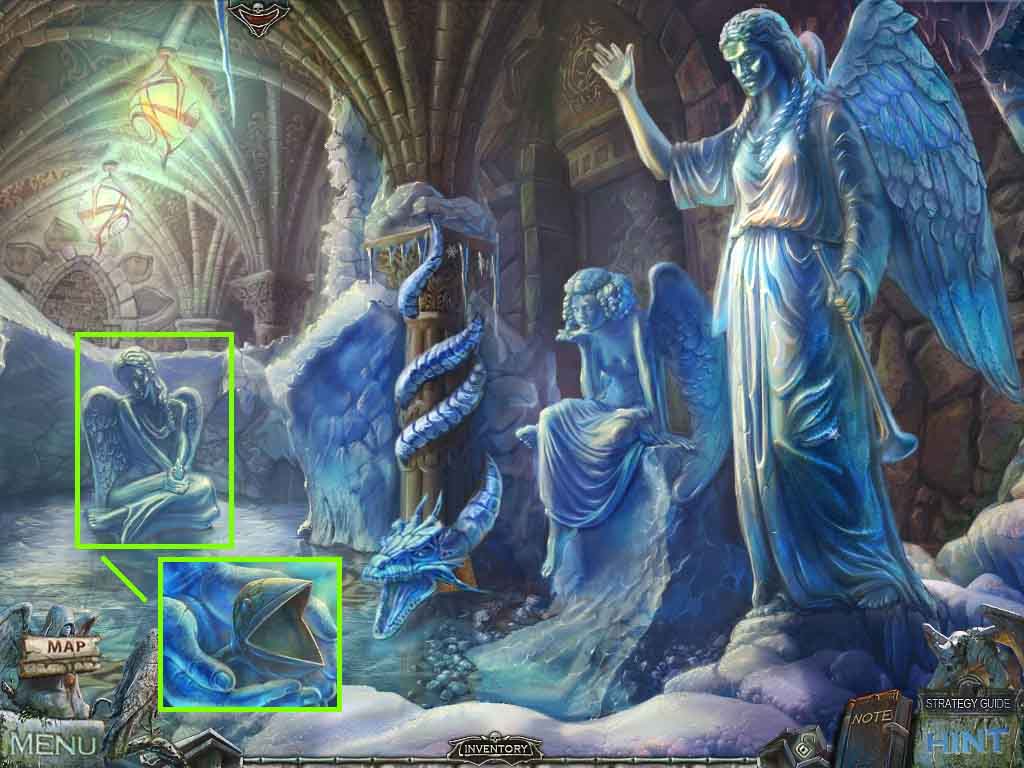
- Click the wings and insert the sword to trigger a mini-game.
- Click the tiles in order to tell the dragon’s story.
- Move to the path on the right.
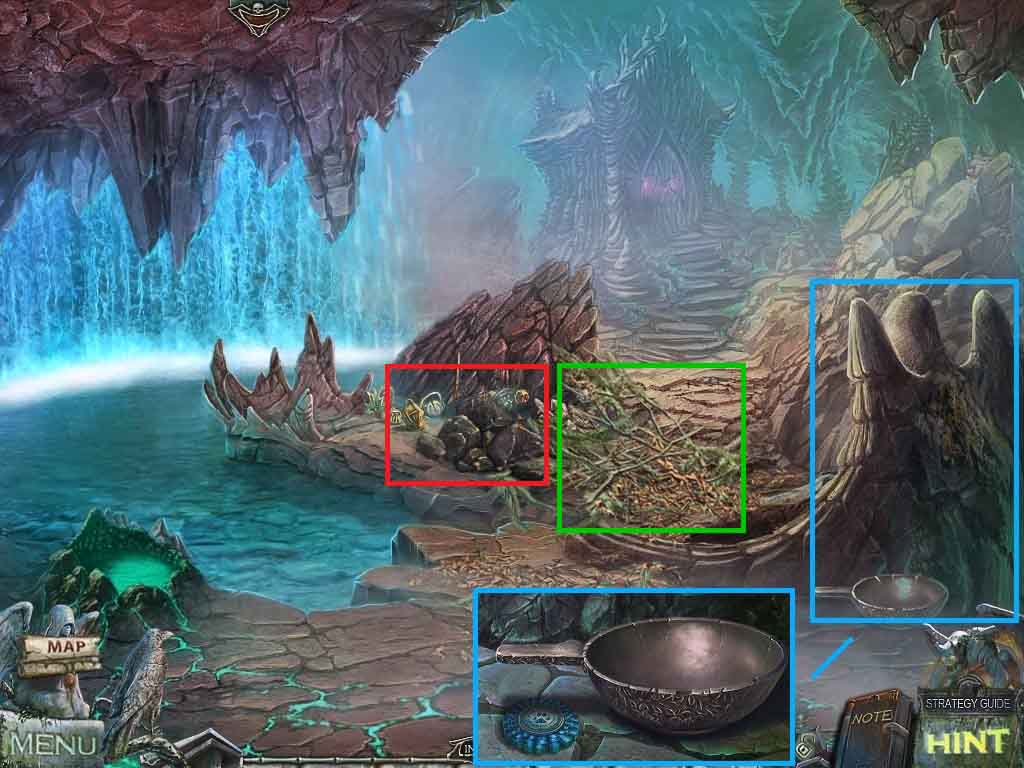
- Click the angel.
- Collect the medal and the bowl.
- Click the weeds.
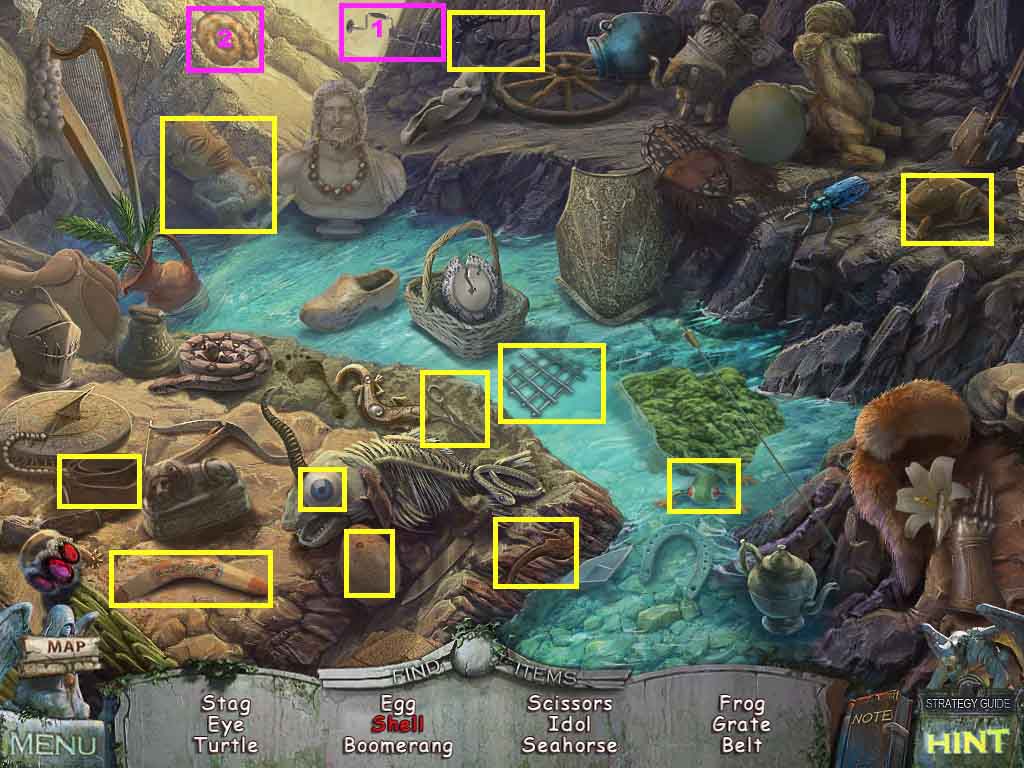
- Click the rocks to access a hidden objects area.
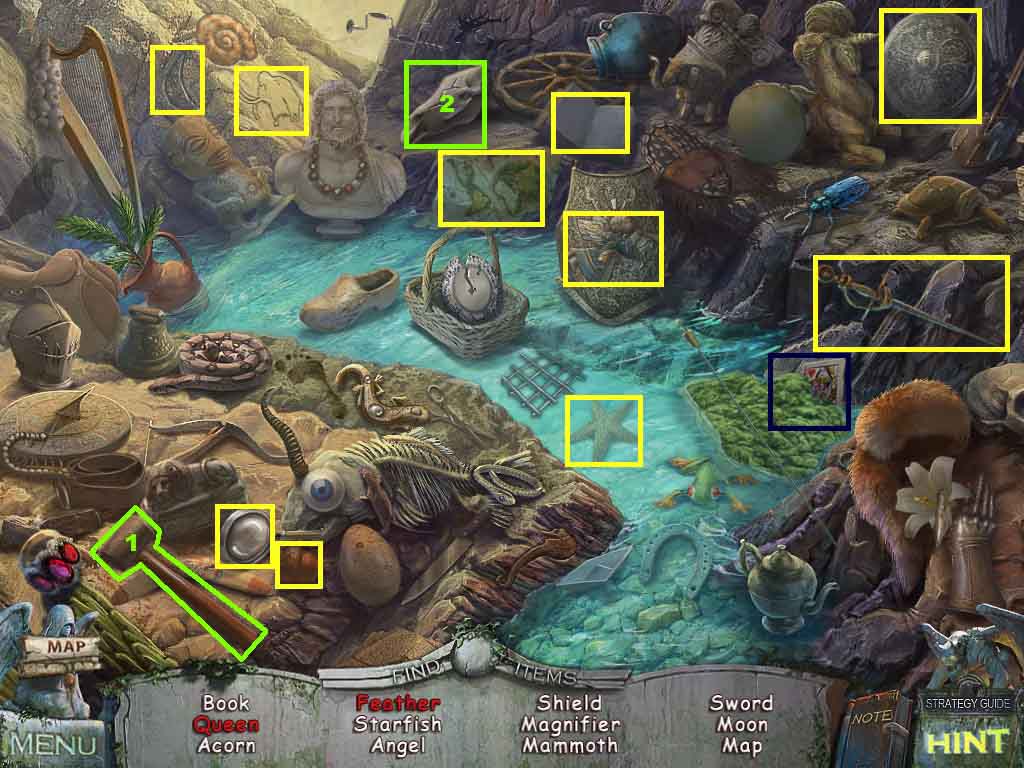
- Find the listed items.
- Click the algae to collect the queen.
- Select the hammer to smash the skull; collect the feather.
- Collect the 2 / 4 angel feathers.
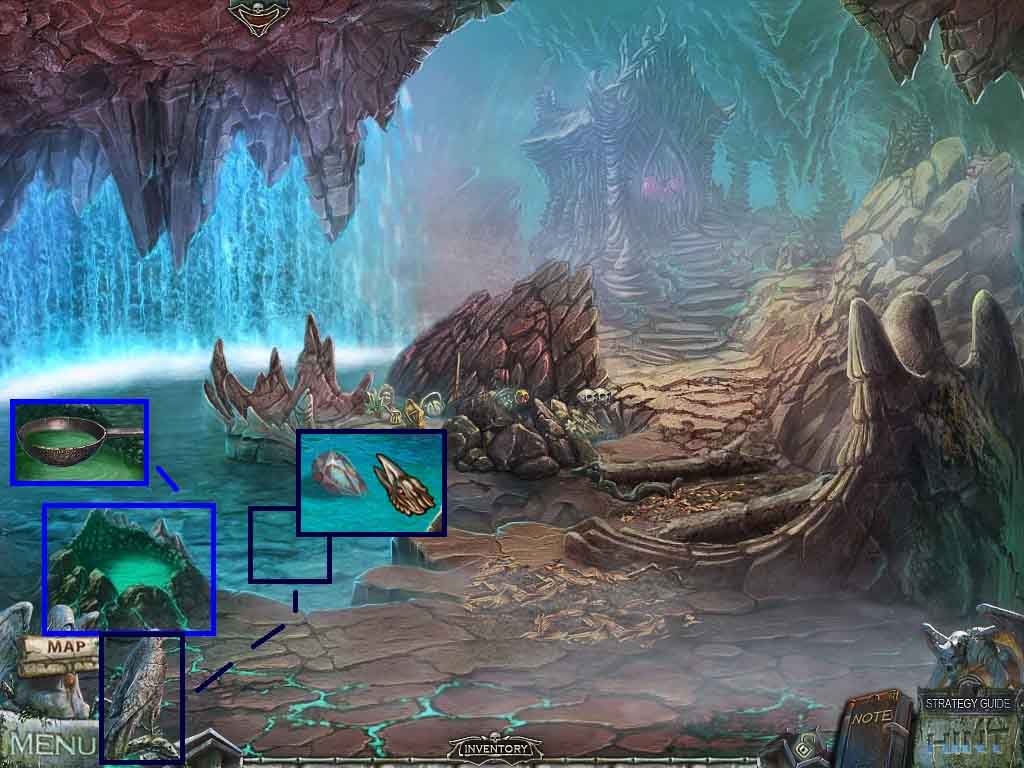
- Click the basin.
- Place the bowl into the water; collect the bowl of water.
- Click the water.
- Select the raven’s power of water to collect the 2nd ruby eye.
- Move ahead.
- Collect the 3 / 4 angel feathers.
- Click the cliff.
- Select the raven’s power of earth to collect the 2 / 2 part of the gate lock.
- Move down 3 times.
- Click the cave to access the hidden objects area.
- Find the items based on their silhouettes.
- Select the scissors to collect the sun shaped amulet.
- Place the empty ladle into the bowl; collect the ladle of liquid.
- Pour the ladle of liquid into the angel’s bowl.
- Insert the stone eye into the beast’s head.
- Select the metal shovel and place it into the coals; collect the shovel with coals.
- Pour the shovel with coals into the demons bowl.
- Insert the sun shaped amulet into the top of the frame; collect the miniature angel.
- Insert the miniature angel and the miniature demon into the painting.
- Collect the blunt spearhead.
- Click the figure; insert the 2 ruby eyes.
- Collect the tongs and the 2nd part of the bird key.
- Combine the 2 parts of the bird key to create the bird key.
- Move down 2 times and move to the left.
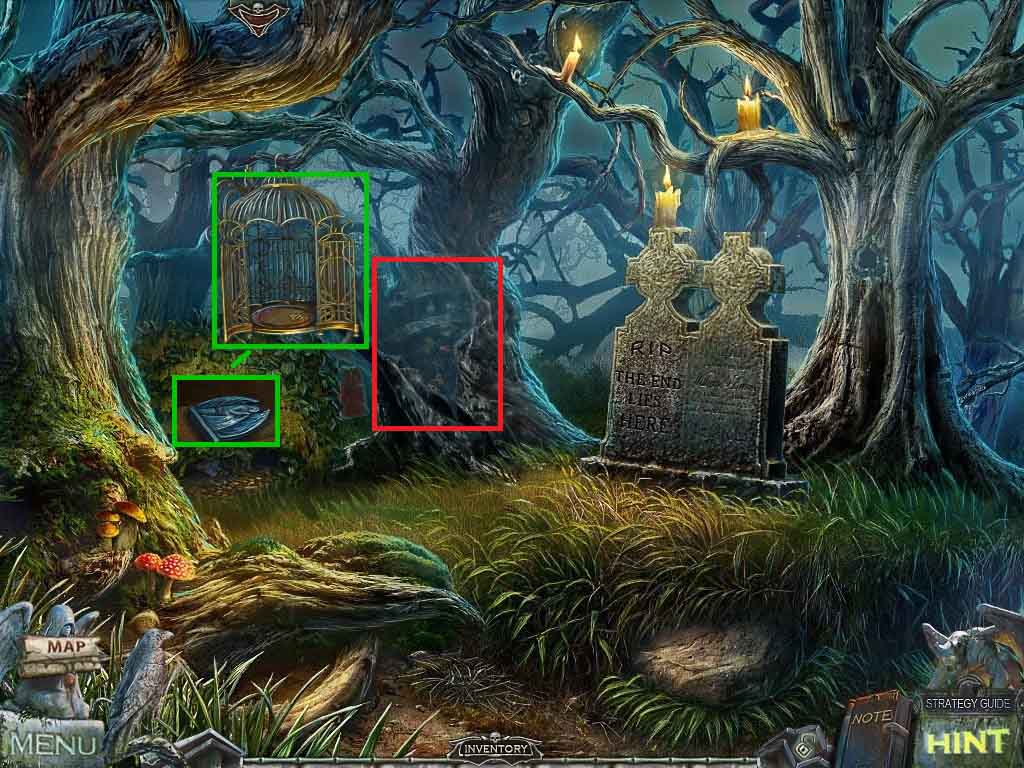
- Click the birdcage; insert the bird key into the lock.
- Collect the angel statuette.
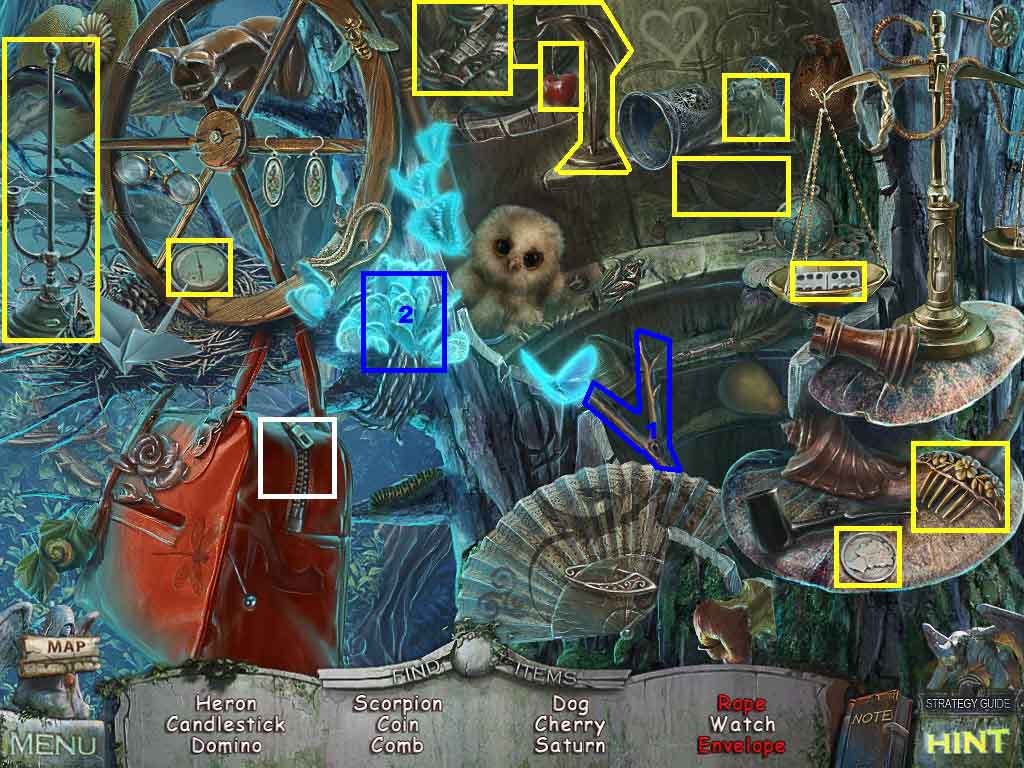
- Click the tree to access a hidden objects area.
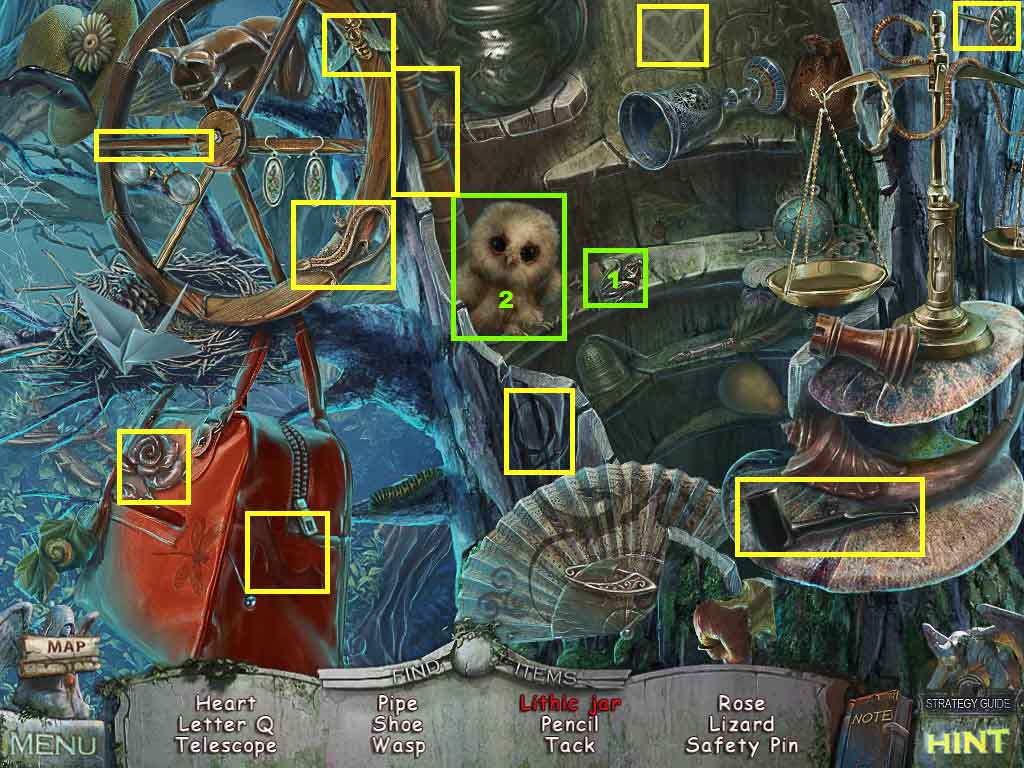
- Find the listed items.
- Give the baby owl the bug; collect the jar.
- Collect the 2 / 2 jars.
- Move down once and go to the right.
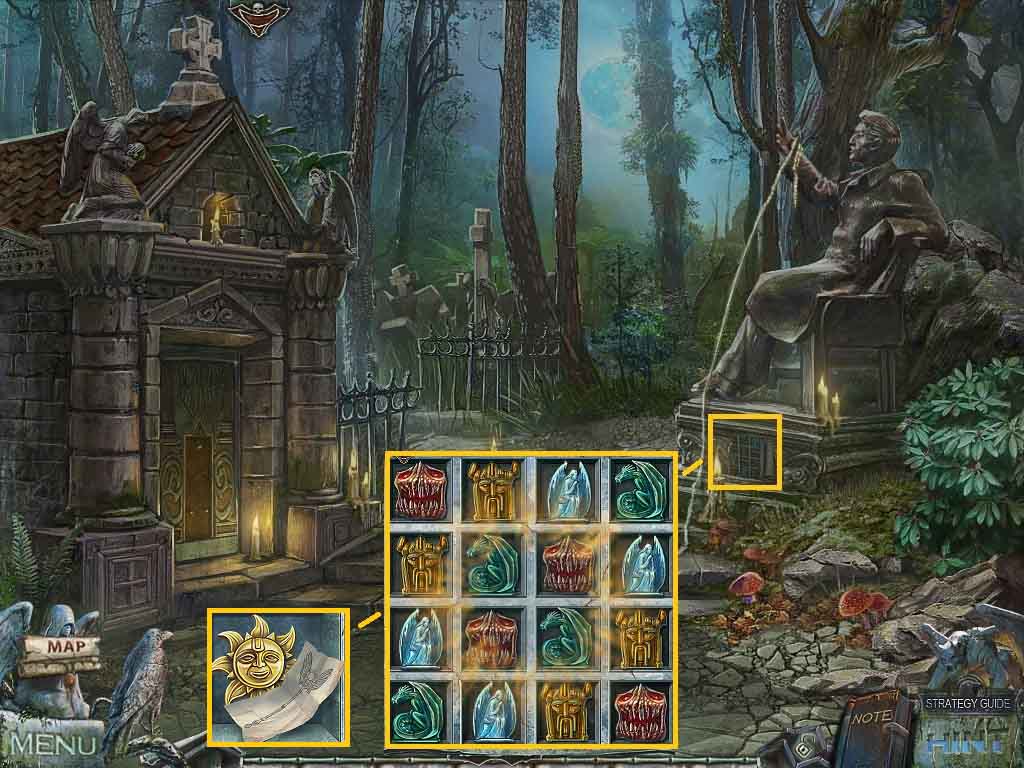
- Click the statue base to access a mini-game.
- Insert the angel statuette to trigger the game.
- Arrange the statuettes in a pattern that there are 4 different statuettes in each column and row.
- Read the note.
- Collect the staff solar disk.
- Move down once, move ahead and go into the crypt.
- Move down the stairs and go ahead on the left side.
- Click the door to access the mini-game.
- Insert the 2 parts of the gate lock and the round part of the gate lock.
- Click the ring and then click the dragon buttons to rotate the rings.
- Click the outer circle and click the right button two times.
- Click the 3rd circle and click the left button 4 times.
- Click the 2nd ring and click the right button 3 times.
- Click the 4th ring and click the right button 1 time.
- Click the 5th ring and click the right button 1 time.
- Move ahead.
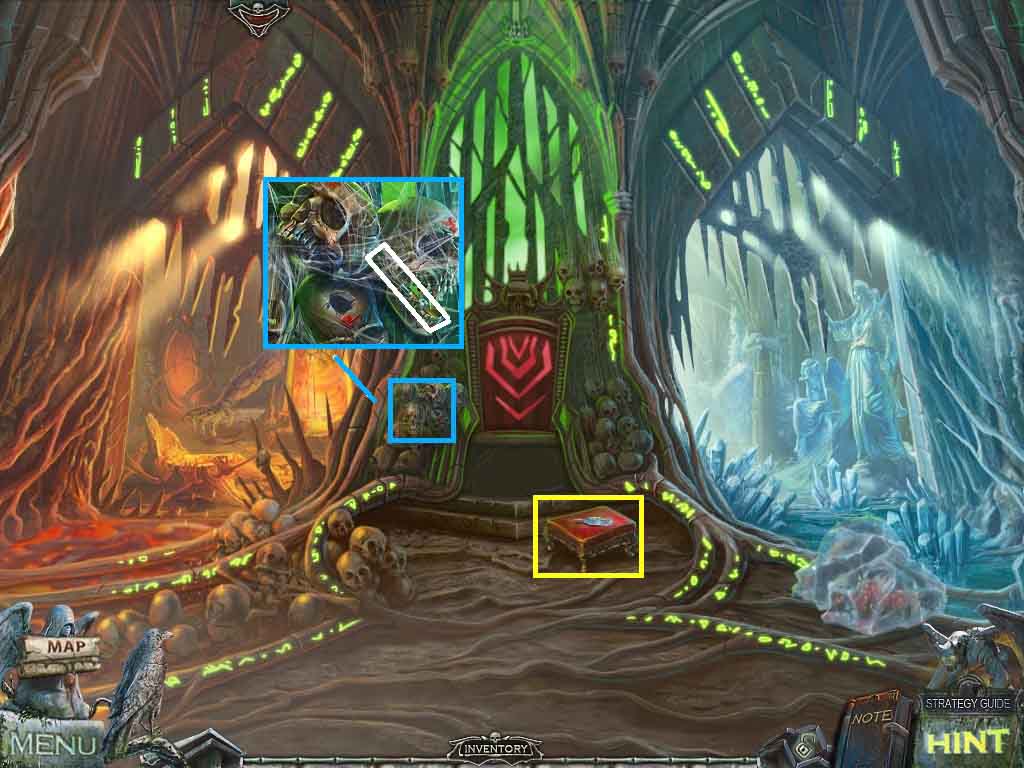
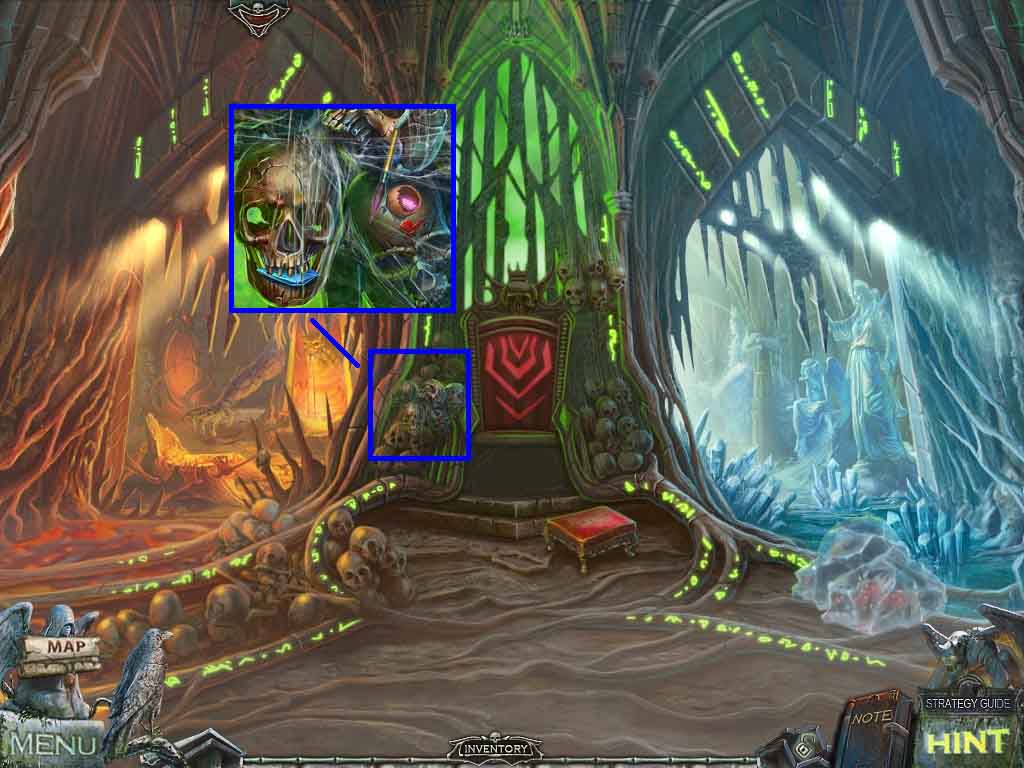
- Click the skull; collect the brush.
- Click the footstool; collect the 4 / 4 angel feather and the drawing.
- Notice the icy path.
- Move ahead on the fiery path.
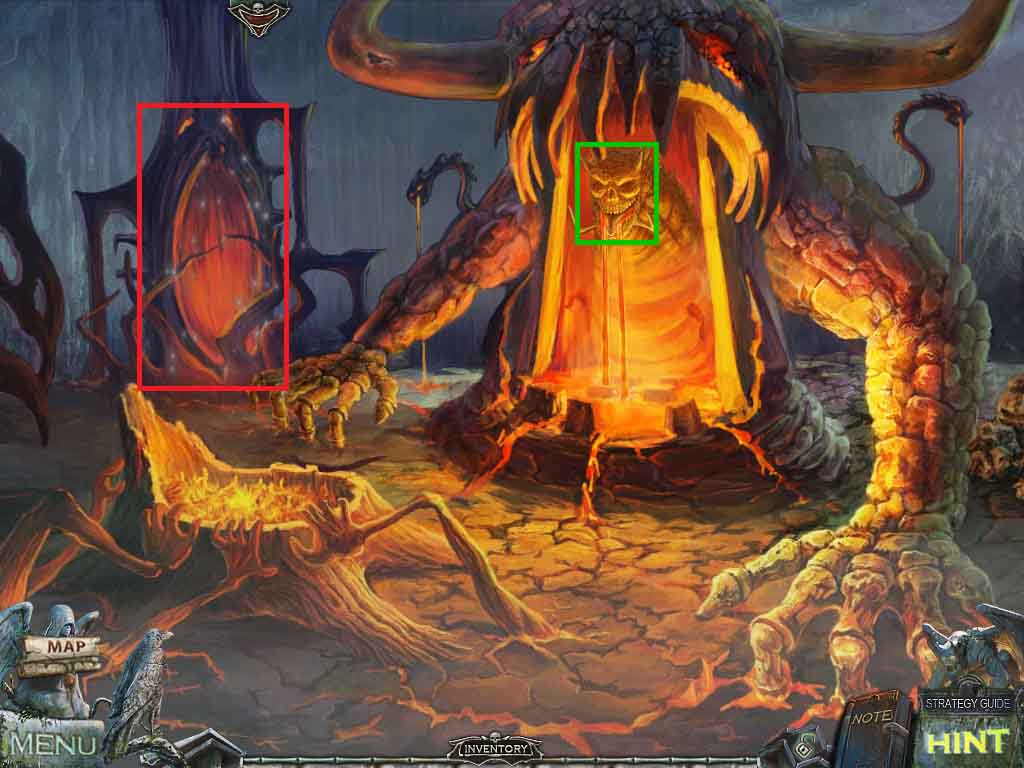
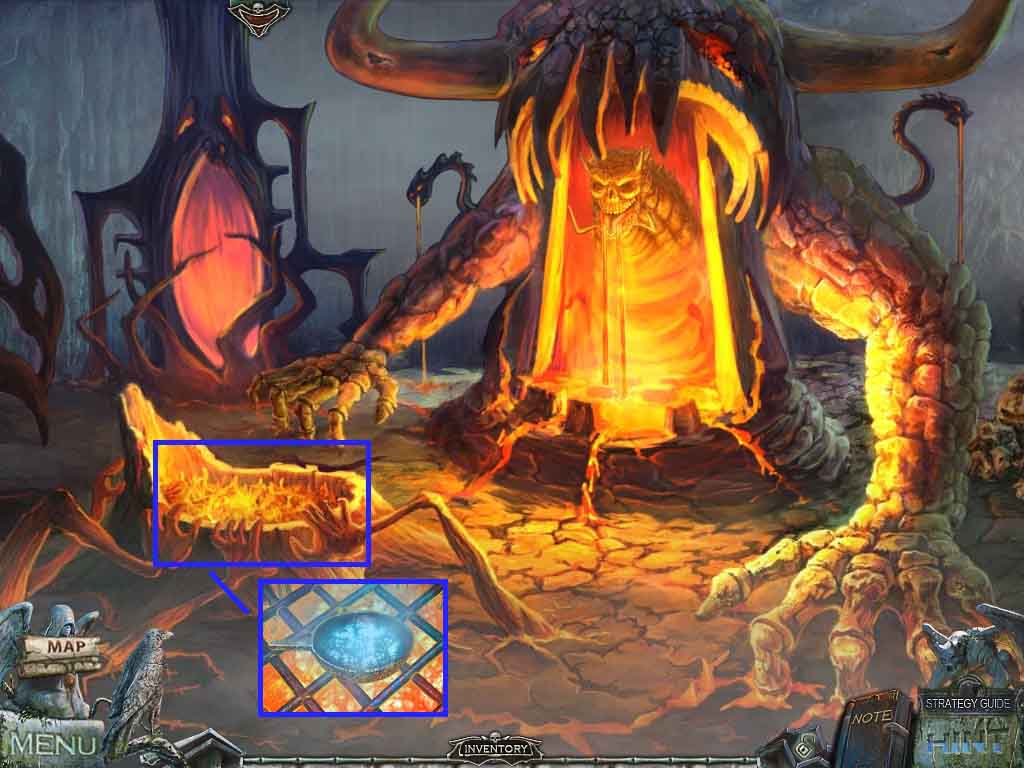
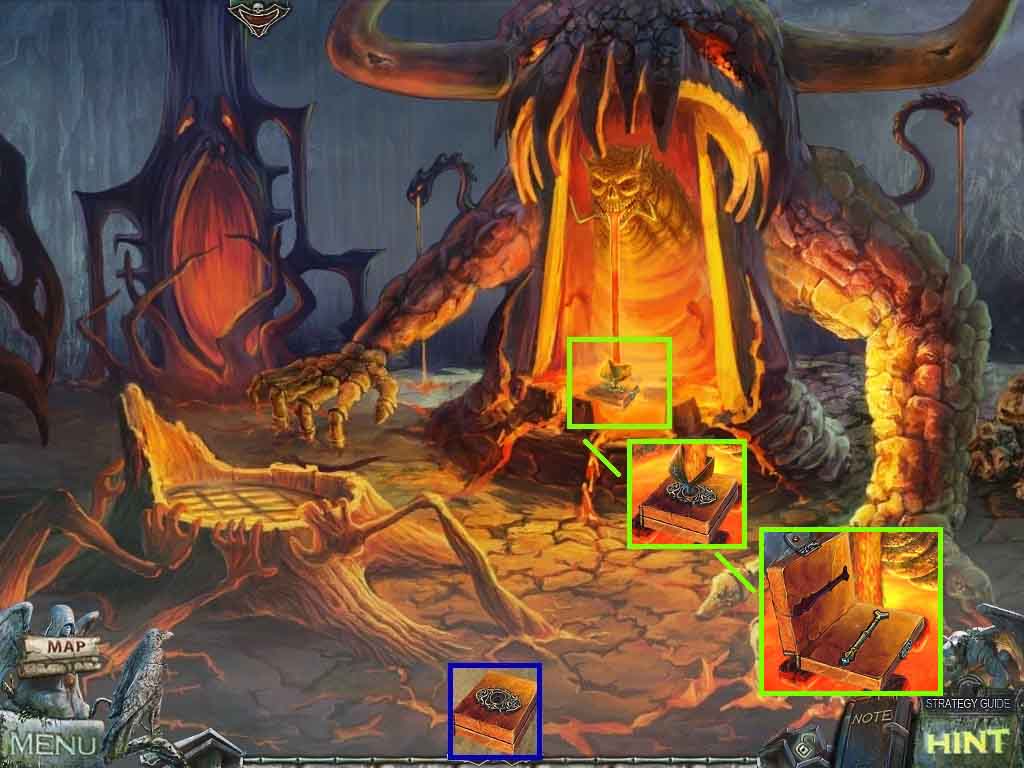
- Notice the crater.
- Click the demon head; open the jaw.
- Click the work area to access the hidden objects area.
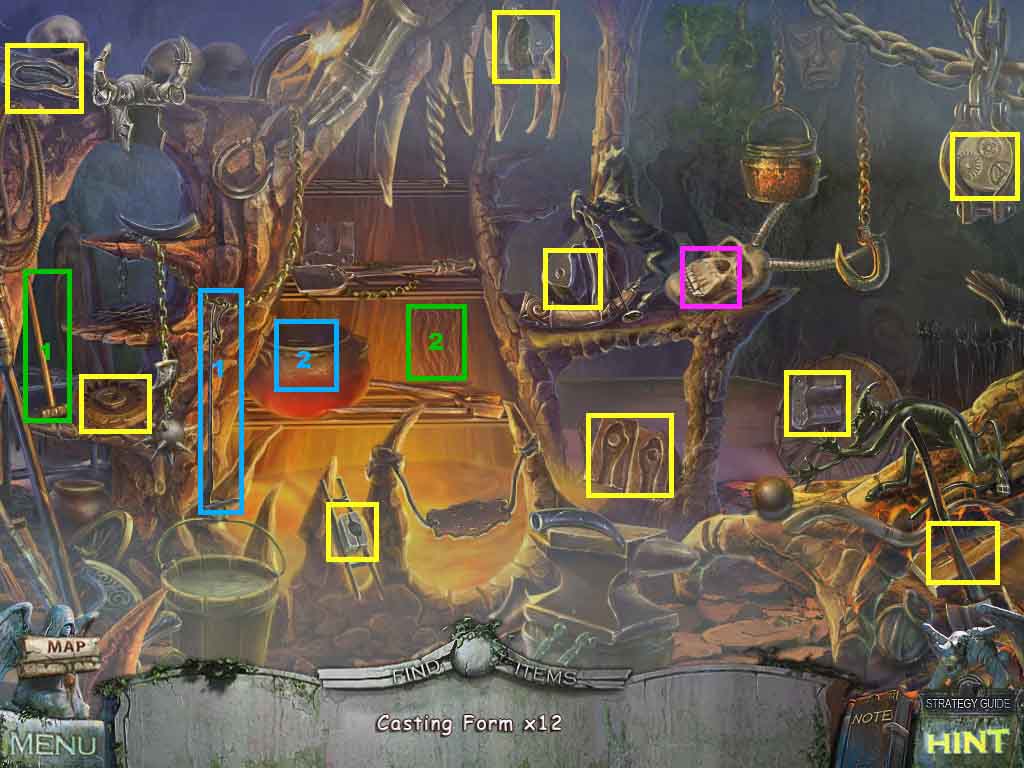
- Find all the casting forms.
- Click the jaw on the skull; collect the form.
- Place the ladle into the pot; collect the form.
- Select the hammer and use it to smash the carving; collect the form.
- Collect the 1st half of the casting form.
- Move down and then forward on the icy path on the right.
- Notice the sitting angel.
- Notice the strange snake.
- Click the angel’s wing to access a mini-game.
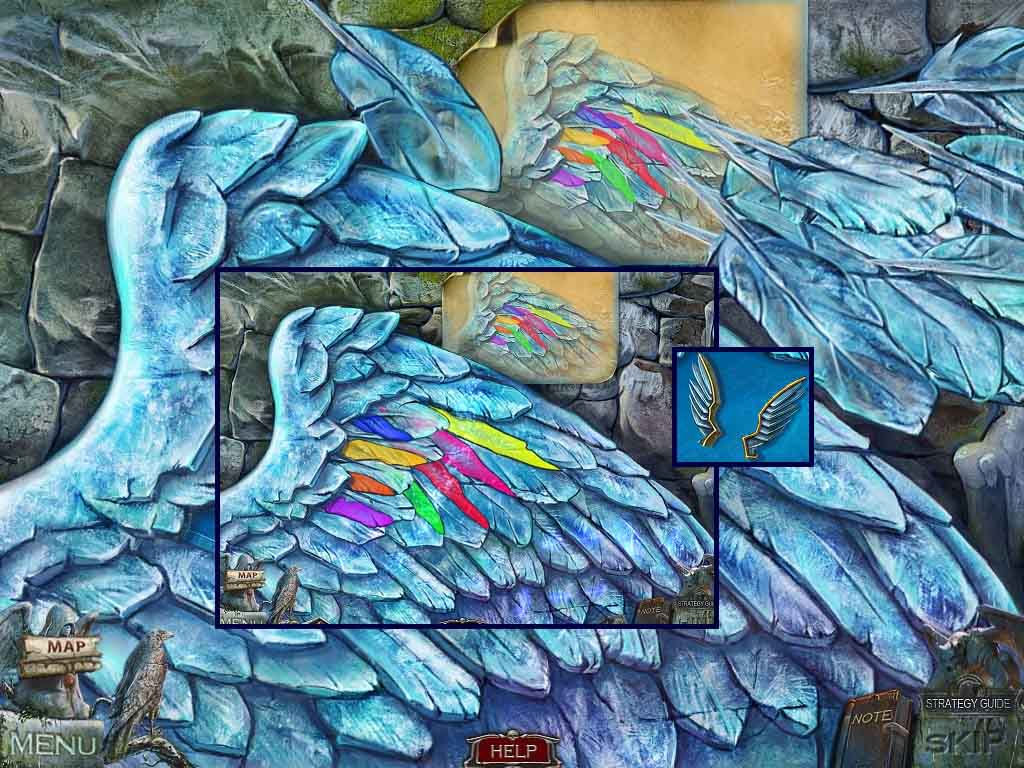
- Insert the 4 angel feathers onto the stone to trigger the game.
- Insert the longest feathers on the edges.
- Insert the color matched feathers.
- Collect the staff wings when the game is complete.
- Move down 3 times.
- Click the mushrooms; collect the 1st diamond tooth.
- Insert the nutshell onto the mushroom.
- Select the scraper and use it on the larger mushroom.
- Collect the mushroom dust.
- Move forward on the left path and move ahead.
- Pour the mushroom dust into the skull hole.
- Dip the brush into the mushroom dust; collect the 2nd diamond tooth.
- Move down 2 times, go down the right path and move ahead.
- Click the carving and insert the 2 diamond teeth.
- Select the blunt spearhead and use it on the teeth to create the sharp spearhead.
- Click the skull door to access a mini-game.
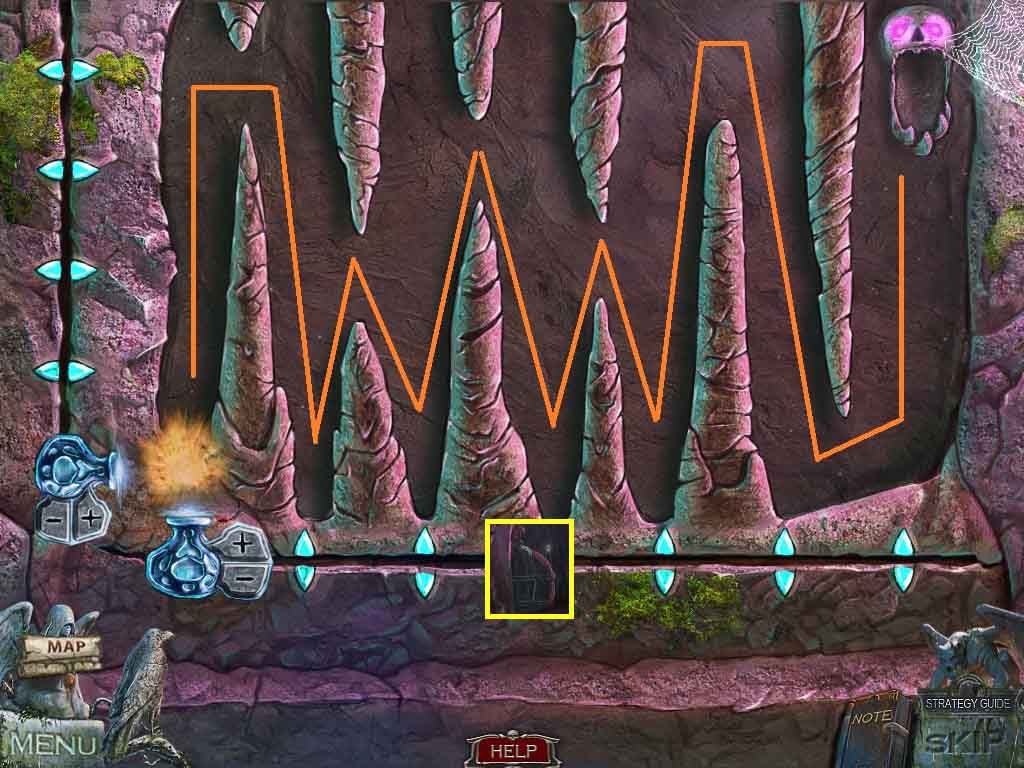
- Insert the 2 jars and the fireball to trigger the mini-game.
- Move the fireball to the skull.
- Collect the magic cage.
- Move down 2 times, go ahead on the left side and move ahead once more.

- Click the footstool.
- Select the sharp spearhead to cut the cloth; collect the token.
- Select the magic cage to use on the demon.
- Move down 2 times and move ahead on the right side.
- Click the rocks to access a hidden objects area.
- Find all the listed items.
- Select the hand drill on the shell; collect the shell.
- Collect the grate.
- Move down once, go to the left and move ahead and go to the left once again.
- Click the crater; place the grate over the lava.
- Lay the bowl of water onto the grate; collect the bowl of hot water.
- Move down once, go forward to the right.
- Click the angel.
- Pour the bowl of hot water onto the sphere.
- Collect the funnel.
- Move down and move ahead on the left.
- Click the alcove to access the hidden objects area.
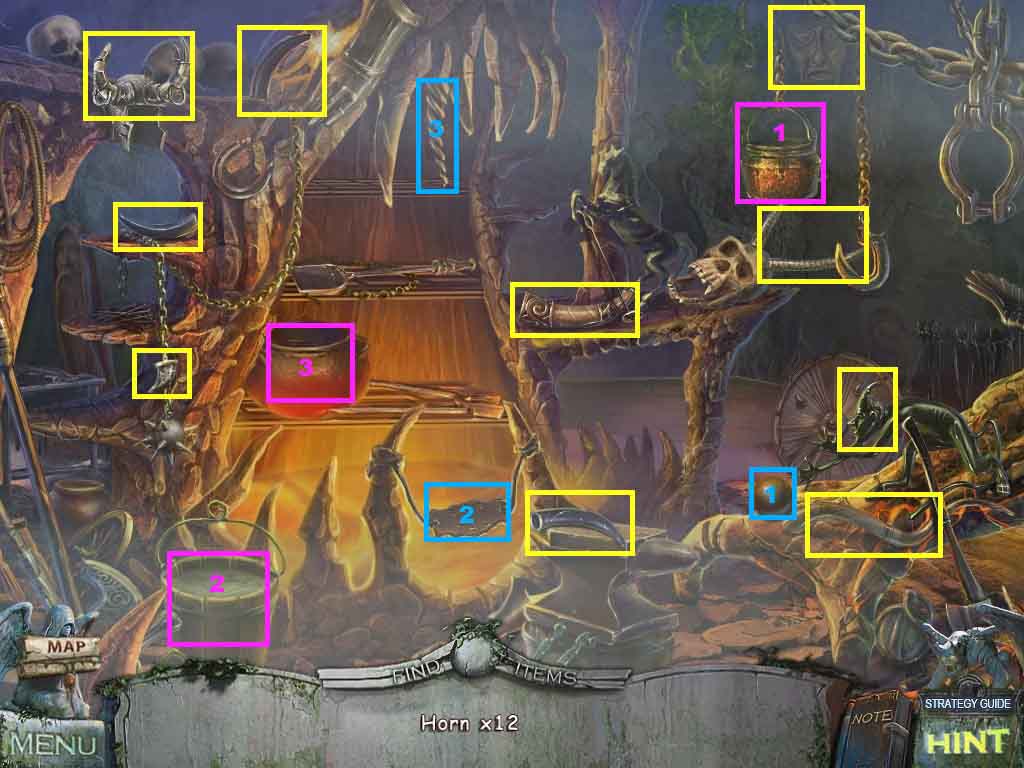
- Find the horns.
- Place the ball into the slingshot; collect the horn.
- Place the teapot onto the bucket and then on the cauldron.
- Collect the horn.
- Move down once, move forward on the right side.
- Click the strange snake and attach the horn onto the head.
- Click the base of the pedestal.
- Collect the medal and the 2nd half of the casting form.
- Move down and move ahead to the left.
- Combine the 2 halves of the casting forms to create the casting form.
- Click the pit and place the casting form onto the stones.
- Insert the funnel.
- Click the demon head and click the jaw closed.
- Click the pit and select the tongs to open the mold.
- Collect the part of the magic staff.
- Move down 2 times.
- Combine the part of the magic staff with the staff solar disk to create the magic staff.
- Give Hina the magic staff; collect the magic staff once again.
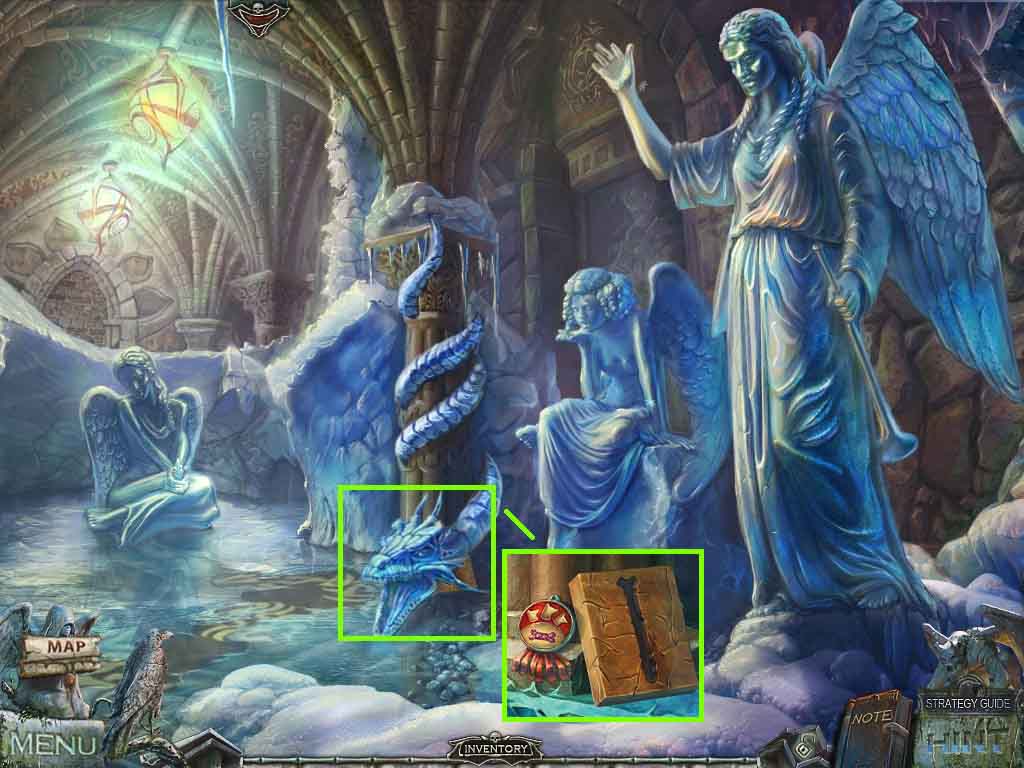
- Move ahead.

- Select the magic staff to use on the cage.
- Place the collar onto the dog.
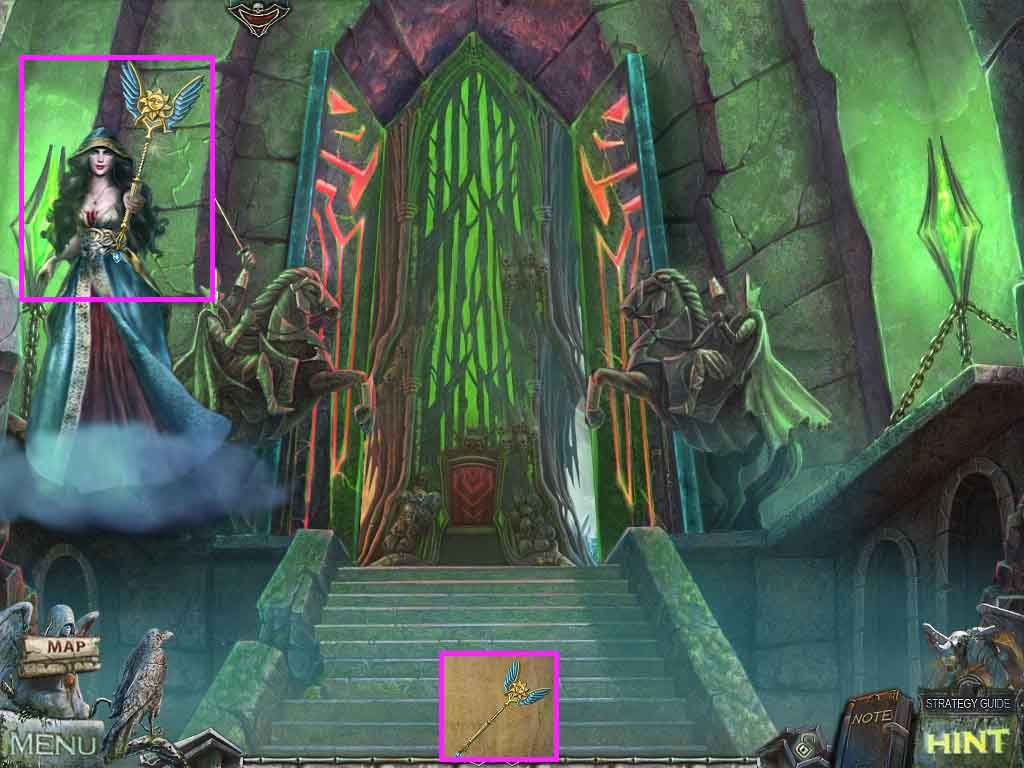
- Speak to Hina.
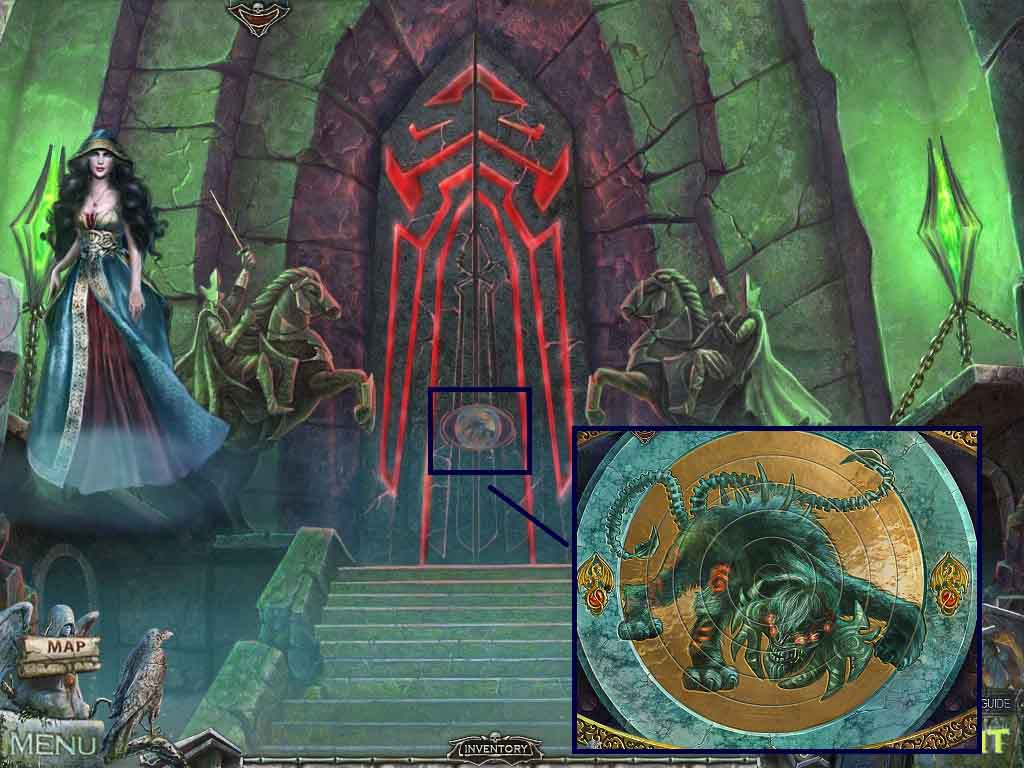
- Go into the portal above the throne.
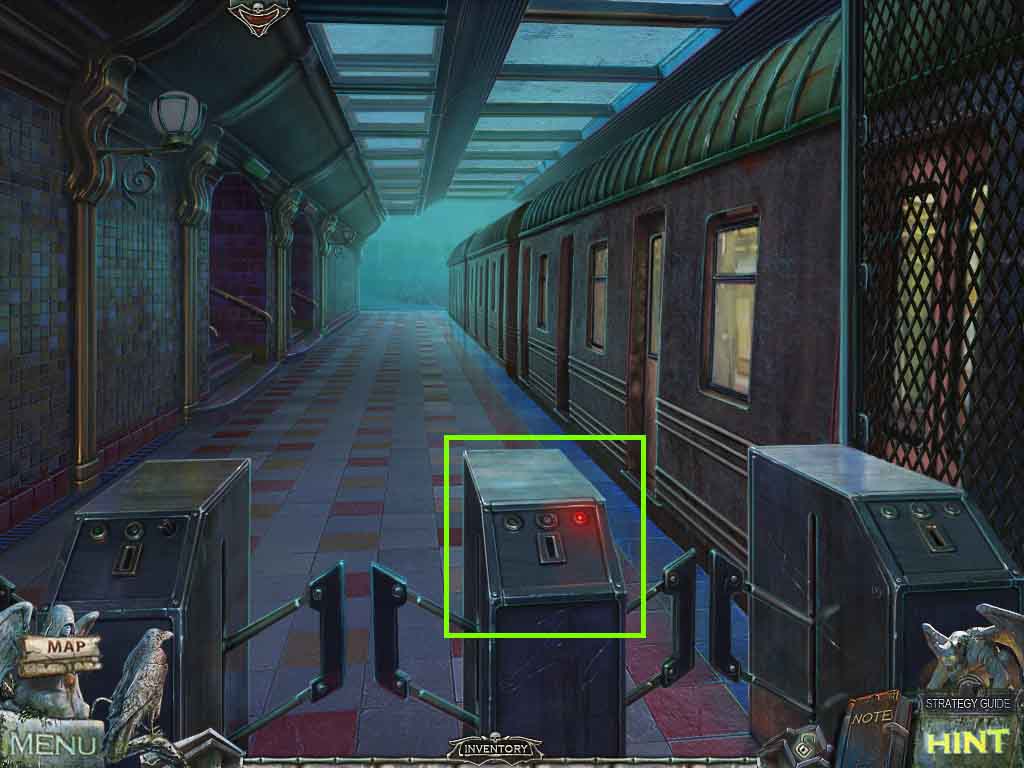
- Click the turnstile.
- Insert the token into the slot.
Congratulations! You have successfully completed Redemption Cemetery: Salvation of the Lost Collector’s Edition!