
Princess Isabella: The Rise of an Heir: Chapter Two: The Exploration
Our Princess Isabella Rise of an Heir Walkthrough will be a great asset on your journey as you help Bella once again in this stunning conclusion to the Princess Isabella trilogy. Use our detailed, chapter-by-chapter instructions, our custom screenshots marked with key item locations, and our puzzle solutions to help free your Fairy Godmothers, save your mother, and defeat the evil witch once and for all.
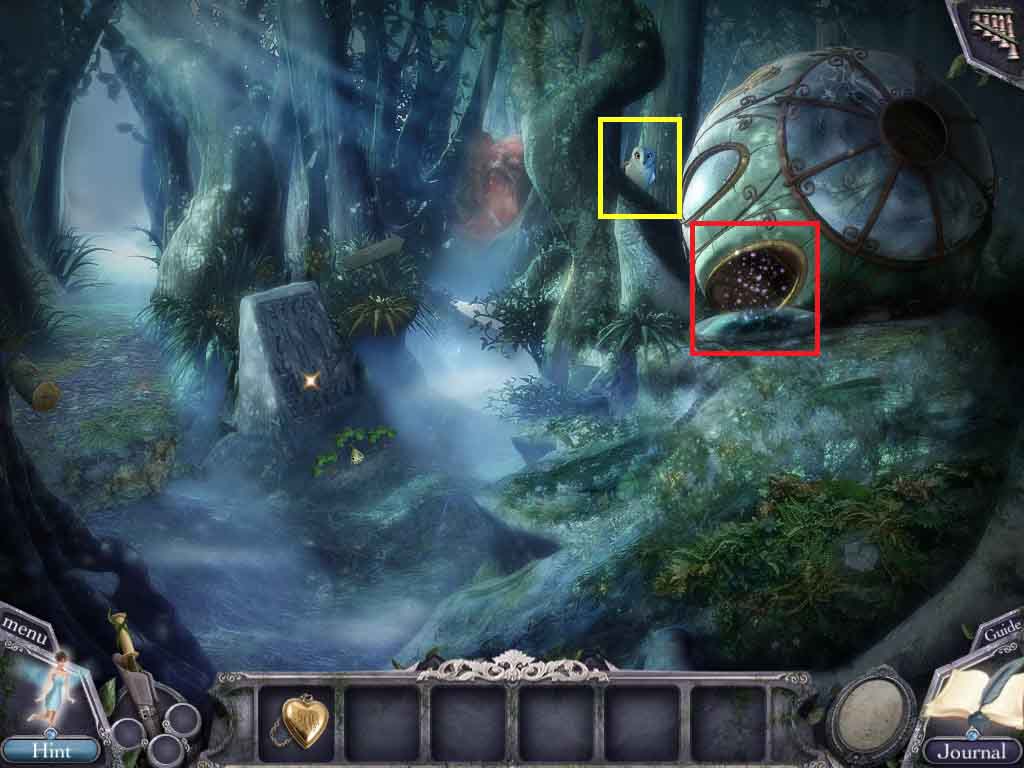
- Speak to the owl.
- Click the landing pod to access a hidden objects area.
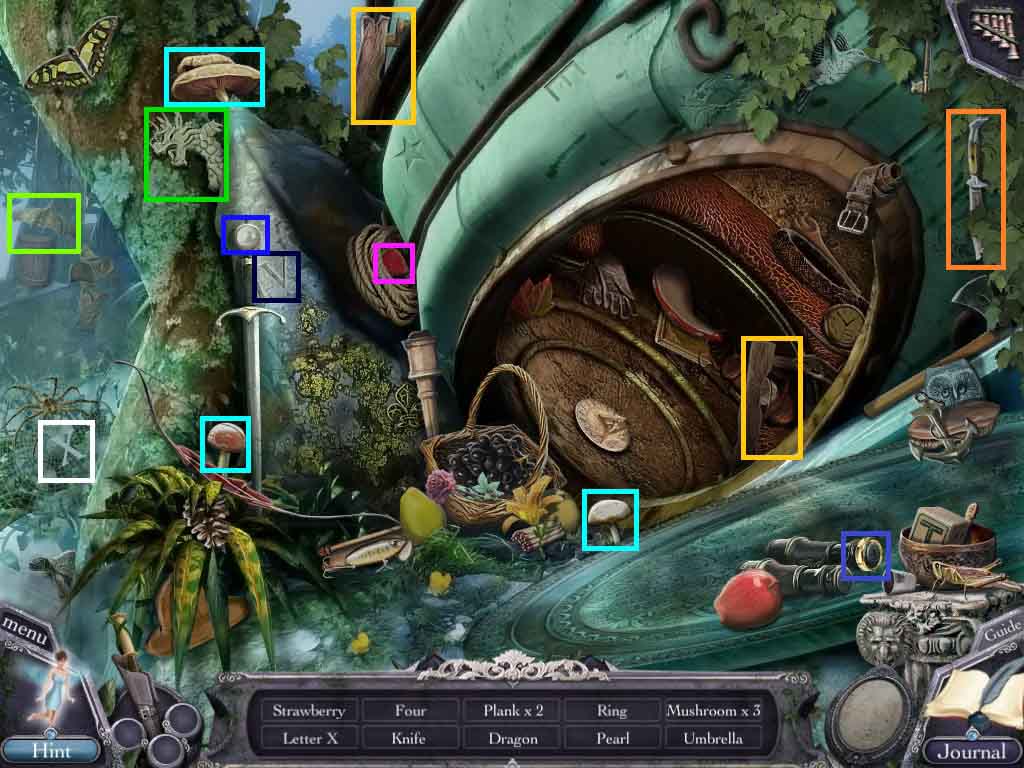
- Find the listed items.
- Collect the 2 wooden planks.
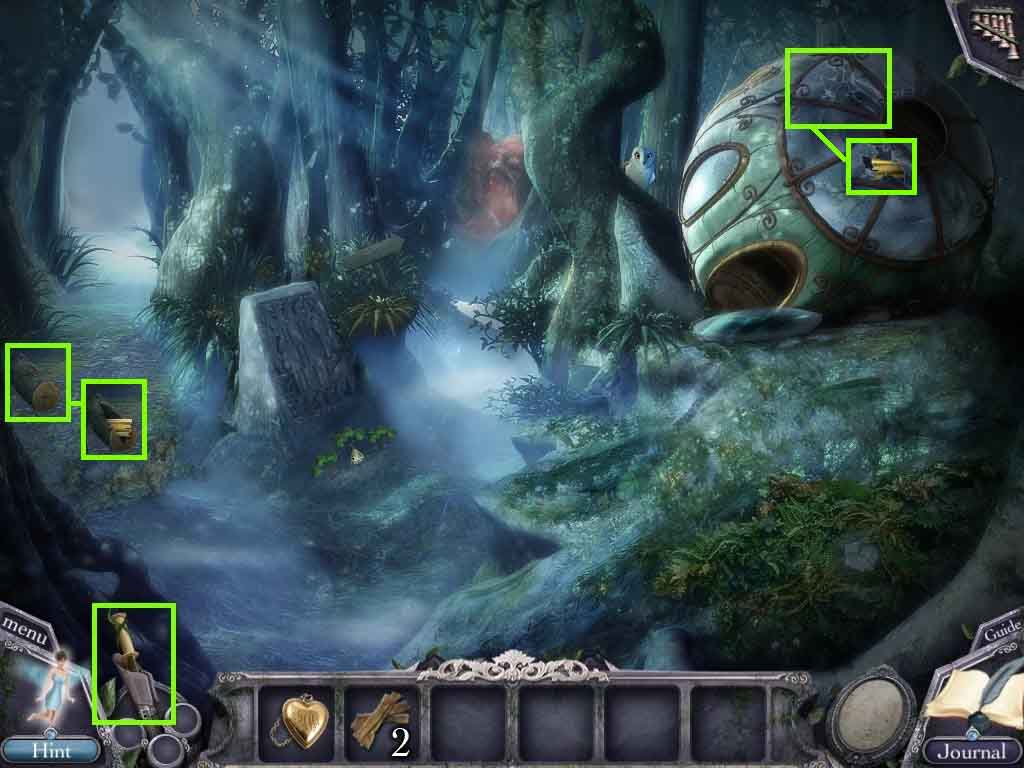
- Select the magic wand; use it to crack the log.
- Collect the portrait piece 1 /10.
- Select the magic wand; use it to break the window.
- Collect the portrait piece 2 / 10.
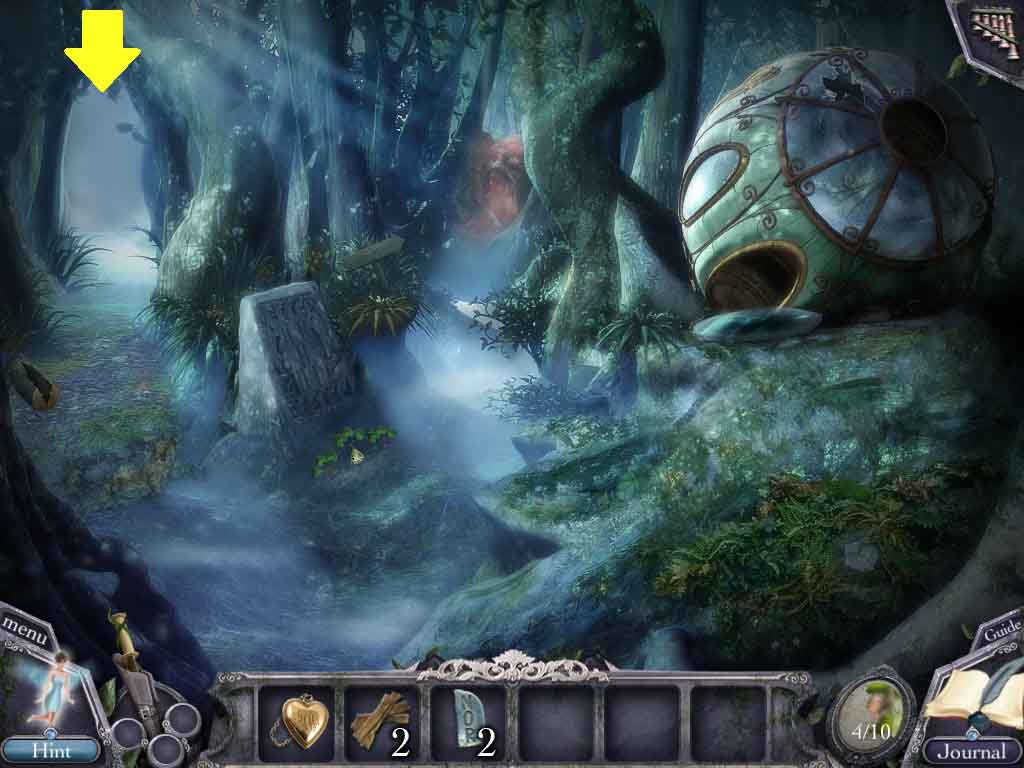
- Go to the middle path to the Spider Forest.
- Click the log to access a hidden objects area.
- Find the listed items.
- Collect the glyph stone 1 / 3.
- Move through the skull path to the Swamp area.
- Use the dragon’s flute to move the 3 monuments.
- Collect the glyph stone 2 / 3.
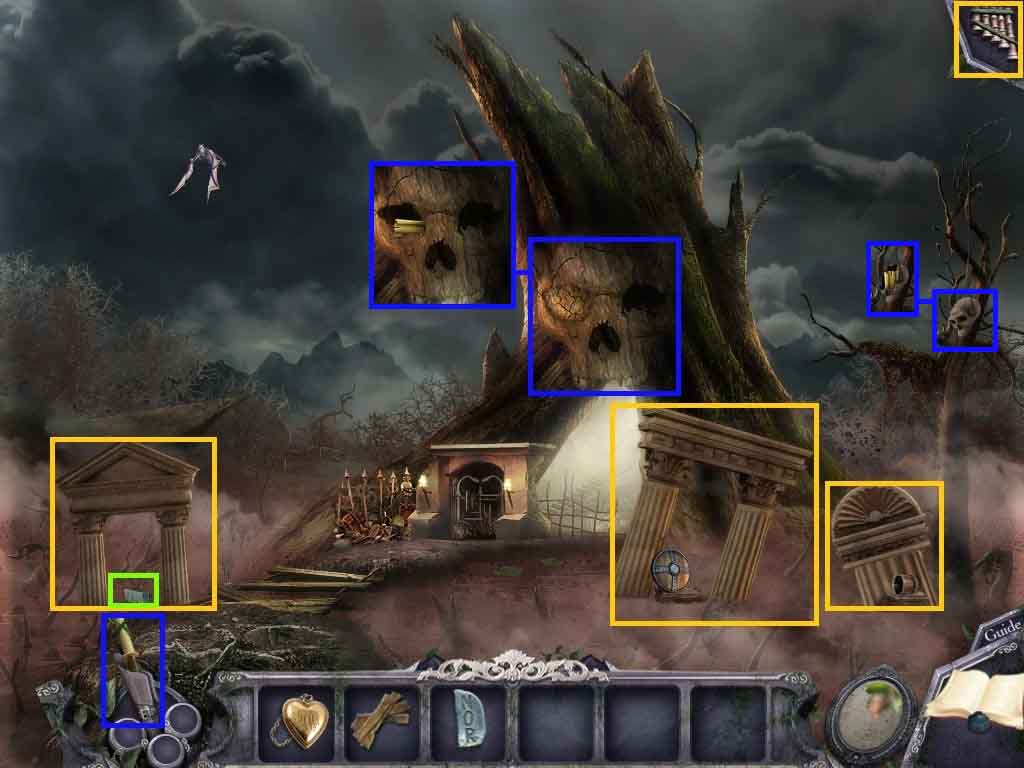
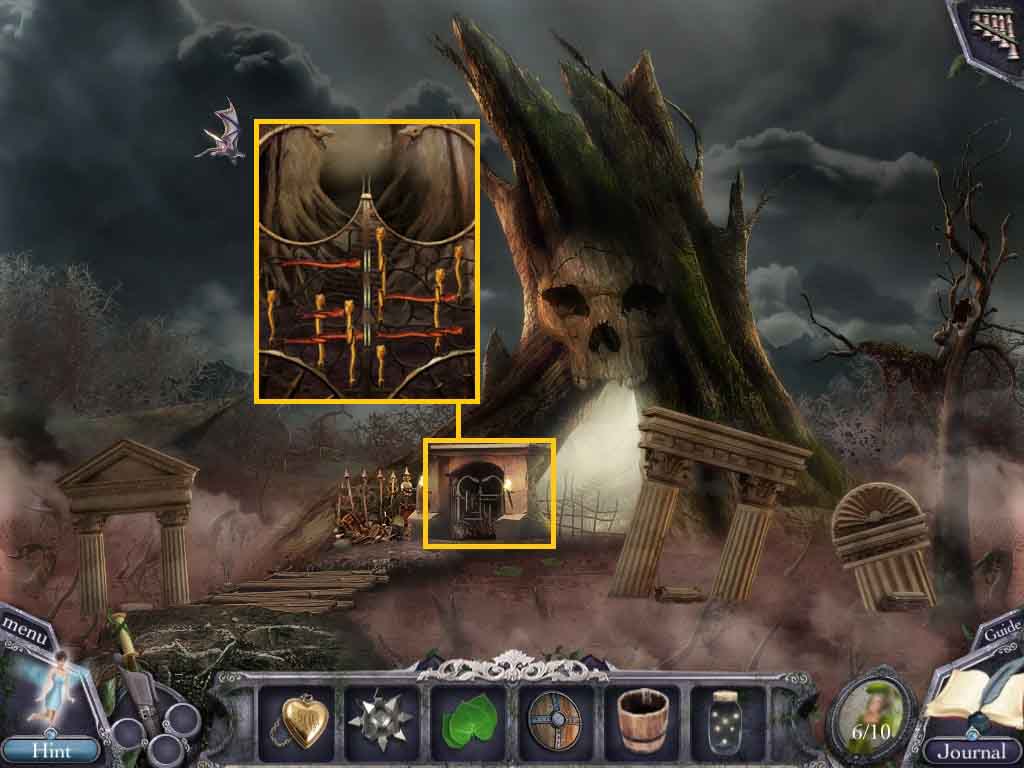
- Select the magic wand and use it on the skull eye; collect the portrait piece 3 / 10.
- Select the magic wand and use it on the skull; collect the portrait piece 4 / 10.
- Move to the Crash Landing pod area.
- Move to the left path to the dock area.
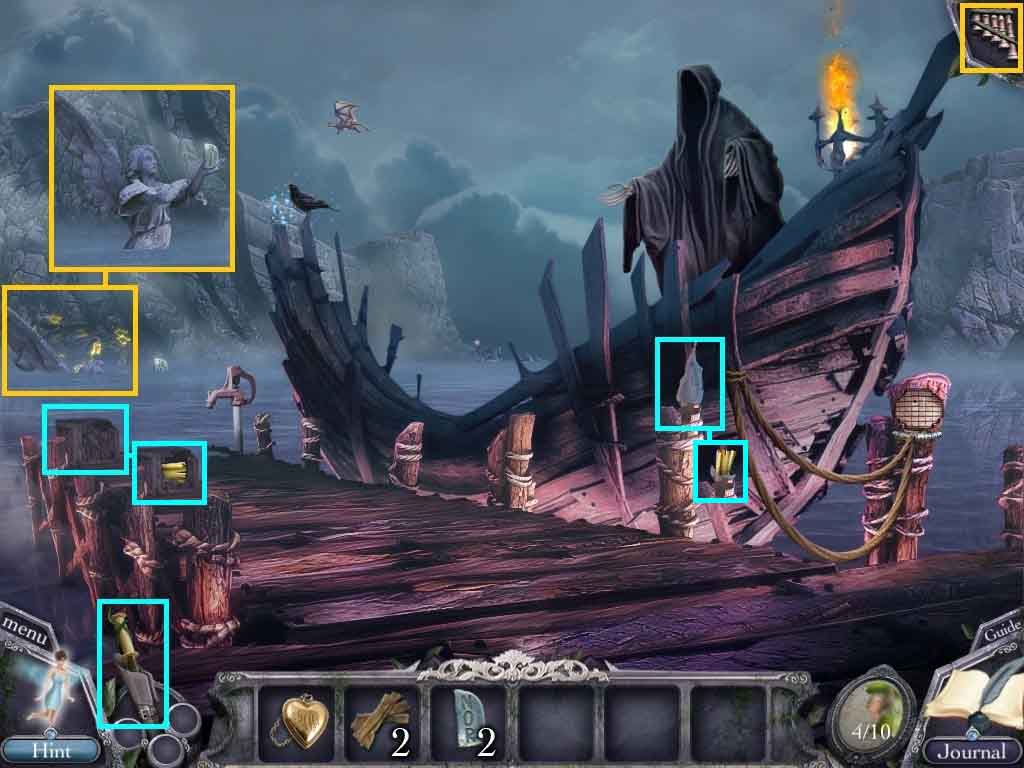
- Select the magic wand and use it on the crate; collect the portrait piece 5 /10.
- Select the magic wand and use it on the ice flame; collect the portrait piece 6 /10.
- Use the dragon’s flute to move the statue out of the water.
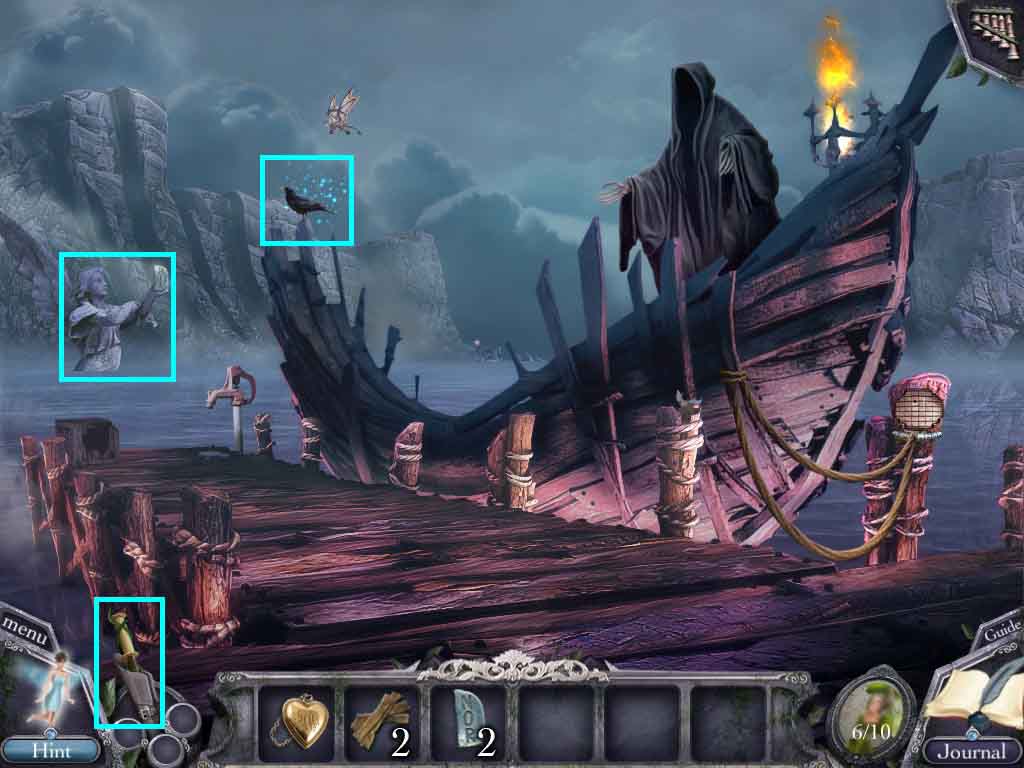
- Select the magic wand and use it on the crow and then click the statue.
- Collect the glyph stone 3 / 3.
- Move to the Crash Landing pod area.
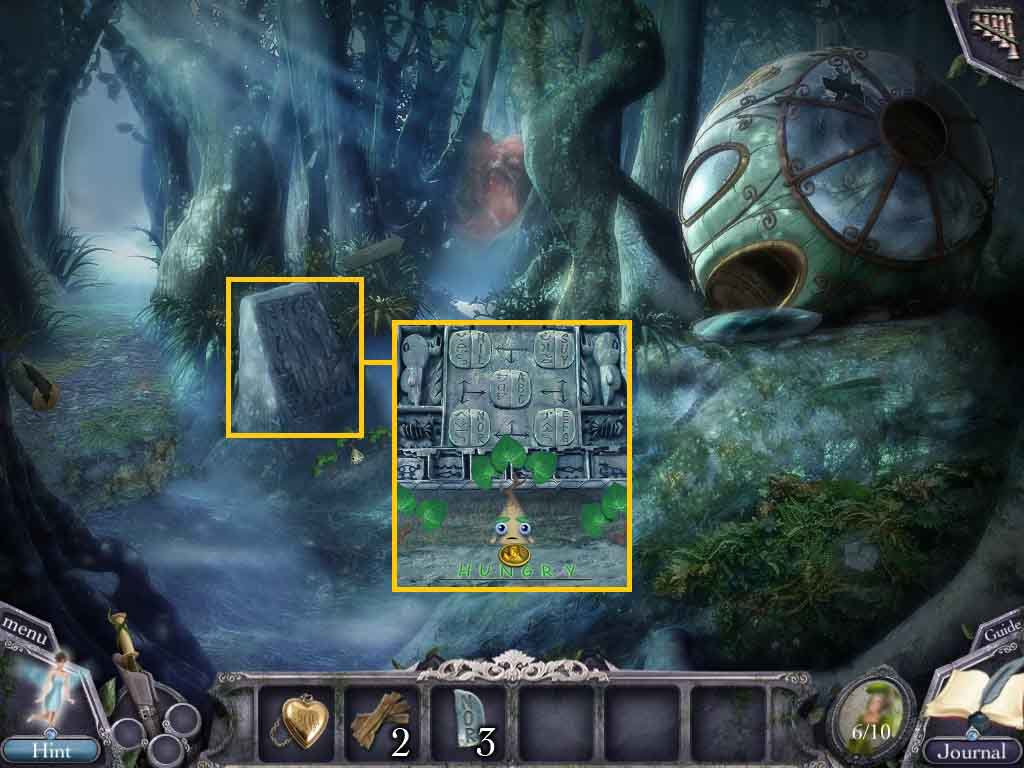
- Click the stone tablet; insert the 3 glyph stones to trigger a mini-game.
- Move the glyph stones into the correct order; collect the coin.
- Move to the dock area.
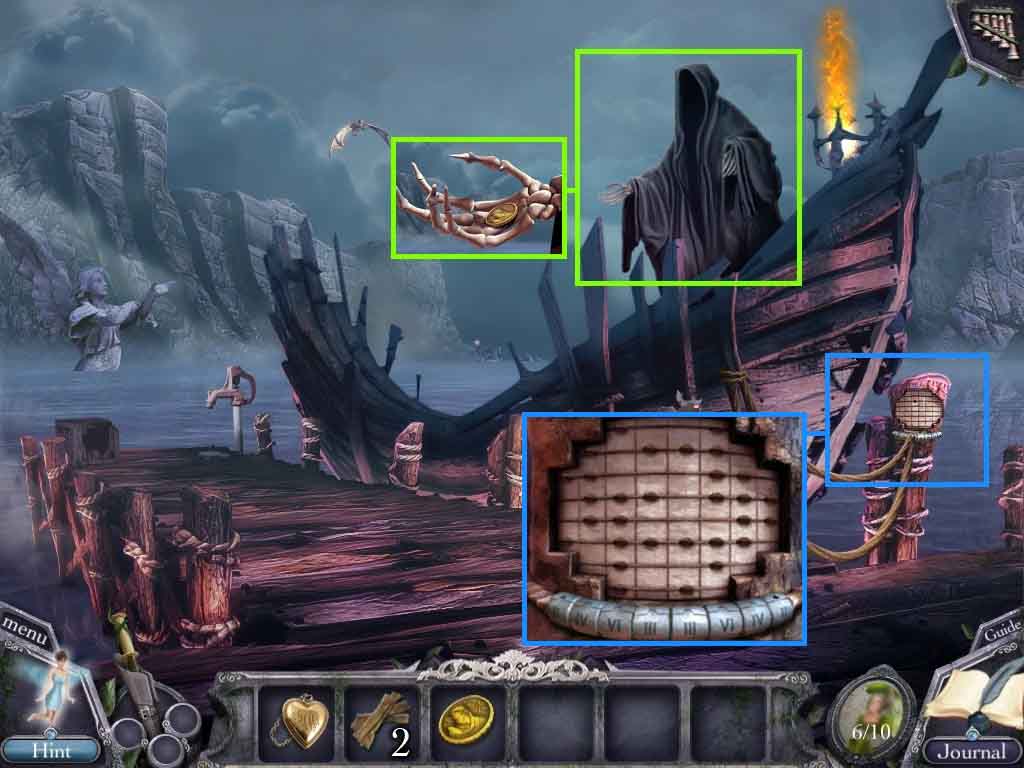
- Click the boatman and place the coin in his hand.
- Click the ropes to play a mini-game.
- Move the beads to reflect the number listed at the bottom of the column.
- Move to the Castle Waterfalls area.
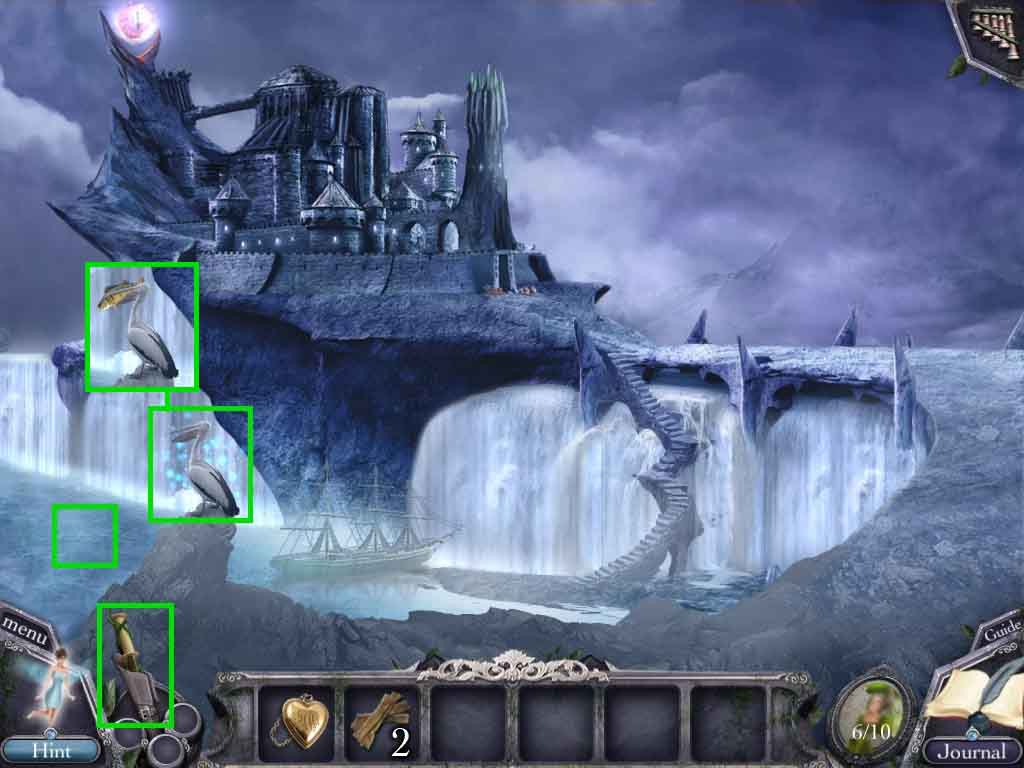
- Select the magic wand and use it on the pelican and the click the fish below.
- Collect the fish from the pelican.
- Move to the Wall of Faces.
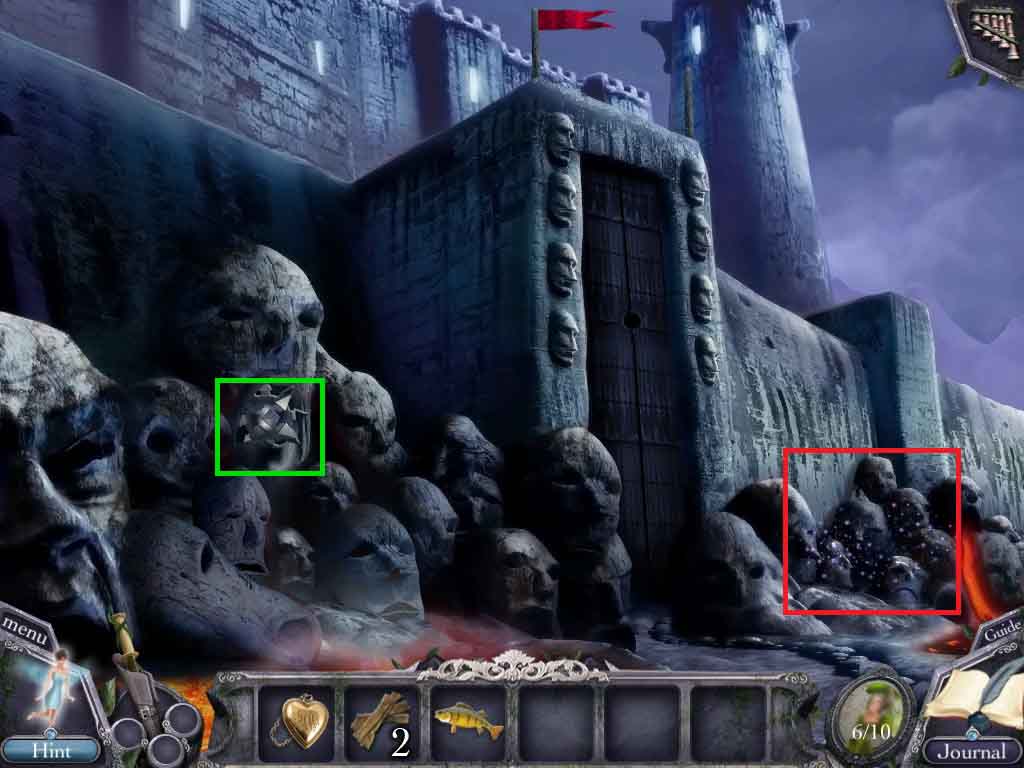
- Collect the mace ball from the stone head.
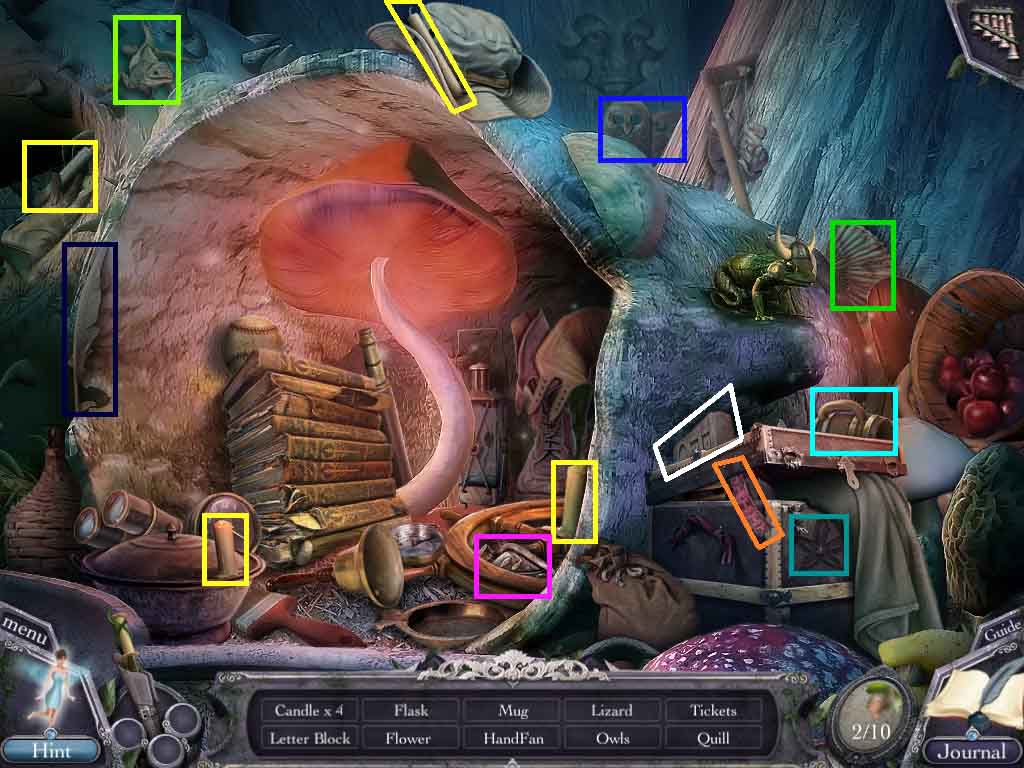
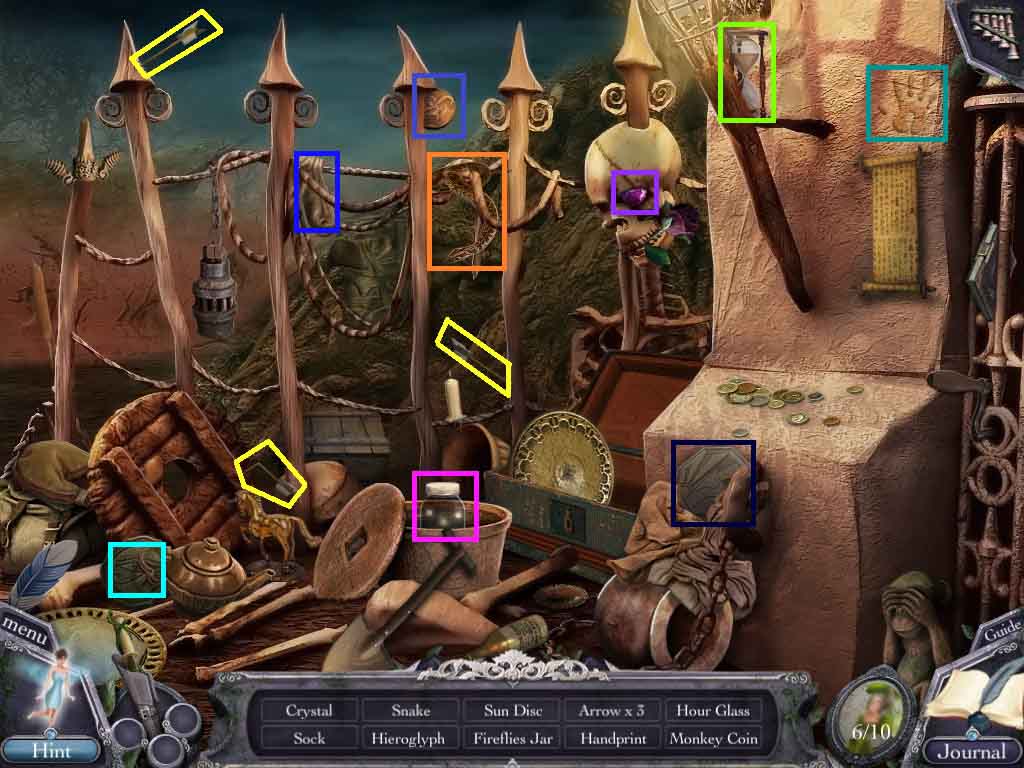
- Click the other stone head to access a hidden objects area.
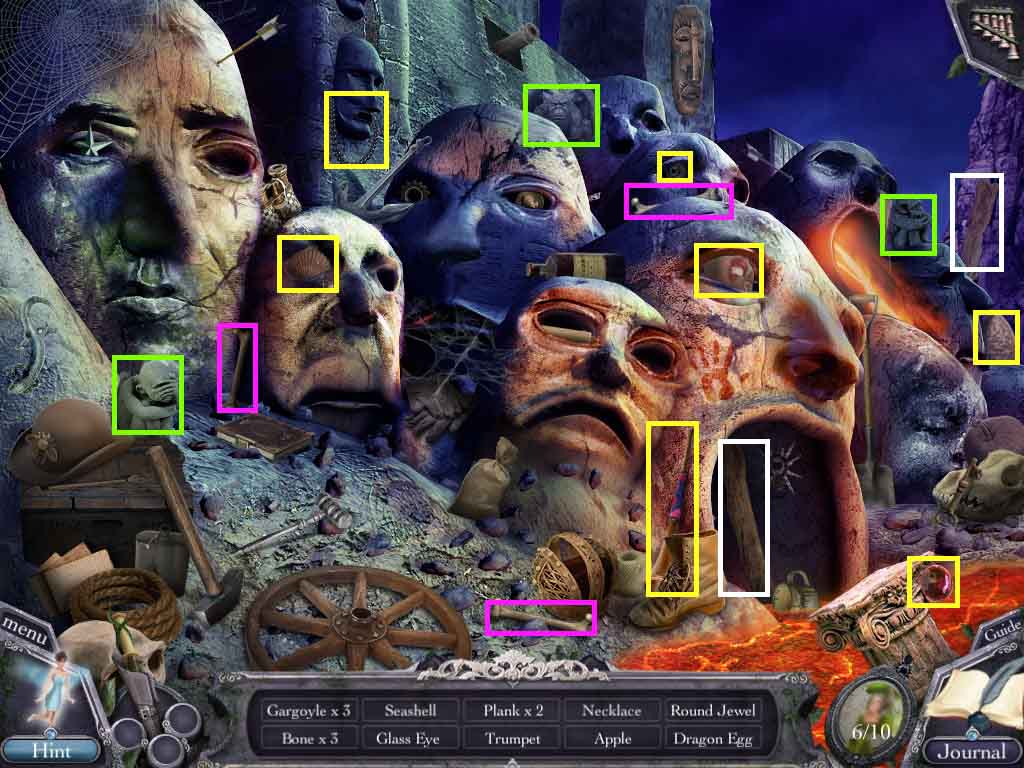
- Find the listed items.
- Collect the 2 wooden planks.
- Move to the Crash Landing area.
- Click the stone tablet.
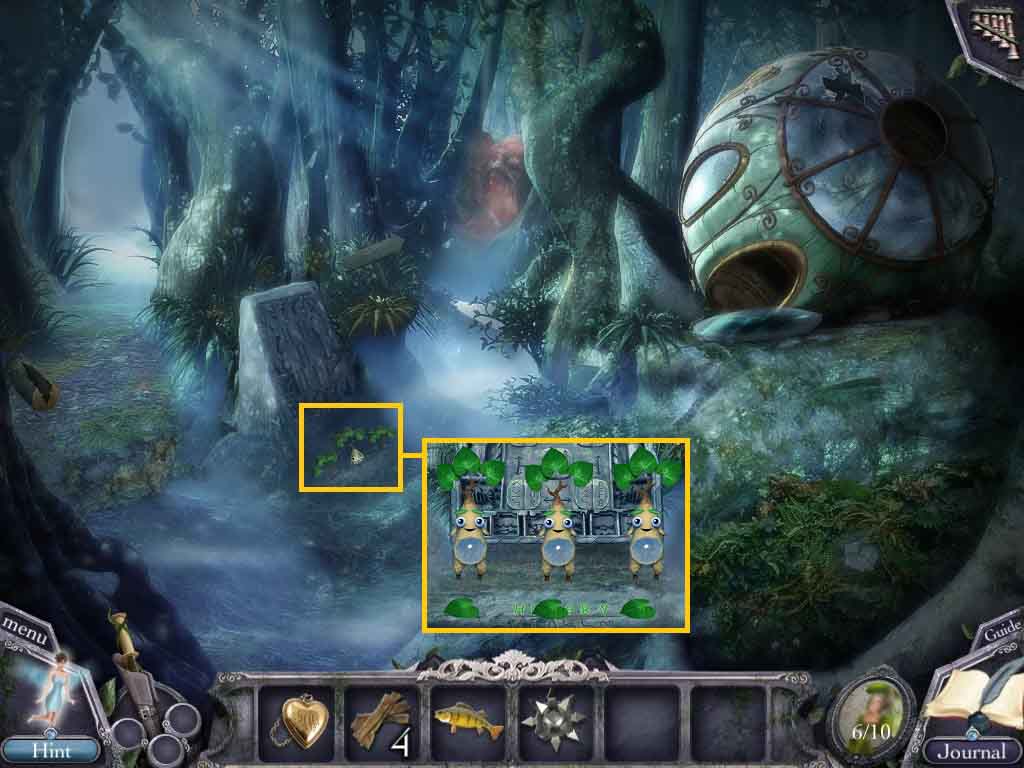
- Give the mandrake the fish.
- Collect the leaves.
- Move to the Swamp area.
- Select the magic wand and use it on the crow; collect the shield.
- Select the magic wand and use it on the crow; collect the empty bucket.
- Click the broken bridge; insert the 4 wooden planks to trigger a mini-game.
- Place the planks into the correct alignment.
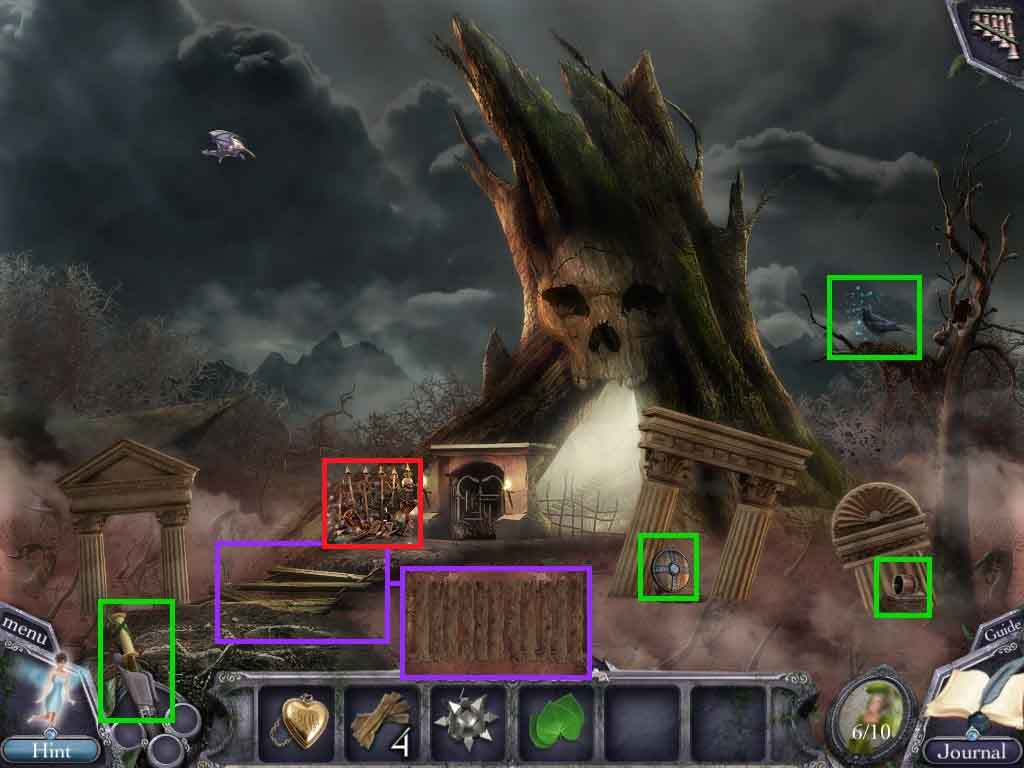
- Click the fence to access a hidden objects area.
- Find all the objects to collect fireflies.
- Click the gate to access the snake lock puzzle.
- Move the snakes in the correct order to unlock the gate.
- Move to the Spider Forest area.

- Use the fireflies on the tree sap in the following sequence.
- 1st: The tree on the right
- 2nd: The center tree
- 3rd: The tree on the left
- 4th: The snapping plant.
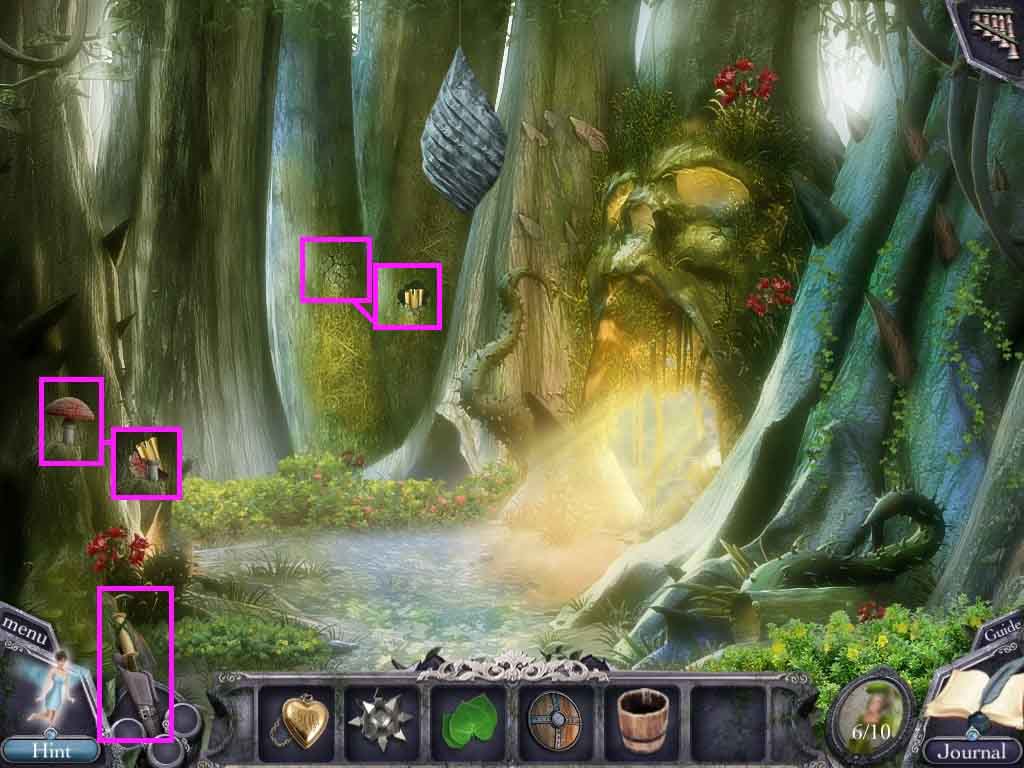
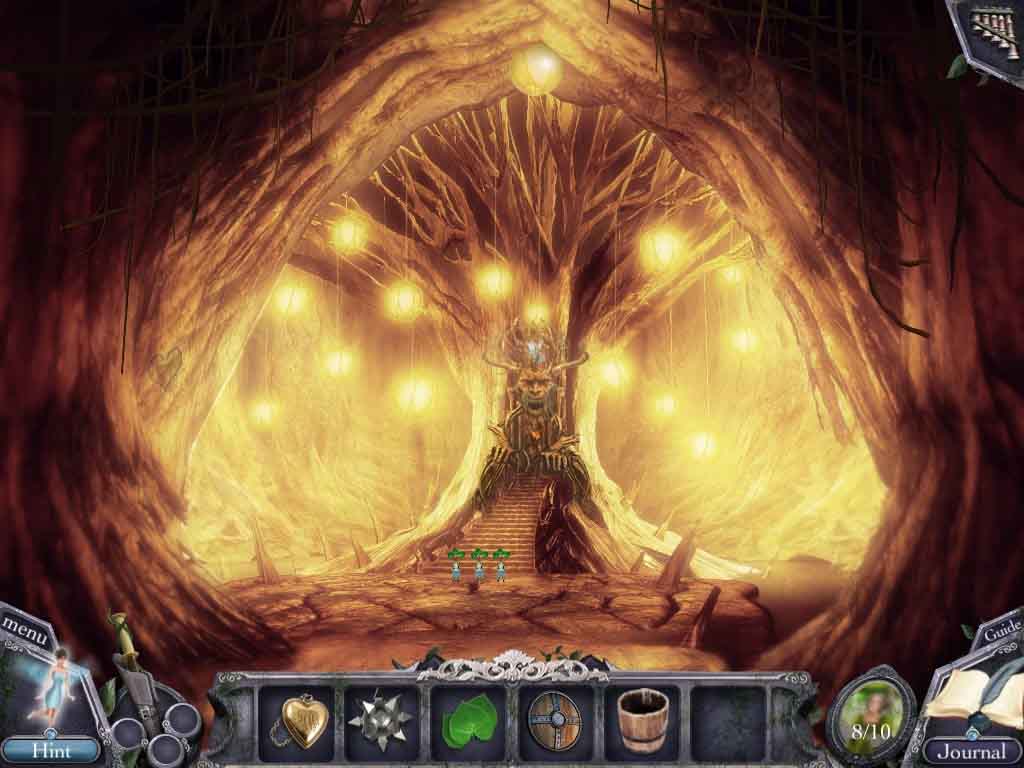
- Select the magic wand and use it on the mushroom; collect the portrait piece 7 /10.
- Select the magic wand and use it on the cracked tree; collect the portrait piece 8 /10.
- Move to the dock area.
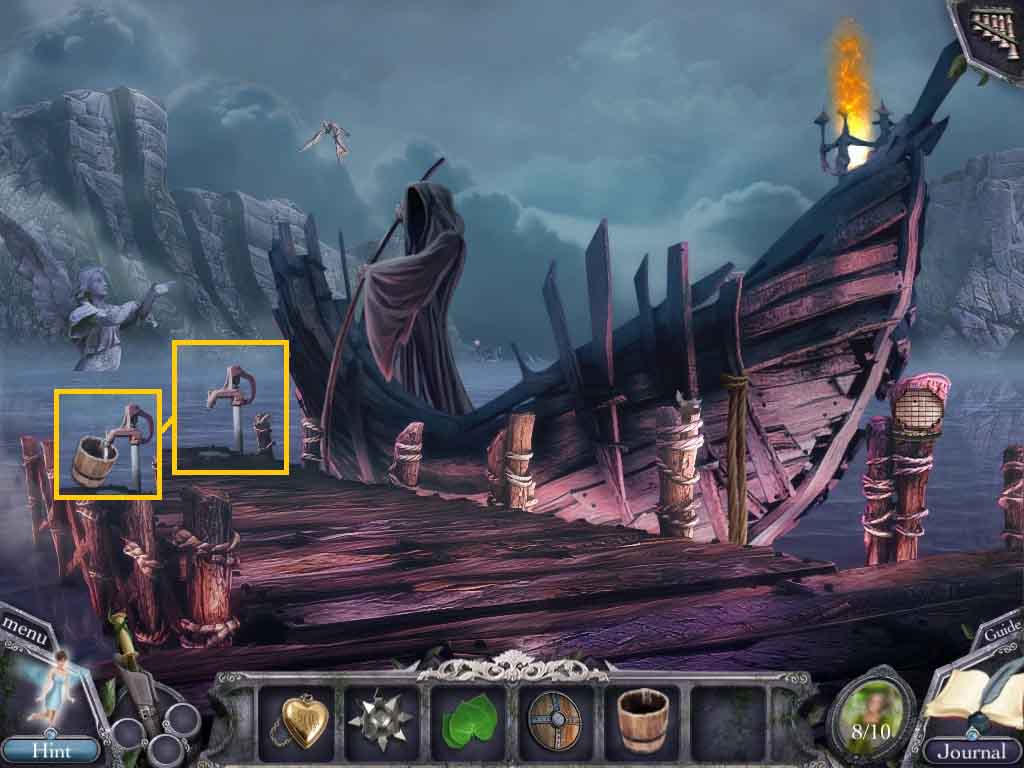
- Place the empty bucket into the water faucet; collect the bucket of water.
- Move to the Spider Forest area.
- Pour the bucket of water on the spider cocoon to release the mandrakes.
- Follow the mandrakes to the Swamp area.
- Move into the Tree Temple.