
Mystery Of The Ancients: Curse of the Black Water: Chapter Three: Hope
Our Mystery of the Ancients Curse of the Black Water Walkthrough is overflowing with helpful tips, screenshots, and detailed game instructions to help you save the world from eternal darkness. When a team of archaeologists unearth an ancient beast of legend intent on the destruction of the world, it's up to you to discover the secrets of the island's darkening waters before it's too late.
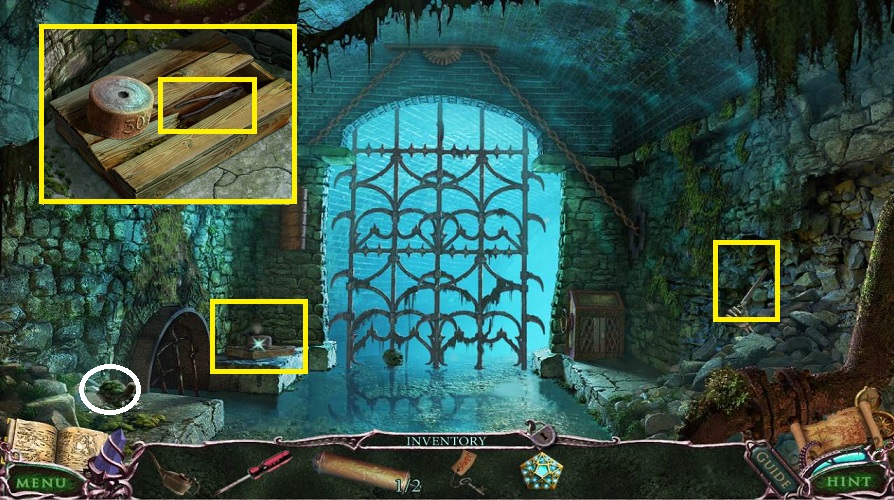
- Examine the skeletal hand to the right
- Pick up the FILE
- Examine far left corner
- Pick up the CORKSCREW
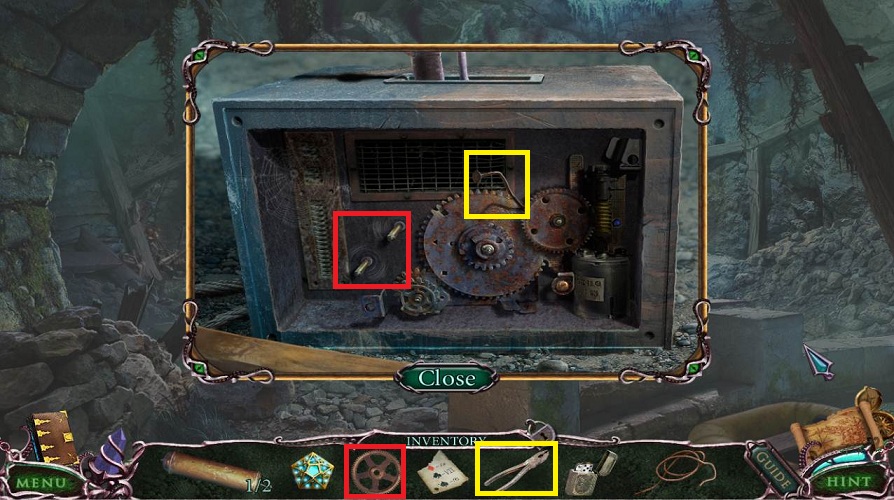
- Pick up the now exposed PLIERS

- Back up once
- Use the CORKSCREW on the cork of the oil barrel
- Use the OILER in the flow
- Go forward and examine the box to the right
- Use the OILER
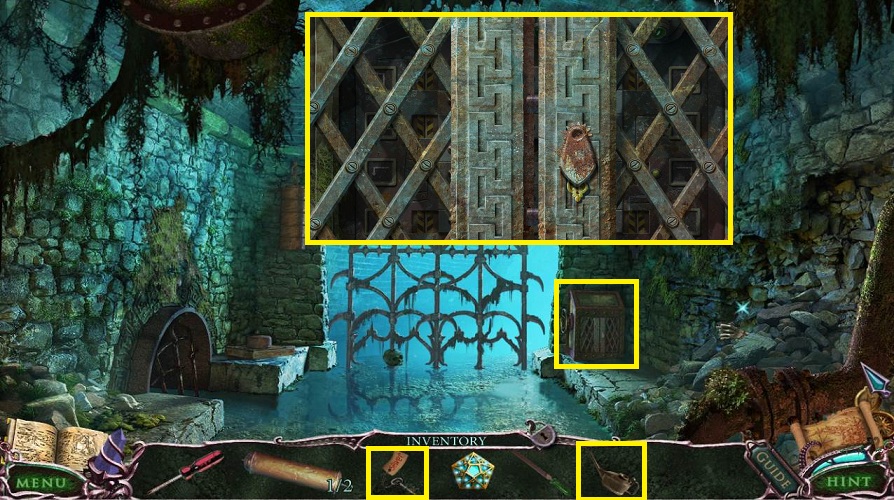
- Use the SEWER KEY
- Click on the door
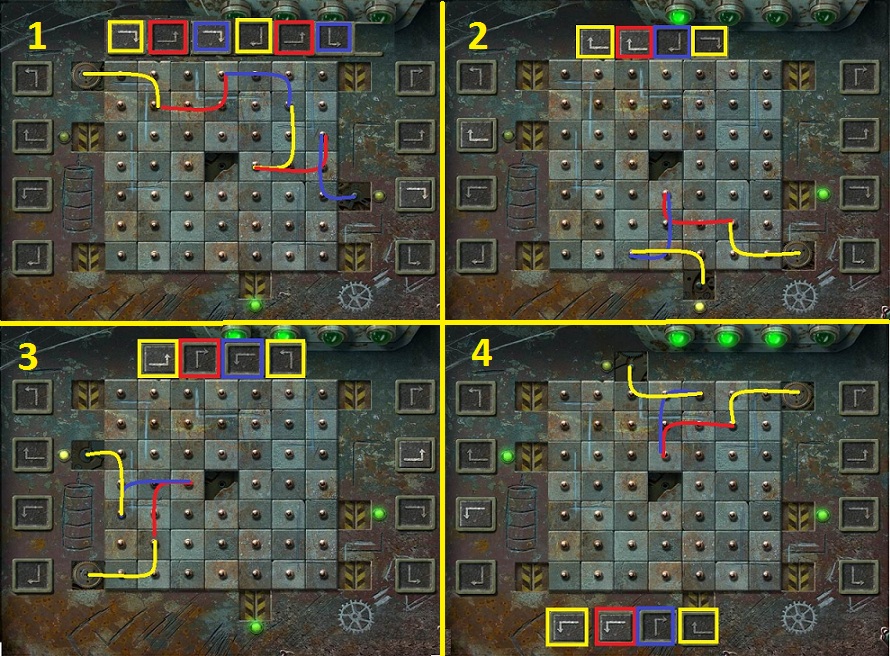
- In this puzzle you need to move 4 gears from the starting point to the open lamp location
- Click on the 8 side buttons to move the gear as noted; it will go two squares in one direction and one square in the next
- Use the solution for help; the buttons to be pressed are noted in left to right order.
- Go forward
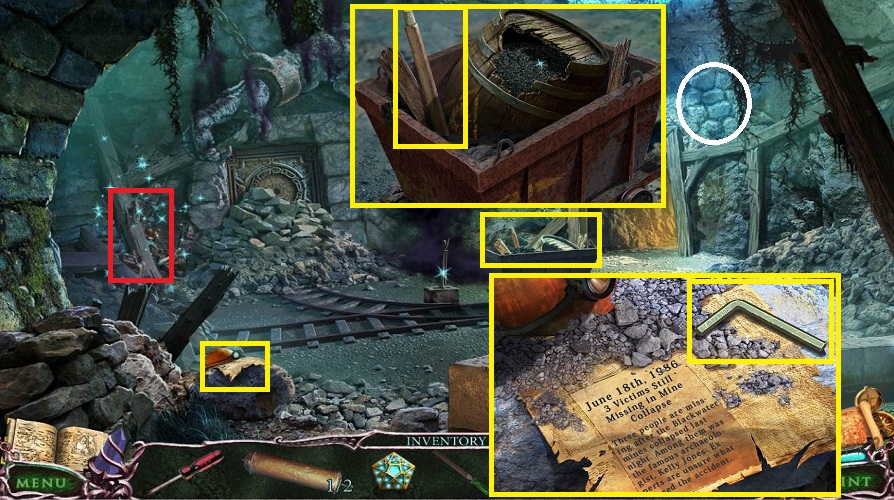
- Examine the mine cart
- Pick up a WOODEN HANDLE
- Examine the yellow helmet to the left
- Pick up the HEX KEY
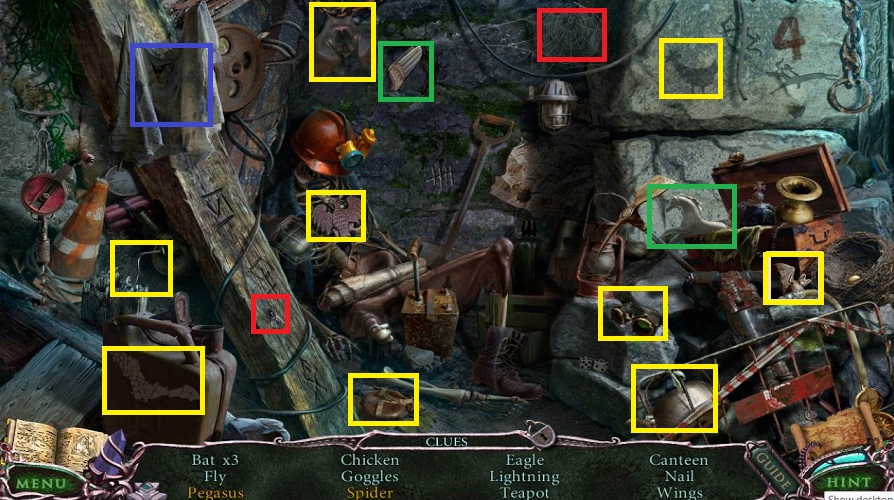
- Do the hidden object scene
- Pegasus: Use the wing on the horse
- Spider: Use the fly on the spider web
- Lightning: Click on the rag
- Receive the EAGLE
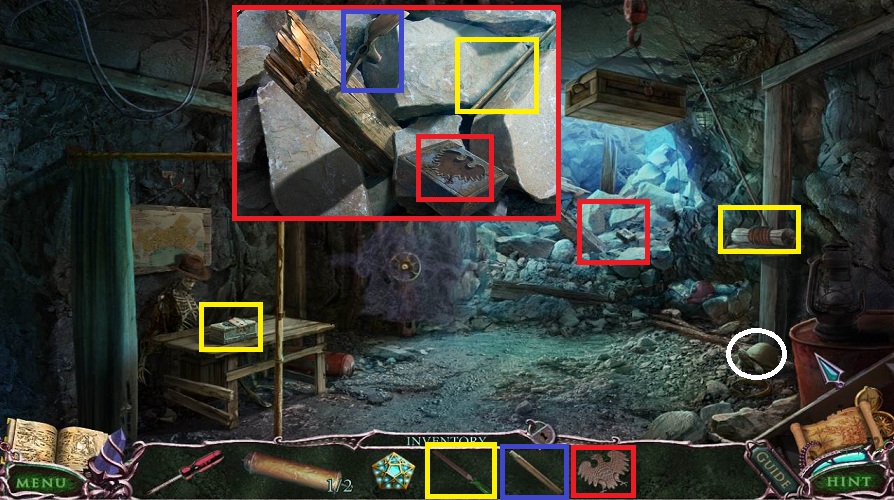
- Head forward
- Click on the curtain to the left
- Examine the rocks in the back
- Use the EAGLE on the box
- Pick up the GEARS
- Pick up the ROD
- Use the WOODEN HANDLE on the pick axe head
- Pick up the PICK AXE
- Examine the table
- Pick up the LIST
- Examine the cable holding the crate up
- Use the FILE
- Examine the crate; you need numbers.
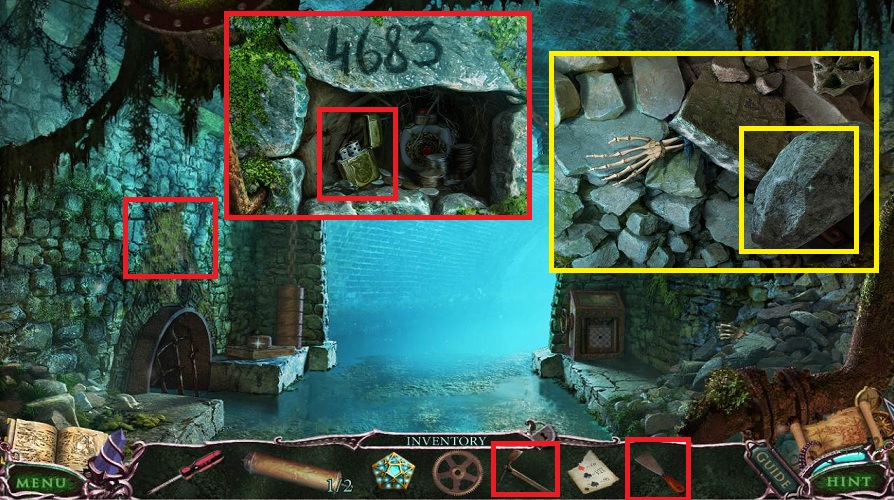
- Back up twice
- Use the ROD to remove the rocks on the skeleton arm
- Pick up the SCRAPER
- Examine the moss to the left
- Use the SCRAPER and note the numbers
- Use the PICKAXE
- Pick up the LIGHTER
- Go forward twice
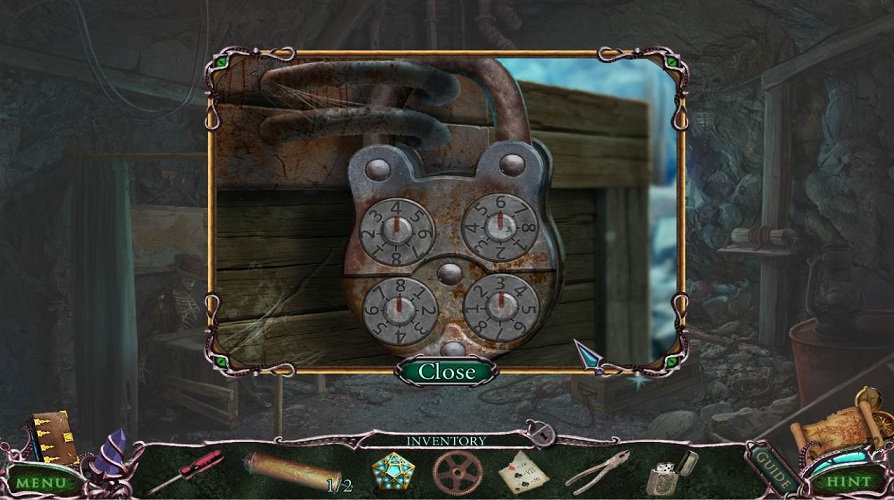
- Examine the crate
- Enter the numbers
- Pick up the FUSE
- Go back once
- Examine the switch box
- Use the HEX KEY to get the cover off
- Use the PLIERS on the nail
- Place the GEARS
- Examine the mine cart
- Place the FUSE
- Use the LIGHTER
- Examine the door on the left
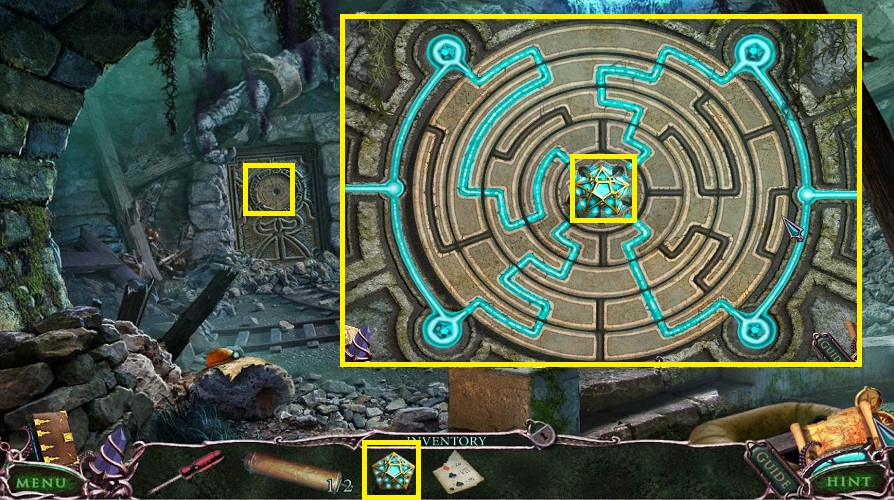
- Place the CRYSTAL
- Turn each circle (starting from the center) until the blue flows to each small crystal
- Enter the room
- Examine the wall to the left
- Pick up the BIG FISH KEY
- Back up once and go right
- Examine the table
- Use the BIG FISH KEY on the lock
- Pick up the CRYSTAL
- Return
- Examine the center
- Place the CRYSTAL
- Click on the screen to move the light to each crystal in a clockwise direction
- If the black smoke hits it while its moving, it will simply go back to the last crystal
- When finished the obelisk will rise
- Click on the blue crystal next to your inventory to charge it up
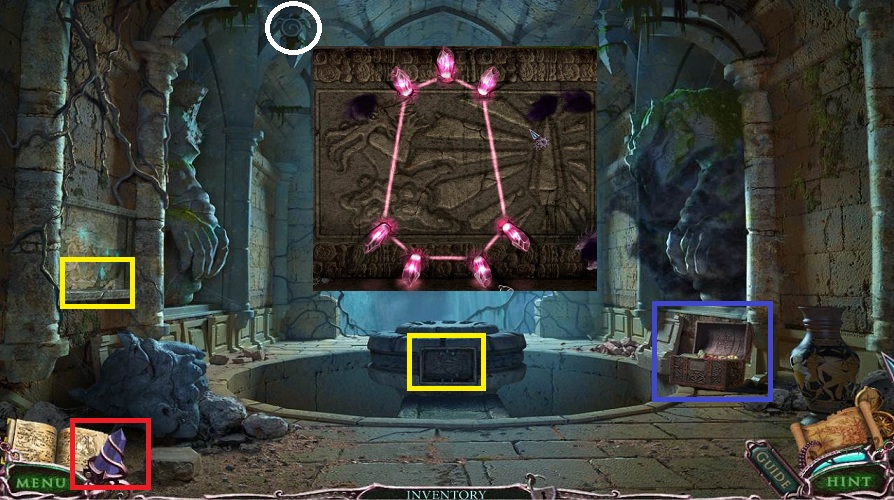
- Examine the chest to the right
- Pick up the TRIDENT and AMULET HALF
- Back up once
- Use the crystal
- Examine the back wall
- Use the AMULET HALF
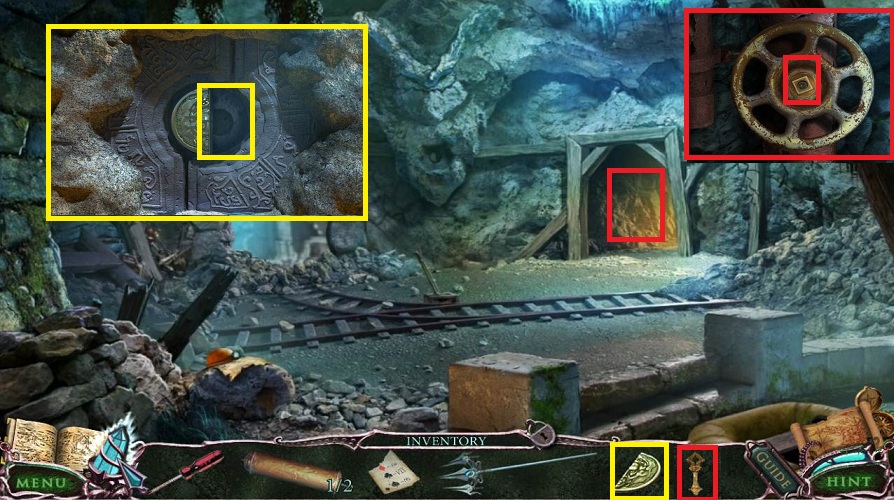
- Pick up the SQUARE WRENCH
- Go forward to the right
- Use the crystal
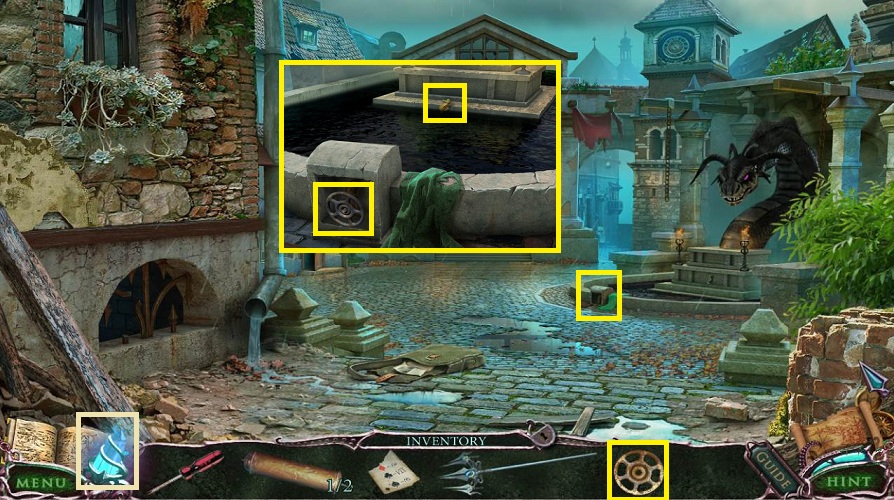
- Examine the valve
- Use the SQUARE WRENCH
- Pick up the VALVE
- Back up 3 times, go up the ladder, and back into the square
- Use the crystal
- Examine the fountain
- Click on the cover
- Use the VALVE
- Pick up the SEA HORSE
- Go forward, up the ladder, to the right, forward, and into the clock building
- Examine the statue on the right
- Place the TRIDENT
-
Pick up the STETHOSCOPE
- Go down the ladder
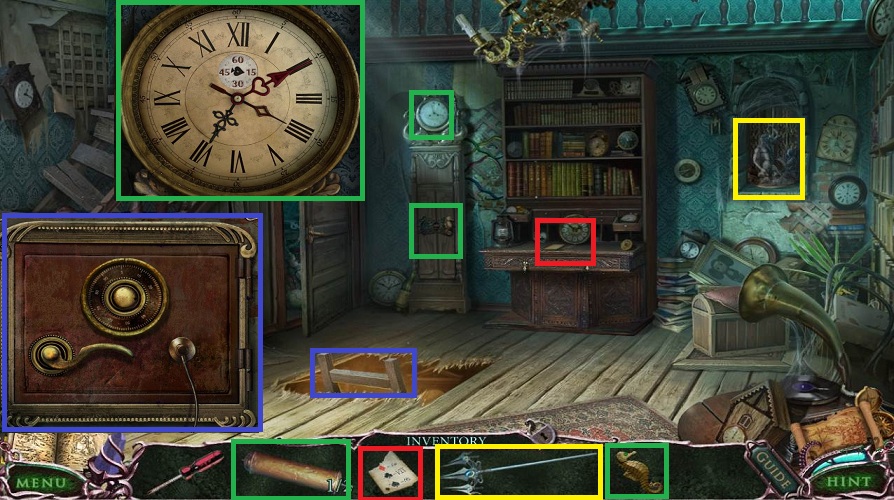
- Examine the safe
- Use the STETHOSCOPE
- Pick up the WEIGHT (2/2)
-
Go back up stairs
- Examine the desk
- Use the LIST
- You will get the code for the clock
- Examine the grandfather clock
- Use the SEA HORSE
- Use the WEIGHTS
- Examine the clock face
- Drag the hands to match the numbers now in your diary
- The clock hands each have the shape to match on them
- The desk will move to open a secret passage
- Go forward to end the chapter