
I Know a Tale: Chapter Two: Searching for Daddy
Our I Know a Tale Walkthrough is ready to move you through four chapters of colorful screen captures, detailed instructions, and mini game and hidden object solutions. We hope you enjoy using our tools to solve this curious caper!
General Information & Tips
Chapter One: The Beginning
Chapter Two: Searching for Daddy
Chapter Three: The Ancient Temple
Chapter Four: Behind the Waterfall
Ask for help in the comments below!
Chapter One: The Beginning
Chapter Two: Searching for Daddy
Chapter Three: The Ancient Temple
Chapter Four: Behind the Waterfall
Ask for help in the comments below!
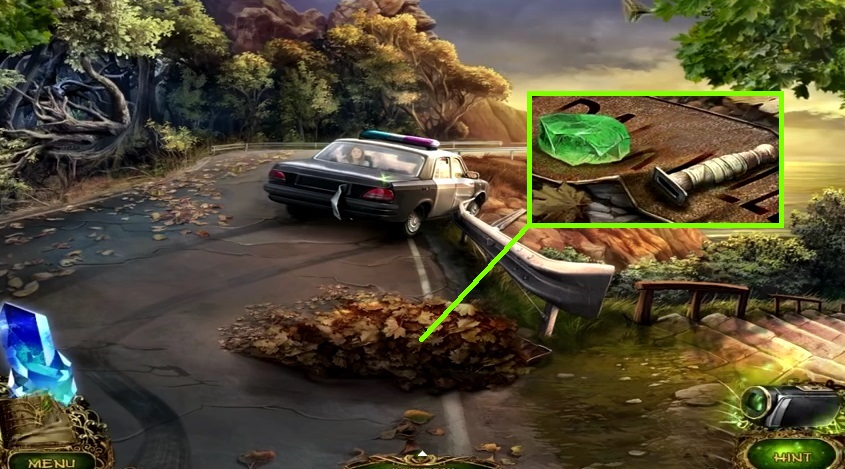
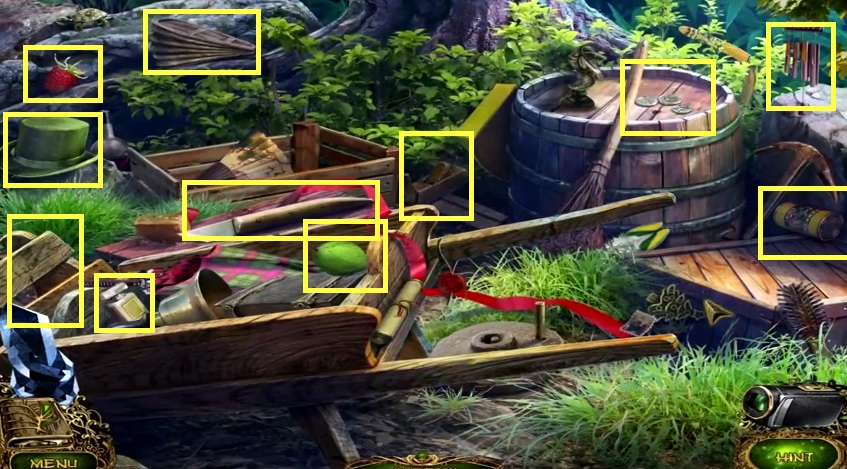
- Zoom into the leaves and click them aside; collect the handle for the machete and the emerald.
- Move down the stairs.
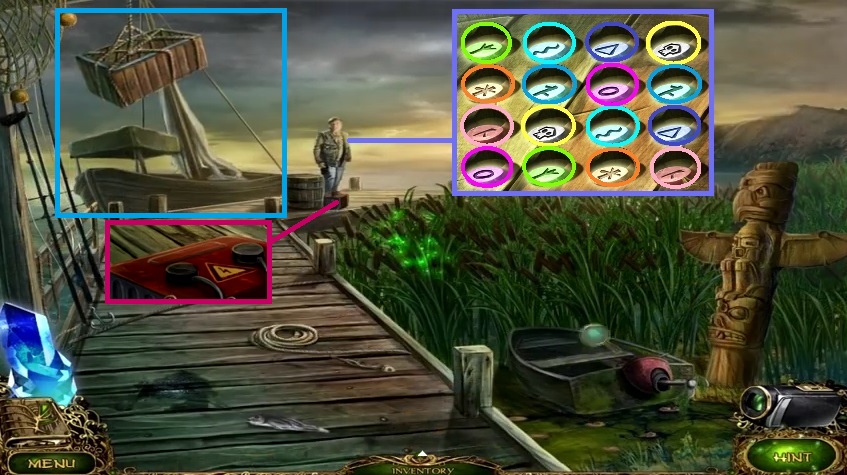
- Speak to the fisherman; a mini game will trigger.
- Solve the game by matching the symbols.
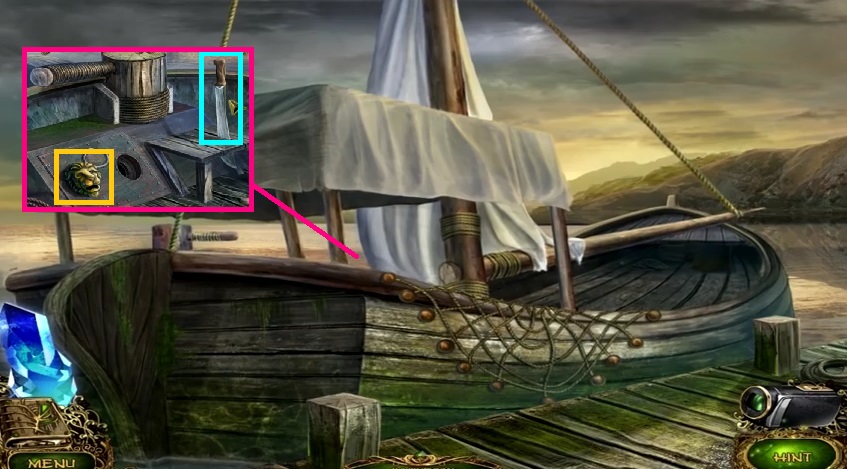
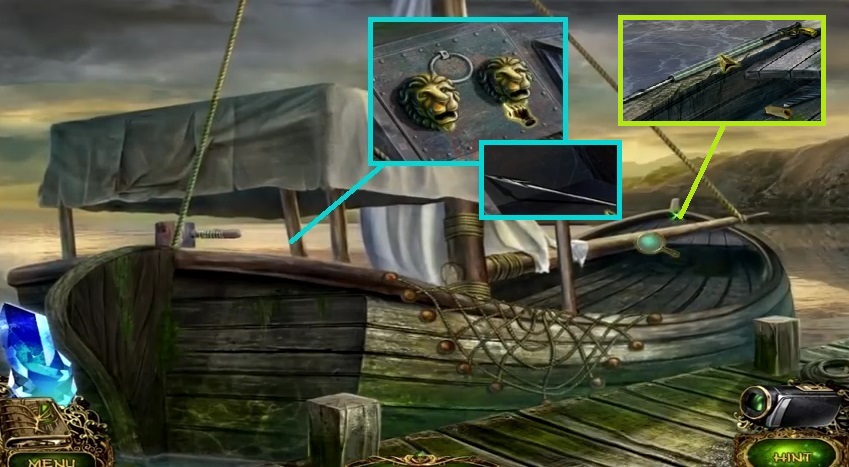
- Collect the left lion head.
- Zoom into the fisherman; collect the welder.
- Zoom into the boat 2x’s.
- Attach the knife handle; collect the machete.
- Insert the left lion head.
- Move down once.
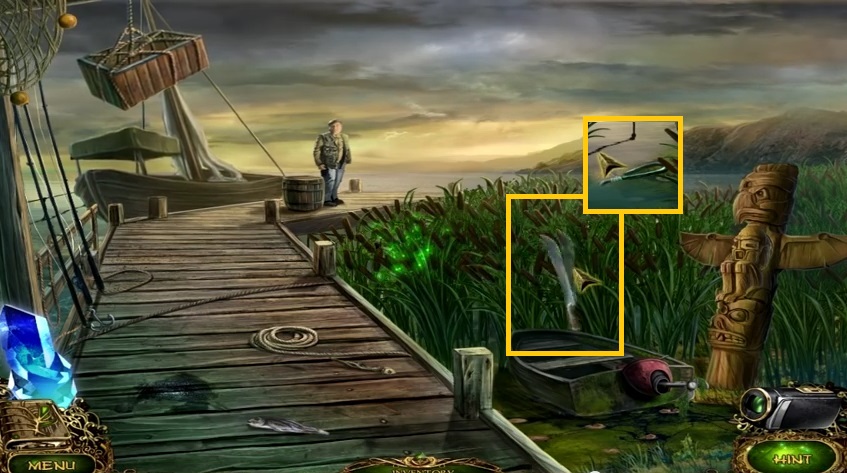
- Select the machete to cut the tall grass.
- Collect the hose.
- Move down once.

- Zoom into the branches and remove them in the correct order.
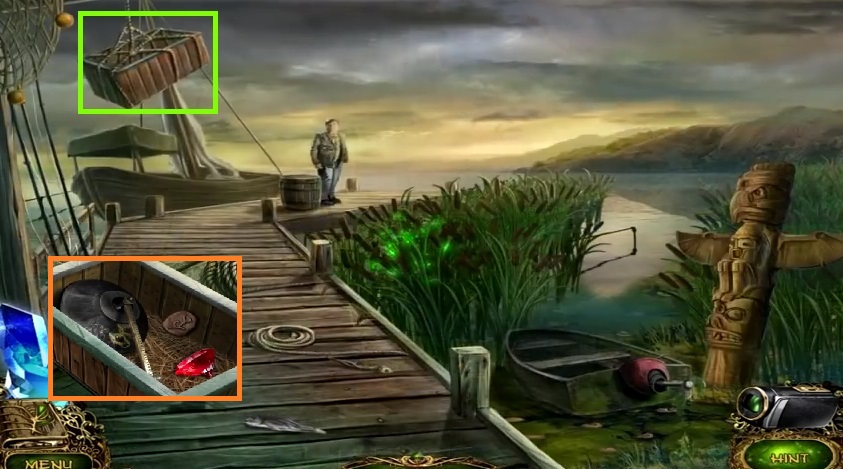
- Collect the fishing net.
- Move down 2x’s and zoom into the boat.

- Toss the fishing net; collect the chest and click it open.
- Collect the right lion’s head and the gas can.
- Exit the close-up.
- Insert the right lion’s head; collect the spear head.
- Zoom into the front of the boat; insert the spear head and collect the spear gun.
- Move down once.
- Select the spear gun to shoot down the box.
- Click it open; collect the glass cutter, the symbol and the ruby.
- Move down once.
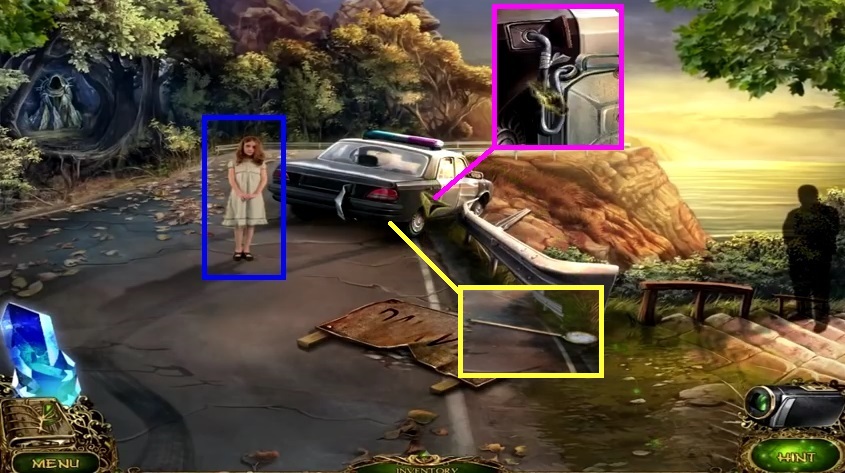
- Zoom into the car and use the glass cutter to free the girl.
- Speak to the girl.
- Collect the car key and insert it into the gas lock.
- Place the empty gas can and the hose; collect the gas can.
- Click the car; collect the net.
- Move down the stairs to the Dockside.
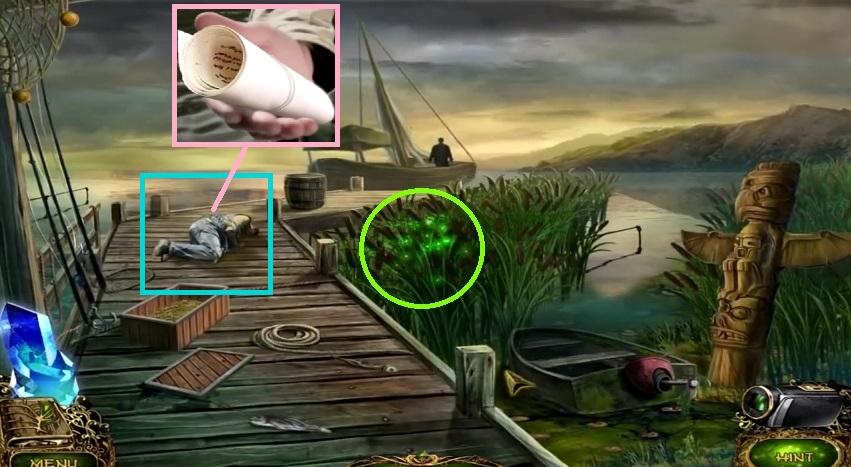
- Zoom into the fisherman.
- Select the machete to cut the rope.
- Collect the part of the map.
- Select the net to collect the fireflies.
- Move down once and zoom into the formerly branched area.
- Place down the fireflies.
- Select the blue crystal to place onto the symbol to trigger a hidden objects area.
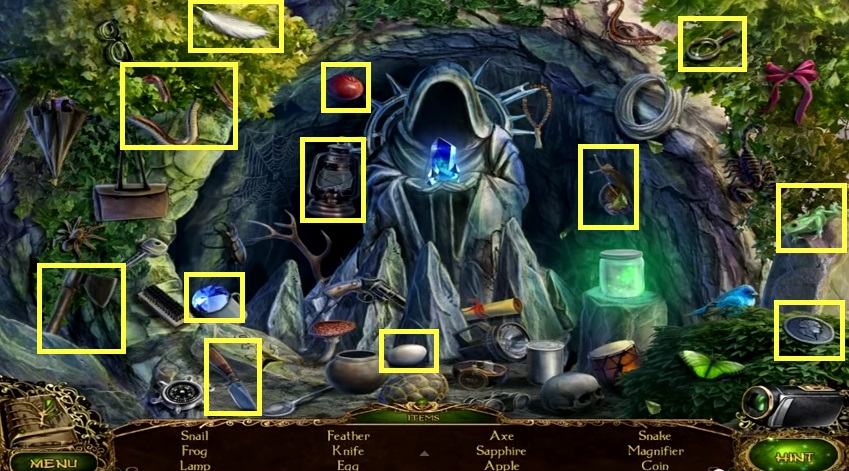
- Find the items.
- Collect the sapphire.
- Collect the symbol.
- Move to the Dock.
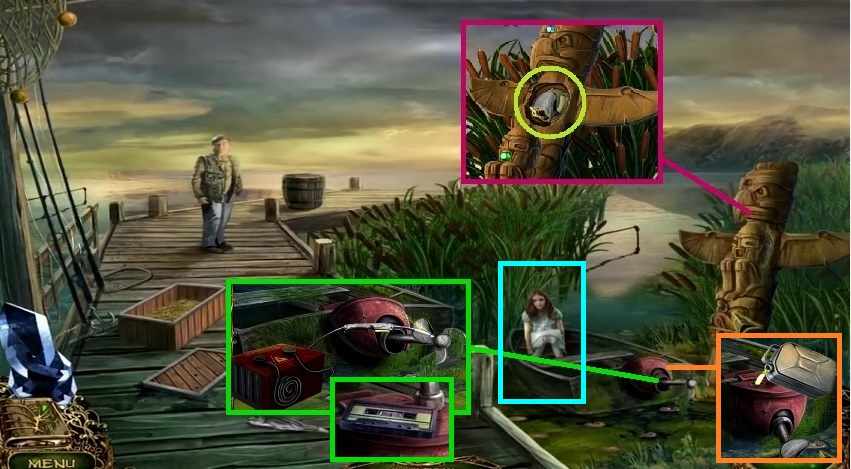
- Zoom into the totem pole; insert the gemstones.
- Collect the propeller part; attach it onto the boat propeller.
- Select the welder to secure it; collect the cassette tape.
- Pour the gas into the tank.
- Speak to the girl.
- Click the map to trigger a mini game.
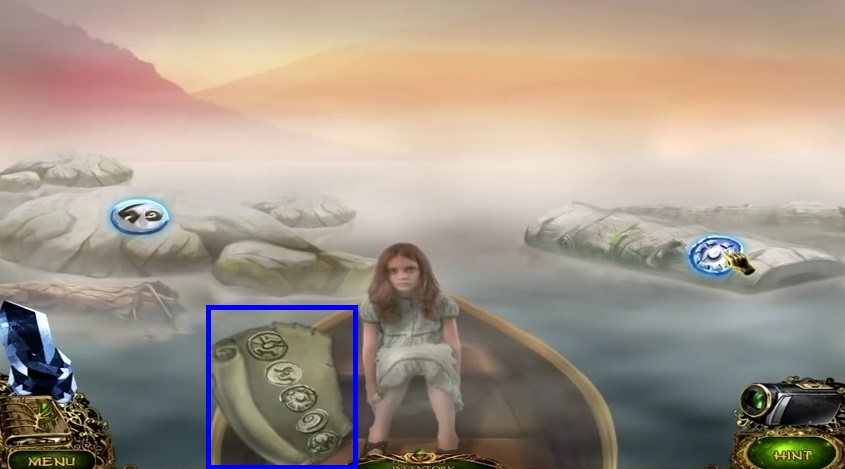
- Solve the game by selecting the correct symbols to navigate the journey.
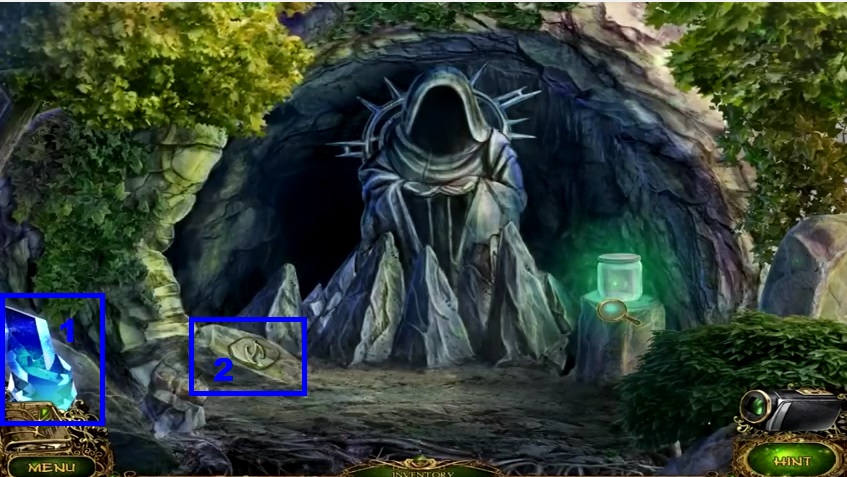
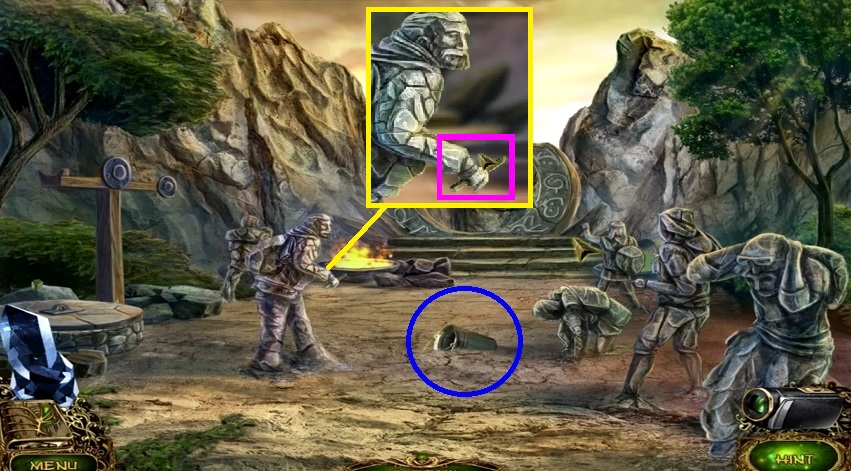
- Zoom into the statue; collect the symbol.
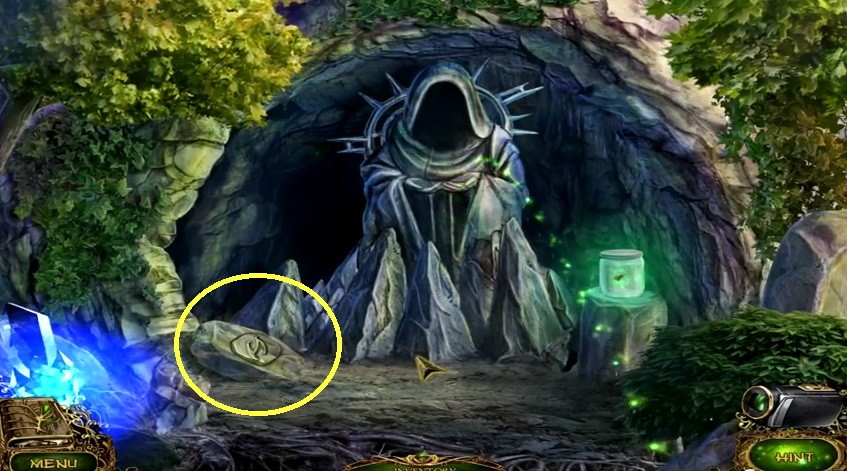
- Zoom into the rocks; collect the symbol.
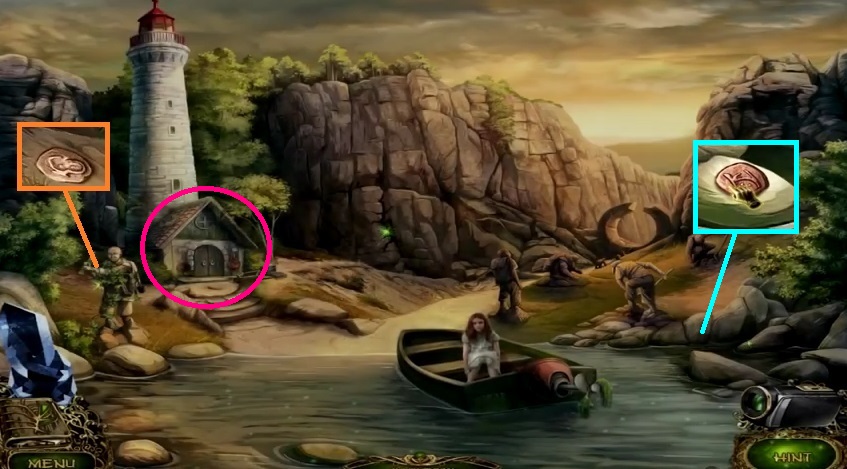
- Move toward the Lighthouse Entrance.

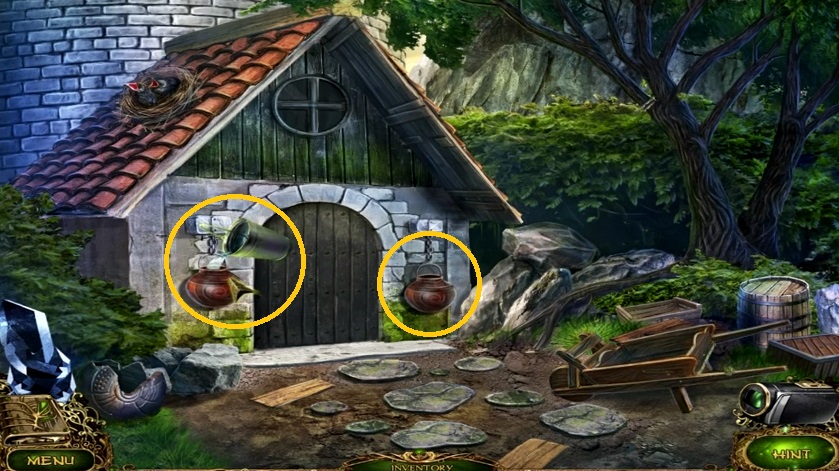
- Zoom into the clay jug; collect the symbol.
- Select the hammer to smash the jug; collect the shard
- Click the hanging rock.
- Move down once.
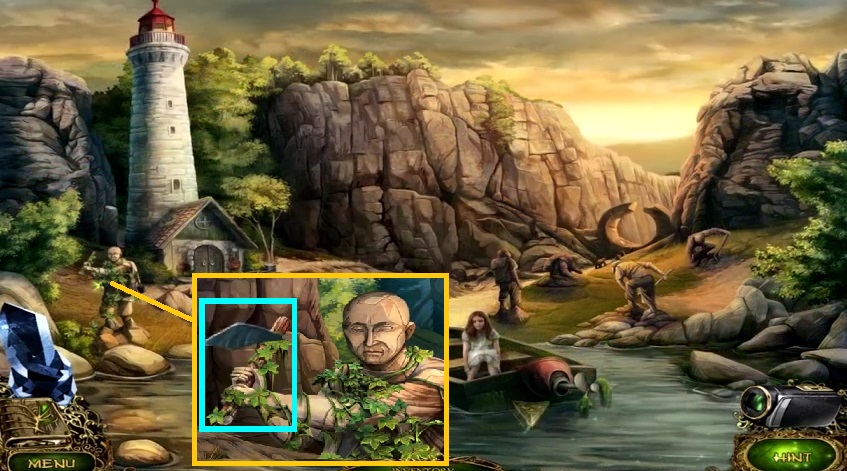
- Zoom into the statue.
- Select the shard to slice the vines; collect the stick.
- Move to the right.
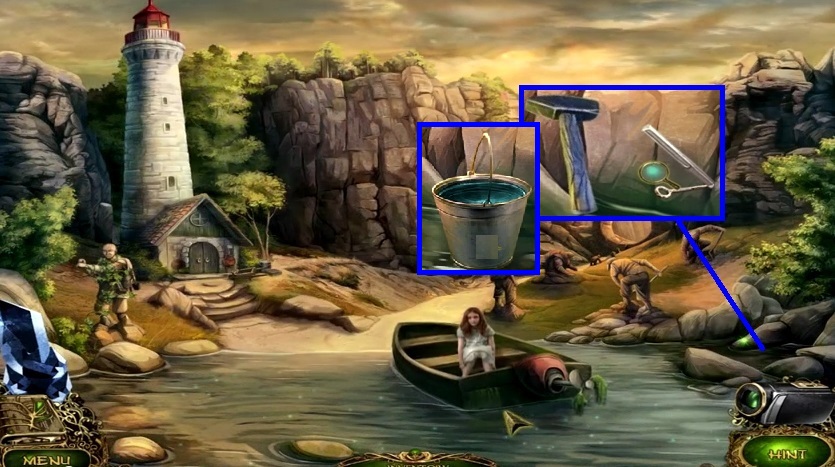
- Collect the bucket.
- Zoom into the statue; collect the chisel.
- Move down once.
- Zoom into the rocks; select the chisel and hammer to collect the key.
- Dip the empty bucket into the water.
- Move to the Lighthouse Entrance.
- Select the bucket of water and pour it into the cauldrons.
- Enter the Lighthouse.
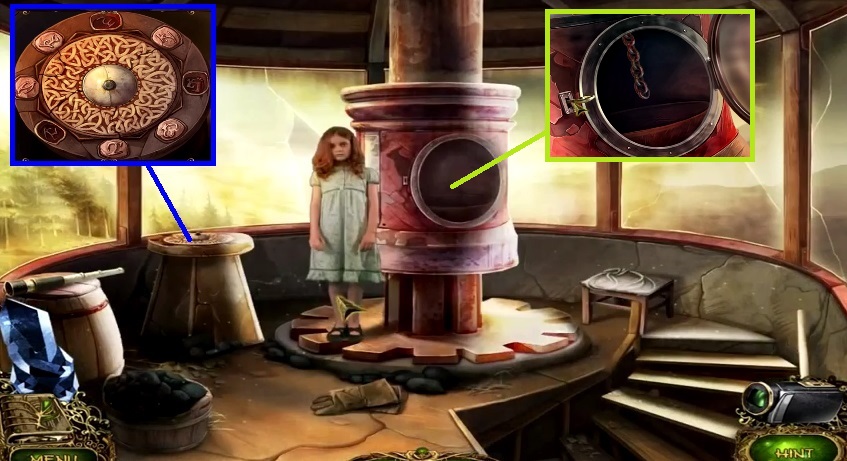
- Zoom into the disc and insert the symbols.
- Zoom into the portal and insert the key; collect the chain.
- Move down 2’x’s and to the right.
- Attach the chain and the hanging stone.
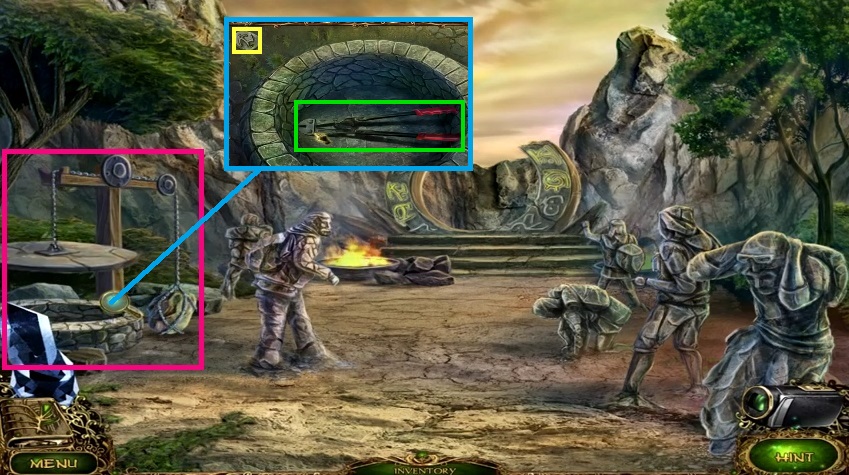
- Zoom into the well; collect the wire cutters and the symbol.
- Move down once.
- Zoom into the statue.
- Select the wire cutters to collect the shovel.
- Zoom into the stone wall and insert the chisel and use the hammer to strike it.
- Collect the symbol.
- Move down 2x’s to the Dock.

- Speak to the fisherman.
- Move down once.
- Use the stick to move the sign.
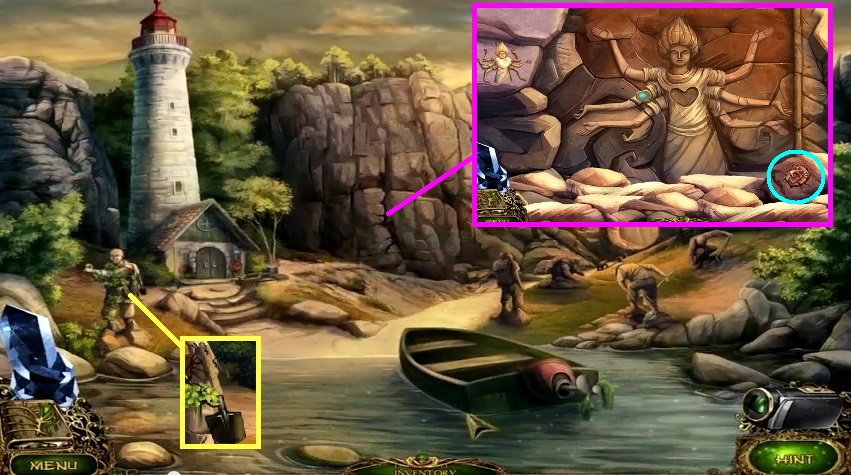
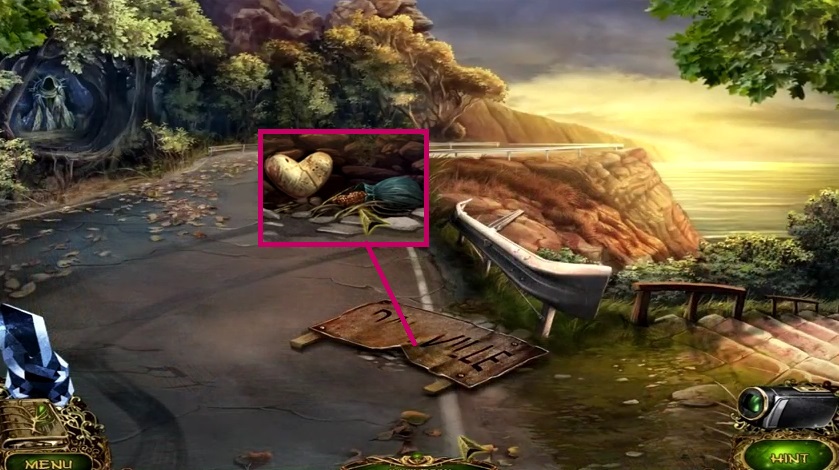
- Select the shovel to uncover and collect the heart and the pouch.
- Move to the Island and zoom into the stone wall.
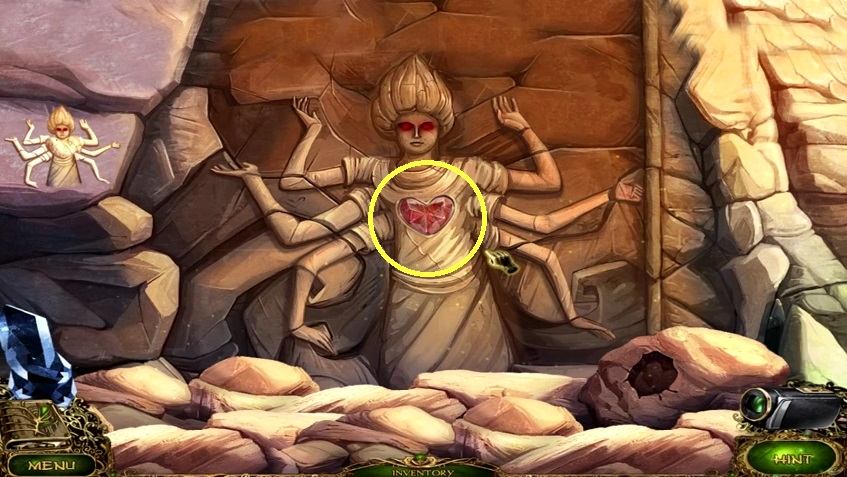
- Insert the heart into the stone wall to trigger a mini game.
- Solve the game by aligning the arms based on the carving.
- Collect the ruby heart and move to the Lighthouse Entrance.
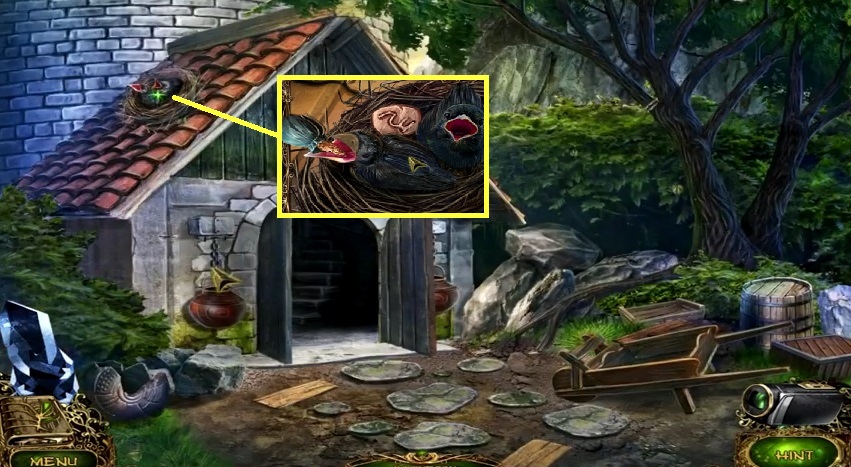
- Zoom into the bird nest; give the pouch to the birds and collect the symbol.
- Enter the Lighthouse.
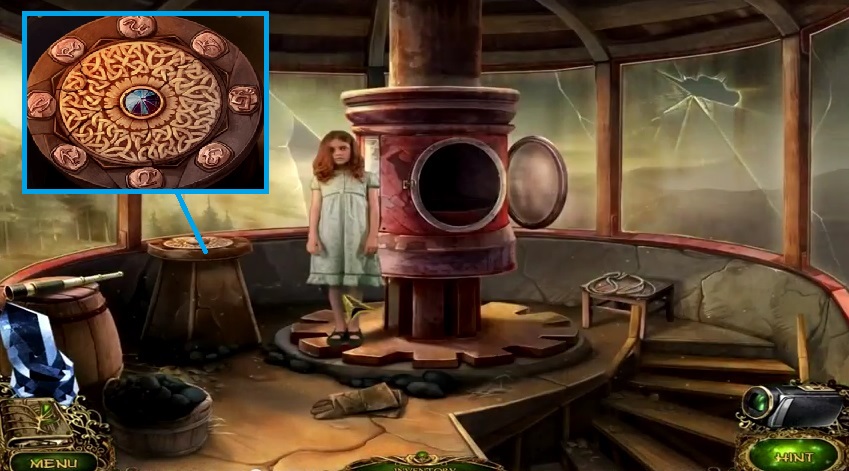
- Zoom into the disc and insert the symbols.
- Move to the Dockside.
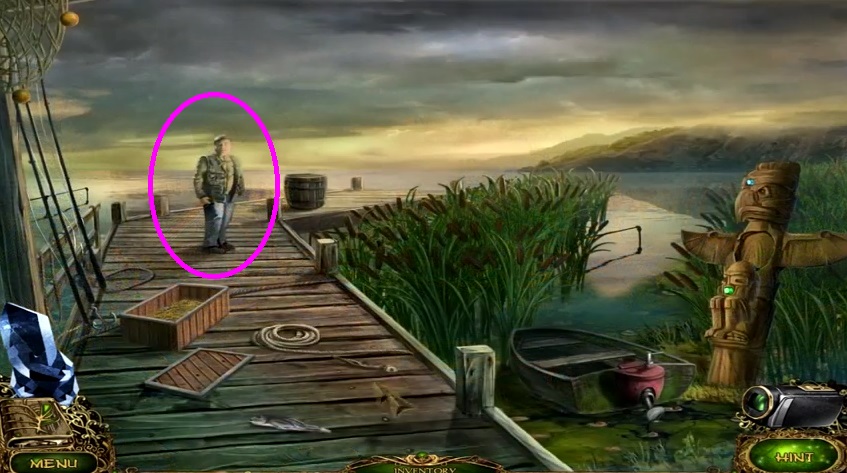
- Use the ruby heart on the fisherman.
- Collect the kettle.
- Move into the Lighthouse.
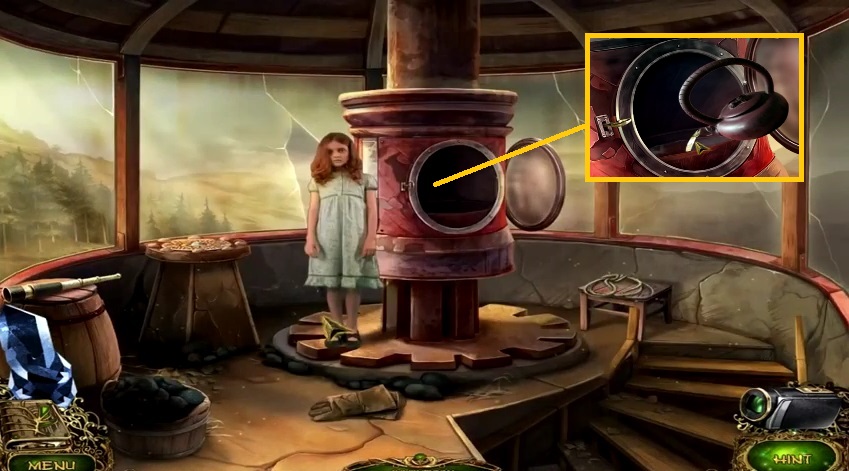
- Zoom into the portal and pour in the kettle.
- Move down once and click the hidden objects area.
- Find the items.
- Collect the videotape.
- Move into the Lighthouse
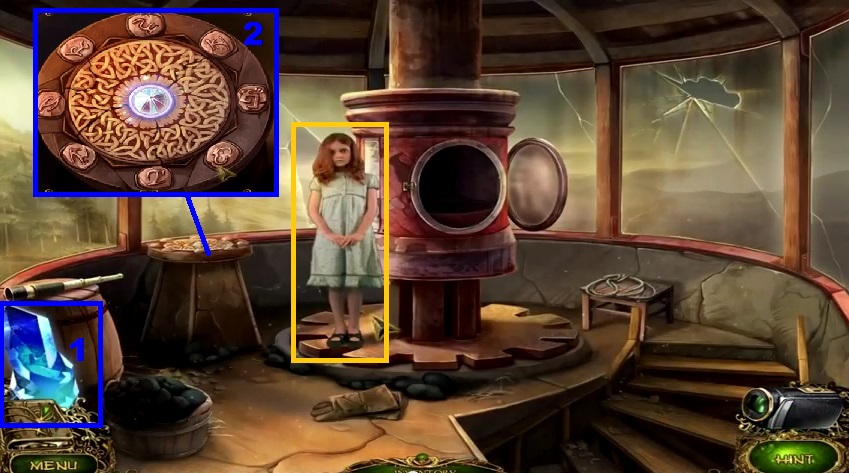
- Select the blue crystal to place onto the symboled disc.
- Speak to the girl.
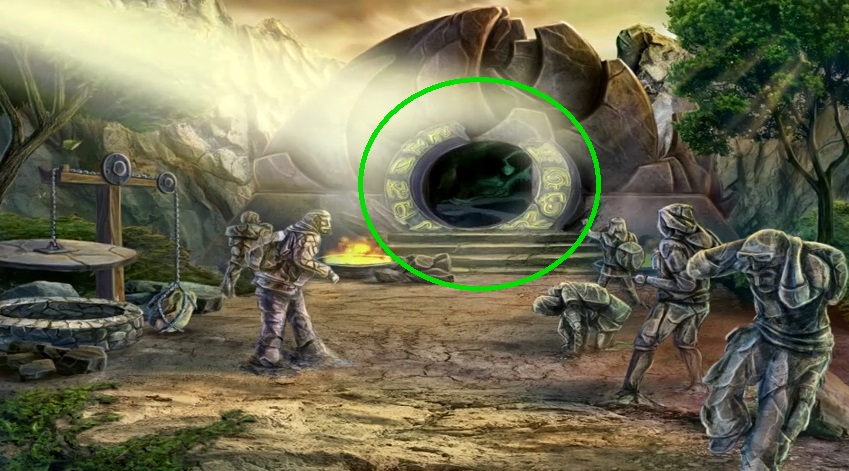
- Move into the Ancient Temple.
General Information & Tips
Chapter One: The Beginning
Chapter Two: Searching for Daddy
Chapter Three: The Ancient Temple
Chapter Four: Behind the Waterfall
Ask for help in the comments below!
Chapter One: The Beginning
Chapter Two: Searching for Daddy
Chapter Three: The Ancient Temple
Chapter Four: Behind the Waterfall
Ask for help in the comments below!