
Haunted Hotel: Eternity: Chapter Six: Terrance
Look to our Haunted Hotel Eternity Walkthrough to help you complete this mysterious and adventurous hidden objects game. Wealthy philanthropist Kevin Reynolds has gone missing due to his involvement with a confidential medical research project that has gone terribly awry! With so many enemies and so little answers, you will be happy to know we have included informative screen shots, mini game and hidden object area solutions and step–by–step instructions to help you solve this case! We hope you enjoy your journey as you race the clock to save the day!
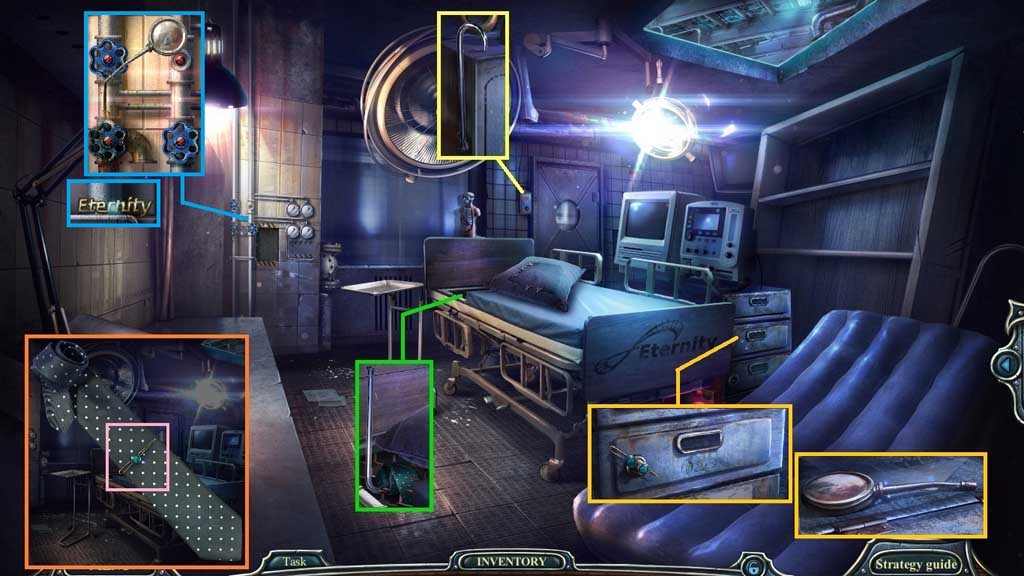
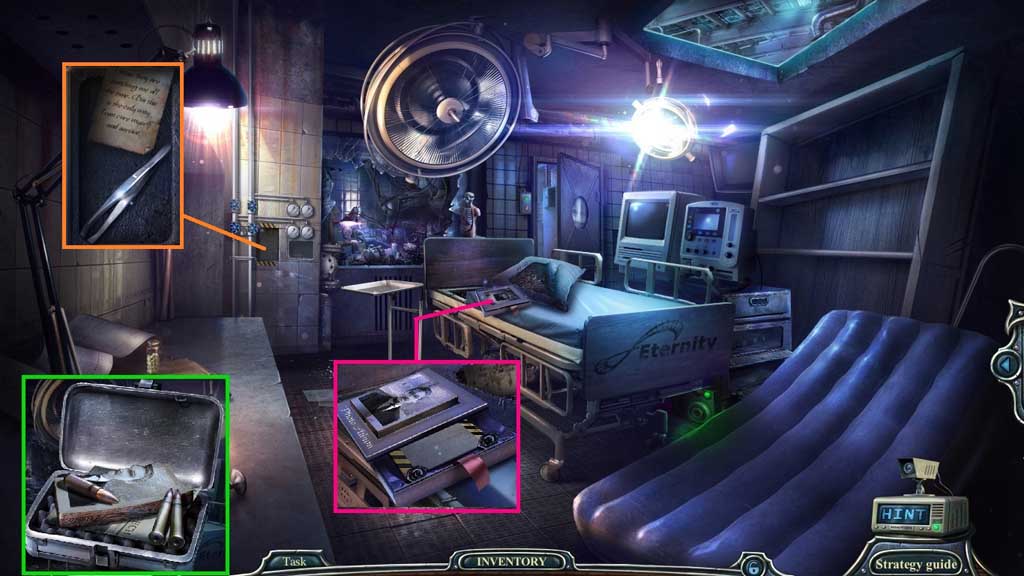
- Collect the hook and use it to collect Terence’s tie.
- Click the tie 2x’s; collect the tie clip and insert it into the drawer.
- Click the clip; collect the oil can and use it to on the valve to collect the bronze emblem.
- Move to the Ventilation Room.
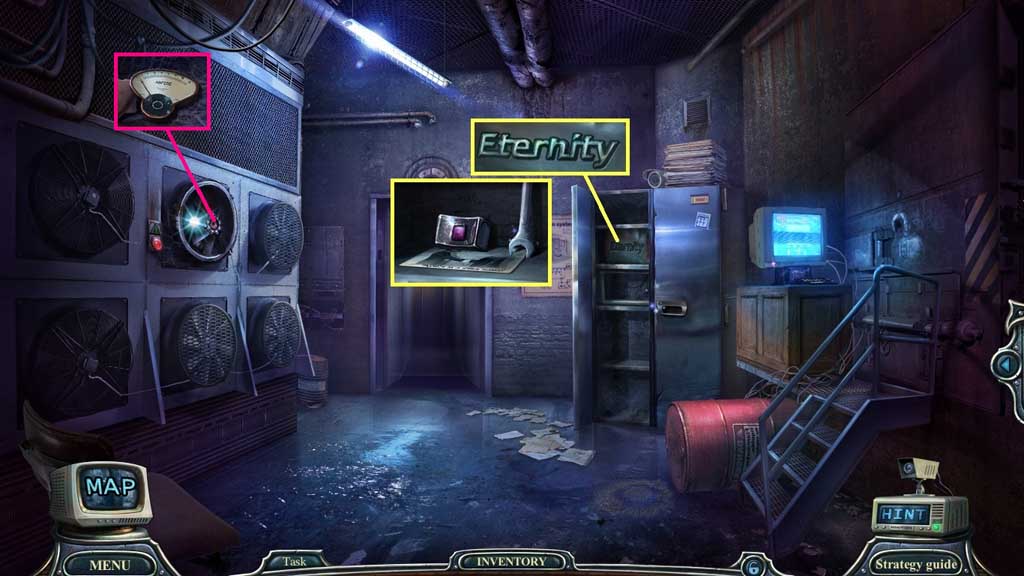
- Insert the bronze emblem; collect the small slider and the wrench.
- Examine the photo.
- Select the wrench to remove the blades; collect 1 /2 gauges.
- Move ahead.
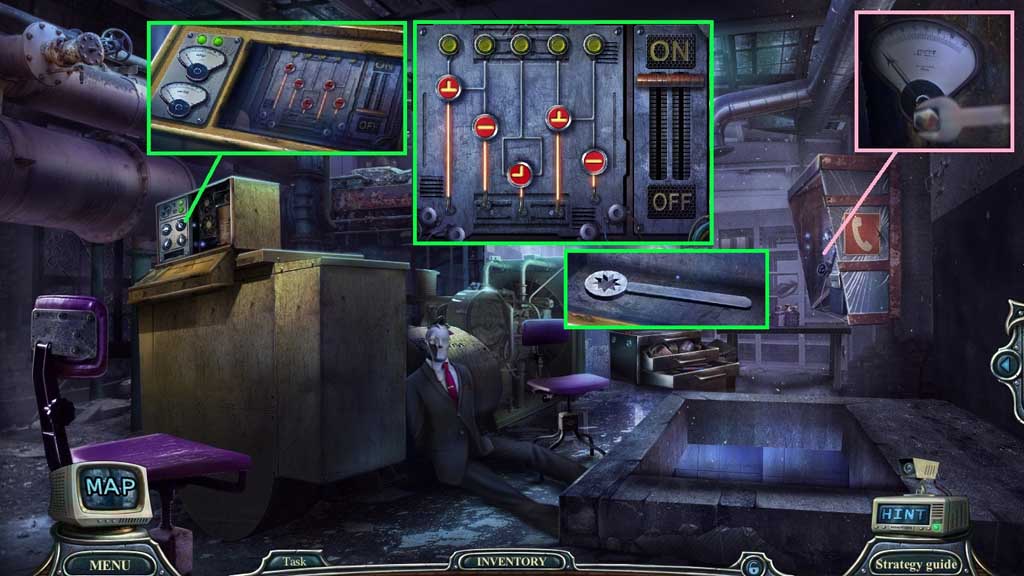
- Select the wrench to collect 2 /2 gauges.
- Attach the 2 gauges to trigger a mini game.
- Solve the game by clicking the dials to turn all of the currents off.
- Click the lever.
- Collect the sprocket wrench.
- Move to Terence’s Room.
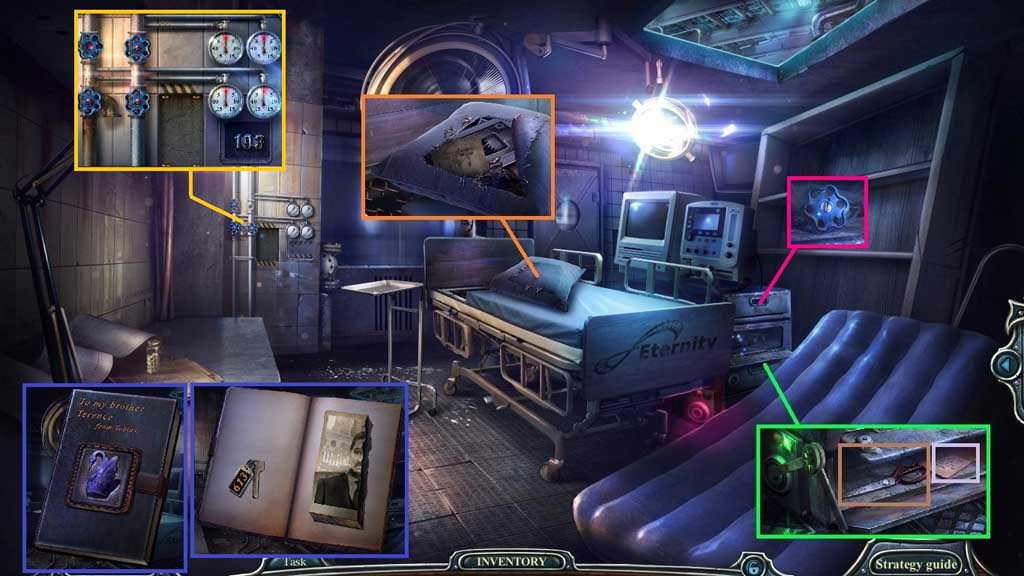
- Select the sprocket wrench to collect the scissors.
- Read the note.
- Select the scissors to cut the seam; click the material.
- Read the note.
- Click the photo album; collect Terrence’s diary.
- Place the glass figurine into Terrence’s diary; click the pages and collect the drawer key and the photo part.
- Insert the drawer key and click it 2x’s; collect the tap handle and place it onto the stem trigger a mini game.
- Solve the game by adjusting the dials correctly.
- Collect the code.
- Move to the Electrical Room.
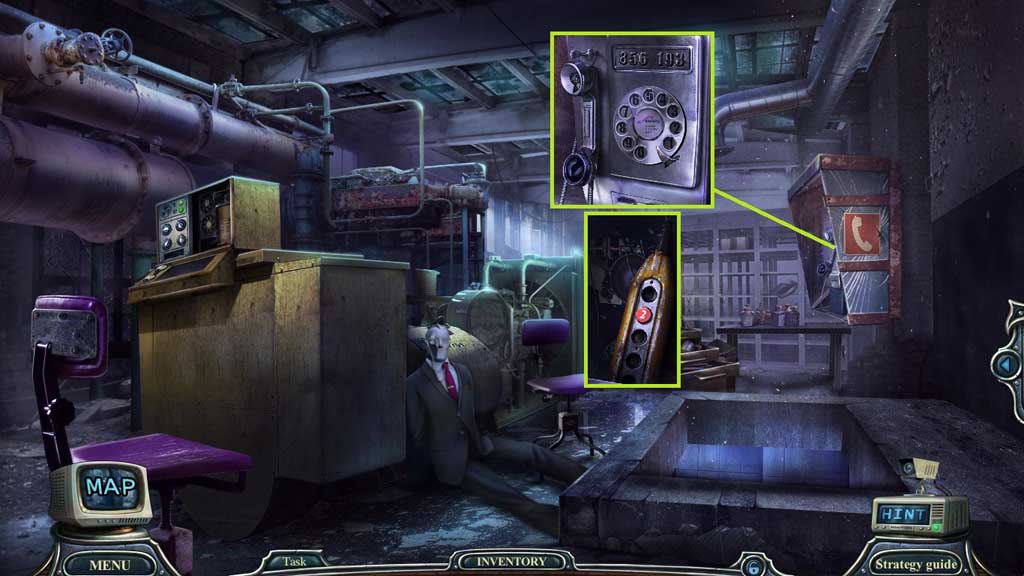
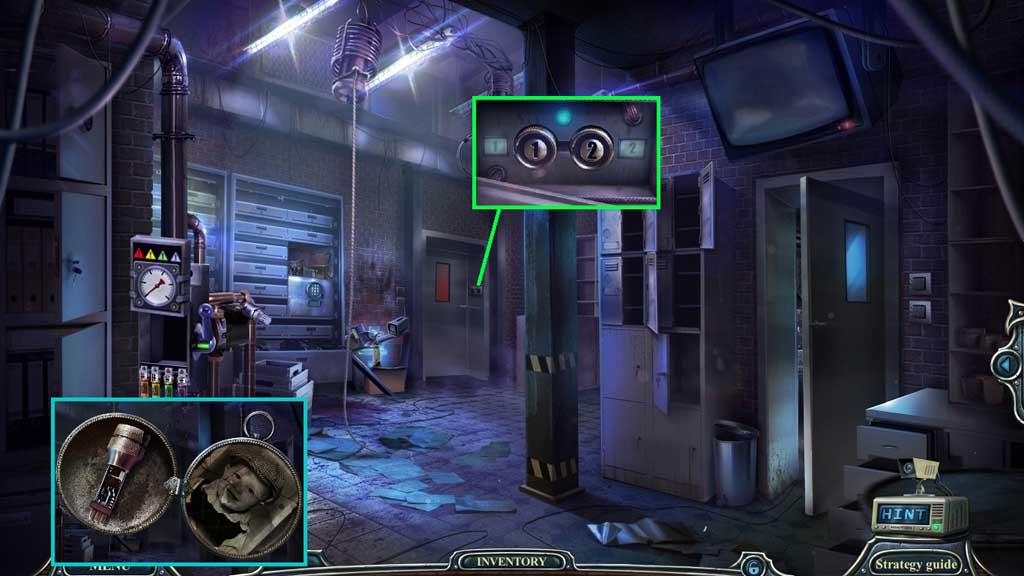
- Place the 2 codes into the phone.
- Dial: 856 – 193; collect the controller.
- Move to Terence’s Room.
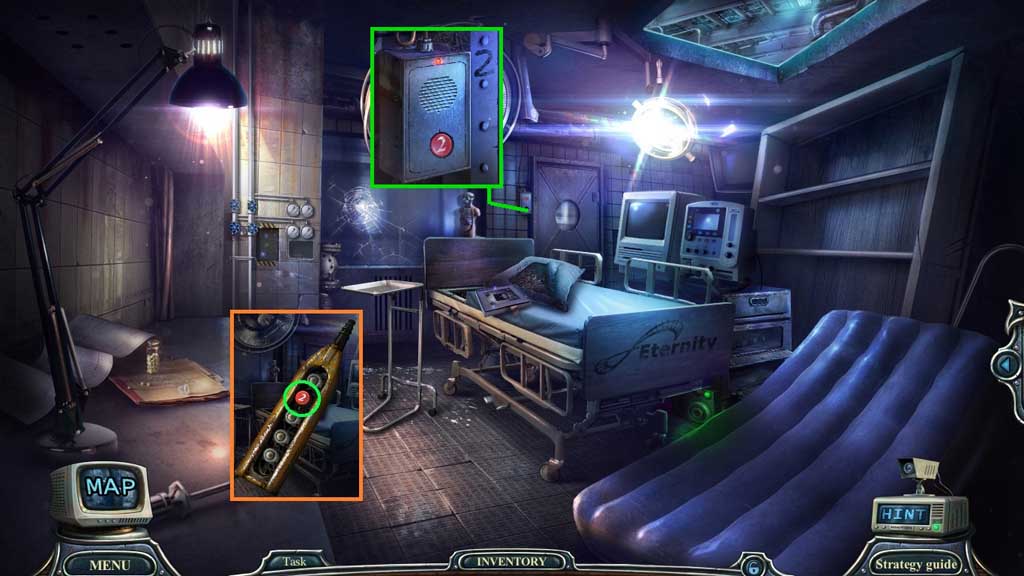
- Click the controller plate; collect the 2nd floor button.
- Attach and click the 2nd floor button.
- Move to the 2nd Floor.
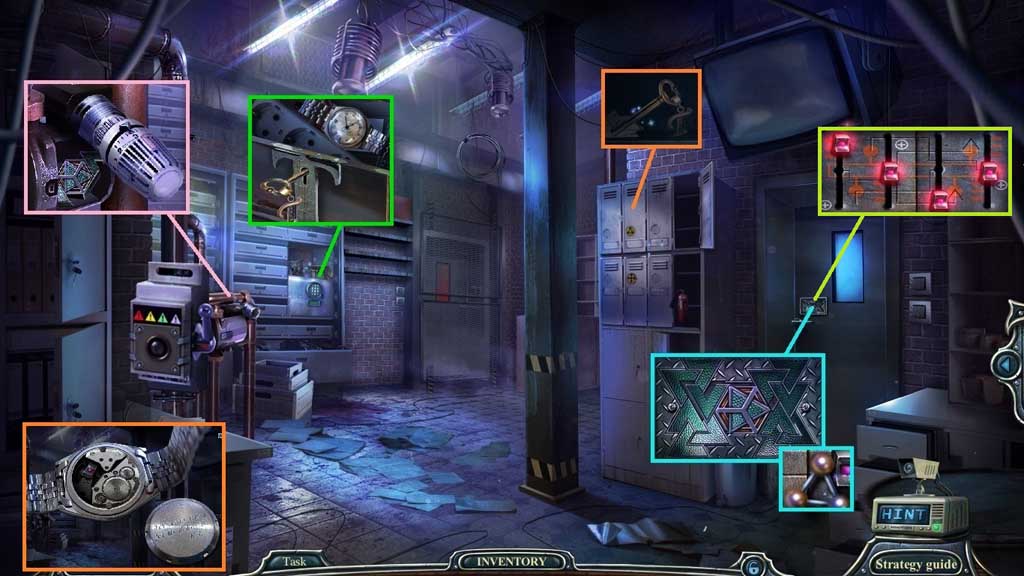
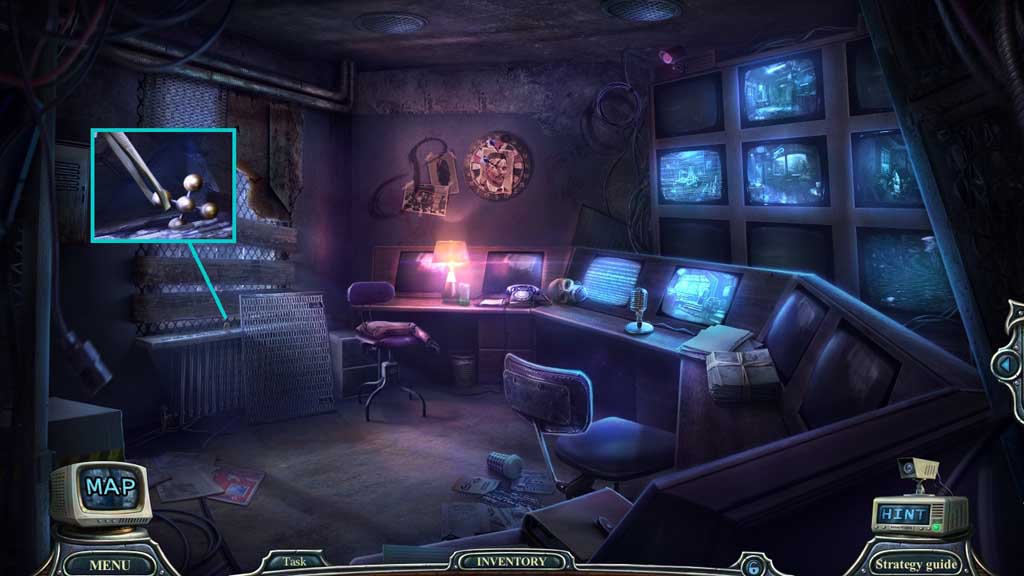
- Select the hook to collect the molecule.
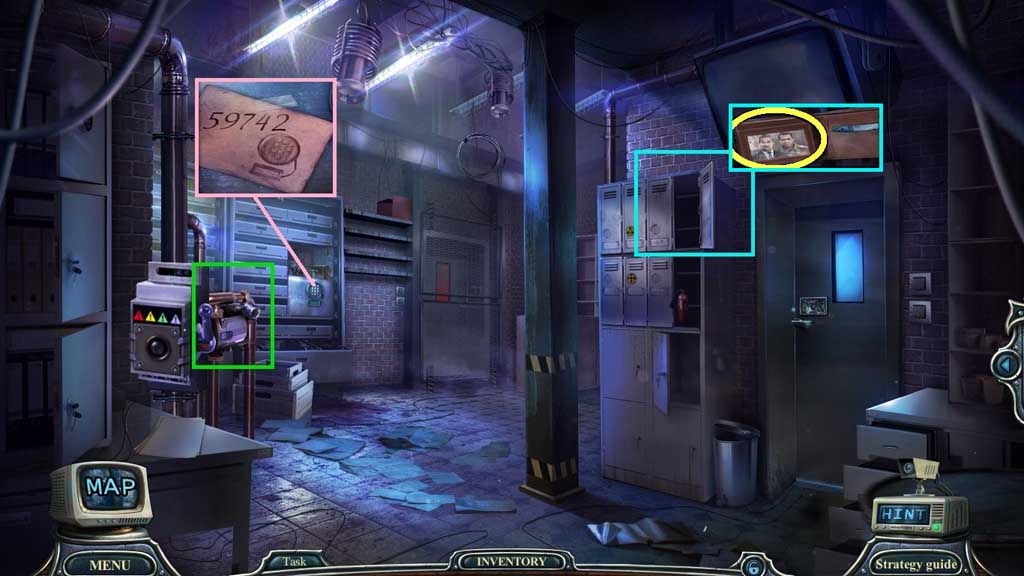
- Insert the molecule into the locker; collect Tobias’ wallet and click it open.
- Zoom into the photo; collect Tobias’ code and place it onto the safe to trigger a mini game.
- Solve the mini game by unlocking the safe.
- Solution: 5 – 9 – 7 – 4 – 2; collect the sledgehammer.
- Move down once.
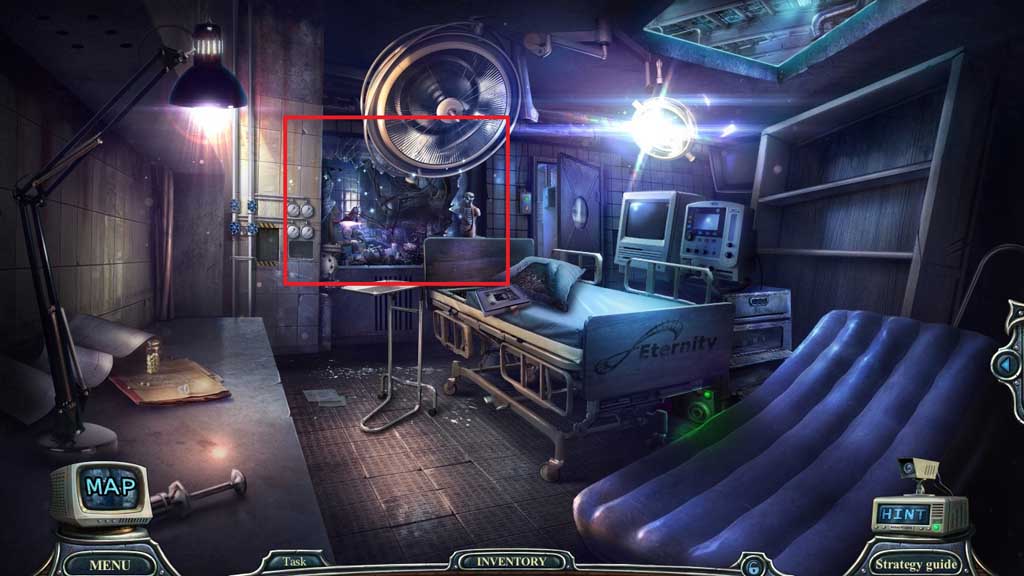
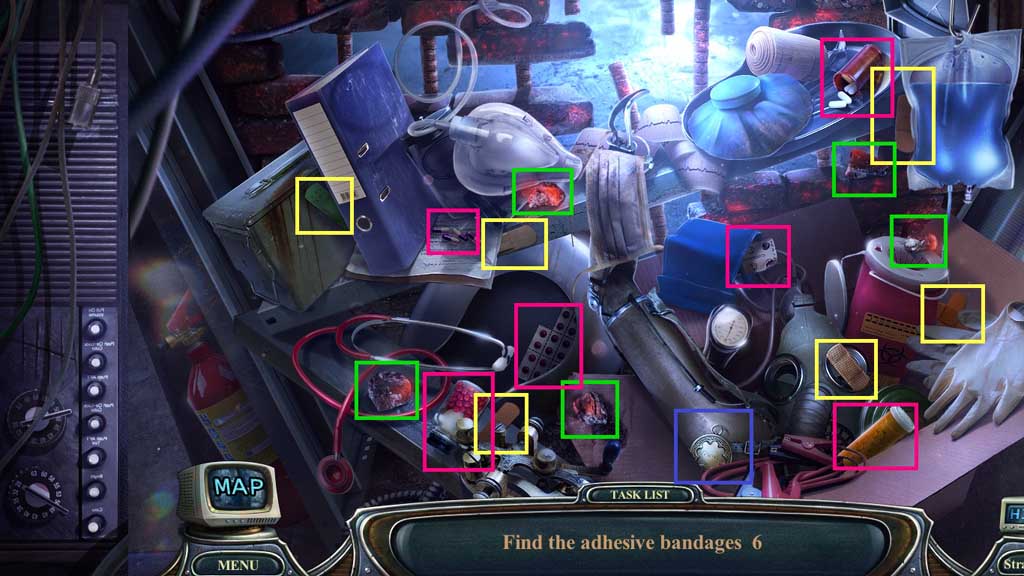
- Select the sledgehammer to smash the glass and trigger a hidden objects area.
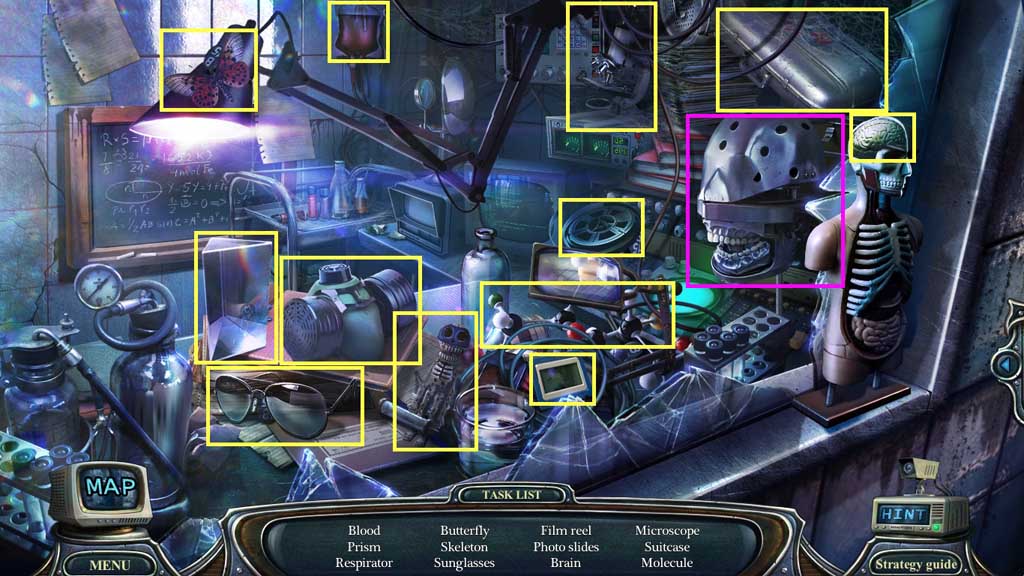
- Find the items and click the fragments beneath them.
- Collect the regulator.
- Move ahead.
- Insert the regulator; collect the metal ornament.
- Click the door.
- Insert the metal ornament; collect the molecule and insert it into the locker.
- Collect Tobias’ key and insert it into the lock; click the box and collect the watch.
- Click the watch 3x’s; collect the small slider.
- Insert the 2 small sliders to trigger a mini game.
- Solve the game by aligning the sliders correctly.
- Move into the Surveillance Room.
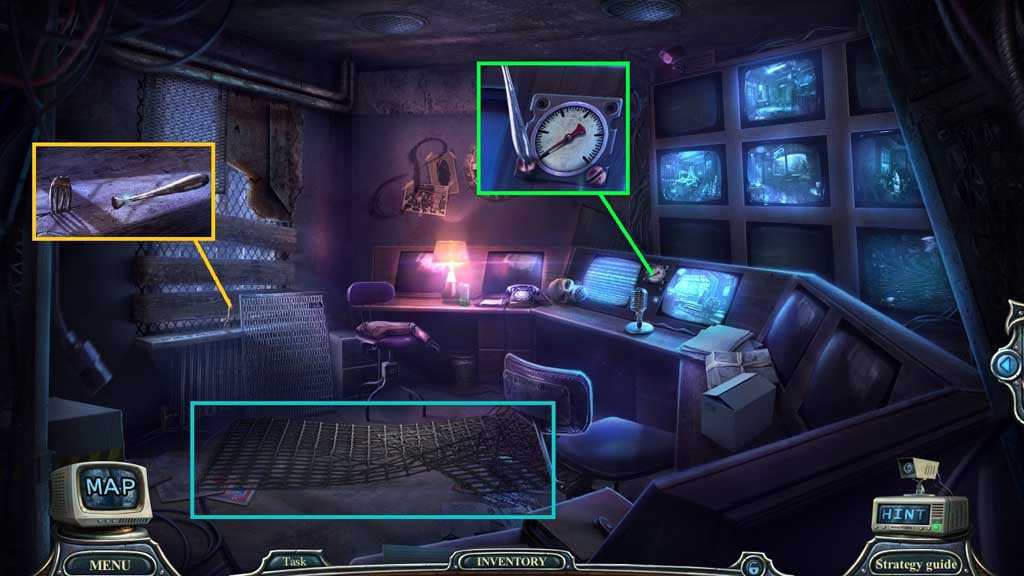
- Collect the net trap.
- Collect the screwdriver and use it to collect the gauge.
- Move down once.
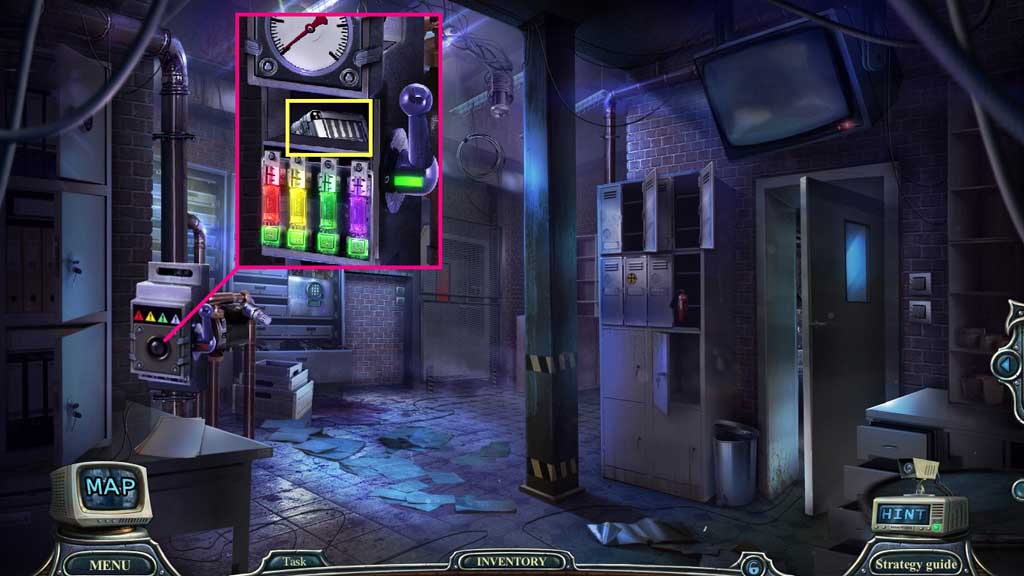
- Attach the gauge to trigger a mini game.
- Solve the game by aligning the fuses correctly; click the lever.
- Collect the lead box.
- Move down once.
- Click the lead box; collect the photo part and Tobias’ security chip.
- Insert the 2 photo parts; collect the tile and insert it into the wall.
- Collect the tweezers and read the note.
- Move to the Surveillance Room.
- Click the card, then the cobwebs.
- Select the tweezers to collect the molecule.
- Move down once.
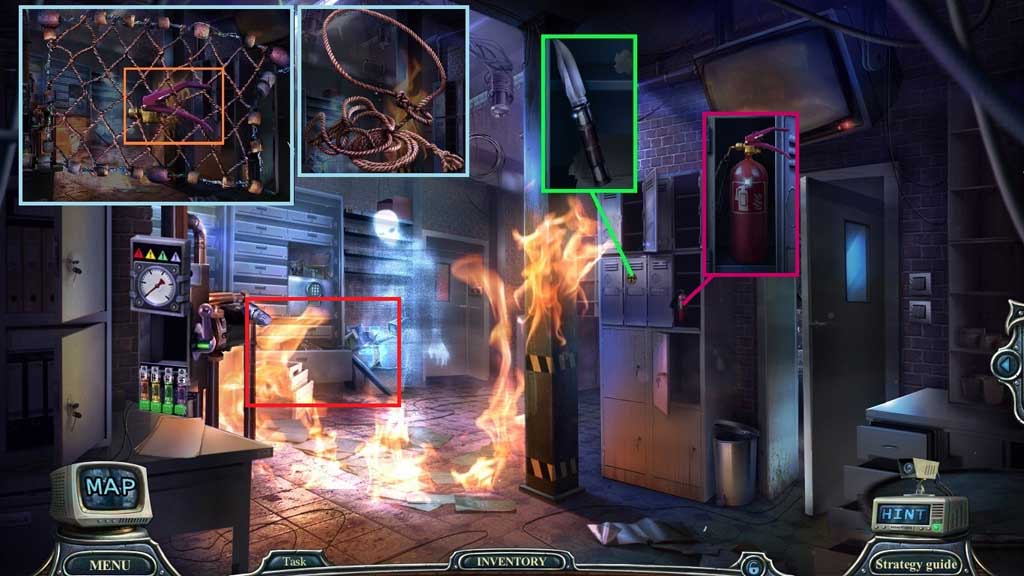
- Insert the molecule into the locker; collect the engraved knife.
- Click the net trap 2’xs; collect the fire extinguisher nozzle.
- Select the engraved knife to create the lasso.
- Place the fire extinguisher nozzle onto the fire extinguisher.
- Use the fire extinguisher to douse the flames; toss the lasso forward.
- Click the hidden objects area.
- Find the items.
- Collect Terrence’s medallion.
- Click Terrence’s medallion 2x’s; collect Terrence’s security chip.
- Click the panel and insert Terrence’s security chips; click them.
- Move into the Torture Room.
- Click the machine; a mini game will trigger.
- Solve the mini game by finding the matches.
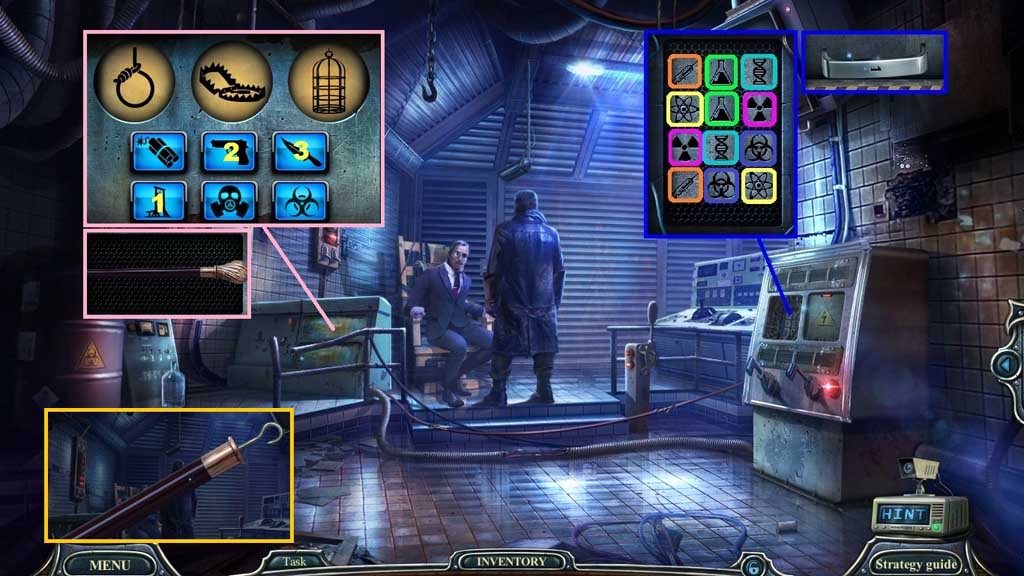
- Collect the handle and insert it into the slot; click the panel to trigger a mini game.
- Solve the game by clicking on the correct icons.
- Collect the professor’s walking stick; click it 2x’s.
- Collect the stick with hook.
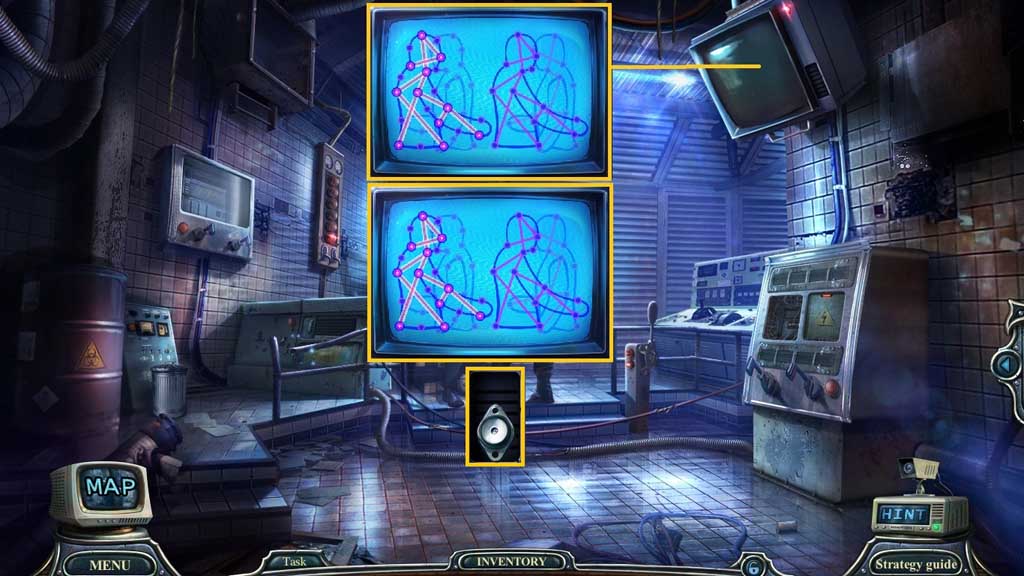
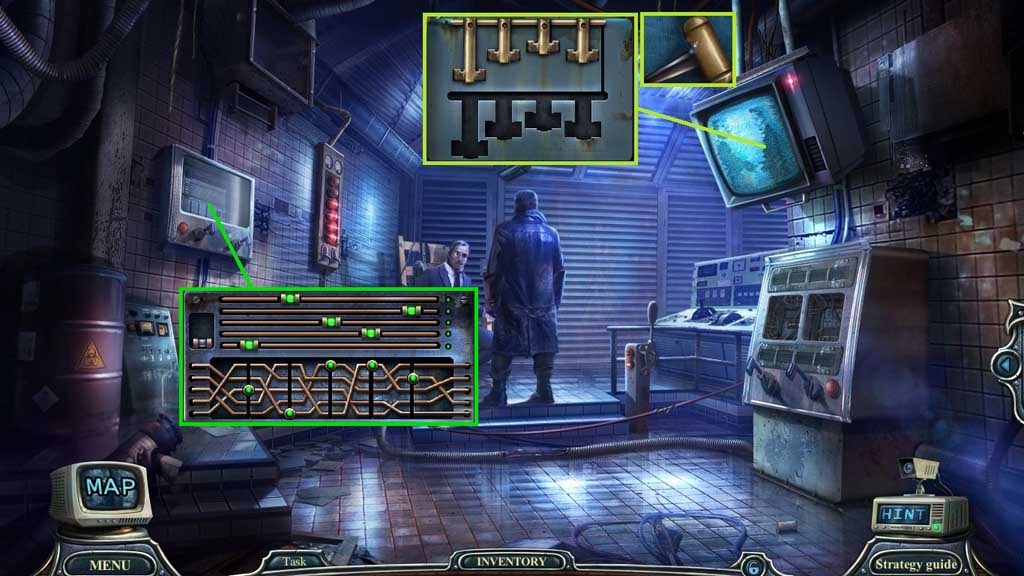
- Select the stick with hook and use it on the TV to trigger a mini game.
- Solve the game by first connecting the dots correctly; collect the diode.
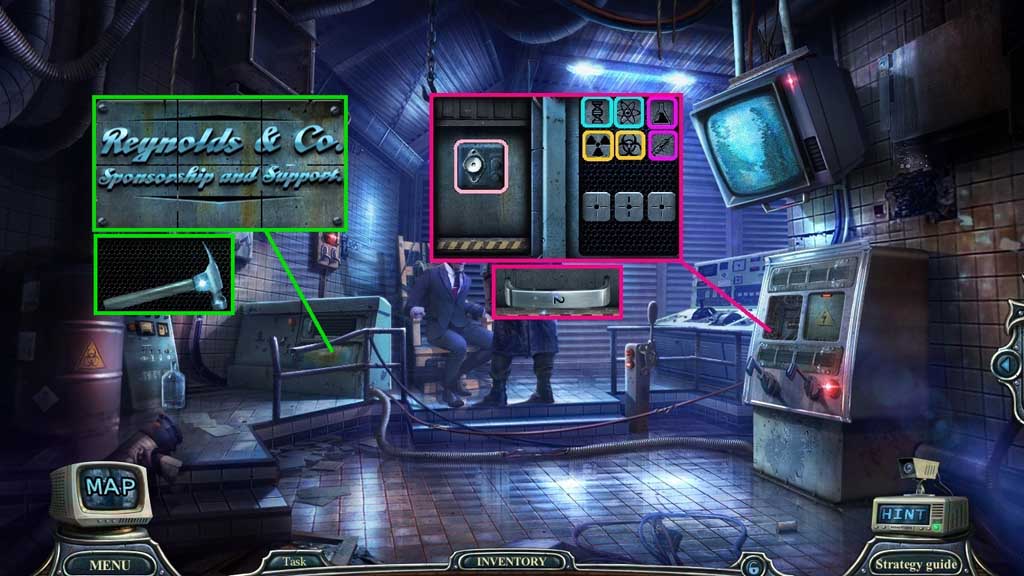
- Insert the diode to trigger a mini game.
- Solve the game by clicking the related images.
- Collect the handle.
- Attach the handle and click the panel to trigger a mini game.
- Solve the game by aligning the image tiles correctly.
- Collect the hammer and use it to smash the TV screen to trigger a mini game.
- Solve the game by aligning the parts correctly.
- Collect the lever.
- Insert the lever to trigger a mini game.
- Solve the game by aligning the circular buttons correctly.
- Collect the fuse.
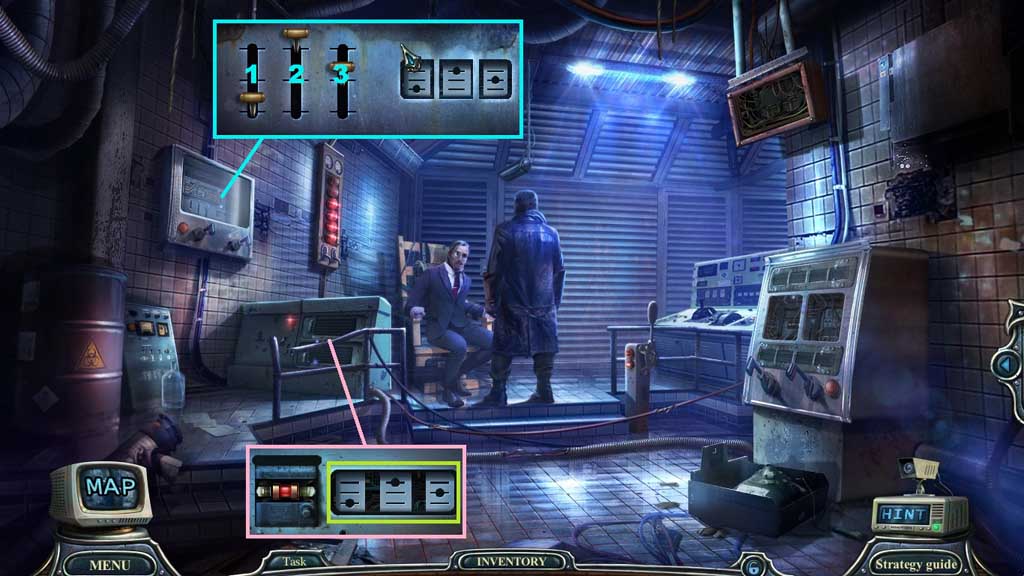
- Insert the fuse; collect the combination and insert it into the panel to trigger a mini game.
- Solve the game by aligning the levels correctly.
- Solution: 1 – 3 – 2.
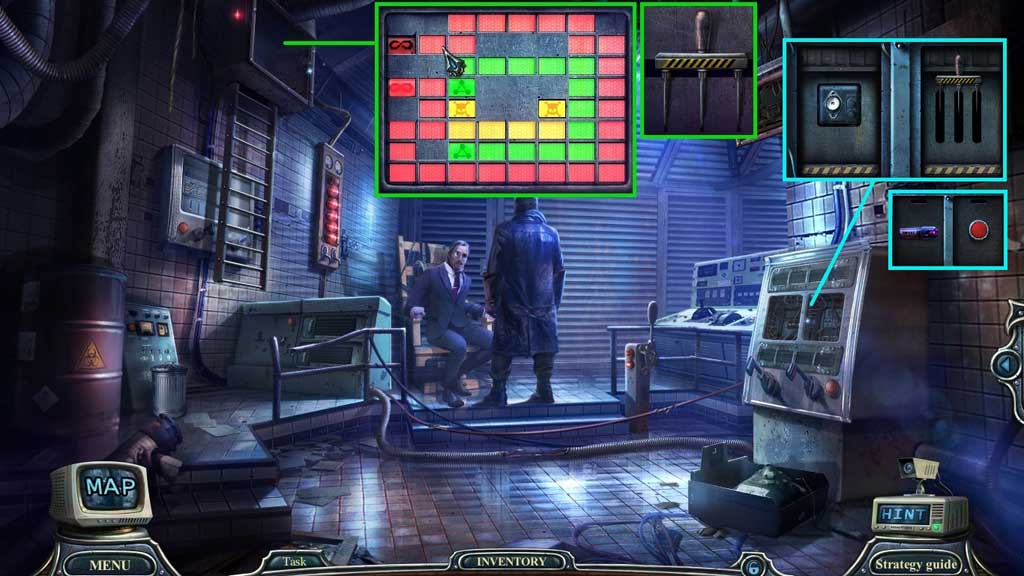
- Click the duct to trigger a mini game.
- Solve the game by connecting symbols without over lapping.
- Collect the emergency switch and insert it into the socket; click it once.
- Select to click the button or select the pepper spray.
- Congratulations! You have successfully completed the main game of Haunted Hotel Eternity C. E.