
Haunted Hotel: Death Sentence: Chapter Four: Redmond Revelations
Our Haunted Hotel: Death Sentence Walkthrough is the tell-all guide you've been waiting for as you attempt to survive your exploration of the Holy Mountain Hotel. As things get a bit hairy, you'll be happy to know you can always count on our trusted game instructions, our custom marked screenshots, and our easy-to-understand puzzle solutions to see you through this new haunting adventure!
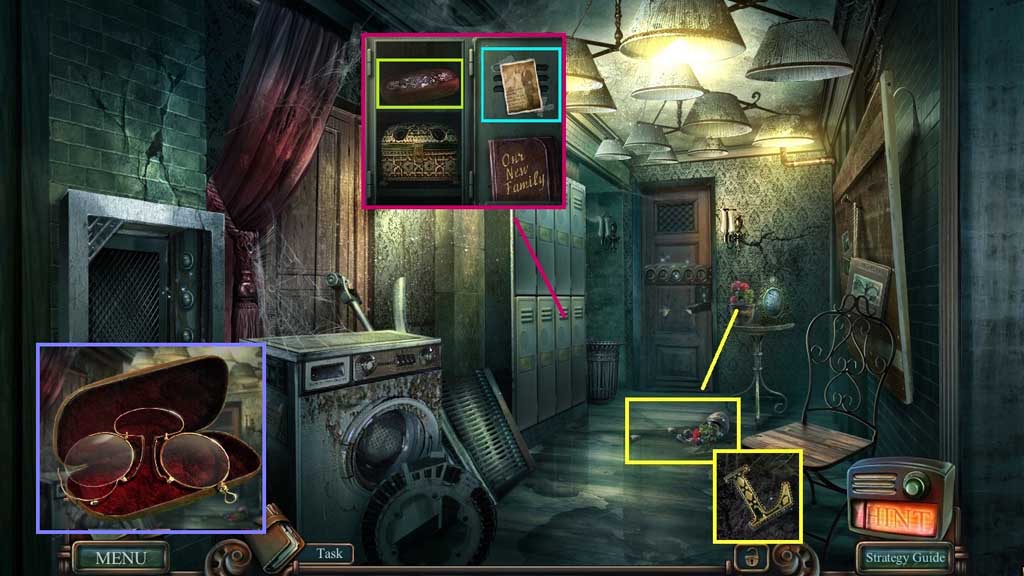
- Click the plant.
- Select the herbicide to spray onto the vines; collect the L medallion and insert it into the locker.
- Click the picture and collect the glasses case.
- Click the glasses case 2x’s; click the glasses to collect the lens.
- Move down once.
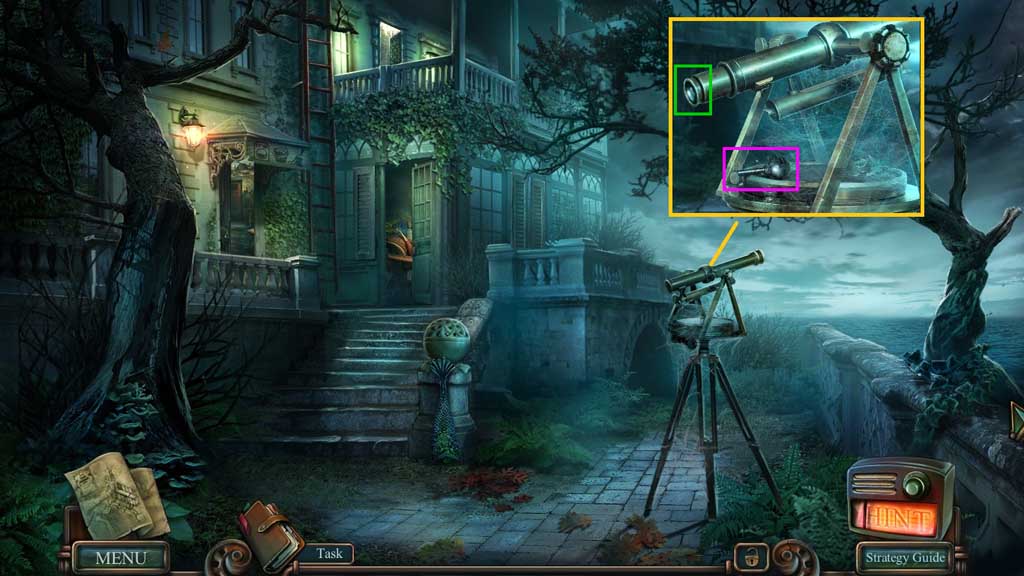
- Click and replace the broken lens; collect the hinge joint.
- Move to the Back Hallway.
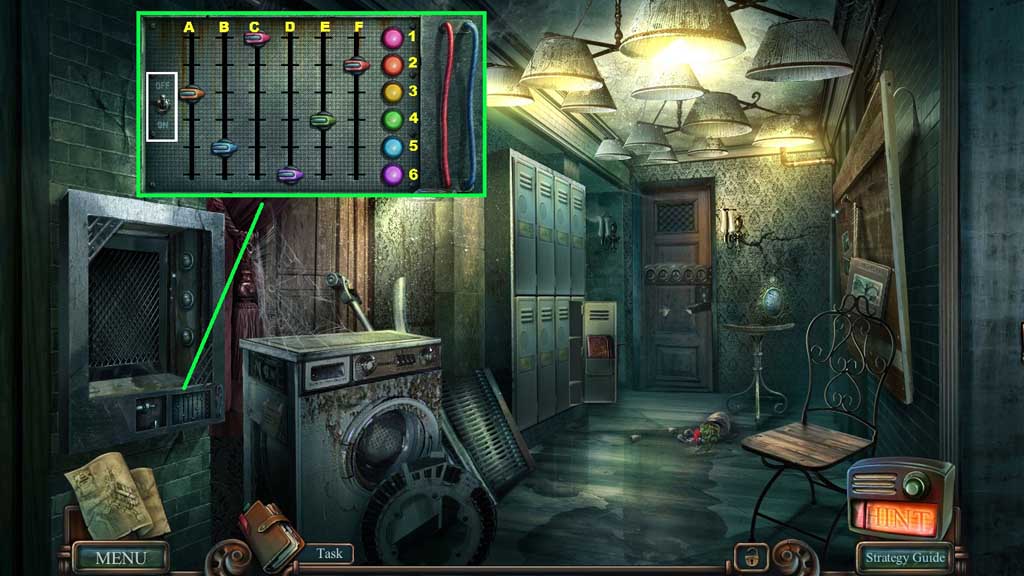
- Attach the hinge joint and replace the wire to trigger a mini game.
- Solve the game by aligning the sliders with the color matched lights.
- Use the following solution to solve: ( D-6 ) ( B-5 ) ( C-1 ) ( A-1 ) ( E-4 ) ( C-1 )
- Click the switch.
- Move into the Laundry Room.
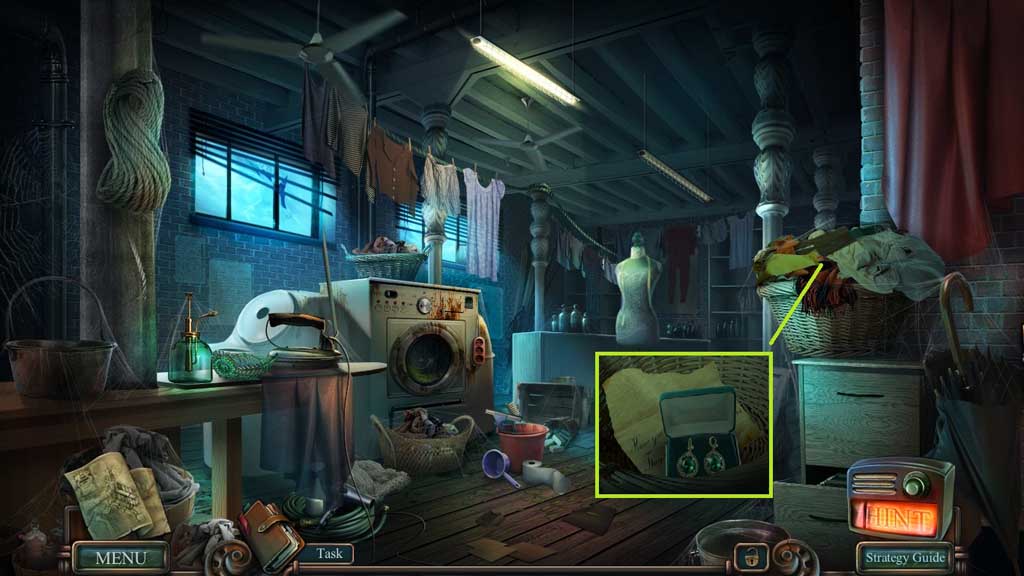
- Click the clothes aside; collect the earrings.
- Read the note.
- Move down once.
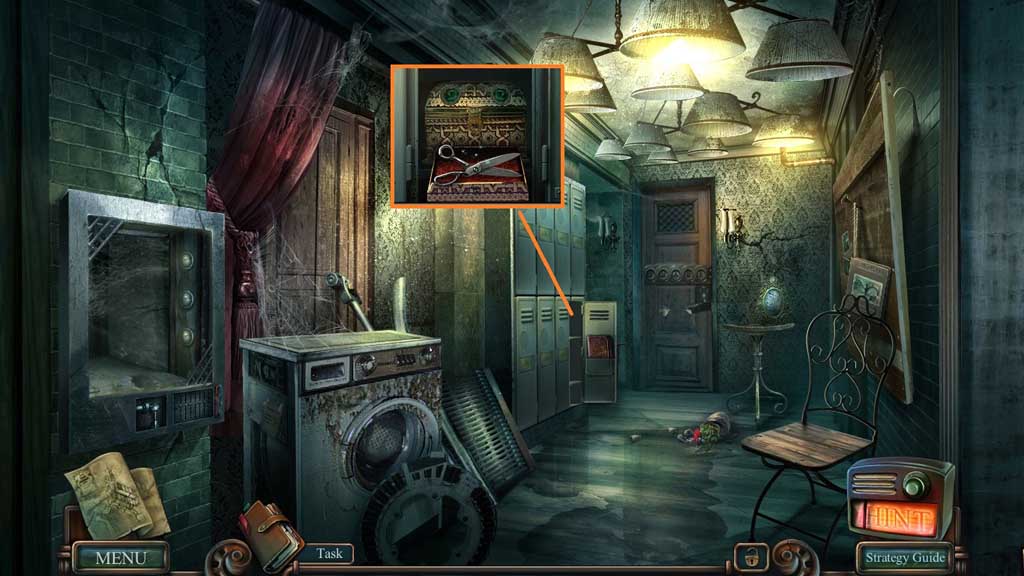
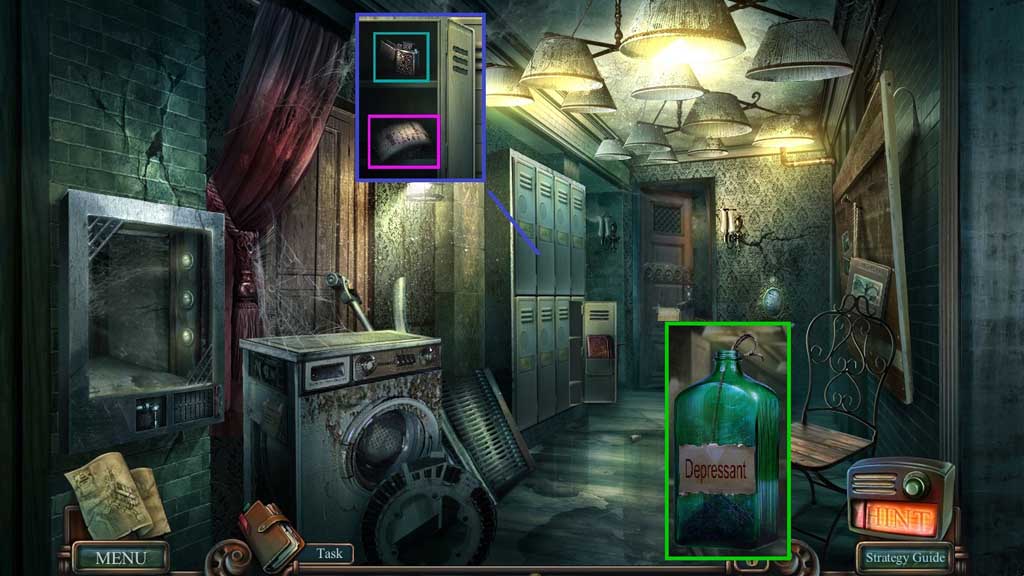
- Zoom into the locker.
- Place the earrings into the box; click the box and collect the scissors.
- Move to the Laundry Room.
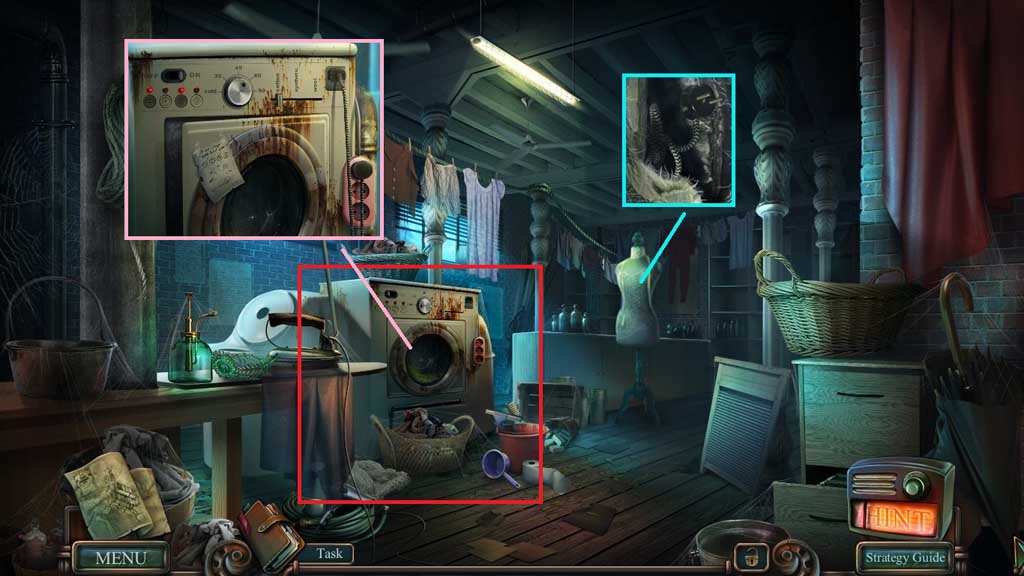
- Select the scissors to slice the mannequin seam; click and collect the connector cord.
- Attach the connector cord onto the washing machine to trigger a mini game.
- Solve the game by adjusting the machine settings correctly.
- Adjust the slide to “cotton” set the temp to “60” and click the 1st and 3rd buttons, then click “on” to solve the game.
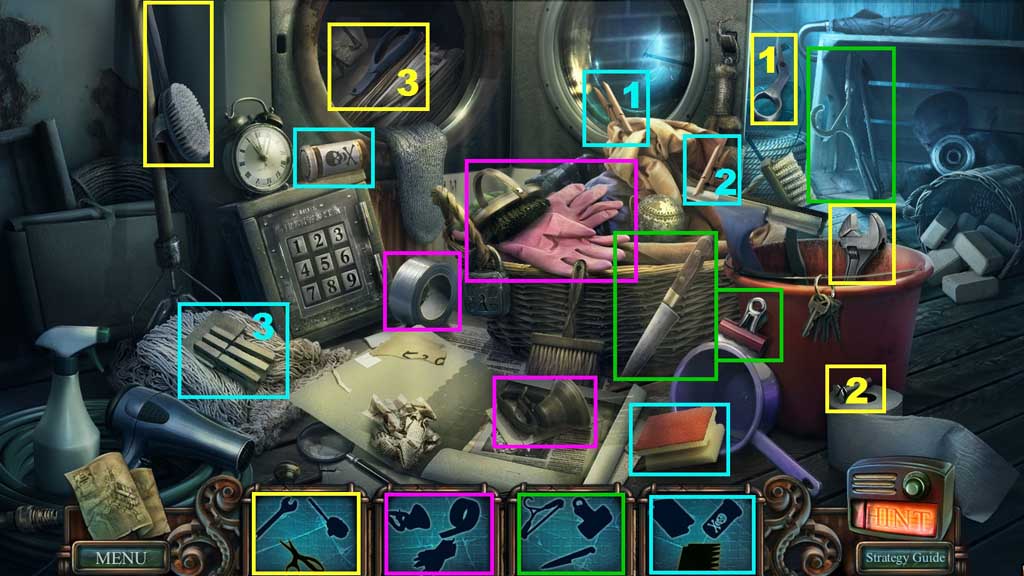
- Click the hidden objects area.
-

- Find the items.
- Assemble the code and enter it into the keypad.
- Collect Redmond’s reel.
- Move to the Front Hall.

- Attach Redmond’s reel and click the switch.
- Collect Veronica’s dossier; click it open and collect the code.
- Move to the Back Hallway.
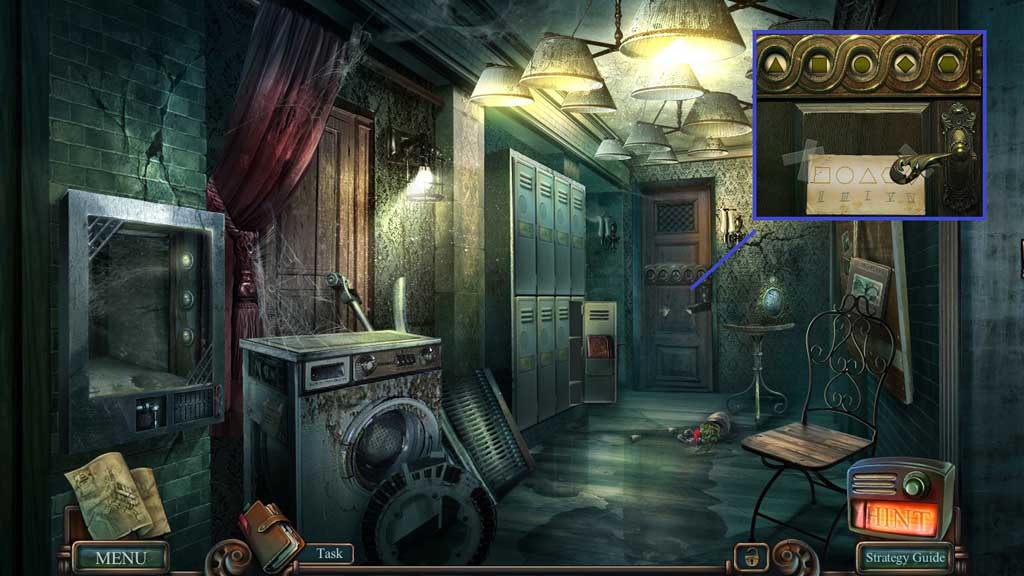
- Place the code onto the door to trigger a mini game.
- Solve the game by adjusting the symbols as shown on the diagram.
- Move into the Economy Room.
- Read the note.
- Select the scissors to slice the pillowcase open.
- Click the covers; collect the empty flask and the valve.
- Zoom into the tub and click away the body wash.
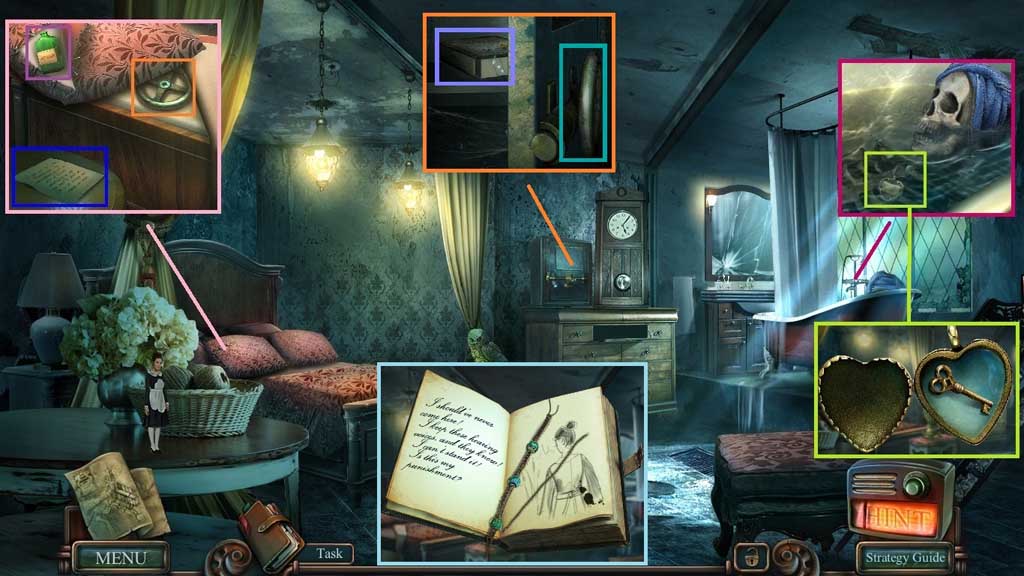
- Click and collect Veronica’s locket; click it open, remove the picture and collect the tiny key.
- Attach the valve and click it once; collect Veronica’s diary and click it once.
- Insert the tiny key and read the diary, click the bookmark and collect the wick.
- Move down once.
- Insert James’s ring into the locker.
- Read the note.
- Collect the lighter and the gunpowder.
- Click the empty flask and pour in the gunpowder and place the wick to create and collect the explosive.
- Move to the Deluxe Suite.
- Place the explosives by the door and ignite it using the lighter.
- Move ahead.
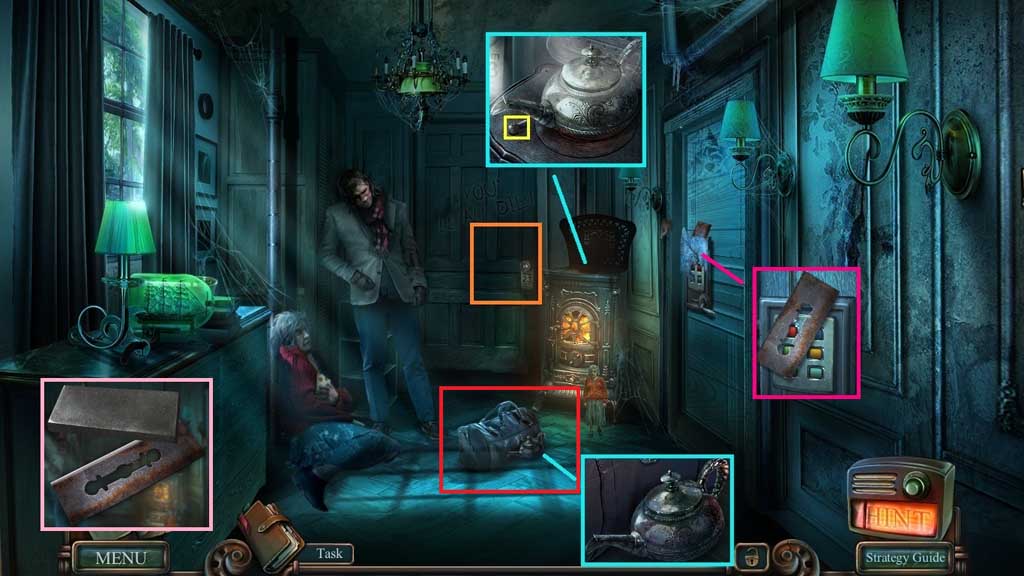
- Collect the kettle of water and place it onto the stove; click the knob and collect the boiling water.
- Collect the grindstone.
- Pour the boiling water onto the door; collect the rusty blade.
- Select the rusty blade and use the grindstone on it; collect the razor blade and use it to slice the travel bag and trigger a hidden objects area.
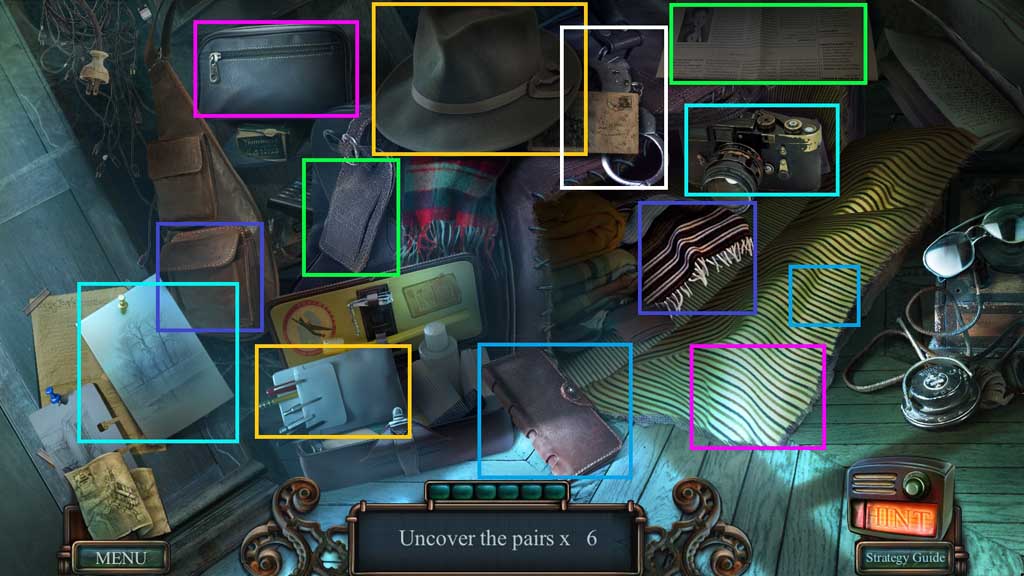
- Find the paired items.
- Collect the handcuffs.
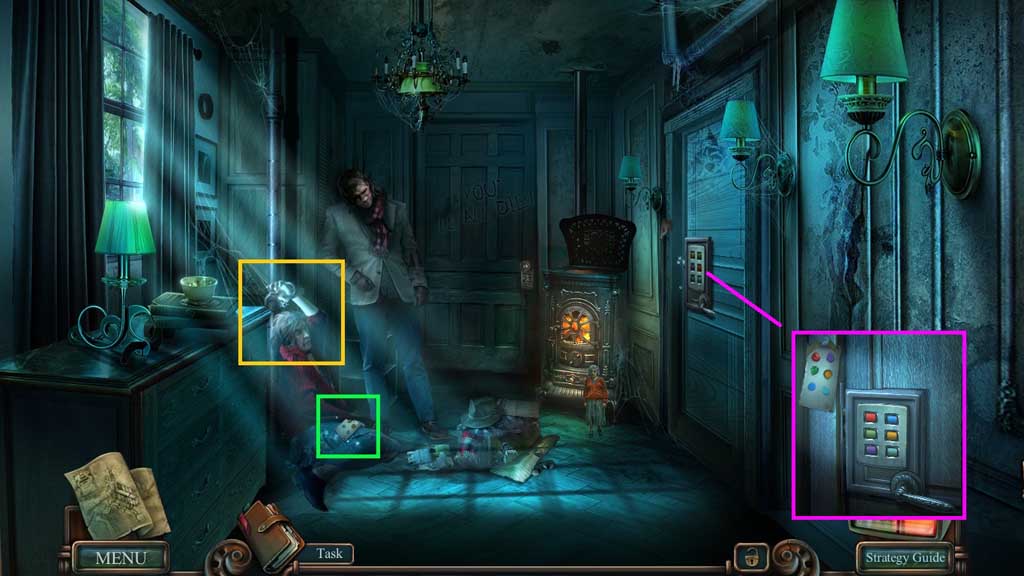
- Place the handcuffs onto the woman.
- Collect Lilith’s code and place it onto the door to trigger a mini game.
- Solve the game by clicking the color code based on the diagram.
- Click the door open.
- Move into the Storage Room.