
Fear for Sale: The 13 Keys: Chapter Four: Jack
Our Fear for Sale: The 13 Keys Walkthrough will guard your back as you prepare yourself to spend a night in Room 13 of the Hotel Berkeley. When things take a turn for the worst, and your world becomes transformed into something out of a nightmare, you'll be relieved to find our detailed game instructions, custom marked screenshots, and easy puzzle solutions won't abandon you as you search for answers in the haunted halls of the hotel.
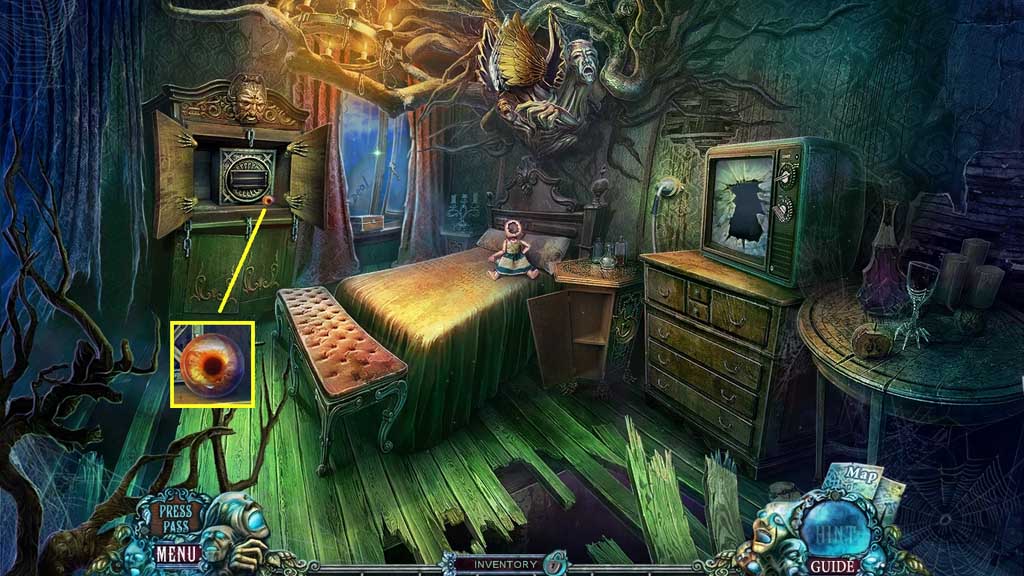
- Collect the eye.
- Move down once.
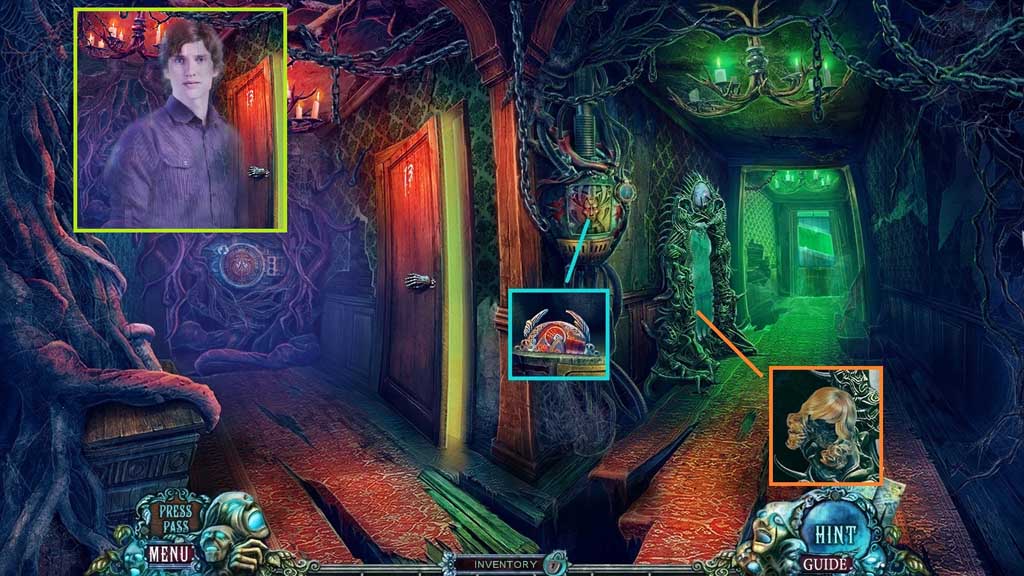
- Speak to Jack.
- Click the door; collect the emblem half 1.
- Attempt to collect the wig to trigger a hidden objects area.
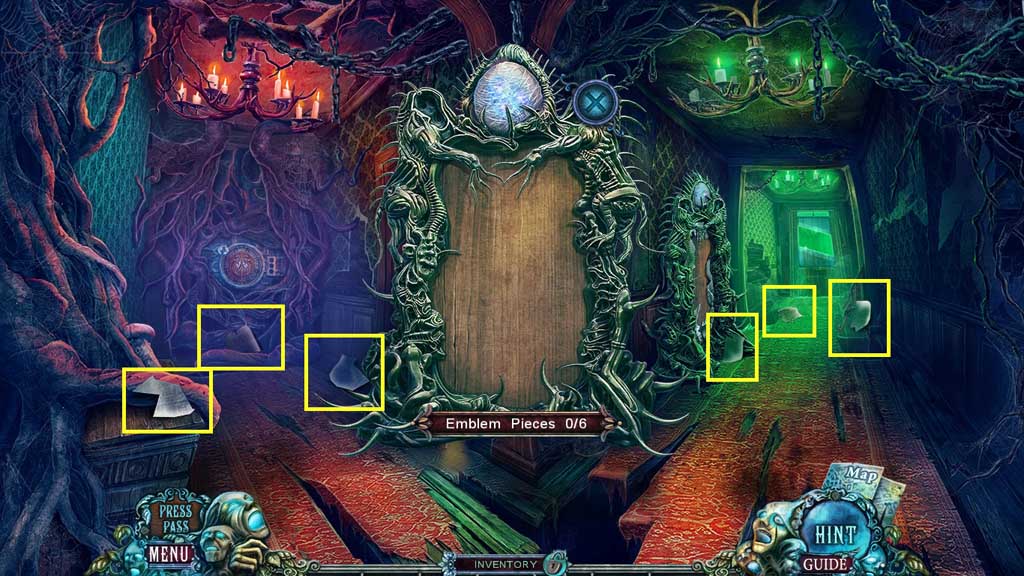
- Collect the fragments.
- Collect the wig.
- Select the glue to repair the mirror; collect the wig.
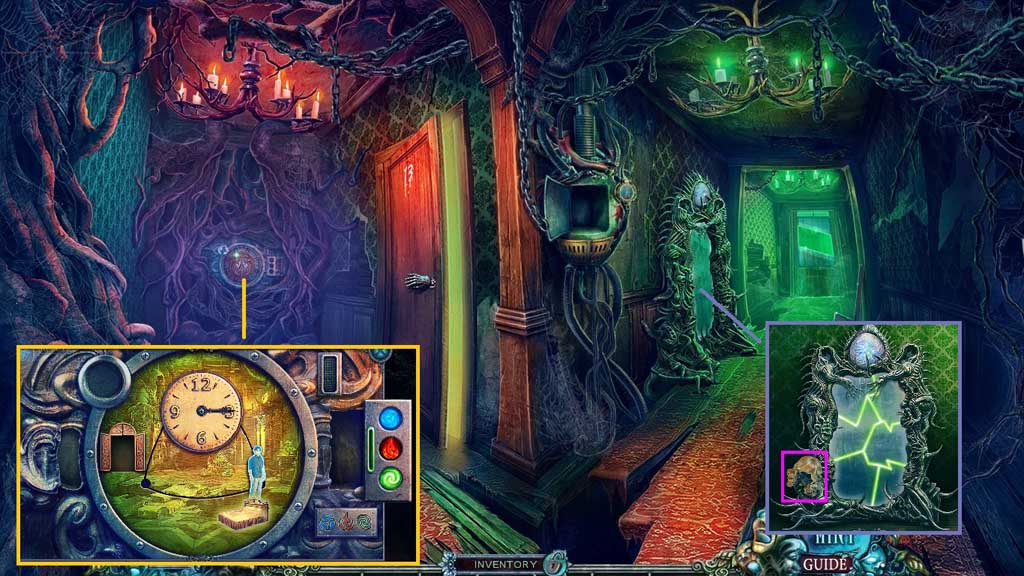
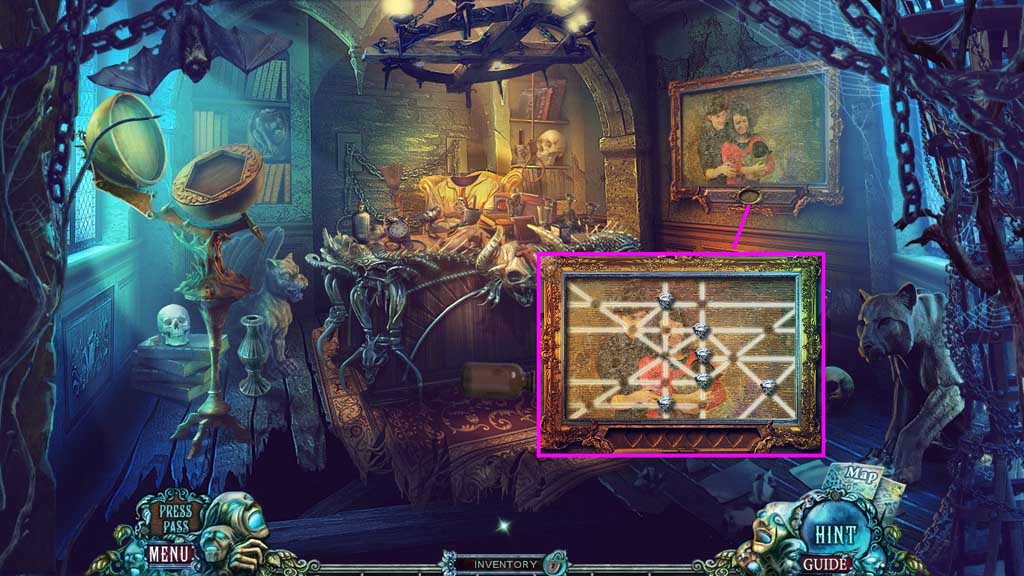
- Insert the library card to trigger a mini game.
- Solve the game by restoring the sequence of events.
- 1. Click the buttons to match the pattern
- 2. Insert the clock hands and click it once.
- 3. Click the woman and place the number 12 click the clock face once.
- 4. Click the man; collect the missing piece and insert it into the groove; collect the number 3.
- 5. Place the number 3 and click the clock hand; click the man once.
- Move upstairs.

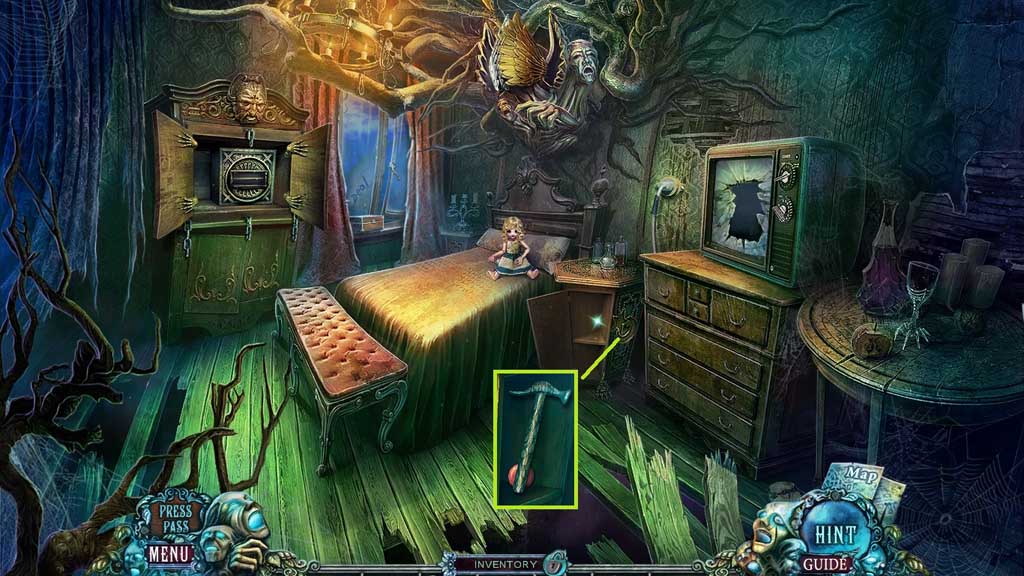
- Select the scissor jack and collect the lion.
- Move down once.
- Select the scissor jack to open the doorway; click button 3.

- Collect the half-moon.
- Click the altar 2x’s and collect the eagle and wrench.
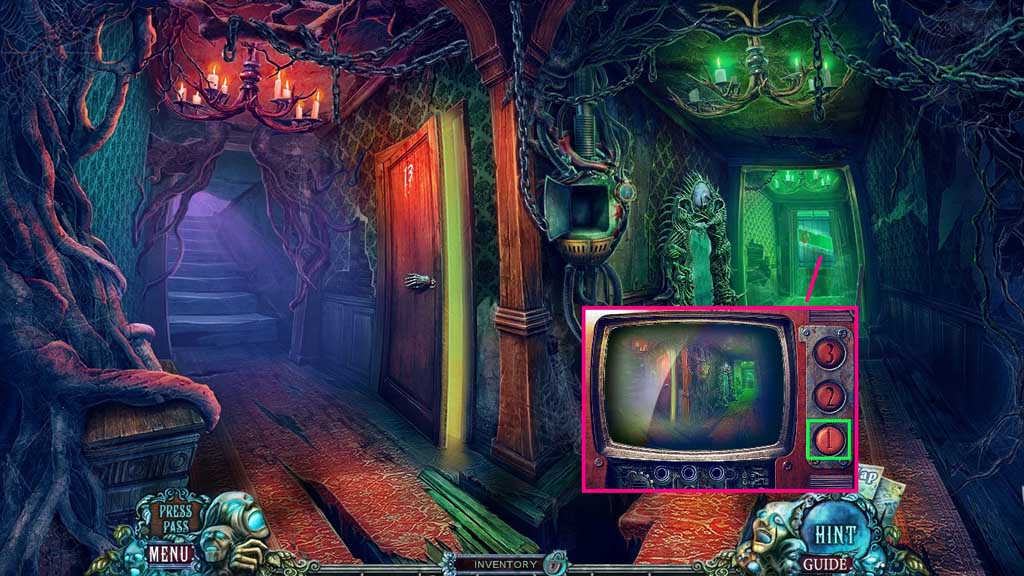
- Move down once and click button 2.
- Move into Emma’s Nightmare Room.
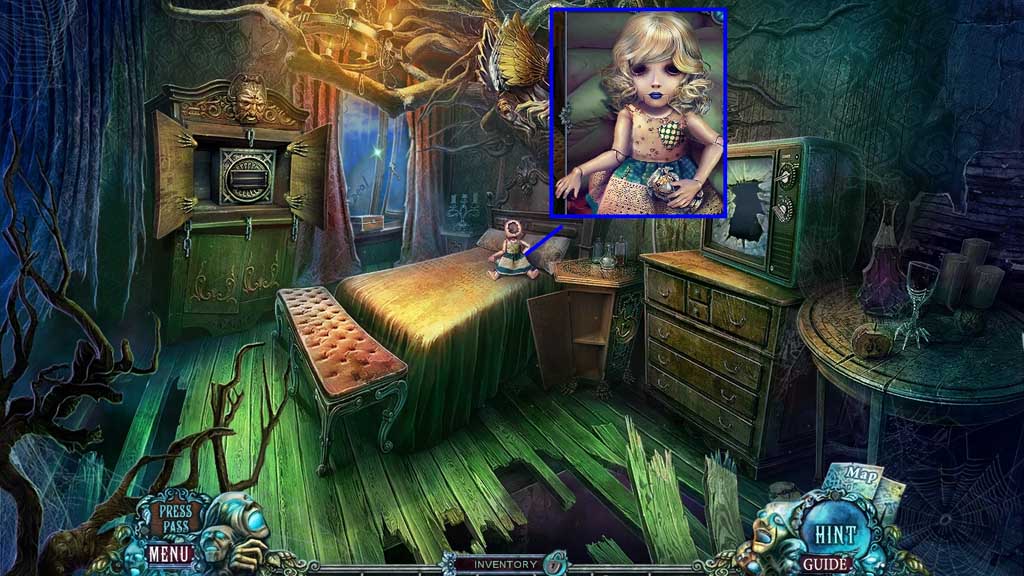
- Place the wig onto the broken doll; collect the hourglass.
- Move down once and go upstairs.
- Insert the eagle.
- Insert the eye; collect stained glass 2.
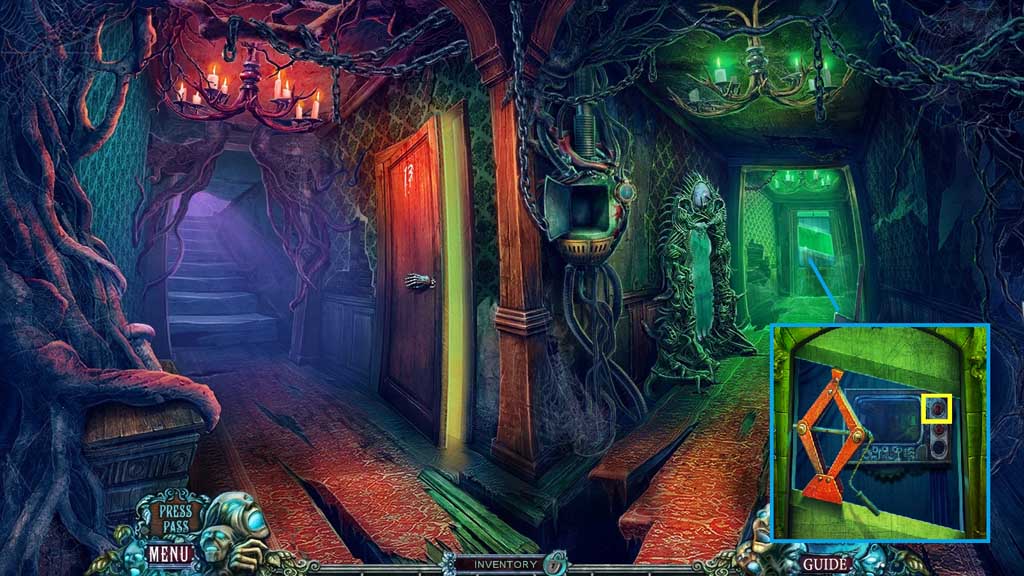
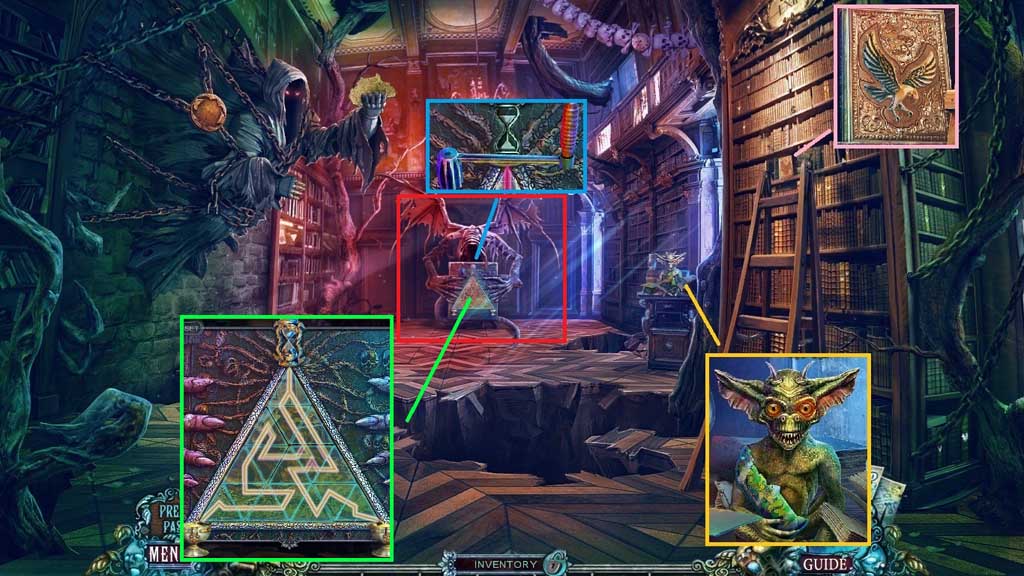
- Collect the handle; insert the hourglass to trigger a mini game.
- Solve the game by arranging the triangles so the hourglass sand can flow into the containers.
- Click the hidden objects area.
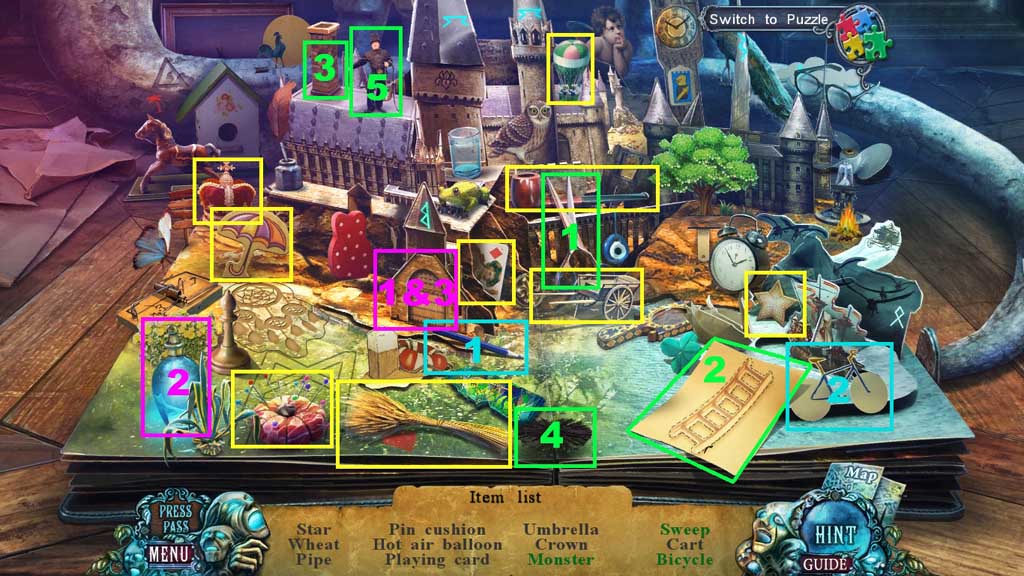
- Find the items.
- Click the door and place the illuminated bottle into the darkness; collect the monster.
- Select the scissors to cut out the ladder and place it onto the chimney; select the brush and give it to the man and collect the sweep.
- Select the pencil to complete and collect the bicycle.
- Collect the stained glass 1.
- Move to the Nightmare Roof.

- Insert stained glass 1 & 2.
- Collect the star and coded cylinder.
- Move to Emma’s Nightmare Room.
- Insert the star and the half moon.
- Collect the hammer and button 1.
- Move down once.
- Insert and click button 1.
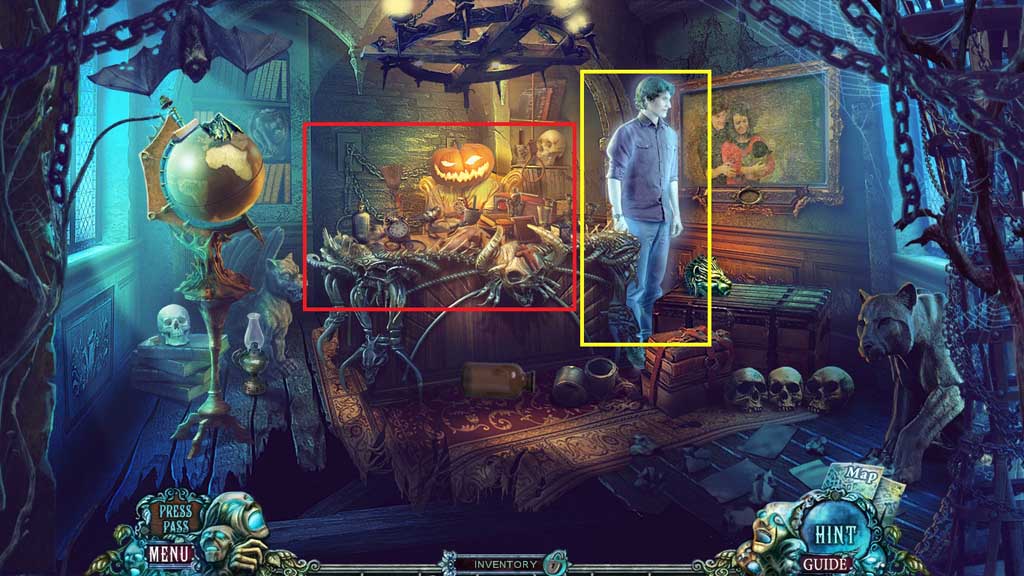
- Speak to the man.
- Click the hidden objects area.
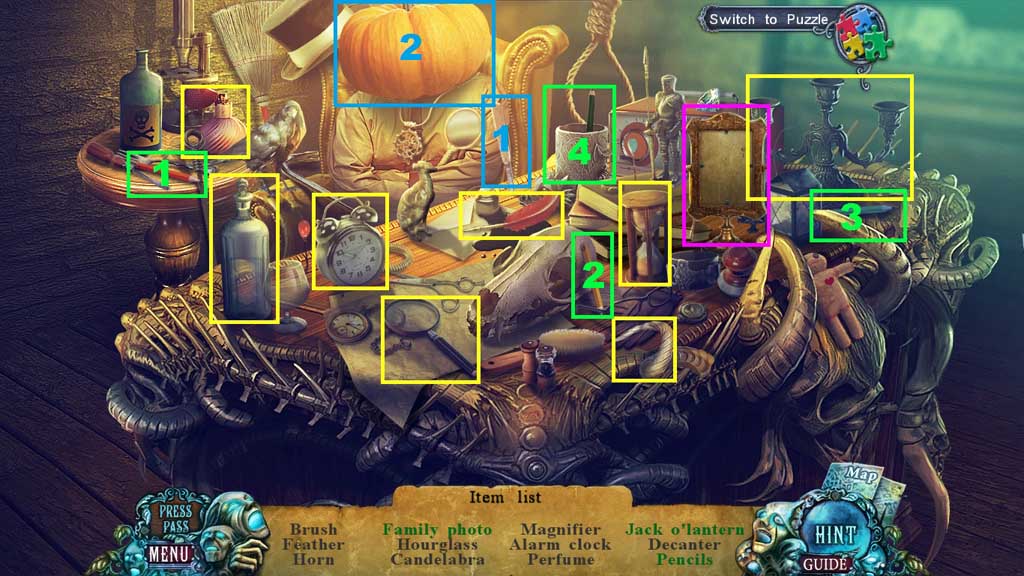
- Find the items.
- Click the frame; collect the family photo.
- Select the knife to carve and collect the Jack - o’-lantern.
- Select the pencils and place them into the cup; collect the pencils.
- Collect the horn.

- Collect the chalk and the dragon wing.
- Collect lion 2.
- Move to Emma’s Nightmare Room.

- Attach the dragon wing; collect the crystal skull.
- Select the chalk to reveal the code.
- Insert the coded cylinder and adjust the tumblers to 2 – 0 – 6; collect the jar with electrode.
- Move down once.

- Place lions 1 & 2; collect parts of the antenna.
- Move to the Nightmare Roof.
- Select the parts of antenna and the jar with electrode to create and collect the jar with lightning.
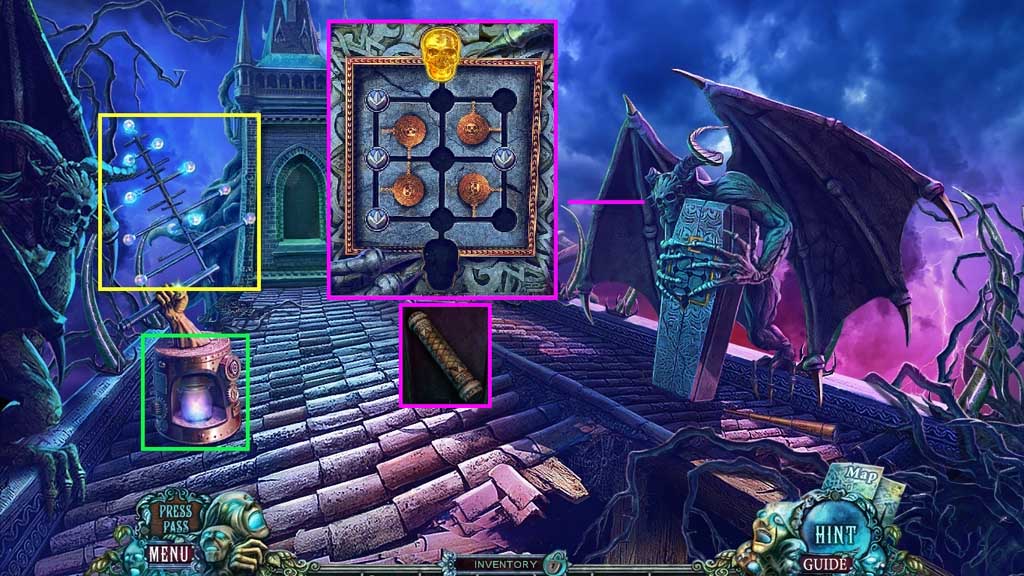
- Place the horn and insert the crystal skull to trigger a mini game.
- Solve the game by guiding the skull through the maze.
- Collect the scroll.
- Move to the Nightmare Library and click the hidden objects area.
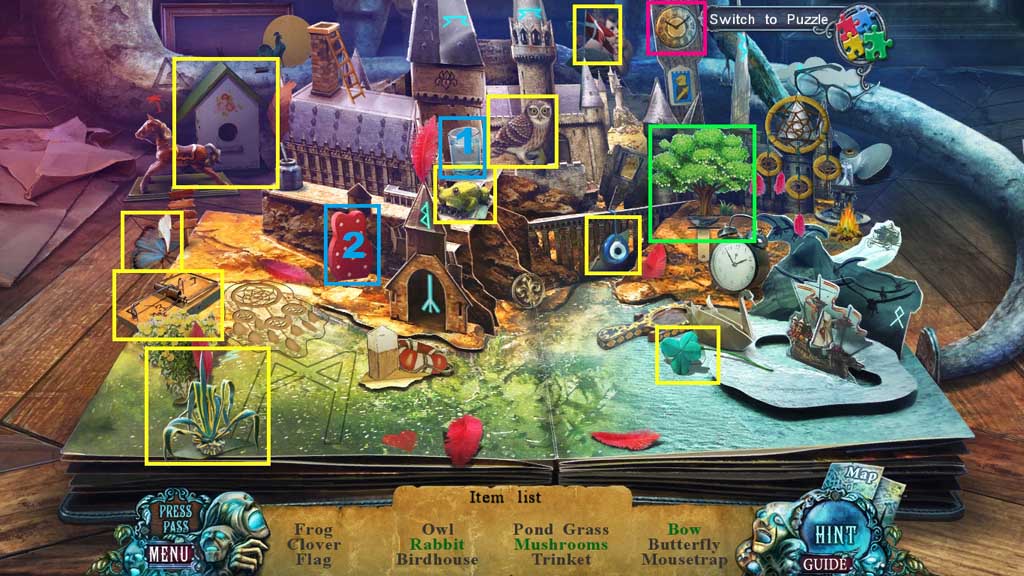
- Find the items.
- Select the glass of water and pour it onto the sponge; collect the rabbit.
- Click the area beneath the tree; collect the mushrooms.
- Click the clock; collect the bow.
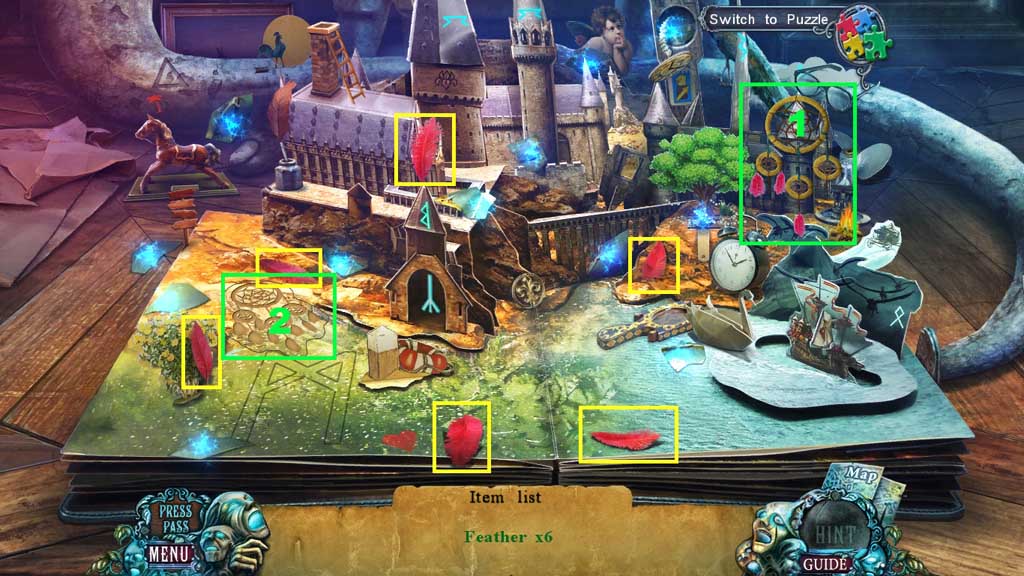
- Click the glowing fragments.
- Find the feathers.
- Insert the dream catcher into the groove.
- Collect the box with ears.
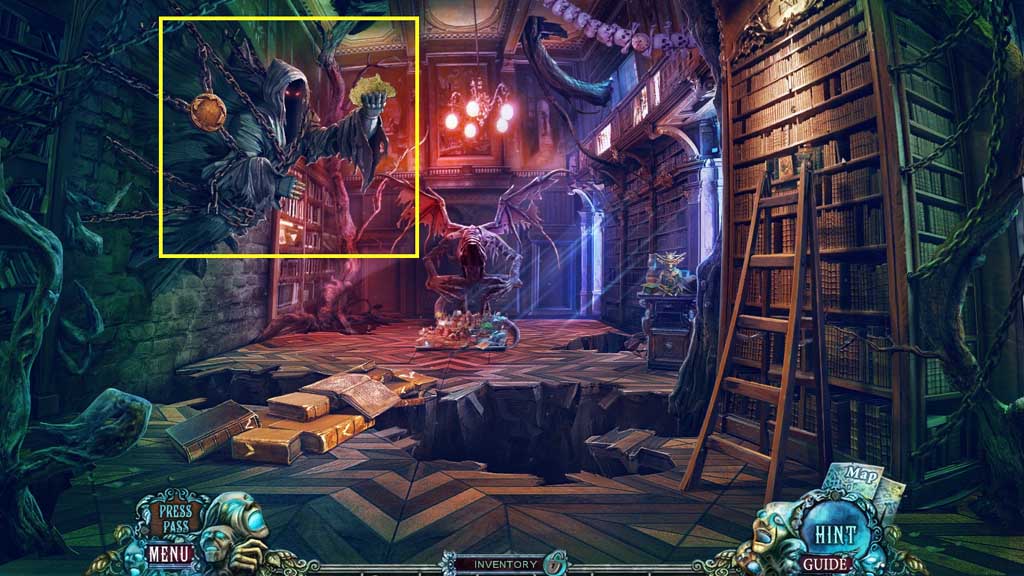
- Give the scroll to the cloaked phantom; collect Africa.
- Move down once.
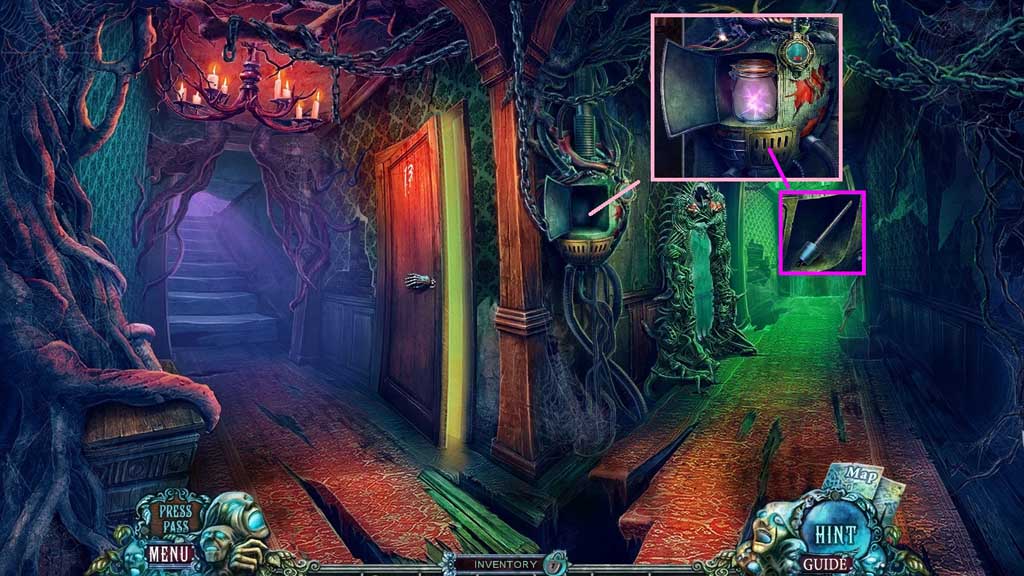
- Place the jar with lightning into the slot.
- Collect the clapper.
- Move to the Nightmare Roof.
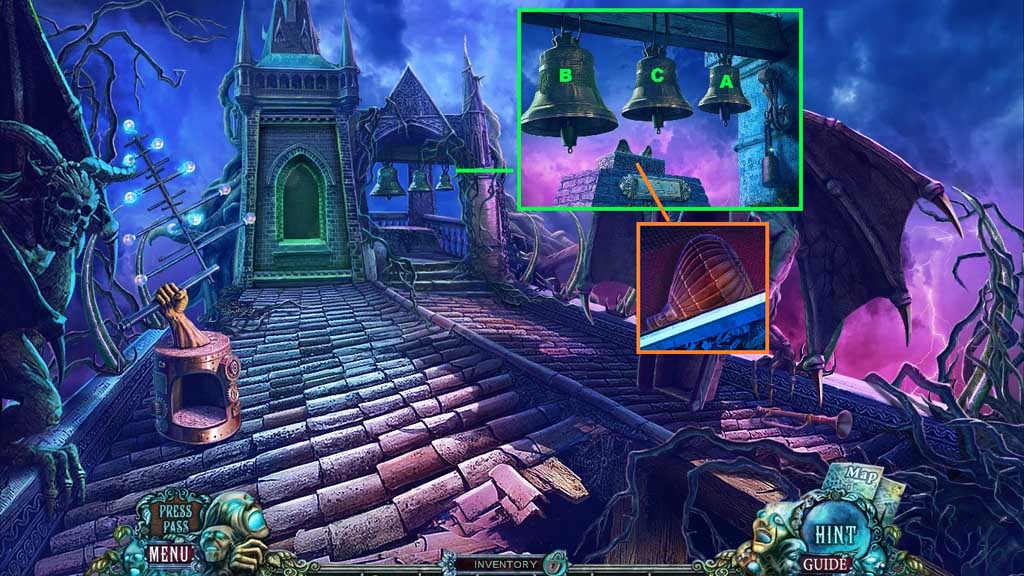
- Insert the clapper and place the box with ears onto the altar.
- Select the mallet the hit the bells in ABC order; collect the hot air balloon.
- Move to the Nightmare Office.
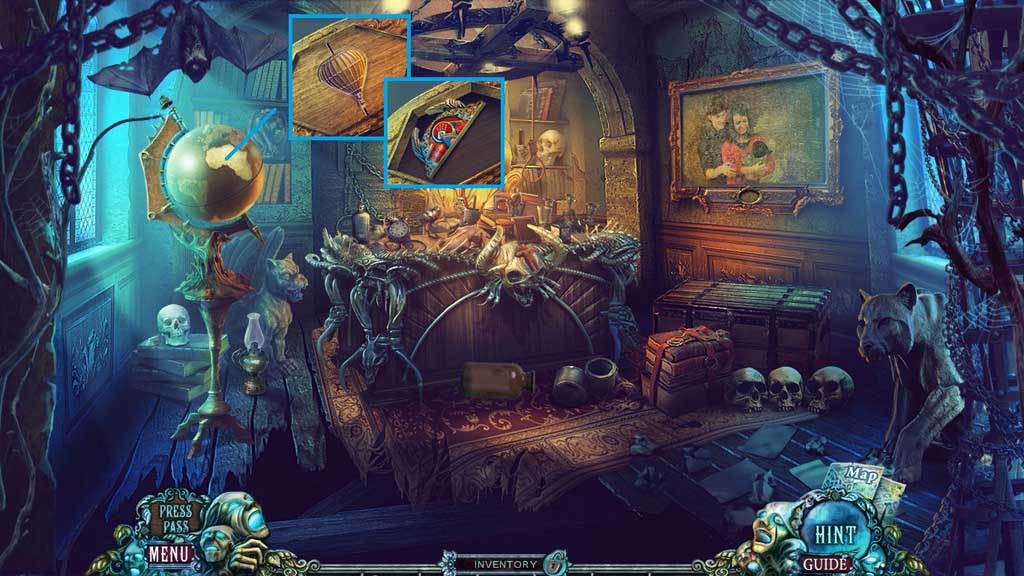
- Insert Africa and the hot air balloon.
- Collect the emblem half 2.
- Move to the Nightmare Library.
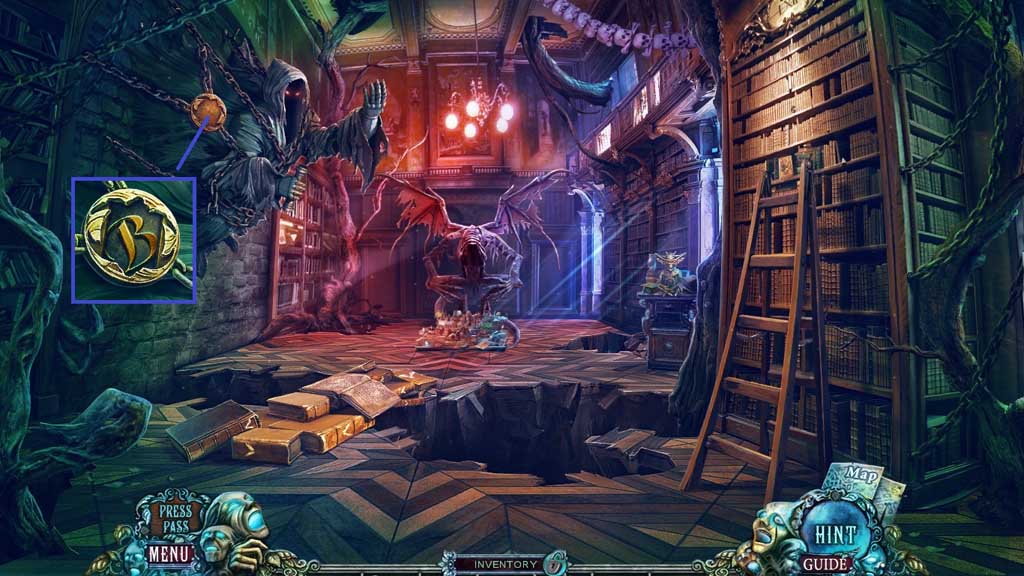
- Insert the emblem halves 1 & 2; collect the monogram.
- Move to the Nightmare Office and click the hidden objects area.

- Find the items.
- Select the pins and place them into the doll; collect the voodoo doll.
- Select the stamp and place it into the ink; collect the paw.
- Collect the rainbow crystal.
- Insert the monogram.
- Insert the rainbow crystal to trigger a mini game.
- Solve the game by arranging the crystals in the top slots so that all of the tracks are illuminated.
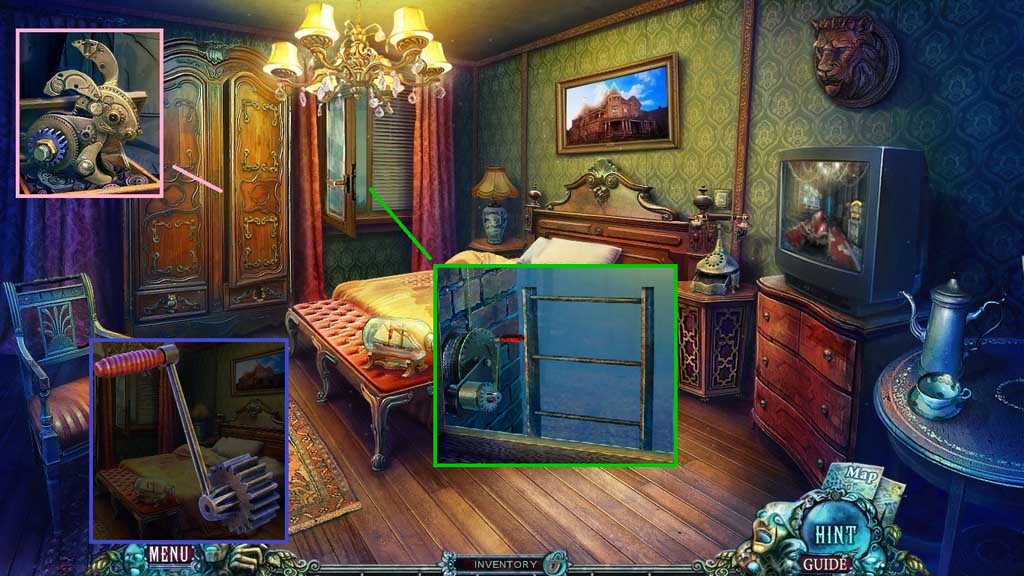
- Remove the cog wheel using the wrench.
- Create the gear by combining the handle and the cog wheel.
- Select the gear to raise the ladder.
- Move down the ladder.