
Echoes of the Past: Wolf Healer: Chapter One: Tower
Our Echoes of the Past Wolf Healer Walkthrough will be a welcome guide on your perilous journey as you attempt to drive out the dark warriors responsible for the decimation of your Healer clan. Rely on our detailed gaming instructions, our custom marked screenshots, and our easy puzzle solutions to overcome the darkness and restore the kingdom to its rightful state in this amazing hidden object adventure game.
General Information & Tips
Chapter One: Tower
Chapter Two: Market
Chapter Three: Forest
Chapter Four: Gates
Chapter Five: Bridge
Chapter Six: Castle
Chapter Seven: Dark Castle
Ask for help in the comments below!
Chapter One: Tower
Chapter Two: Market
Chapter Three: Forest
Chapter Four: Gates
Chapter Five: Bridge
Chapter Six: Castle
Chapter Seven: Dark Castle
Ask for help in the comments below!
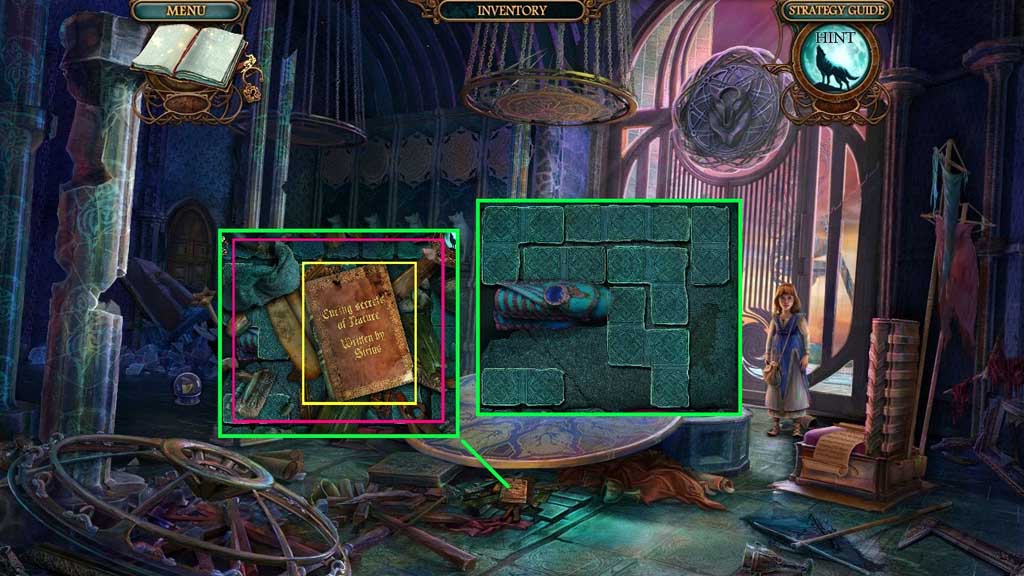
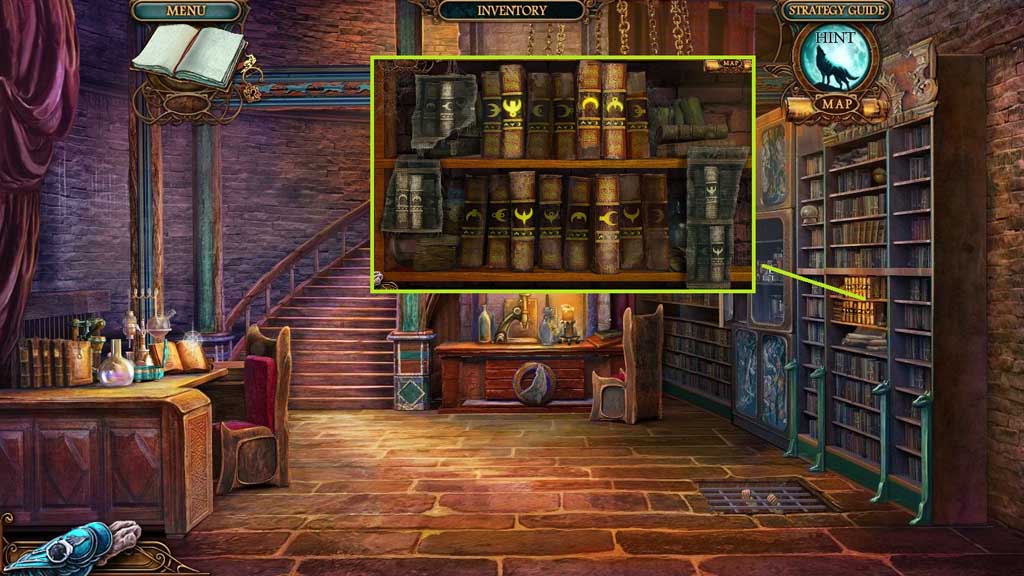
- Collect 1 /3 books.
- Click the debris beneath it to trigger a mini game.
- Solve the game by moving the blocks to collect the bracelet.
- Zoom into the bracelet.
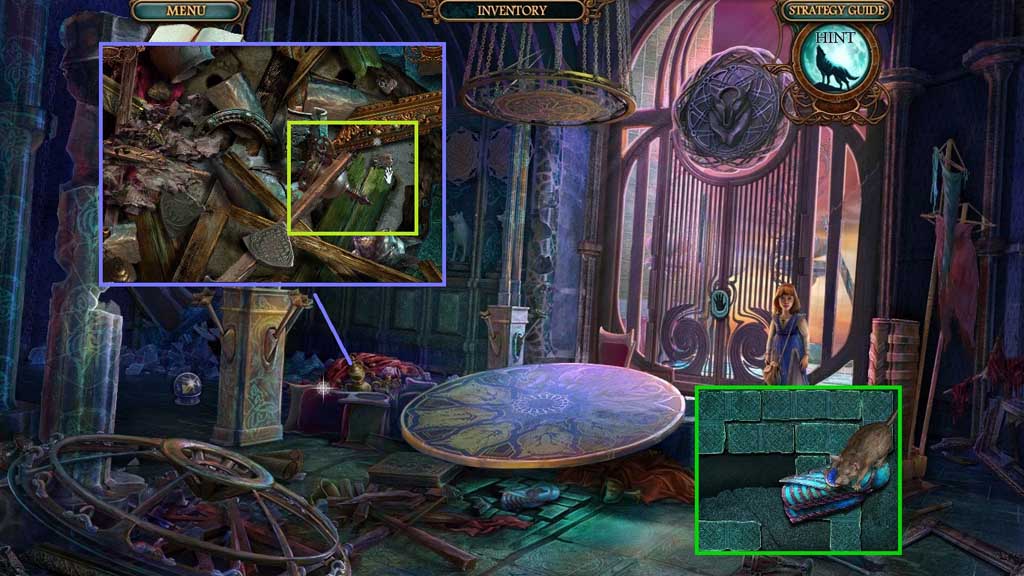
- Zoom into the mouse to trigger a mini game.
- Solve the game by finding the mouse.
- Click the debris to trigger a mini game.
- Solve the game by finding the matching pairs.
- Collect the charged crystal.
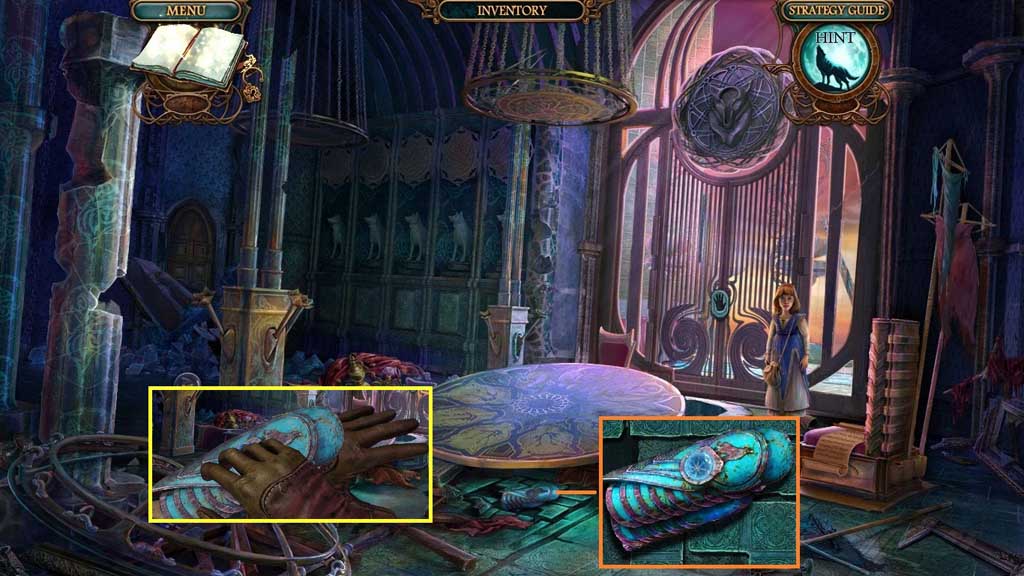
- Insert the charged crystal; collect the bracelet.
- Select the bracelet to illuminate the room.
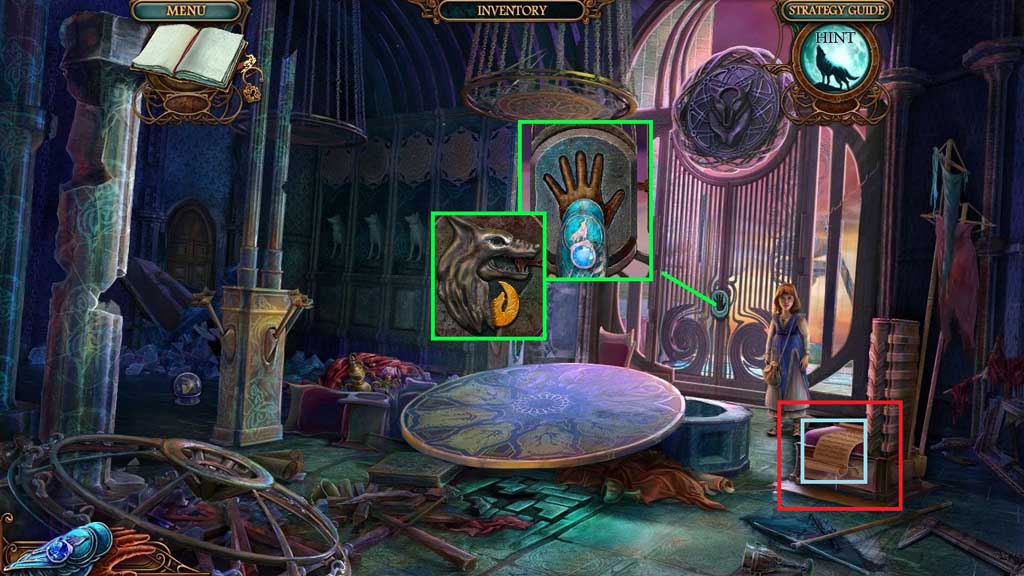
- Click the lock.
- Collect the bas-relief.
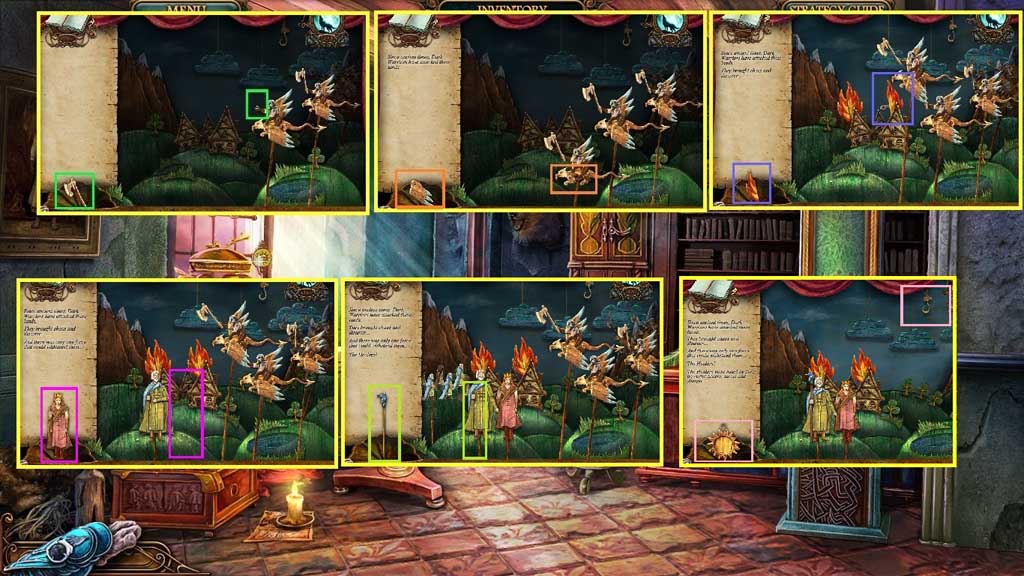
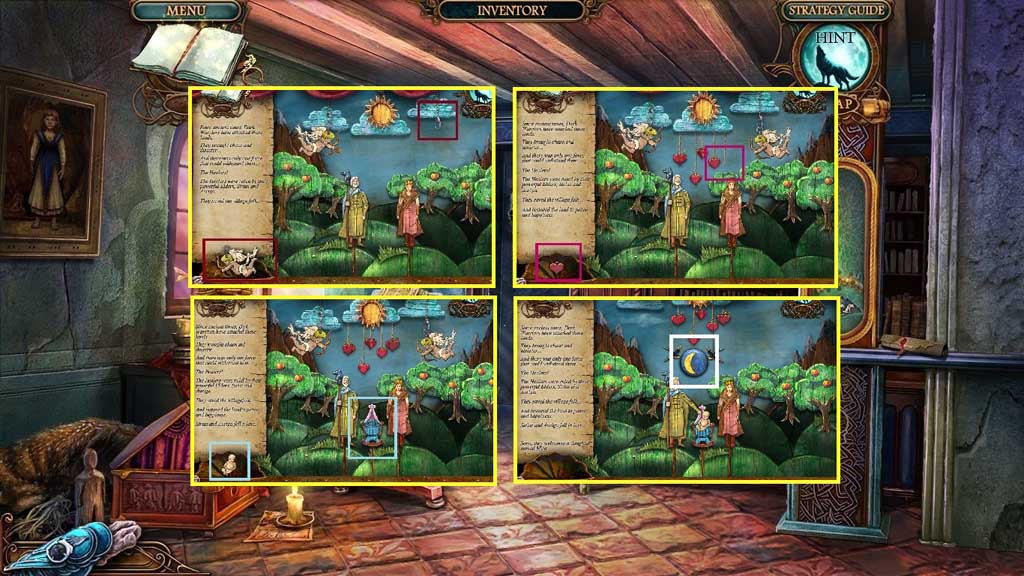
- Read the scroll.
- Insert the bas-relief to trigger a hidden objects area.
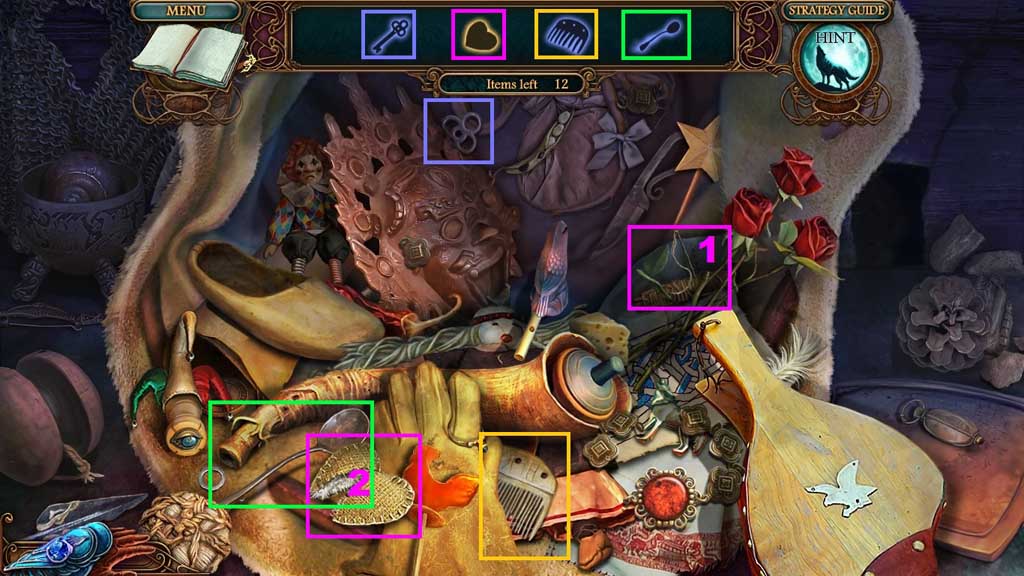
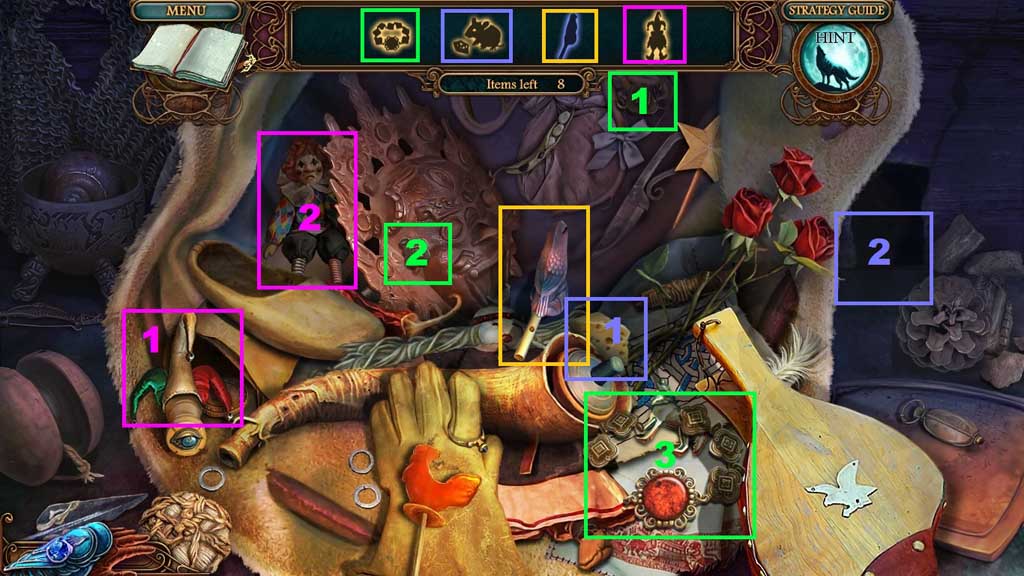
- Find the items.
- Select the needle and thread to mend and collect the heart.
- Select the links and place them onto the bracelet; collect the bracelet.
- Select the cheese and use it to lure and collect the mouse.
- Select the hat and place it onto the clown; collect the clown.
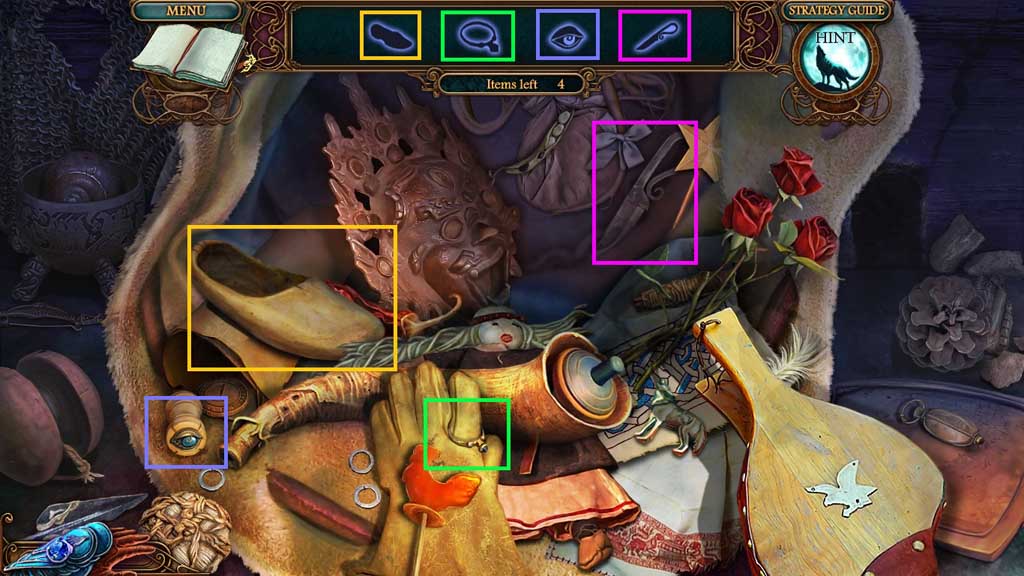
- Collect the wolf eye.

- Insert the wolf eye.
- Move ahead.
- Click the bracelet.
- Move ahead through the opening.
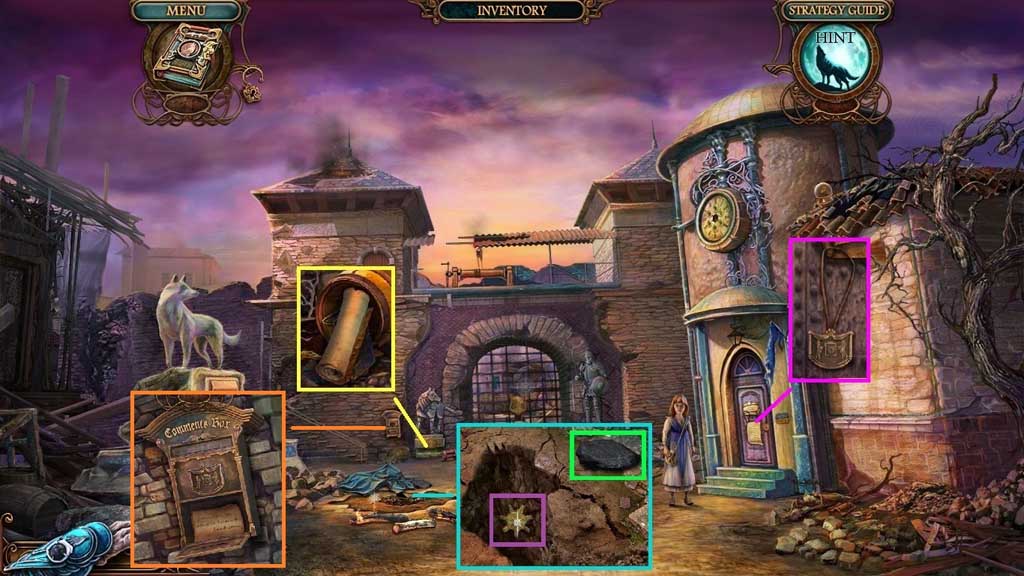
- Collect the map and 2/ 3 books behind it.
- Collect the coal.
- Click the dirt 3x’s; collect 1 /2 gears.
- Read the plaque and the note; collect the postbox emblem.
- Insert the postbox emblem; collect the letters, the air sign and the button.

- Insert the button to trigger a mini game.
- Solve the game by aligning the coins correctly.
- Use the following solution to solve: A x 2 – B – C – B x 3
- Collect the key and insert it into the lock.
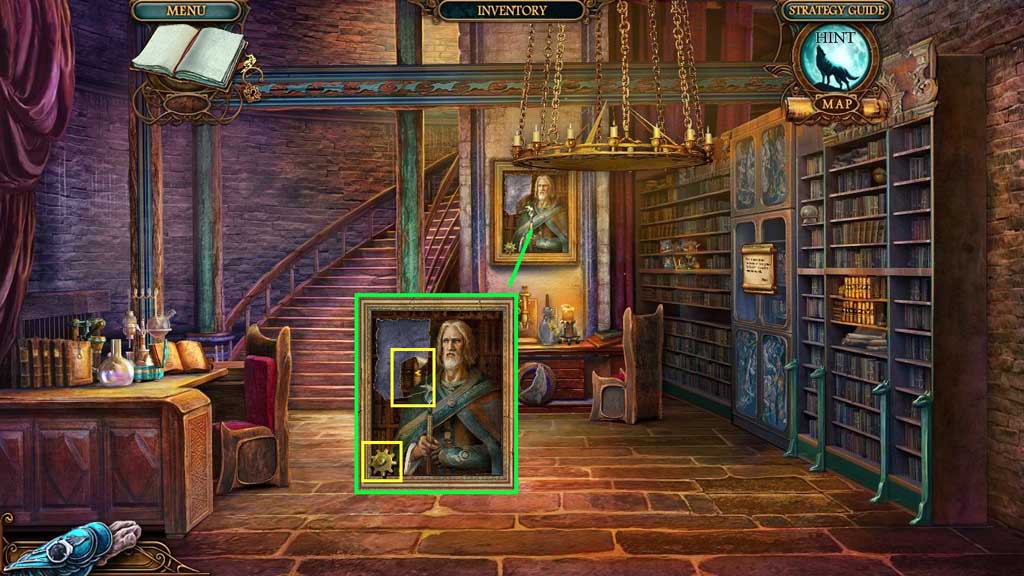
- Enter the doorway and move upstairs and click the hidden objects area.
- Place the items correctly.
- Collect the fire sign.
- Collect the water sign.
- Select the coal to reveal the code.
- Collect the burning candle.
- Move down once.

- Select the burning candle to illuminate the chandelier.
- Click the hidden objects area.
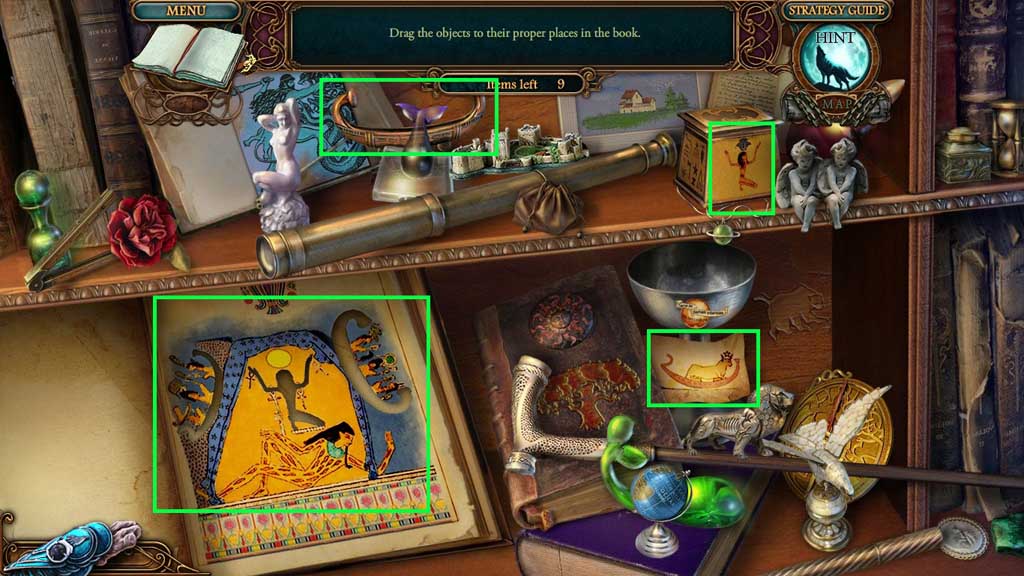


- Place the items correctly into the book.
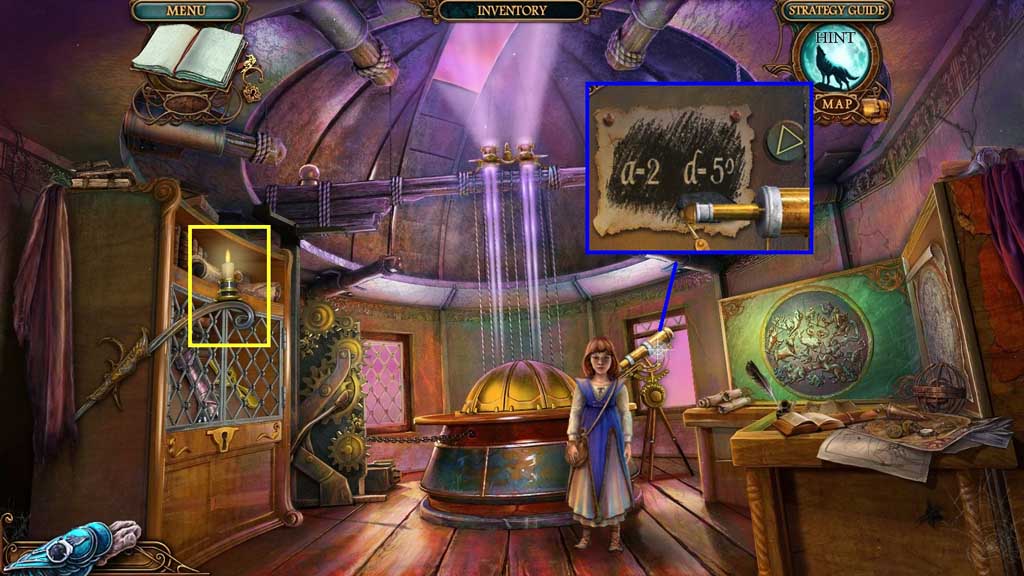
- Collect the telescope part.
- Collect 2 /2 gears and 1 /2 pieces of canvas.
- Move upstairs.
- Click the lever and insert the gears.
- Click the lever.
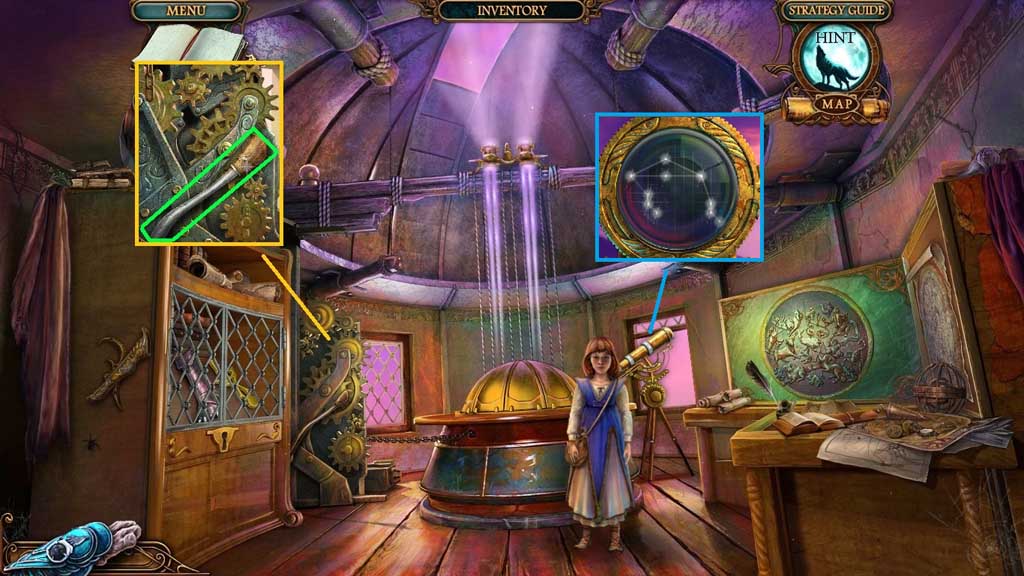
- Attach the telescope part; adjust the parts using the code shown.
- Collect the lens.
- Move down once.
- Collect the 2nd piece of canvas.
- Collect the earth sign.
- Collect the note.
- Insert the air – fire – water and earth signs.
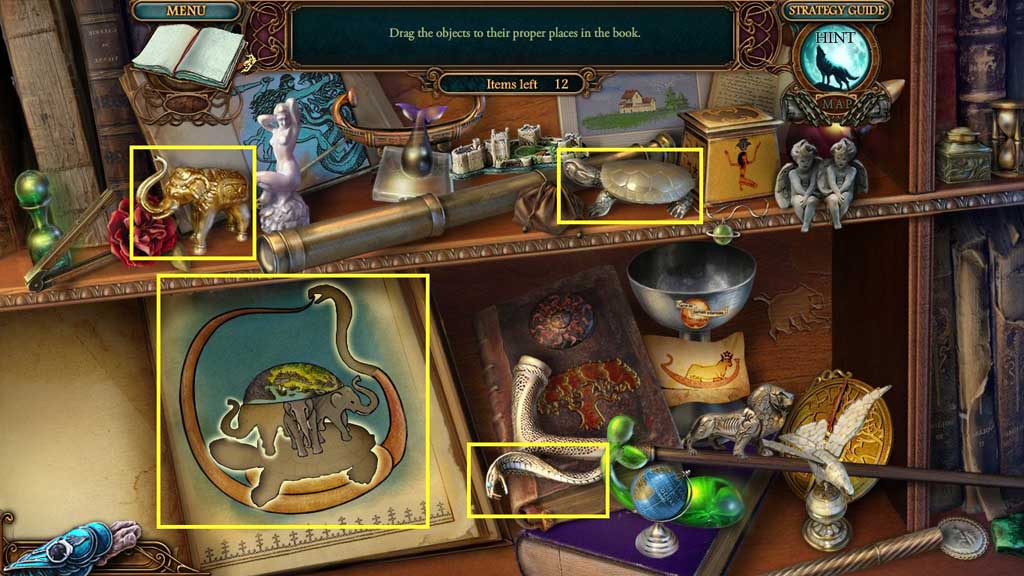
- Collect 3 /3 books and the jar.
- Insert the books and the piece of canvas to trigger a mini game.
- Solve the game by clicking the books based on the clues on the canvas.
- Move to the right.
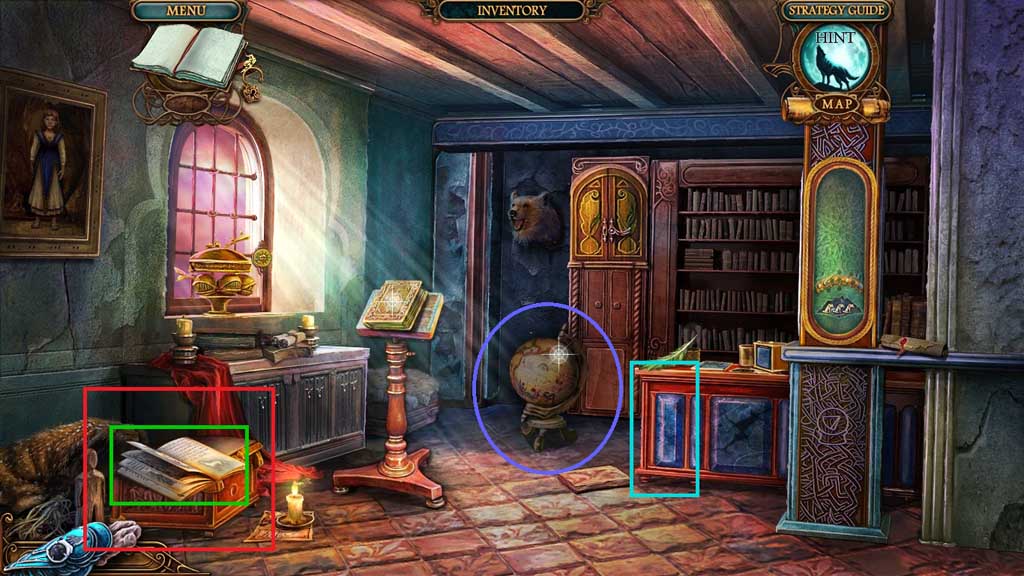
- Click the globe 3x’s; collect 1 /2 clock hands.
- Collect the book and click the box to trigger a hidden objects area.
- Place the items correctly.
- Collect 1 /3 moons.

- Collect 2 /3 moons.
- Insert the lens to trigger a mini game.
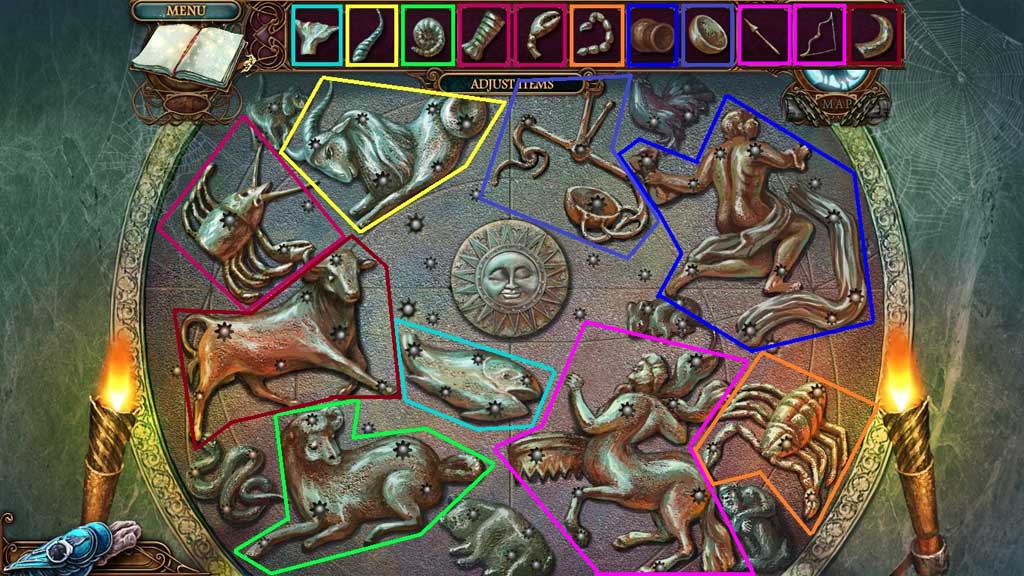
- Solve the game by recreating the constellation.
- Collect 3 /3 moons.
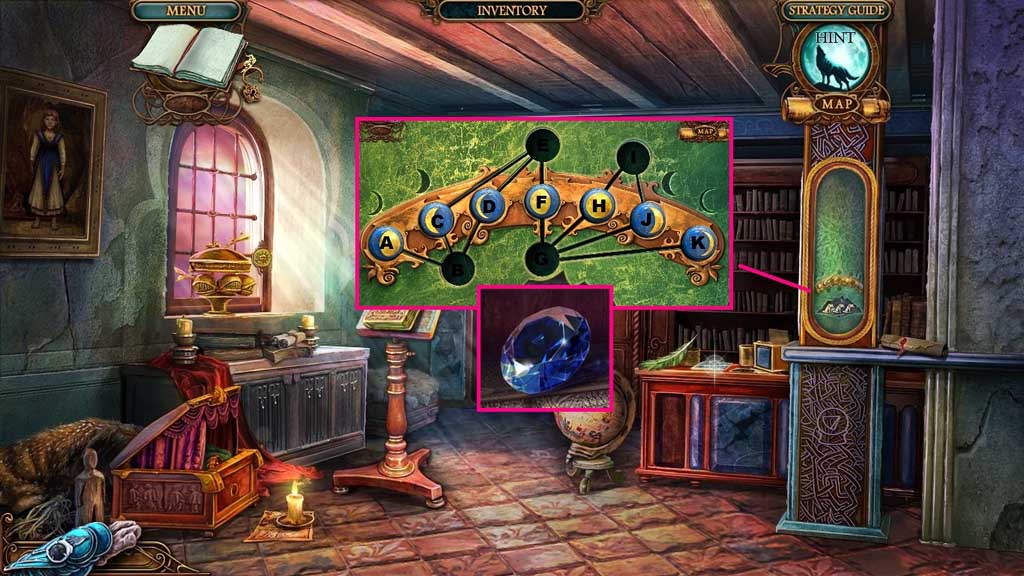
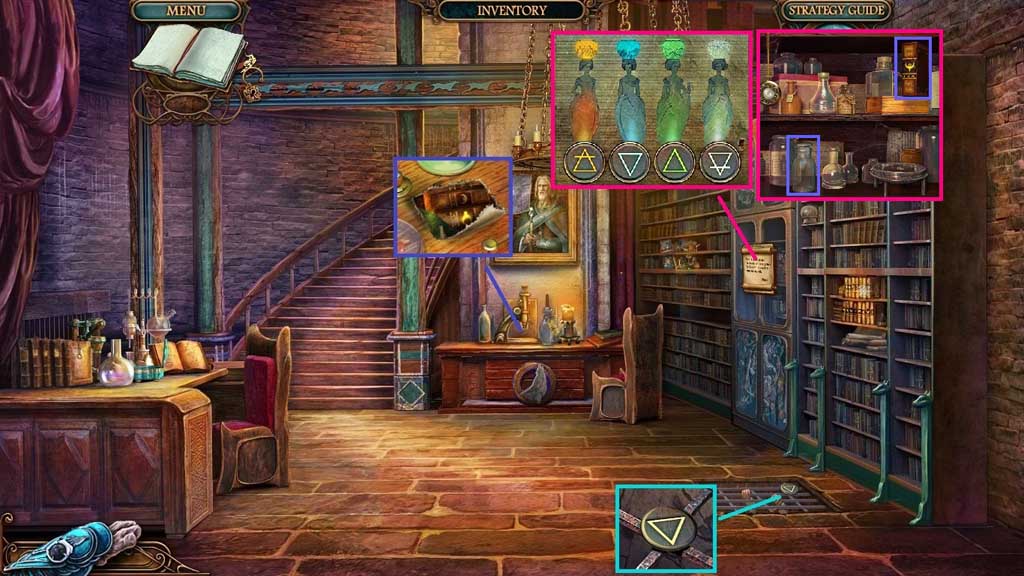
- Insert the moons to trigger a mini game.
- Solve the game by arranging the lunar cycle correctly.
- Use the following solution to solve: H – I, F – H, D - B, K – D , C – K, B – C, D –B, J – D, C – J , B – C, D –G, A – D, C – A, G –C, H – G , I – H, J – I, G – J, H – E, K – F, I – K, J – H, F –J, E –F
- Collect the crystal.
- Move down once and go upstairs.
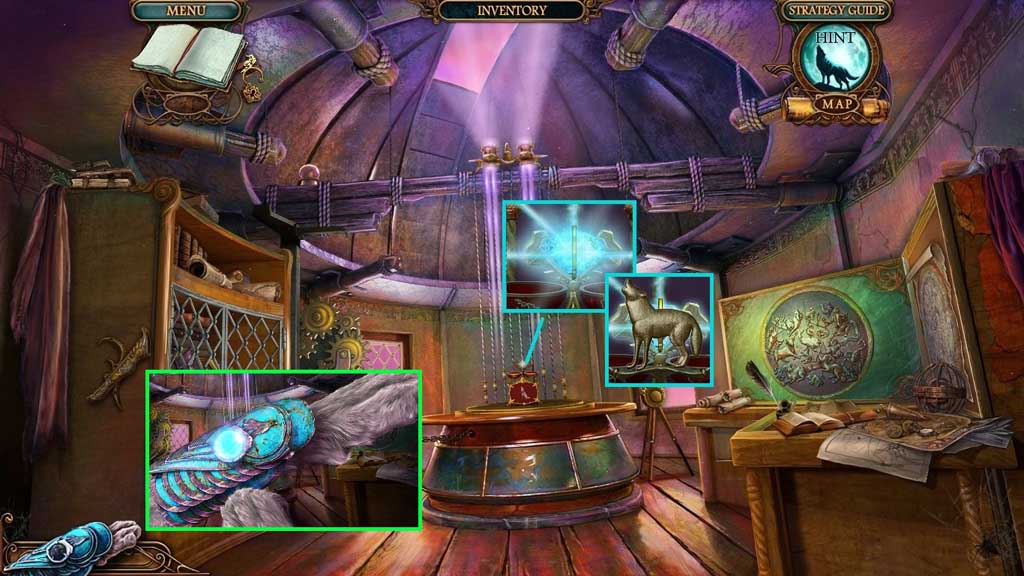
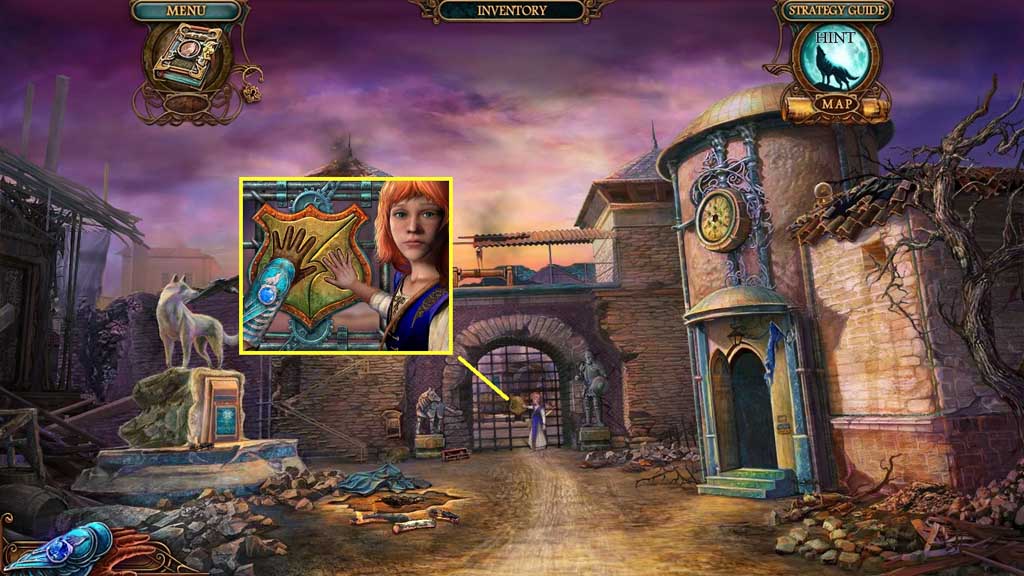
- Insert the crystal; collect the charged crystal and Mira’s amulet.
- Insert the charged crystal into the bracelet.
- Move down once and go to the right.
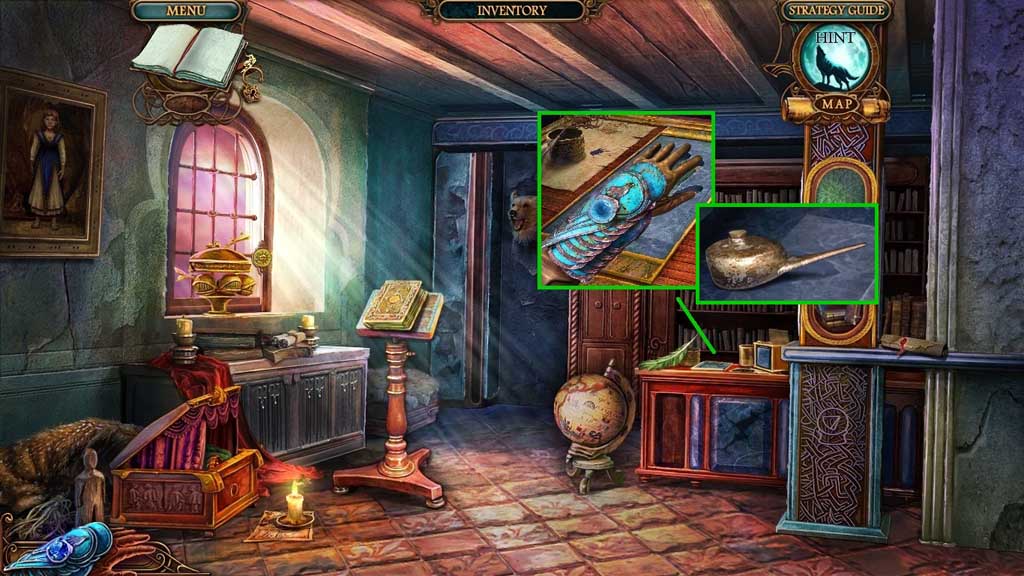
- Click the hand tile; collect the oil.
- Move down 2x’s.
- Select the oil to lubricate and open the toolbox.
- Collect the hacksaw.
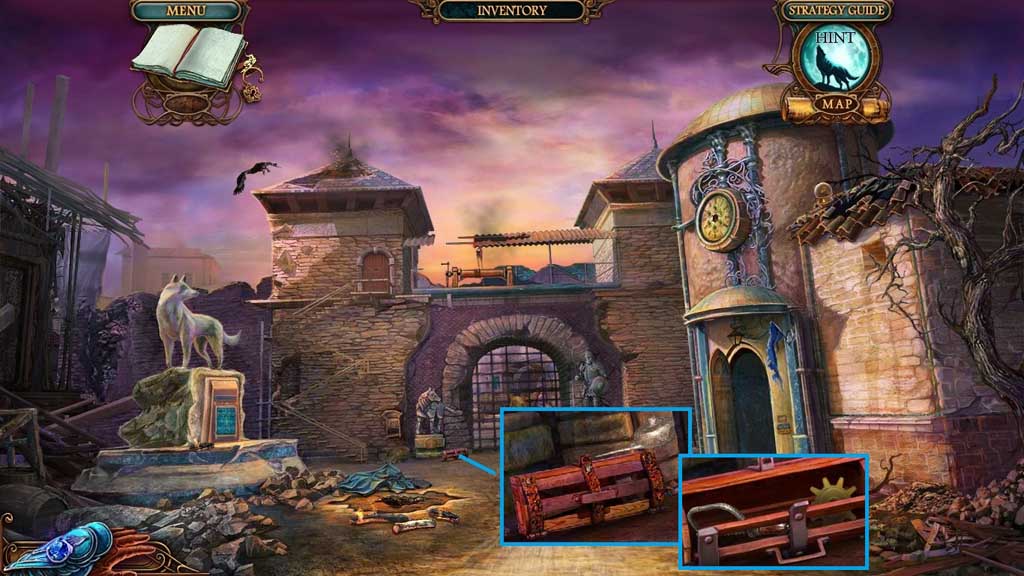
- Move to the right.
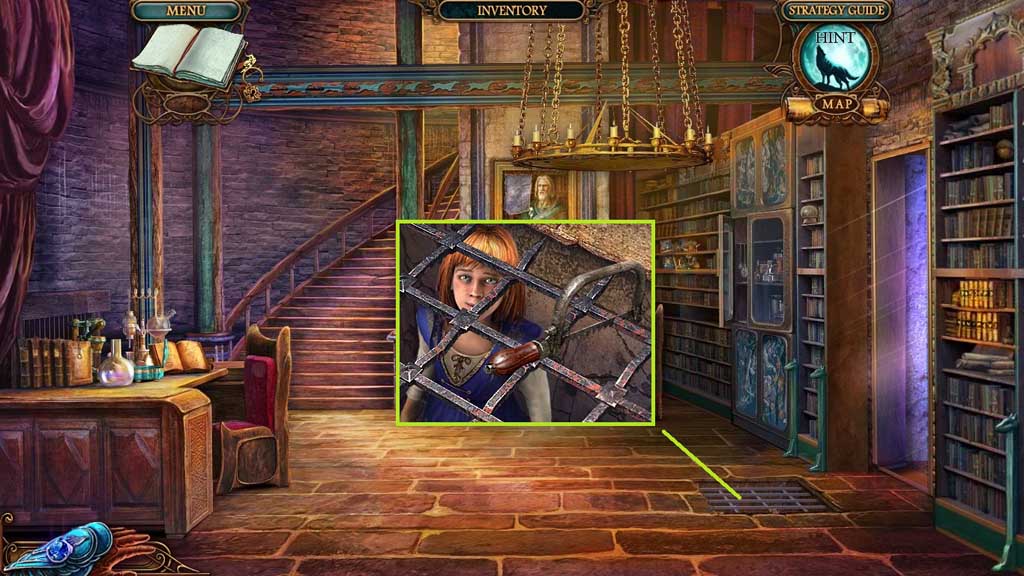
- Select the hacksaw to cut through the bars.
- Move down once.
- Click the lock.
- Move ahead.
General Information & Tips
Chapter One: Tower
Chapter Two: Market
Chapter Three: Forest
Chapter Four: Gates
Chapter Five: Bridge
Chapter Six: Castle
Chapter Seven: Dark Castle
Ask for help in the comments below!
Chapter One: Tower
Chapter Two: Market
Chapter Three: Forest
Chapter Four: Gates
Chapter Five: Bridge
Chapter Six: Castle
Chapter Seven: Dark Castle
Ask for help in the comments below!