
Danse Macabre: Moulin Rouge: Chapter Five: The Baron’s Villa
Our Danse Macabre: Moulin Rouge Walkthrough will provide some much-needed relief in a case that's bound to confound and confuse even the most seasoned detectives. Gear up to help the famous artist, Henri de Toulouse-Lautrec's found out who killed his dear friend Sophie - the leading lady of the famed Moulin Rouge. Remember to trust no one but our detailed instructions, our custom marked screenshots and our simple puzzle solutions to keep you from becoming the next victim in this thrilling hidden object adventure game!
General Information & Tips
Chapter One: Welcome
Chapter Two: The Stage
Chapter Three: Enter the Elephant
Chapter Four: Into the Park
Chapter Five: The Baron’s Villa
Ask for help in the comments below!
Chapter One: Welcome
Chapter Two: The Stage
Chapter Three: Enter the Elephant
Chapter Four: Into the Park
Chapter Five: The Baron’s Villa
Ask for help in the comments below!
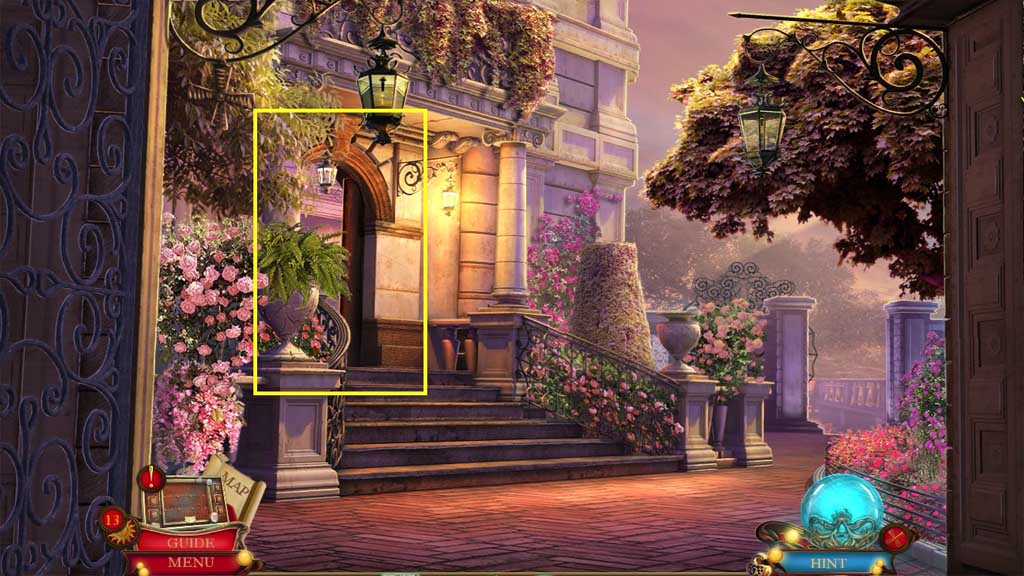
- Move into the Villa Lobby.
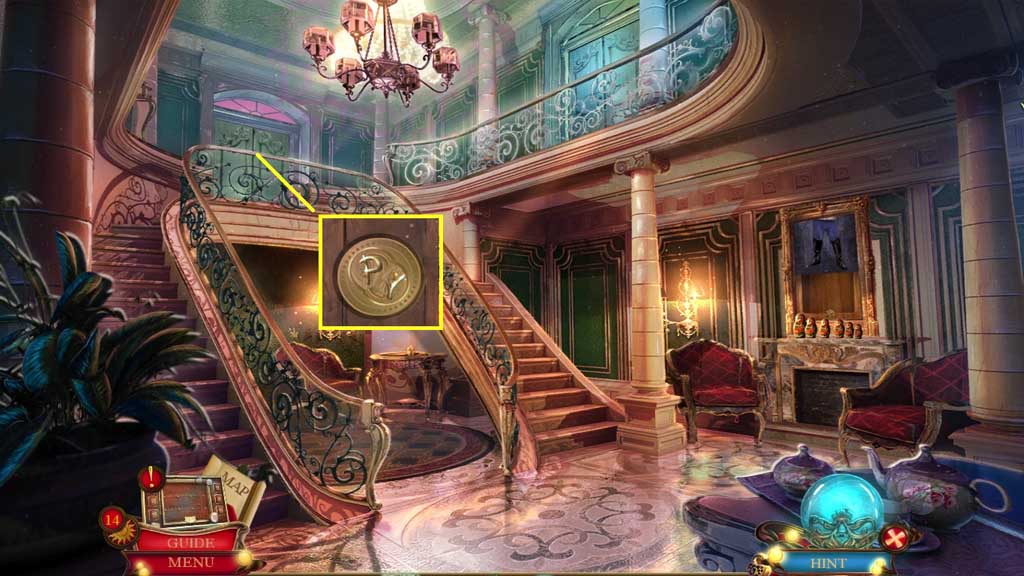
- Insert the 2 medallion pieces.
- Move ahead.
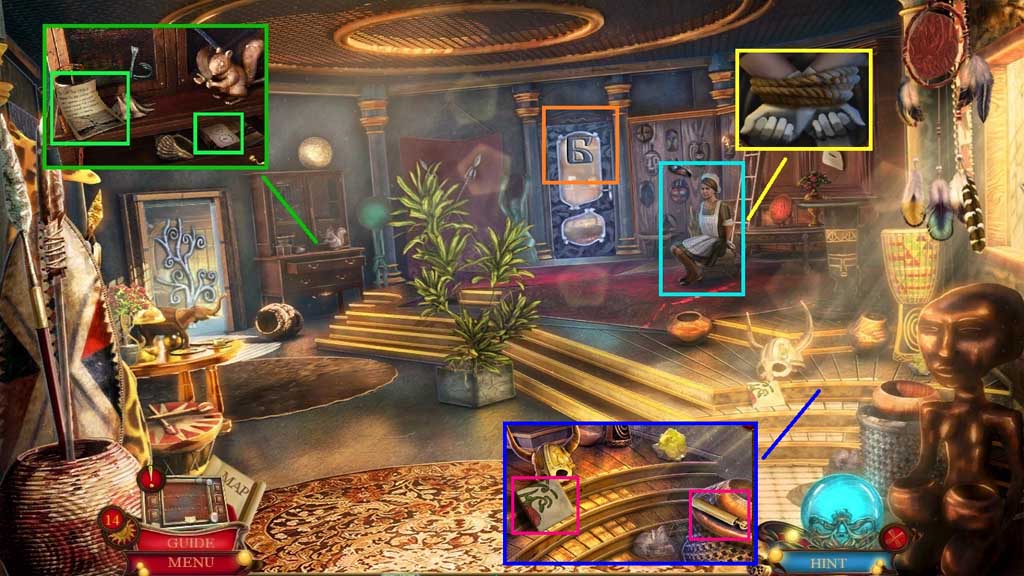
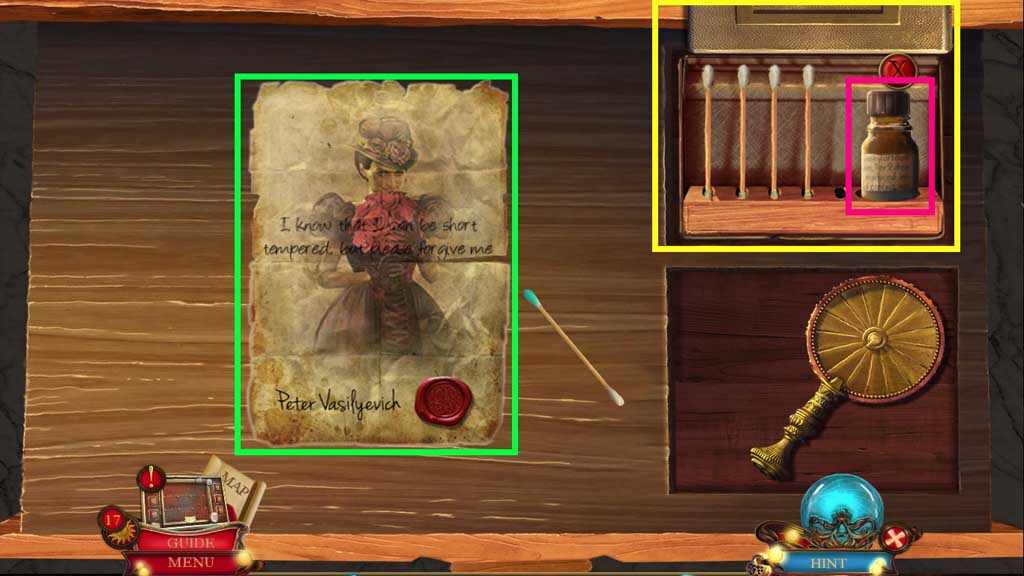
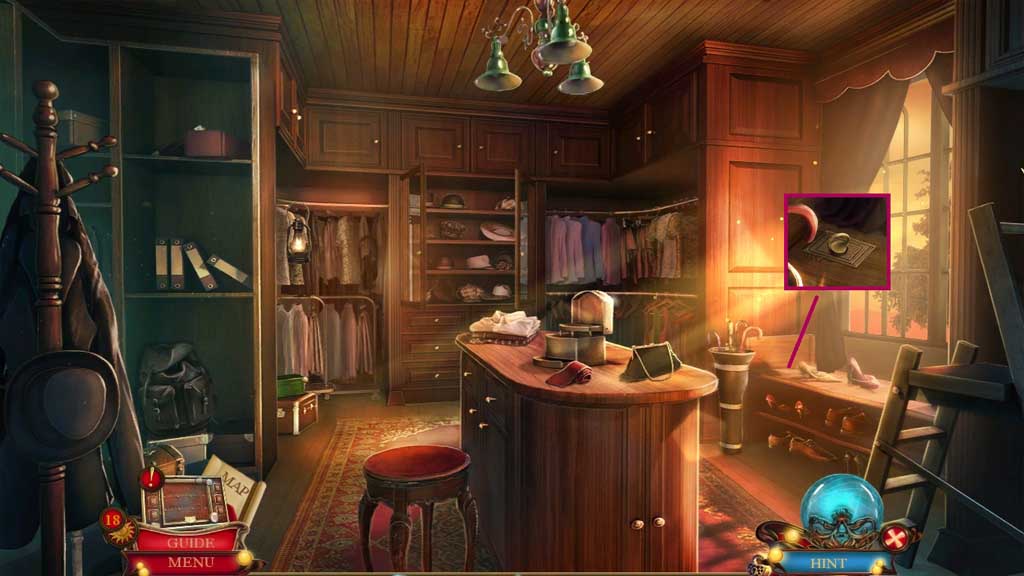
- Collect the note and the time note.
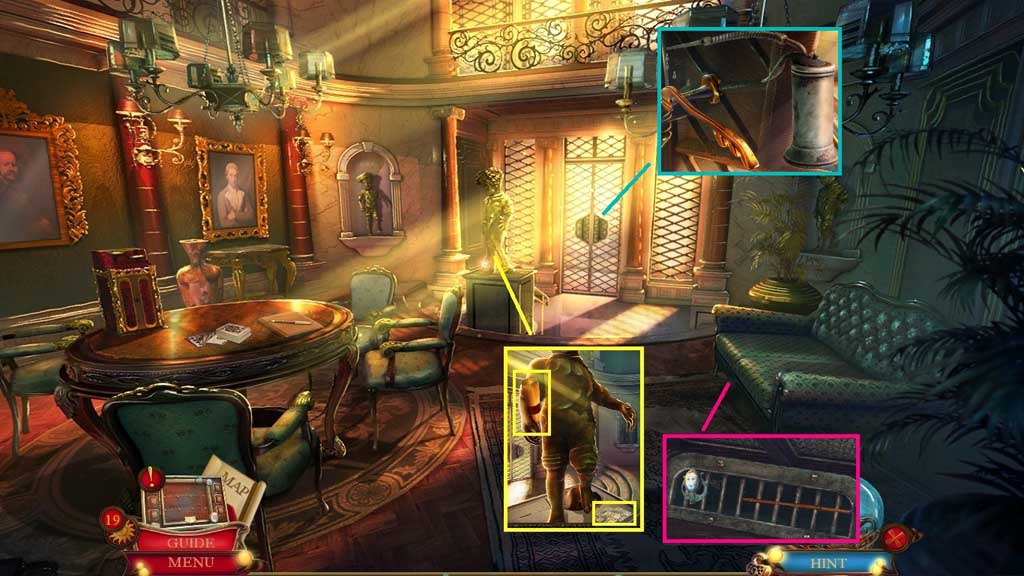
- Click the ropes.
- Speak to the girl; receive the letter B.
- Collect 1 /3 ceramic tiles and the clock weight.
- Insert the letter B.
- Move ahead.
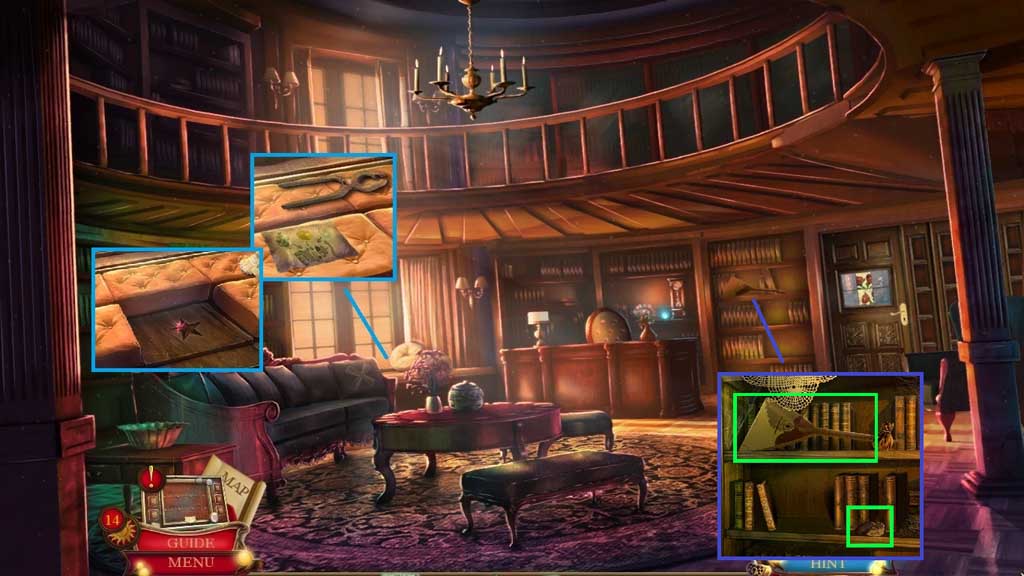
- Collect the small pliers and the recipe.
- Click the cushion.
- Collect the Balalaika and tobacco can.
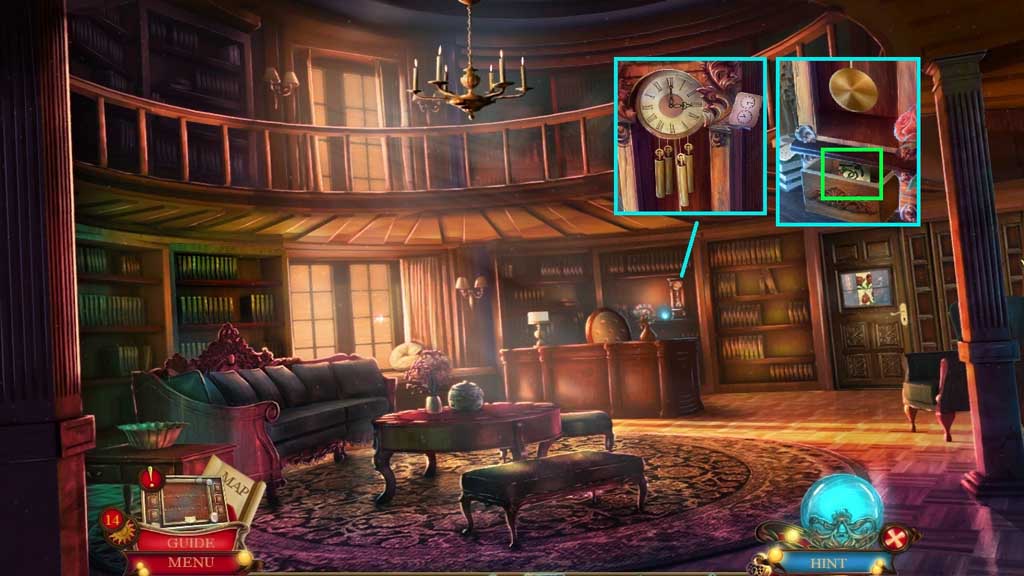
- Read the note and attach the clock weight.
- Place the time note.
- Set the clock to 6:15 and then set it to 10: 45.
- Collect 2 / 3 ceramic tiles.
- Move down once.
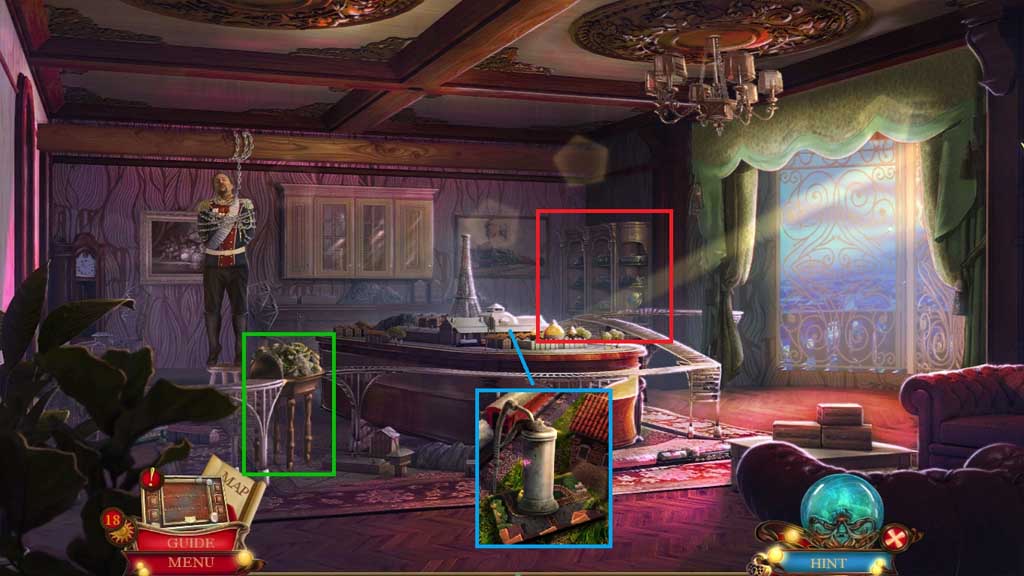
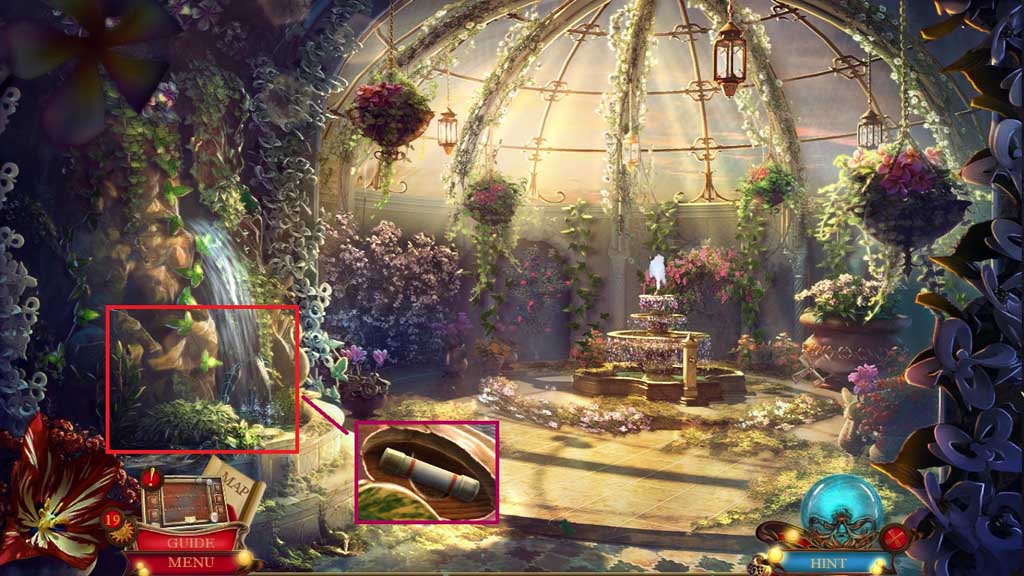
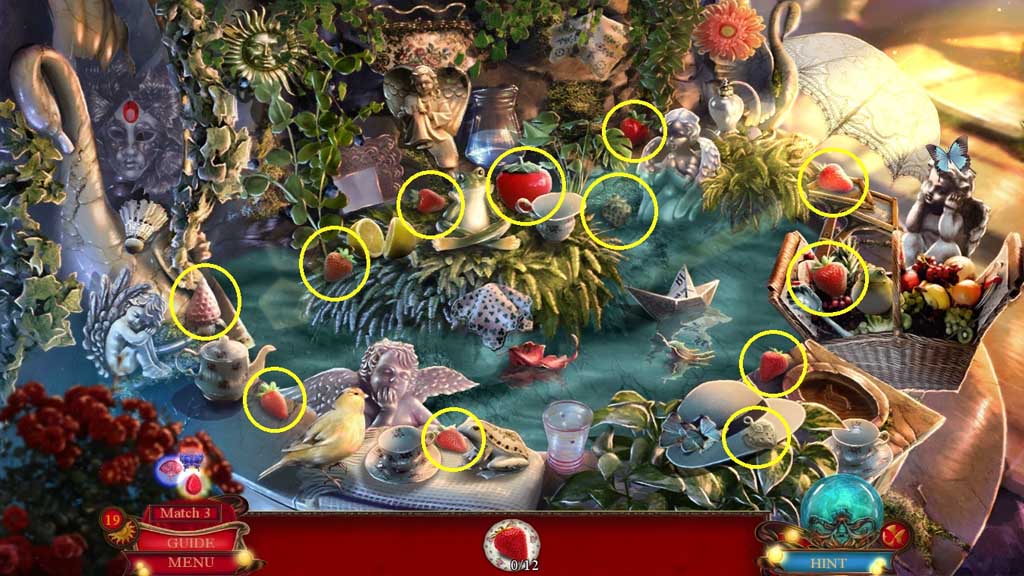
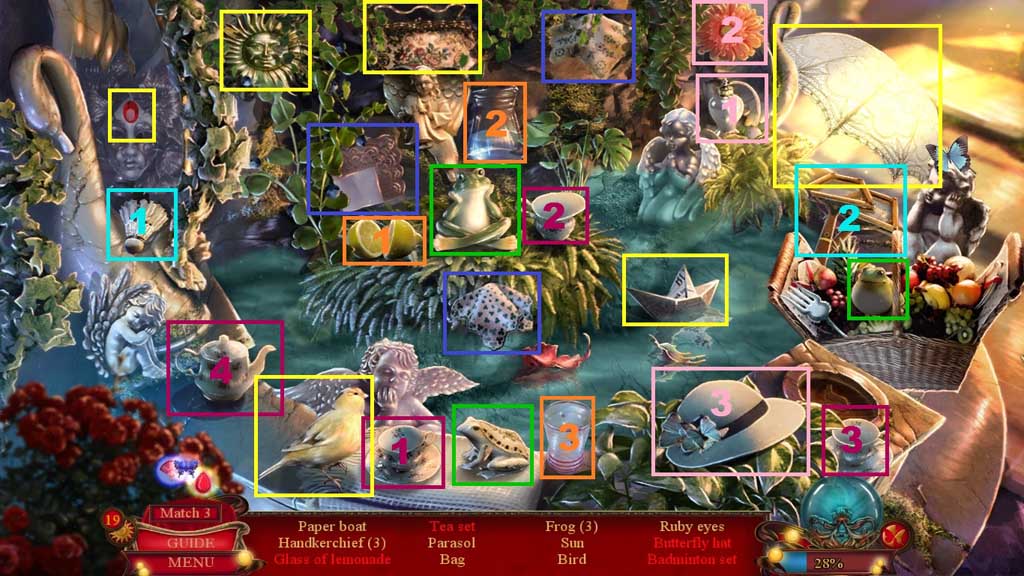
- Place the balalaika and click the hidden objects area.
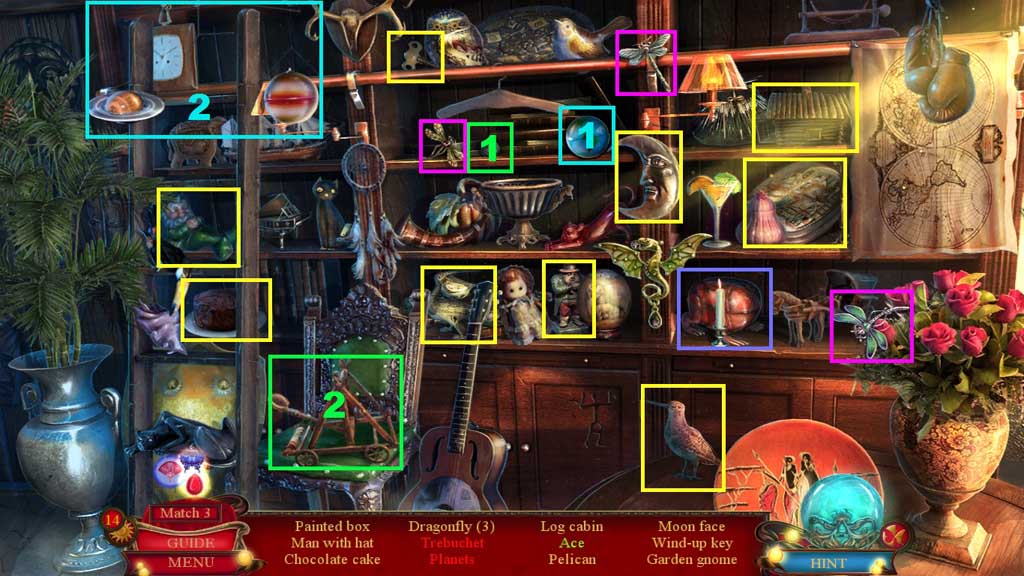
- Find the items.
- Select the ball and place it into the catapult; collect the trebuchet.
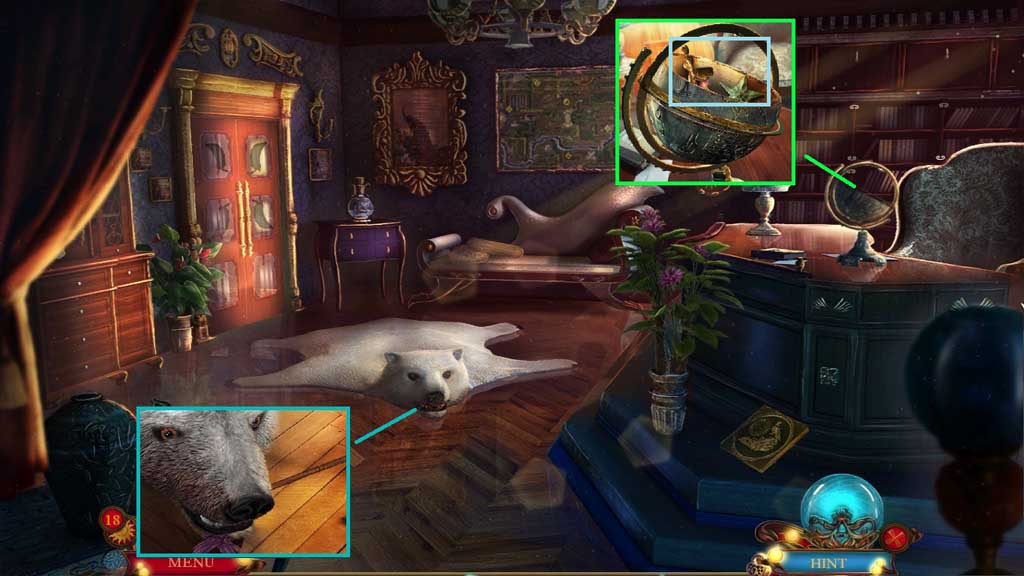
- Select the earth and place it onto the mobile; collect the planets.
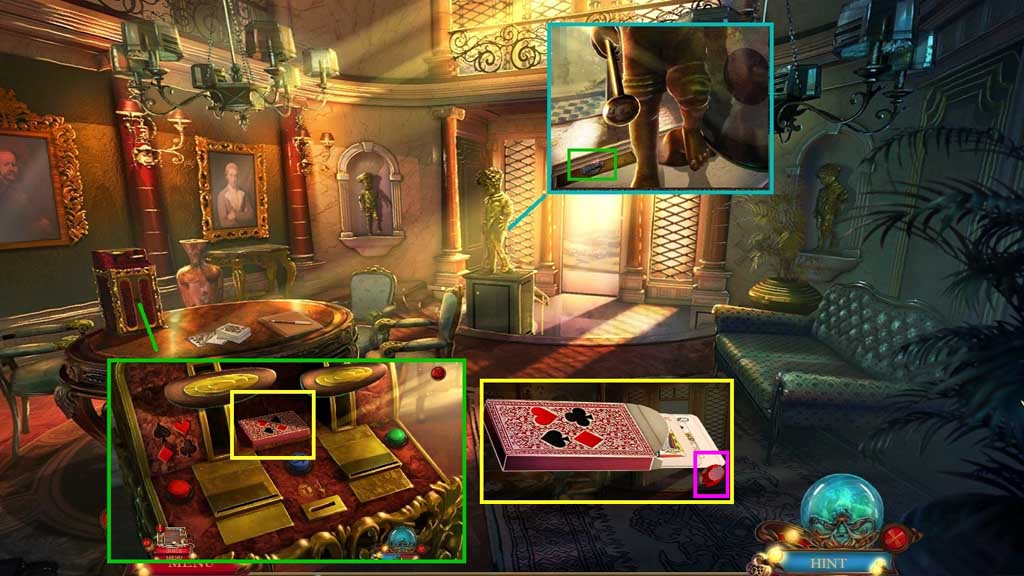
- Click the box; collect the ace.
- Collect the painted box.
- Click the painted box; collect 3 /3 ceramic tiles.
- Select the small pliers to collect the sulfur crystal and the saltpeter crystal.
- Move ahead.
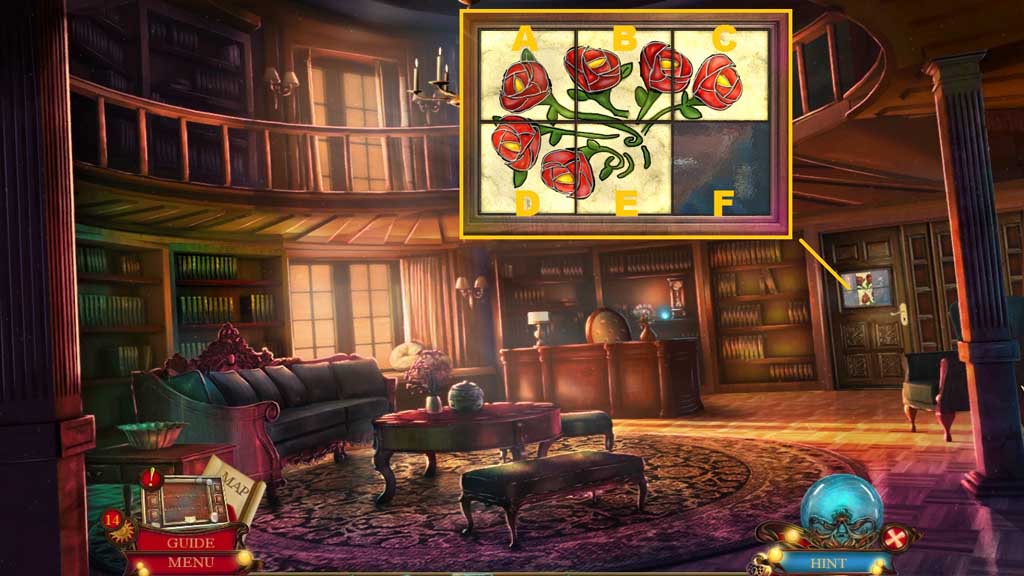
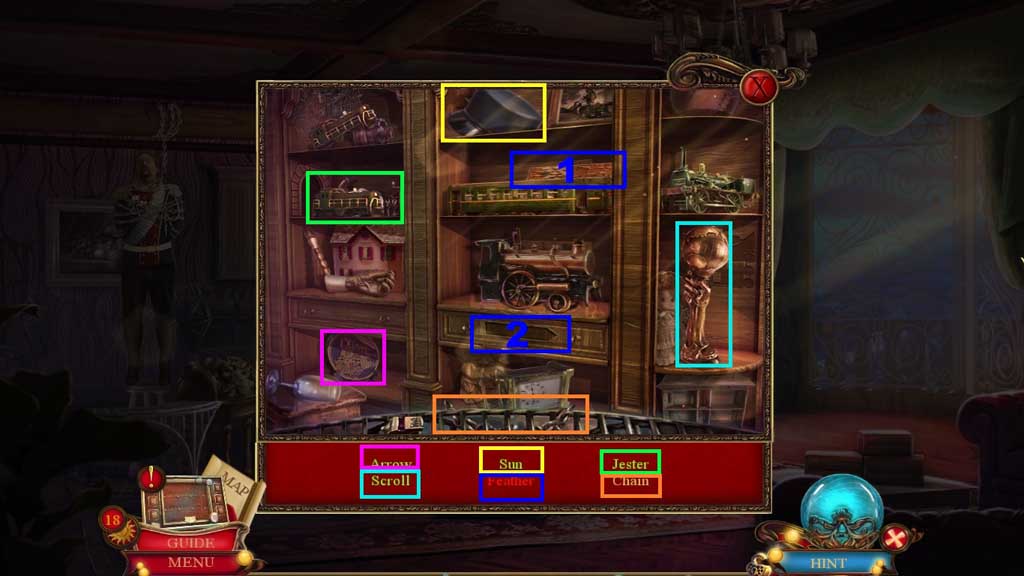
- Click the ceramic tile board and insert the ceramic tiles to trigger a mini game.
- Solve the game by aligning the tiles correctly.
- Use the following sequence to solve: B – A – D – E – F – C – B – A – D – E – F –C – B – B – E – F
- Move ahead.
- Collect the fuse.
- Collect the oil lamp.
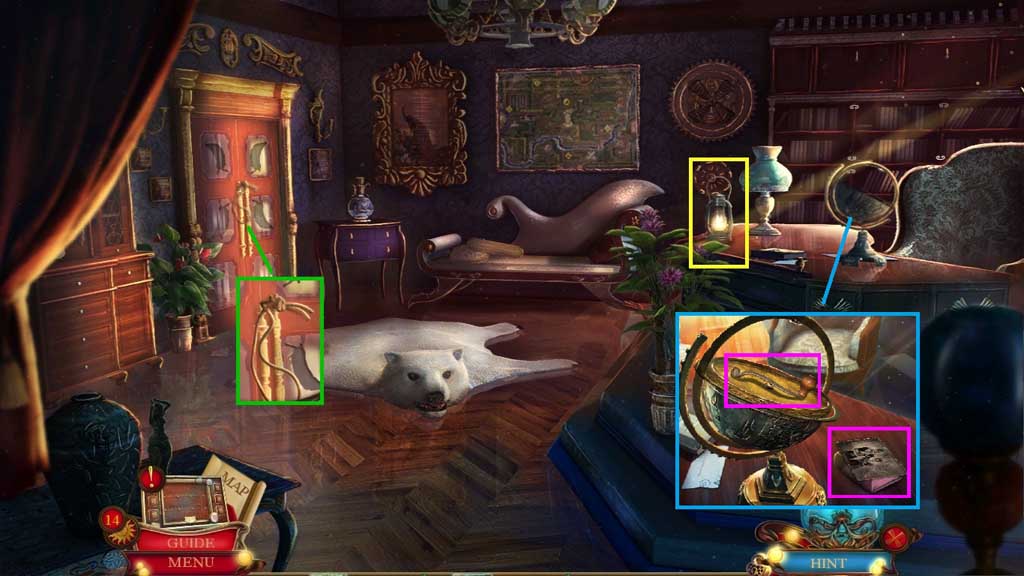
- Collect the photo, the book and the mill handle.
- Move down once.
- Insert the book.
- Click the panel.
- Collect the golden mask mouth and the acorn; click the button.
- Click the hidden objects area.

- Find the items.
- Select the photo fragment and place it into the frame.
- Click the envelope to uncover the photo fragment and place it into the frame; collect the photo frame.
- Click the cloth and use the nail puller to collect the pearls.
- Collect the family crest.
- Move down once.
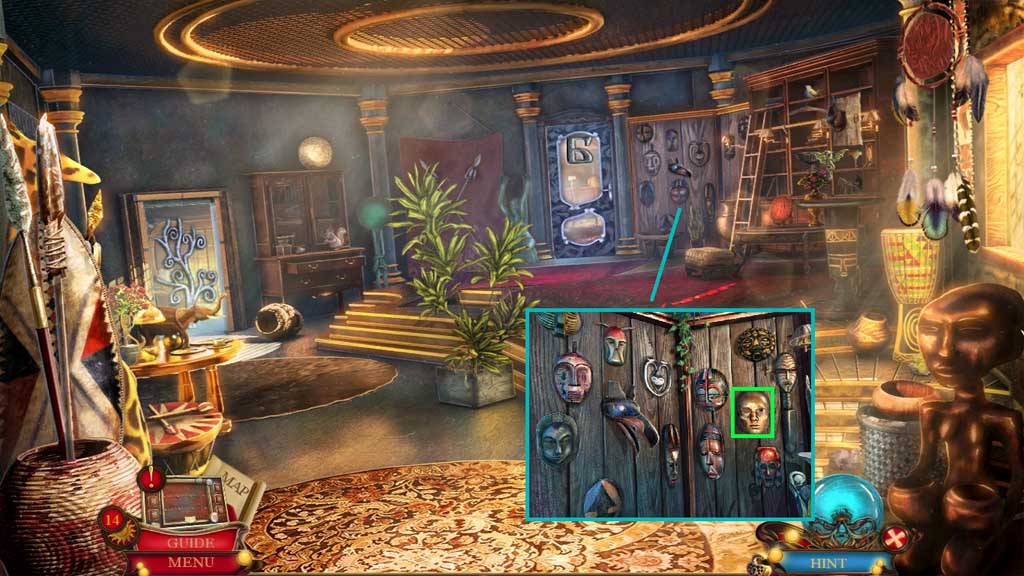
- Attach the golden mask mouth to trigger a mini game.
- Solve the game by aligning the masks correctly.
- Collect the charcoal eye.
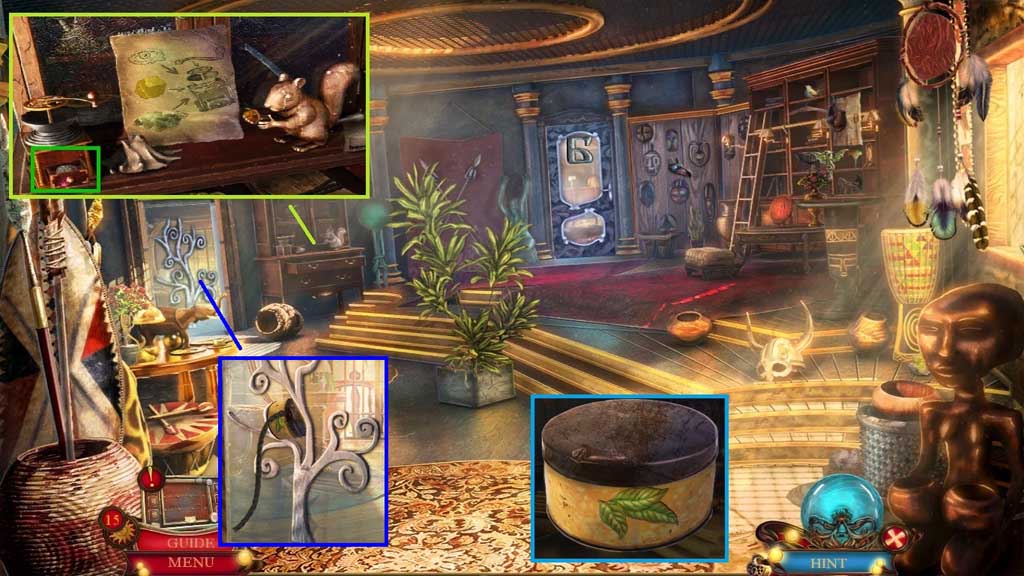
- Place the acorn into the squirrels’ paws; collect 1 /4 copper feathers.
- Place the recipe and add the saltpeter crystal, the sulfur crystal and the charcoal eye.
- Attach the mill handle.
- Collect the gun powder.
- Select the tobacco can and the gunpowder to create and collect the gunpowder can.
- Select the gun powder can and the fuse to insert into the door.
- Select the matches to ignite the fuse.
- Move to the left.
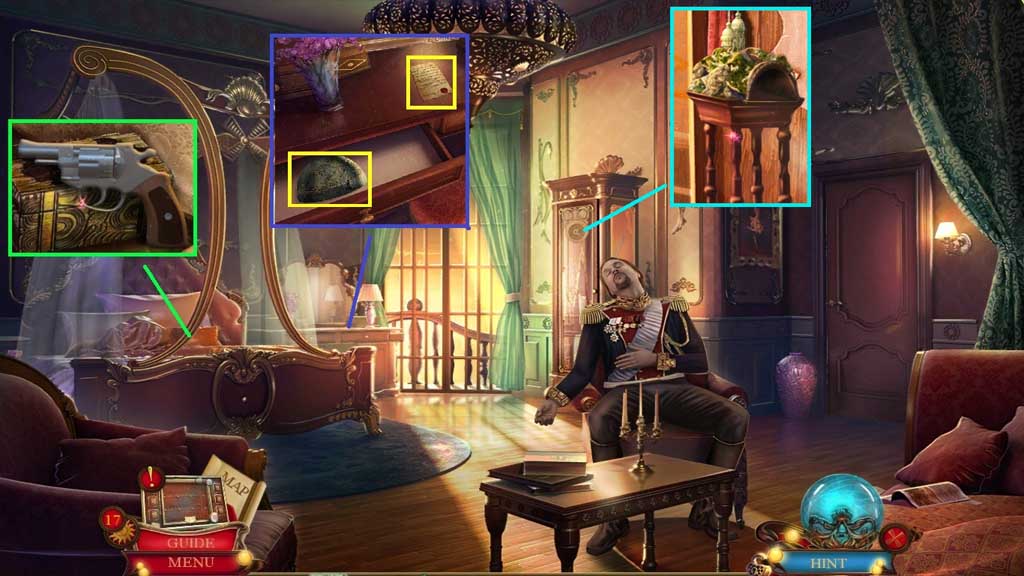
- Click the pillow; collect the gun.
- Click the drawer; collect the hemisphere and the goodbye letter.
- Insert the family crest.
- Collect the miniature bridge.

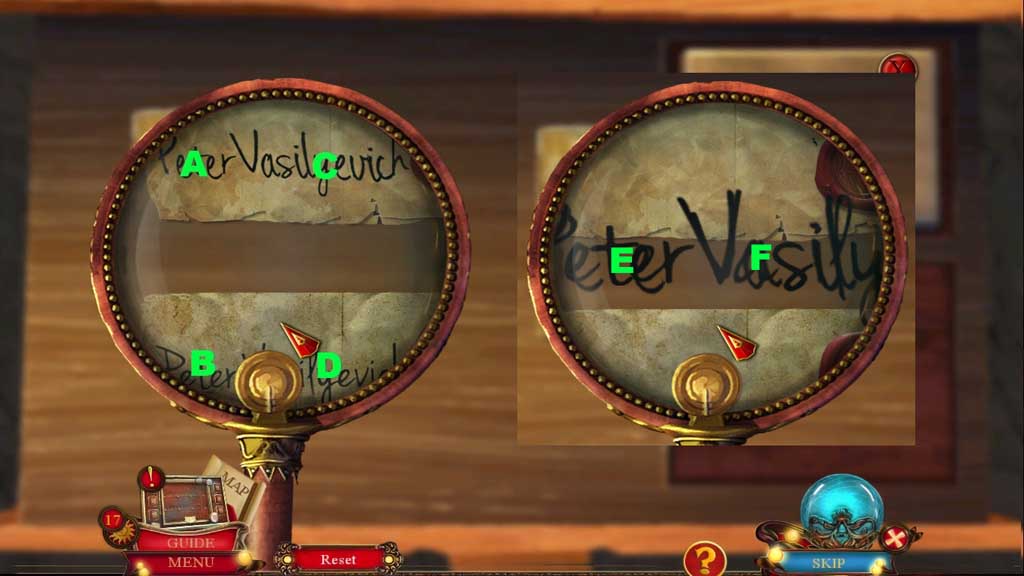
- Click the forensic kit and place down the Baron’s letter and the goodbye letter.
- Select the magnifying glass to click through the clues A – F.
- Click the case and select the solution.
- Collect 1 /3 doll dress up kits.
- Move to the right.
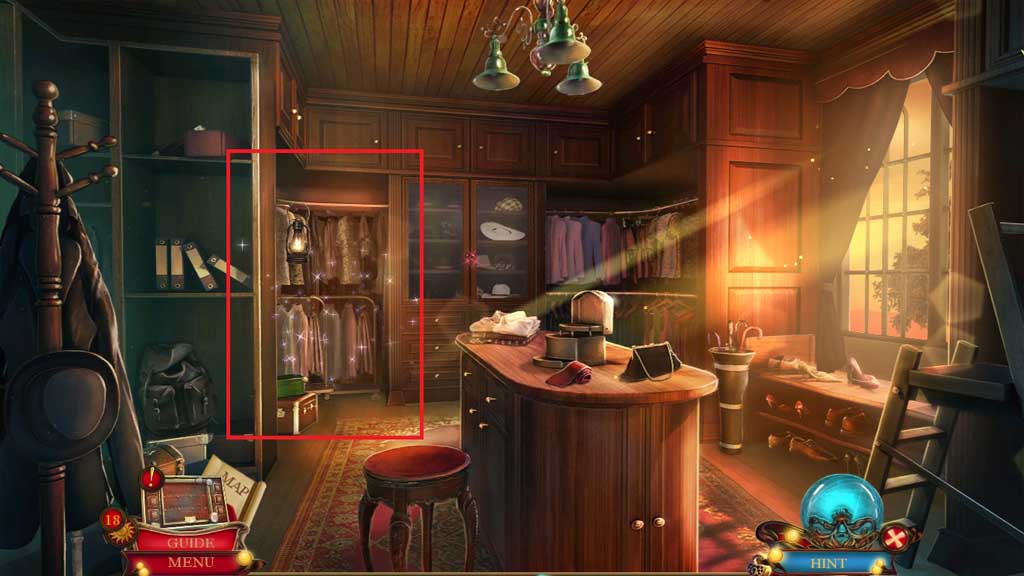
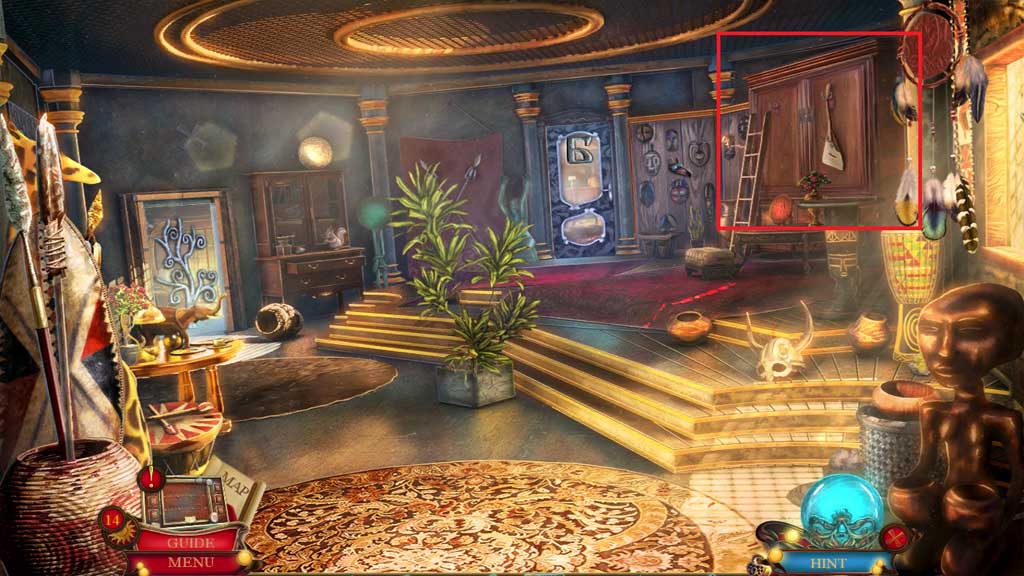
- Select the oil lamp to illuminate the closet.
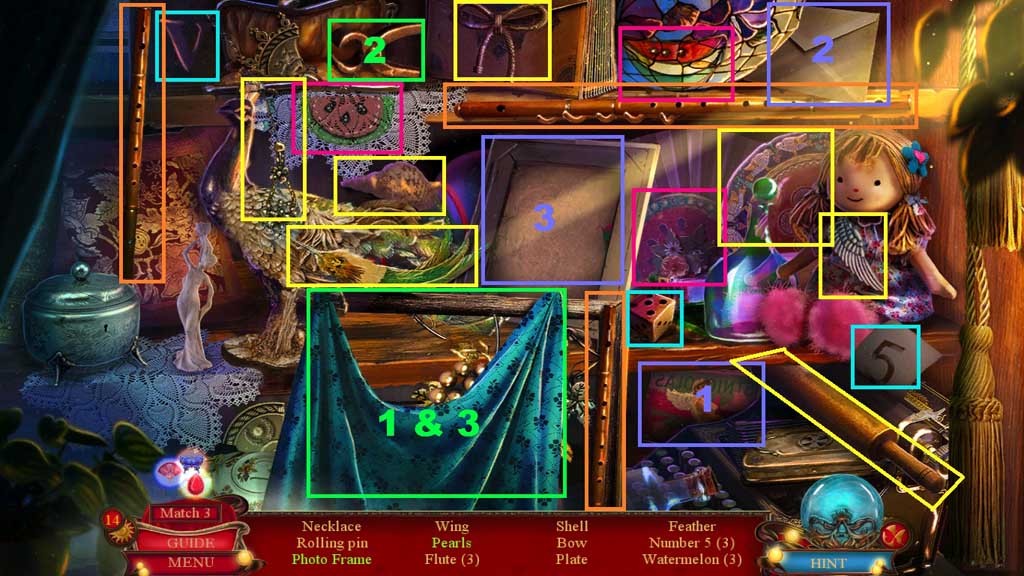
- Click the hidden objects area.
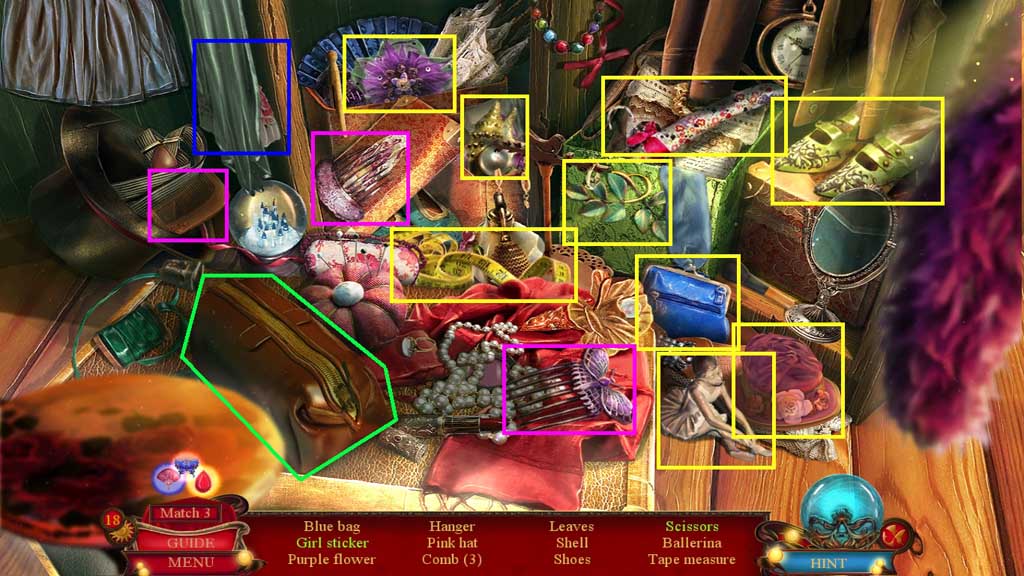
- Find the items.
- Click the clothes; collect the girl sticker.
- Click the bag; collect the scissors.
- Collect 2 / 3 doll dress up kits.
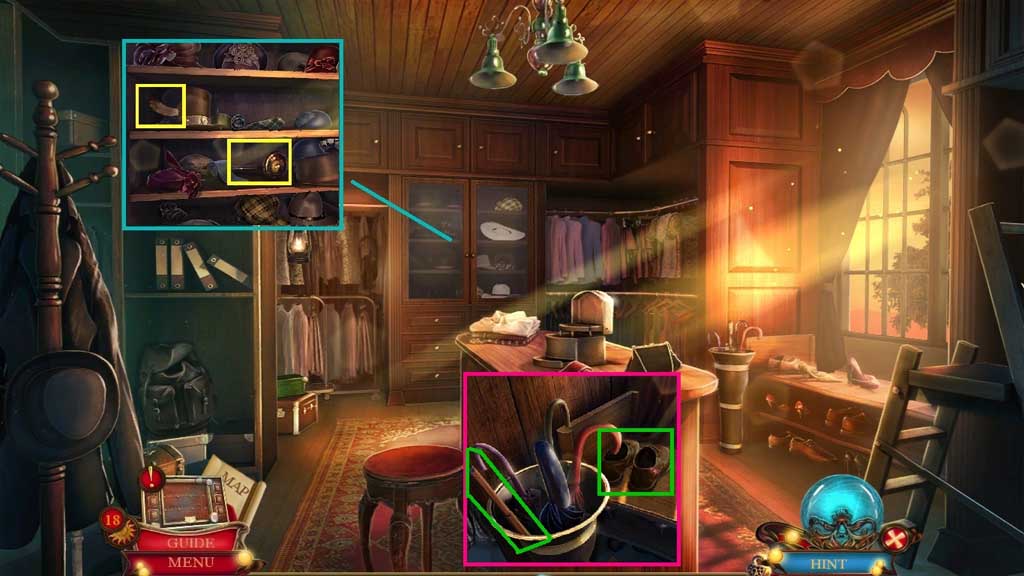
- Click the cabinet; collect 2 /4 copper feathers and the gong mallet.
- Collect the cane and click the shoes.
- Move to the Villa Office.
- Select the cane to collect 3 /3 doll dress up kits.
- Attach the hemisphere.
- Collect the star and the ballerina statuette.
- Move down once.
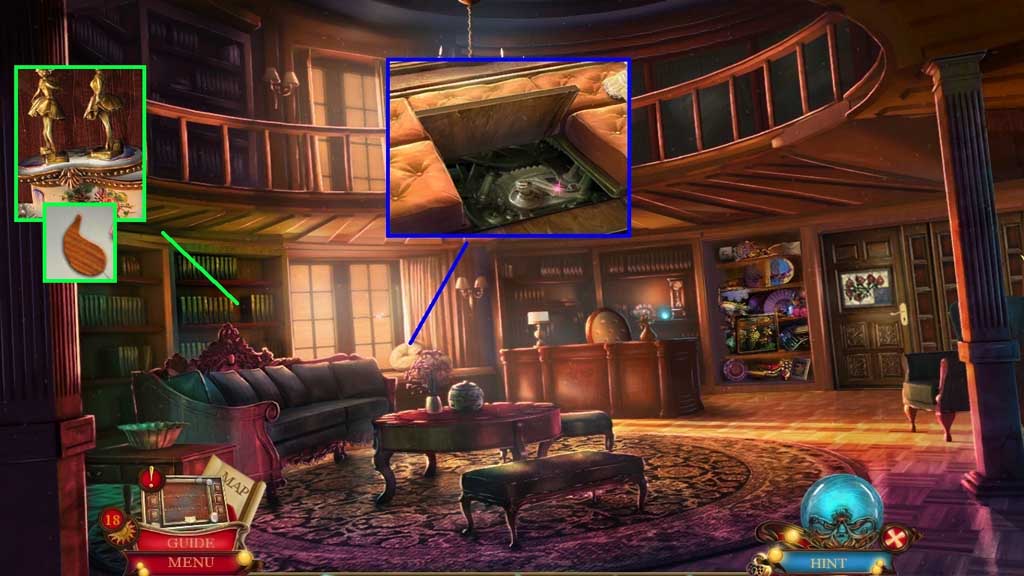
- Insert the star.
- Click the lever.
- Place the ballerina statuette.
- Collect the water drop symbol.
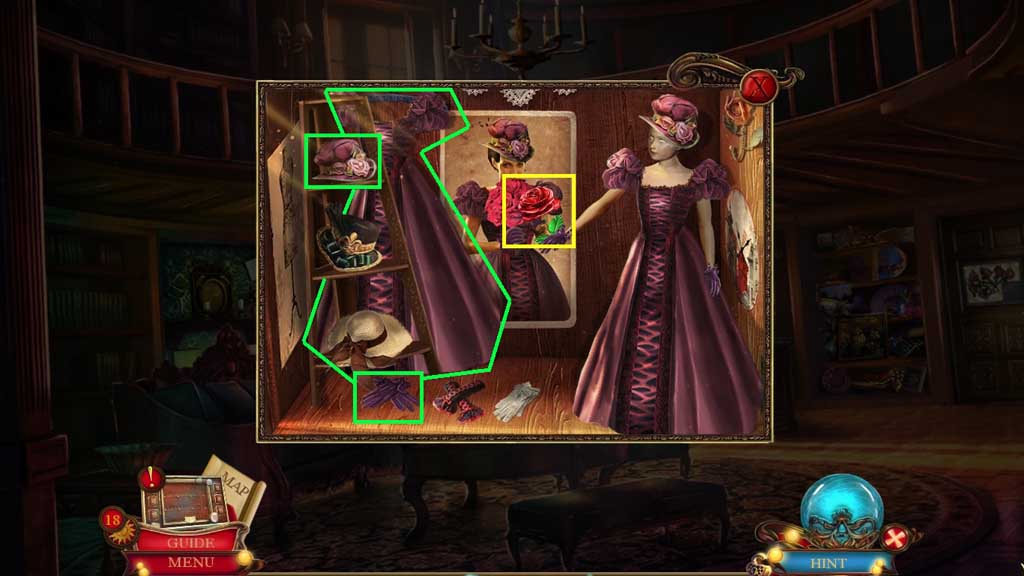
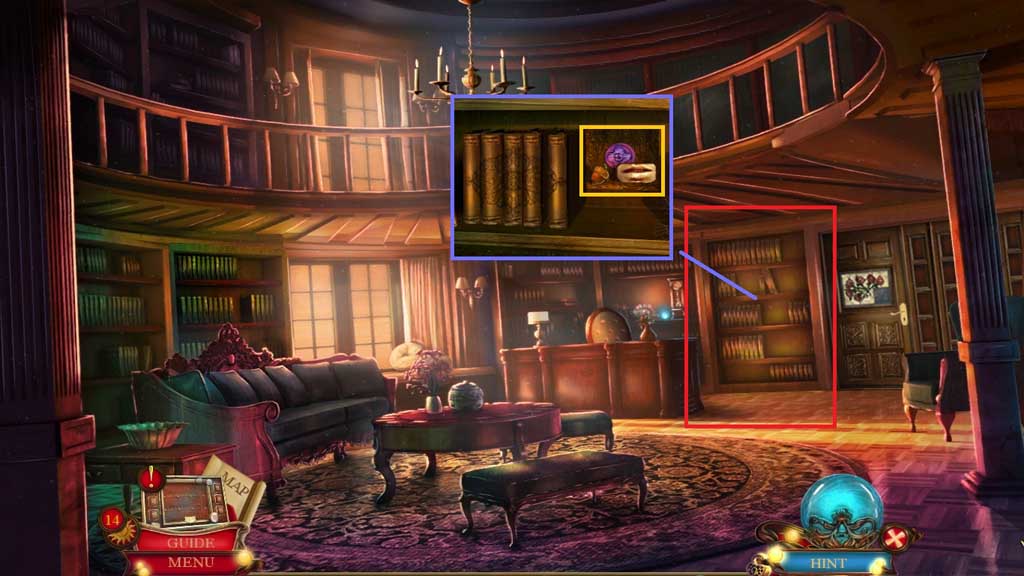
- Place the 3 doll dress up kit pieces into the shelf.
- Click the hat, gloves and the dress to match the image.
- Collect the metal rose.
- Move to the Bedchamber.
- Read the note.
- Insert the metal rose.
- Collect the Baron’s ring.
- Move to the right.
- Insert the Baron’s ring.
- Move ahead into the Secret Room.
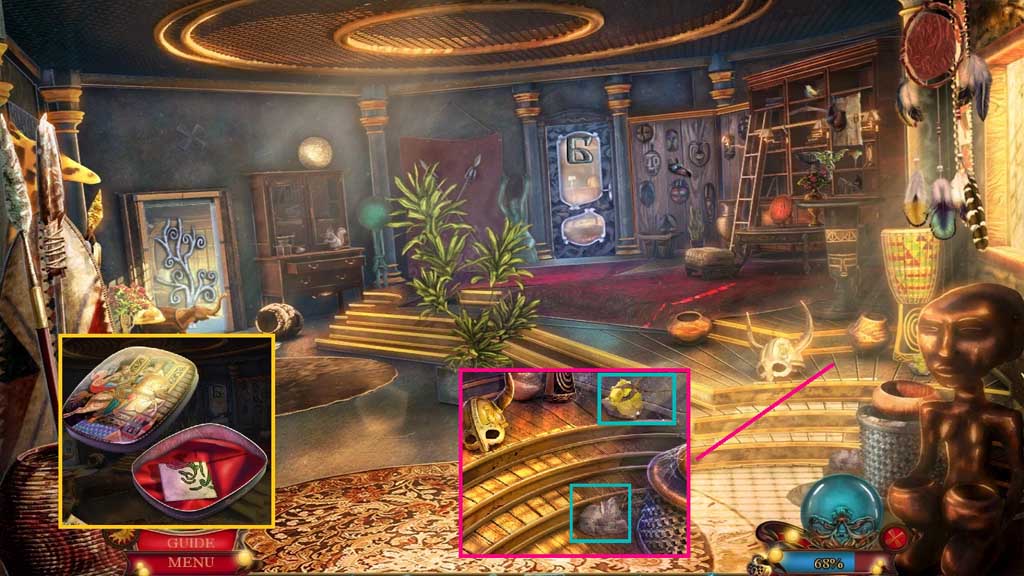
- Place the miniature bridge down.
- Collect the oil bottle and the map piece.
- Click the hidden objects area.
- Find the items.
- Collect 3 /4 copper feathers.
- Move to the Villa Office.
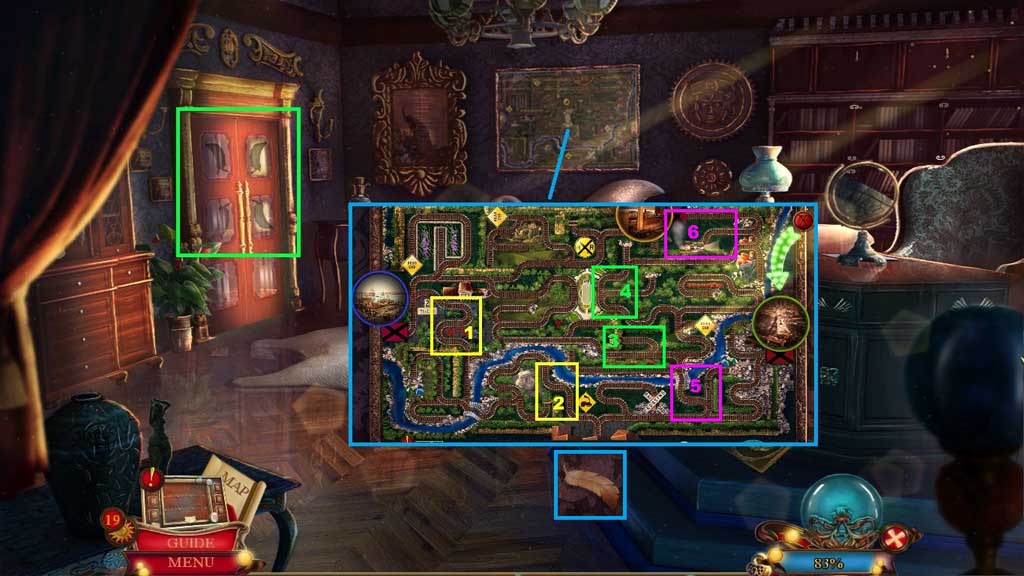
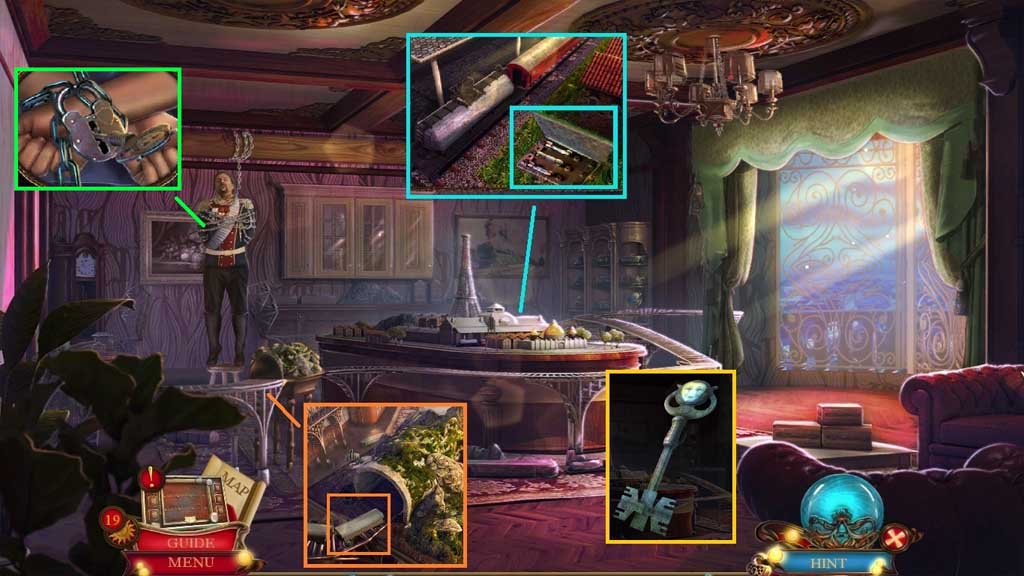
- Click the train map and insert the map piece to trigger a mini game.
- Solve the game by laying the tracks correctly.
- Collect 4 /4 copper feathers.
- Insert the 4 copper feathers.
- Move to the left.
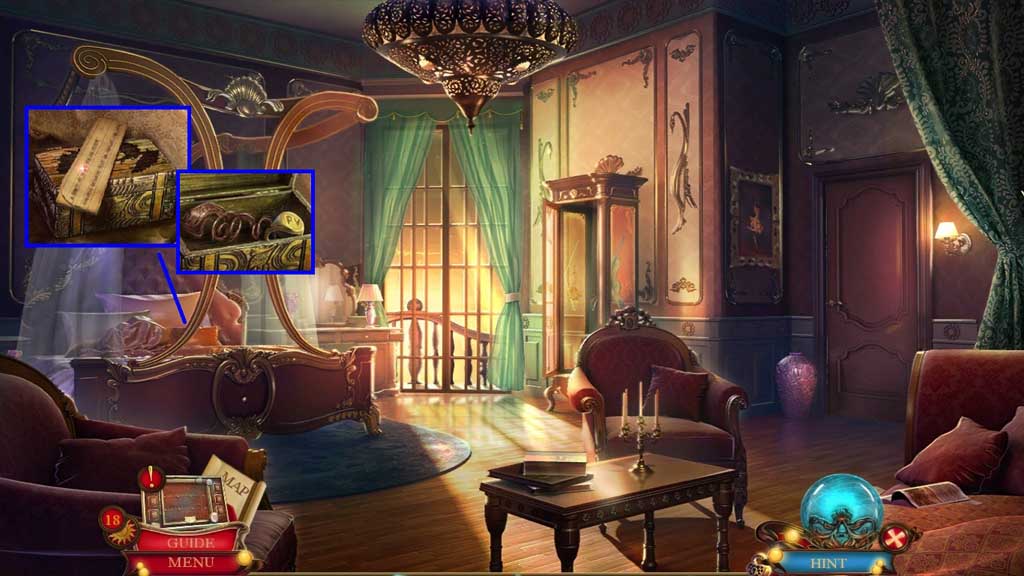
- Collect the porcelain tiles and the note.
- Select the cane to collect the Baron’s key.
- Select the oil bottle to lubricate the handle.
- Move ahead.
- Collect the fuse and insert the water drop symbol.
- Click the hidden objects area.
- Find the items.
- Select the lemon and squeeze it into the glass, then pour the water in; collect the glass of lemonade.
- Select the china and place them together; collect the tea set.
- Select the perfume to use on the flower and collect the butterfly; place the butterfly onto the hat and collect the butterfly hat.
- Select the shuttlecock and place it with the racquets; collect the badminton set.
- Collect 1 /2 ruby eyes.
- Collect the card machine token.
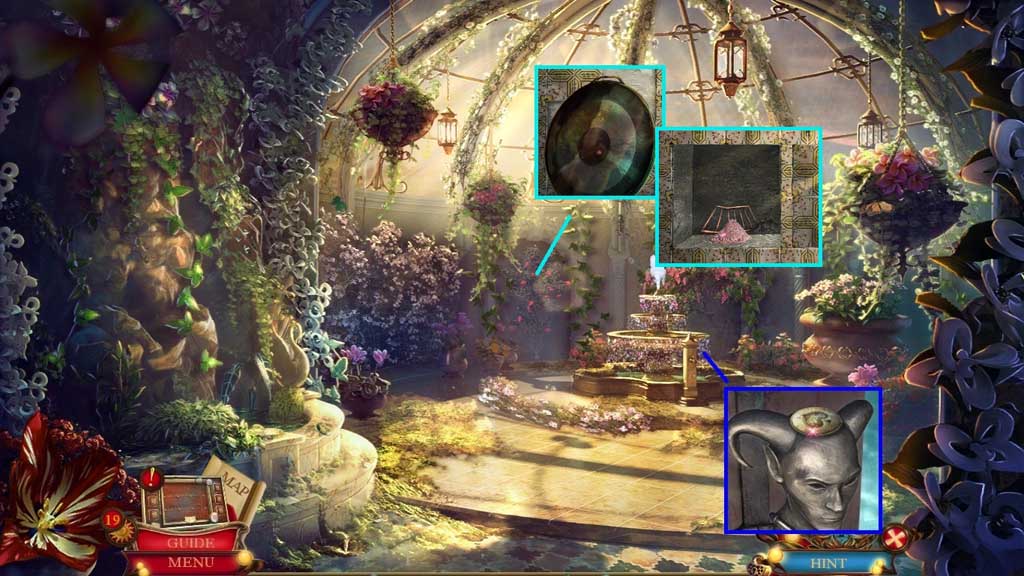
- Click the flowers; collect the gong.
- Insert the porcelain tiles.
- Collect the dust and track part.
- Move down once.
- Place the gong mallet and the gong onto the statue.
- Collect the Baron’s key piece.
- Click the token machine and insert the card machine token to trigger a mini game.
- Solve the game by clicking the buttons to match the cards.
- The solution is random.
- Collect the deck of cards; click it once and collect 2 /2 ruby eyes.
- Move ahead.

- Insert the 2 ruby eyes.
- Collect the Baron’s key part.
- Move to the Model Room.
- Click the panel and insert the fuse.
- Insert the track part collect the Baron’s key teeth.
- Select the Baron’s key, the Baron’s key piece, the Baron’s key part and the Baron’s key teeth to create and collect the Baron’s key.
- Insert the Baron’s key into the lock.
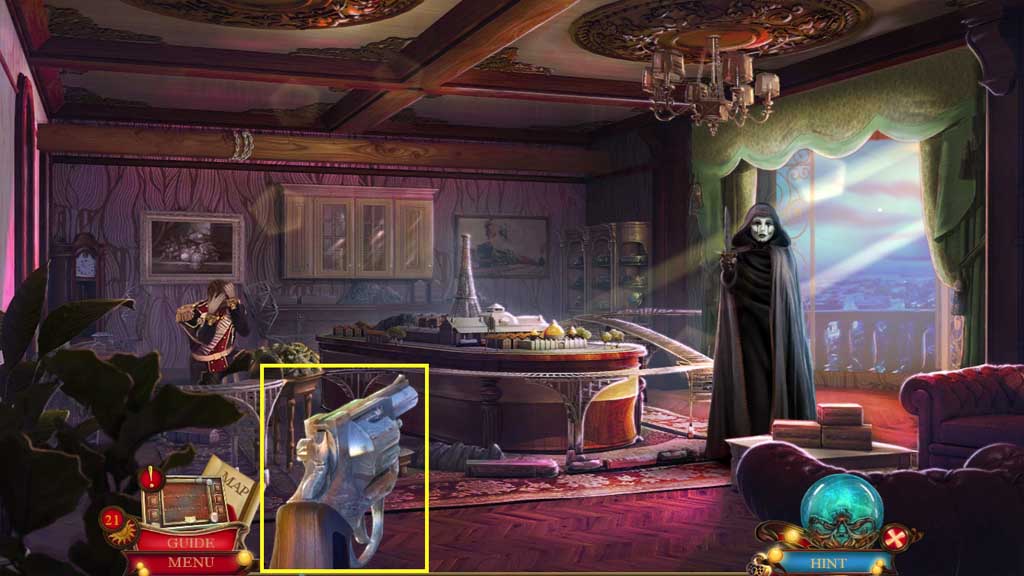
- Select the gun to shoot the chandelier.
- Move ahead.
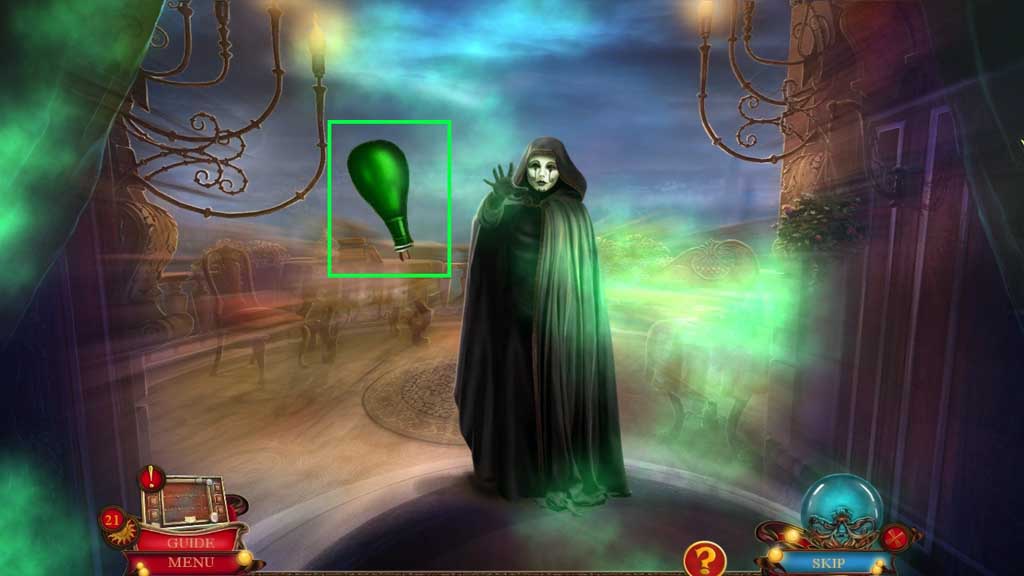
- Select the dust to toss.
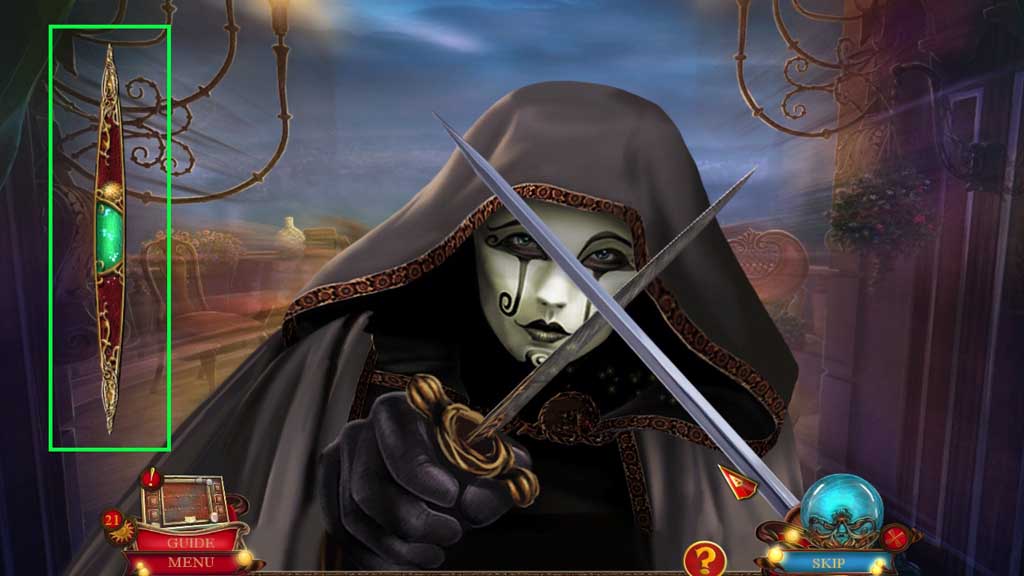
- Click 3 green flasks of poison.
- Click the ball while it’s in the green zone and continue to do this as the zones get smaller and smaller.
- Congratulations! You have successfully completed the main game of Danse Macabre Moulin Rouge C.E.
General Information & Tips
Chapter One: Welcome
Chapter Two: The Stage
Chapter Three: Enter the Elephant
Chapter Four: Into the Park
Chapter Five: The Baron’s Villa
Ask for help in the comments below!
Chapter One: Welcome
Chapter Two: The Stage
Chapter Three: Enter the Elephant
Chapter Four: Into the Park
Chapter Five: The Baron’s Villa
Ask for help in the comments below!