
Christmas Eve: Midnight's Call: Chapter Three: The Basket
Our Christmas Eve: Midnight's Call Walkthrough will keep you in the holiday spirit this season as you're treated with all the tips and advice you'll need in order to save Christmas. We've stuffed tons of custom marked screenshots, detailed game instructions, and easy puzzle solutions in this guide to ensure you never lose your way as you explore the magical world of Snow Hill.
General Information & Tips
Chapter One: The Package
Chapter Two: The Deed Is Done
Chapter Three: The Basket
Chapter Four: Toys
Chapter Five: Ice Castle
Chapter Six: Christmas
Ask for help in the comments below!
Chapter One: The Package
Chapter Two: The Deed Is Done
Chapter Three: The Basket
Chapter Four: Toys
Chapter Five: Ice Castle
Chapter Six: Christmas
Ask for help in the comments below!
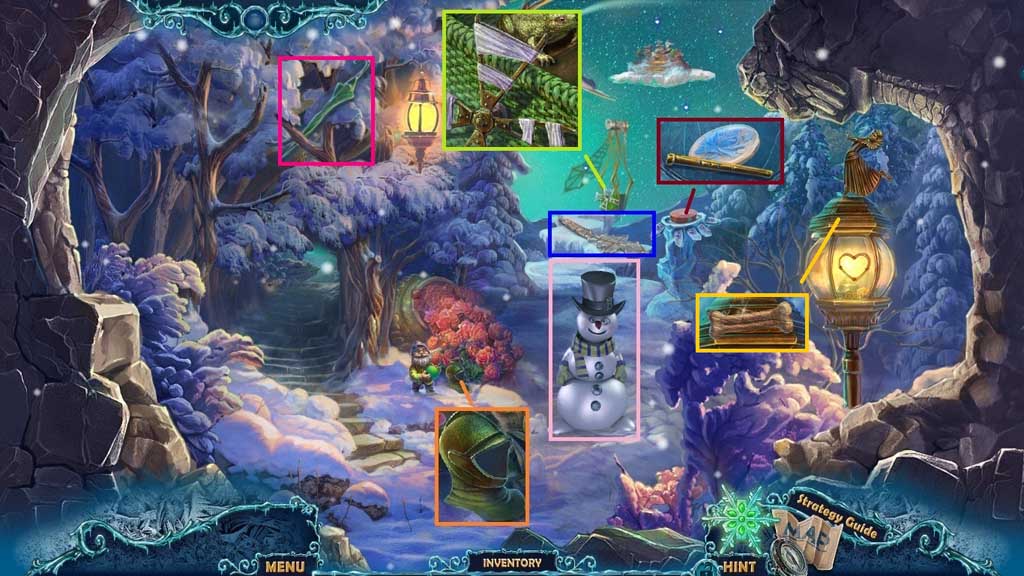
- Speak to the snowman; receive the snowman.
- Collect the knight’s head.
- Collect the flute and the rose inlay.
- Collect the broken wing.
- Collect the broken fan.
- Select the snowman to use on the umbrella; collect the umbrella.
- Collect the doghouse piece.
- Move to the left.
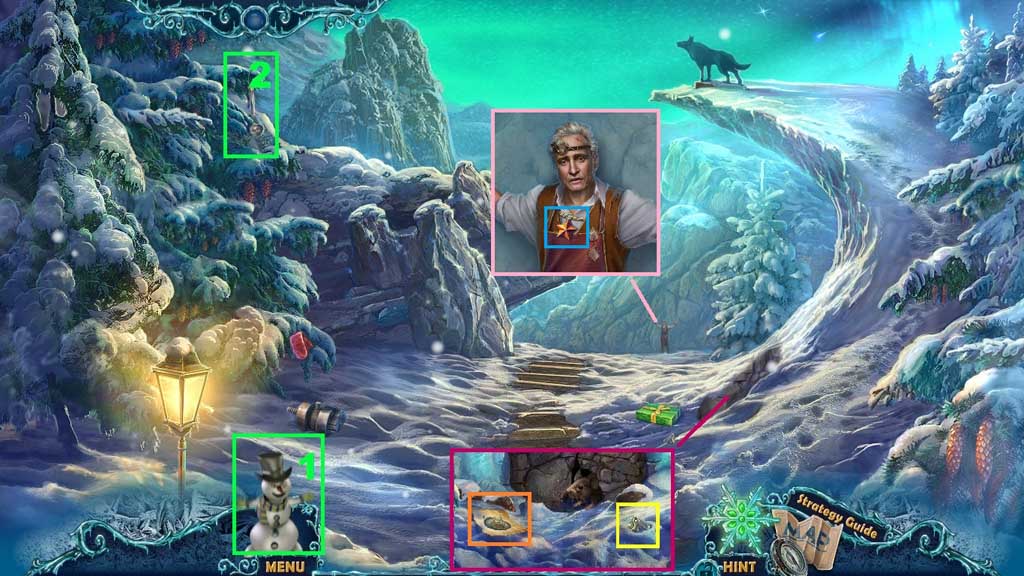
- Collect the code and the zipper pull.
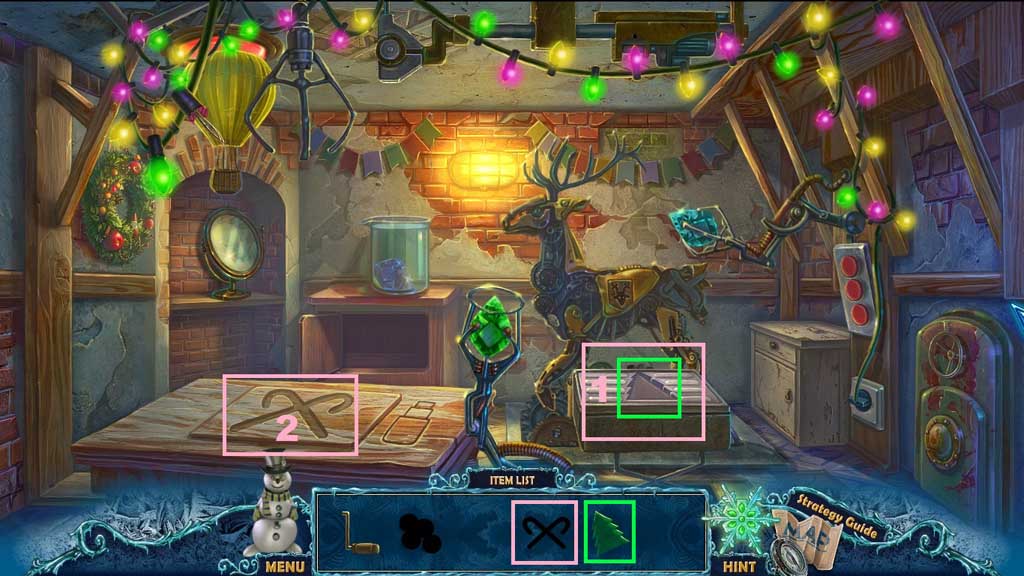
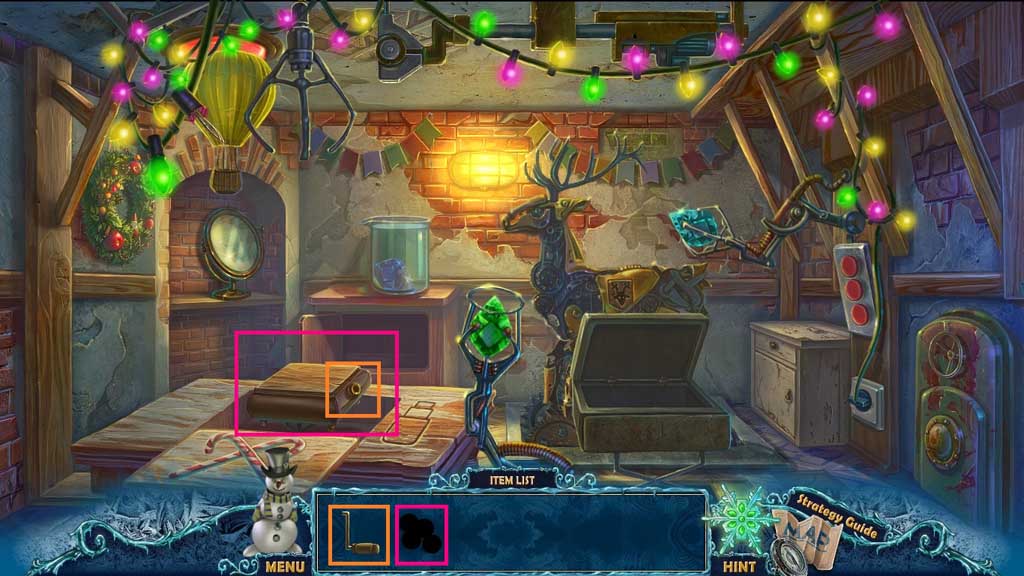
- Select the snowman to use on the tree; collect the ladle.
- Speak to Robert; collect the star.
- Move to the area in front of Robert’s House.
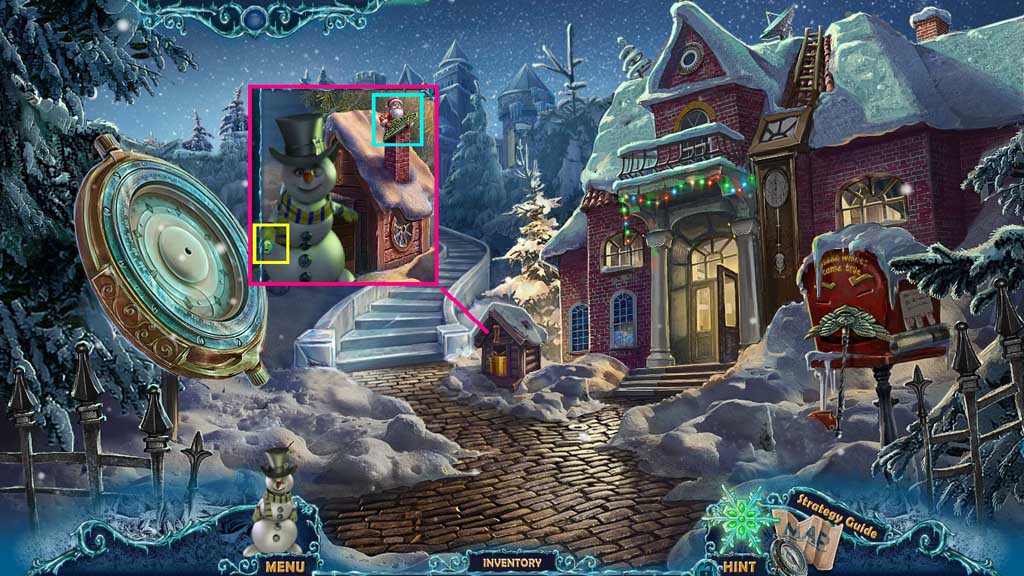
- Insert the doghouse piece; collect the stair.
- Select the snowman to collect 2 /2 buttons.
- Move to the right.
- Select the code solution and place it along with the stair and the grate.
- Adjust the step colors as shown on the diagram.
- Click the hidden objects area.
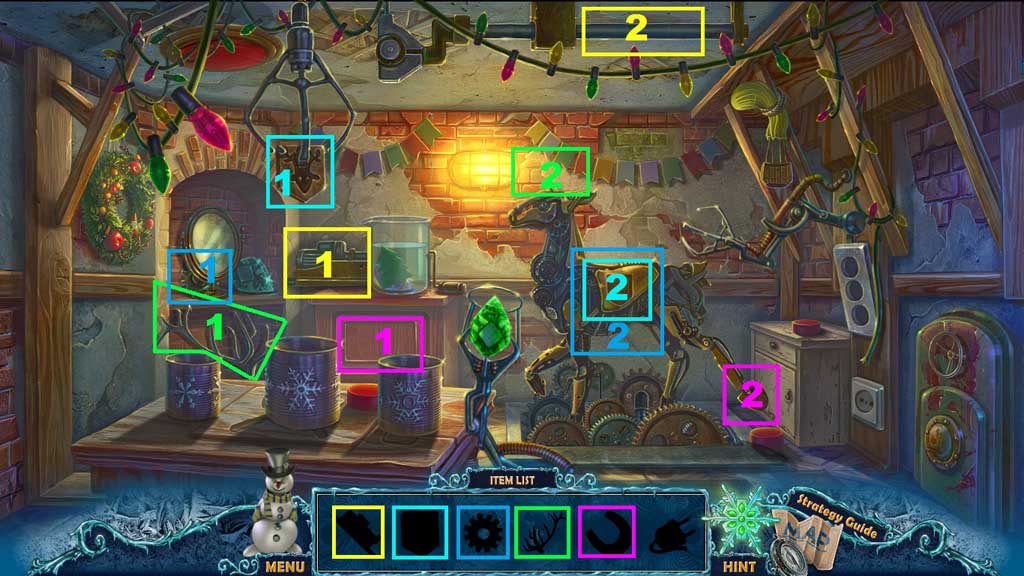

- Find the items.
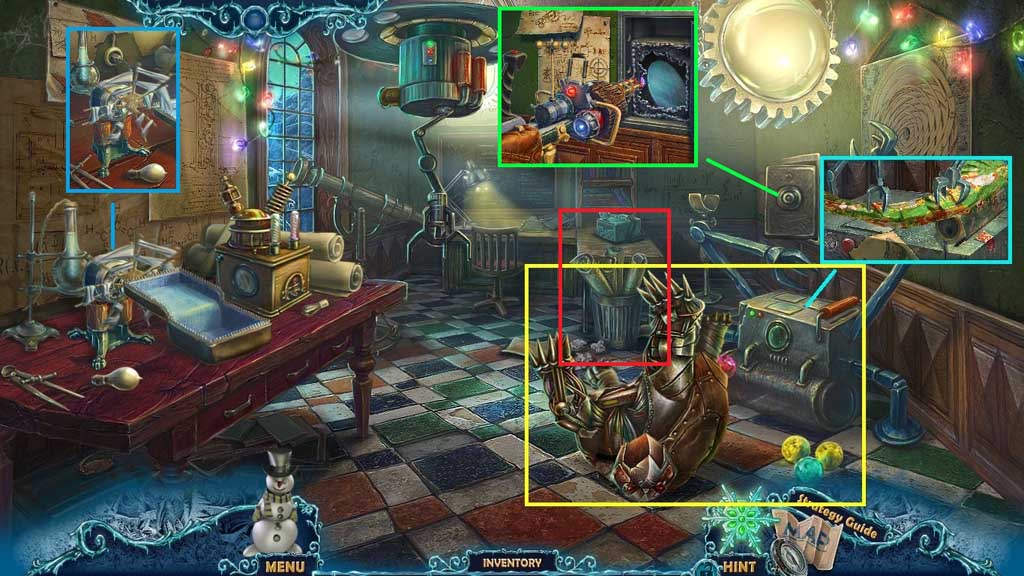
- Collect the reducer and place it onto the mechanism; collect the reindeer symbol.
- Insert the reindeer symbol into the saddle; insert the gear.
- Select the antlers and place them onto the mechanical reindeer.
- Select the horseshoe and place it onto the mechanical hoof to trigger a mini game.
- Play the mini game.
- Use the following sequence to solve the mini game: A-B / C –A / B –A / B –C / A – B / A – C / B –C
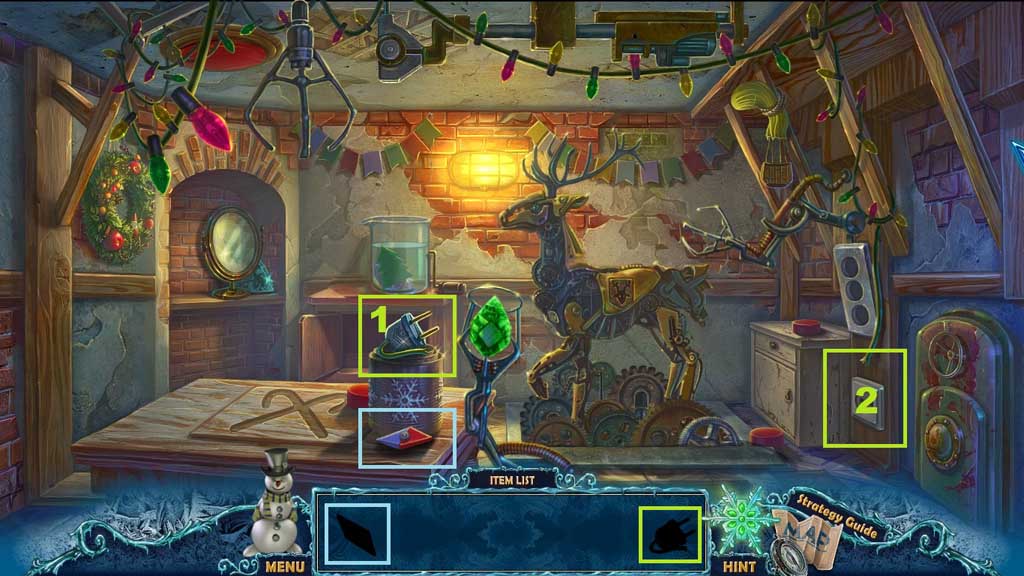
- Select the plug and insert it into the socket.
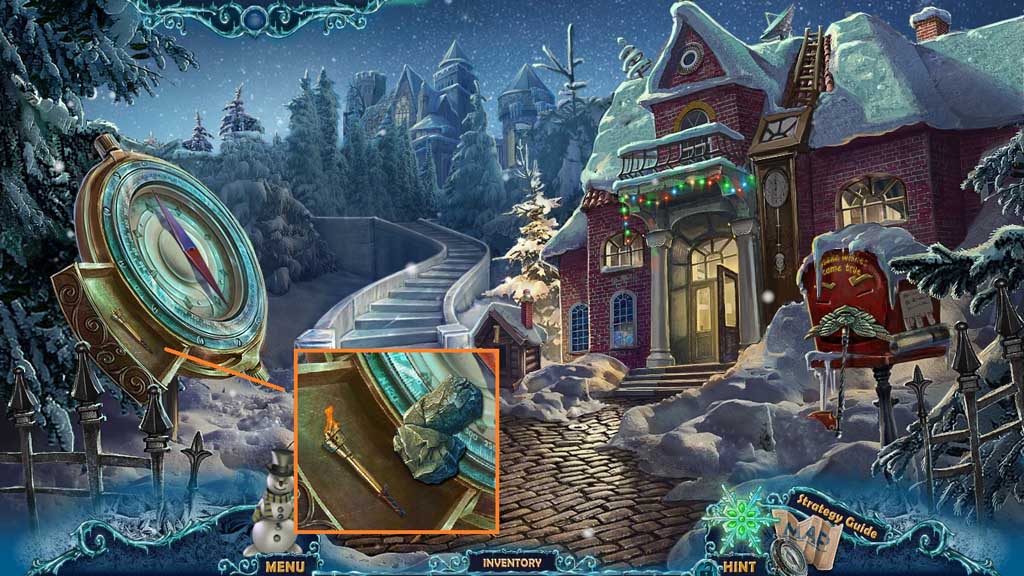
- Collect the compass arrow.
- Move down once.
![]()
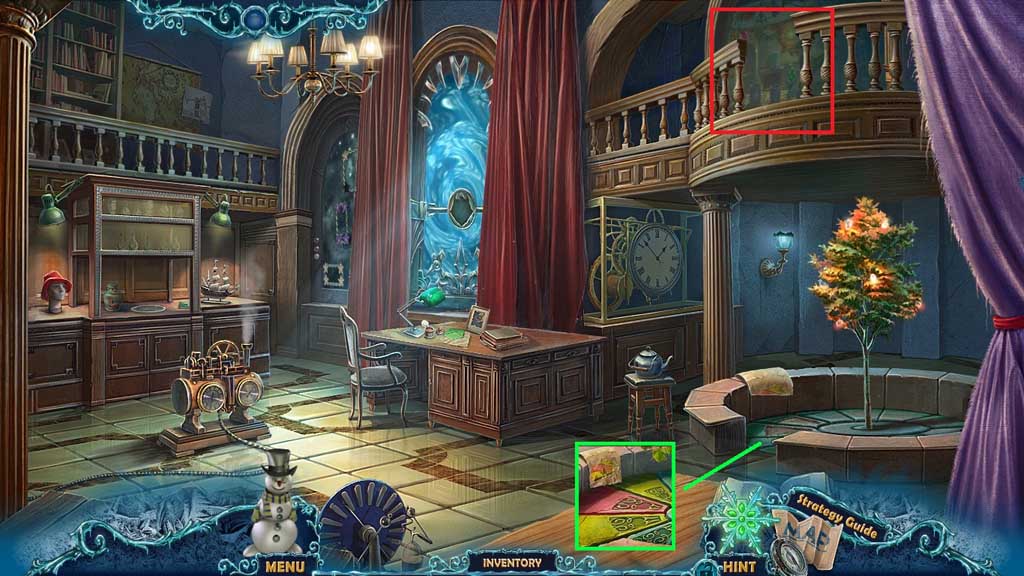
- Insert the compass arrow.
- Collect the page with clover.
- Move to the right.
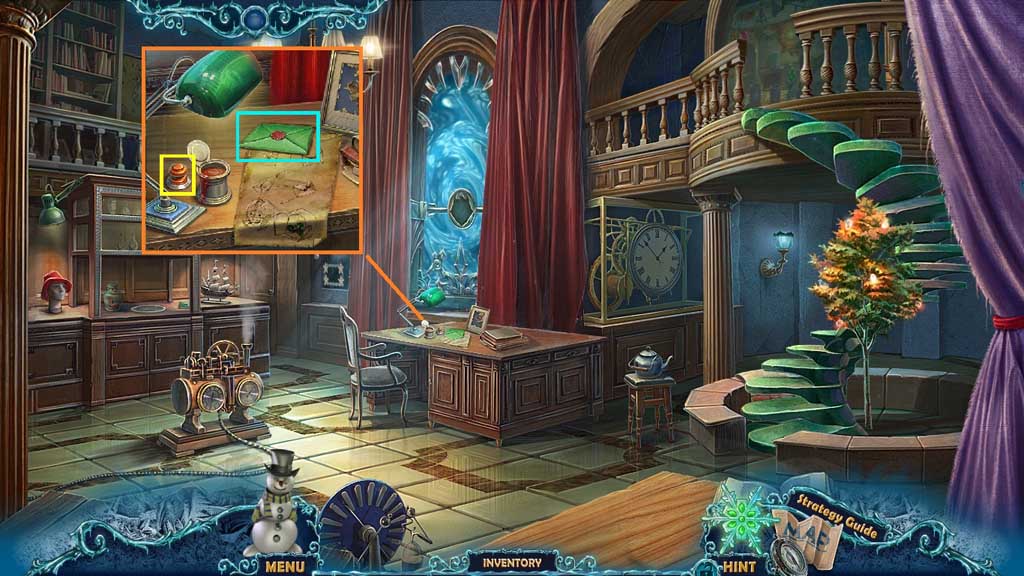
- Place the page with clover onto the desk and click it 3x’s.
- Select the seal to stamp the envelope and collect the letter.
- Move down once.
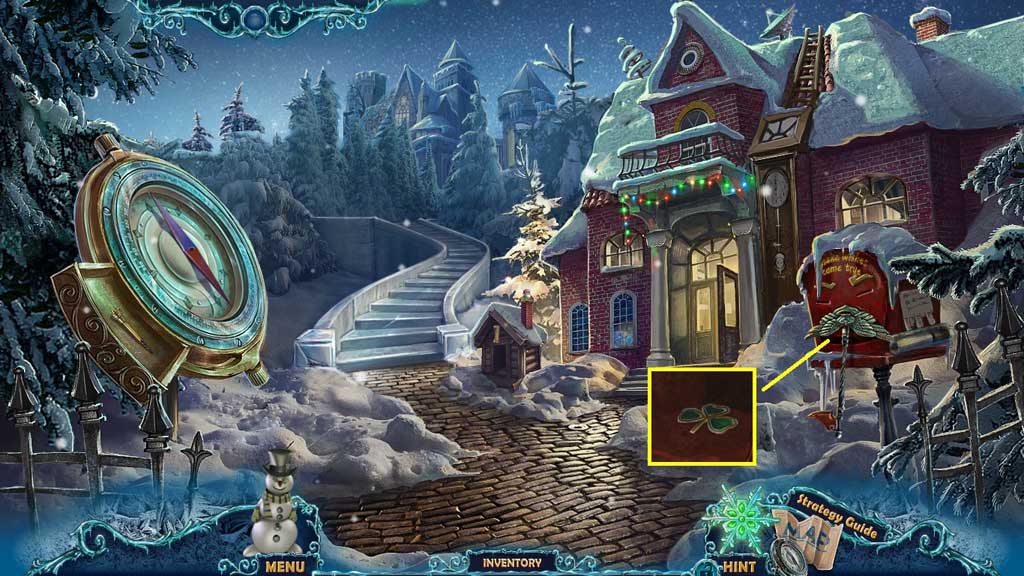
- Place the letter into the mailbox.
- Click the mailbox open; collect the book key.
- Move to the right.
- Insert the book key and click it once to trigger a mini game.
- Solve the game by unscrambling the image.
- Click the page 2x’s; collect the star.
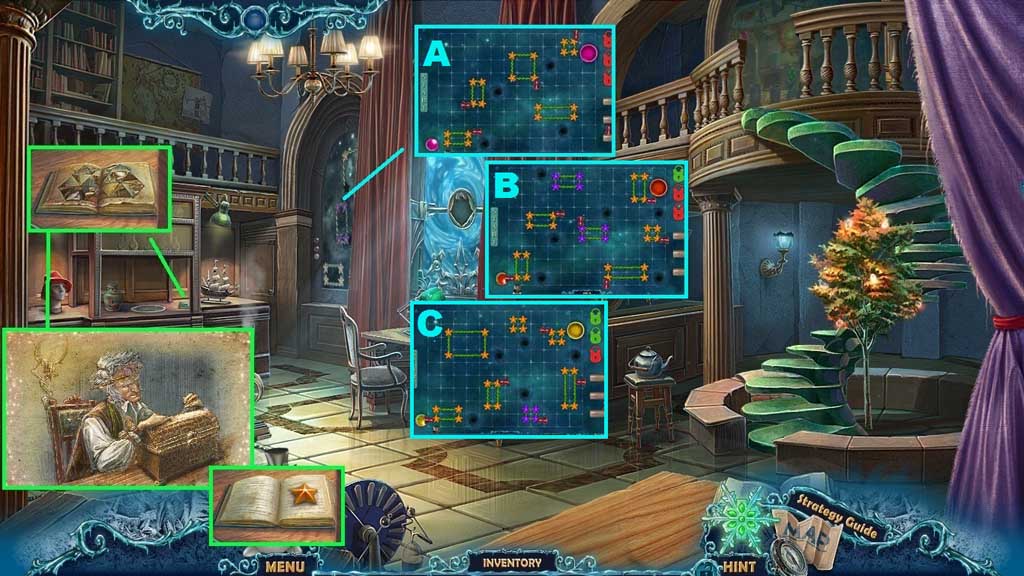
- Insert the 2 stars to trigger a mini game.
- Solve the game by repositioning the holders to guide the ball correctly.
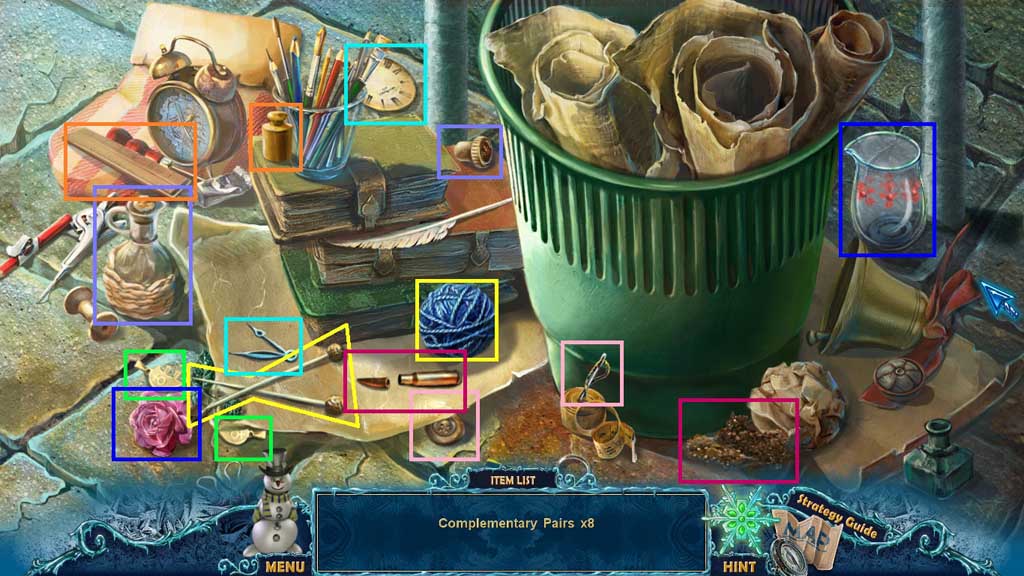
- Move ahead and click the hidden objects area.
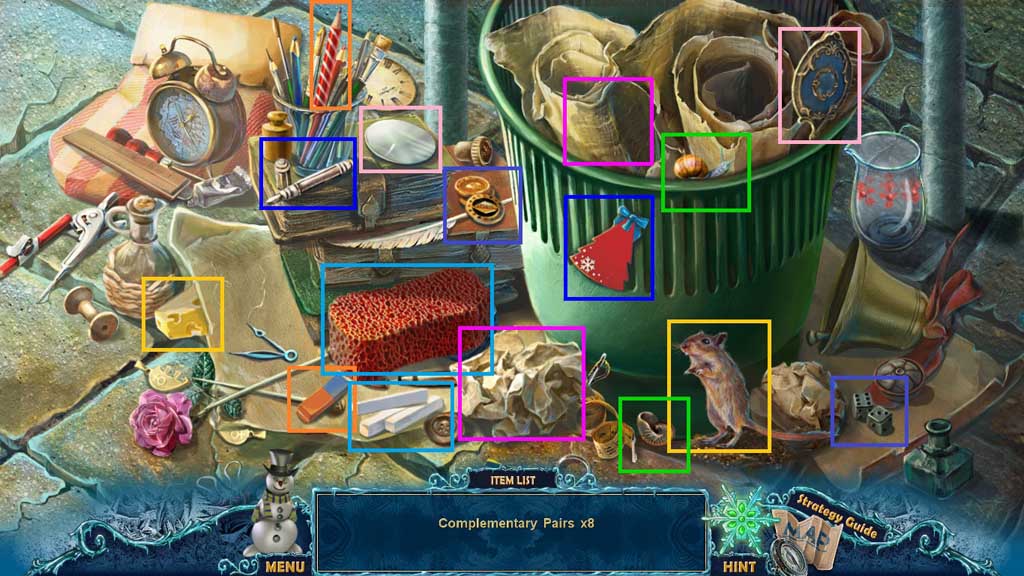
- Find the paired items.
- Collect the flint.
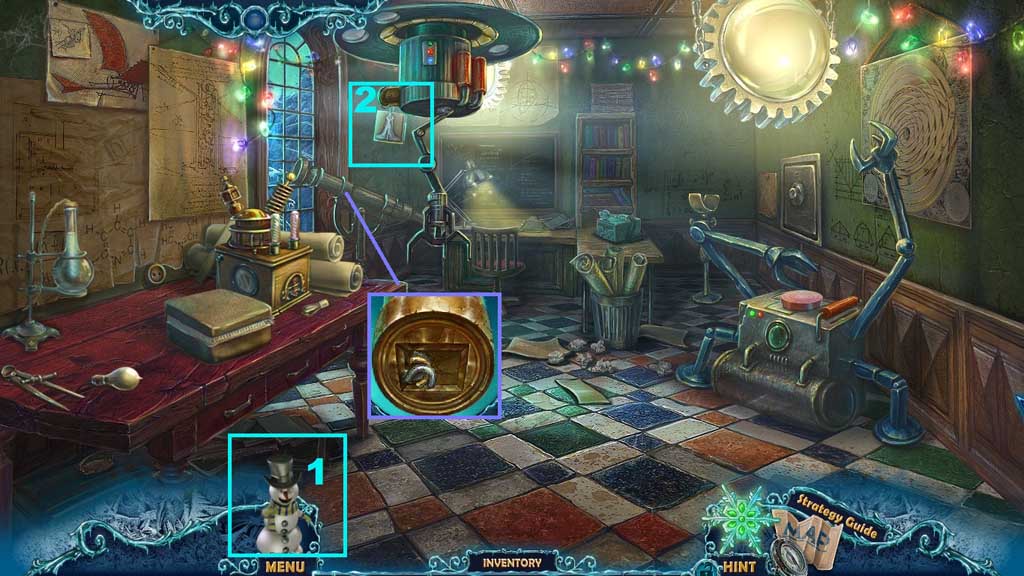
- Click the telescope; collect the puzzle piece.
- Zoom into the telescope lens.
- Select the snowman to use on the mechanism.
- Collect the game piece.
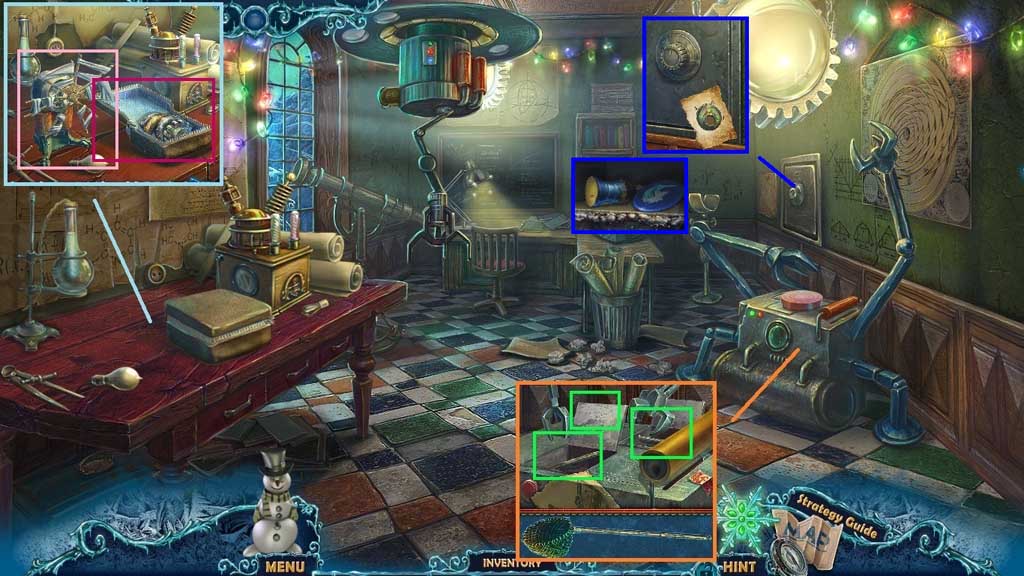
- Click the 3 compartments open; collect the butterfly net parts.
- Collect the butterfly net.
- Place the broken fan onto the table and attach the zipper pull; click it once.
- Collect the cog and the puzzle piece.
- Place the code onto the safe and click the knob to 10 – 70 – 90; collect the part of apparatus and the lever.
- Move down 2x’s.
- Select the flint to light and collect the torch.
- Move ahead 2x’s.
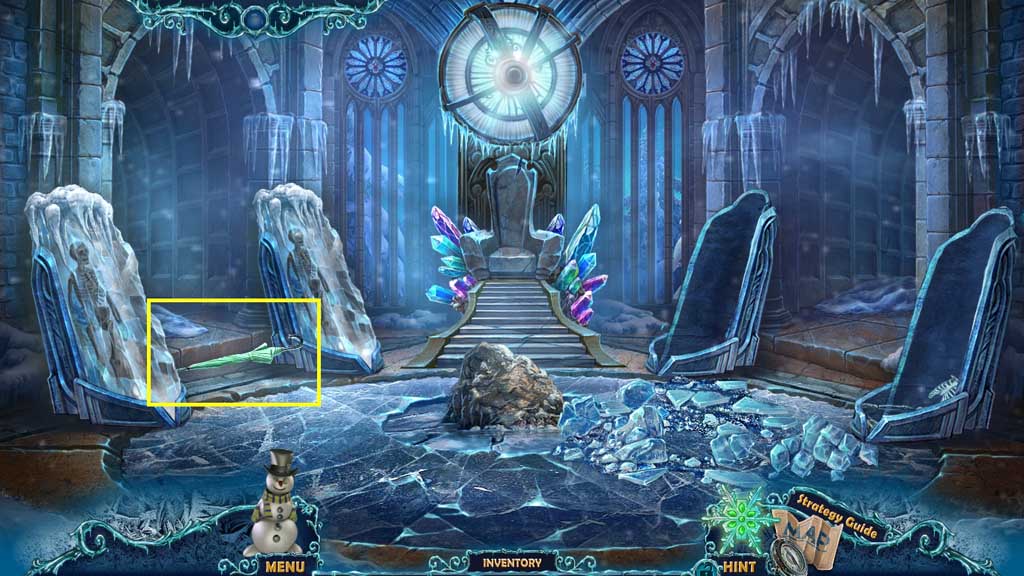
- Place the umbrella between the 2 ice enclosures.
- Move to the left.
- Select the torch to illuminate the scene.
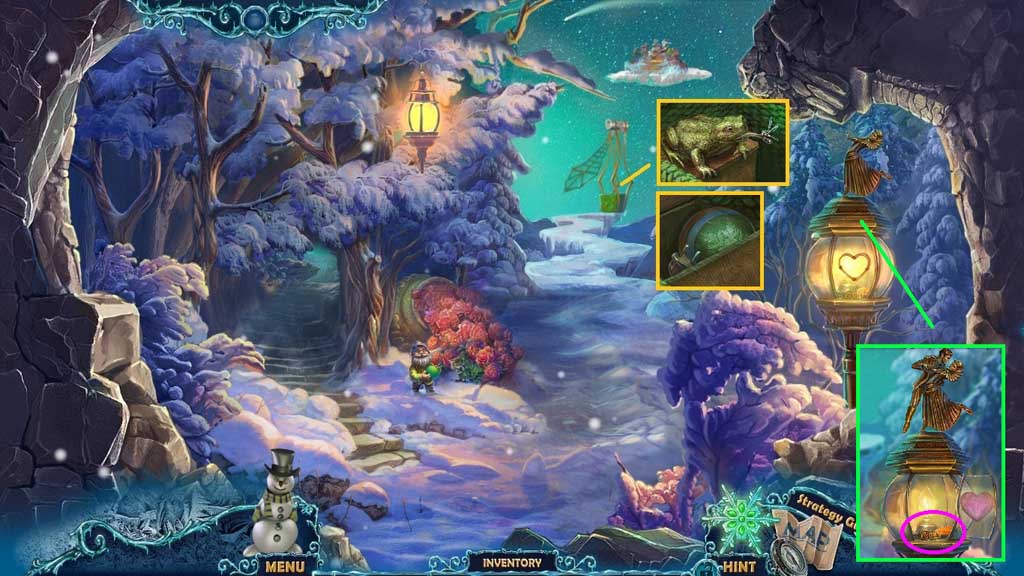
- Place the flute onto the gnome statue; collect the laser.
- Collect the stone bone.
- Use the butterfly net to collect the dragonfly.
- Insert the rose inlay into the vase; collect the lantern gem.
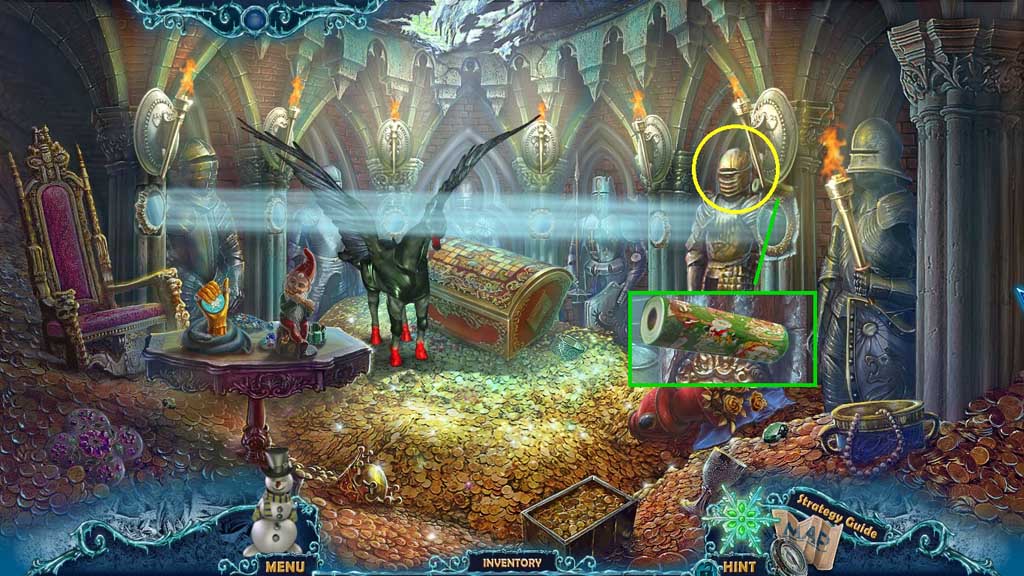
- Attach the knight’s head.
- Collect the wrapping paper.
- Move down once and go to the right.
- Select the dragonfly to feed to the frog; collect the frog.
- Collect the cannonball and the power cord.
- Place the boy statue and the lantern gem; collect the bracelet and the carrot.
- Move to the left.
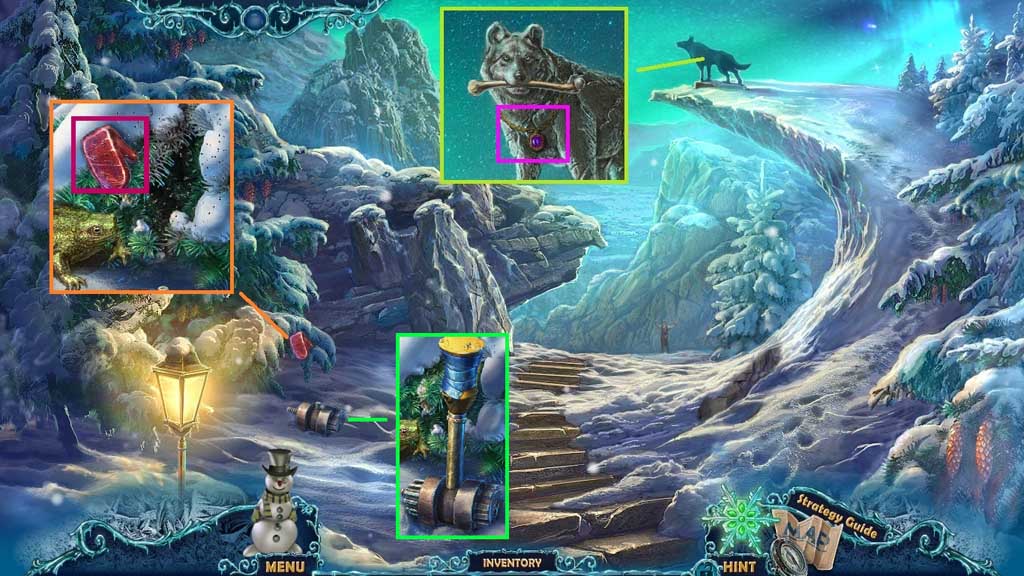
- Place the stone bone into the wolf’s mouth; collect the gem flower.
- Place the frog to eat the flies; collect the left mitten.
- Insert the cog and the lever; click the lever.
- Move to Robert’s Secret Room.
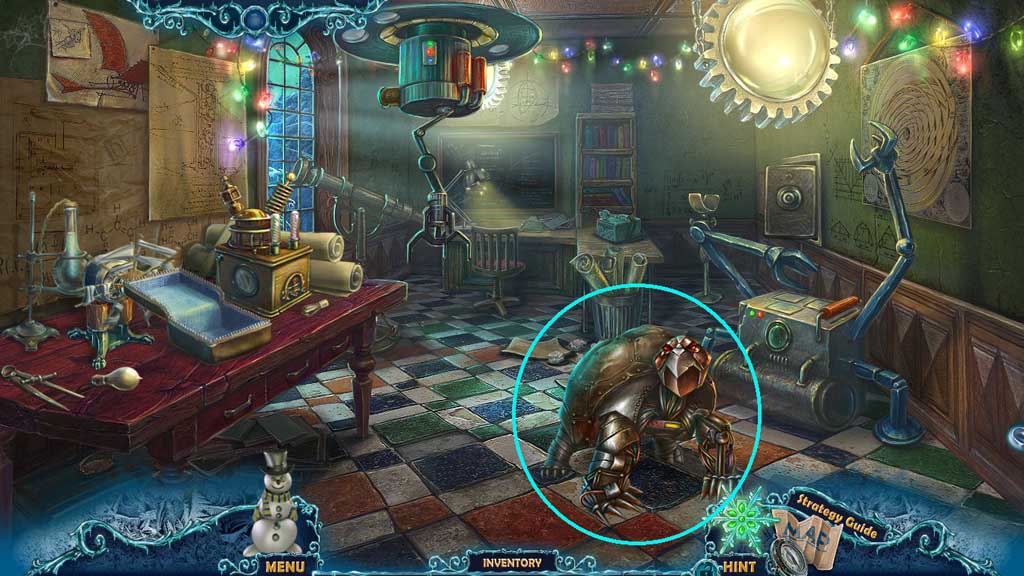
- Click the creature.
- Move down once and click the hidden objects area.

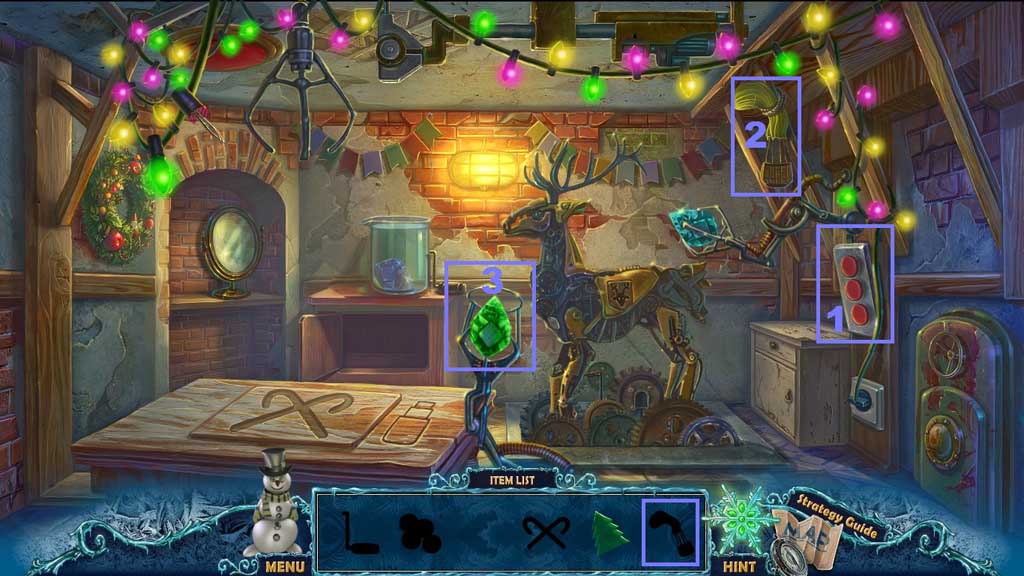
- Find the items.
- Collect the buttons and place them into the slots on the keypad.
- Select the crystal and insert it into the mechanical arm; click the middle button.
- Collect the tree.
- Click the 2nd button on the key pad; collect the hot air balloon.
- Place the hot air balloon onto the crystal and click the key pad again.
- Insert the tree into the groove; collect the candy canes and place them into the slot.
- Attach the handle onto the box; click it once.
- Collect the marbles.
- Move ahead.
- Toss the marbles toward the creature.
- Place the wing and the wrapping paper onto the device; collect the wing.
- Insert the power cord; collect the fan.
- Place the laser and click the button; collect the mirror.
- Click the hidden objects area.
- Find the paired items.
- Collect the yarn.
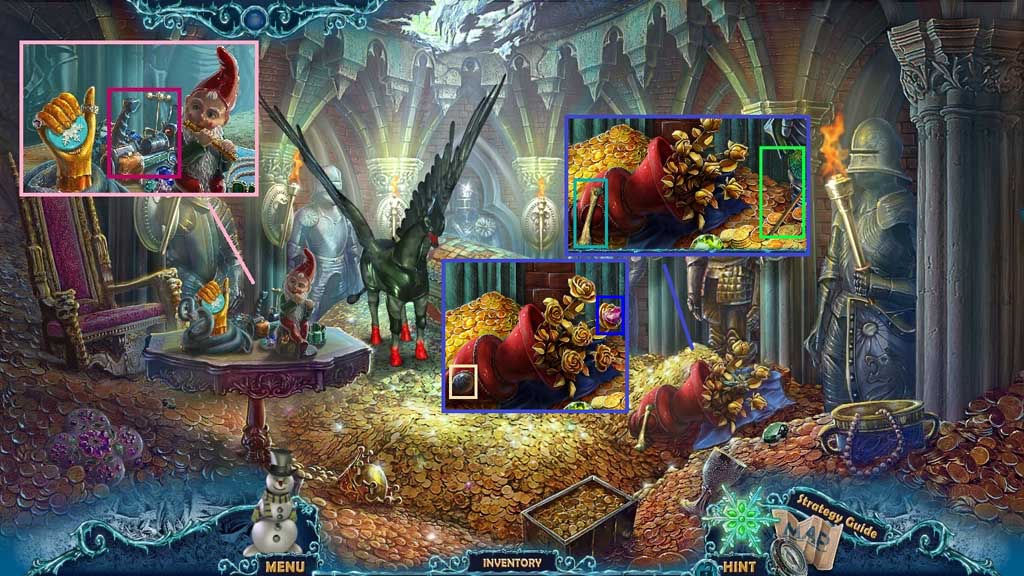
- Move to the Treasure Vault.
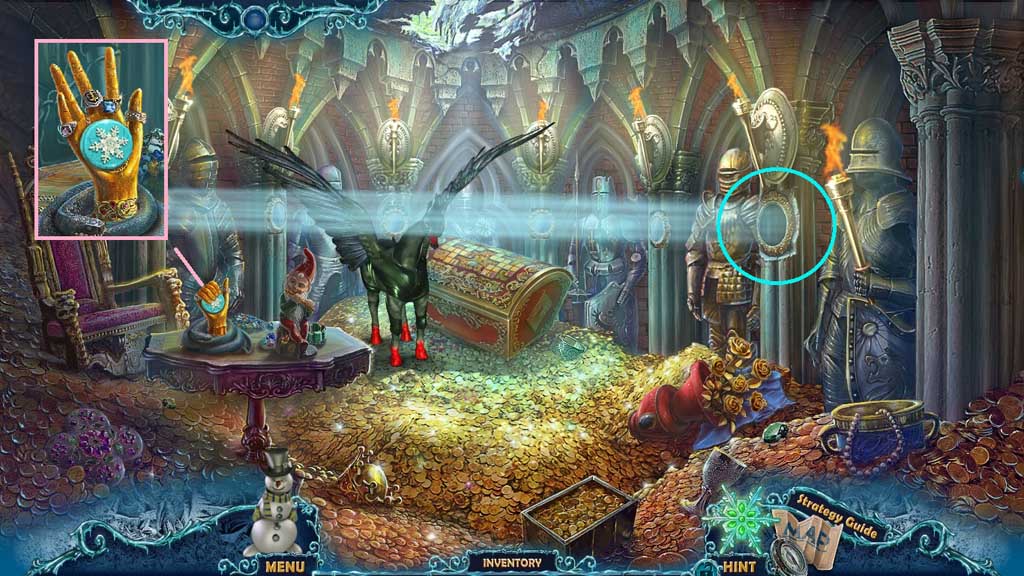
- Place the bracelet; collect the part of mechanism.
- Place the mirror.
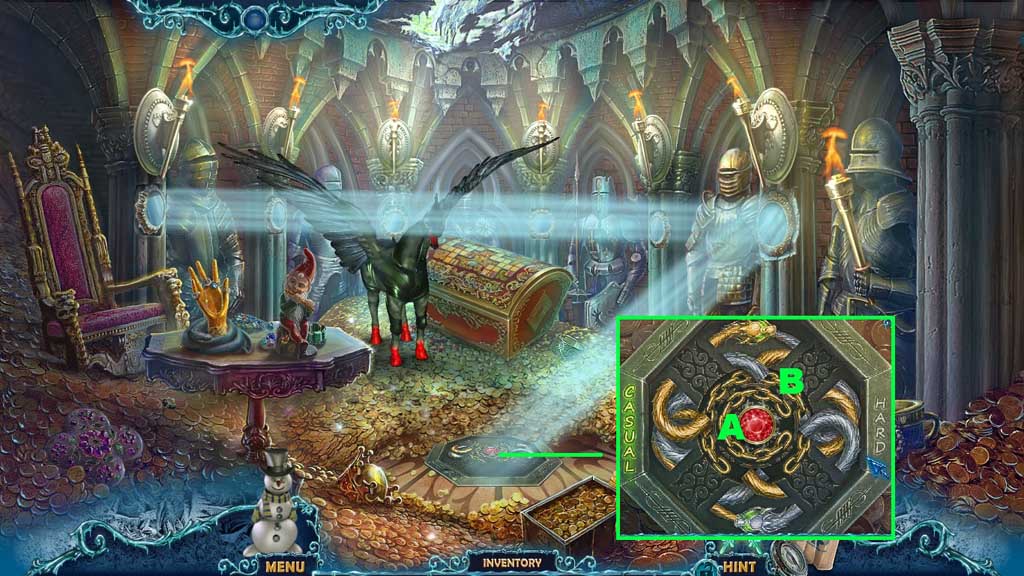
- Insert the 2 puzzle pieces to trigger a mini game.
- Solve the game by
- Use the following sequence to solve: A – B / B – A – B / B – A- B / B – A – B
- Move to the Garden.
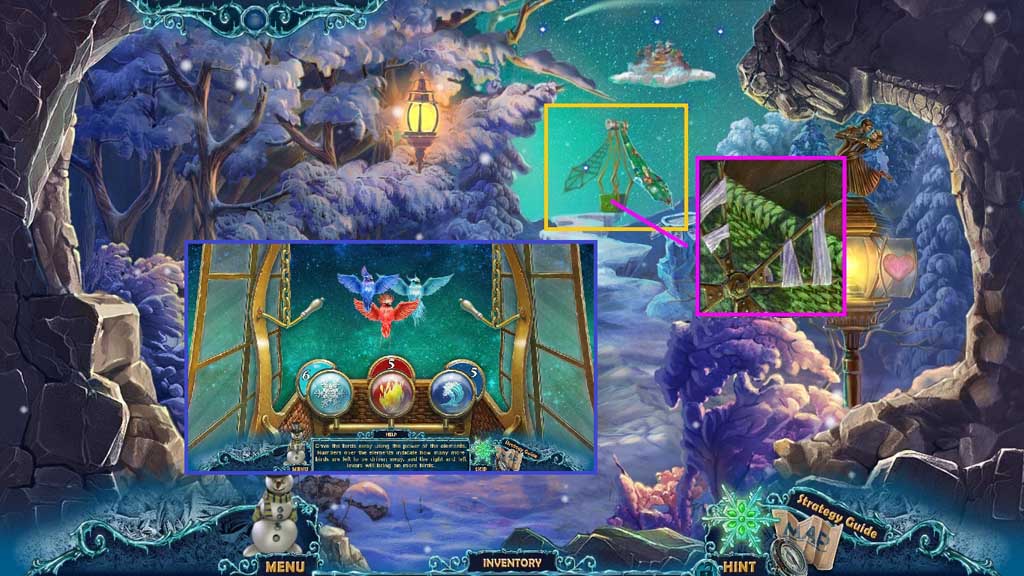
- Place the wing onto the flying basket.
- Place the fan onto the basket.
- Place the part of apparatus and the part of mechanism to trigger a mini game.
- Solve the game by using the right elements to get rid of the birds.
General Information & Tips
Chapter One: The Package
Chapter Two: The Deed Is Done
Chapter Three: The Basket
Chapter Four: Toys
Chapter Five: Ice Castle
Chapter Six: Christmas
Ask for help in the comments below!
Chapter One: The Package
Chapter Two: The Deed Is Done
Chapter Three: The Basket
Chapter Four: Toys
Chapter Five: Ice Castle
Chapter Six: Christmas
Ask for help in the comments below!