
Cadenza: Music, Betrayal and Death: Chapter Five: The Stage
Our Cadenza: Music, Betrayal, and Death Walkthrough is complete and ready to help guide your steps as you attempt to get to the bottom of what's happened at your father's Jazz Pepper Club in New Orleans. Consult with our detailed, step-by-step instructions, our custom marked screenshots, and our easy puzzle solutions as you search for a way to stop the man in white from spreading his hypnotizing music.
General Information & Tips
Chapter One: Chestnut
Chapter Two: Liberty
Chapter Three: The Rue
Chapter Four: Riverside
Chapter Five: The Stage
Chapter Six: On Board the Zeppelin
Chapter Seven: The Candy Shop
Chapter Eight: House of the Moon
Chapter Nine: Song of Water
Ask for help in the comments below!
Chapter One: Chestnut
Chapter Two: Liberty
Chapter Three: The Rue
Chapter Four: Riverside
Chapter Five: The Stage
Chapter Six: On Board the Zeppelin
Chapter Seven: The Candy Shop
Chapter Eight: House of the Moon
Chapter Nine: Song of Water
Ask for help in the comments below!

- Move ahead 2 times.
- Pan to the left 2 times.
- Click the detective to trigger a hidden objects area.
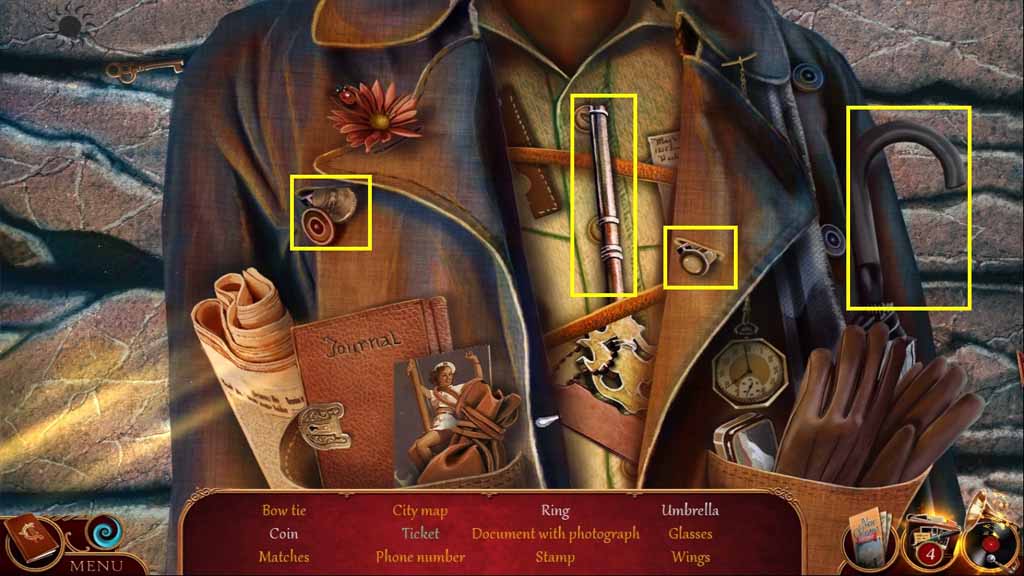
- Find the listed items.
- First find the ring, the coin and the umbrella and place the pieces beneath them onto the metal cylinder; click the jacket open to reveal more items.
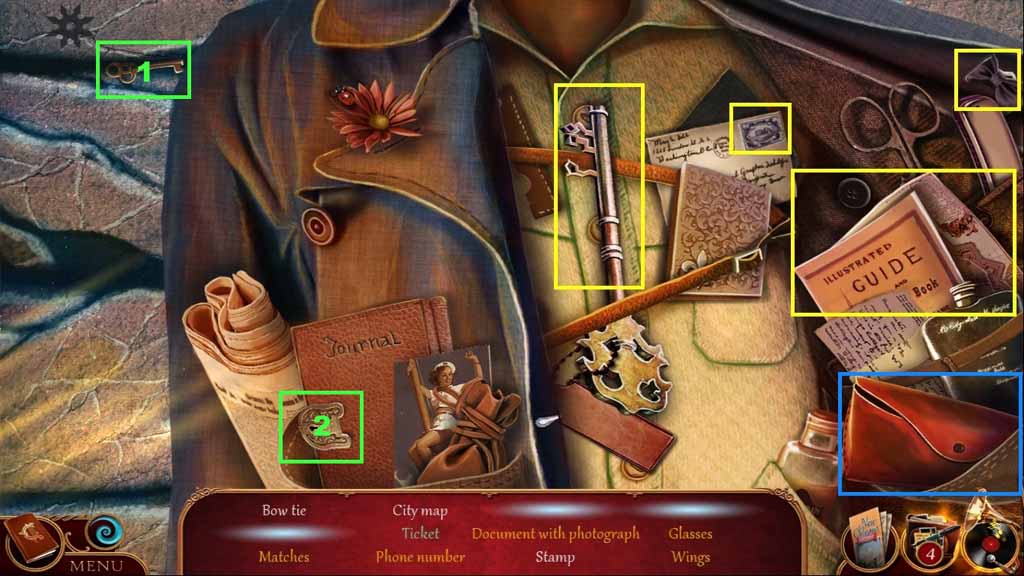
- Find the bow tie, the city map and the stamp. Click the glass case to collect the glasses. Place the pieces beneath the items onto the metal cylinder. Select the key and place it into the journal; collect the ticket. Click the jacket to reveal more items.
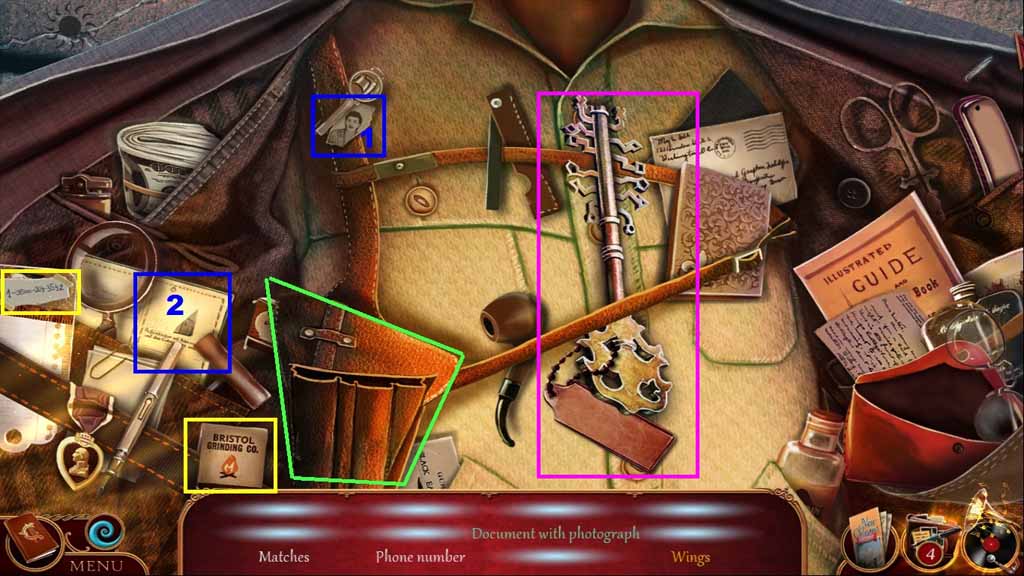
- Find the matches and the phone number. Click the holster to collect the wings.
- Select the portrait piece and place it onto the document to create and collect the document with photograph.
- Collect the detective’s key.
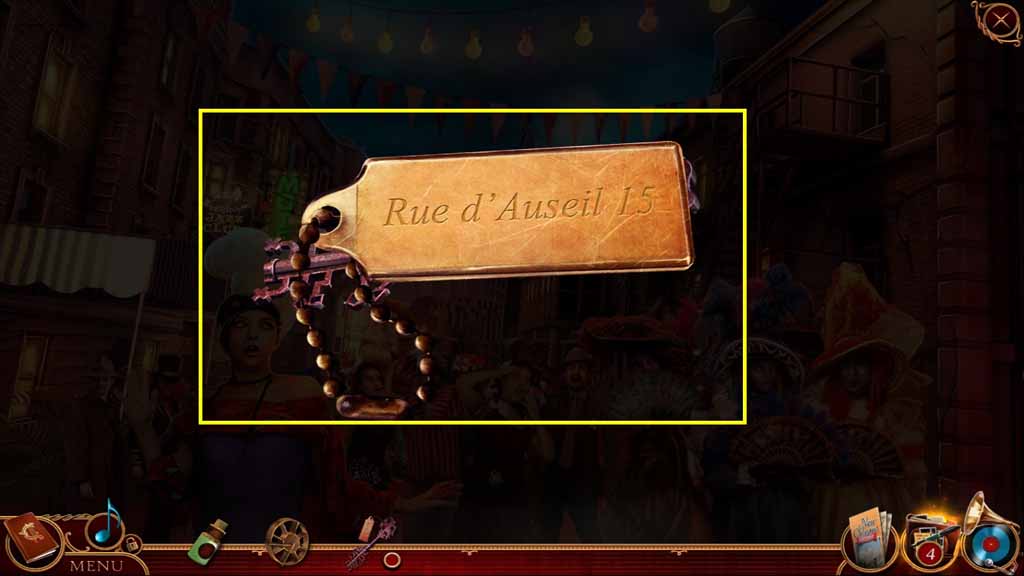
- Click the detective key to get the address.
- Move to Rue d’Auseil.
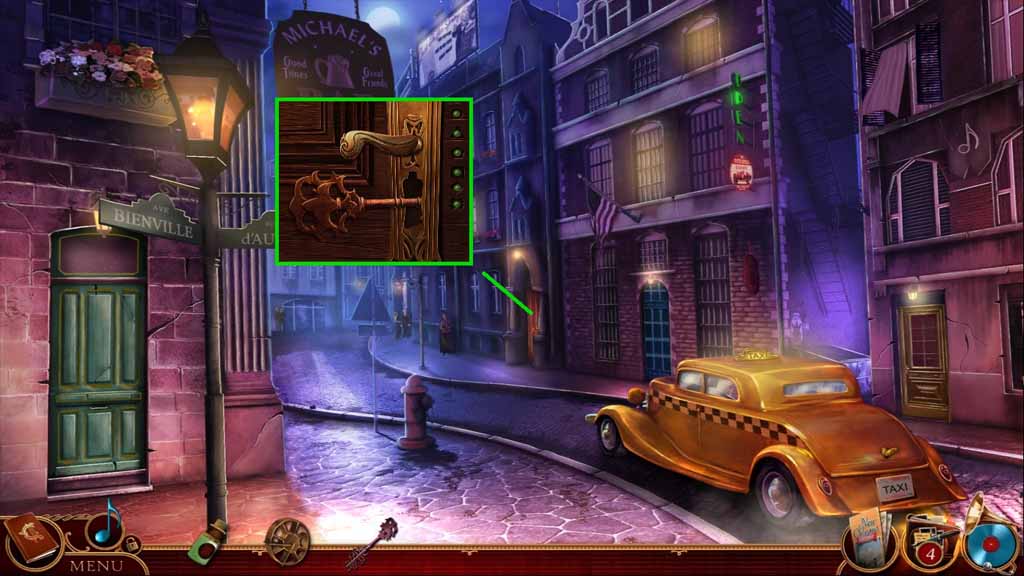
- Insert the detective key to trigger a mini game.
- Solve the game by adjusting the key fragments to fit the lock.
- The solution is random.
- Click the handle.
- Move into the Detective’s Office.

- Collect the detective note.
- Collect the battery.
- Examine the folders and click the papers aside.
- Collect the victim’s and suspect’s photos.
- Click the detective notes to collect the detective note pieces.
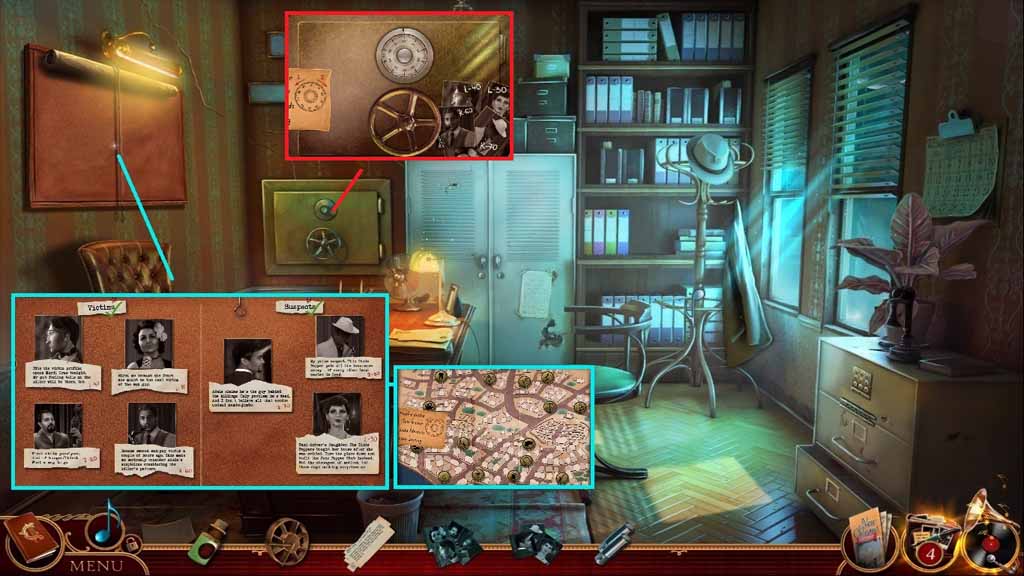
- Click the bulletin board.
- Pin the victim’s and suspect’s photos along with the detective’s note pieces onto the board to trigger a mini game.
- Solve the game by placing the items correctly.
- Examine the suspect’s photos.
- Collect the safe combination and notice the map.
- Click the safe and use the following combination to open it.
- Right 70 – left 40 – right 20 – left 10.
- Click the valve.
- Click the safe to trigger a hidden objects area.
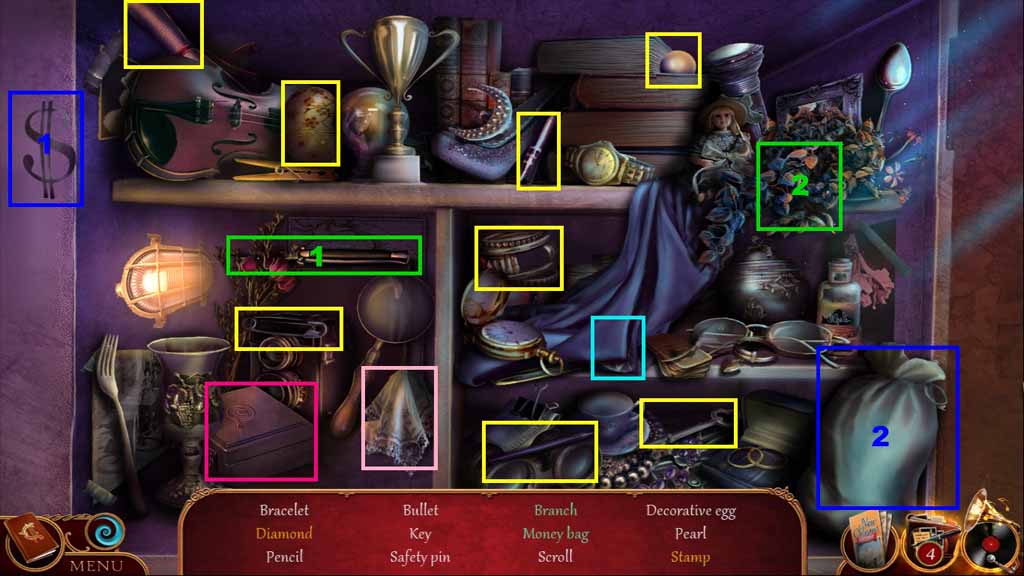
- Find the listed items.
- Select the knife to collect the branch.
- Select the dollar sign and place it onto the bag; collect the money bag.
- Click the handkerchief; collect the stamp.
- Click the cloth; collect the diamond.
- Collect the detective’s toolbox.
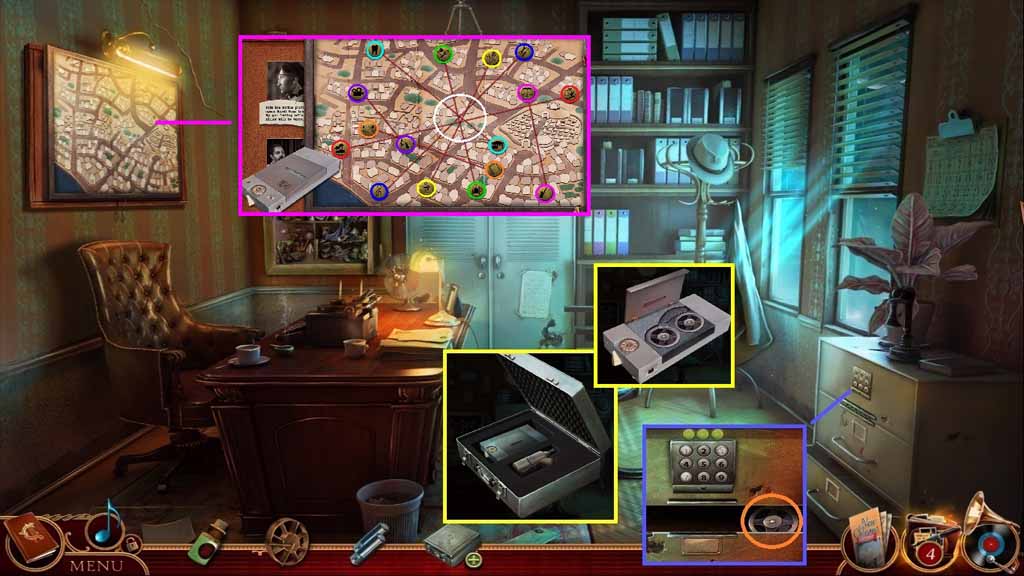
- Click the detective’s toolbox; collect the finger print kit and the dictation machine.
- Select the fingerprint kit to use on the key pad.
- Use 7 – 1 – 3 for the combination.
- Click the drawer; collect the detective’s tape.
- Click the dictation machines panel; insert the batteries and close the panel.
- Click the cover and insert the detective’s tape then click the cover again.
- Click the map.
- Place down the dictation machine.
- Connect the locations on the map based on the clues.
- Click the center point on the map.
General Information & Tips
Chapter One: Chestnut
Chapter Two: Liberty
Chapter Three: The Rue
Chapter Four: Riverside
Chapter Five: The Stage
Chapter Six: On Board the Zeppelin
Chapter Seven: The Candy Shop
Chapter Eight: House of the Moon
Chapter Nine: Song of Water
Ask for help in the comments below!
Chapter One: Chestnut
Chapter Two: Liberty
Chapter Three: The Rue
Chapter Four: Riverside
Chapter Five: The Stage
Chapter Six: On Board the Zeppelin
Chapter Seven: The Candy Shop
Chapter Eight: House of the Moon
Chapter Nine: Song of Water
Ask for help in the comments below!