ABOUT THE GAME:
Your character is Vera; a well educated woman who's fiancé is missing. The wedding is in 2 days! Vera goes on a "Back-to-the-Future" search to find her missing fiancé. Of course, it wouldn't be a game without many obstacles, challenges and surprises. Vera also has some short but entertaining history lessons. Find out if Vera finds her fiancé, Tom in time for the wedding.
This game delivers on every aspect. I generally am not drawn to these types of games. I would have loved to have been a fly on the wall during the development of this game. I could just imagine the "brain-storming" conversations that ensued. Delve into the game and see what I mean!
GENERAL INFORMATIONS AND TIPS:
- You can fast click through the story if you don't want to listen to the story; or you read faster than the story narration. I found the story entertaining and somewhat educational. Stories are generally my least favorite part of a game.
- There are unlimited hints in this game. The hints however do take time to recharge.
- There are no time limits in this game.
- The game is rather lengthy. There are 23 chapters with 1-6 tasks (levels) per chapter. Don't let the number of tasks fool you. A chapter with 1 task can take as long as chapters with multiple tasks.
- The game saves itself at the end of a chapter while traveling through a vortex. If you exit the game before it saves; you'll have to start at the beginning of the chapter you left.
- You can exit to the main menu and return to the beginning of the task you left.
- If an item "sparkles" when your mouse runs over it, it's usually worth investigating.
- Items in the silhouetted task bars are not always in the same position in the scene.
- Many items can't be located until previous items are found.
- Many actions require a previous action.
- Many tasks have multiple scenes. When the hint button is selected in a scene where no more actions are required; the hint button will only show you the direction in which to go to the next scene. It will not give the location of the item in the next scene.
- You can replay a chapter after the completion of the chapter by going to the main menu and making the chapter selection.
- If an item from your inventory has been used and it's still there. Chances are; you'll have to use it again.
ABOUT THE WALK THROUGH:
I've included screenshots with encircled locations and/or descriptions on most levels/tasks. The levels/tasks without screen shots are due to the randomness of the task. The screen shots are usually at the end of each level description/instructions. Some levels have multiple screen shots. ENJOY!!
CHAPTER 1: THE LABORATORY:
Task l: Help Professor Einbock regain consciousness
- Select the books next to the binders on the second shelf of the bookcase
- Select the handkerchief that falls to the floor
- Drag the handkerchief to the ammonium chloride that is on the left side of the desk next to the plant
- Drag the handkerchief saturated with ammonium chloride to Professor Einbock's face and he will awaken from consciousness.
Task 2: Find the missing photo of Professor Einbock's wife to enter the laboratory.
- Select the potted plant on the desk
- Pick up the screwdriver revealed after the plant moves to the right (double click screwdriver to put into inventory)
- Select the First clock in the Second row
- Select your screwdriver in your inventory to remove the clock
- Select the photo of Prof. Einbock's wife, Gretchen
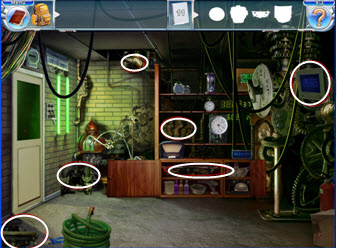
Task 3: Enter the laboratory and find all items indicated on top bar
- Select access card Prof. Einbock gave you for his wife's photo and use on the security lock on the left side of the door
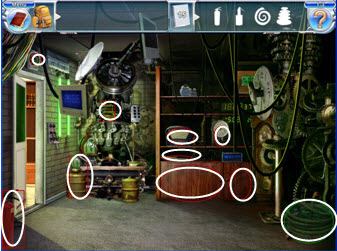
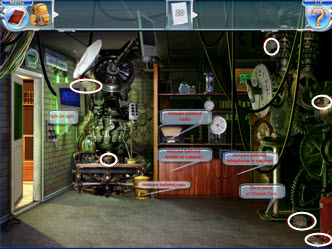
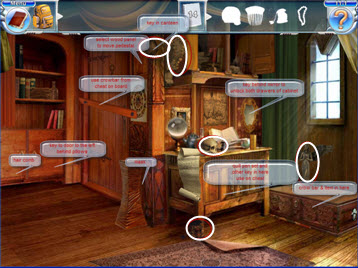
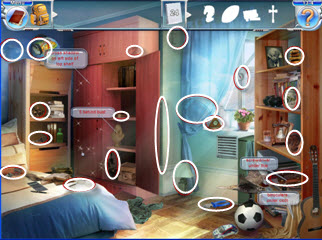
- Find the 15 items hidden in the scene that are silhouetted on top bar (only 4 will appear at a time).
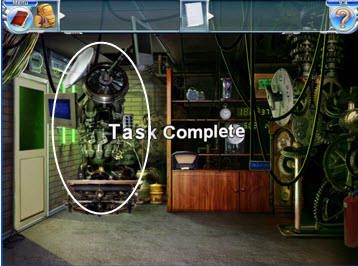
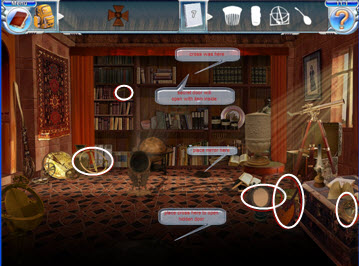
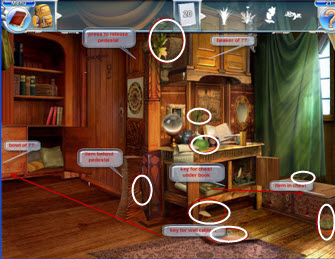
You will have to open the doors on the bottom of the cabinet. Some items are in different positions than their silhouette. Also some items are behind other objects. See screenshot below:
CHAPTER 2: 3008 A.D.
Task 1: Enter the password required to reboot the robot. Select a letter from the keypad. If you have chosen a letter in the word it will appear in white on the password and be green on the keypad. Choose an incorrect letter and it will be red on the key pad. (Password is selected at random and is not the same each time on this level)
Task 2: Find the key and open the gate
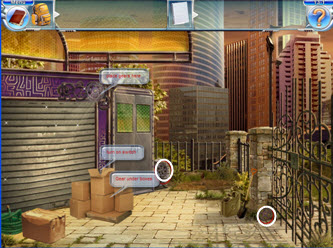
- Open right door of cabinet with the green tags on it
- Select the light bulb and put in socket in upper right of the garage
- Open bottom cabinet door in upper right of the garage and take key
- Use key on top cabinet door
- Take sledgehammer and open lock on door to the right of the garage
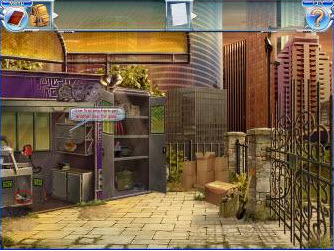
- Select the jerry can full of gasoline on the bottom shelf of the cabinet and drag it over to the weed eater
- Select the oil can on the third shelf of the cabinet and oil the weed eater
- Select the week eater and trim the tall grass to the right of the tall cabinet
- Select the key and open the gate to the graveyard
- Enter the cemetery
- Select shovel near gate, double click to put into inventory. You'll use the shovel later.
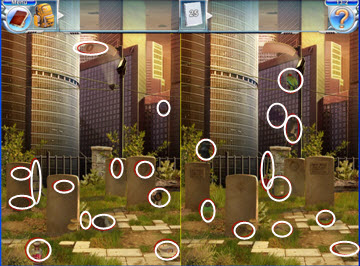
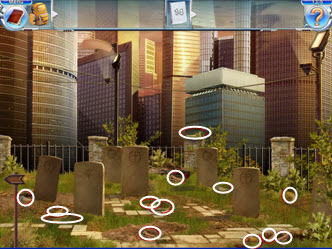
Task 3: Find 25 name plates
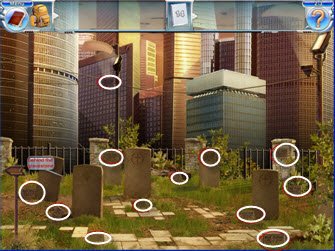
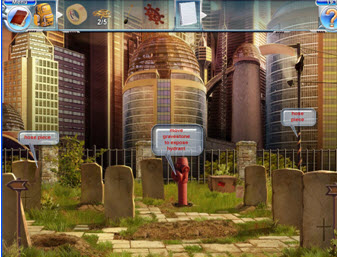
- Select gravestones that "sparkle" when mouse is hovered over them. The gravestones will move, then select the nameplates that were under the gravestones
- Select the nameplates on the rock pillars of the fence
- Select shovel from inventory and dig a hole in the middle of the scene to collect 1 name plate
- Select name plate hidden on light
- Select name plate hidden behind bush to the right of the graveyard
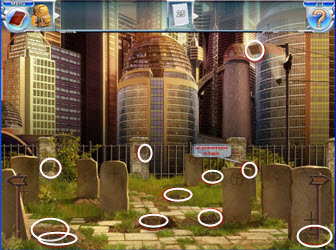
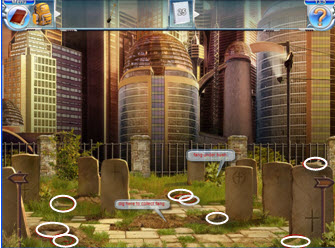
- Select arrow on bottom right of the screen to move to the next section of the graveyard
- Select nameplates in view along with moving the grave stones
- There is 1 nameplate on one of the lights and another under a bush
- Use the hint button if you can't find them all
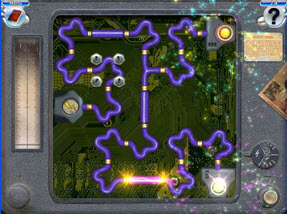
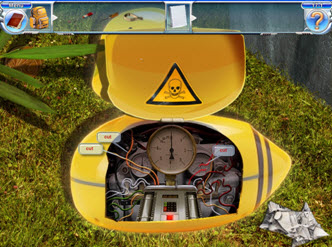
Task 4: Repair and activate the hologram box
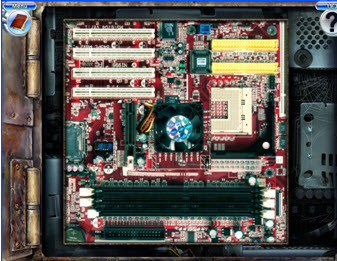
Select each wire and they will rotate. Rotate all the wires until they are blue and hooked up to the green-lighted energy sources.
CHAPTER 3: THE ELIXIR OF UNDERSTANDING
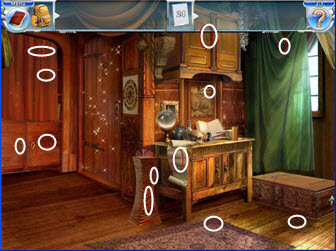
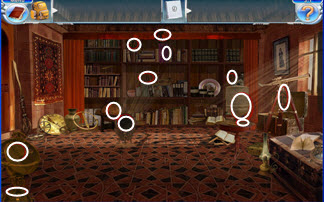
Task 1: Find all (24) of the zodiac symbols in Nostradamus' house
- Open the cabinet doors on the top left to find a symbol behind the red books
- Open green curtain to find a symbol above window
- Open red curtain and select black books in middle of bookcase to find a symbol
- Select pillar to the left of cabinet to find 2 symbols
- Select symbol on top shelf behind red curtain
- One symbol in on the wall above opened book
- Select symbol on floor by trunk
- Select parchment and select symbol behind parchment
- Select rug and use key on bottom right cabinet with the red curtains select black books, then select symbol behind them
- Select pillows on bottom right of cabinet to retrieve a key
- Use key on left cabinet door where you found the pillows, select black books and then select symbol
- Enter the storage room
- Select 2 symbols on wall tapestry
- Select symbol statue in front of the globe
- Select 2 symbols on astrological compass on the bottom left of screen
- Select symbol on trunk
- Open red window curtains on the wall behind telescope
- Open red curtains on back wall ma_3_1c.jpg
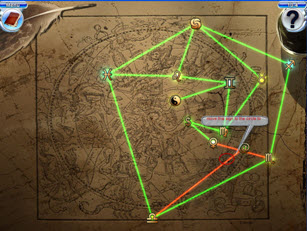
Task 3: Align zodiac symbols so none of the lines cross each other (you'll have to solve this puzzle twice and the lines will make a zodiac sign)
- Pull on the zodiac symbols to untangle the lines, green lines indicate lines are untangled and red lines indicate tangled lines
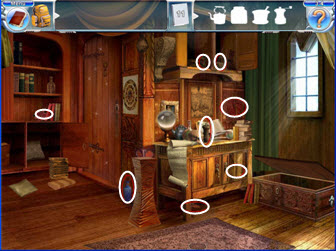
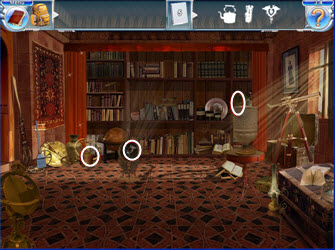
Task 4: Prepare the Elixir of understanding. Find the 11 silhouetted items in upper task bar between 2 scenes.
I forgot to highlight a bottle on the middle top row.
Use unlimited hints if unable to find all items
CHAPTER 4: THE JURASIC PERIOD
Task 1: Think of what to do next
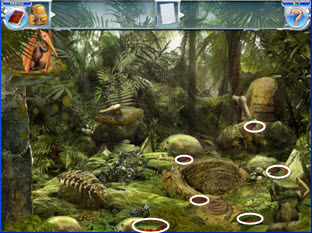
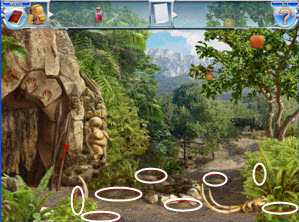
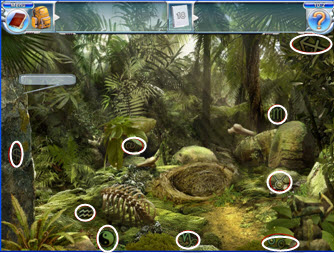
- Find the cockroaches in the scene, 4 are visible and 1 is under the leaves on the lower right of the screen.
- Give the 5 cockroaches to the lizard. The lizard will climb up the tree to the pterodactyl on the top left side of the scene.
Task 2: Do something to make the dinosaur drink the elixir
- Collect 18 pieces of fruit. There are 2 scenes on this task, use the arrows on the bottom of the screens to move back and forth.
Task 3: Help clean the dinosaur's teeth
- Select the pterodactyl and it will fly away
- Select the bone and it will go on the dinosaur's tongue.
- Select the branches on the left side of the mouth. The branches should go into your inventory ma_4_3.jpg
- Select the arrow on the bottom left of the screen to go to another scene
- Select the rope on the ground and put into inventory
- Select the arrow on the bottom right to move to the next screen
- Select the rope around the bone on the ground and put into your inventory
- (no screen shots on these as the strings are very visible)
- Return to the dinosaur's mouth by selecting it
- Take the smallest rope and put it around the yellow tooth on the left side and pull out the tooth
- Select the bone on the tongue and put it on the branches in your inventory. Now take the rope and put it on the bone and the branches. Wow, a prehistoric toothbrush!
- Take the prehistoric toothbrush and clean the green, red and blue bacteria out of his mouth.
- Select the both green teeth and clean the bacteria from under the teeth
Task 4: Separate items into 2 groups. 1) Those which Dino should eat 2) Items Dino should not eat
The smiling faced Dino side (left) should be the items Dino can eat. The angry faced side (right) should be the things Dino should no longer eat. Select a bad item from the smiling Dino with a good item from the angry Dino.
These items should be on the Smiling side: Bamboo, fern, banana, eggplant, cake (why?), apple, mushroom and lettuce
These items should be on the Angry side: Dinosaur, UFO, mosquito, mouse, woman, pterodactyl, frog and fish
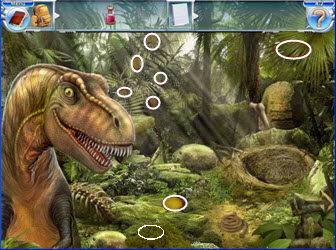
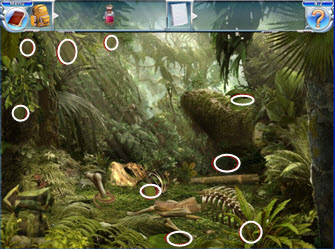
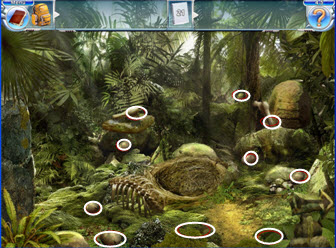
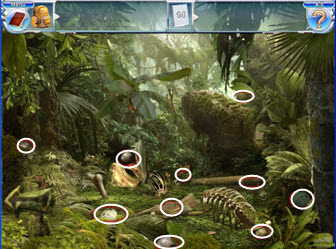
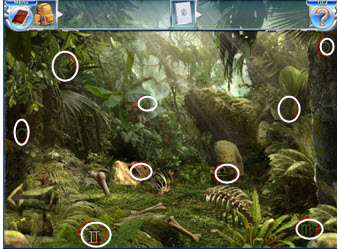
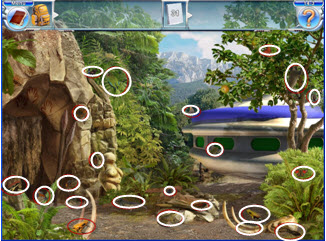
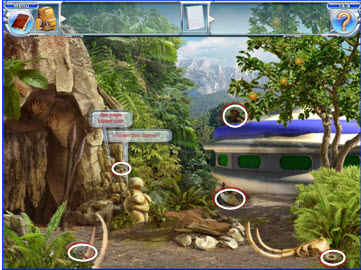
Task 5: Find Dino's eggs (there are 21). See screen shots below or use the refillable hint button. Use the arrows on the bottom of the scene to move to the next or previous scene.
Task 6: Put the photo back together. When 2 or more adjacent pieces of the photo are put next to each other they will stay together.
CHAPTER 5: STONEAGE, THE CAVEMAN
Task 1: Start a conversation with the caveman
- Collect the 9 ladder pieces from the scene
- Drag the ladder to the apple tree
- Collect the apple when it falls from the tree and put into inventory
- Enter the cave
- Select the fur curtain above the cave door
- Pour the elixir on the apple
- Give the red apple to the caveman picture
Task 2: Collect 25 pieces of firewood outside & inside the cave
- Select the hands above the cave door, then select the cave idol on the side of the cave to select a hidden piece of wood
- Select the fallen curtain in the cave to find a hidden piece of wood
Task 3: Light a fire
- Collect 5 more pieces of fire wood scattered around the scene
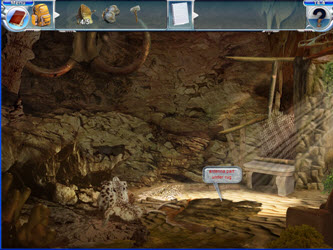
- Enter the cave and the select the sledge hammer behind the bush by the chair
- Use the sledge hammer on the stalagmite on the lower left side of the screen. A section of flint will drop. Put the flint in your inventory
- Exit the cave
- Place the wood in the fire pit
- Place the dry wood from inventory in the fire pit
- Select the flint from your inventory and drag to the flint next to the fire pit. The fire should start
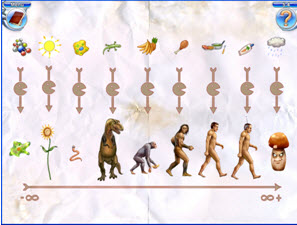
Task 4: Put the pictures of everything in evolutionary order and then align the food required by each organism
- Select 2 pictures from bottom of screen and they will exchange places. See screen shot below for correct order
CHAPTER 6: THE NAKED THINKER (SOCRATES)
Task 1: Find Socrates' tunic. And while you're at it, clean the place up a little bit
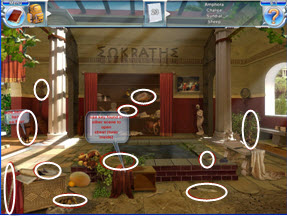
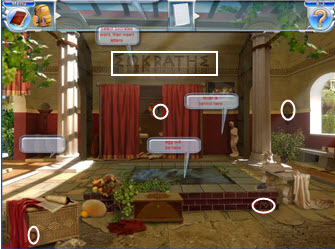
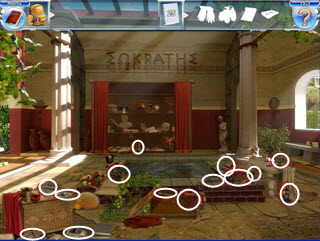
- Find the 23 items in the upper right task bar
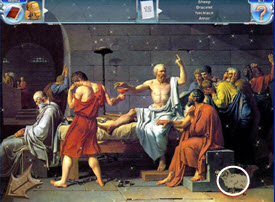
- The sheep is found in picture of Socrates' death to the right of the red curtains on the wall
- After the basket top (last item) is found on the list, a key will appear. Select the key and put into inventory.
- Return to the temple and unlock the chest with your key from the inventory. The tunic will be in the chest.
Task 2: Give Socrates a Massage:
- Remember and repeat the sequences 10 times. A white X will appear with a number. Repeat the sequence in the correct number order. A blue bar on the bottom of the screen will progress to the right when the sequence is selected in the correct order. Don't worry, you get as many tries as you need; you'll only have to restart the current sequence. The sequence stays the same each time.
Task 3: Find the Dinosaur egg
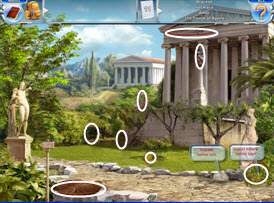
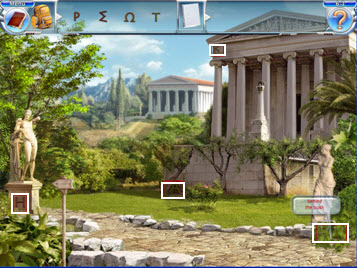
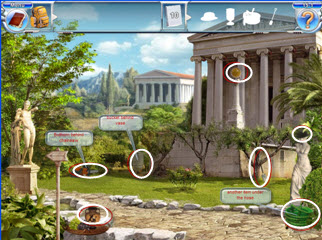
- Find the letters 8 letters inside and outside the temple and put in your inventory 4 at a time
- Select the word Socrates on the back wall and then insert the letters
- When all the letters a returned to the wall a hidden door will open. Select the lever, the pool will drain and retrieve the egg from the pool.
Task 4: Decode the message written on the back of the painting.
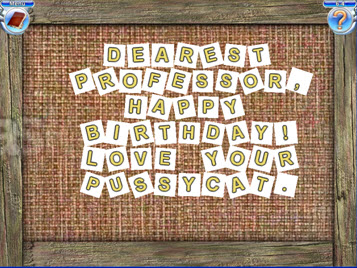
- Select 2 letters in the same row and they will swap. Put the letters in the correct order. It should read as follows:
DEAREST
PROFESSOR,
HAPPY
BIRTHDAY!
LOVE YOUR
PUSSYCAT.
CHAPTER 7: THE PROFESSOR'S SPIRIT
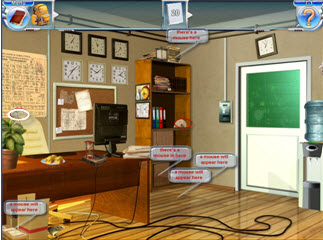
Task 1: Find all 20 mice in the laboratory office and laboratory
- Place 1 piece of cheese from the desk in the box by the desk I the laboratory office
- Place 1 piece of cheese next to the wall in front of the bookcase in the laboratory office
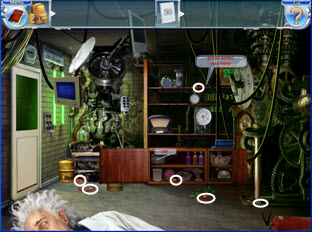
Task 2: Find Einbock's 20 pills in the laboratory office an laboratory
- Select the green bottle on the top shelf in the laboratory, the bottle will fall and break, then select the pill off the floor
See screenshots below for pill locations
Task 3: Help remove the things from Einbock's mind that cause his autophobia
- Locate the 21 items silhouetted in the task bar
- Use key found in the top right cabinet shelf behind door on the right of your screen to unlock the middle 2nd row shelf of the same cabinet
- Use the crowbar on the left of the screen next to the cabinet to open cabinet
- Select the canoe and she will continuously paddle across screen
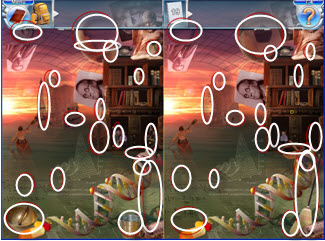
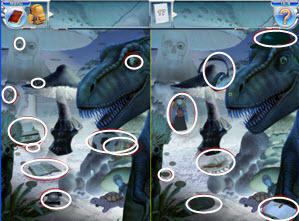
Task 4: Find the differences between the split screen pictures
CHAPTER 8: THE MUSHROOM AGE
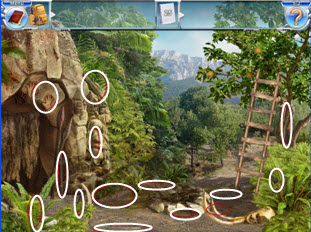
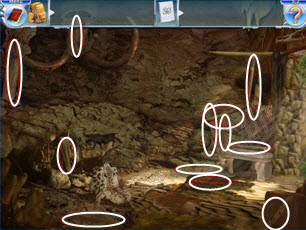
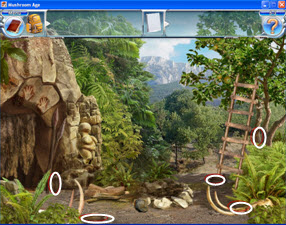
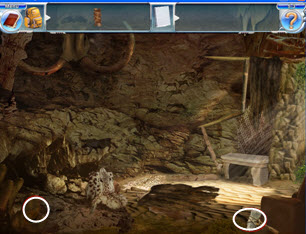
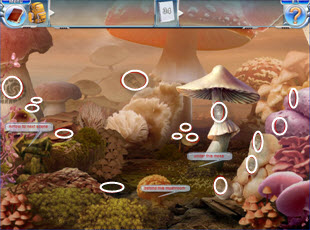
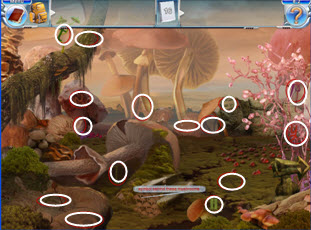
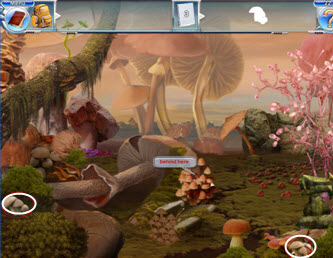
Task 1: Find 34 off Tom's footprints between the 2 scenes. 2 footprints are hidden in the first scene. See screen shot below
There are several hidden footprints in this scene, see screenshot below
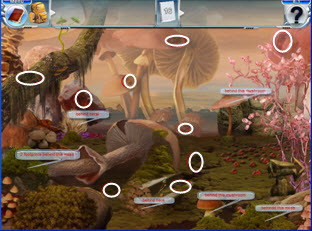
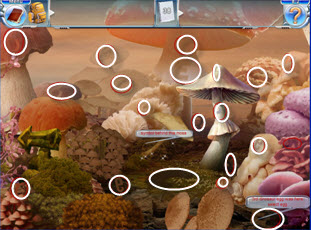
Task 2: Find 38 symbols between 2 scenes
Task 3: Decode the following text
Swap 2 letters in the same row like the previous game. Text should read:
CAREFUL
HYPNOTIC
POWERS
HERE! TOM
CHAPTER 9: TIMEQUAKE
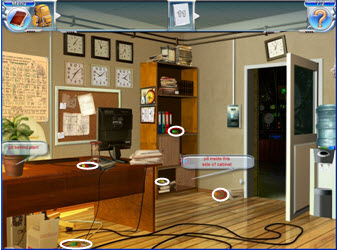
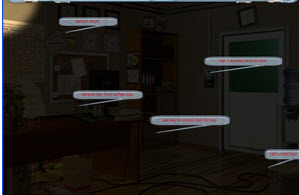
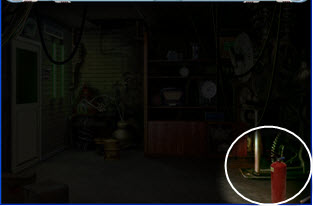
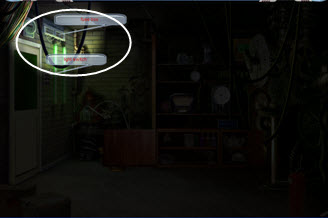
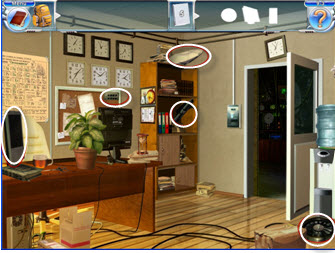
Task 1: Find 3 access cards and enter the lab, the lab will be dark & screen shots aren't very good black. Put access cards in inventory
- One card is behind first clock on second row
- One card is under the box in the lower right side of the screen by the water cooler
- Select the cup on the desk, a key should fall out, then select the key to use on the bottom left door of the cabinet to retrieve the third access card
- Use the red access card on lock first, then yellow and green last
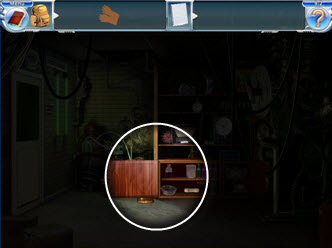
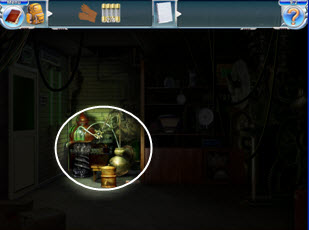
Task 2: Restore the power (find 4 fuses in the dark)
- Retrieve gloves from lower left door of cabinet; put in inventory
- See screen shots below for fuses
Task 3: Find the 11 parts of the time machine in the laboratory and laboratory office from silhouette clues in task bar
Task 4: Reassemble the time machine; place the pieces from the floor on the time machine in the correct places, like a puzzle.
Task 5: Repair and activate the holographic device
CHAPTER 10: JURASSIC ZODIAC
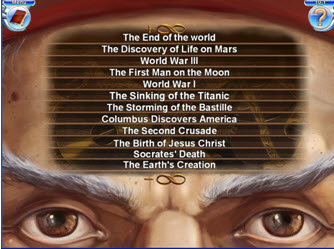
Task 1: Help Nostradamus regain his senses by placing the historical events in order. Past events on the bottom and future events on the top by swapping 2 lines of text at a time.
Solution order:
- The End of the World
- The Discovery of Life on Mars
- World War III
- The First Man on the Moon
- World War 1
- The Sinking of the Titanic
- The Storming of Bastille
- Columbus Discovers America
- The Second Crusade
- The Birth of Jesus Chris
- Socrates' Death
- The Earth's Creation
Task 2: Find Nostradamus' 18 zodiac symbols
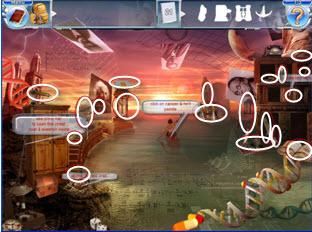
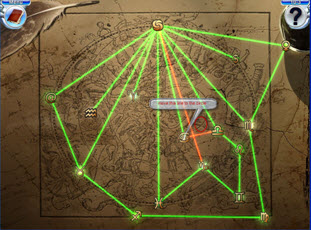
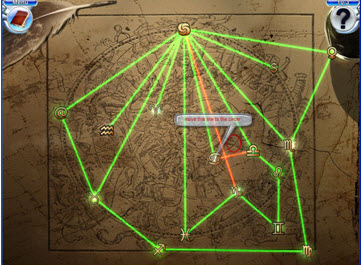
Task 3: Align the zodiac symbols so that none of the lines that connect them are crossed. Solve puzzle like previous constellation puzzle. The screen shot is the puzzle solved with one step left to solve. Follow the directions on the screen shot please to solve.
Task 4: Align the zodiac symbols, solve puzzle the same as previous puzzles. The screen shot is the puzzle solved with one step left to solve. Follow the directions on the screen shot please to solve.
CHAPTER 11: LEONARDO'S TIME MACHINE
Task 1: Look around Nostradamus' house. Find 14 items that match the silhouette on the toolbar. This task is more complicated as there are many hidden objects along with interaction from several objects.
- Select the mirror close to the window and retrieve a key
- Use key to unlock the bottom doors on the cabinet next to the chest
- Remove the items in bottom cabinet shelves and retrieve another key
- Open the chest and select items on task bar along with the crowbar
- Select the canteen to right above the door and retrieve another key
- Unlock the right cabinet door next to the door
- Remove the pillows and retrieve another key
- Use the key found behind to pillows to unlock the cabinet door to the left
- Select wood panel above bull's eye picture to move pedestal and retrieve mask
- Use crowbar to enter the boarded storage room
- Open the red curtains on the back wall of the storage room
- Select cross on top middle shelf and put in inventory
- Select mirror next to chest on the bottom right of screen and place in front of bookshelves where there is a dark circle
- A mosaic circle will be exposed on the carpet on the bottom middle of the scene. Place the cross in the middle of the circle
- Retrieve the hologram box from the hidden door when it appears on task bar (this will be your last item)
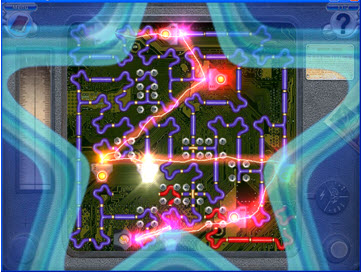
Task 2: Repair and activate the holographic device. Solve this puzzle like the previous puzzles of this kind. Some pieces of the puzzle don't move and not all pieces will be used to solve the puzzle. Rotate the wires to connect the pieces of the puzzle. See screenshot for solution.
Task 3: Help Nostradamus think
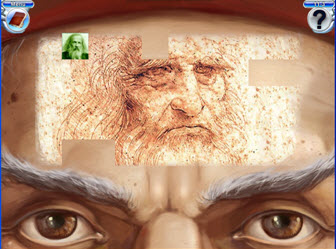
- This is a matching game. Select Nostradamus' forehead and pictures will be revealed. Select 2 identical pictures consecutively to make matches. When a match is made the boxes will fill in and ultimately be a picture of Leonardo diVinci. There are duplicates of the same picture on the forehead.
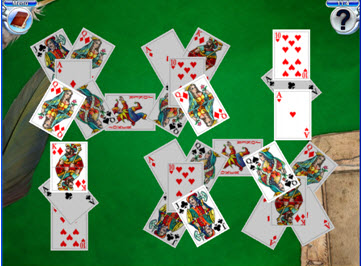
- Task 4: Summon daVinci's spirit by matching pairs and removing them from the pile of cards. This game is similar to mahjong. JOKERS ARE WILD & CAN BE MATCHED TO ANY CARD. THERE WILL BE 2 CARDS YOU HAVE TO MATCH WITH JOKERS. You can only remove the luminescent cards on top.
Task 5: Decode the plans. The selected square will have a yellow highlighted outline around it; the adjacent squares will have a green highlight outline around them. You can only switch cards that have a green outline around them with your selected card. See screen shot for solution.
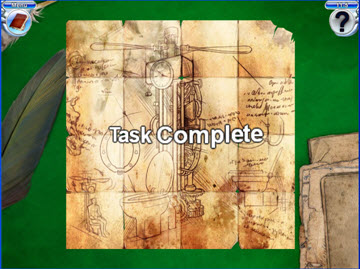
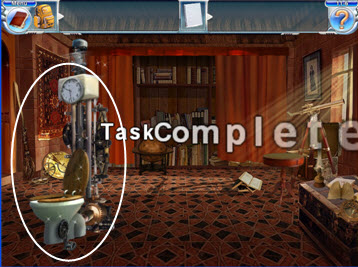
Task 6: Assemble DaVinici's time machine. Solve this task like a jigsaw puzzle. Place the pieces of the time machine in the correct positions on the dark time machine. Who knew a toilet could have such a use. Makes you think the next time
you need to "go".
CHAPTER 12: THE OMNISCIENT ONE
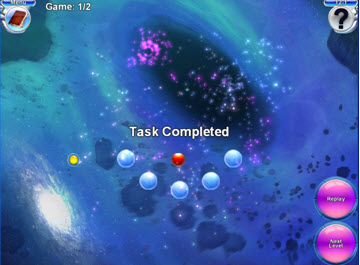
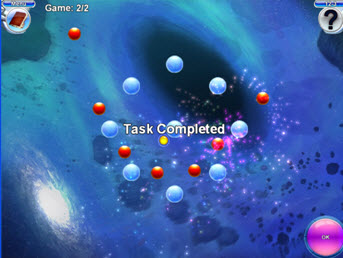
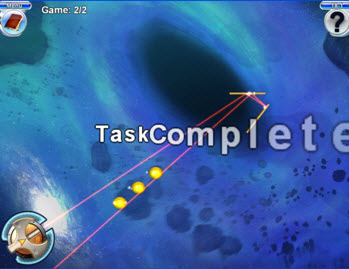
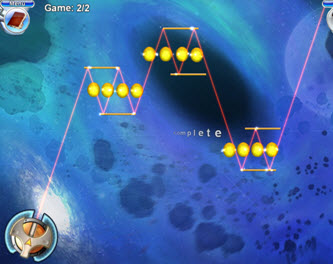
Task 1: Hit the yellow balls. Position the red ball as a bumper. Move the red ball in the middle of the screen. Push start and pray the red ball is in the correct position when another yellow ball drops from the top of the screen hitting the yellow balls. You get as many tries as needed to win the game. There are 2 rounds that need to be won.
Task 2: Hit the yellow balls. Position the red balls as bumpers. Play game the same as the previous game with more red and yellow balls.
Task 3: Hit the yellow balls. Position the red balls as bumpers.
CHAPTER 13: TOM
Task 1: Find the key and enter the cemetery.
- Select 3 gears; one by the cabinet, one by the gate and one under the boxes
- Put the gears on the upper right side of the garage door
- Select switch on the bottom right of the garage
- Select the cloth on the cabinet to the left and retrieve the key
- Use key on top door of wall cabinet on the right side of the garage
- Select key on shelf and use key to open the gate
Task 2: Clear all the extra things from Tom's subconscious
Task 3: Get into a conversation with Tom
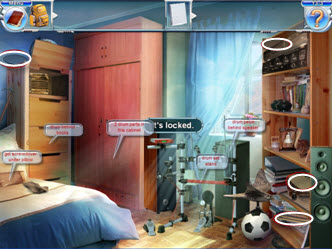
- Collect 7 drums pieces throughout the room
- Select pillow on bed and retrieve screwdriver and put in inventory
- Select the speaker under the window it will move out of the way and reveal a vent
- Select the vent, retrieve the key and open the door on the right side of the red cabinet
- Select the books on the bottom right side shelf of the red cabinet and retrieve a drum part
- Select the saxophone which will move to the bed; retrieve a drum part behind the saxophone
- Select crowbar behind the bed and use on the stuck third drawer; select the green bottle. The bottle will break. Retrieve the key and use on the door on the left side of the red cabinet, pick up the bat (Why should you do this? I don't know…just because you can)
- When all 7 pieces of the drum set have been collected; place drums on drum set stand in front of window
- Place drumsticks on drums
Task 4: Find the things that Tom had during his childhood. Find the 24 items silhouetted in the task bar.
Select the drum set and it will move out of the way to reveal some of the hidden objects
Task 5: Collect the 25 Sacred Fangs
- Go to the cemetery gate (scene to the furthermost left and retrieve the shovel and put in inventory
- Collect the fang next to the shovel
- In 2nd scene, pull wooden lever to release the gravestone to retrieve the fangs
CHAPTER 14: CAVE PHILOSOPHY
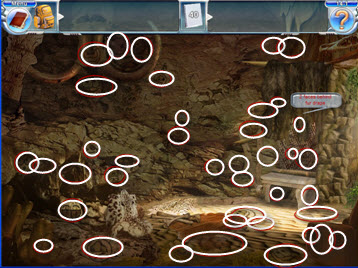
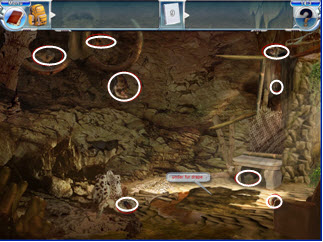
Task 1: Find the 40 imaginary shadows on the cave walls. Look for faces with different expressions
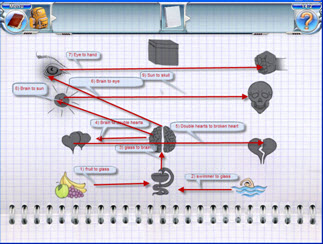
Task 2: Find an absolute truth by combining the following basic concepts
Combine the items in the following order (when glossing over an item, it will give you clues)
- Drag the fruit on the drinking glass with the snake
- Drag the swimmer on the drinking glass (you have now made a healing glass)
- Drag the healing glass on the brain (the glass with the snake)
- After the brain has changed color, drag the brain to the double hearts
- Drag the double hearts to the broken heart (loneliness is cured)
- Drag the brain to the eye (you experience compassion)
- Drag the eye to the hand (cruelty defeated)
- Drag brain to sun to experience good
- Drag sun to skull (evil defeated)
- Select the box to finish the task
Task 3: Collect the 31 representative fauna (small animals) for the alien outside and inside the cave
Select the hands on the cave wall to lower the statue
Task 4: Help the alien repair his radar
- Select the hands above the cave wall to lower the statue
- Select the antenna piece where the statue was
- Select the small triangle by the statue to open a hidden door
- Select the flint from the hidden door
- Collect the stone axe and put into inventory
- Go into cave to collect the last antenna piece under the fur rug
- Start a fire by selecting the flint from your inventory and put on rocks by fire
- Select the antenna part from inventory and place over the fire
- Select the stone axe from inventory and hammer out the dents. YIPPIE, it's fixed! And magically it became clean and shiny in the process. Oh, the wonder of computers.
CHAPTER 15: THE FIGHT FOR DEMOCRACY
Task 1: Look around Socrates' house. Locate 25 silhouetted items inside and outside the temple
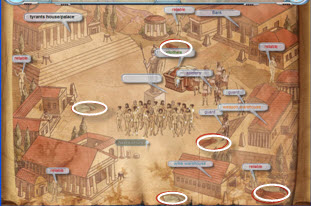
Task 2: Restore democracy to Athens
- Select the 6 tunics on the scene (3 red and 2 white)
- Select the 5 reliable women around the outskirts of the scene and put them in inventory
- Drag the tunics to the reliable women in inventory and wall-la they're clothed. The women are now revolutionaries.
- Drag the women (revolutionaries to the bank to take out a loan). A money chest will appear.
- Let's get them drunk? Drag the money chest to wine warehouse where you'll receive wine barrels.
- No, no, no…let the enemy get drunk! See the plot starting to thicken? Give one barrel of wine to the group of soldiers and the other to the guards in front of the weapon warehouse.
- Drag the clothes to the naked people
- Now arm your people by dragging them to the weapon warehouse
- Overthrow the government; get rid of the tyrant by dragging your new found army to the tyrants house
- What an odd looking tyrant! Drag the revolutionaries (women) to the overthrown palace. Wow, a chest of money.
- Select the chest of money and pay back your loan by dragging the money chest to the bank!
- What disarm the people you say! Select the sleeping soldiers and guards to awaken them.
- Drag the soldiers to the clothed and armed people to disarm them.
- Select the unarmed people. Holy batman we did it, task complete!
Task 3: Reboot the robot
- Solve this game like the previous game of this nature. Solution is random
- Select a letter. A green colored background after letter is selected will be in the solution. A red colored background letter is not in the solution.
CHAPTER 16: TOADSTOOL
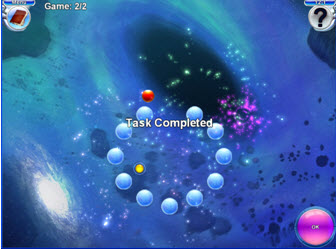
Task 1: Play a game of robo-checker. You can jump vertically, horizontally and diagonally.
- You can undo a move by selecting the arrow key on bottom right side.
- You start with 36 marbles. You're allowed 16 moves, when the counter hits 0 you've won.
- Eliminate as many of the marbles you can. A good strategy is to eliminate a complete side of marbles before going to the next side
- A yellow highlighted outline indicates a legal move.
- Jump marbles to an empty circle
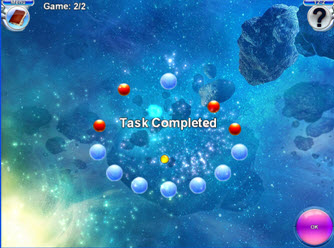
Task 2: Robo-Checkers; solve puzzle like the previous game with 39 moves allowed
Task 3: ANOTHER GAME OF ROBO-CHECKERS!
Task 4: Find the differences between the left and right parts of the screen
Task 5: Unscramble the blocks to break free from the hypnotic powers and restore vision
- Swap any two pieces to restore the picture
- The lines will disappear around the pieces that are in the correct position
- As you are swapping sections, there is a picture underneath a selected square that shows which piece belongs in that area.
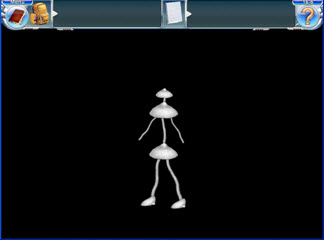
Task 6: Try to become human again (make a stick figure out of mushroom pieces)
- Select the mushroom and continuously click 2 more times or until 2 more mushrooms appear
- Select and click the 2 small mushrooms 2 times each or until full grown
- Take the top off the tall mushroom on the left and put it on top of the middle mushroom
- Take the top off the tall mushroom on the right and put it on the bottom of the stem on the middle mushroom
- Select the stem on the left and attach it to bottom mushroom top, repeat this action for the right mushroom stem
- Select the tops off the other mushrooms to make shoes
- Guess where the last stems go? You're right arms. Now, isn't she pretty
- Select the pretty mushroom lady and she will walk around the screen.
- Please be a little patient, she will walk off the screen
CHAPTER 17: THE END OF THE WORLD
Task 1: Disarm the annihilator
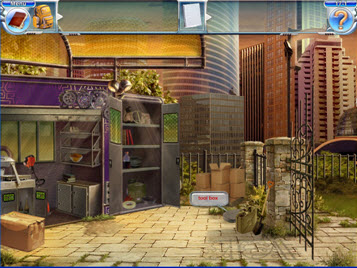
- Use the arrow keys on the bottom left on the next 2 screens to arrive at the garage
- Select the box near the gate, the box will slide and reveal a toolbox
- Select the tool box and it will slide to the left, select the toolbox again and tools will fall out
- Select the tools and put them in your inventory
- Go through the gate and return to the first scene of this task using the arrow key on the bottom right of the scene
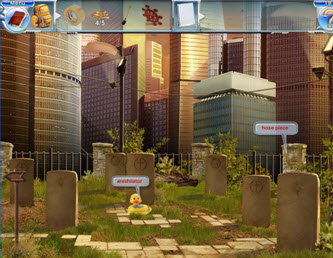
- Select the annihilator (rubber ducky you're the one, you make my bath time) oops sorry, lost my concentration. You should have a close up few of the ducky.
- The ducky sounds & looks like it could be a ticking time bomb.
- Select the red-handled (Phillips) screw driver to remove the Phillips screws (the first one on the left and the last one on the right)
- Select the wood-handled (flat-headed) screwdriver and remove the flat head screws on the duck
- Select the hammer to lift the ducky lid up
- Select the wire cutters and disarm the ducky by clipping the wires. I'm unsure if there is an order to this, however this is the only order I was able to disarm the ducky and it took some persistent attempts to get the location just right
CHAPTER 18; THE ALL JOYOUS ONE (do puzzle 6 times)
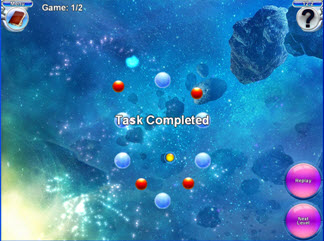
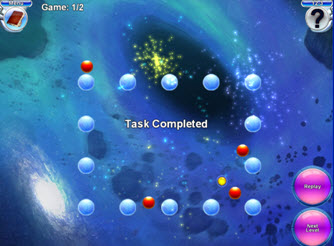
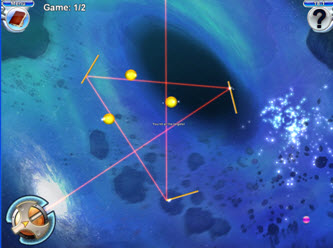
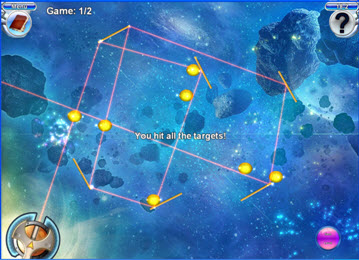
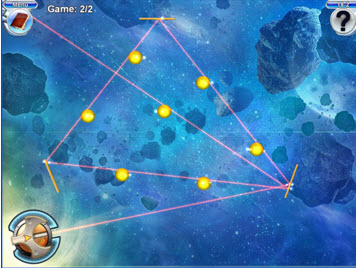
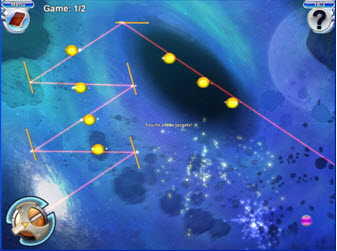
Task 1: Move the Mirrors so the beam of light touches all of the red targets. This can be a little tricky, especially if you have a lot of leeway in your mouse. The slightest movement of the mirrors can cause a miss or a hit. You have a mirror placed correctly when the red ball turns yellow. Select the pink next level button on the bottom right of the scene when completed.
1A-Move the Mirrors
1B-Move the Mirrors
Task 2: Move the Mirrors (same as above with more mirrors and balls)
Game 2-A
Game 2-B
Task 3: Move the Mirrors, same game, more challenging and the last time!
Game 3-A
Game 3-B
CHAPTER 19: THE END OF THE WORLD PART II
Task 1: Disarm the Annihilator in a pool of water
- This task will entail using the garage scene, the middle cemetery scene and last cemetery scene
- Exit the cemetery and go to the left and go to the garage area using the arrow key on the bottom left of the scene
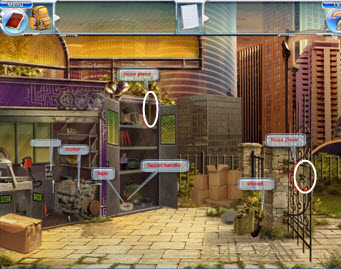
- Retrieve these items from the garage area and put in your inventory:
- 2 pieces of fire hydrant hose- 1 on top of tall cabinet and one on the gate
- tape-bottom shelf of tall cabinet
- faucet handle-bottom shelf of tall cabinet
- shovel near the gate
- turn on switch in the back of the garage
- Retrieve 2 hose pieces in the middle of the cemetery area and put in your inventory
- Retrieve a hose piece in the end cemetery
- You should have 5 hose pieces total
- From your inventory drag the tape to the fire hydrant hose pieces
- Move gravestone to expose fire hydrant in middle cemetery
- Attach the repaired hose to the fire hydrant
- Attach the faucet handle to the top of the fire hydrant
- Dig a hole with the shovel from inventory in front of the fire hydrant. The hole should fill up with water.
- Return to the end cemetery and put the annihilator (yellow duck) in the pool of water
Task 2: Reboot the Robot: Solve this puzzle in the same manner as the previous puzzles. Solutions are random; however they do have a correlation to the game story.
Task 3: Repair the Robot (jigsaw puzzle)
- Clear the way by placing the pieces on the edges of the screen
- The pieces do not rotate, thank goodness!
- Many of the pieces have straight edges making it difficult to discriminate between an inner piece or an edge piece
- Pieces will stick together when correctly placed
- The blue crystal goes in the center of the puzzle
CHAPTER 20: COMPUTER GAMES
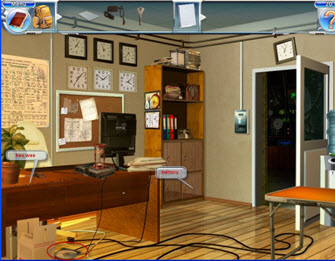
Task 1: Find a laptop computer, a disc with games, and start a computer game.
- Laboratory:
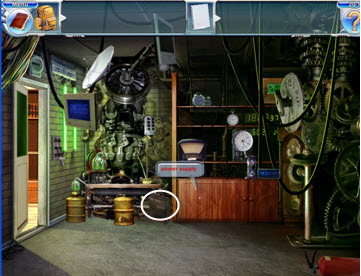
- Select the lower left cabinet and put the power cord in your inventory
- Select the gold drum, the laptop will appear behind the drum
- Laboratory Office:
- Take key off desk and unlock bottom doors of cabinet
- Take battery from bottom right cabinet shelf
- Move box near desk and select the disk under the box
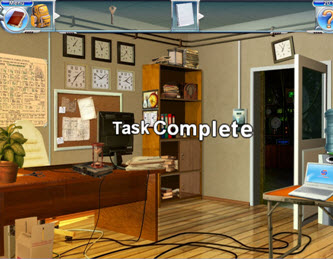
- Place laptop on table near water cooler
- Place battery pack on laptop
- Attach power supply to laptop
- Select the laptop to turn it on, it will then ask for the CD, by showing a picture of a CD
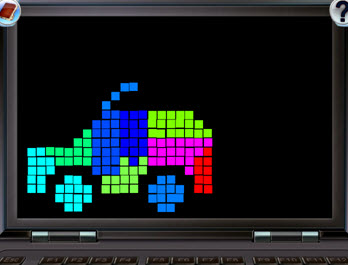
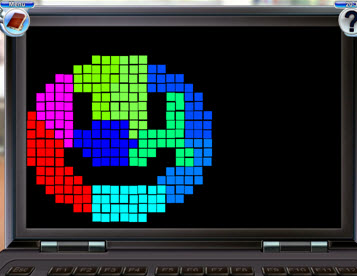
Task 2: Play a computer game with Tom (3 puzzles)
- Pieces do not rotate
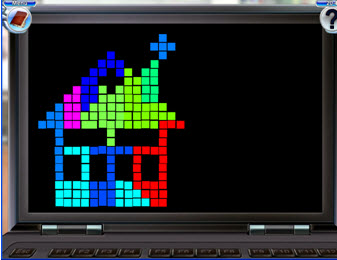
- Place the pieces on the image, where they all fit on the puzzle, similar to a tanagram
Puzzle 1-Truck
Puzzle 2-Smiley Face
Puzzle 3- House
CHAPTER 21: JOAN OF ARC
Task 1: Nostradamus' Historical Order
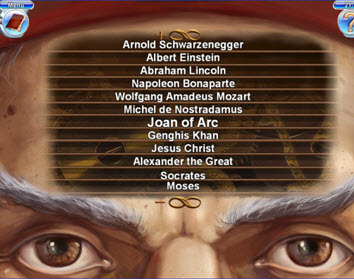
- Place the people in historical by order by swapping pieces on Nostradamus' forehead. Starting from top to bottom (recent to last); the order is:
- Arnold Schwarzenegger
- Albert Einstein
- Abraham Lincoln
- Napoleon Bonaparte
- Wolfgang Amadeus Mozart
- Michel de Nostradamus
- Joan of Arc
- Genghis Khan
- Jesus Christ
- Alexander the Great
- Socrates
- Moses
Task 2: Match pairs of cards to help summon Joan of Arc's spirit:
This is a mahjong style card game. Only the top illuminated cards can be removed from the deck. Jokers are wild and can be matched with any card, however to win the game, there is only 1 correct option.
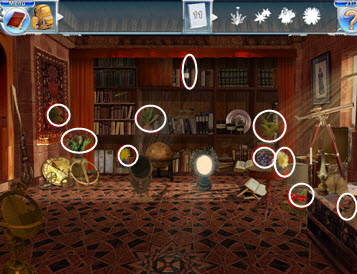
Task 3: Prepare the elixir of total understanding. Locate the 20 silhouetted items (plants and herbs) in the task bar in 2 rooms.
- Select rug and obtain the key
- Use the key on the bottom door of the wall cabinet
- Select bottom left door of cabinet by window to obtain the key for the chest
- Select panel to the right of the storage room door to move pedestal
CHAPTER 22: MUSHROOM SOUP
Task 1: Fight the hypnosis by swapping neighboring pieces until the background has been restored.
- Select a square and make a swap with a piece that has green highlighted background until the background is restored
- Image behind selected pieces is the correct background.
- Pieces will loose there outline when in the correct position
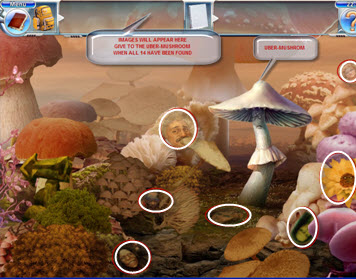
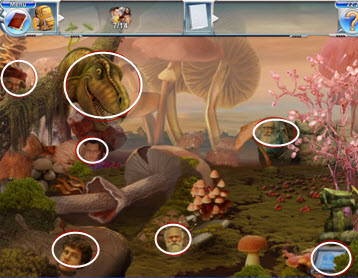
Task 2: Help the uber-mushroom learn the truth. To do this find the 14 images in 2 scenes of everyone involved in the recent events.
- Look behind all "sparkle" mushrooms
- After selecting an image, a larger image of the person will appear. Select the large image to release from the screen.
Images to find (not in any specific order):
- Professor Einbock
- Ugu: Stone Age
- Pan-Galatic: Order keeper of the galaxy
- Leonardo: who didn't have time to change
- The flower that can talk
- Gretchen Einbock-missing for 20 yrs.
- Joan of Arc- knows recipe for the elixir of total understanding
- Cemetery robot- year 3008
- Socrates-Athens citizen
- Young Tom
- Tom
- Leonardo da Vinci
- Dinosaur
- Nostradamus
ATER FINDING ALL 14 IMAGES SELECT; THE IMAGES IN YOUR INVENTORY AND GIVE TO THE UBER-MUSHROOM.
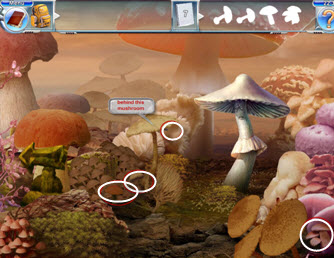
Task 3: Collect the edible mushrooms to talk to Tom. Select the 7 edible mushrooms from the silhouetted task bar
CHAPTER 23: THE WEDDING
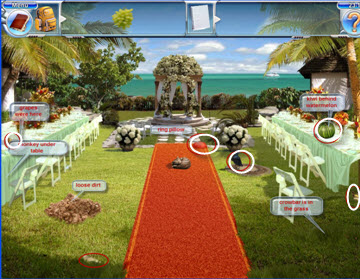
Task 1: Find the wedding rings (not as simple as it sounds)
- Select the crow, he will ask for a kiwi, grapes, a pear and a watermelon. Find the fruits and give to the crow.
- Select the crow again, he'll ask for an apple, give the crow the apple and he'll fly away exposing a man-hole cover
- Select the crowbar in the grass (lower right corner of screen) and open man-hole cover
- Select the man-hole and a shovel will jump out
- Take the shovel and dig up the loose dirt on the lower left of the screen. Another man-hole cover will be exposed and a mouse will jump out
- Give the mouse to the sleeping cat. A ring will be under the cat
- Select the ring and put on the ring pillow
- Select the crowbar from inventory and open the man-hole cover
- Select the banana under the table on the right to the monkey under the table on the left behind the front chairs. Keep feeding the monkey the bananas until they are gone. The monkey will give you the other ring.
- Place the other ring on the ring pillow
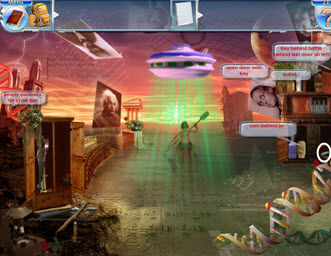
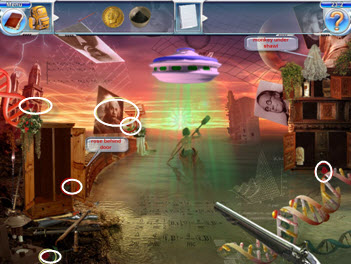
Task 2: Help Eibock regain consciousness (AGAIN!); to do this match the image of the lost Gretchen with the real one.
- Select the professor and you will be take to the mind of Einbock
- Select last door on the top row of the china cabinet in the upper right of the scene. Select the bottle and obtain the key.
- Use the key on the same cabinet, left door on second row.
- Open tall armoire on the left of the scene and empty.
- Select the crowbar and break the glass on the second row and the blue bottle on the bottom row in the china cabinet.
- Obtain the coin revealed after breaking glass. Give to the monkey under the shawl on top of the china cabinet
- Select the bullet from the second row of the china cabinet and put into the rifle that should now be on the lower left of scene.
- Select the gun powder from the bottom right shelf of the china cabinet and put into rifle
- Select the gun and it will shoot the UFO. An alien will appear. The alien will ask for roses.
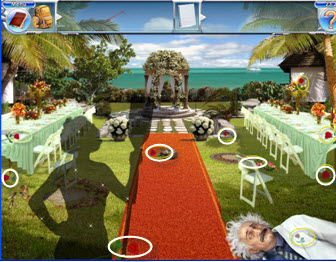
- Select the 6 roses in this scene and 10 in the wedding scene
- Double click on Einstein's photo on the left of the scene to transfer to wedding scene to gather the 10 additional roses
- Return to Eibock's mind by selecting his eye
- Give the roses to the alien and he'll fly away
- Select the coin in inventory and put on Gretchen (the woman in the canoe)
- Select the image of Gretchen that appears near the white roses; put the image in inventory
- Return to the wedding scene
- Put the colored image of Gretchen on her shadow
Content(s) of this game guide may not be copied or
published on any other site without permission from Casual Game Guides.
©CasualGameGuides.com 2006 - 2021
