Images ©Big Fish Games
Overview: In this next installment of the Hidden Expedition series, you're on your way to find a lost pilot who was last seen over the Bermuda Triangle.
Note from H.E.A.T (Hidden Expedition Adventure Team): H.E.A.T. assumes no liability for physical energy or psychological duress incurred during expeditions. - as seen on expedition roster
Cursors:
• Eye – this allows you to take a closer look at something.
• Arrows – these allow you move in different directions or back.
• Hand – this allows you to pick something up.
• Blue Swirls – this points out an area of interest.
Logbook:
• Entries – this gives you detailed information as your progress through the game.
• Objectives – list your current tasks which you need to complete to advance through the game.
• Characters – these are profiles of all the different people you meet, they are a lot of fun to read.
• your logbook will glow when new information is available to read.
Hints:
• Item Name – click on the item name to get a silhouette of the object.
• Hint Button – click this to show where the item is.
• Hints are unlimited, but you will have to wait for the heliometers to fill up before you can use another.
• Hints can be used to skip puzzles/mini games.
Inventory: You can use these items during game play. You can also combine some items to create one you need. Only Inventory items will be circled in the screenshots.
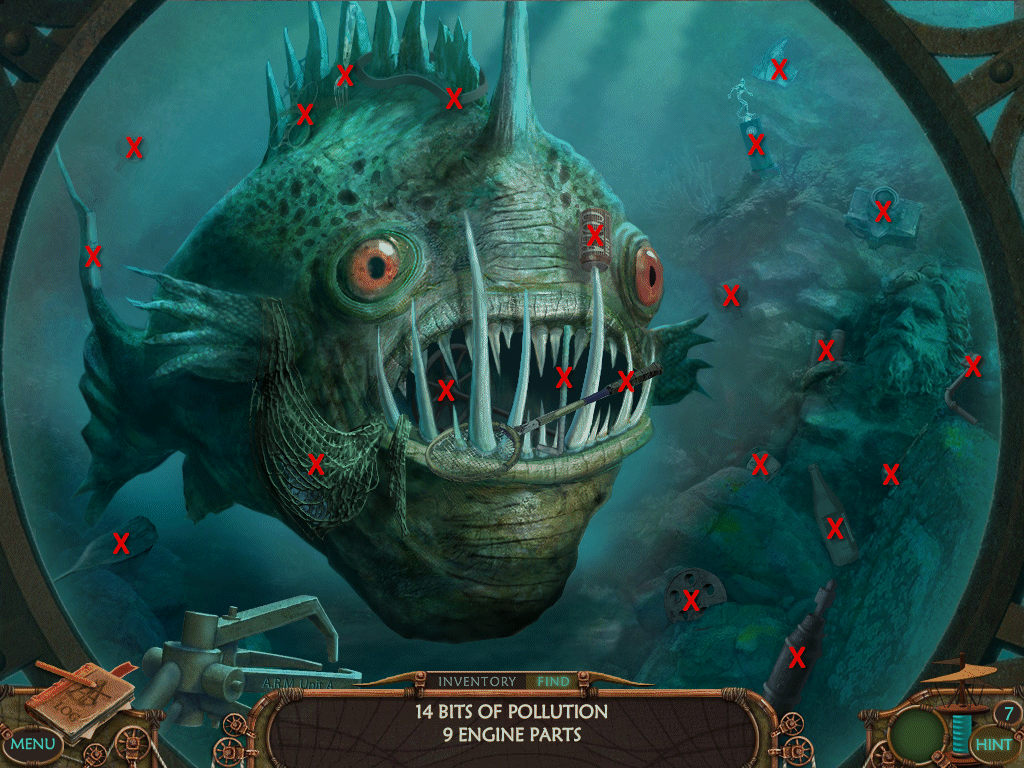
Hidden Objects: Most hidden objects vary for each individual player, so you can play the game over.
Fun Fact: Clicking different items within the scenes, for example the cats, will emit sounds or responses from the character.
THERE ARE NO PENTALITIES FOR CLICKING
Levels:
Chapter 1: New York
New York
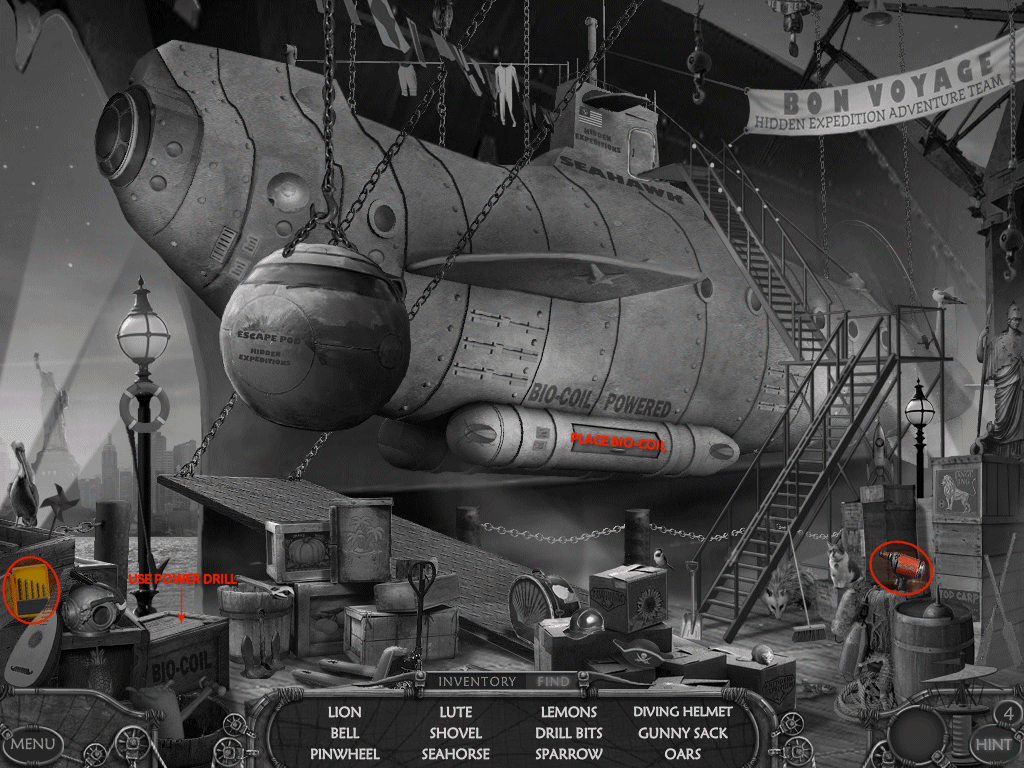
1. find the hidden objects – find drill bits
2. locate the power drill
3. combine the drill bits and power drill
4. examine the crate marked Bio-Coil
5. use the power drill on the crate screws
6. take the Bio-Coil
7. open the door on the side of the submarine
8. place the Bio-Coil inside
9. exit through the Submarine door
Submarine – Lounge
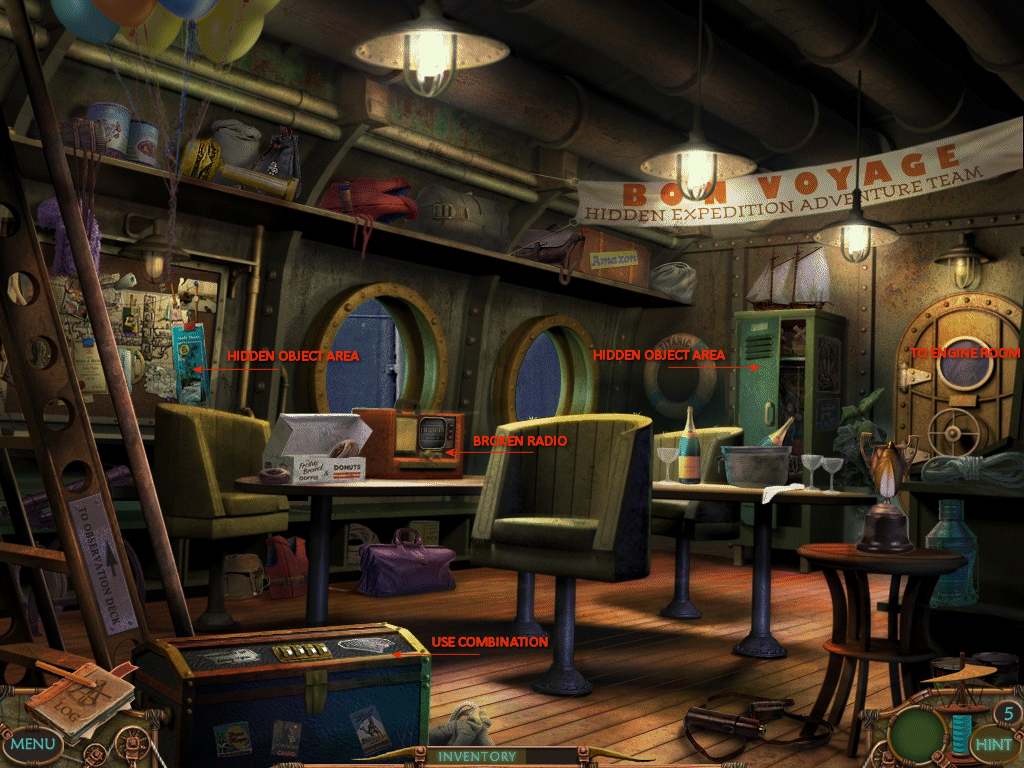
1. talk to Emily and choose "I'd like to ask you some questions"
2. continue asking questions until you've exhausted all conversations
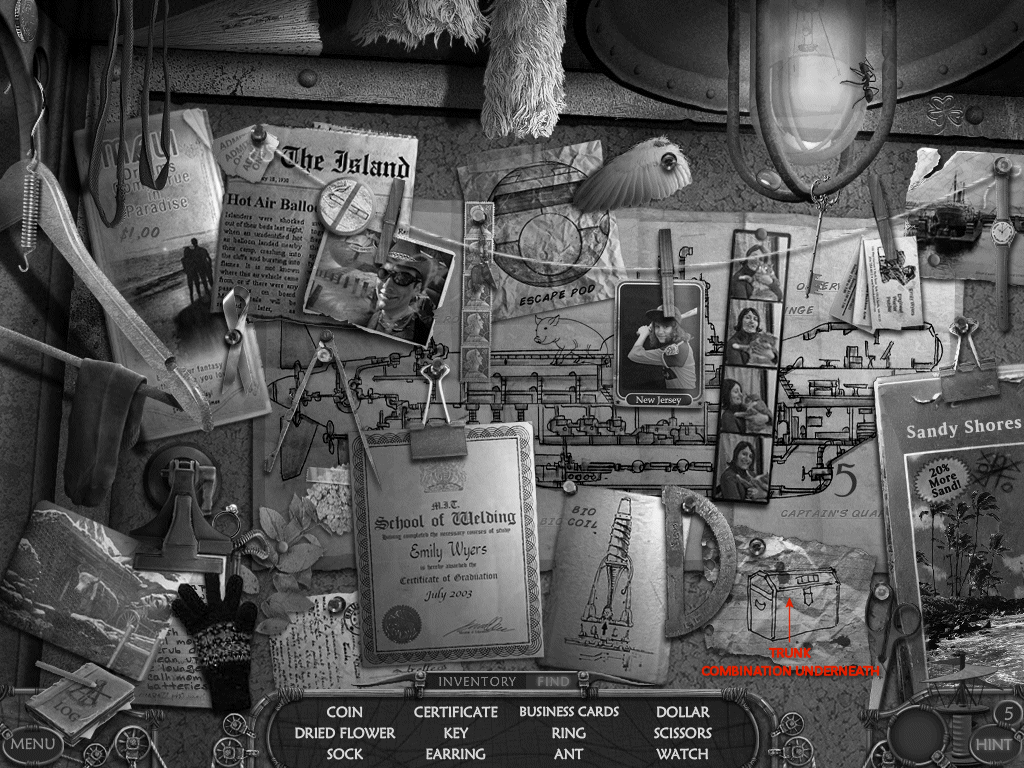
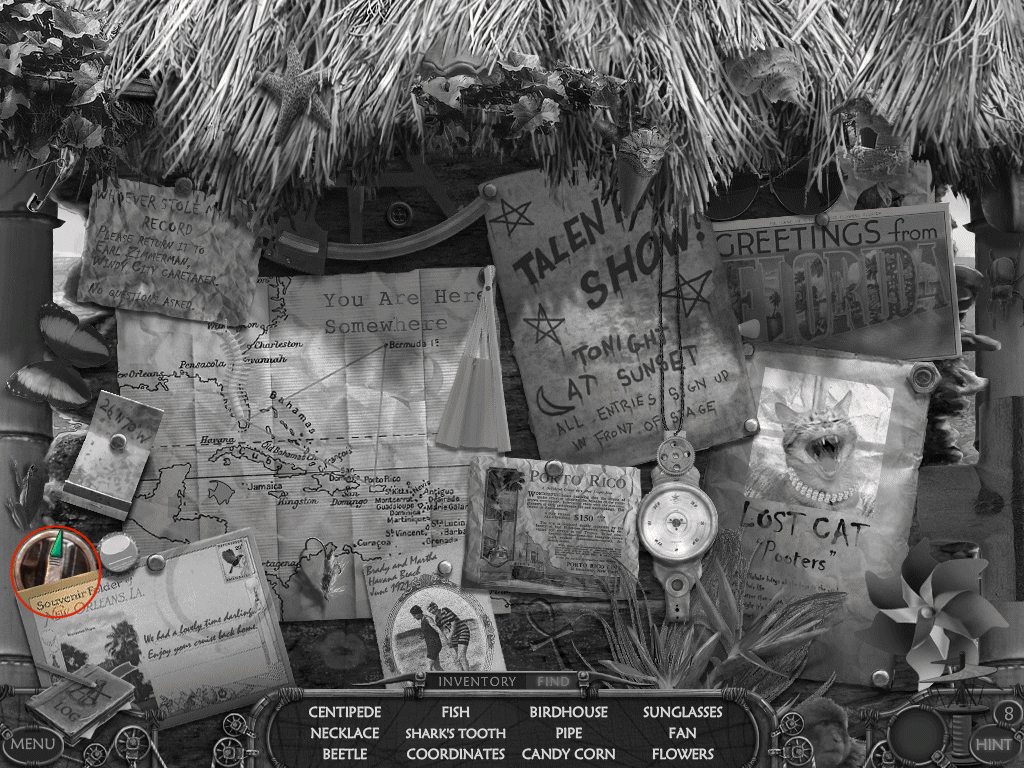
3. examine the bulletin board and enter a hidden object area - find combination
4. use the combination you found on the board on the trunk
5. take the electrical cord
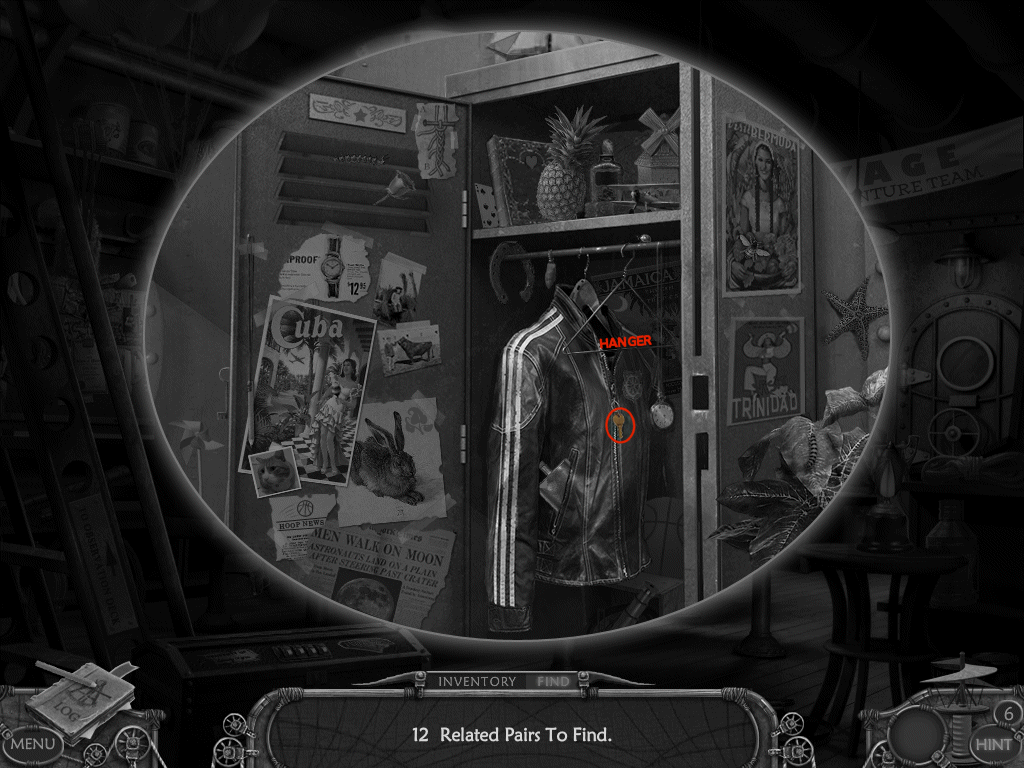
6. examine the locker
• you must find 12 related pairs
• these very with every game
• there are 2 items everyone has to find: gold key and wire hanger
7. exit up to Observation Deck
Observation Deck
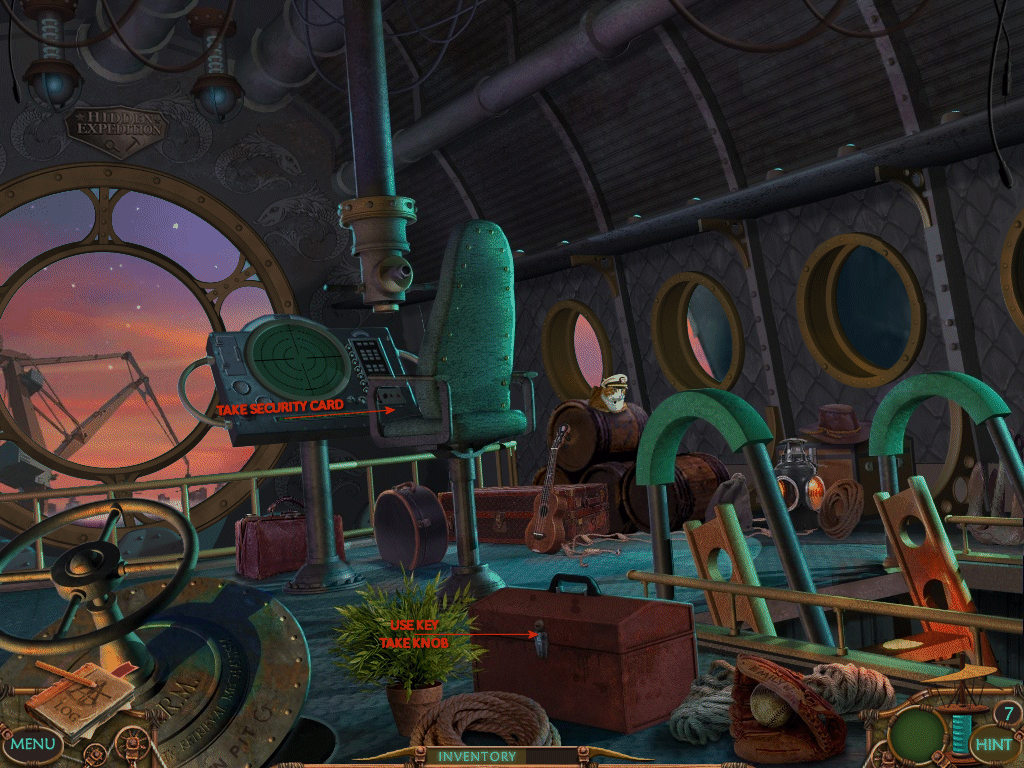
1. examine the red toolbox
2. use the key on the toolbox – take the knob
Lounge
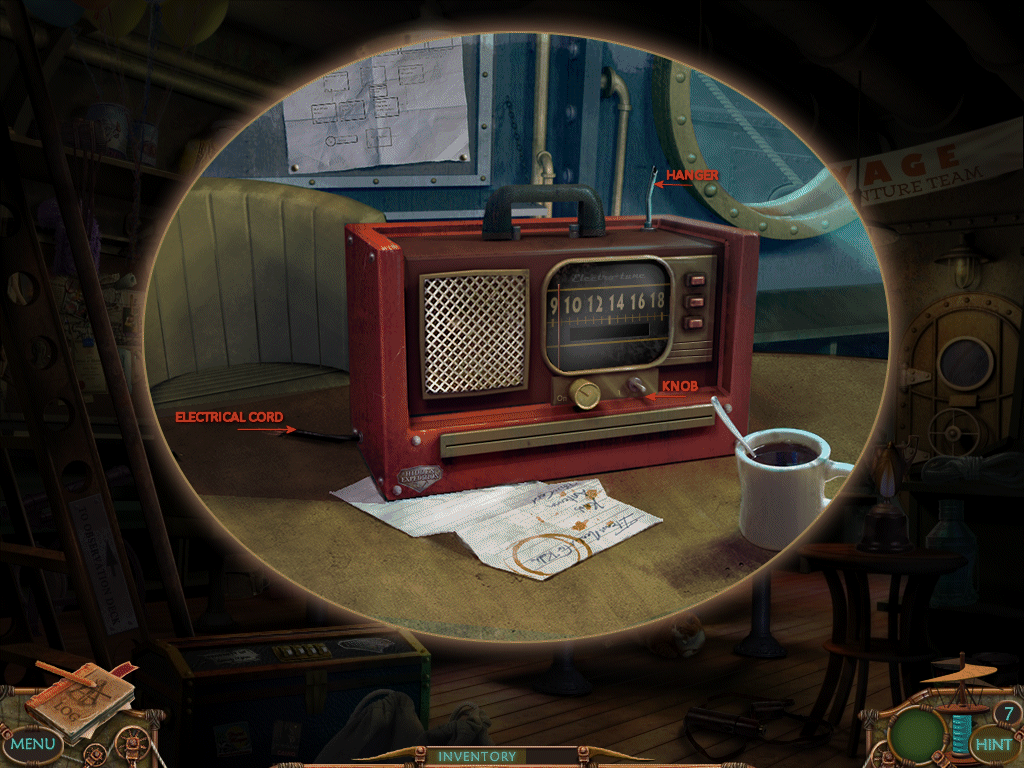
1. examine the broken radio
2. use the electrical cord, knob, and hanger on it
3. the hanger is used for the antennae
4. turn the left knob to turn it on
5. turn the right knob slowly until the display reads "headquarters"
6. exit to Observation Deck
Observation Deck
1. examine the sonar system – take the security card
2. exit to downstairs to the Engine Room door
Engine Room Door
1. swipe the security card
2. enter the Engine Room
Engine Room
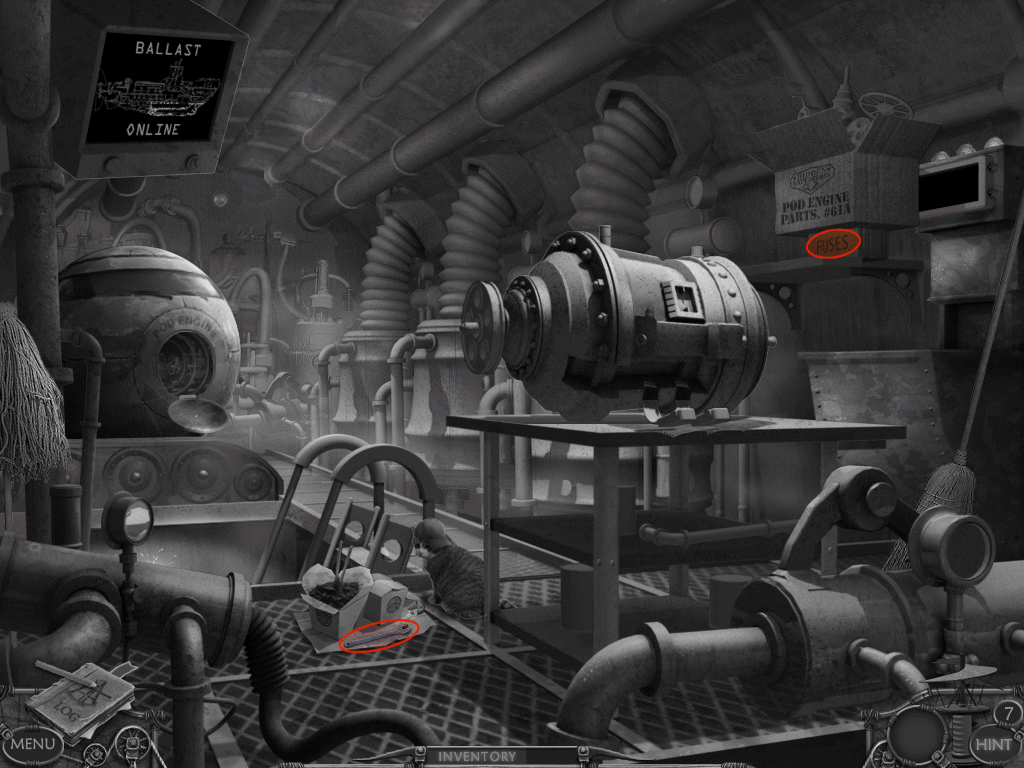
1. examine the Chinese food – take the wrench
2. take the fuses from the shelf
3. hurry back to the Observation Deck
Observation Deck
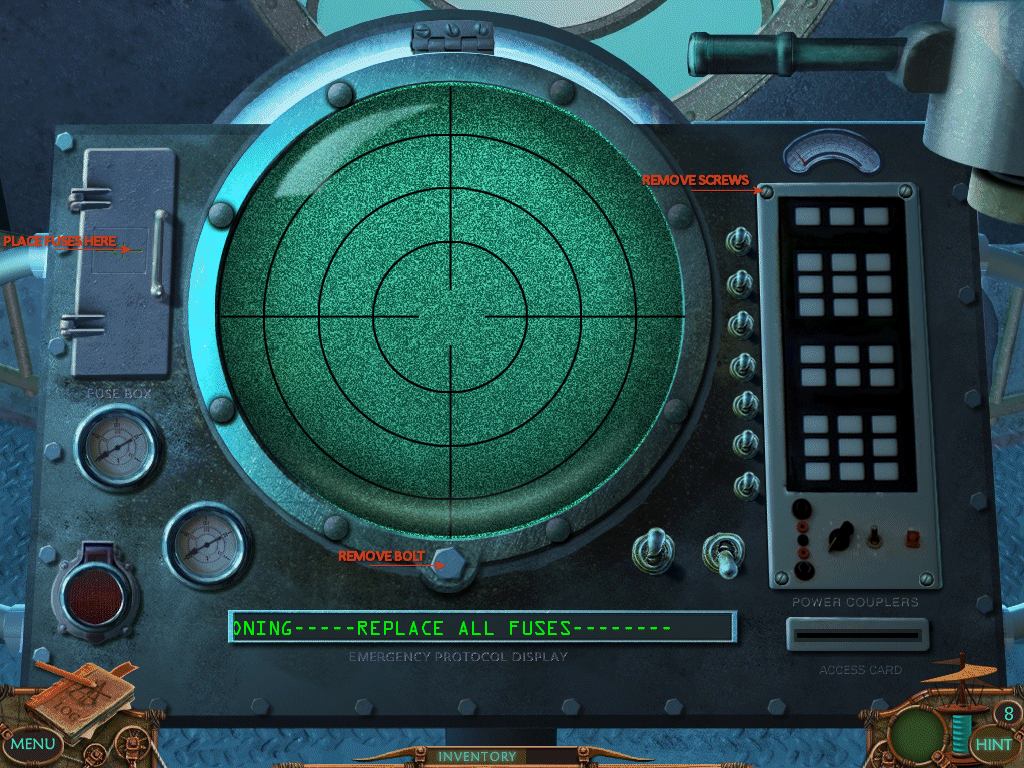
1. examine the sonar system
2. open up the fuse box and remove the fuses
3. replace them by matching the colors inside the box to the new fuses
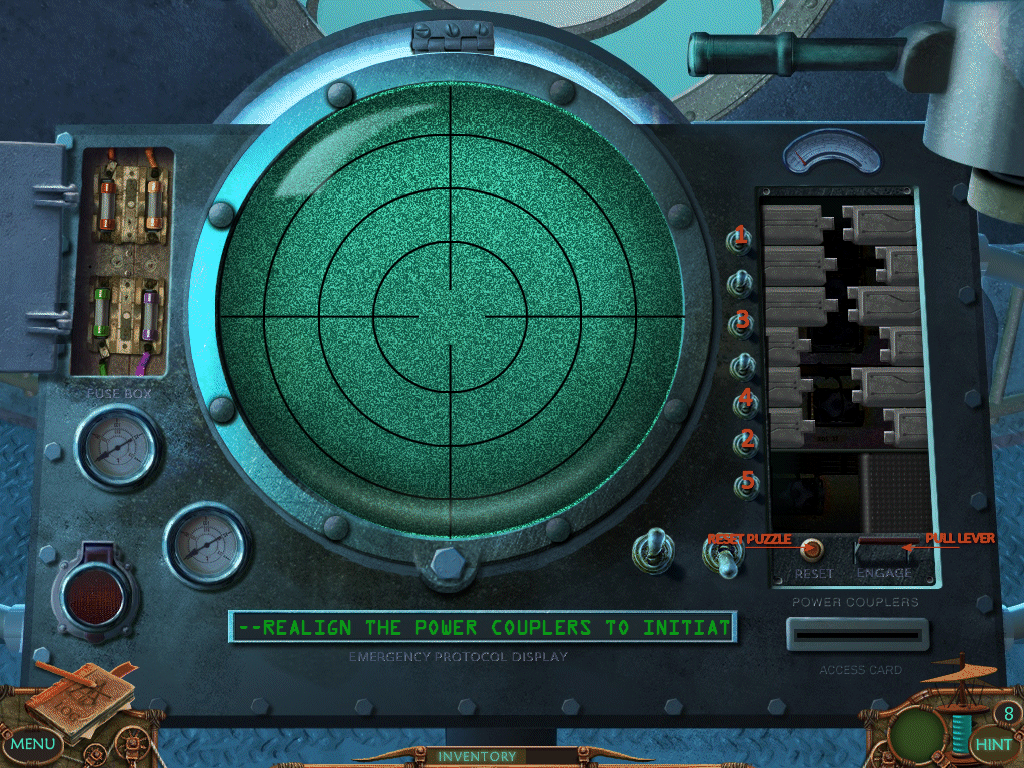
4. use your screwdriver to remove the panel on the right
• you need to flip the switches to the left of the grid so the "teeth" match
• when you flip a switch it moves 2 teeth at a time
• it will place the first set in a holding spot the bottom
• the next switch you flip will place those in the first empty spot
• the small teeth should be across from the long, etc.
• see screenshot for the solution
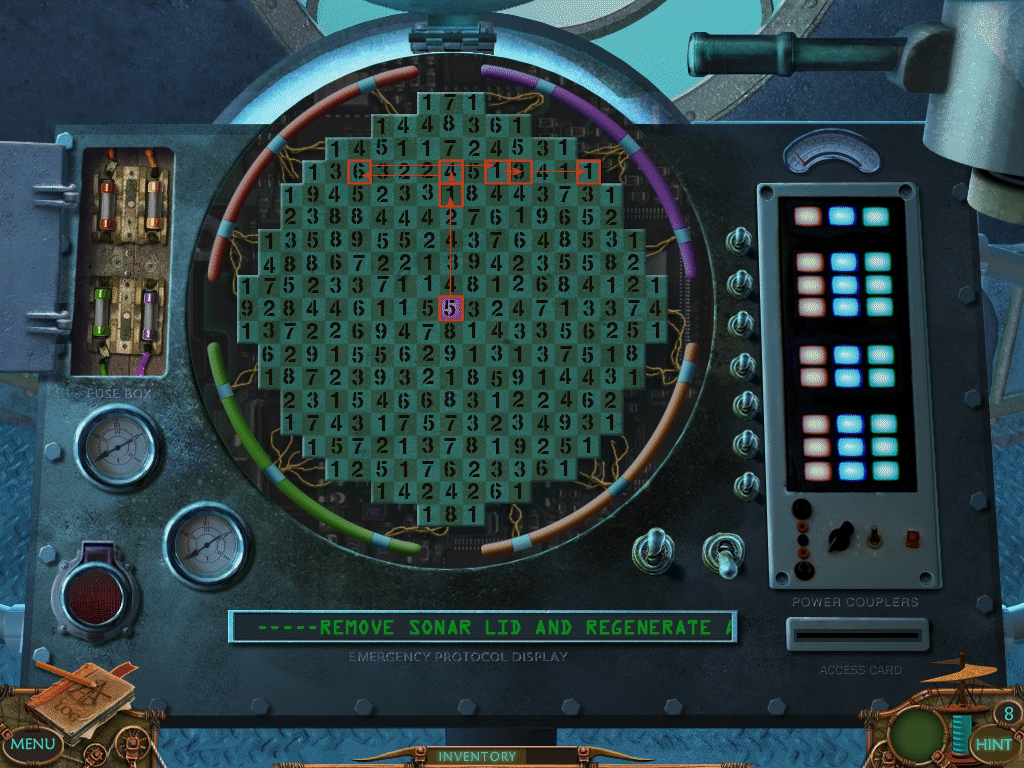
5. use the wrench on the bolt
• this is a numbers puzzle
• the first number blinking is a purple 5
• click the 5 and the numbers will move up, down, and sideways 5 spaces
• now you need to find the next number which will get you closer to the purple lights
• for example, if you click the 7, the numbers will move 7 spaces in each direction
• the object is to get 1 number right beside the purple lights/wires
• this puzzle will repeat for all 4 colors
• the first screenshot shows you how the puzzle works
• solutions: purple = 5, 1, 4, 6, 1, 3, 1 | orange = 5, 7, 1 | green = 5, 7, 1 | red = 5, 1, 8 1
6. oh no! pirate attack! hurry get to the Engine Room!
Engine Room
1. examine the engine
2. it needs repaired – see video for correct order
3. if you pull the handle, it will eject any pieces that are in the incorrect spot
4. it's very important that you flip the lever up before you insert the pin
5. place engine in escape pod
Chapter 2: Devil's Triangle
Beach
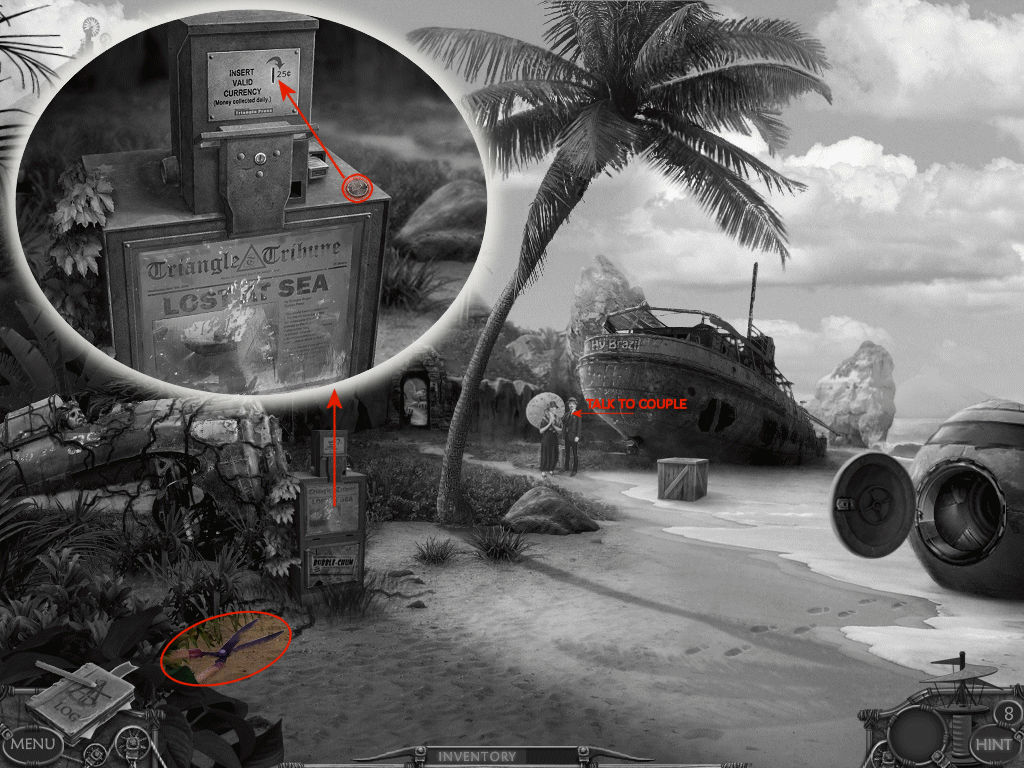
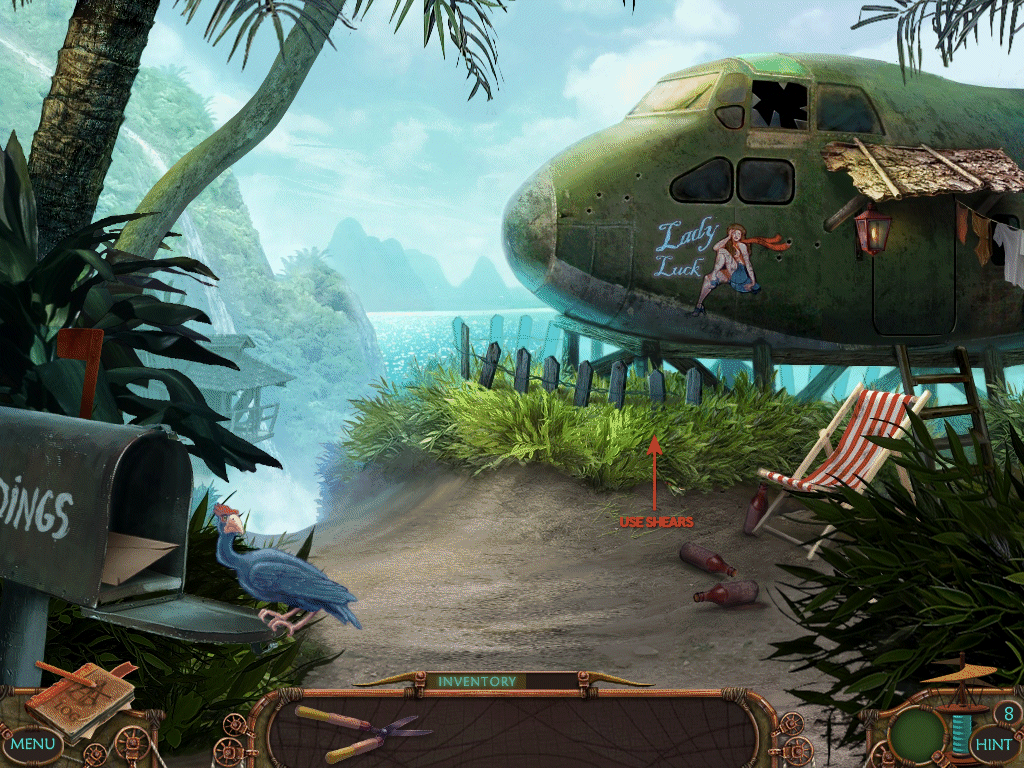
1. pick up the shears
2. examine the newspaper
3. pick up the quarter
4. put the quarter in the slot – hmm, it doesn't work
5. go talk to the couple – Brady and Martha? B & M White was on that note...
6. exhaust all conversations
7. go up to Blandings House
Blandings House
1. use the shears on the grass – take the leash
2. go up and enter the Town
Town
1. pick up the pilots patch – hmm, it looks like our missing pilot was here!
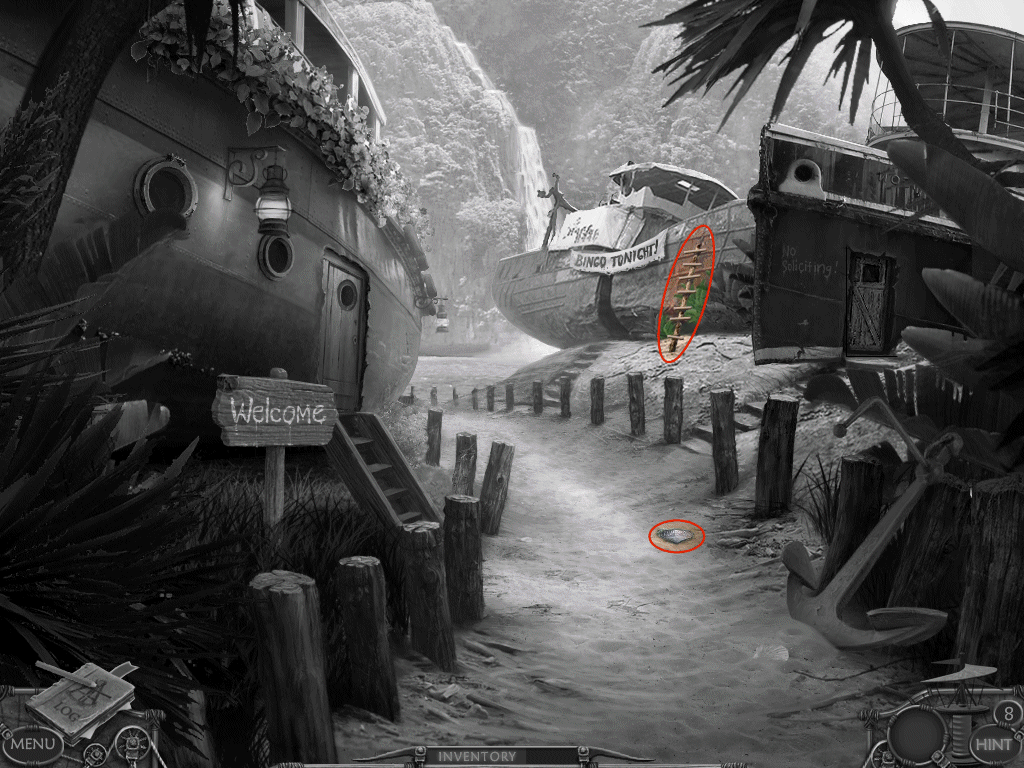
2. take the ladder
3. head back to Blandings House
Blandings House
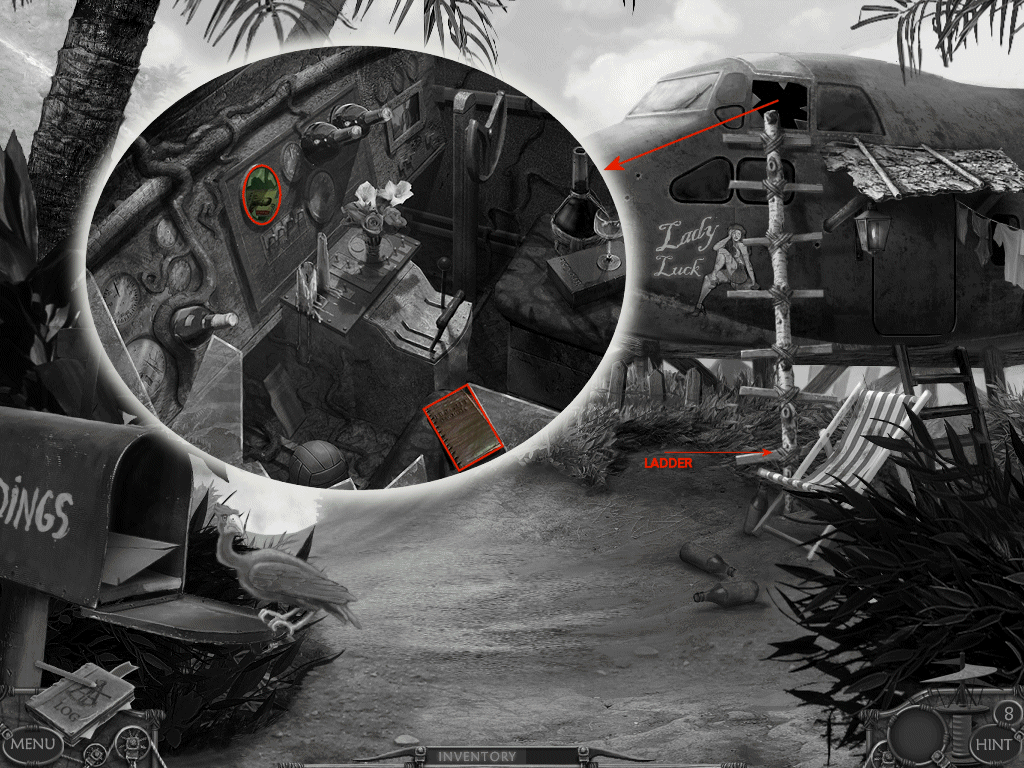
1. prop the ladder up against the cockpit window
2. look inside and take the photo ID and log journal
3. read the journal and make note of the map
4. let's explore some more, exit up twice to the Stage
Stage
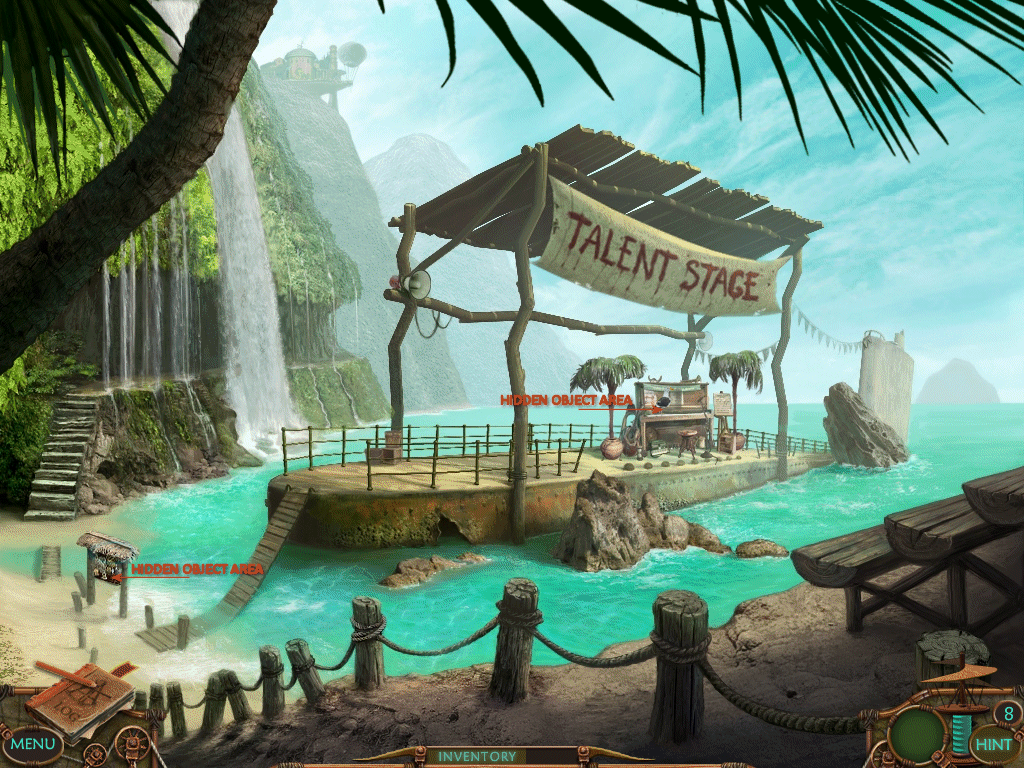
1. examine the sign and enter a hidden object area – find the knob
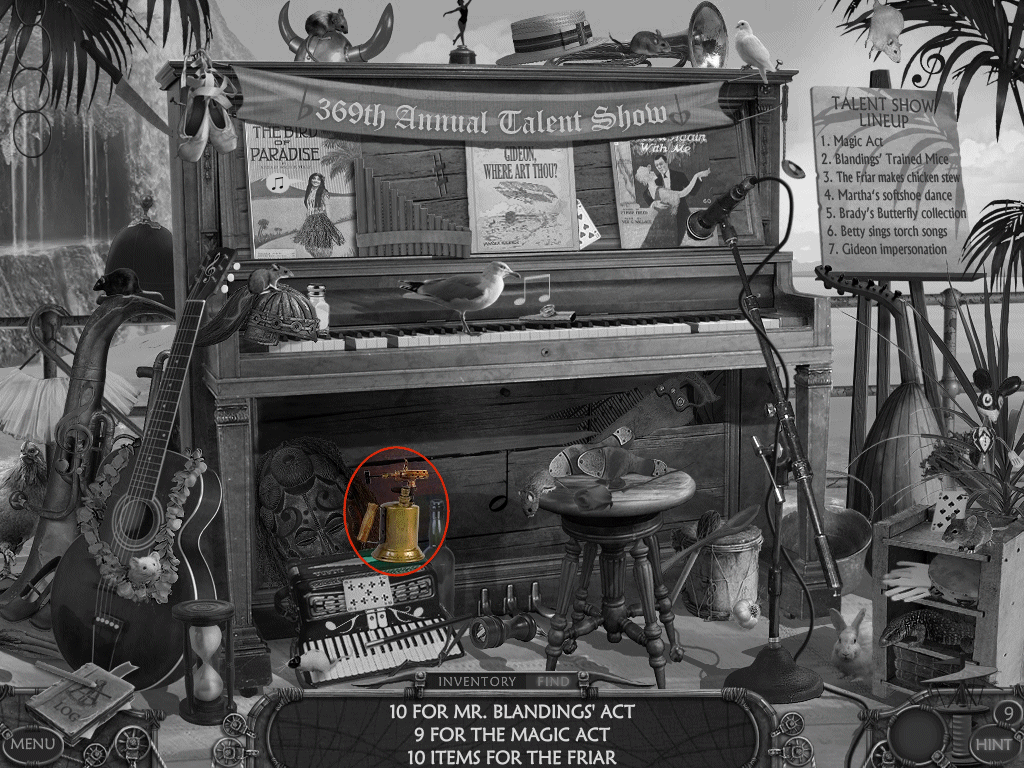
2. examine the stage and enter a hidden object area - find the blow torch
3. exit up to the Elevator
Elevator
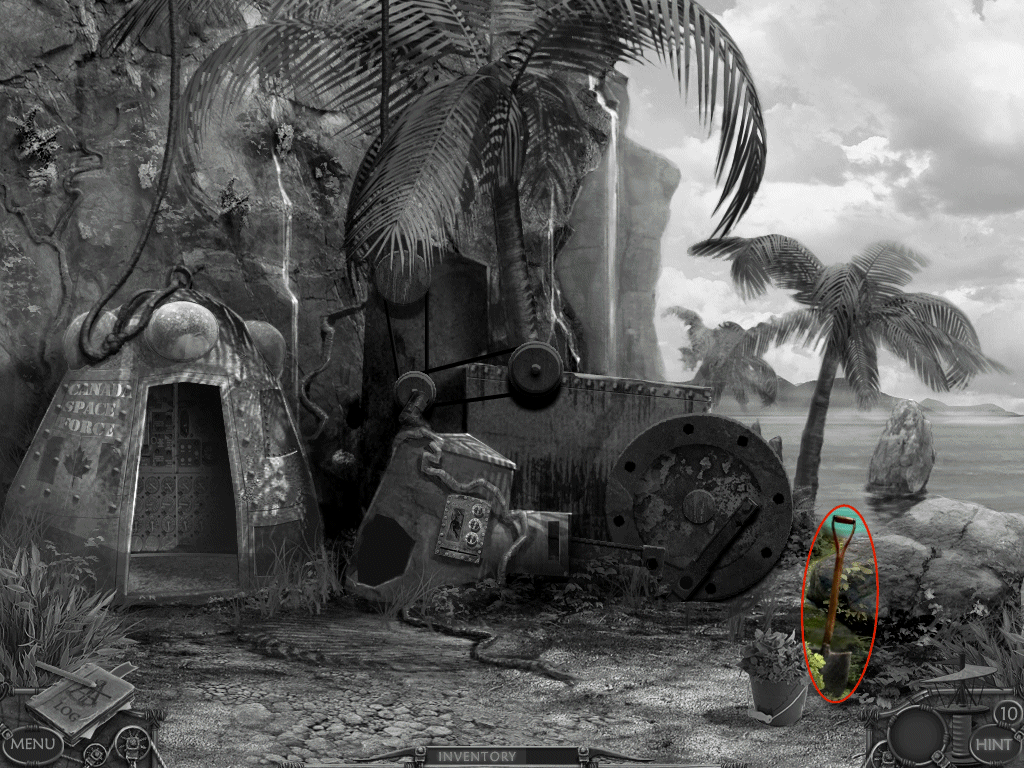
1. grab the shovel
2. head back down to the beach
Beach
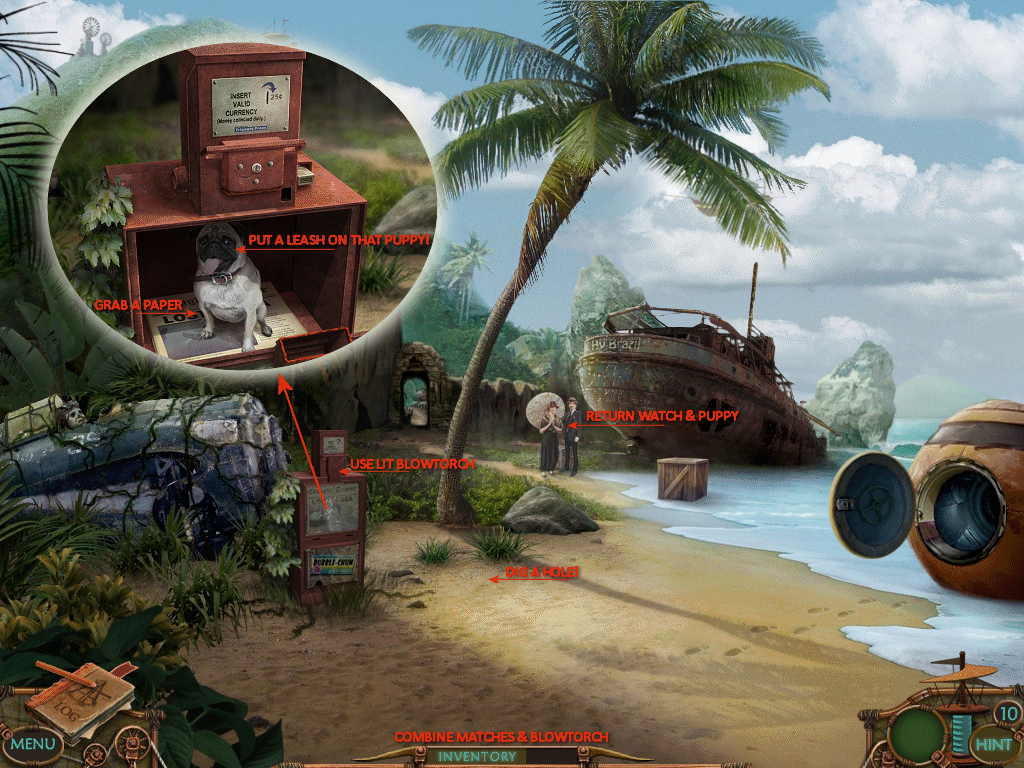
1. dig where X marked the spot on Blandings journal
2. examine the box and open it
3. remove the top tray
4. read the note – curious?
5. take the matches and watch
6. combine matches with the blowtorch
7. use the lit blowtorch on the newspaper
8. awww a puppy! use the leash on Sally
9. grab a newspaper while you're there
10. return the dog and watch to Martha and Brady
11. exit up twice to their House
Martha and Brady's House
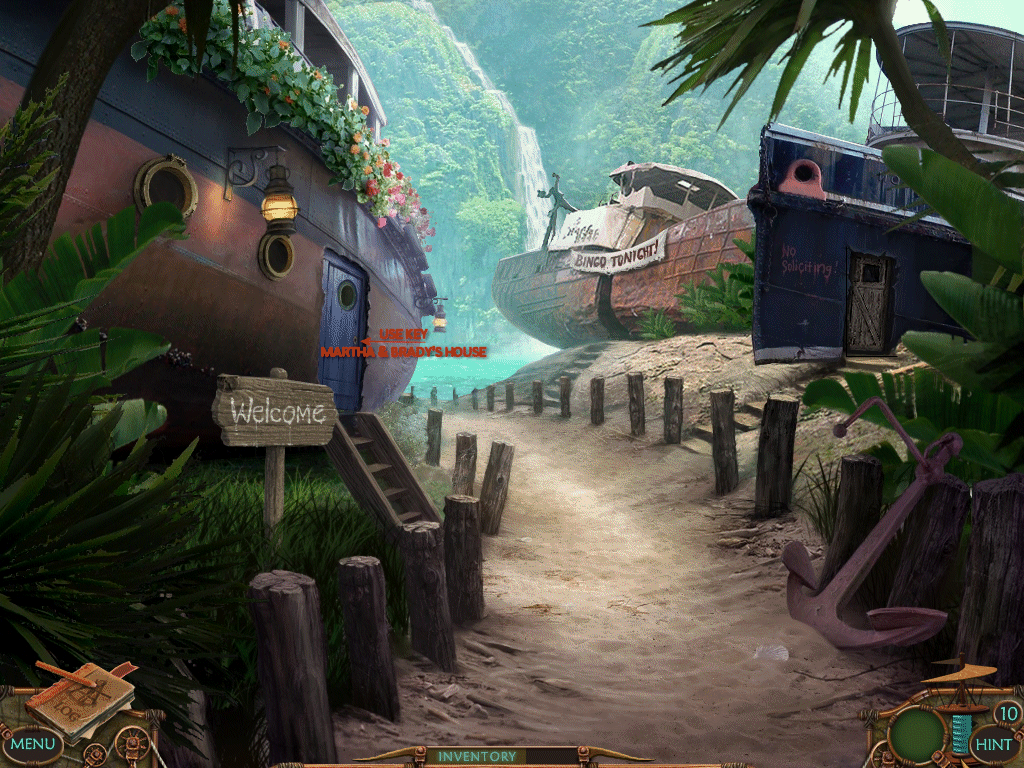
1. use the key and enter their house
2. examine the trophy – spooky!
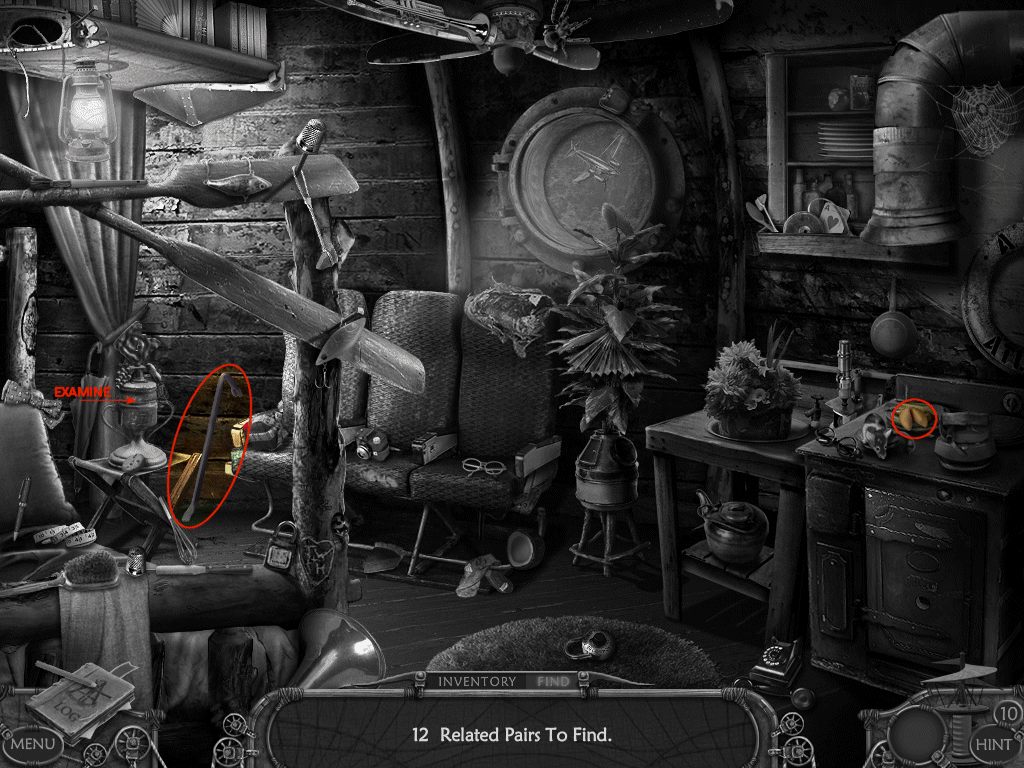
3. find 12 related pairs
4. take the crowbar and fortune cookie
5. you may have to open the oven door
6. exit back to the Beach
Beach
1. use the crowbar on the crate
2. take the belt
3. go up to Blandings house
Blandings House
1. feed the cookie to the bird
2. pick up the letter and break the seal
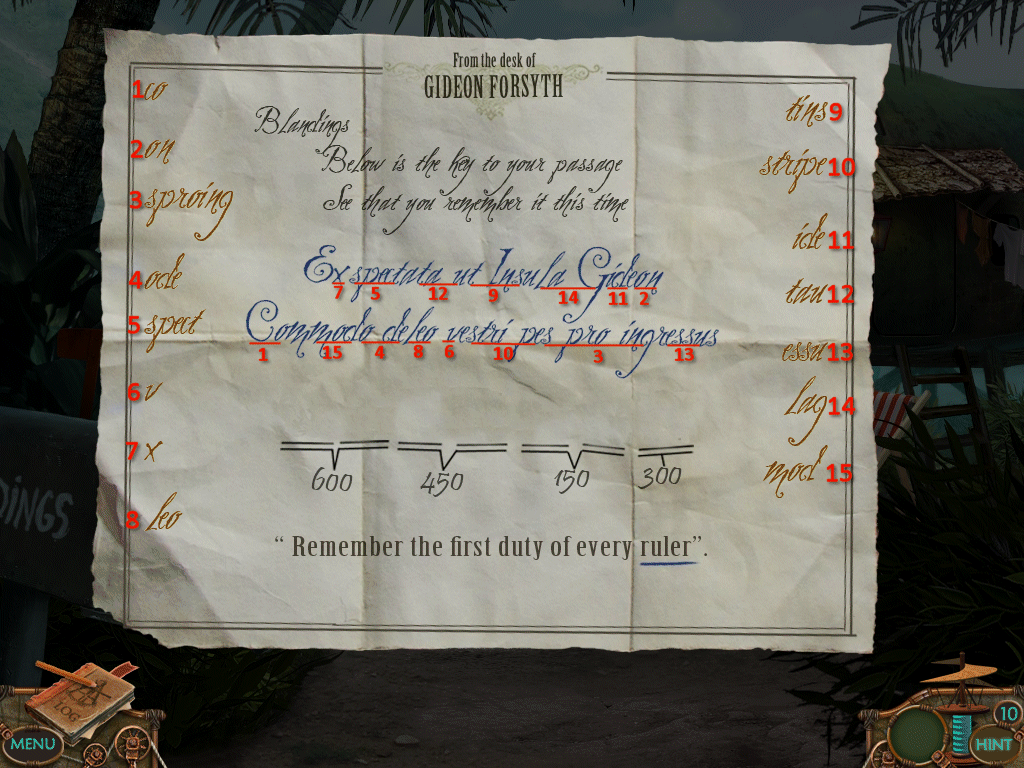
• match the letters on the right and left side of the letter to the Latin in the middle – words in blue
• to do this drag the letters on the side and drop them on the letters they match
• words may overlap to make a set of letters
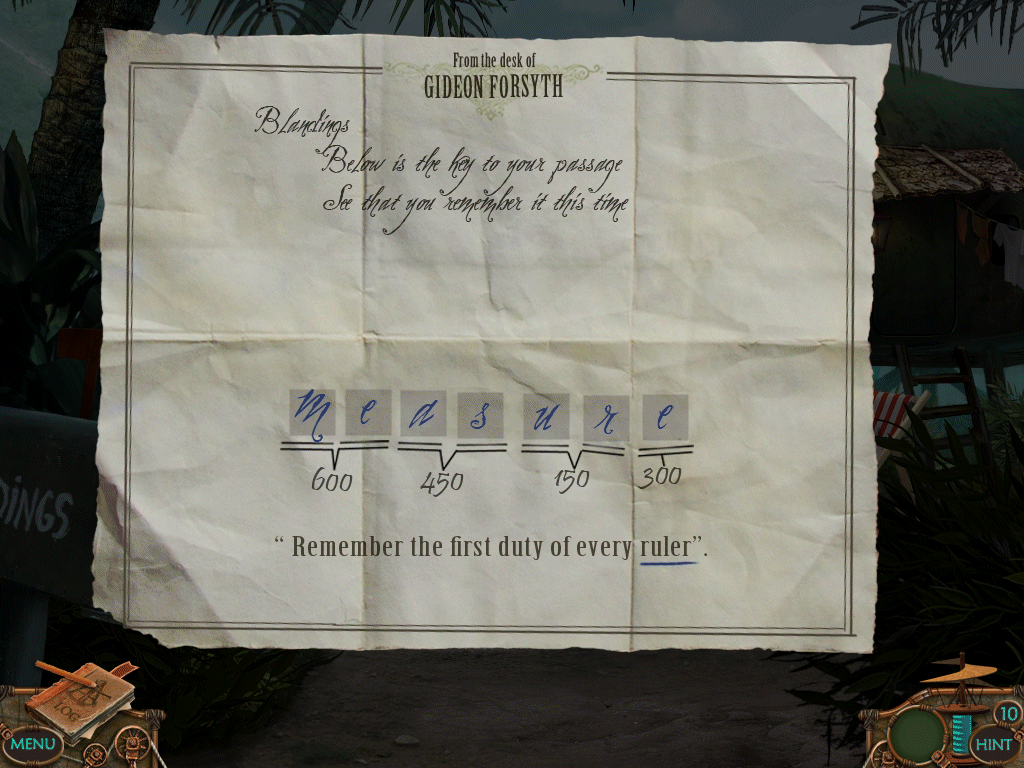
• the leftover letters need to be unscrambled – the clue is the underlined word
• solution: MEASURE
3. exit up to the Elevator
Elevator
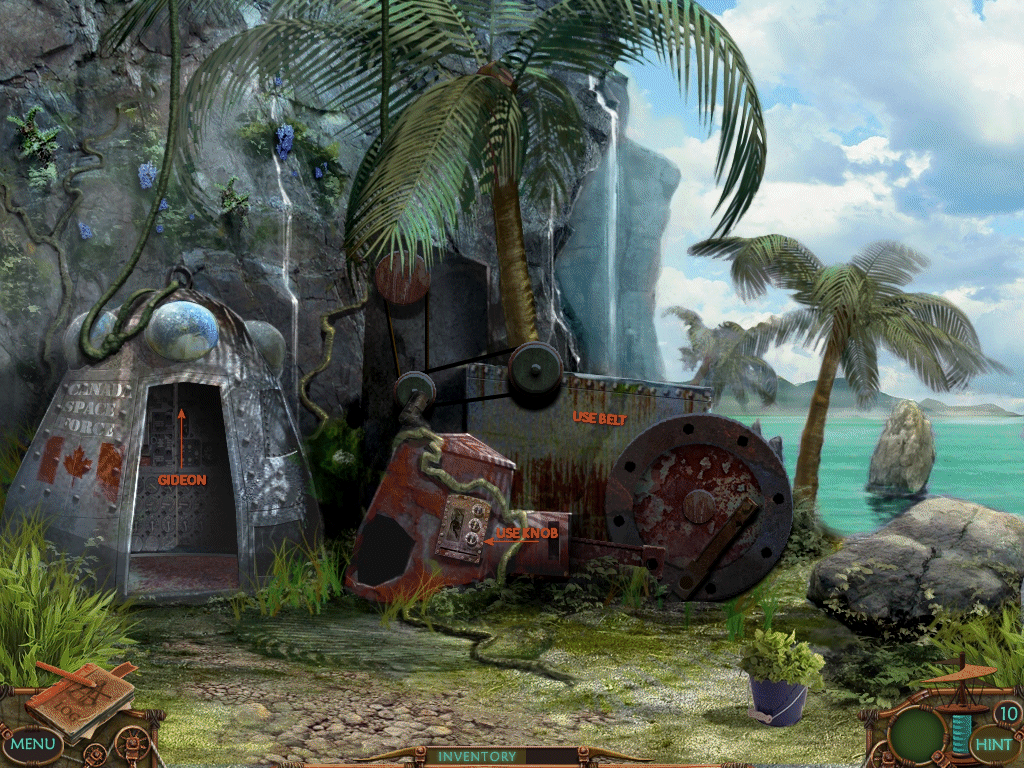
1. place the belt on the machine in the back
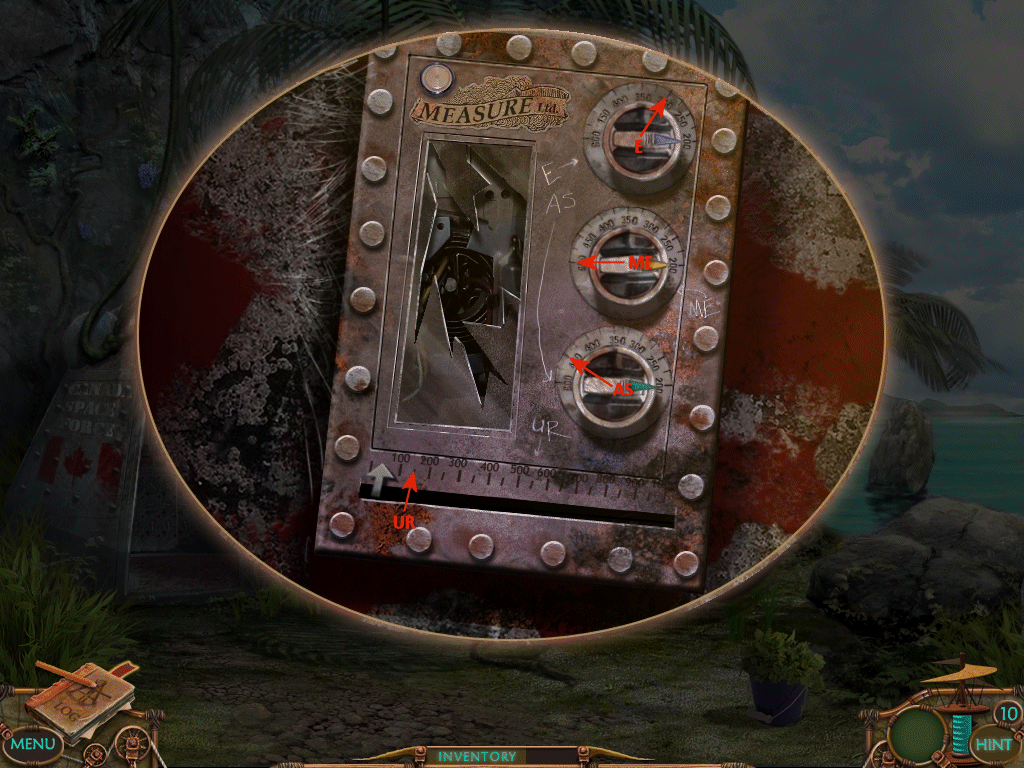
2. examine the box and place the knob on it
3. next to each knob are letters – they match the letters from the mailbox
4. compare the letters and numbers
5. turn the knobs accordingly
6. solution: ME = 600 | AS = 450 | UR = 150 | E = 300
7. enter the elevator
Chapter 3: A Strange Meeting
Gideon's Door
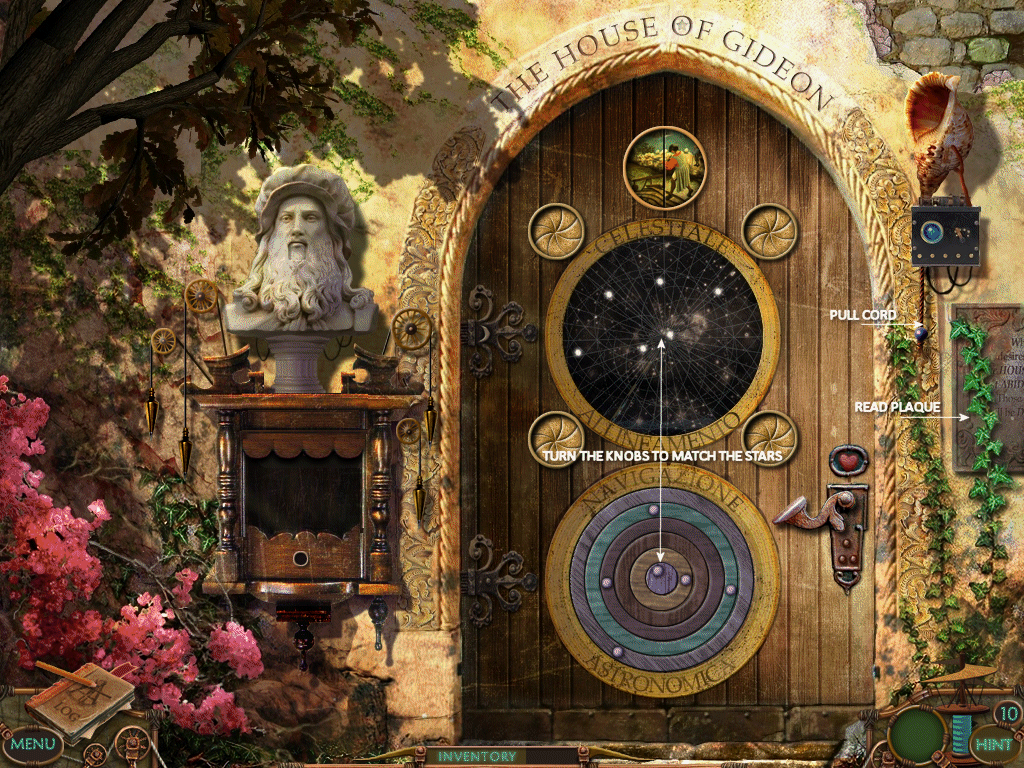
1. pull the cord on the telecom
2. oh no! static, now how do we get in
3. be sure to read the sign on the wall
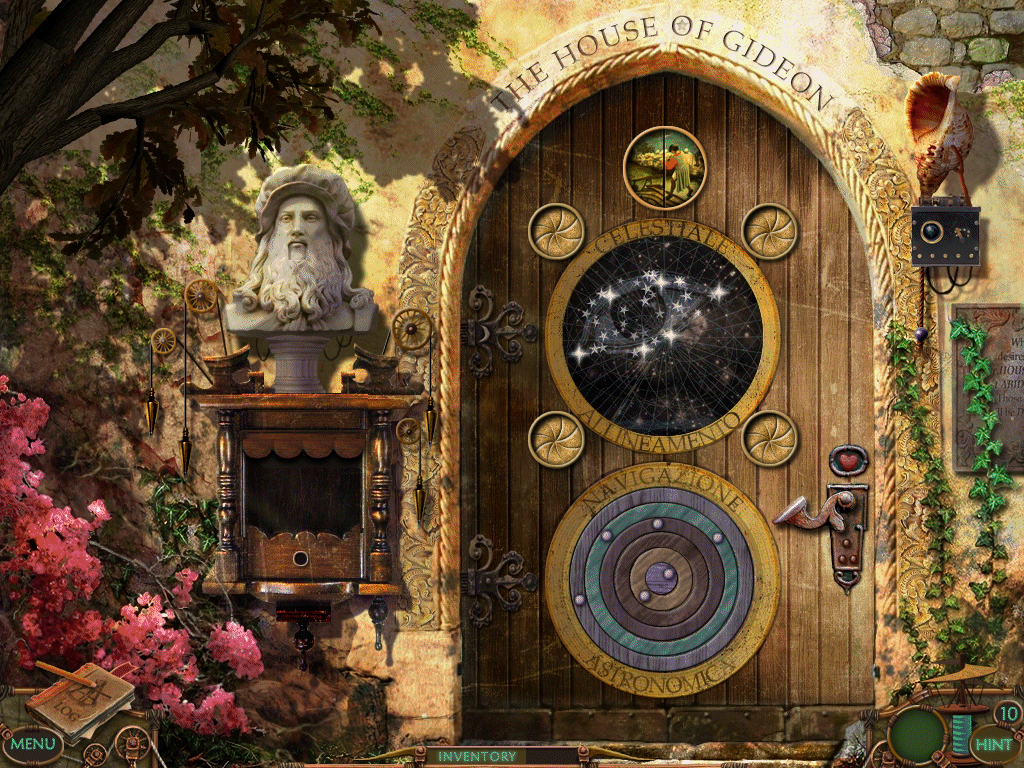
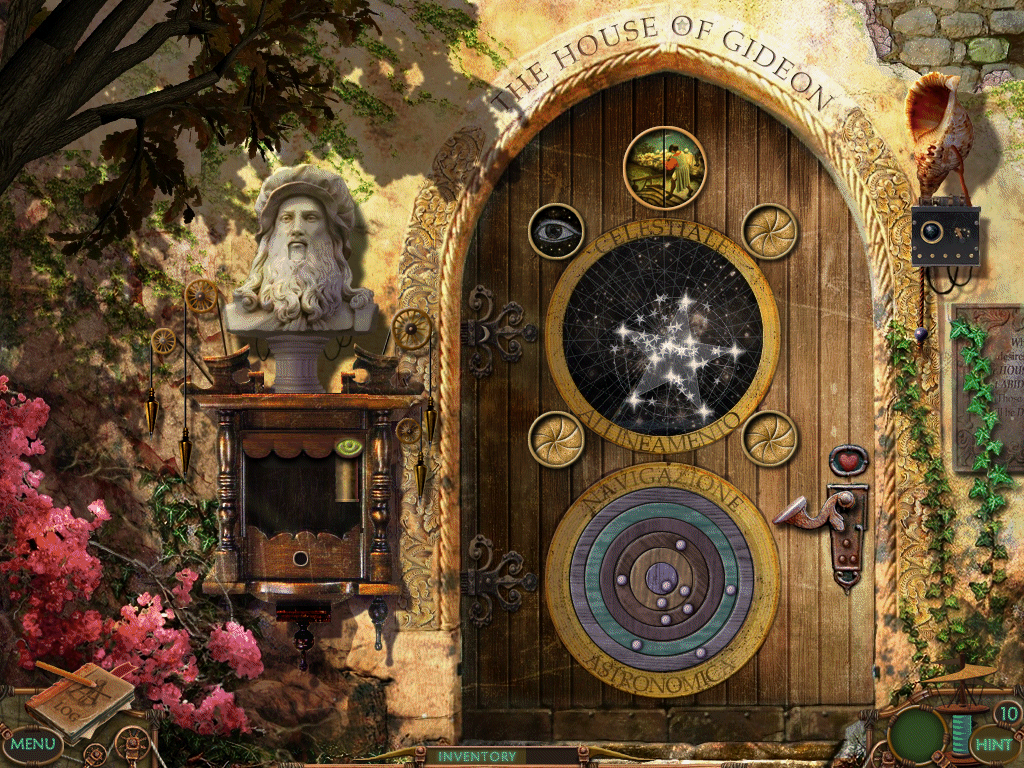
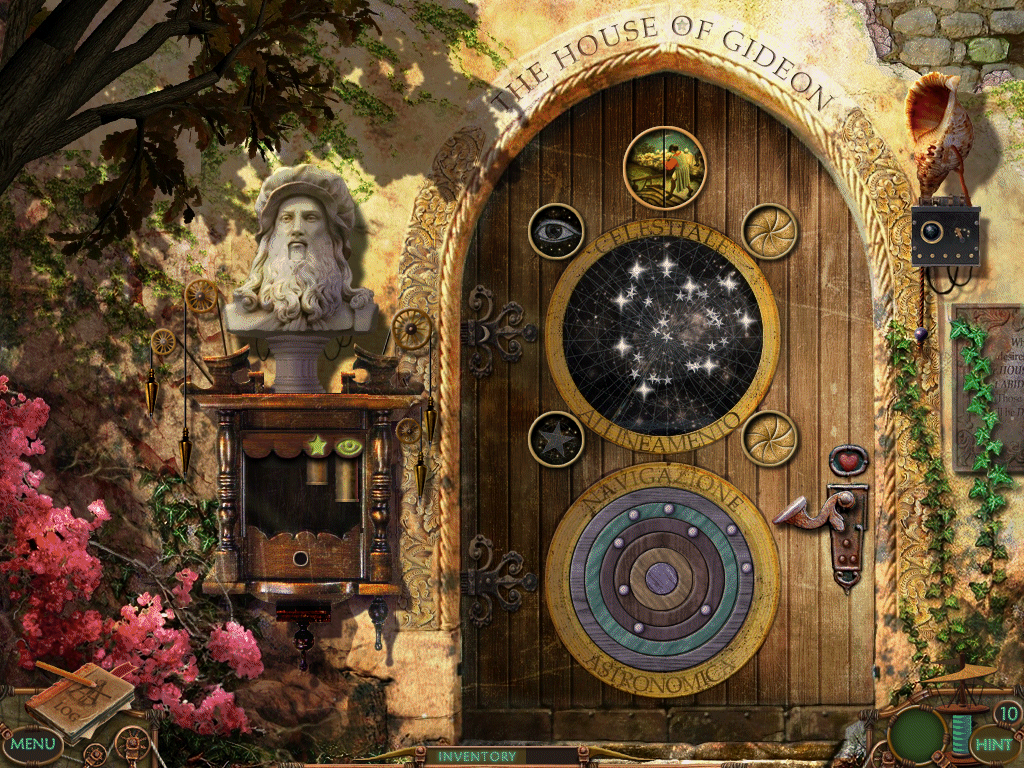
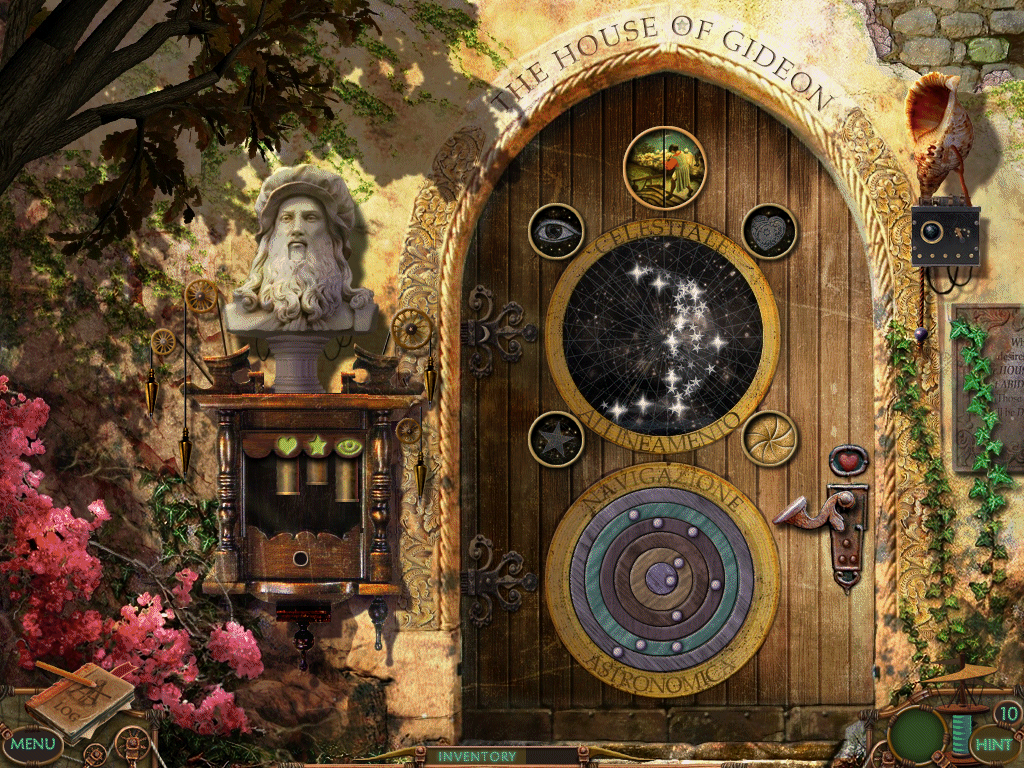
4. the answer to entry lies in the door
• below the picture of the constellation is some circles with knobs
• each knob or knobs matches a star in the constellation
• turn each one until the correct star or stars light up
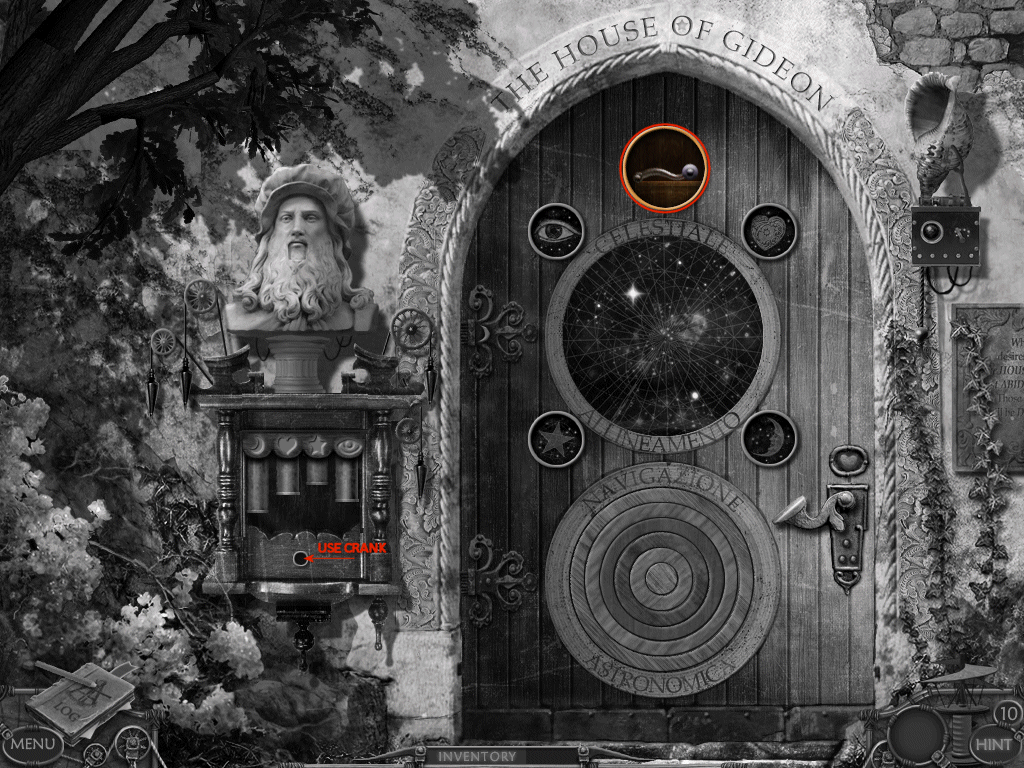
• each time you get one correct, a gold bar will lower and a symbol will light up on the mechanism to the left of the door
• once you've completed all 4 – take the lever that appears above the door
5. use the lever in the mechanism at left
6. crank it and listen to a tune play – the door opens!
7. enter into the Courtyard
Courtyard
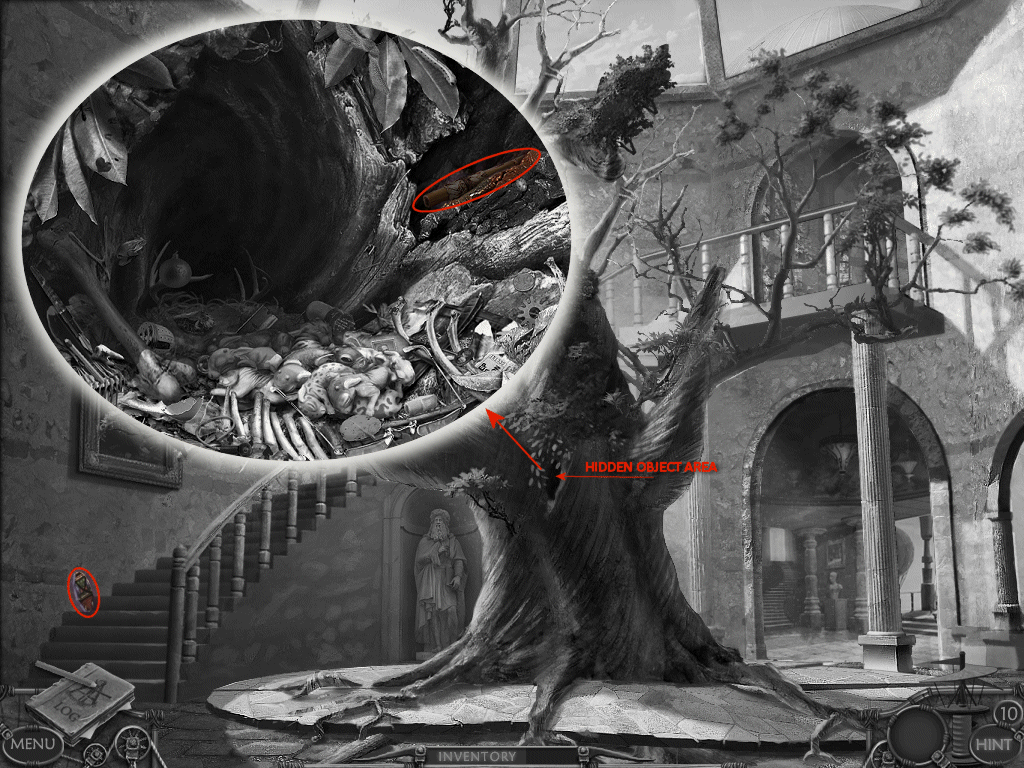
1. pick up the stained glass on the steps
2. examine the hole in the tree and enter a hidden object area – find the blow gun
3. awww, look, baby... jackolopes? eeek! mama isn't too happy!
4. go up the stairs to the Hallway
Hallway
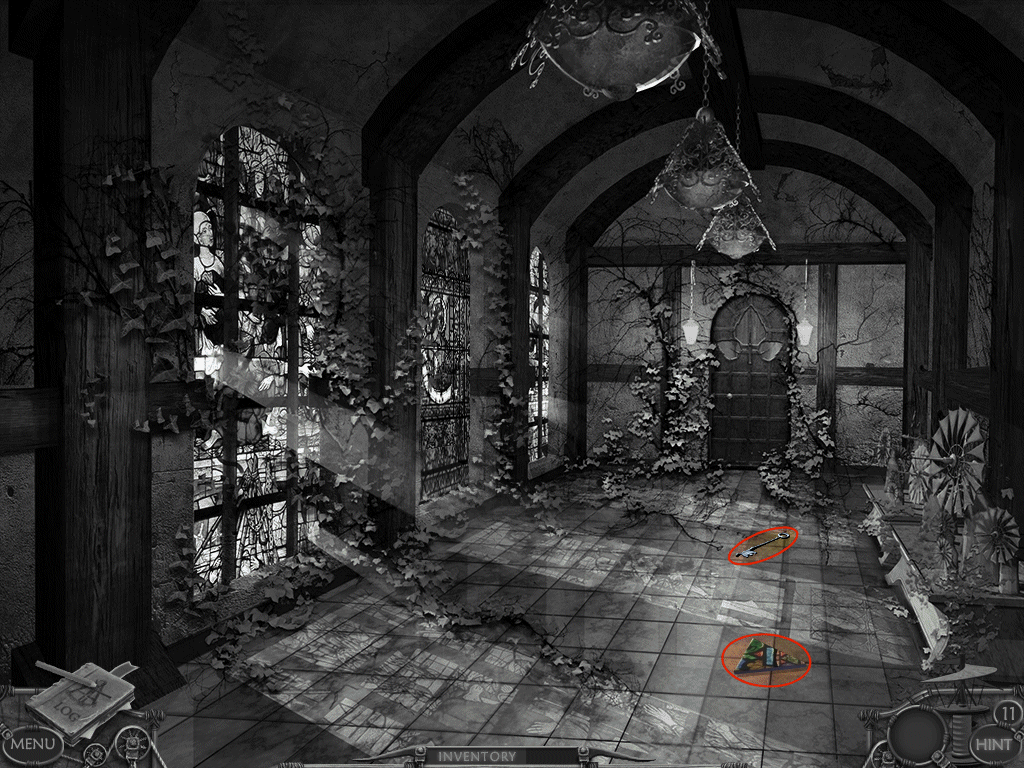
1. pick the stained glass piece
2. pick up the key
3. exit downstairs to the Courtyard and then enter the Foyer
Foyer
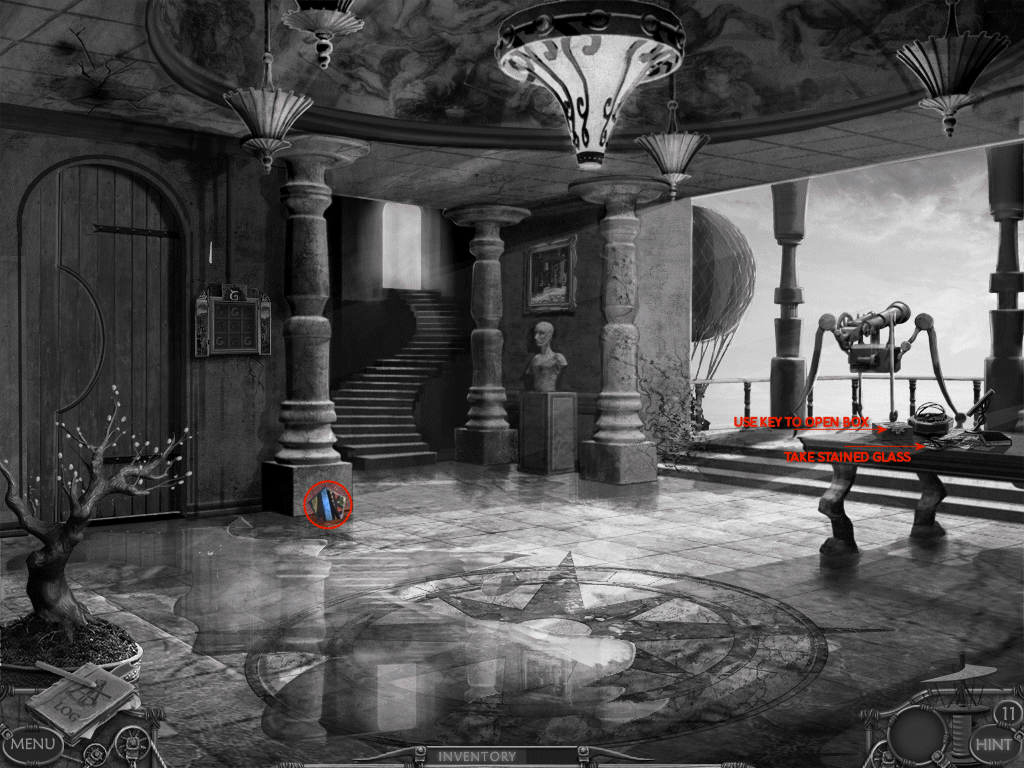
1. take the piece of the stained glass
2. examine the table – take the stained glass
3. open the box on the table with the key – take the beaker
4. go upstairs to the Water Reservoir
Water Reservoir
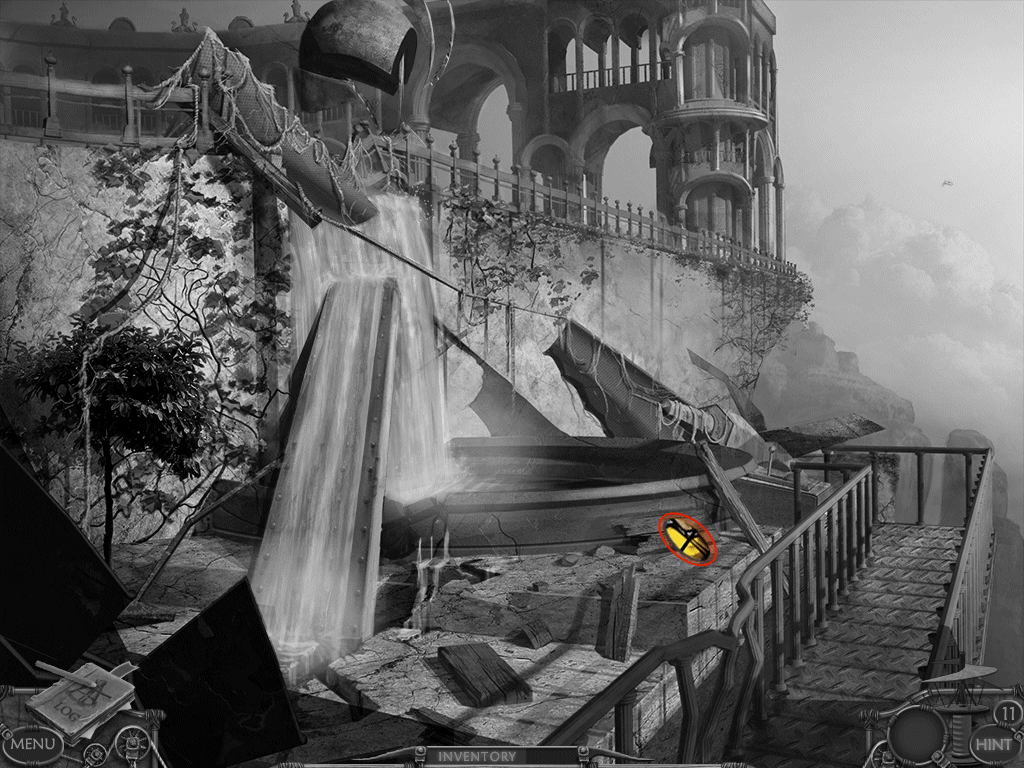
1. take the piece of stained glass
2. head back to the Hallway
Hallway
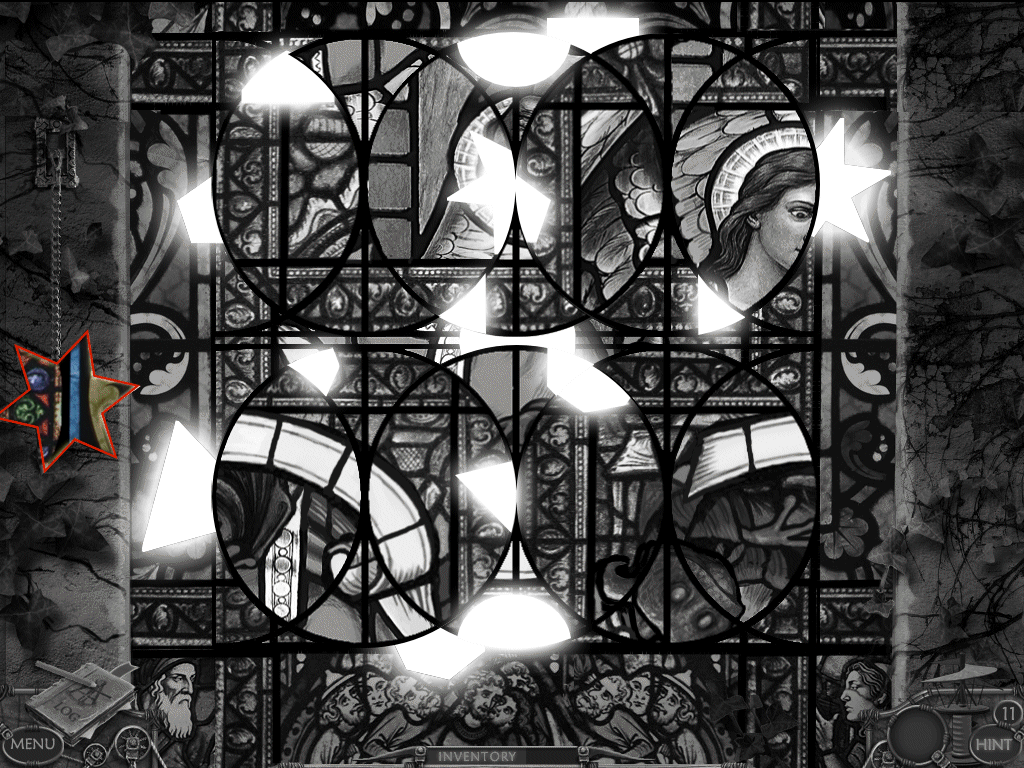
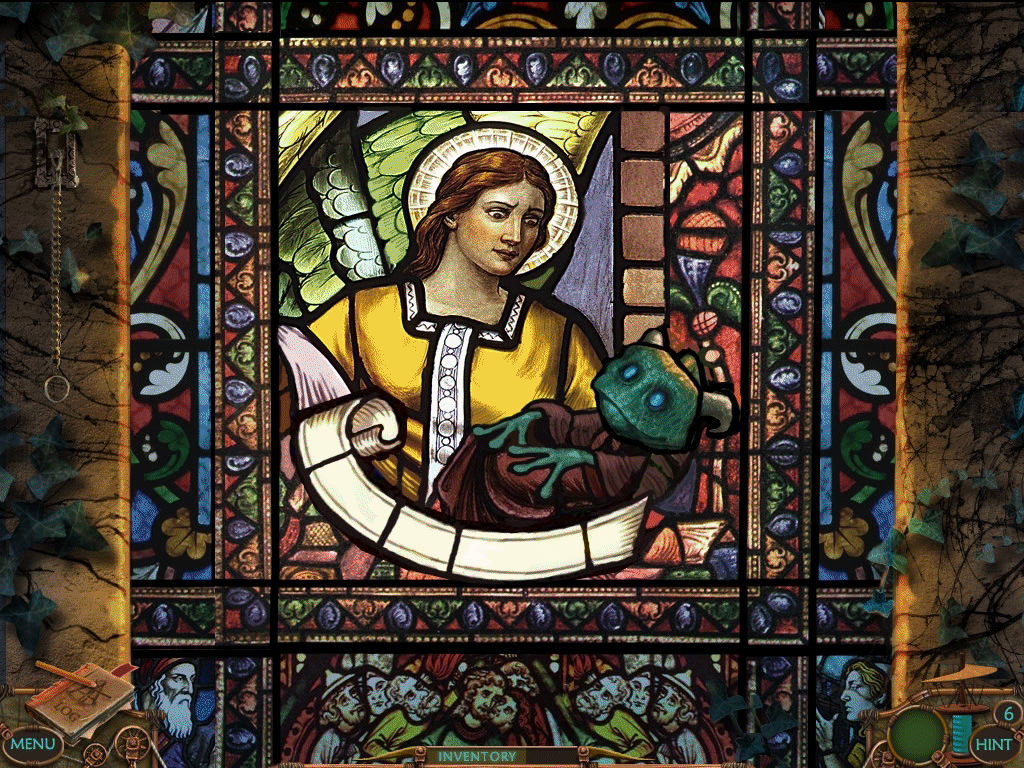
1. look left and find a broken stained glass window
2. pick up the star shaped stained glass to the left
3. now rotate the pieces so there are 6 different shapes
4. place the shapes you found inside them
5. rotate the pieces again until you have a complete picture
6. go through the door to the Botany Lab
Note: Remember you can skip puzzles by using hints!
Botany Lab
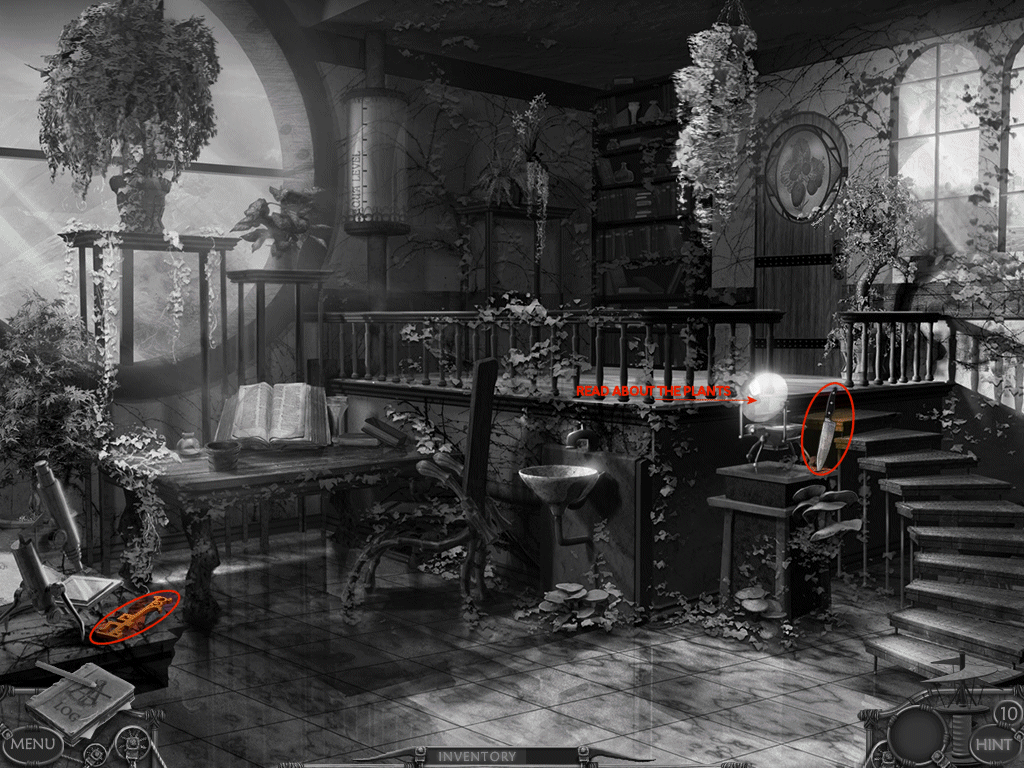
1. take the funny key on the left table
2. take the knife from the table on the right
3. examine the glowing object on the same table and read about the different plants by pulling the handle
4. go up the stairs and outside into the Garden
Garden
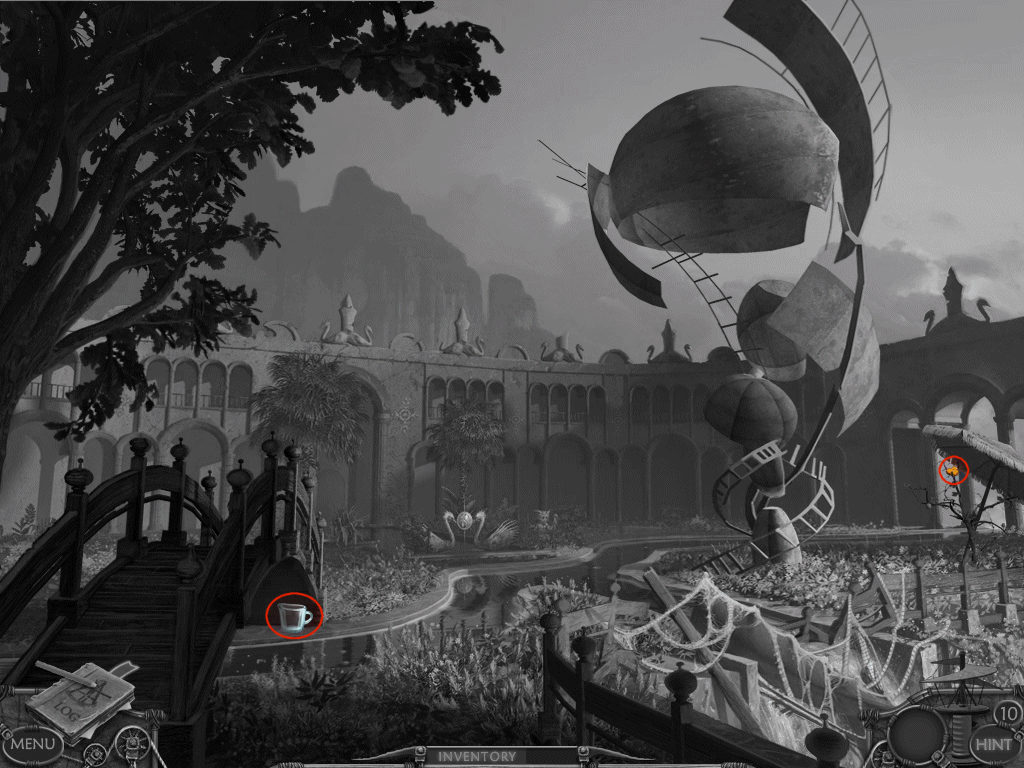
1. take the measuring cup under the footbridge
2. to the right are some branches – pick the Dire Shade berries
3. examine the structure in the middle – hmm, it has a weak spot
4. go back inside and go all the way back to the Water Reservoir
Water Reservoir
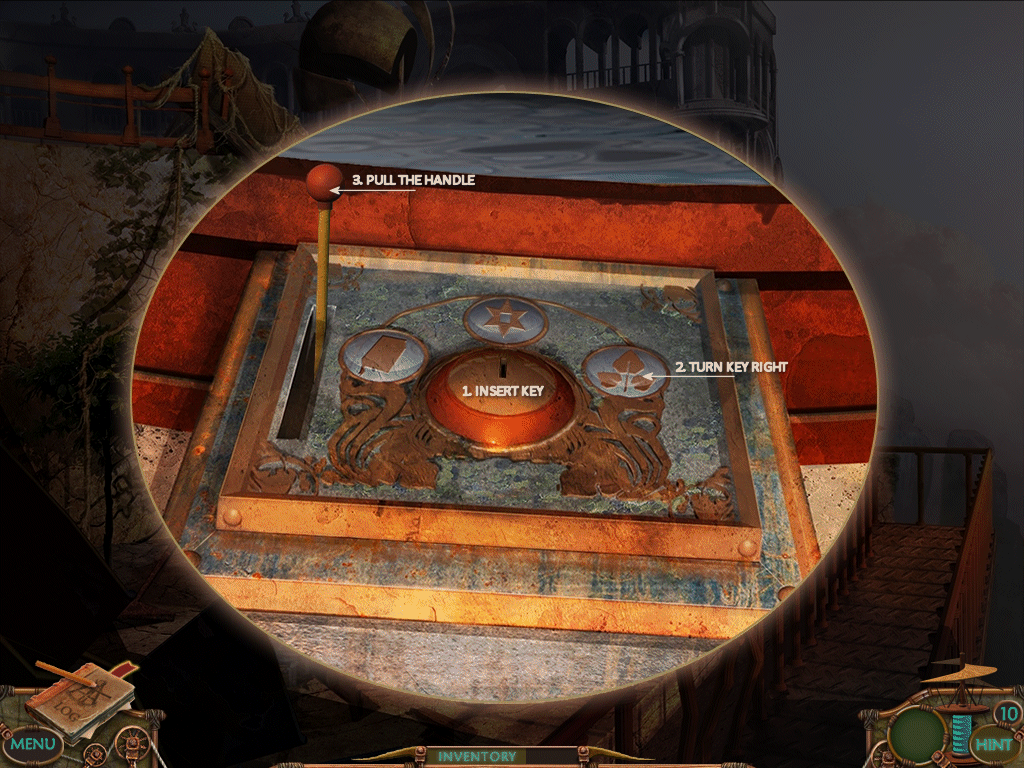
1. examine the box at the base of the water
2. insert the funny key and turn it one right – the leaf symbol will light up
3. now pull the handle – you just routed the water to the Botany Lab, return there
Botany Lab
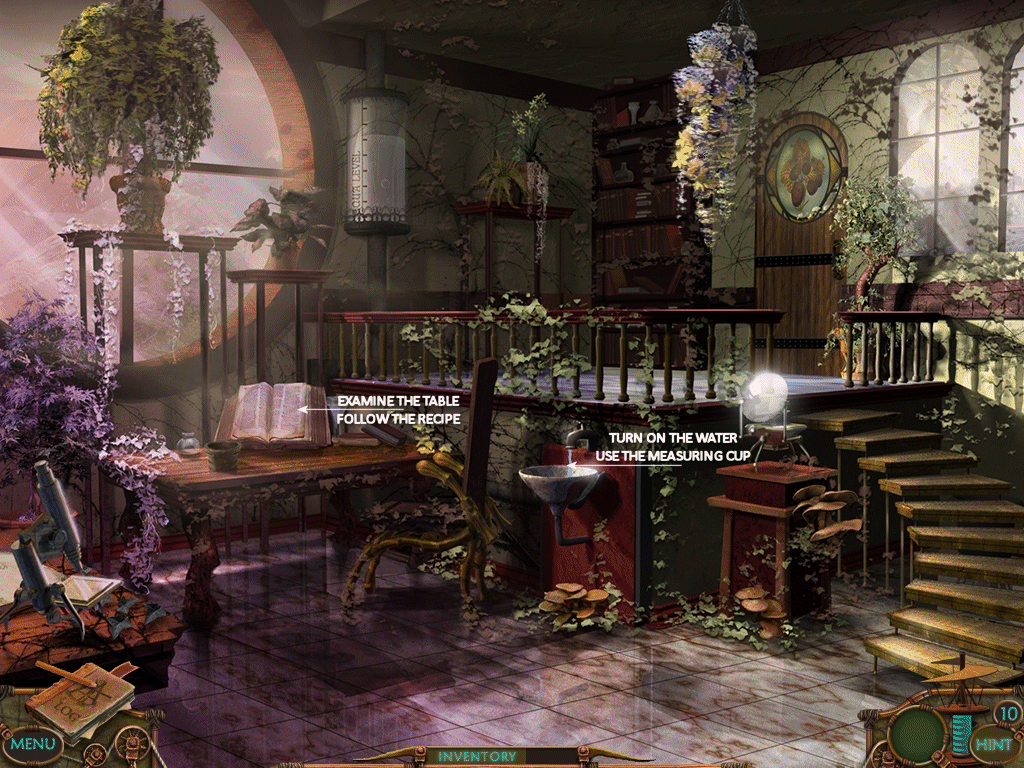
1. turn on the water
2. use the measuring cup to get some water
3. examine the table
4. read the recipe
• place the Dire Shade berries on the table
• use the knife on the berries
• place the sliced Dire Shade berries into the bowl
• use the pestle to crush them
• pick up the chemical X and pour it in
• pour in the water
• use the pestle to stir the mixture
• use the beaker on the mixture to hold it
5. don't forget to turn off the water before you leave!
6. go up the stairs to the Garden
Garden
1. examine the structure
2. pour the explosive mixture on it
3. step back and aim the blow gun at it
4. exit back downstairs to the Foyer
Foyer
1. examine the panel on the wall beside the door
• the object is to flip all the G's so they are facing the correct way
• they will also light up green when they are correct
• you have to flip 2 tiles at a time
• see the video for the solution – although puzzles may vary
2. enter Gideon's Room
Gideon's Room
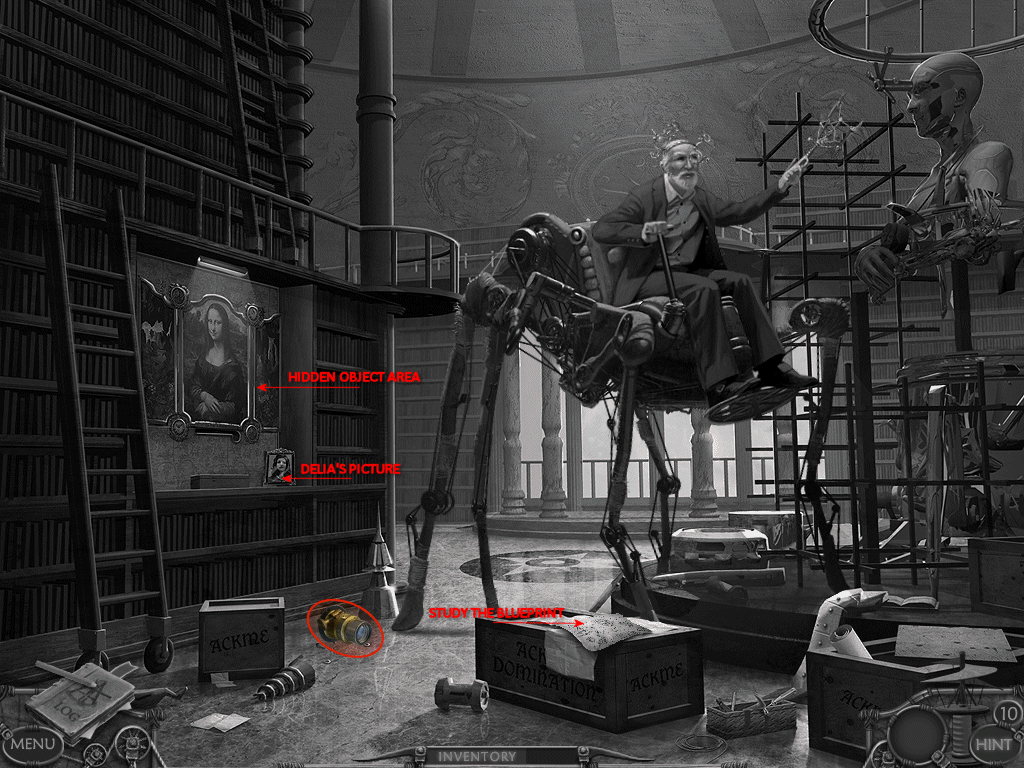
1. talk to Gideon and exhaust all conversations
2. pick up the telescope lens
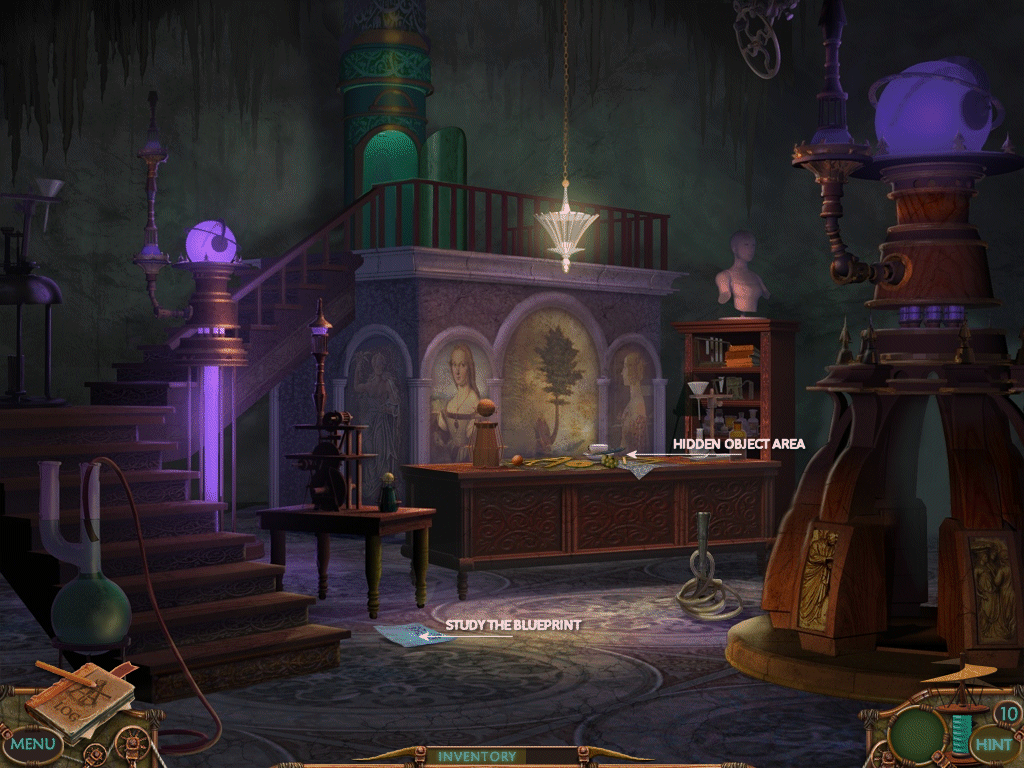
3. study the blueprints
4. look at the picture of Delia
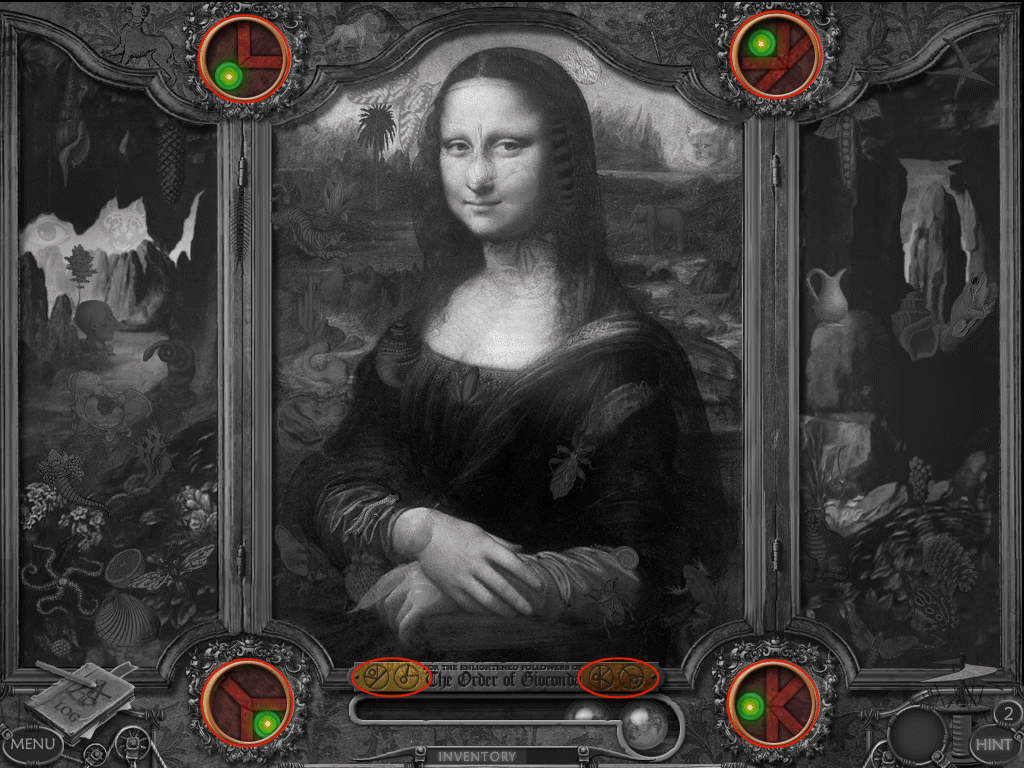
5. examine the picture of Mona Lisa and enter a hidden object area
• in the corner you will see a picture – find 6 objects in the picture that are similar
• for example: a ships wheel = ships, oars, canoe, etc.
• you will have to do this 4 times and the pictures vary
• after you solve them 4 new symbols will appear
• look at the symbols in the title plaque
• turn each symbol so it matches the ones on the plaque
• take the green marbles that appear
6. exit out to the Foyer
Foyer
1. use the lens on the telescope
2. move your cursor left or right to scan the picture
3. you'll see 2 islands and a sunken ship
4. exit out and return to the Garden – from there go up one and find a Pond
Note: If you accidently skip this stop, don't worry it's not absolutely necessary to advance!
Pond
1. the strange creatures you see on the edge of the pond are called Fargoyles according to the log book
2. place a green marble in each Fargoyle's hand
3. watch a door appear and some stepping stones
4. enter Gideon's Lab
Gideon's Lab
1. attempt to take the Bio-Coil
2. uh oh, locked inside, now what?!
3. examine the table and enter a hidden object area – find the letter
4. find 12 related pairs
5. read the letter to her father and make note of the numbers attached
6. look at the blueprint for the time machine
7. go upstairs to the Elevator
Elevator
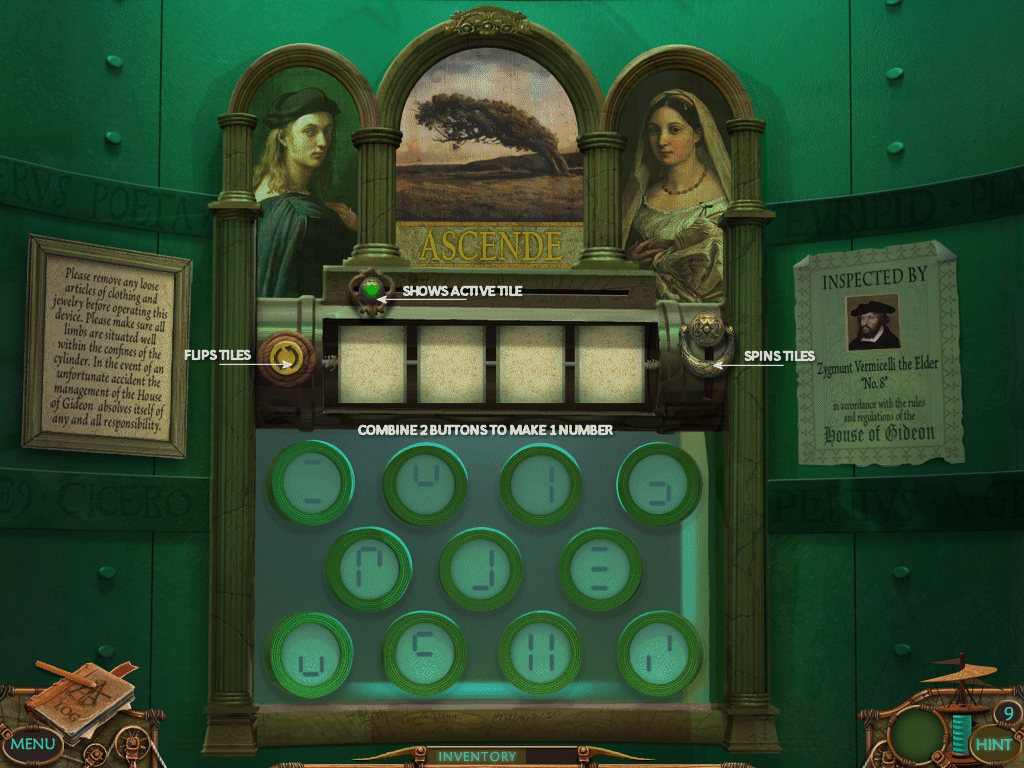
1. now for the somewhat complicated elevator
2. first you need the numbers you found in the letter
• the button on the left flips the panels
• the handle on the right spins the panels very fast
• you can click on each individual panel – there are 4 total
• click on the first panel and click the button that is HALF of your first number
• it might help you to get a calculator out and compare your numbers
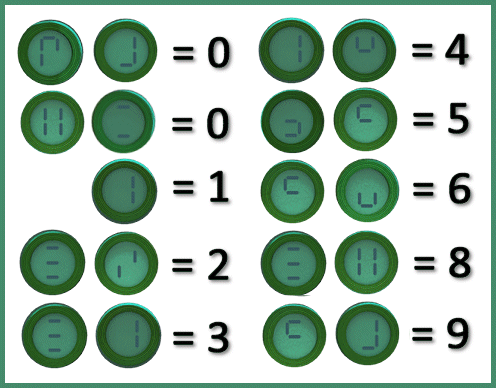
• each number is made up of 2 images
• now push the button the left to flip the panels
• while still on the first panel – click the button that is the second half of your first number
• want to see if you're right? pull the handle on the right and it will spin fast enough to make them blur together
• do this for all 4 numbers
• see my guide if you are not sure which combination makes what number
3. when you are done pull the handle and hold on!
Chapter 4: Buried Secret
Crystal Cave
1. pick up the piece of rock with the triangle on it
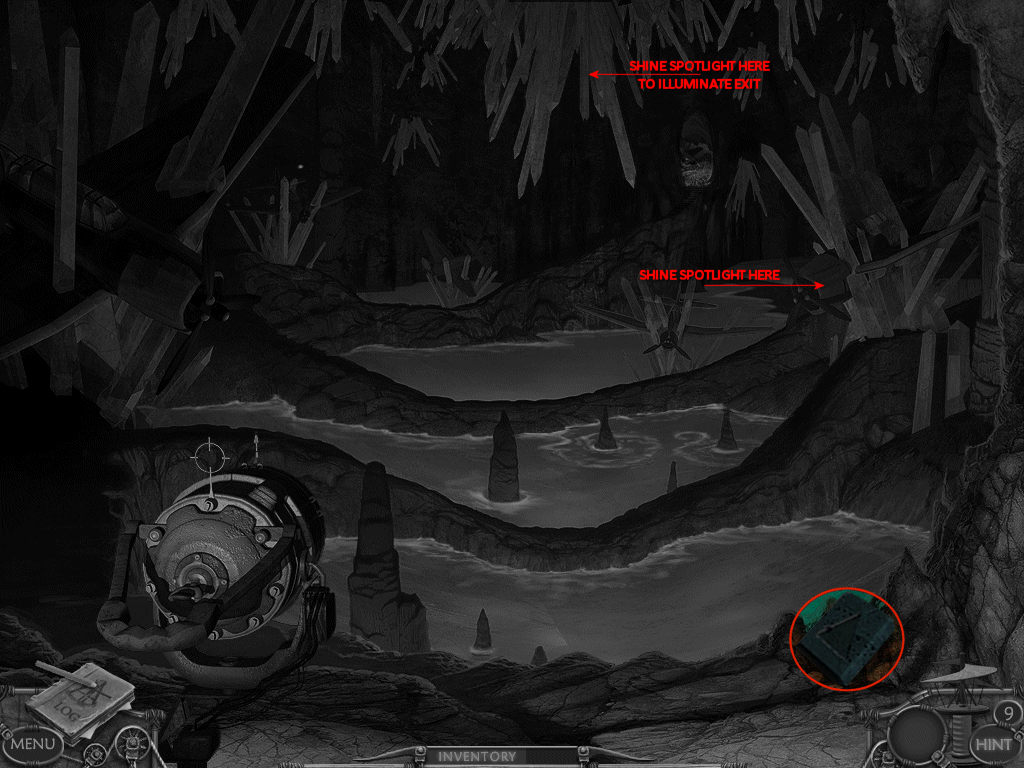
2. play with the spotlight – it lights up a bunch of planes
3. point the spotlight to the right until it lights up a plane
4. examine the plane – we need to remove the crystals to get the jet pack
5. move the spotlight again until it lights up the crystals at the top, illuminating the doorway
6. exit through the door to Phoebe
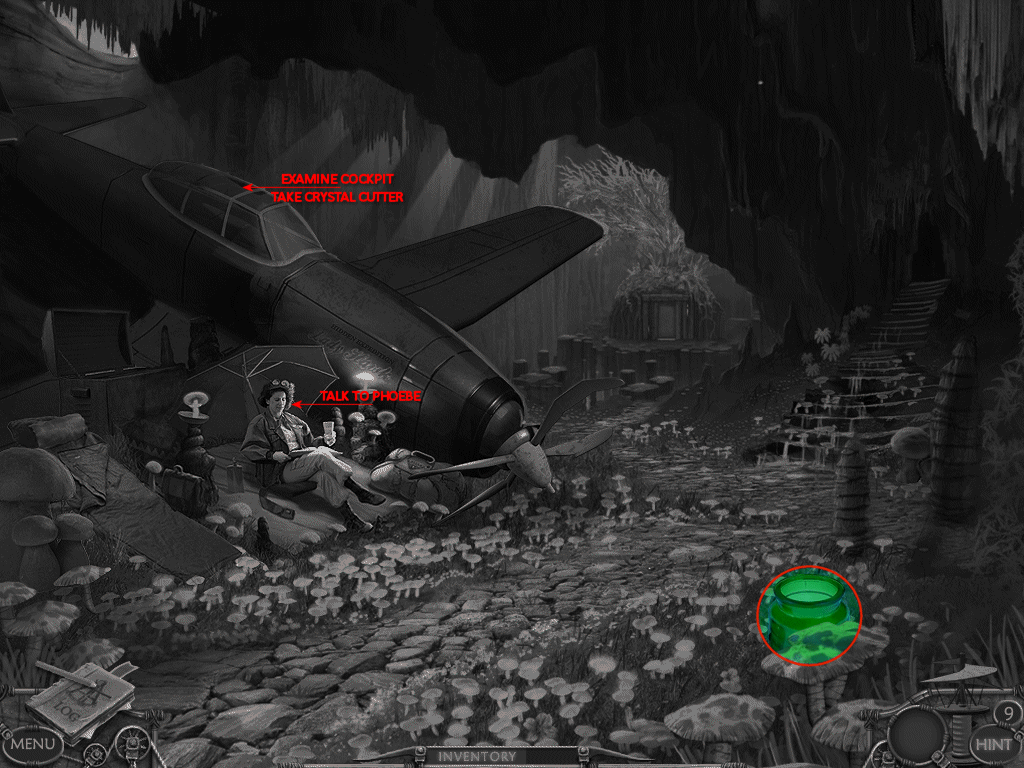
Phoebe
1. talk to Phoebe and exhaust all conversation – receive an object from her
2. pick up the green glass jar
3. examine the airplane – take the crystal cutter
4. exit back to the Crystal Cave
Crystal Cave
1. aim the spotlight at the plane again
2. examine the plane use the crystal cutter to get rid of the crystals
3. open the door and take the jet pack
4. go back to Phoebe and up to the Graveyard
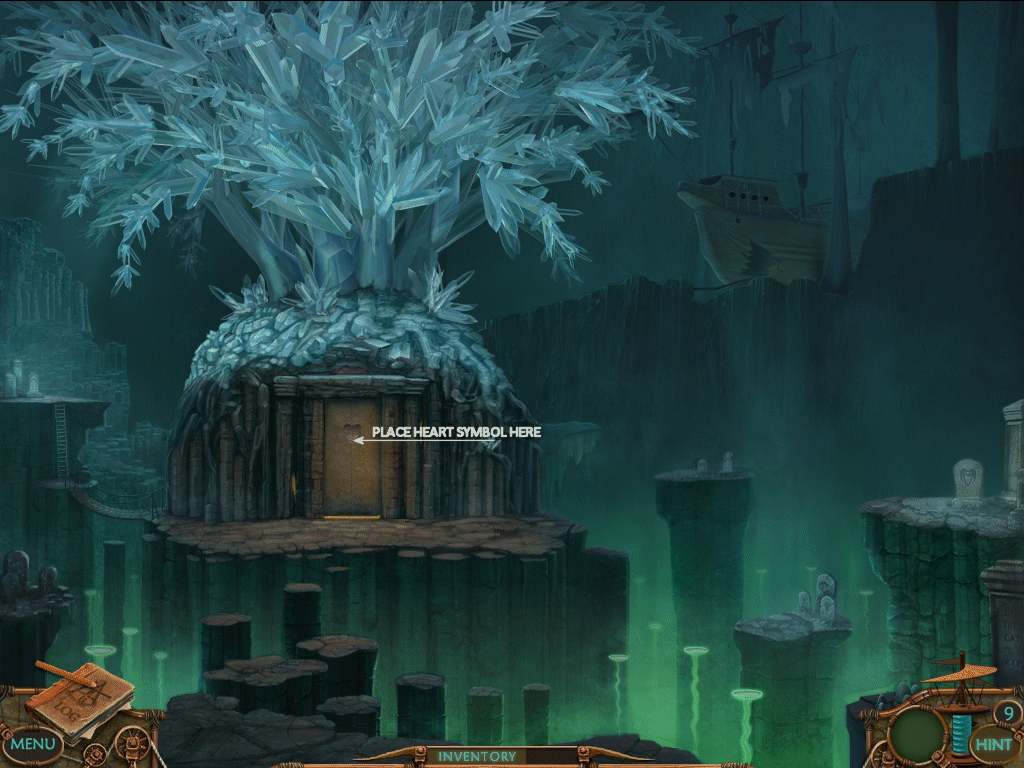
Graveyard
1. examine the main door and place the heart shape you got from Phoebe in the door
2. enter Ely's Tomb
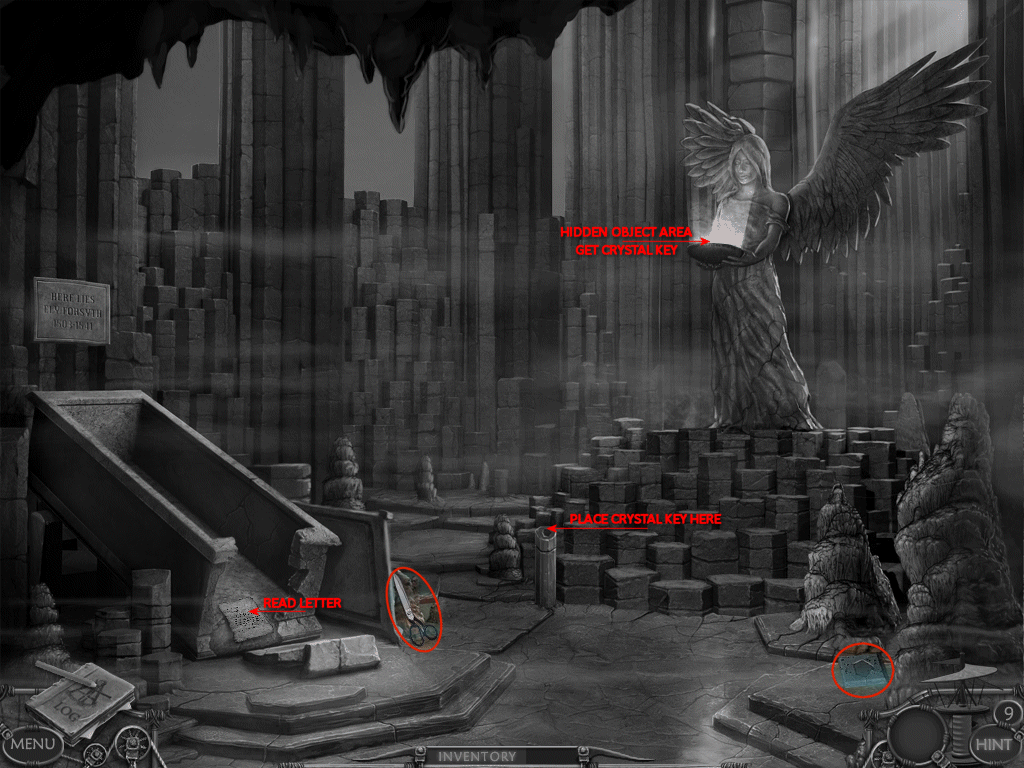
Ely's Tomb
1. pick up another piece or rock with a symbol on it
2. pick up the scissors
3. read the letter to Delia from her mother
4. click the glowing bowl the angel is holding and enter a hidden object area
5. take the crystal
6. examine the baste of the statue – you'll see a column with a hole in it
7. place the crystal in that column
8. go down the secret passage
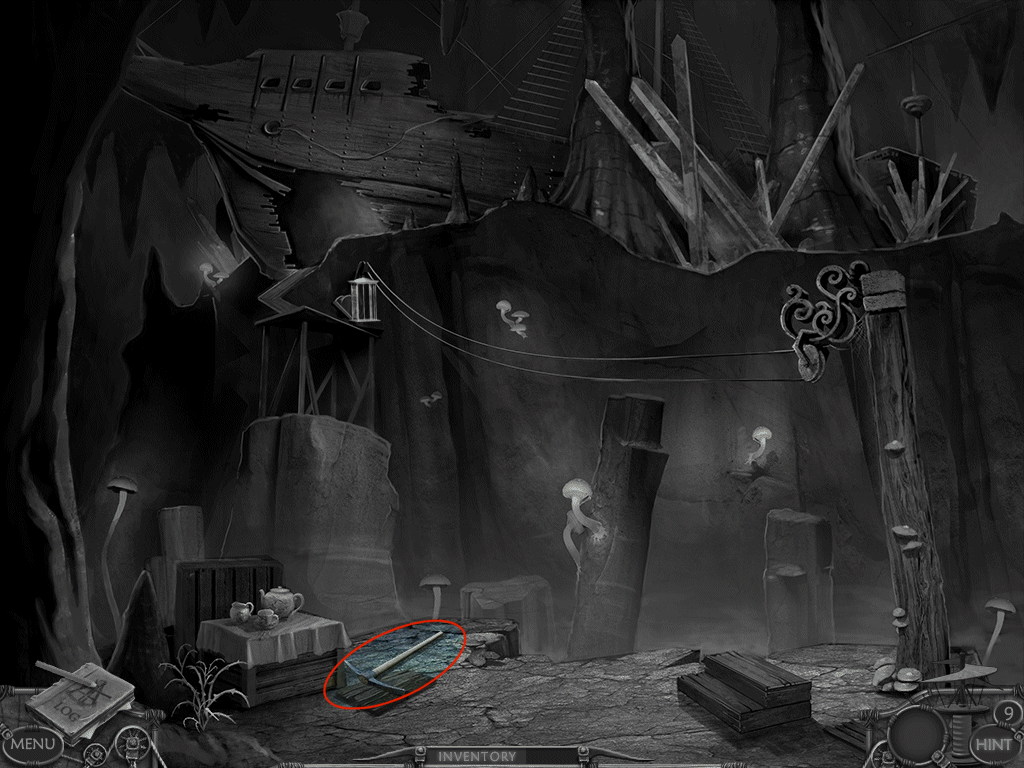
Dead End
1. take the pick axe
2. exit back to Phoebe
Phoebe
1. look at the top of the steps
2. use the pick axe on the rocks
3. use the scissors on the silk – the grappling hook
4. go back to the Dead End
Dead End
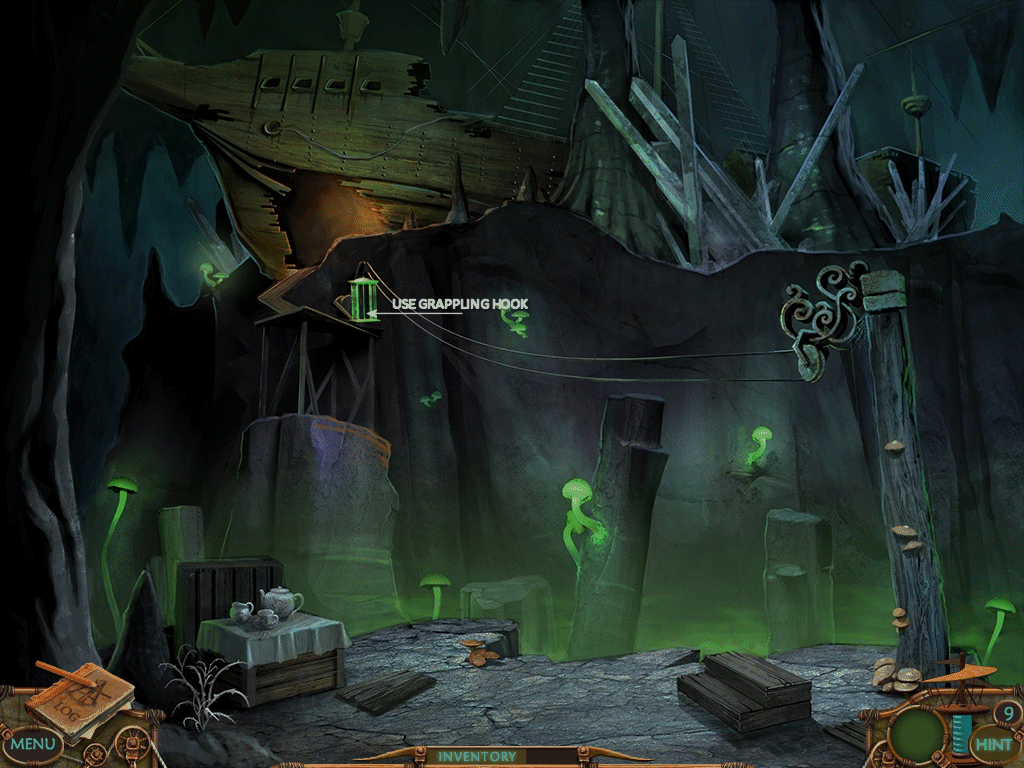
1. throw the grappling hook up on the cage at the far end of the line
2. enter the cage and proceed to the Ship
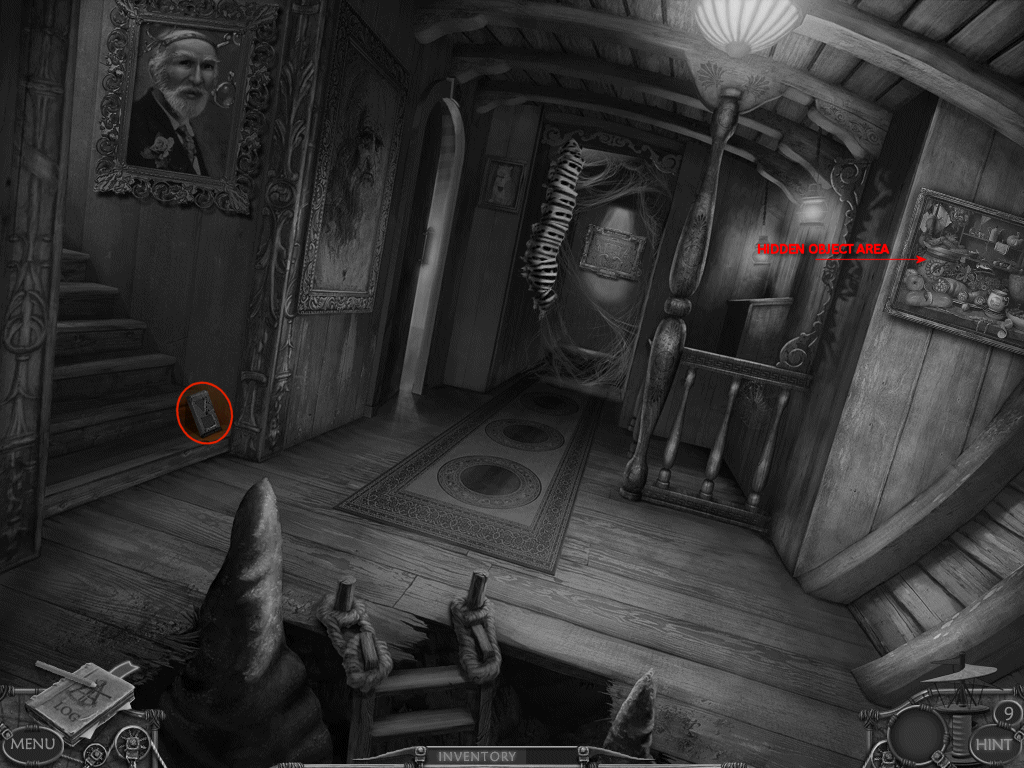
Ship
1. woah! that is some caterpillar over there weaving... silk?
2. take the piece of stone with the symbol on it
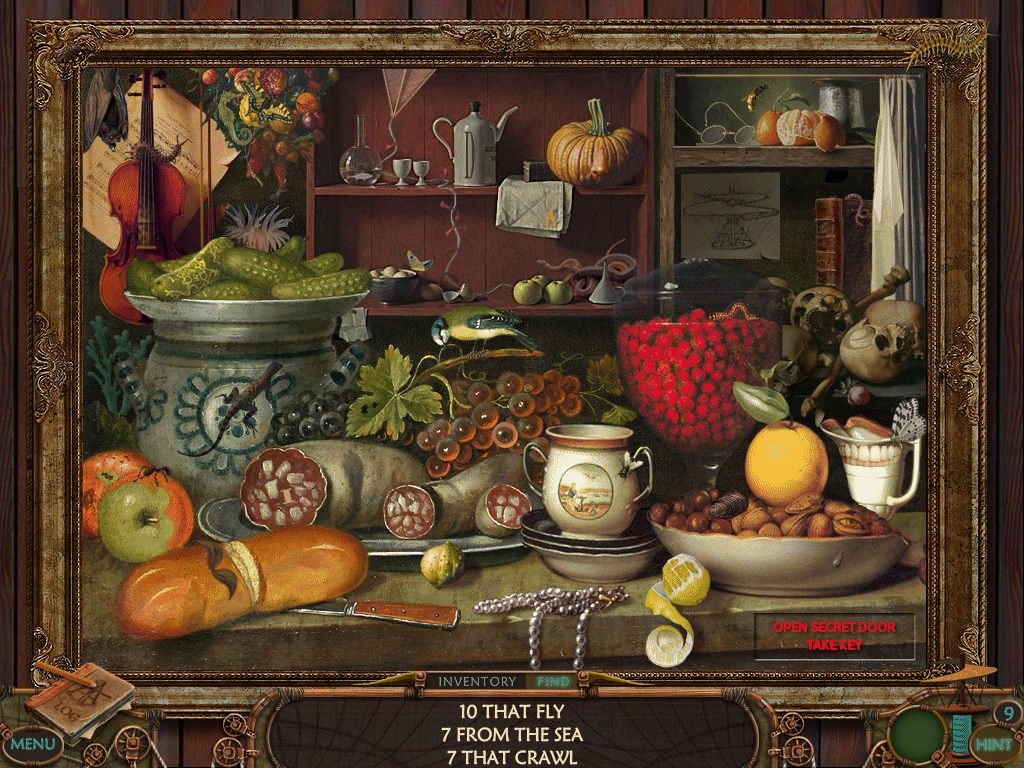
3. examine the picture on the right and enter a hidden object area
4. open the hidden door at bottom, right and take the key
5. go left into the Bedroom
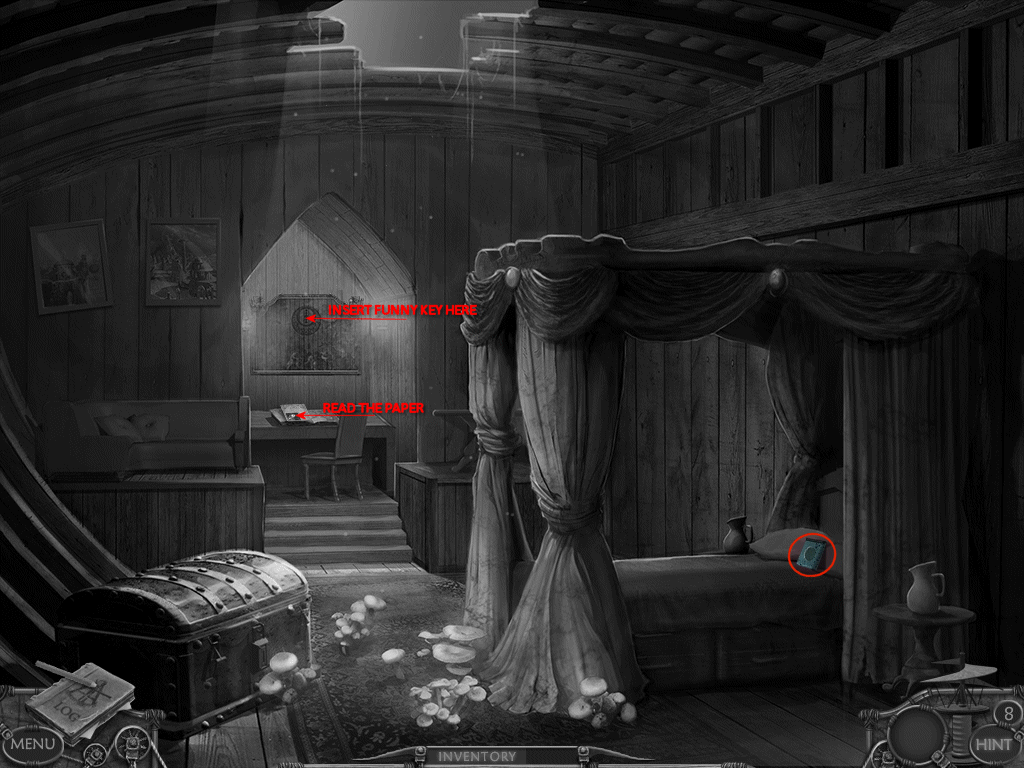
Bedroom
1. take another symbol off the bed
2. examine the picture on back wall – place the funny key in the indentation
3. find 12 related pair – get the flint from his open mouth when you are finished
4. read the newspaper on the desk – hmm, not good news!
5. exit out and go up the stairs to the Salamander
Salamander
1. pick up the symbol
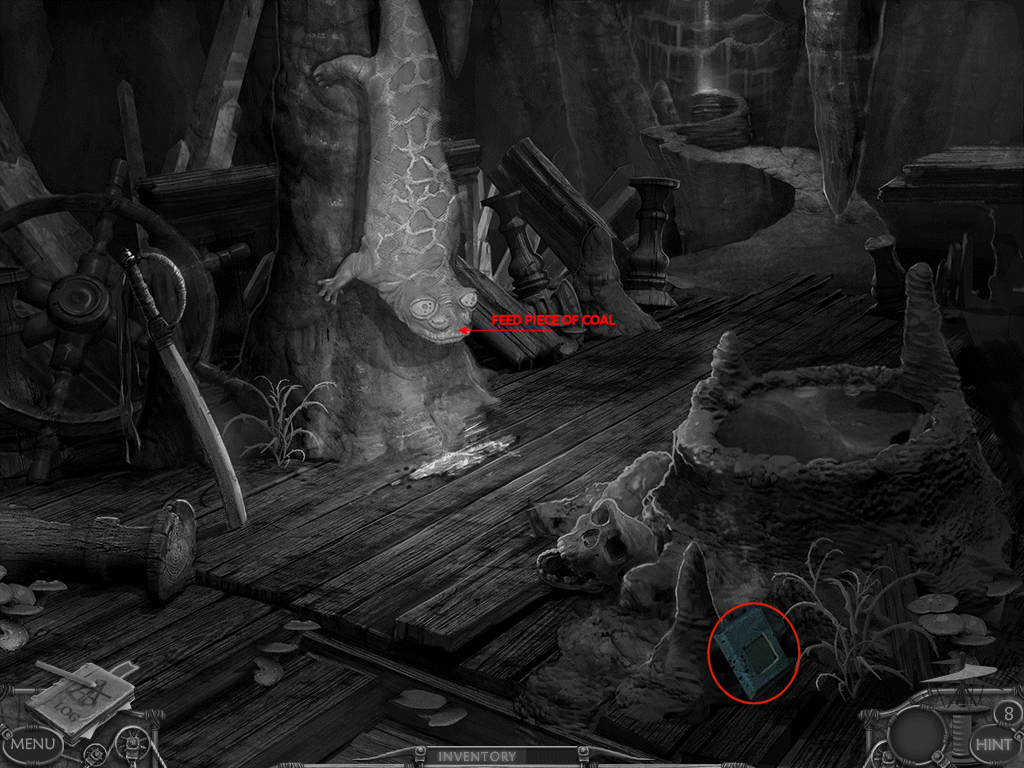
2. feed the hot coal to the salamander
3. go up to the Exit
Exit
1. take the symbol
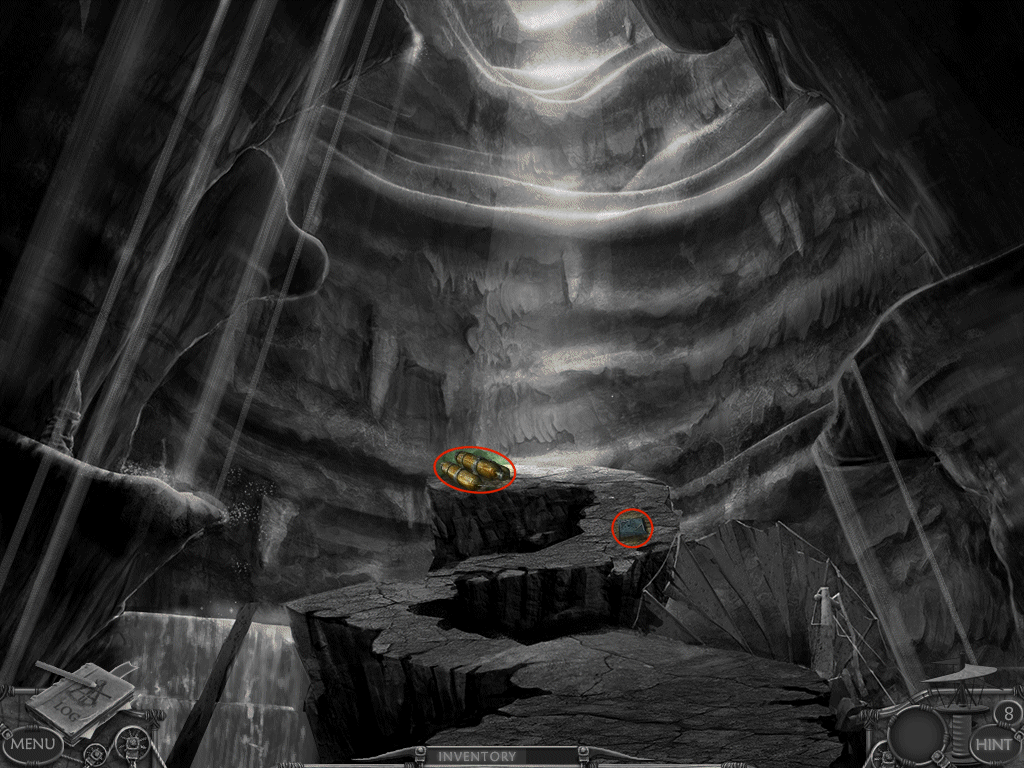
2. pick up the jet packs
3. exit back to the Graveyard and go left to the Headstone
Headstone
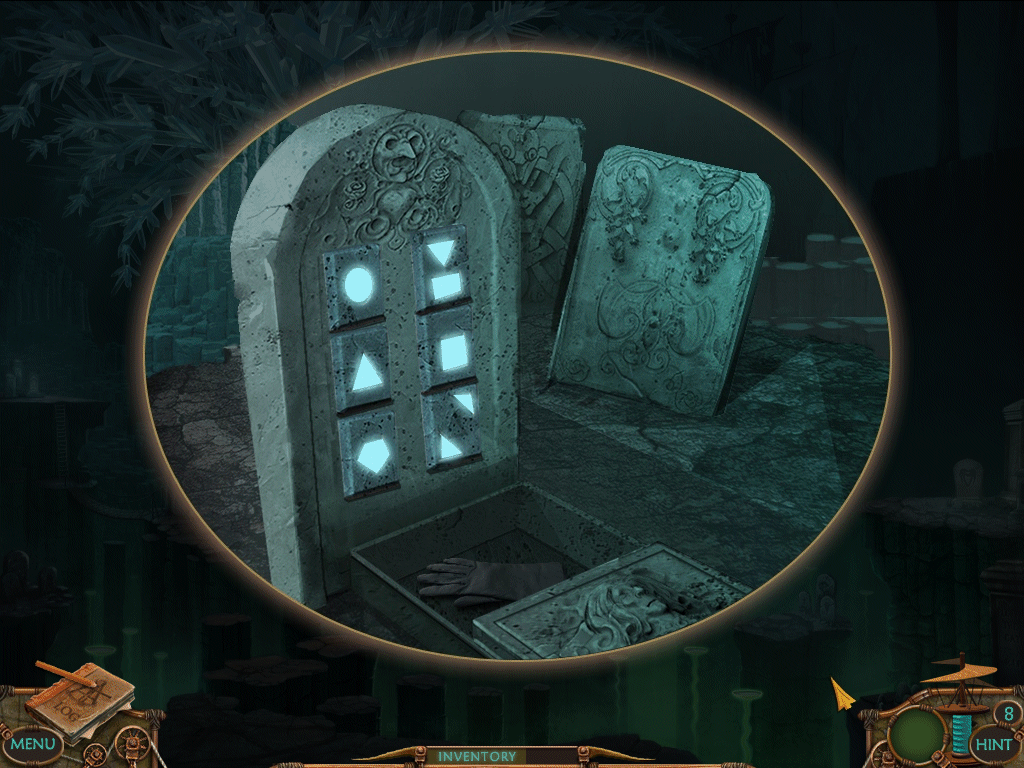
1. take the symbols pieces you found and place them in the correct spots
2. you will know they are in the correct spot when they light up
3. take the gloves
4. exit back to the Salamander
Salamander
1. combine the glove with the green bottle
2. dip it into the sulfuric acid
3. return to the Bedroom
Bedroom
1. examine the trunk
2. use the sulfuric acid on it
3. take the spray can
4. exit the Bedroom
Ship
1. use the spray can on the nasty worm
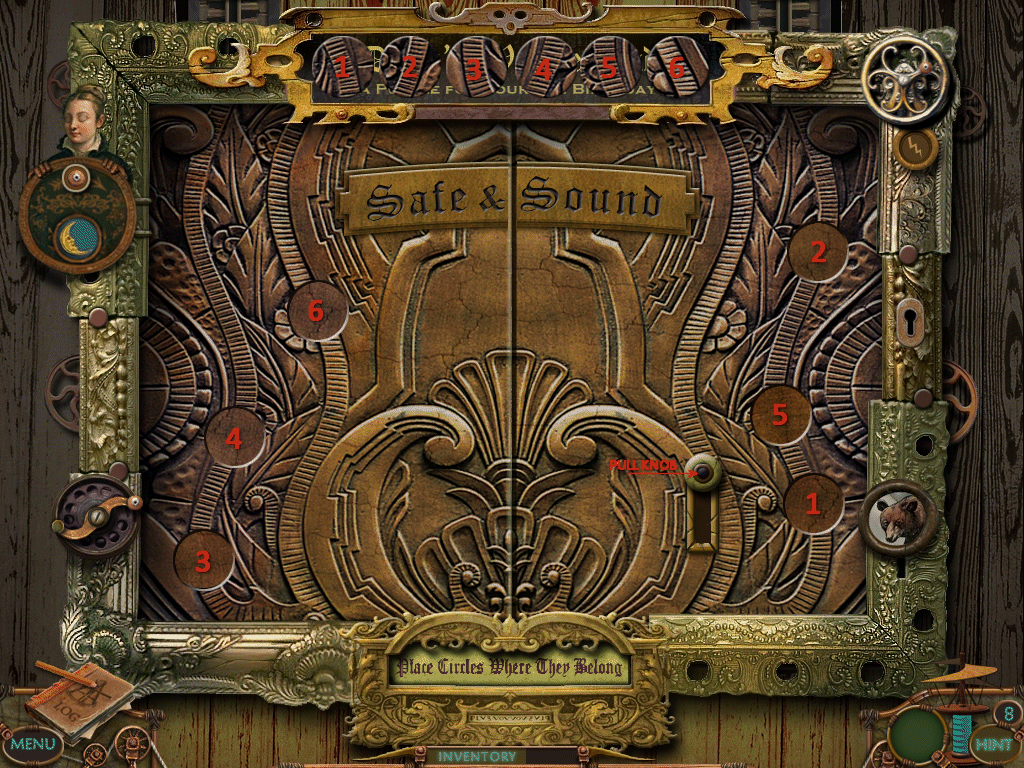
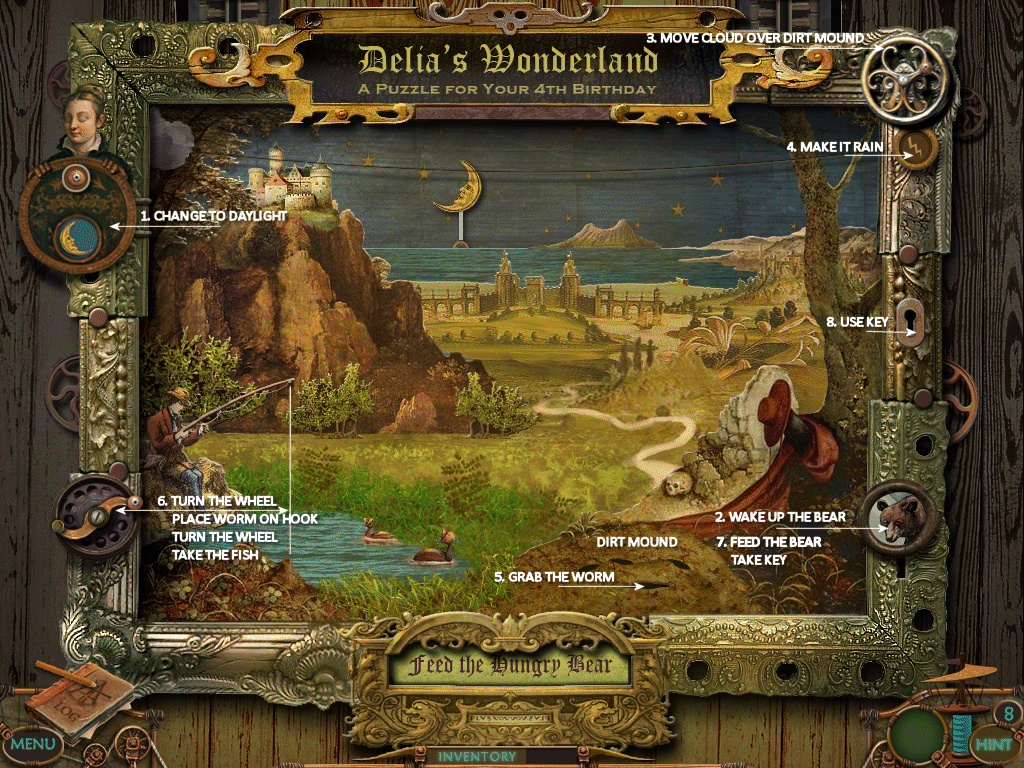
2. examine the picture in the back
• place the circles at the top into the correct spaces
• pull the knob
• now we need to feed the bear
• step 1: make it day light
• step 2: click on the bear button
• step 3: turn the upper, right wheel until the cloud is over the dirt mound
• step 4: click the lightning bolt
• step 5: take the worm
• step 6: turn the wheel beside the fisherman
• step 7: place the worm on the hook
• step 8: turn the wheel 2x
• step 9: take the fish
• step 10: feed the bear
• take the key and use it in the keyhole
• take the control module
3. go back to the Exit
Exit
1. combine the 3 items in your inventory
2. look up and use your jet pack – click on the hole
Chapter 5: Showdown In The Windy City
Windy City
1. go down and talk to Earl
2. exhaust all conversations
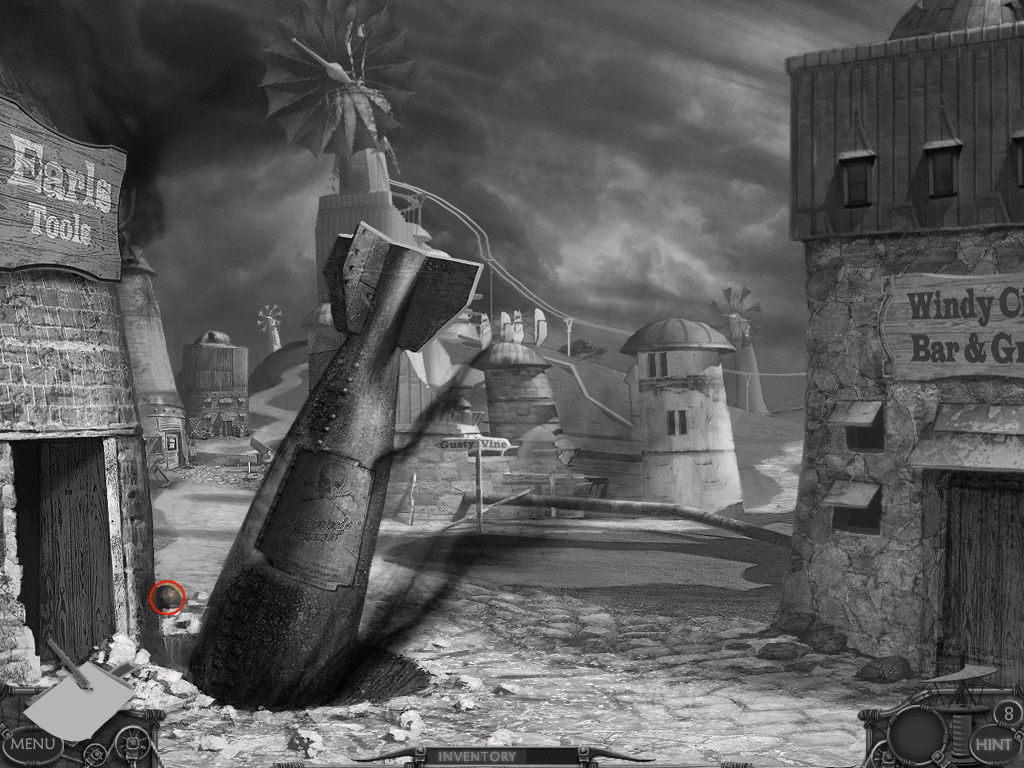
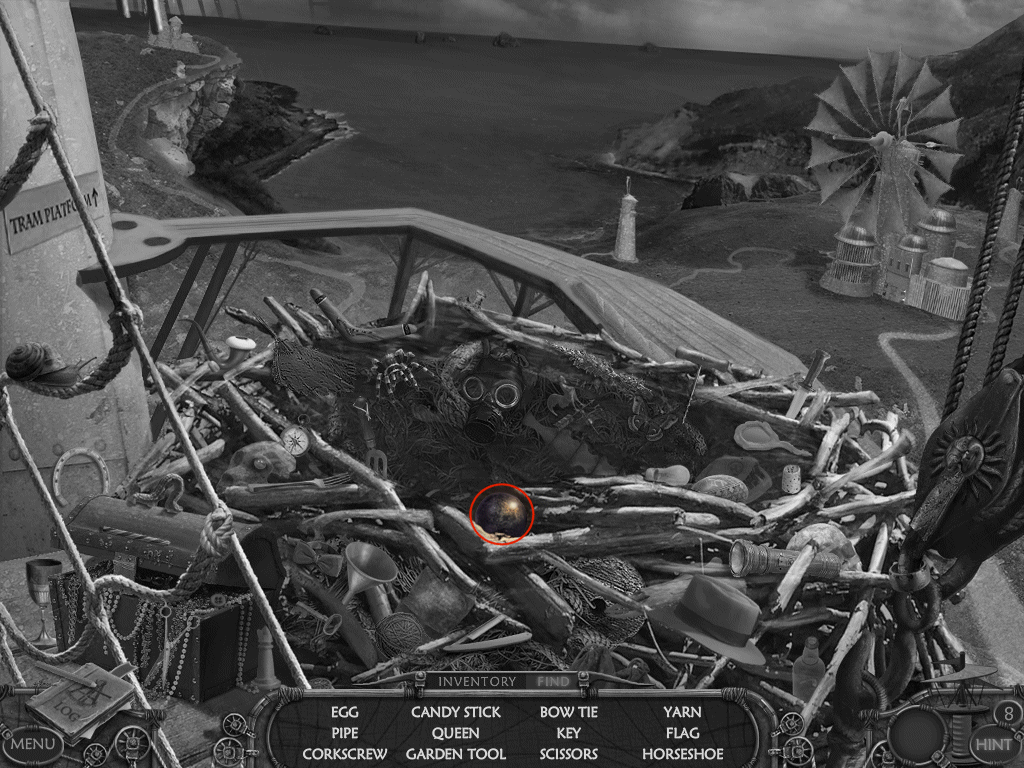
3. pick up the cannon ball
4. exit down and enter the Power Station
Power Station
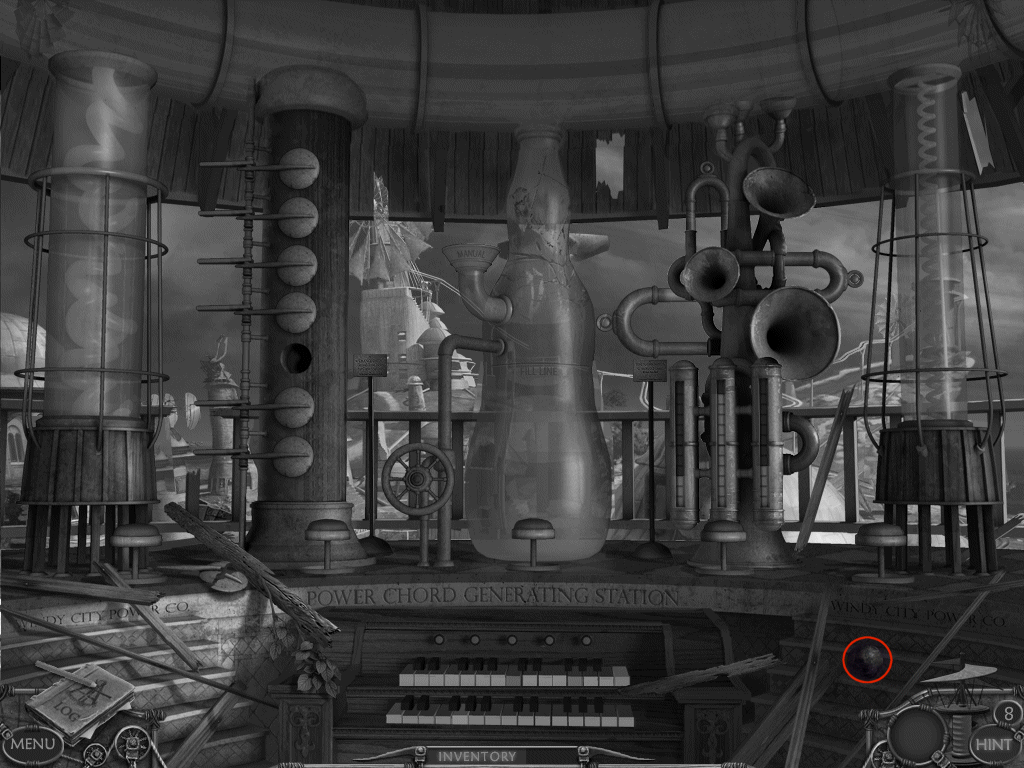
1. pick up the cannon ball
2. go up twice to Game Guy
Game Guy
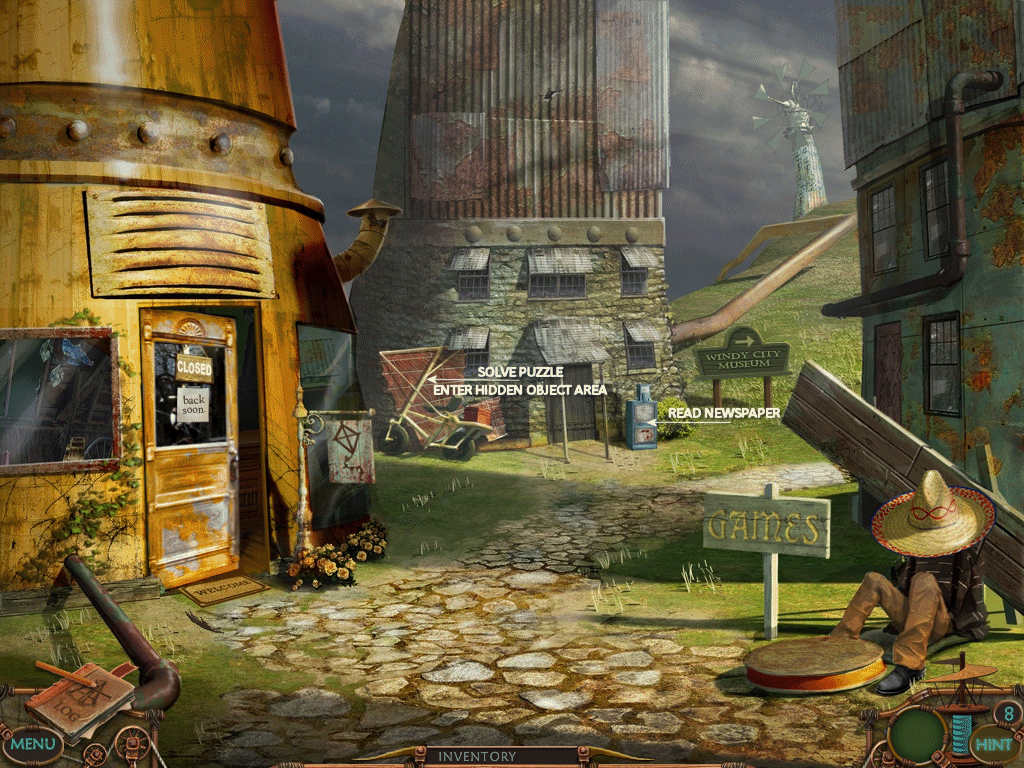
1. you need a "game guy token" to play
2. read the newspaper
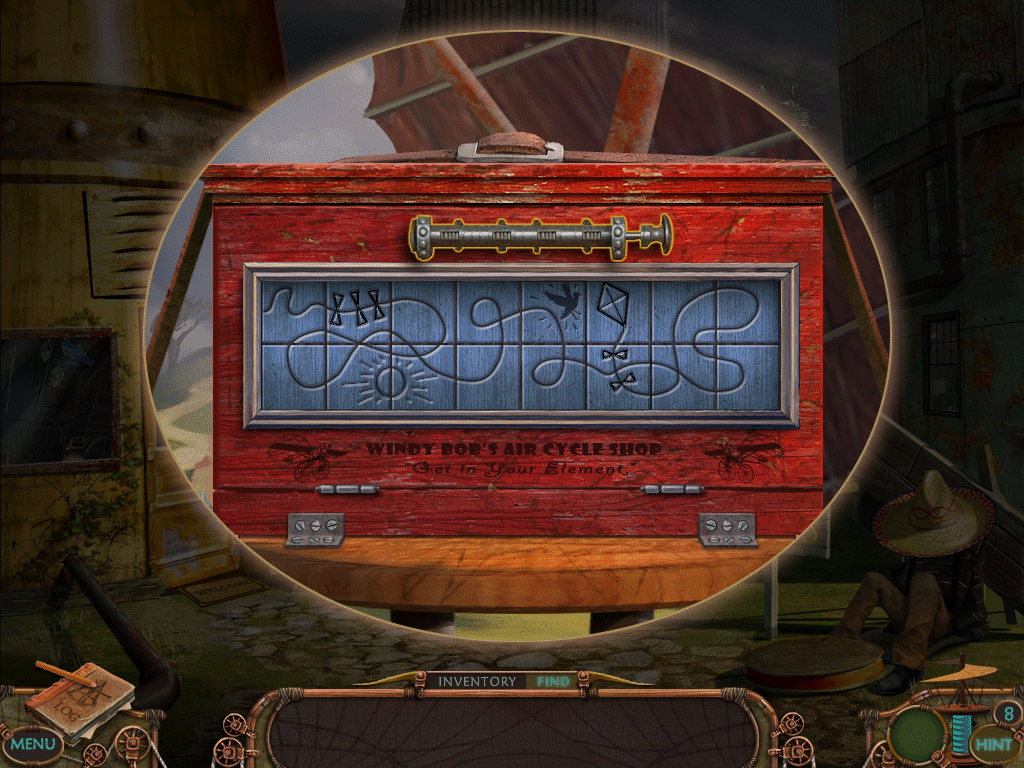
3. examine the bicycle in the distance
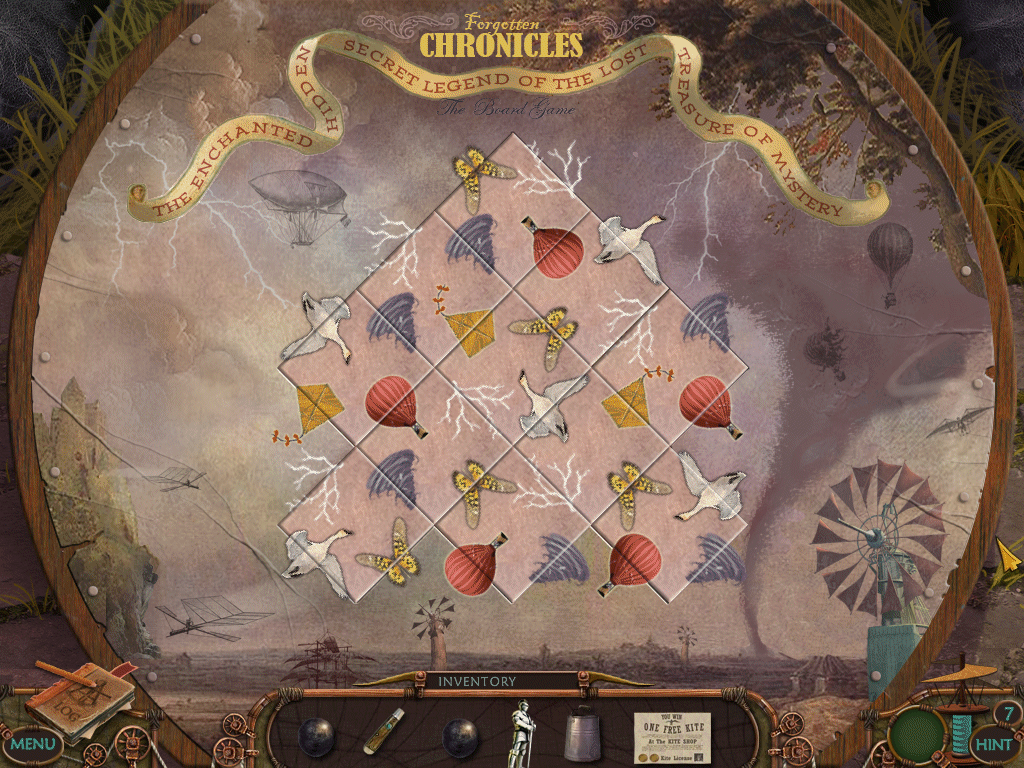
• rearrange the tiles so they form a kite with a very long, winding string
• hint: the bird is about to run into the kite
• hint: the sun is on the bottom
4. after you solve the puzzle you will enter a hidden object area – you will have to interact with some items in order to find what you need
• all the items sent into inventory will be needed to find an item
• for example: find the hammer to use on the nail; use the scissors to cut the string to get the peeler to use on the apple to get the worm
• you will have to find EVERY item in the box
• I thought the puzzles were pretty logical, but if you're not sure you can use a hint or just click around – enjoy!
5. take the multi-tool
6. go right to the Museum
Museum
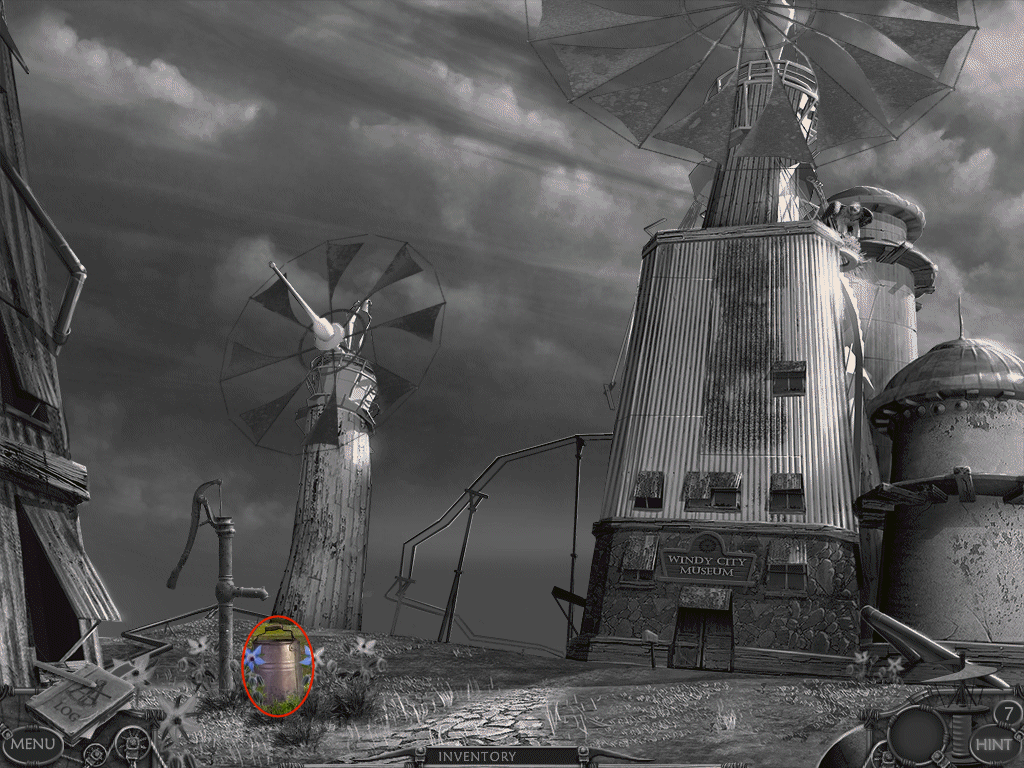
1. take the water bucket before entering the museum
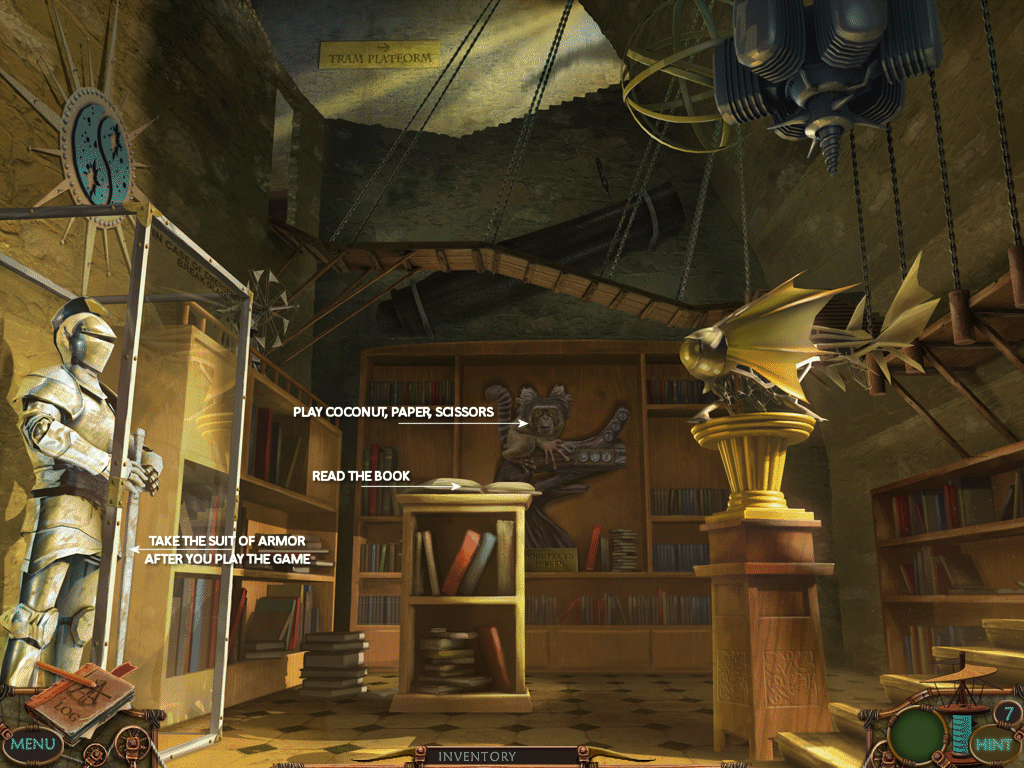
2. read the book on the pedestal
3. examine the weird creature
• this is a game of rock – well coconut – paper, scissors
• you have to win this game 3 times and the weird creature will throw the coconut
4. take the suit of armor
5. go up to the Birds Nest
Birds Nest
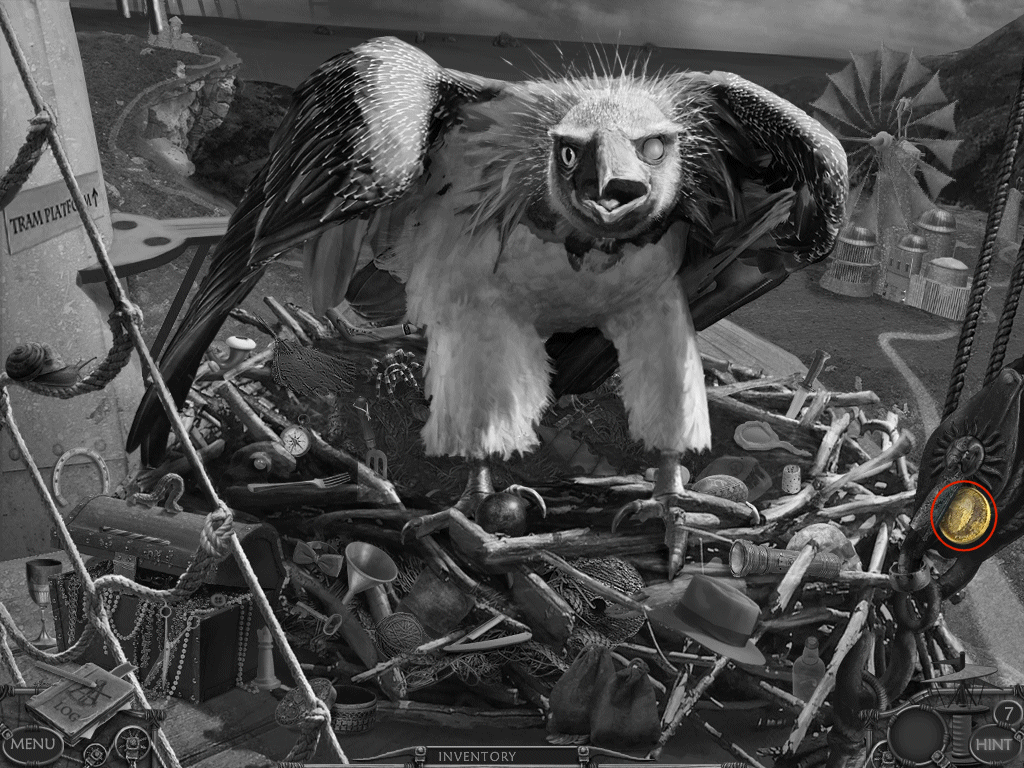
1. take the "game guy token"
2. return to the Game Guy
Game Guy
1. give the game guy his token
• the object of the game is to match all the sides
• click the playing piece to be dealt the cards
• you can click a card to rotate it
2. enter the Kite Shop
Kite Shop
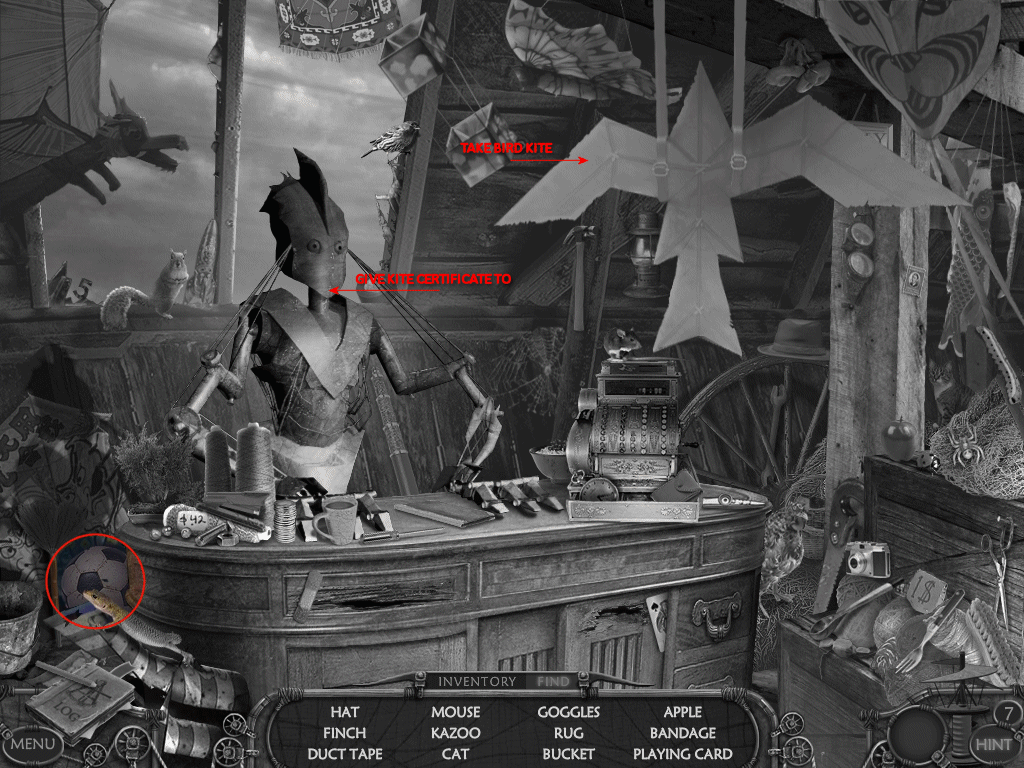
1. take the soccer ball
2. hand the robot your free kite ticket
3. take the white bird kite
4. go back to the Bomb
Windy City – Bomb
1. now that you have the suit of armor you can diffuse the bomb – I hope...
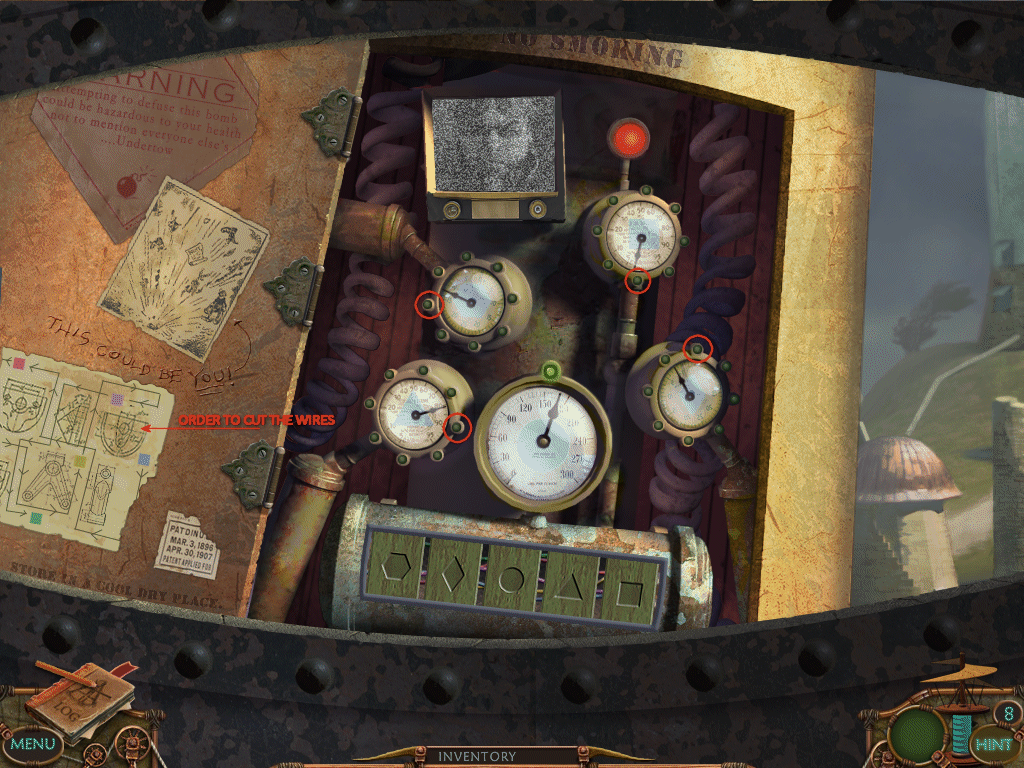
• click on the bomb and use the multi-purpose tool to open it
• you need to open all the doors before you can snip the wires
• they must all move at the same time
• above the dials are round lights – click them 1 at a time until each of the doors are going up and down in sync
• look at the diagram on the left side – it shows the order to snip the wires
• hint: you start with the blue
• use your multi-purpose tool to diffuse the bomb
• solution: blue, pink, yellow, purple, green
2. enter the Earl's Tools
Earl's Tools
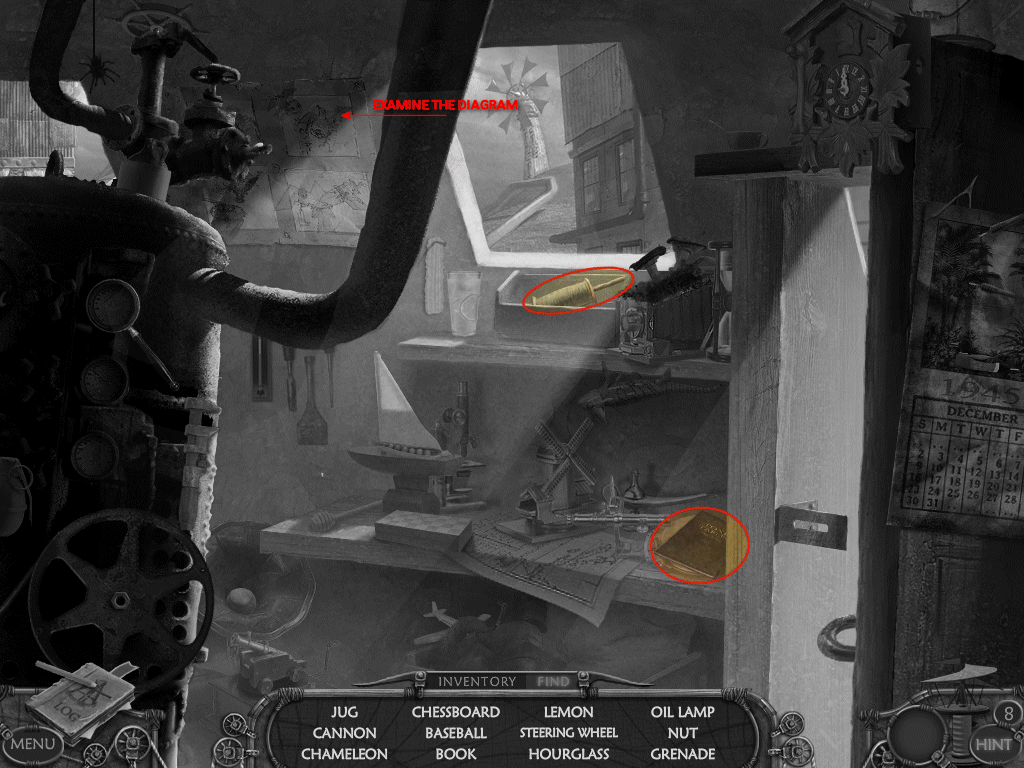
1. find the book – read about the tone tables
2. find the kite string
3. look at the diagram – a way to get rid of the bird!
4. return to the Museum are
Museum
1. combine the kite and string
2. use the kite on the left windmill
3. hurry up the Birds Nest
Birds Nest
1. find the cannon ball
2. return to the Power Station
Power Station
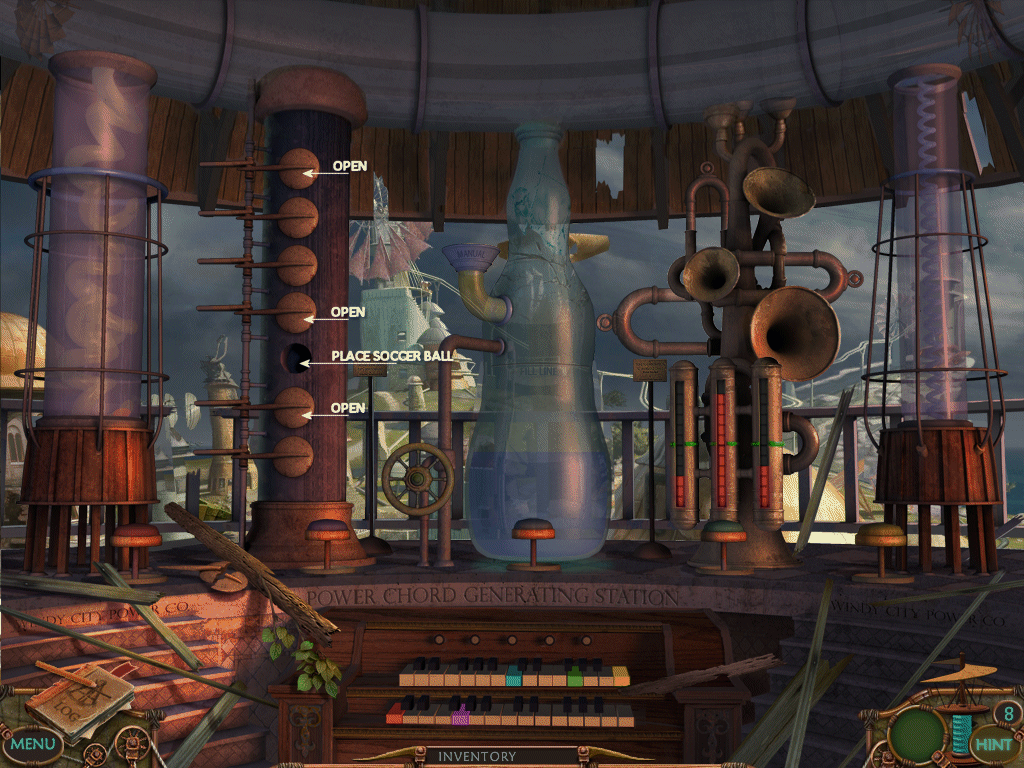
1. there is an open spot in the 2nd from left column – place the soccer ball in it
2. examine the sign beside it
3. open up your log book and read the tone tables
• there is note of today's date behind it – July 23rd
• find that date on the tone table
• mark down what is open/closed for that day – open, closed, closed, open, closed, open, close
• click on the column and open/close the doors until it matches
• push the button in front of it
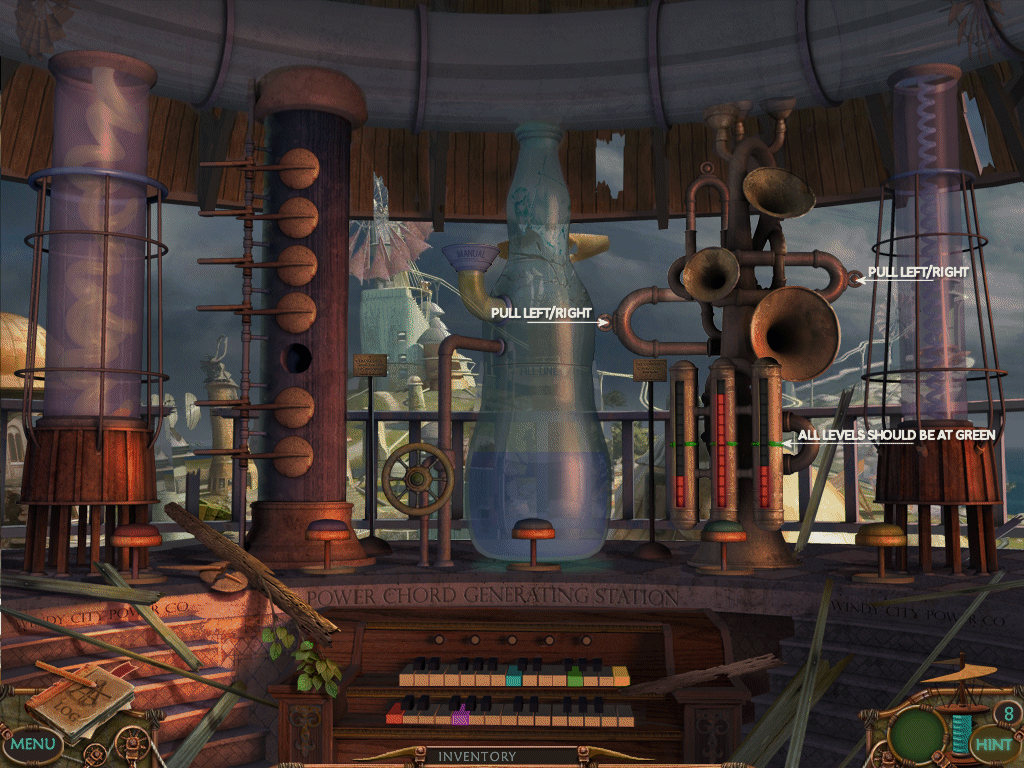
4. examine the column that looks like a bunch of tuba's – read the plaque
• you need to set them all to the green lines
• hover your mouse at the edge of each lever and you will see an arrow
• you can pull the side ones left and right
• you can pull the top one up or down
• by pulling these left or right you can change the levels
• note: you do not need to use the up or down
• solution: left = pull right 3 times; right = pull right 11 times; right = pull left 5 times
• push the button in front of it
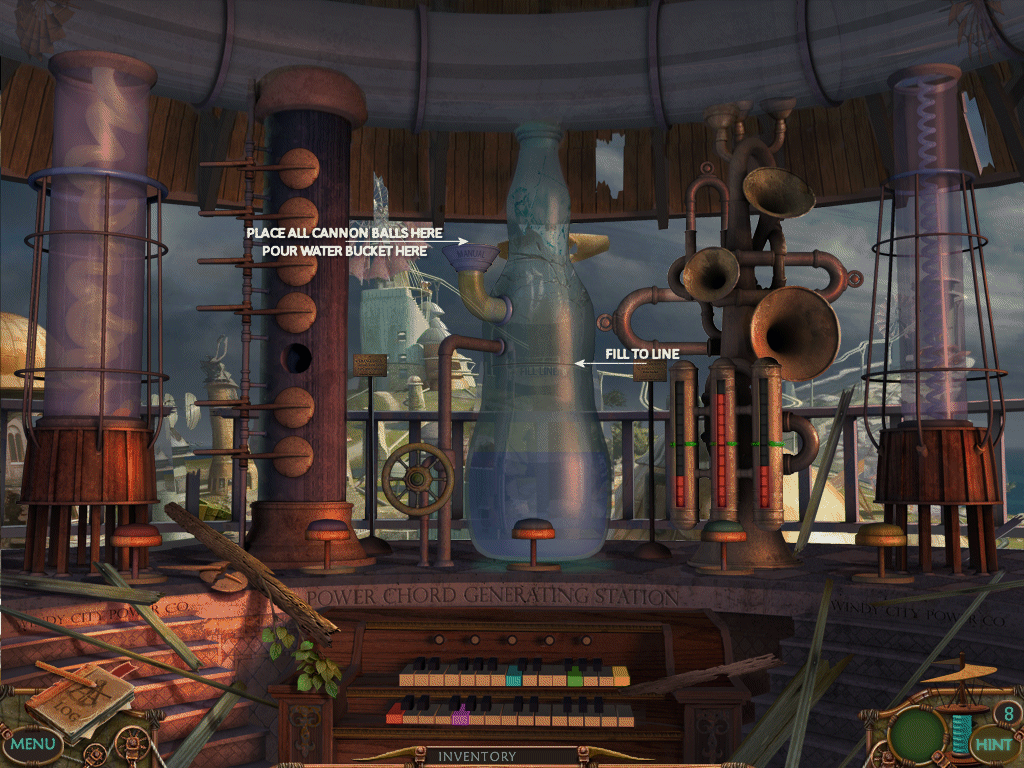
5. examine the water column the middle
• you'll notice it says "fill to line"
• place the 3 cannon balls inside
• pour the water from the water bucket inside
• push the button in front of it
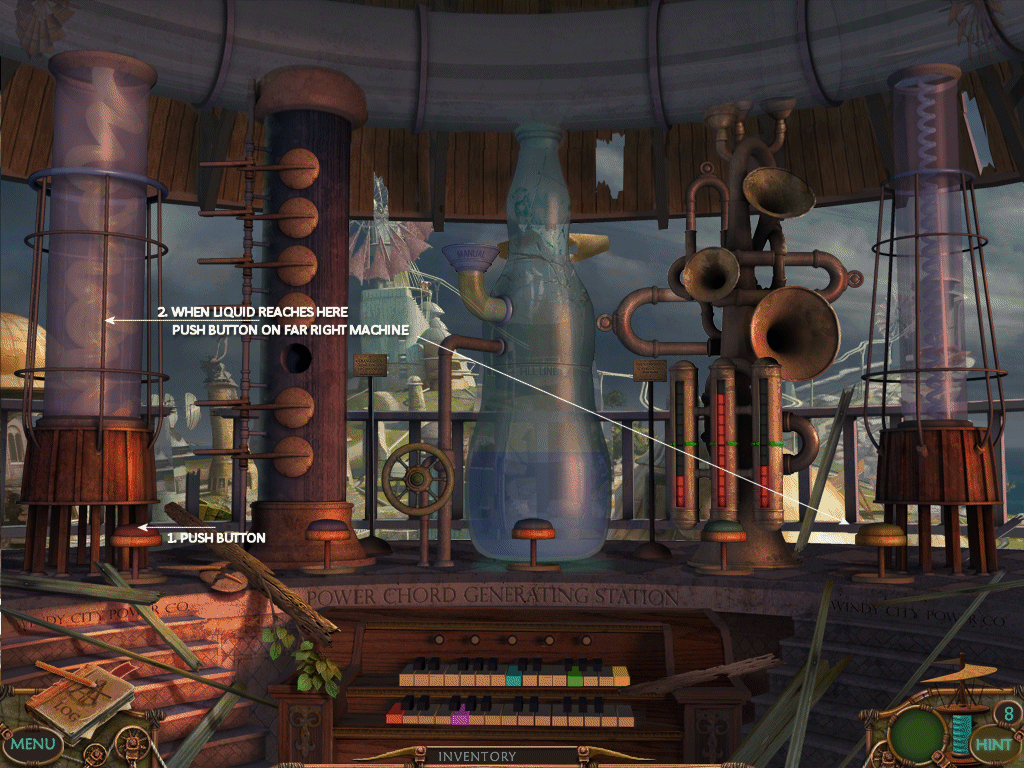
6. time to examine the columns at the 2 ends
• the columns are similar – both with colored liquid that rises to the top but at different speeds
• the object is to get them to the top at the same time
• click the button in front of the left column first – the slower one
• when it gets about half way up, click the button in front of the right column – the faster one
7. click the keyboard
• it's time to play Simon Says
• wait for one of the buttons to light up and then push the corresponding key
• solution: red, green, yellow, purple, blue
• remember its Simon Says so you have to click red; red, green; red, green yellow; etc.
8. return to the Birds Nest and go up to the Tram
Tram
1. examine the power box
• the instructions say to push the button until the lights stop
• it also says do not overload – you have to press them in order
• solution – press in order: bottom, middle, top
2. go to Delia's House
Delia's House
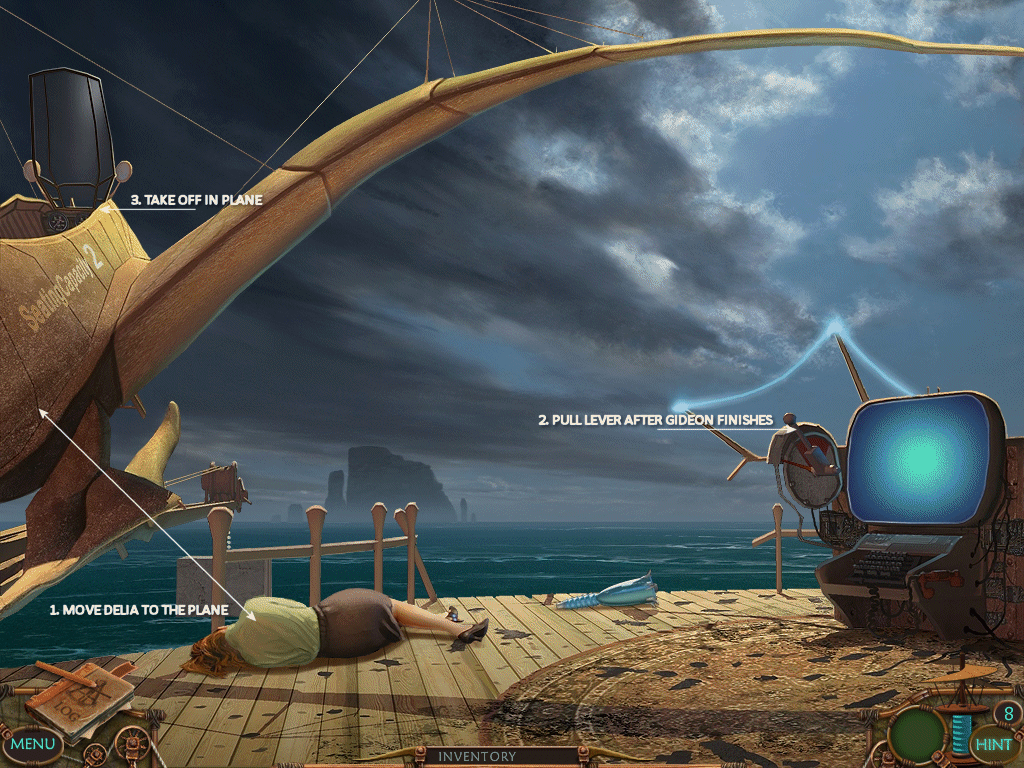
1. go down and watch the scene that unfolds
2. place Delia in the plane
3. listen to Gideon – quick pull the lever on the time machine!
4. watch Gideon and the Bio-Coil fall into the ocean
5. click the plane again and launch it
6. watch the ending...
To Be Continued...
Content(s) of this game guide may not be copied or
published on any other site without permission from Casual Game Guides.
©CasualGameGuides.com 2006 - 2021
