Haunted Halls: Green Hills Sanitarium
The Haunted Halls Green Hills Sanitarium Walkthrough is a step-by-step guide on beating this exciting hidden object game. See custom screenshots, tips, hints and more at www.casualgameguides.com.
A few
important reminders before anything else:
Part 1: Outside The Sanitarium
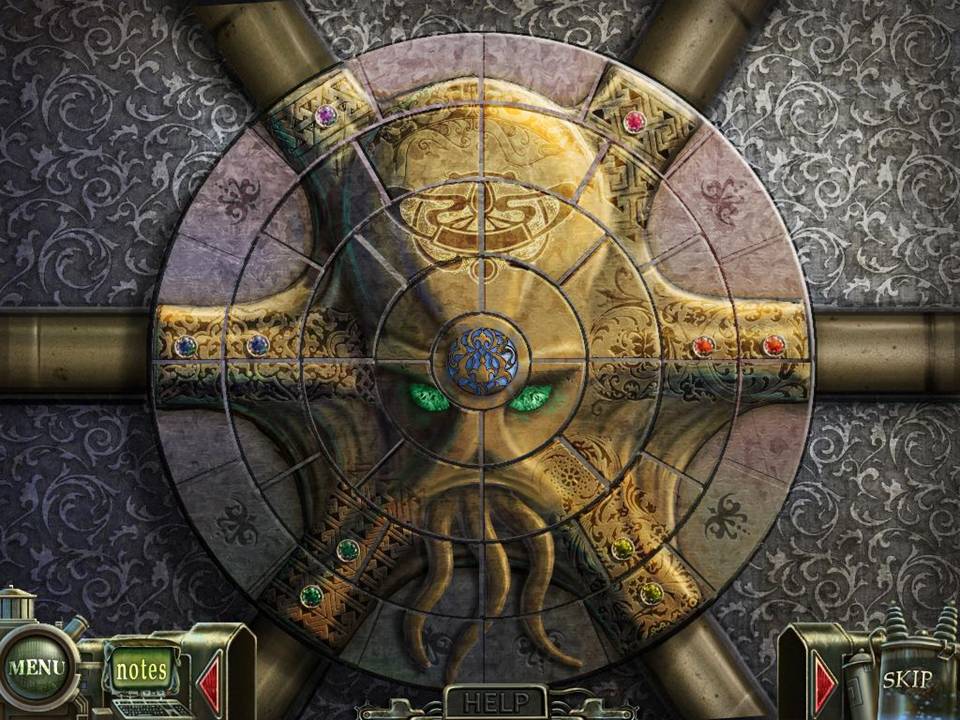
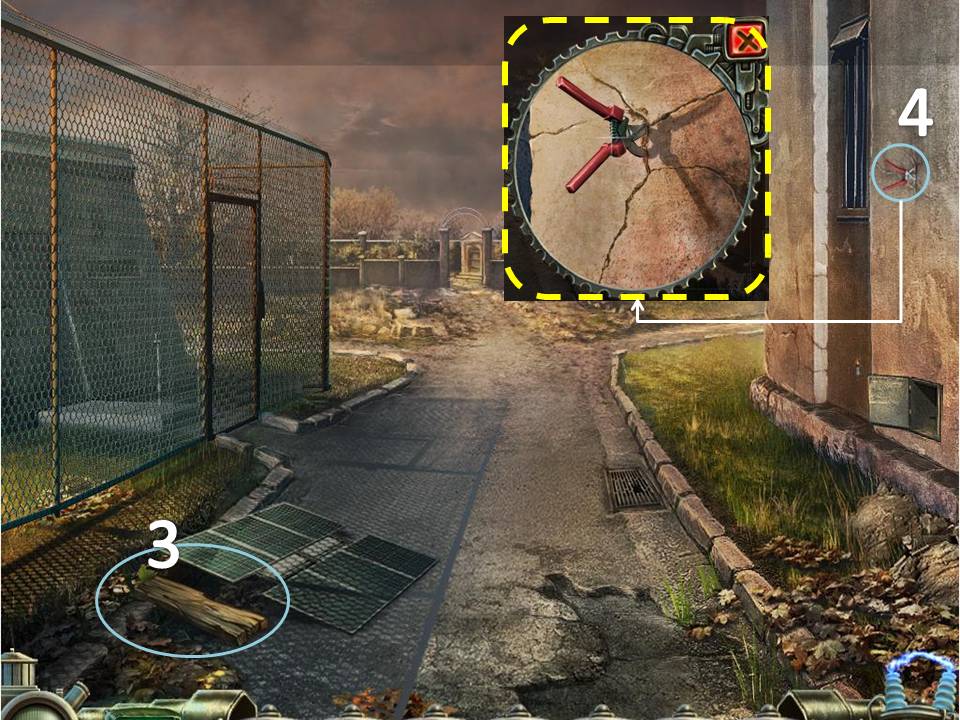
There are 4 disks. You must click two pieces on the same disk to swap their positions.
Once you get their positions right, you can rotate the disk.
Re-arrange and rotate the disks to get the image shown below.
If you cannot solve the puzzle, just wait for the "Skip" icon on the bottom right side to light up. It automatically solves the puzzle for you.
- The items you need to look for in Hidden Object Scenes (HOS) are mostly random. I will, however, try to point out all of those in the list on the screen shot.
- If you really can't find what you're looking for, there's a "Hint" button at the bottom right. It takes 1 minute for the Hint button to recharge.
- The "Hint" button changes into a "Skip" icon for other puzzles. Clicking on "Skip" allows you to automatically solve the puzzle. It takes around 2 minutes for the Skip button to light up.
- On certain scenes, you will see Red/Brown sparkles. This means that you have to play the HOS. When you see Blue sparkles, it means there's a Puzzle waiting to be solved.
Part 1: Outside The Sanitarium
- Take the Umbrella
- Click under the Trunk of the car on the right. Use the Umbrella to get the Valve
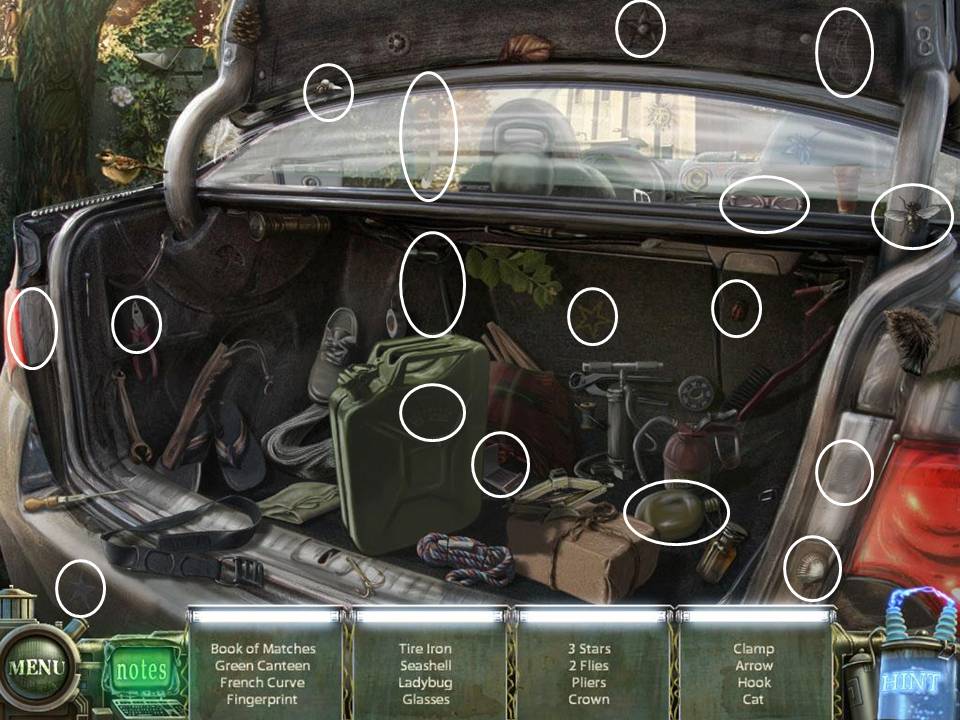
- Open the Trunk of the car on the left. Play the HOS. Book of Matches will be added to your inventory
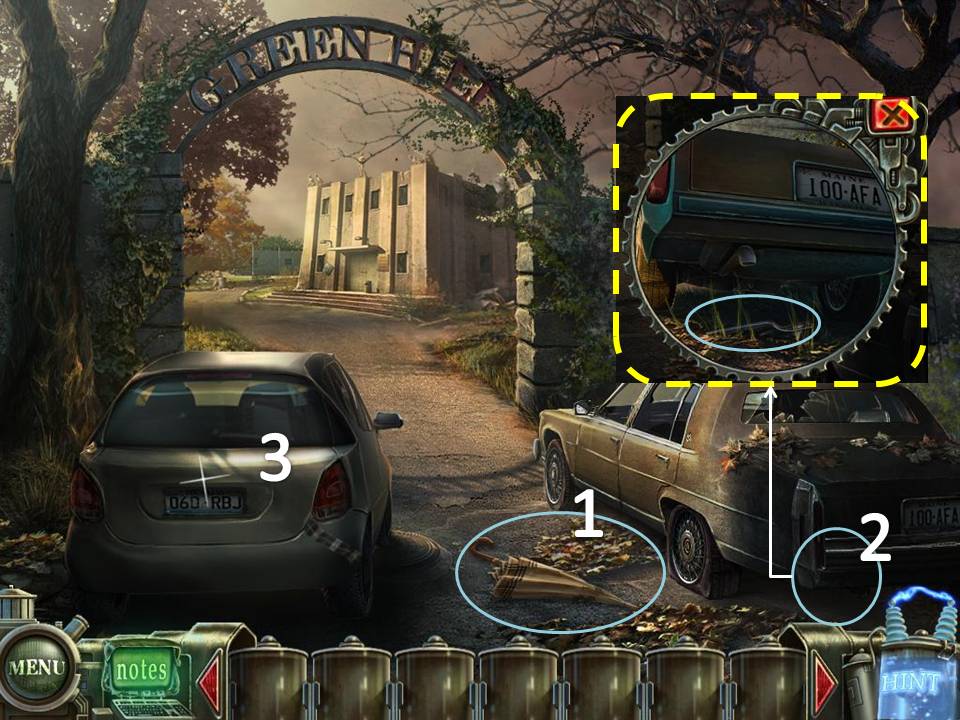
- Take the Newspaper on the ground.
- Go the left side of the building.
- Take the Board (1/3) on the ground.
- Take the Clippers on the wall
- Go down, then to the right of the building.
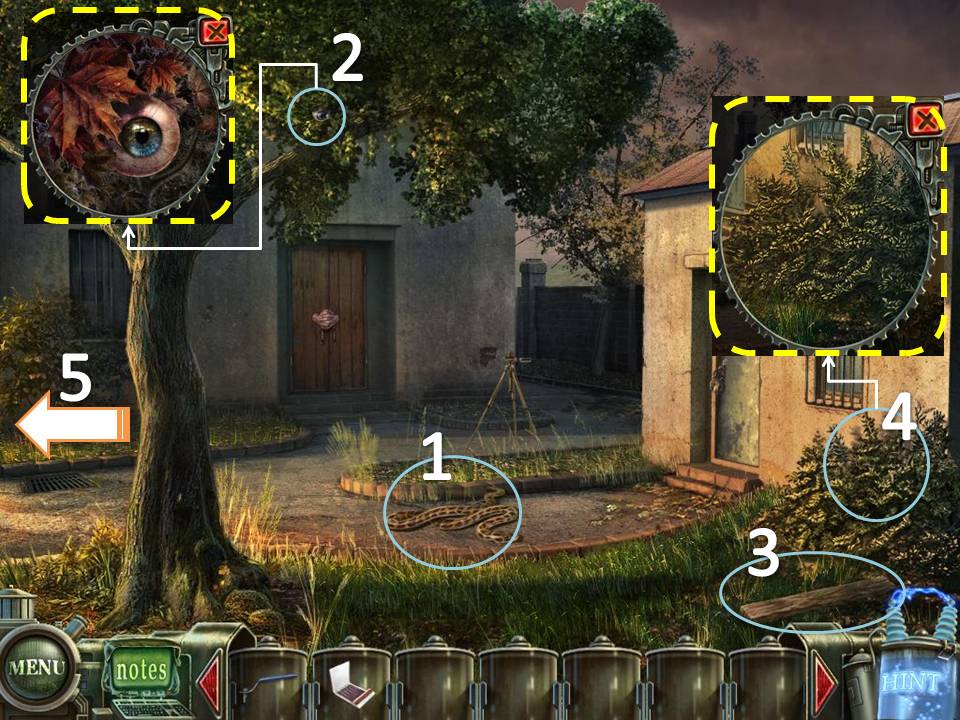
- Click on the Snake on the ground. It will turn into a Hose. Take the Hose
- Examine the Tree. Take the Eye (1/6)
- Take the Board (2/3) on the ground.
- Examine the bushes to the right. Use the Clippers to get the Branches
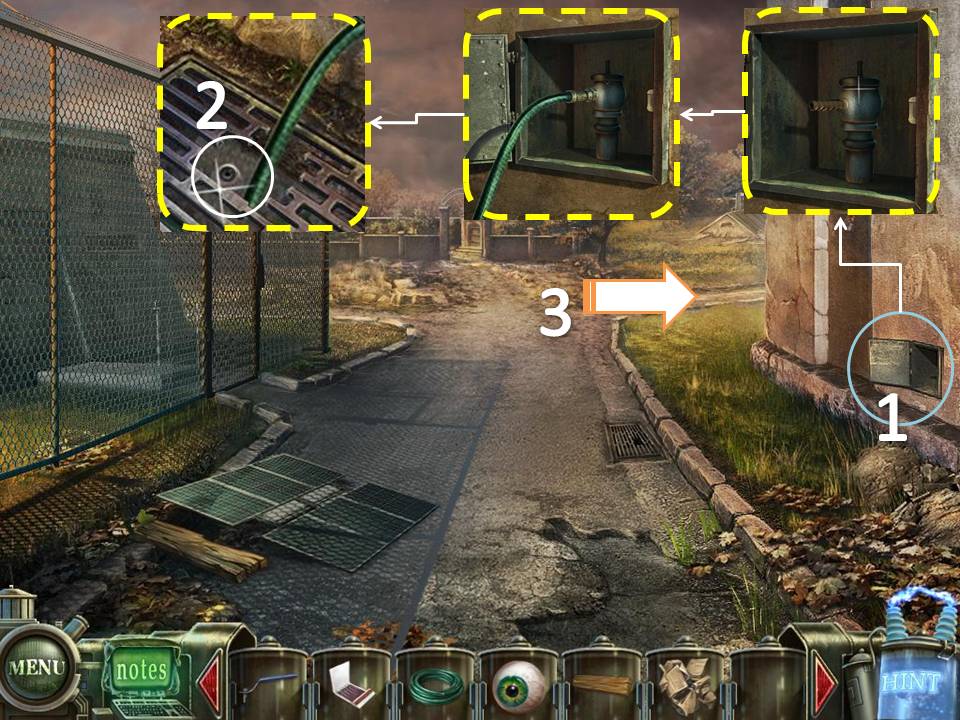
- Go back to the left side of the building.
- Examine the niche on the wall. Attach the Valve then the Hose on the spigot.
- Take the Eye (2/6)
- Head right.
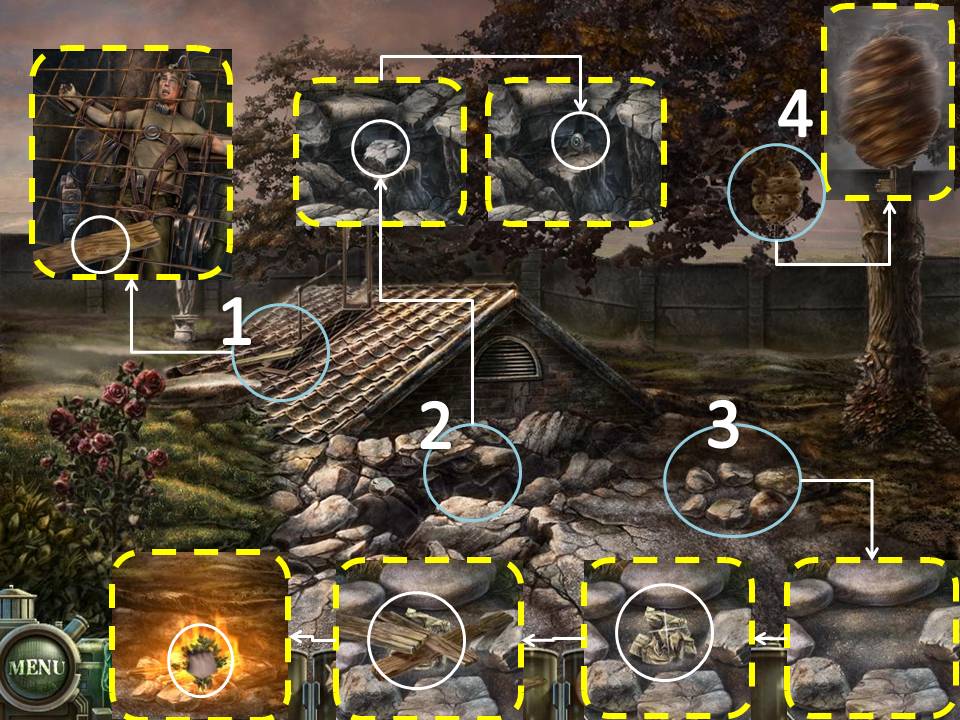
- Examine the Roof. Take the Board (3/3)
- Take the Stone and the Eye (3/6)
- Place the Newspaper. the Boards, and the Book of Matches in that order on the pit. Add the Branches to the Fire.
- Examine the Hive. Take the Key.
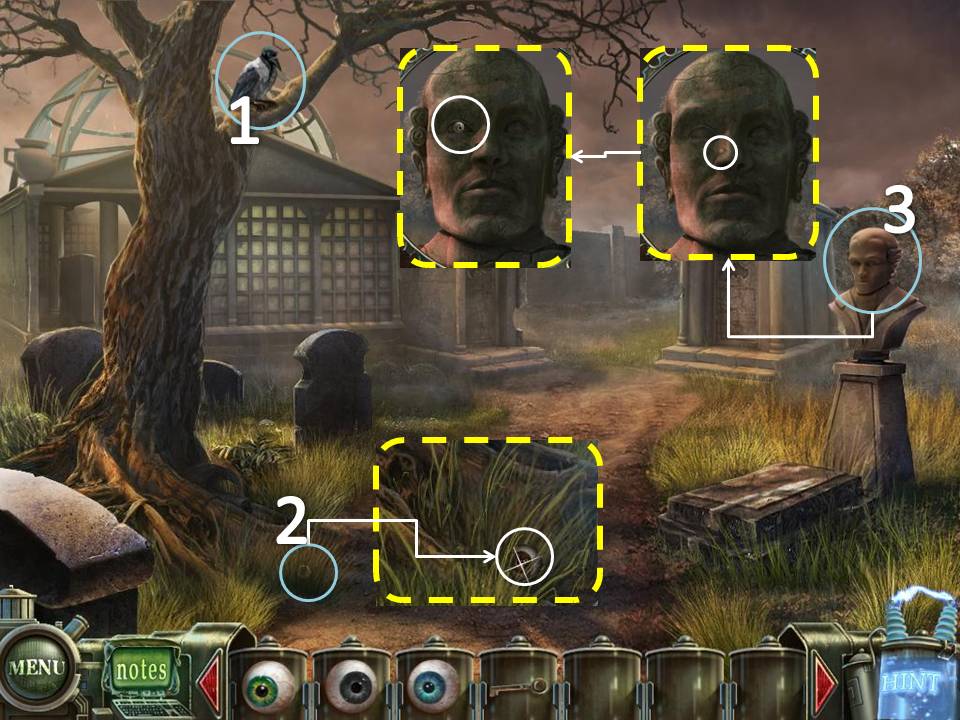
- Head Back then head forward to the Graveyard.
- Use the Stone on the Crow.
- Take the Eye (4/6) on the ground
- Examine the Bust on the right. Click on the mole on the nose. Take the Eye (5/6)
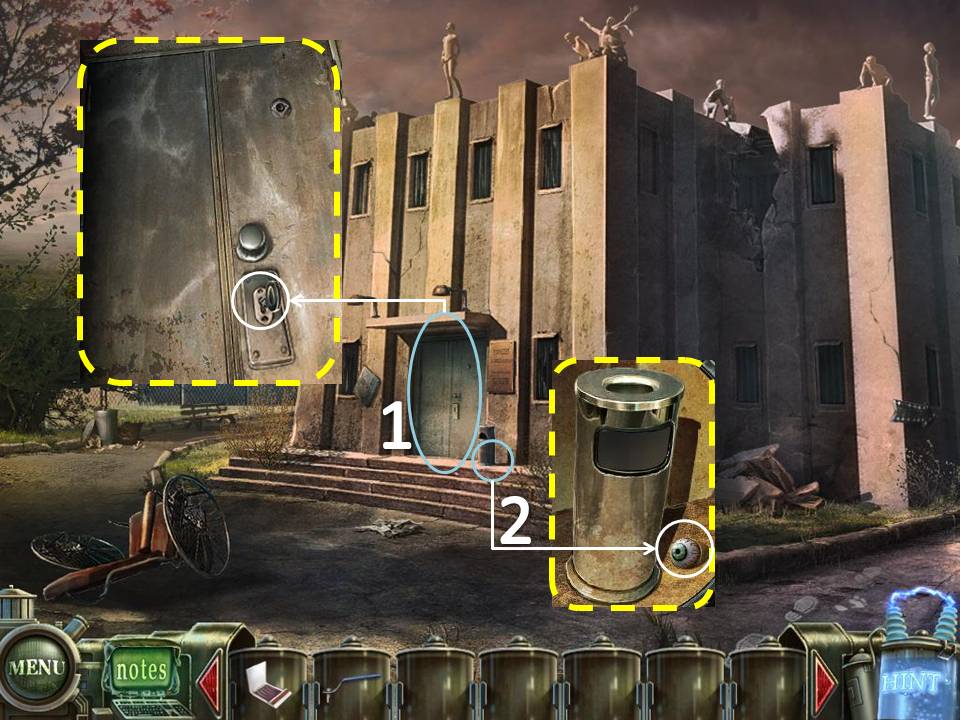
- Head back to the front of the Sanitarium.
- Use the Key on the door.
- Check the Trash Can beside the door. Take the Eye (6/6)
- Play the puzzle on the door.
- Place the Eyes on the slots on their corresponding colors.
Click on the left or the right arrow on the end of each row to move that row accordingly.
The goal is to allow the eyes to drop to the very bottom.
If you cannot solve the puzzle, just wait for the "Skip" icon on the bottom right side to light up. It automatically solves the puzzle for you
The goal is to allow the eyes to drop to the very bottom.
If you cannot solve the puzzle, just wait for the "Skip" icon on the bottom right side to light up. It automatically solves the puzzle for you
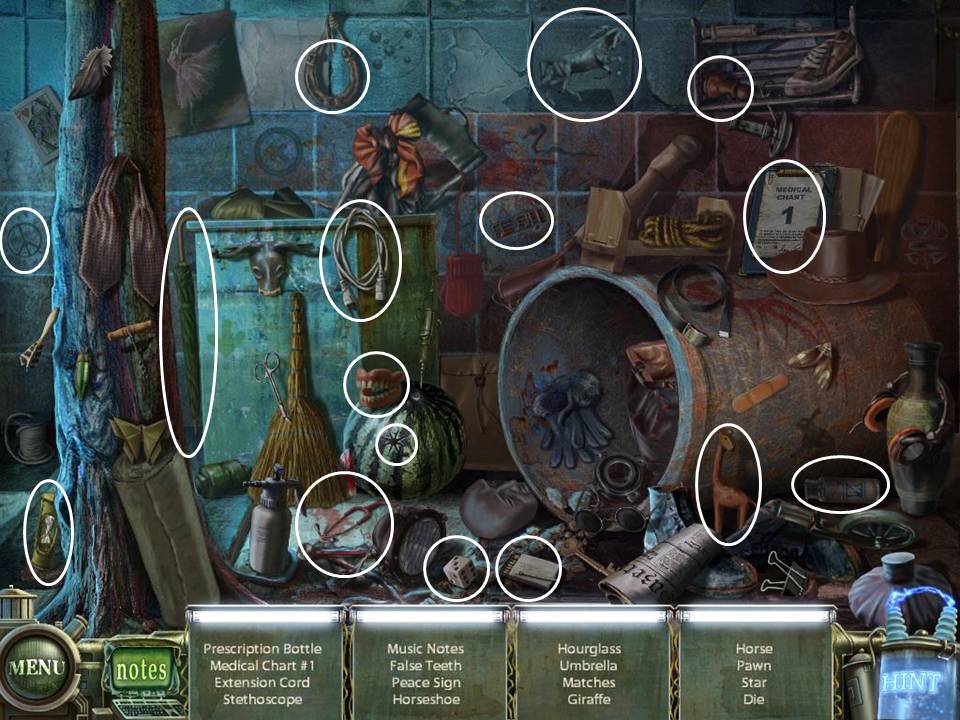
Part 2: Sanitarium, 1st floor
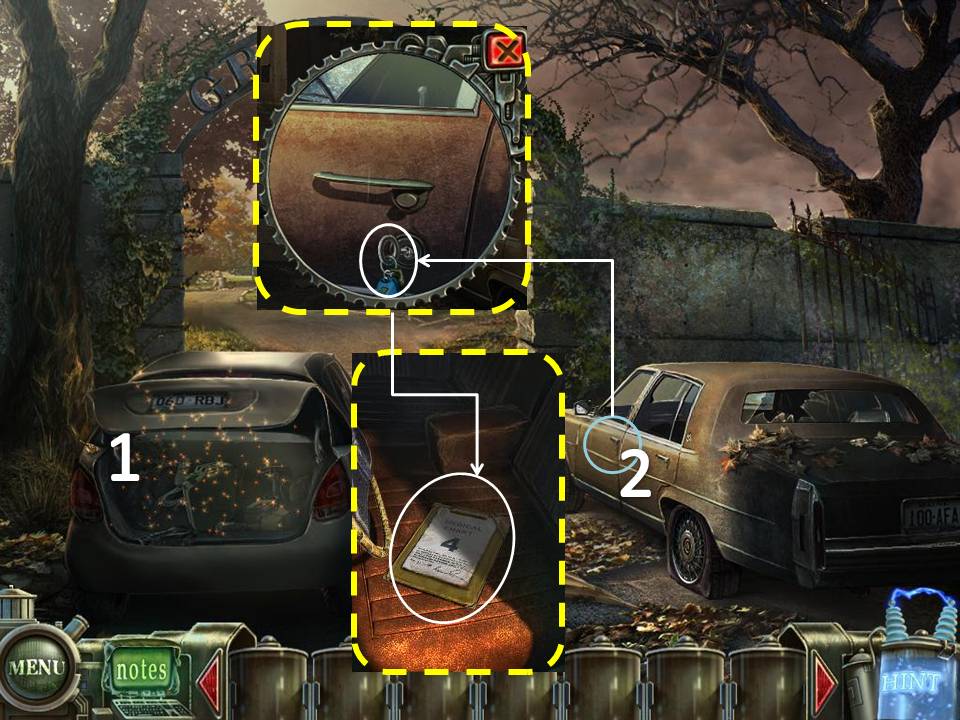
- Play the HOS. Medical Chart 1 will be added to your inventory
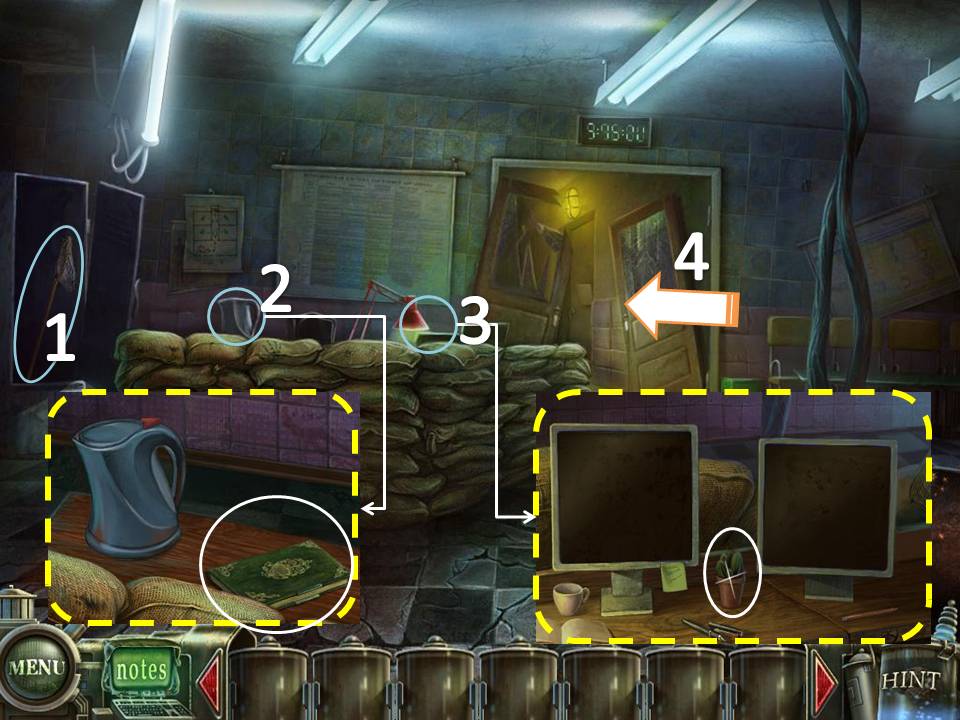
- Take the Net on inside the locker
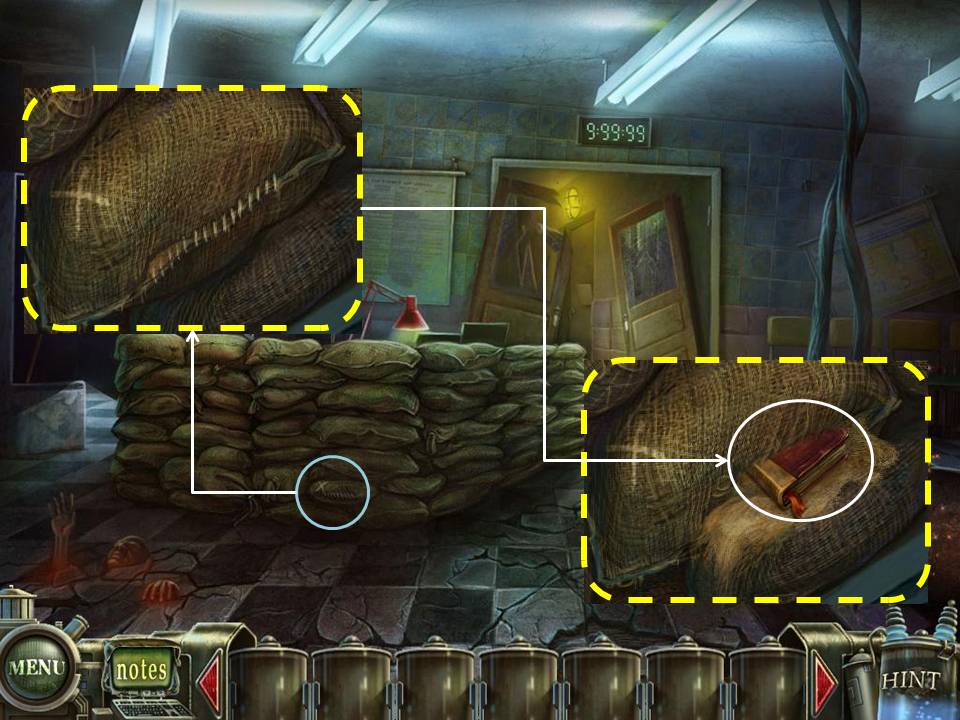
- Examine the coffee pot above the stack of sacks. Take the Book (1/4) beside the pot.
- Click on the lamp beside the coffee pot. Take the Cactus
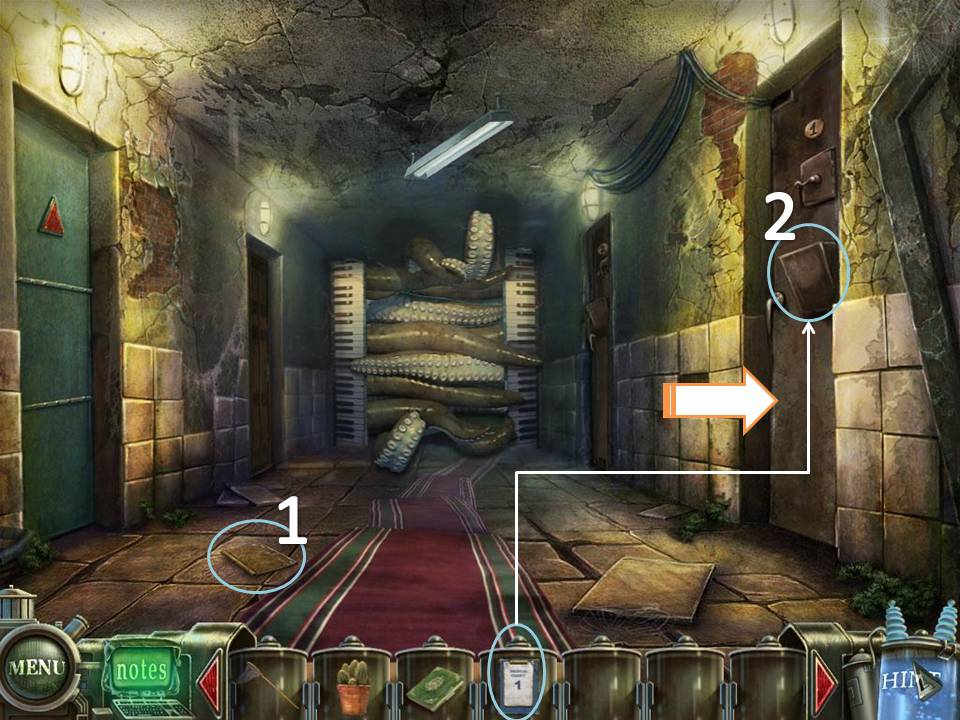
- Go through the door.
- Take the Book (2/4) on the ground.
- Use Medical Chart 1 on the first door to the right. Enter through the door.
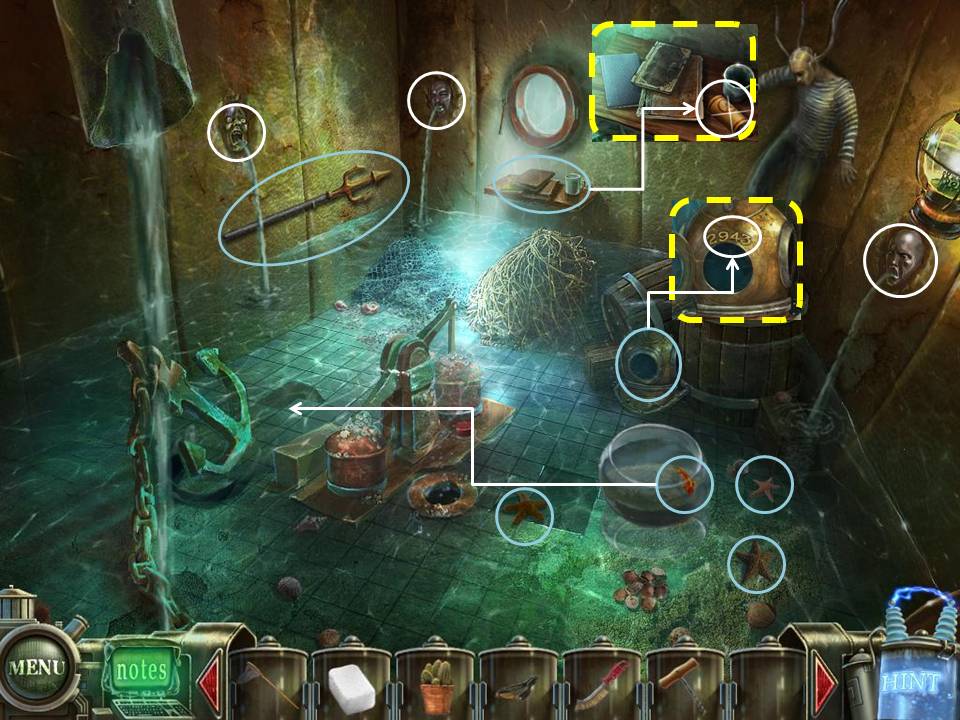
- Collect the 3 Starfishes on the water using the Net.
- Take the Gold Fish on the bowl using the Net
- Check the Diving Helmet at the bottom of the barrel where the patient is standing on. Take note of the number "2943"
- Plug the Faces using the 3 Starfishes.
- Place the Fish on the water near the anchor.
- Take the Trident on the left wall.
- Examine the shelf on the far end of the room. Take the Flypaper.
- Exit the room. Enter the door to the left nearest to the octopus tentacles.
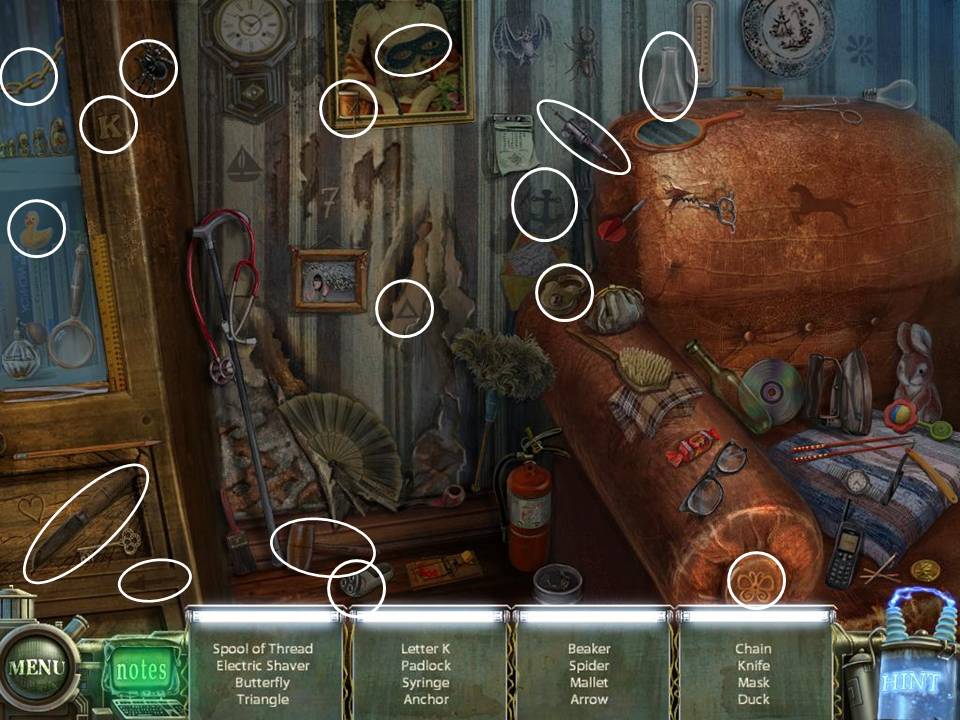
- Play the HOS. Knife will be added to your inventory
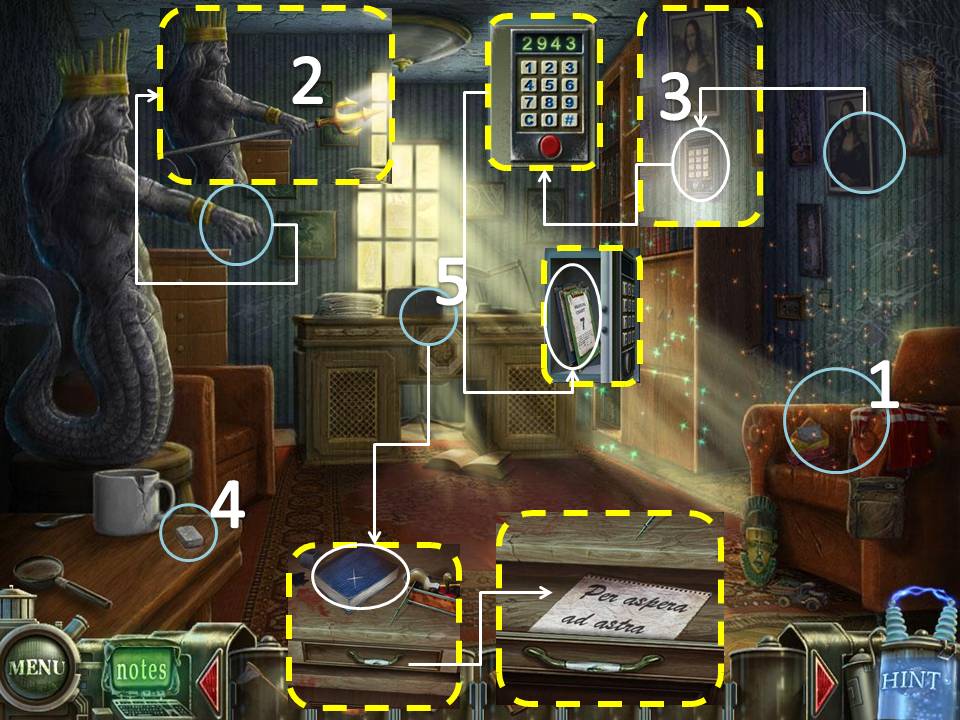
- Place the Trident on Neptune's hand.
- Click on the Safe underneath Mona Lisa. Click on the numbers "2943" Take Medical Chart 2 and 7
- Take the Sugar on the lower left table.
- Zoom in to the Desk on the far wall. Take the Book (3/4). Note also the "Per Aspera ad Astera" on the drawer.
- Exit the room. Go back to the reception area
- Examine the stack of Sacks. Look for the X mark. Click on it.
- Use the Knife on the sack.
- Take the Book (4/4)
- Return to Neptune's room
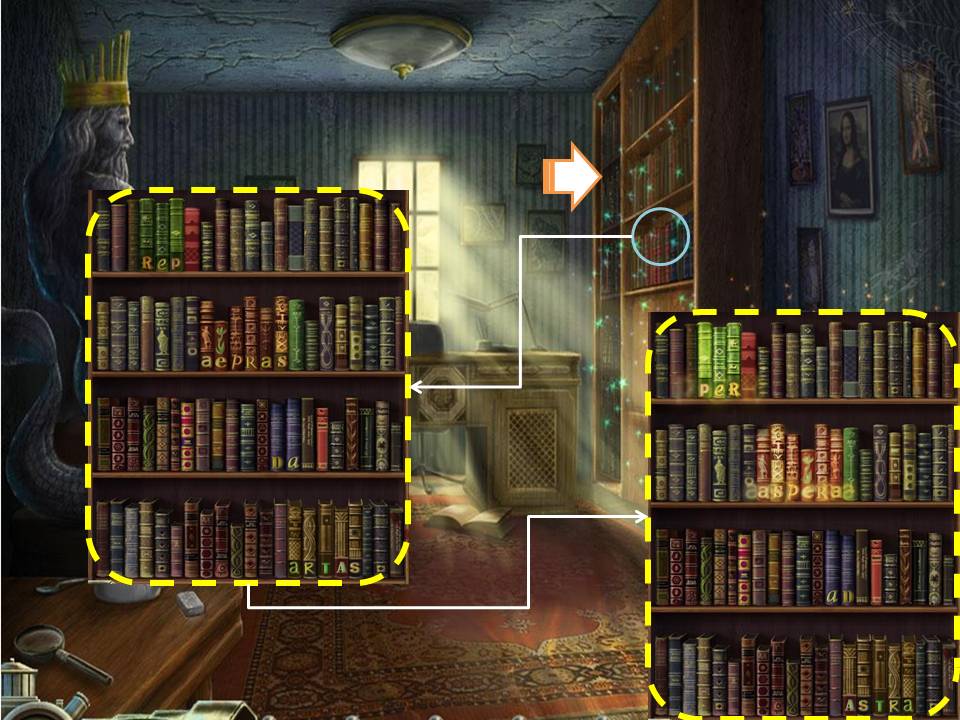
- Zoom in to the Book Case
- Place the 4 Books into the empty slots where their colors match.
- Re-arrange the Books to spell "Per Aspera ad Astera"
- Go through the opening
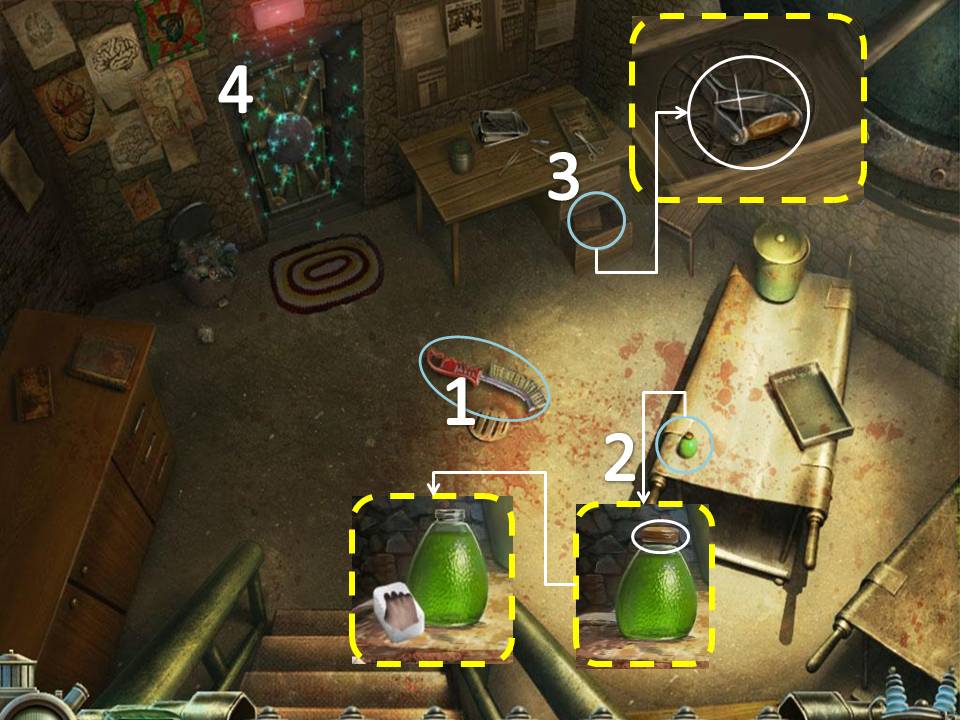
- Take the Brush on the ground.
- Zoom in to the Green vial on the table to the right. Take the top off.
- Use the Sugar on the vial to get "Poisoned Sugar"
- Zoom in to the drawer to the far right and take the Switch. Take note of the carved image.
- Play the puzzle on the door. After solving the puzzle, go through the door.
There are 4 disks. You must click two pieces on the same disk to swap their positions.
Once you get their positions right, you can rotate the disk.
Re-arrange and rotate the disks to get the image shown below.
If you cannot solve the puzzle, just wait for the "Skip" icon on the bottom right side to light up. It automatically solves the puzzle for you.