
- Proceed two steps through the town to the square where the cat is awaiting you.
-
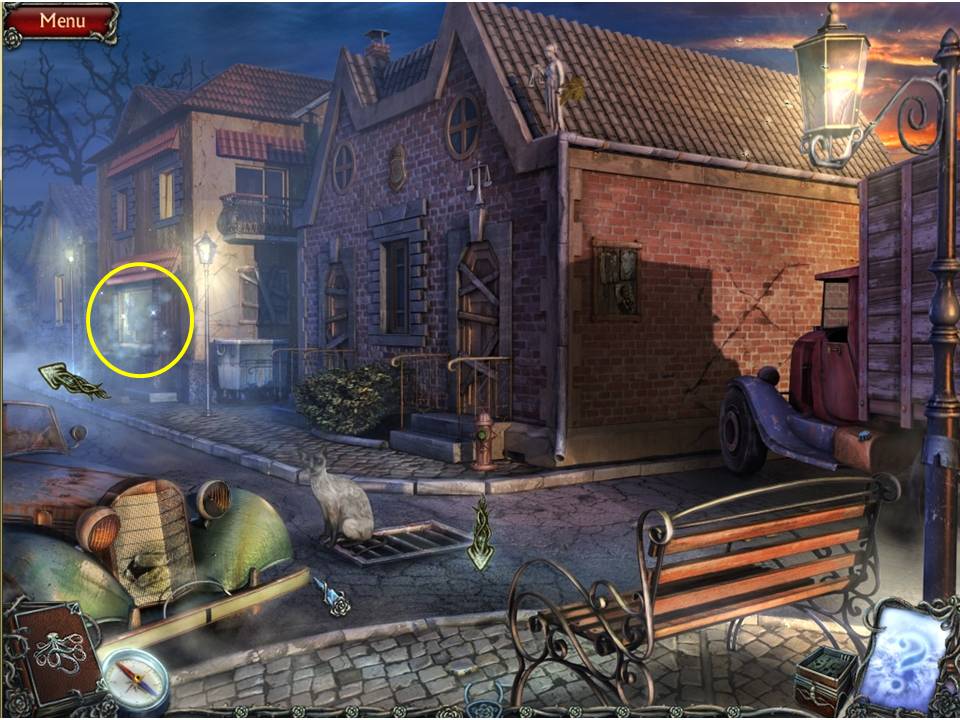
Zoom into the sparking window in the background to initiate the next HOA puzzle.
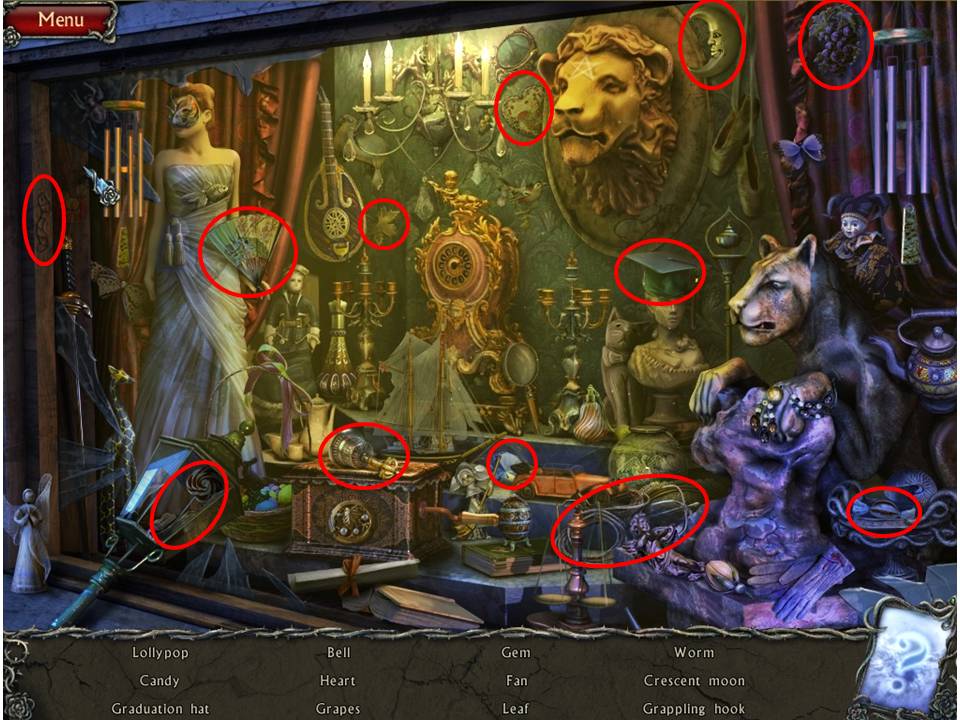
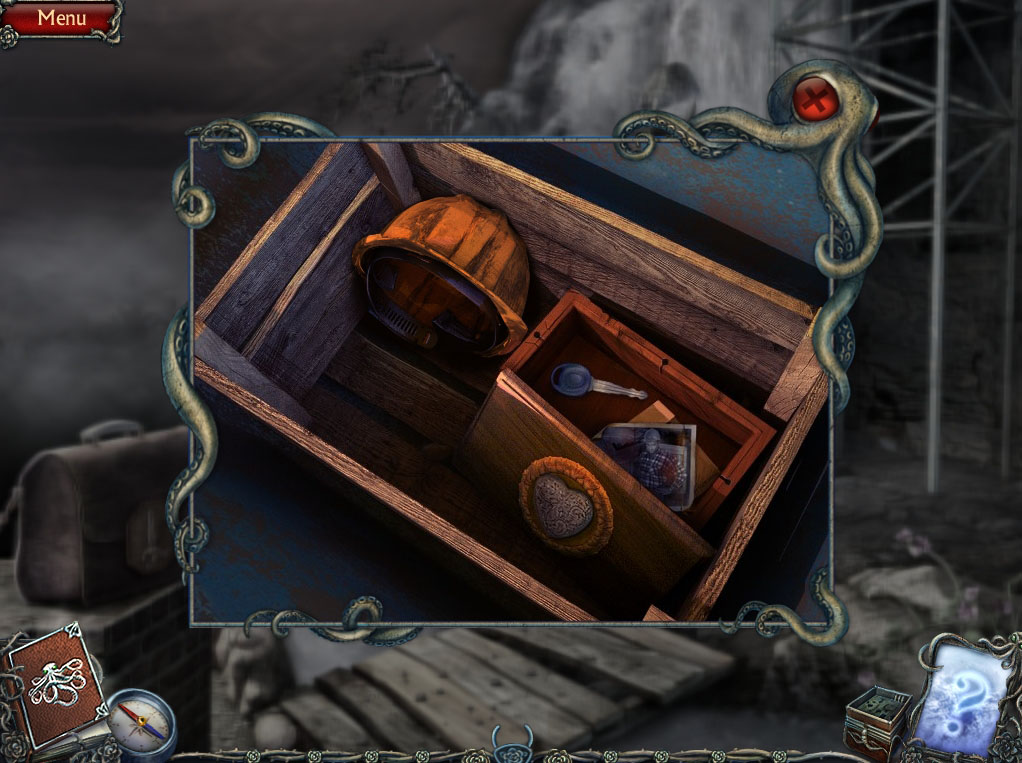
- Find the items listed.
-
Receive the GRAPPLING HOOK.
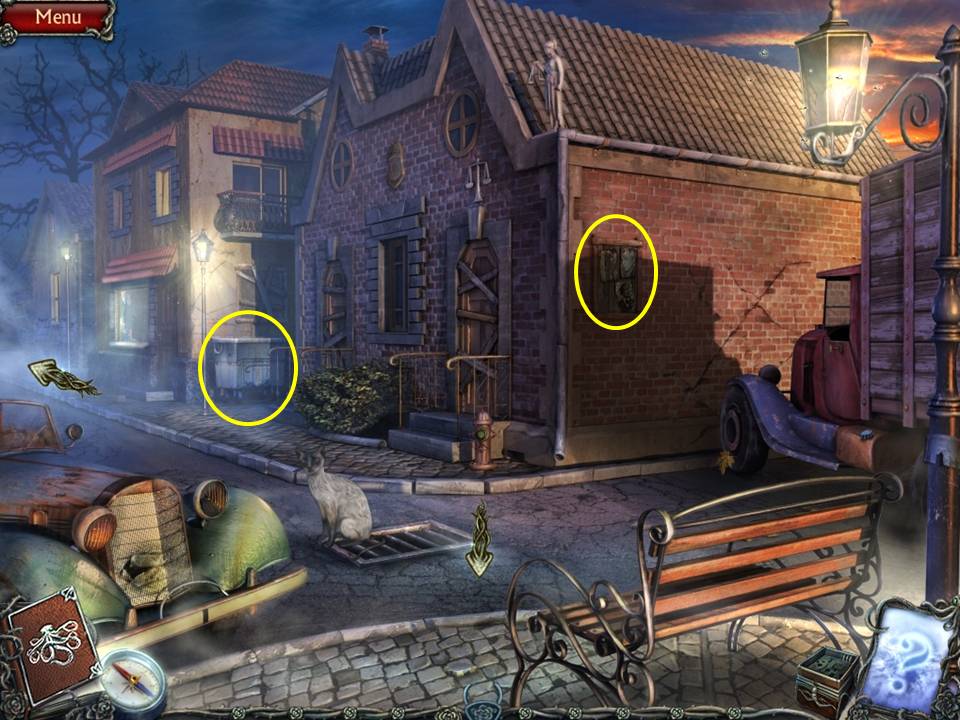
- Zoom into the bulletin board and read the three notes.
- Look at the bin and the note.
-
Go left to reach Main Street.
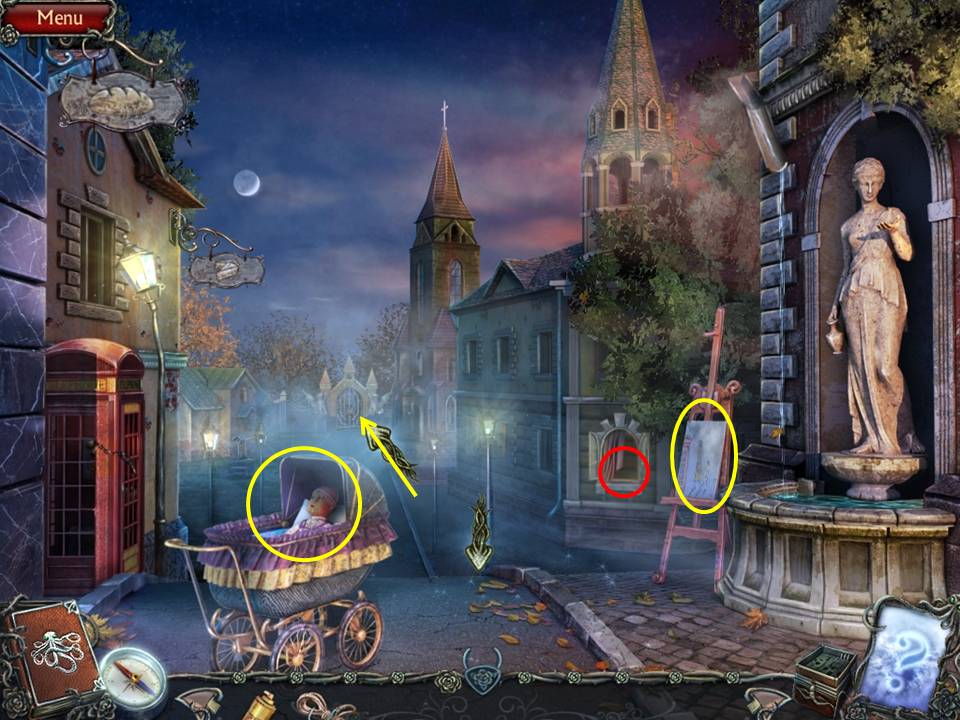
- Zoom into the easel.
- Zoom into the baby carriage.
- Look at the note.
- Zoom into the window.
- Take the SLINGSHOT.
-
Go towards the gate.
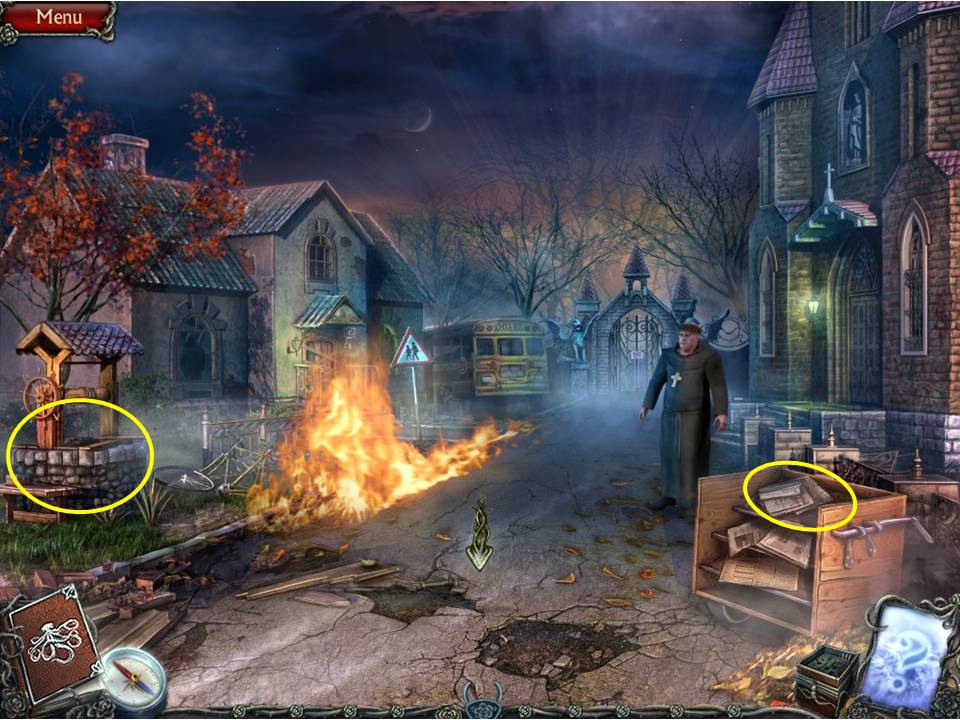
- Talk to the monk, then read the paper on the nearby stand.
- Zoom into the well.
- Click the wheel to drop the bucket.
- Retrieve the BUCKET from the well with the GRAPPLING HOOK.
- Click down.
-
Dip the BUCKET in the fountain to get the BUCKET OF WATER.
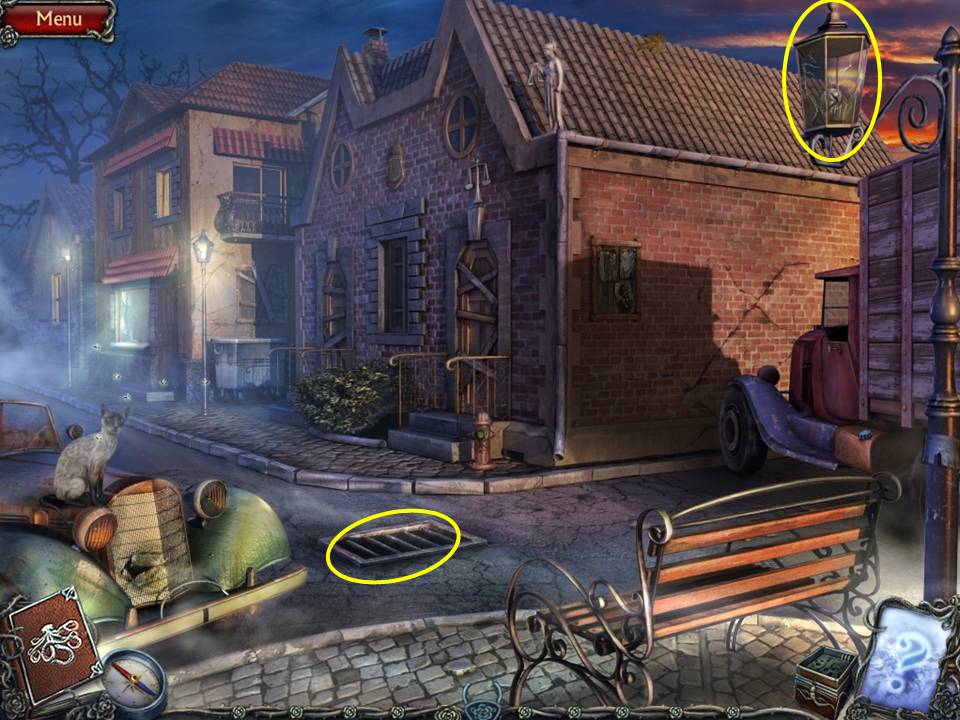
- Go back one step further and use the SLINGSHOT on the lamp.
- Zoom into the grate.
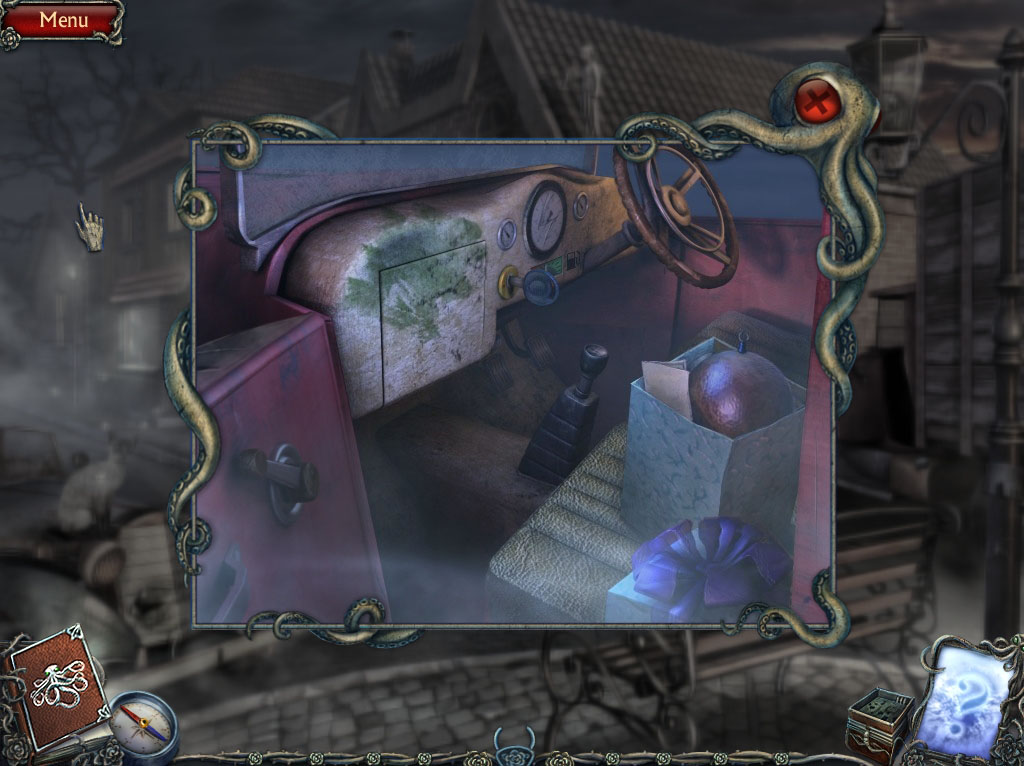
- Take the SMALL SHIP.
- Note the hair clip in the grate.
- Could someone PLEASE kill that mewling cat!
-
Return to the area by the church.
- Douse the fire with the BUCKET OF WATER. Zoom into the well.
- Put the SHIP in the niche on the box.
- Take the DRAWER KNOB and COIN inside.
-
Click down four times to return back over the bridge by the old woman.
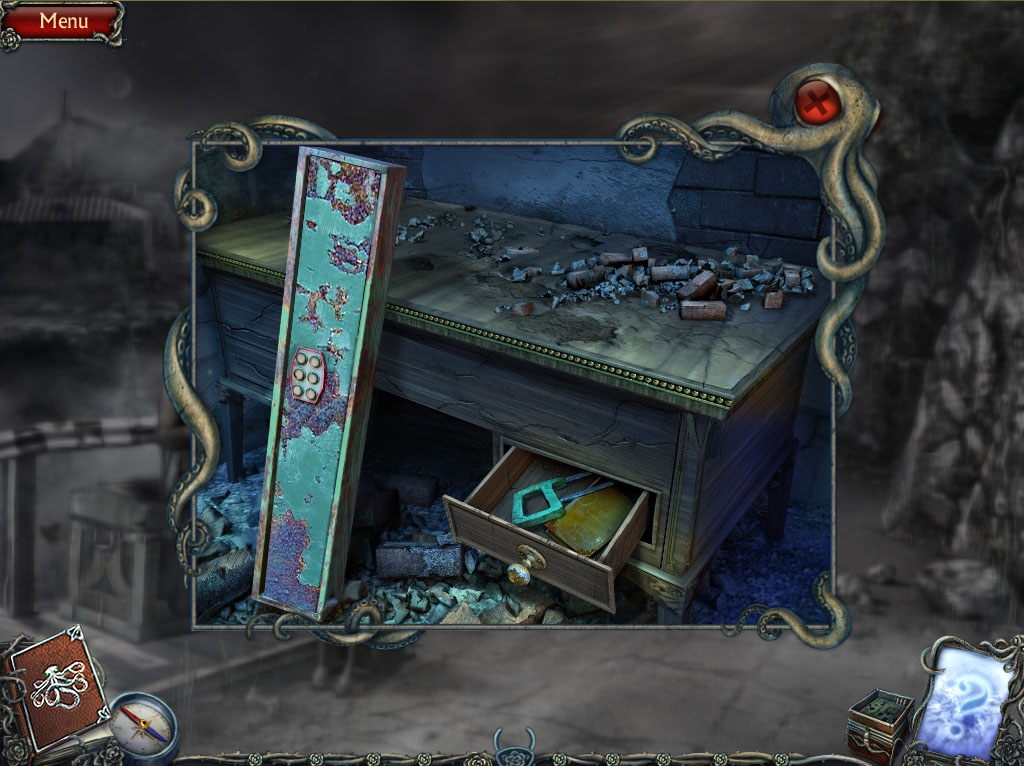
- Zoom into the drawer.
- Put the DRAWER KNOB into the hole and push in the screws (okay, where’s the mystery screw driver I just used?)
- Open the drawer.
- Take the HACKSAW.
- Read through the journal inside.
-
Return to Main Street.
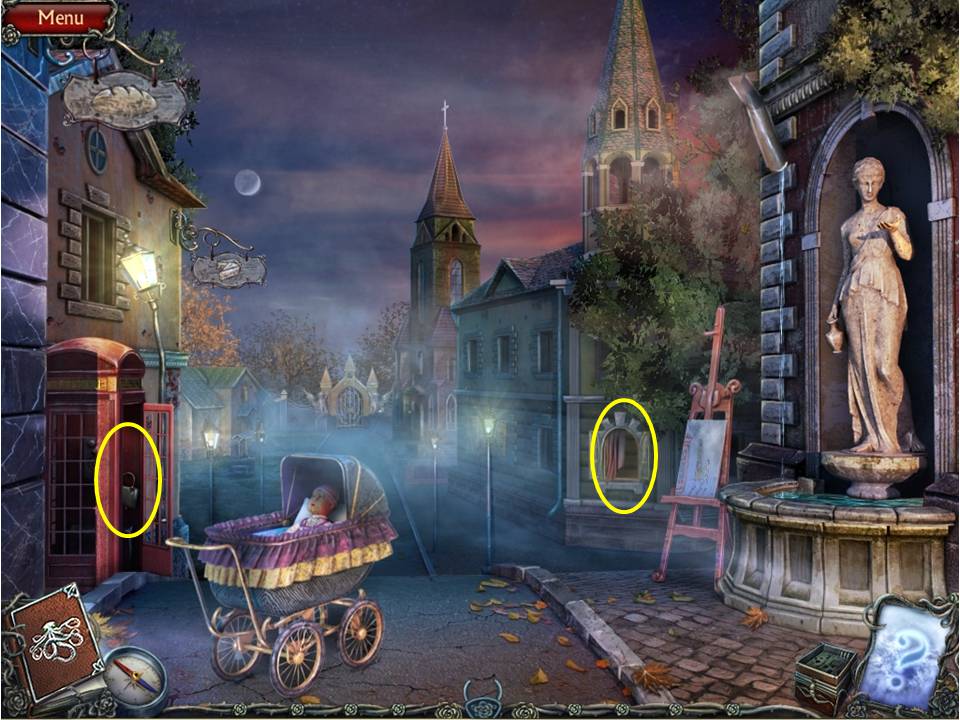
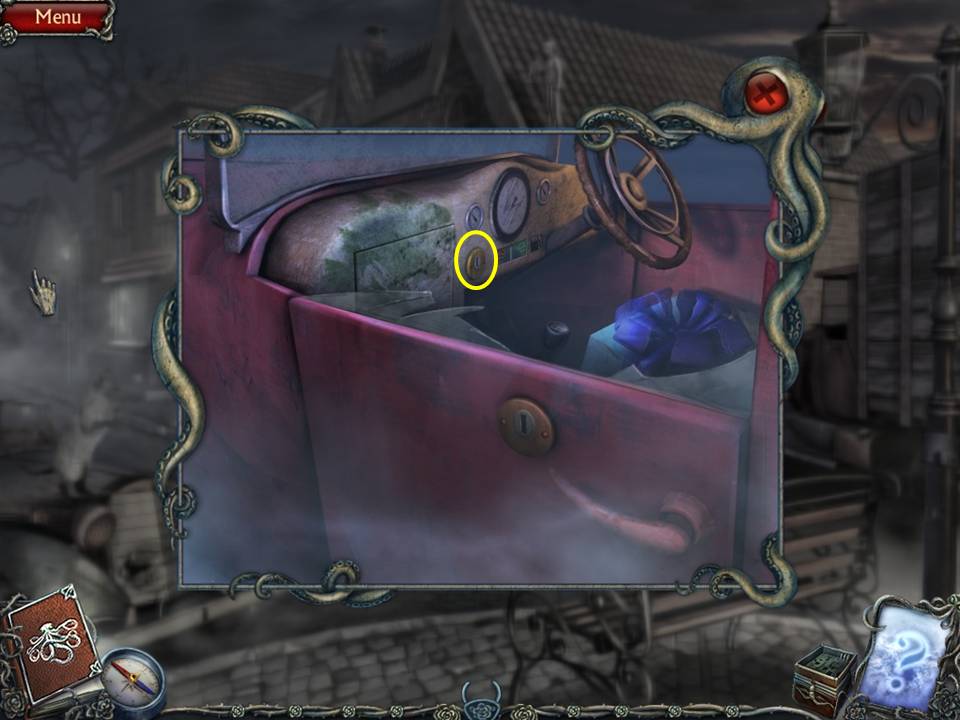
- Zoom into the phone booth.
- Cut the chain with the HACKSAW.
- Take the GLUE. Zoom into the purse.
- Spray it with the BUG SPRAY.
- Open the purse.
- Take the LIGHT BULB and CHURCH.
- Place the CHURCH on the board and exit back out.
- Zoom into the window.
- GLUE the broken planet.
- Take the PLANET.
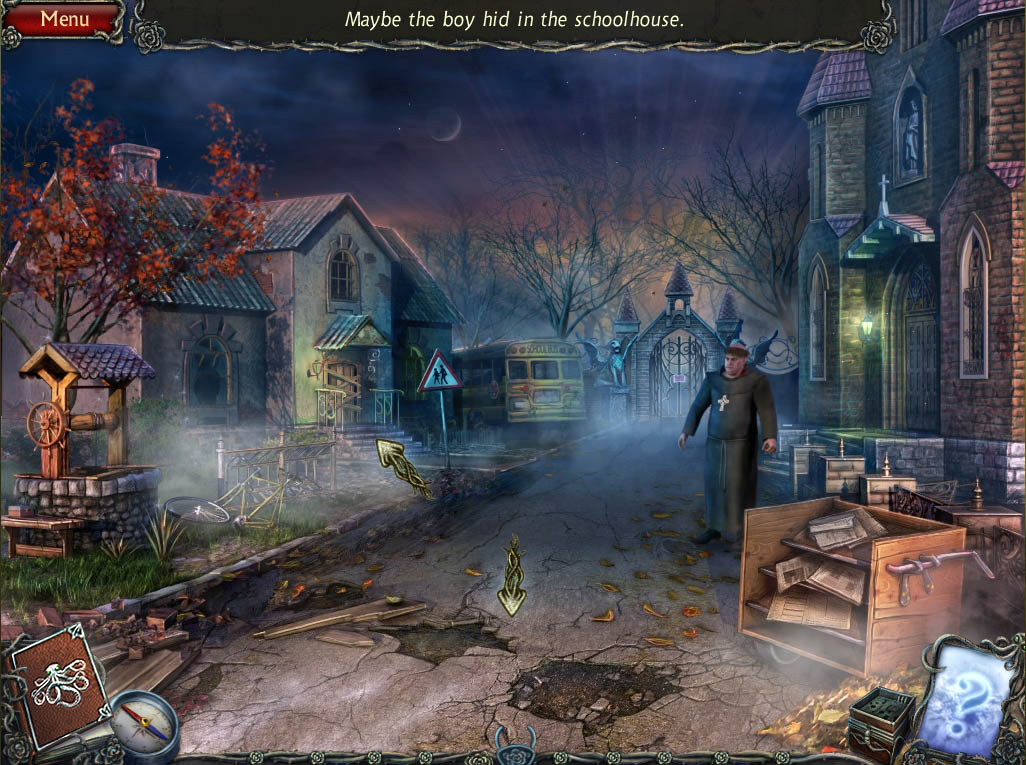
- Return to the church area and go towards the door on the left.
-
Go through the window to the schoolhouse.
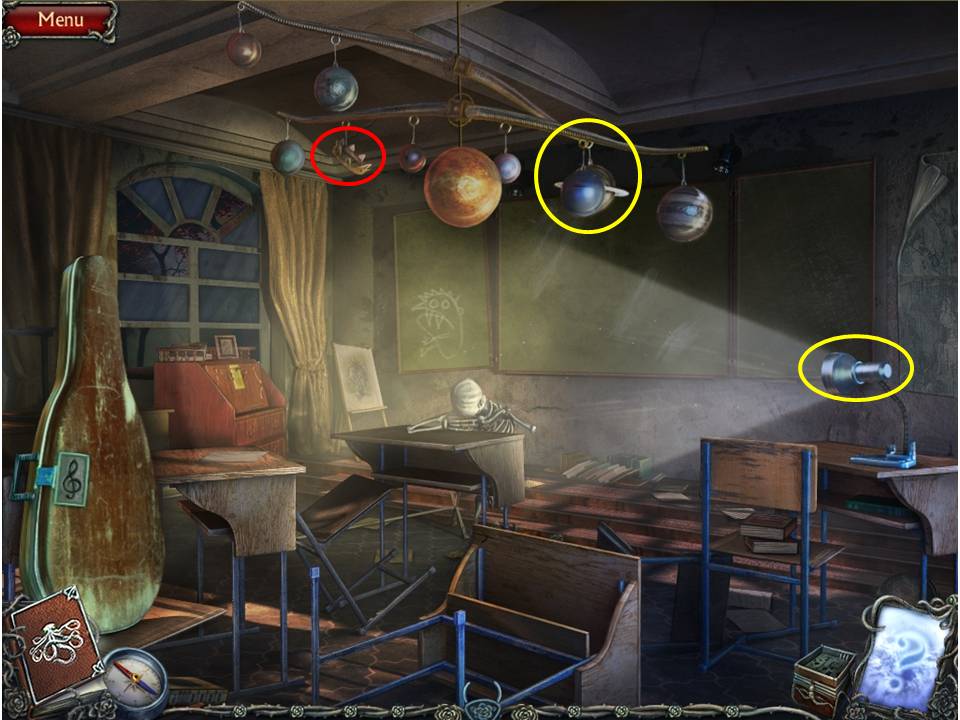
- Insert the LIGHT BULB in the lamp.
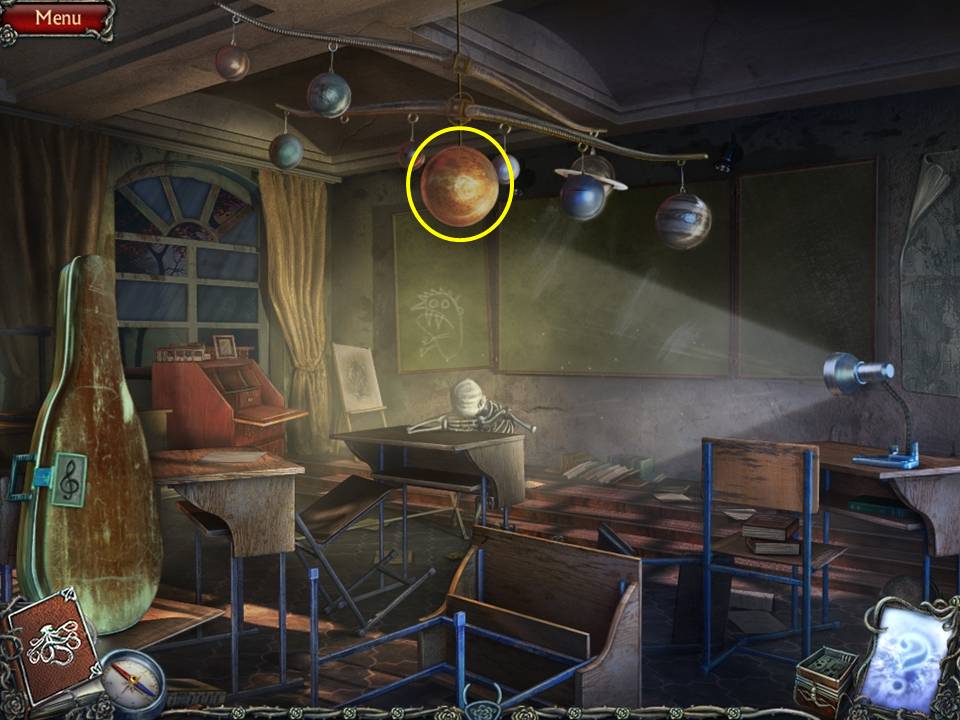
- Place the PLANET on the solar system.
- Take the CROWN.
-
Return all the way back to the dock – after getting another ear bashing from the pesky monk – and approach the boat again to play another HOA puzzle.
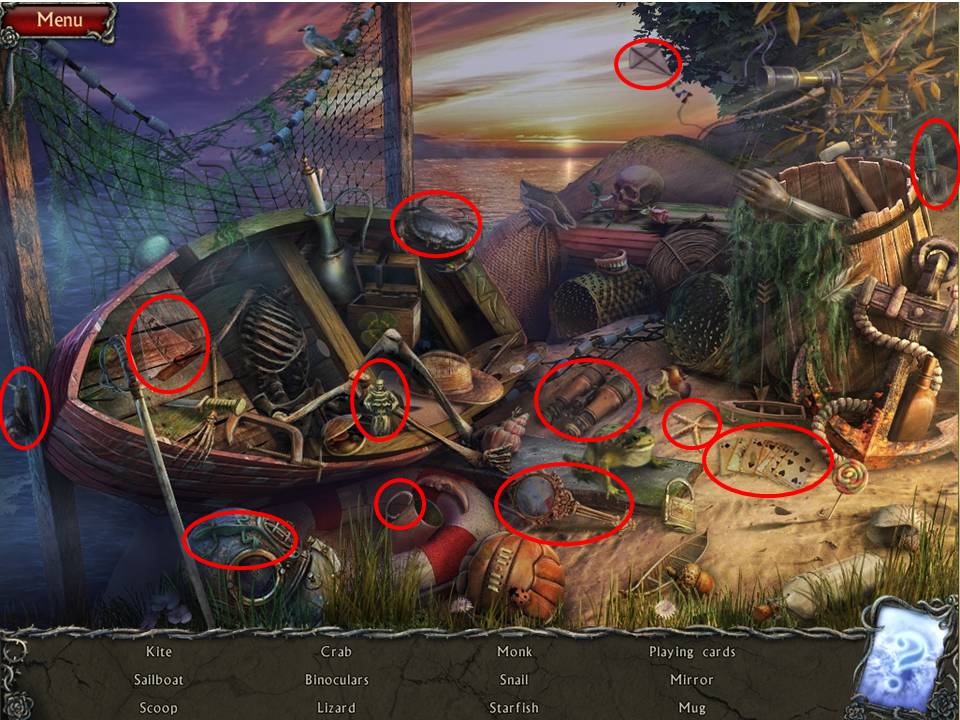
- Find the items listed.
- Receive the MONK.
-
When finished, go left towards the statues.
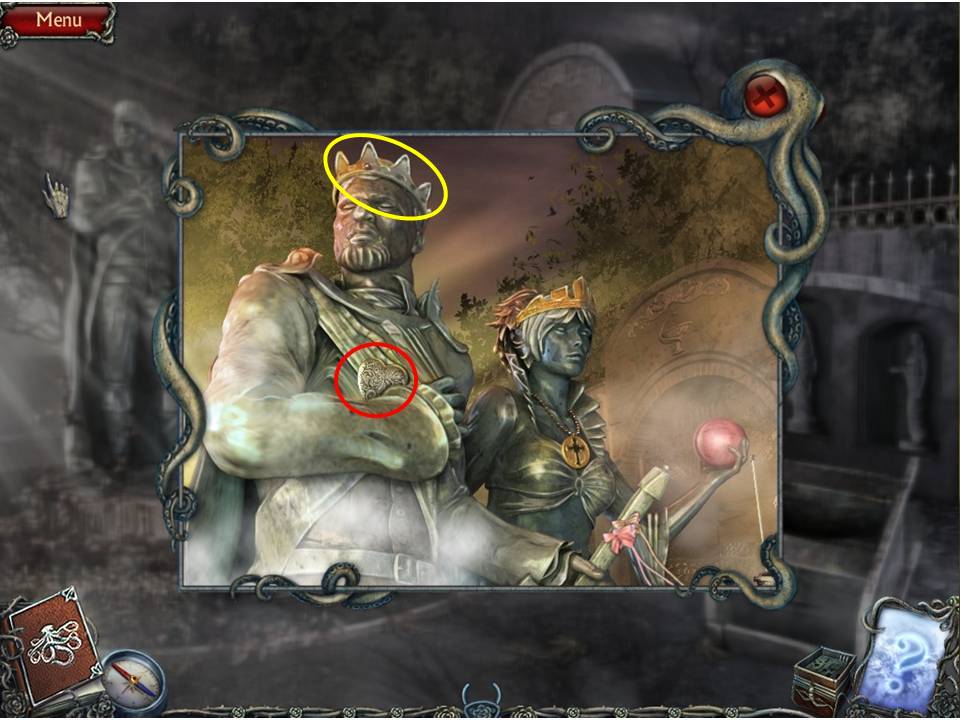
- Zoom into the statues.
- Put the CROWN on the king’s head.
- Take the HEART.
-
Return to the elevator.
- Zoom into the wheelbarrow.
- Place the HEART on the box.
- Take the TRUCK KEY.
- Zoom into the picture.
-
Return to the police station exterior – dying of exhaustion yet?
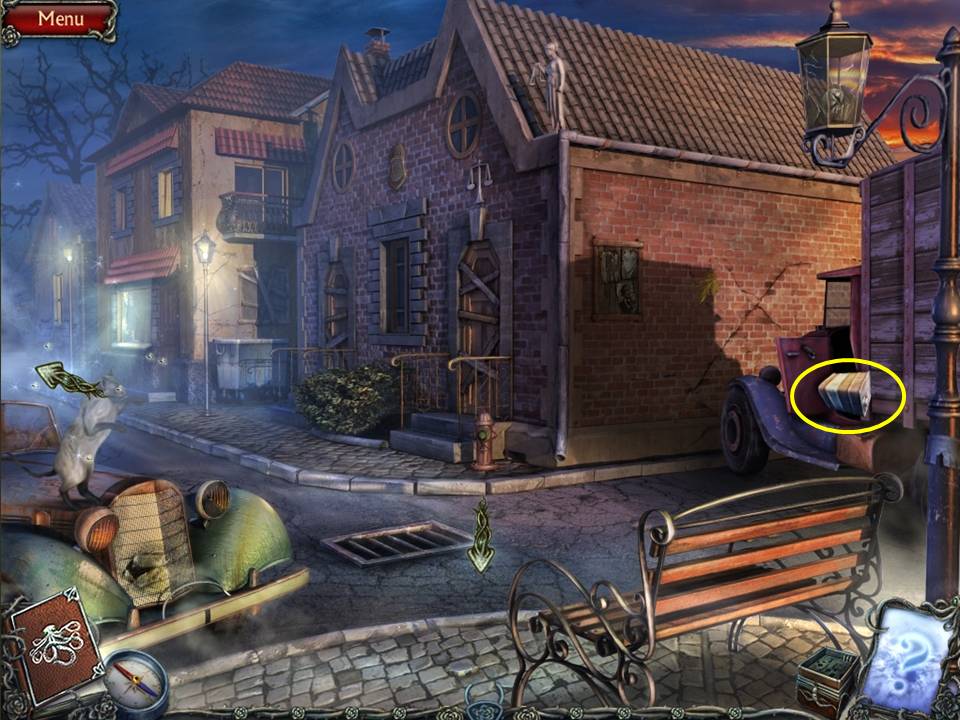
- Zoom into the truck.
- Open it with the TRUCK KEY.
- Take the FEATHER lying on the floor.
- Insert the TRUCK KEY in the ignition and turn it.
- Will someone PLEASE kill the cat!
-
Return to the schoolhouse.
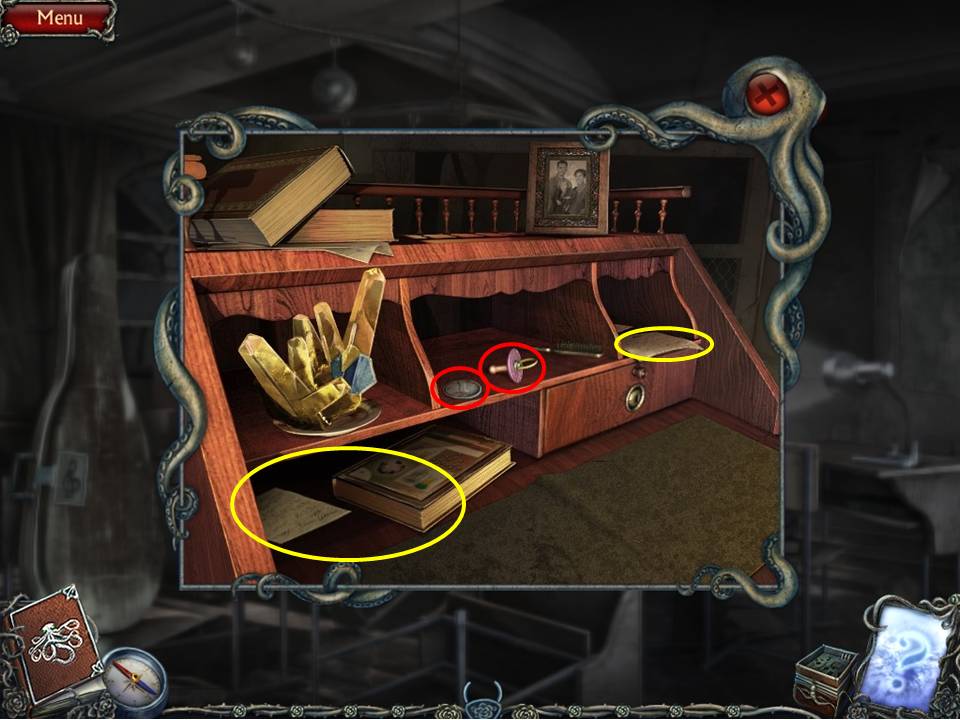
- Zoom into the desk.
- Place the FEATHER in the slot.
- Take the PACIFIER and COIN.
-
Zoom into the two notes and the book.
- Click down three times to return to Main Street.
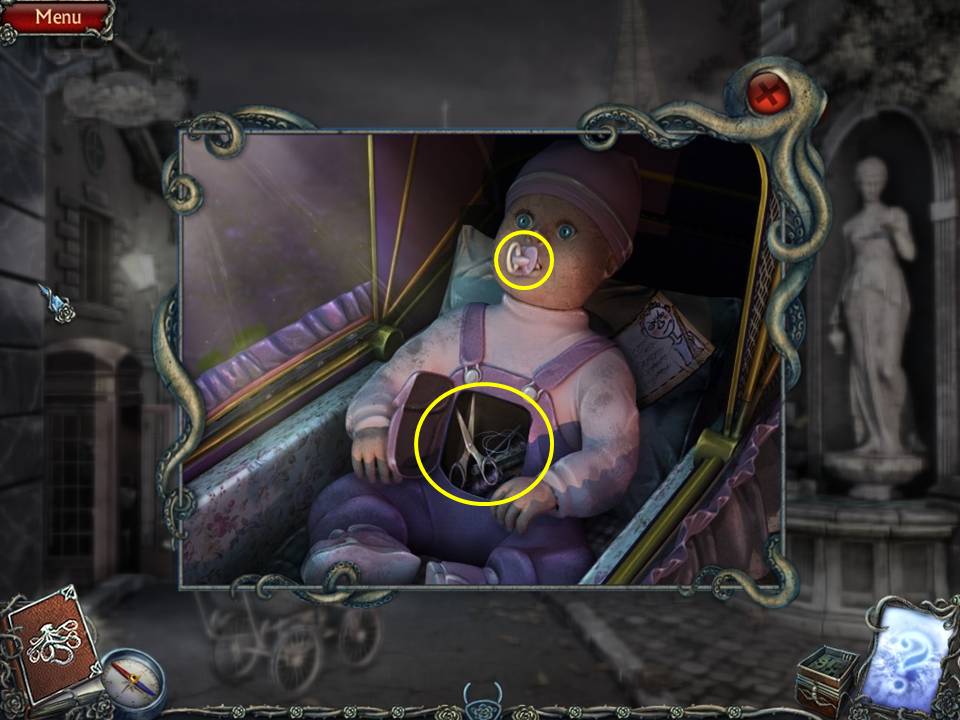
- Zoom into the baby carriage.
- Place the PACIFIER in the baby’s mouth.
- Take the SCISSORS inside the baby!
-
Either this kid has serious health issues, or it’s not real!
- Return to the truck.
- Snip the ribbon on the package with the SCISSORS.
- Take the second PLANET and 2 COINS.
-
Read the note.
- Return to the schoolhouse.
- Place the second PLANET in the solar system.
- Zoom into the golden planet.
- Take the COIN and the CARTRIDGES.
-
Click down six times.
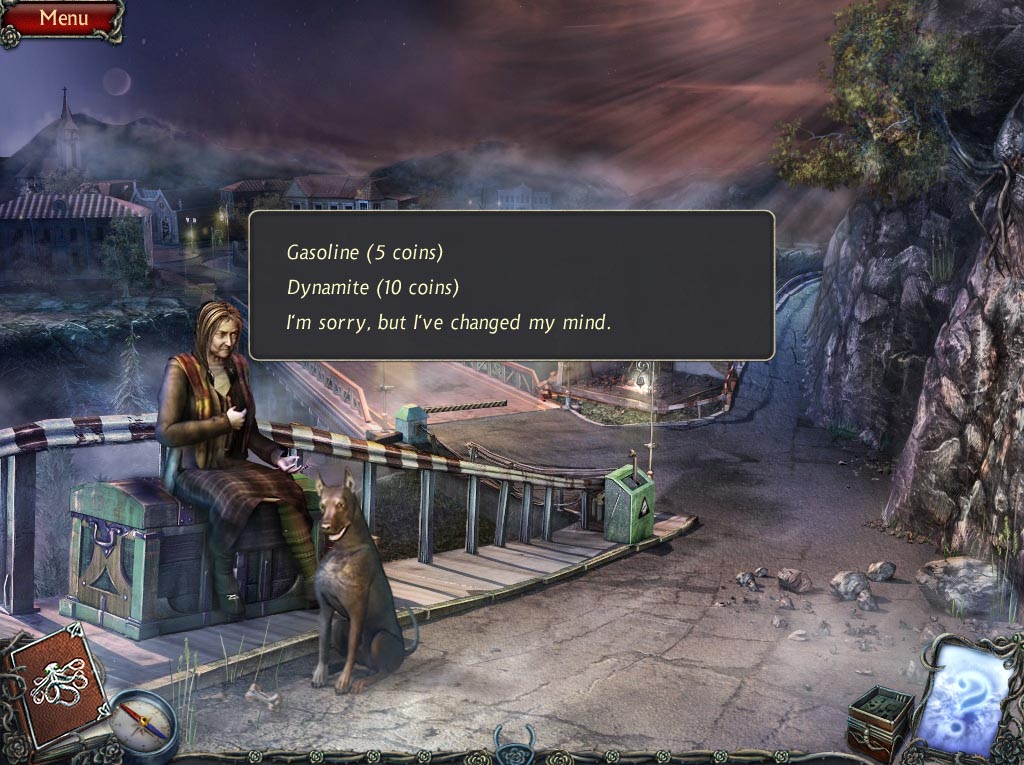
- Talk to the woman.
- Purchase GASOLINE for 5 COINS.
-
Return to the police station exterior.
- Pour the GASOLINE in the gas tank and start the truck up.
-
Enter the police station after the truck plows through the wall – exactly how many years are you going to get for demolishing a cop shop?
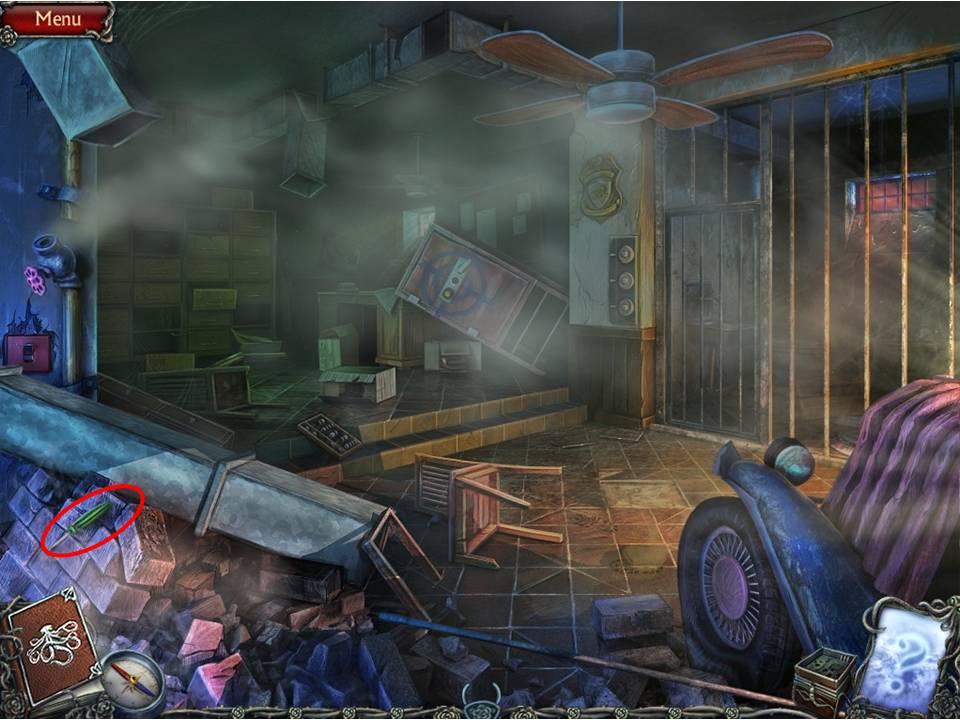
- Take the SCREWDRIVER on the rubble to the left.
-
Return to Main Street.
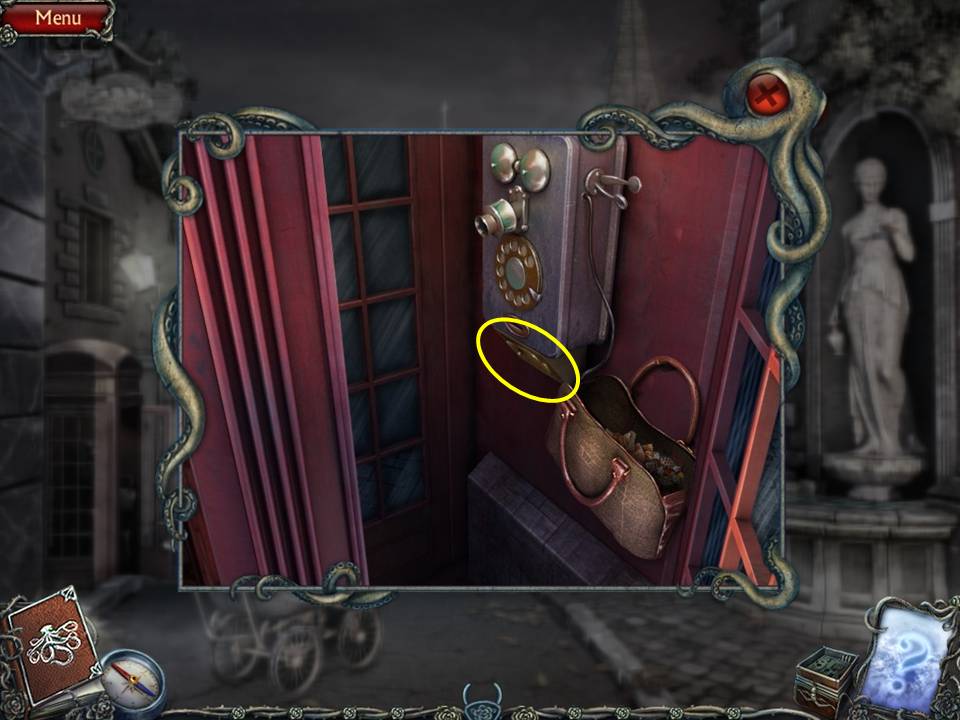
- Zoom into the phone booth.
- Zoom into the phone.
- Unscrew the screw with the SCREWDRIVER.
- Take the CRESCENT MOON and the COIN.
- Return to the church area.