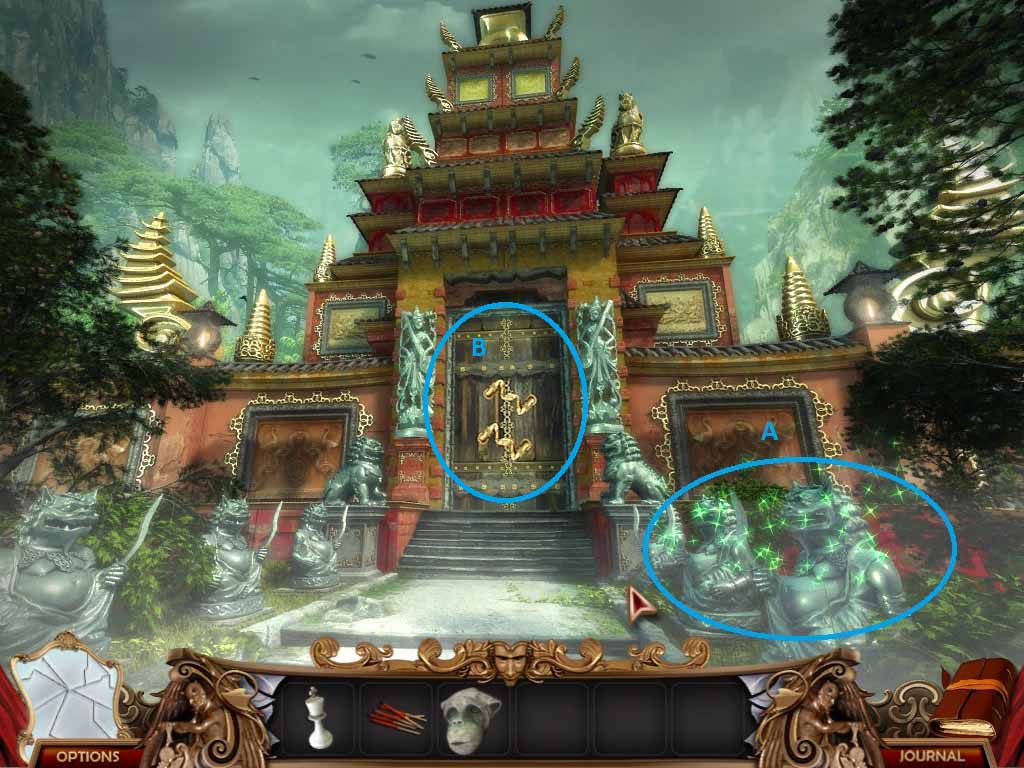
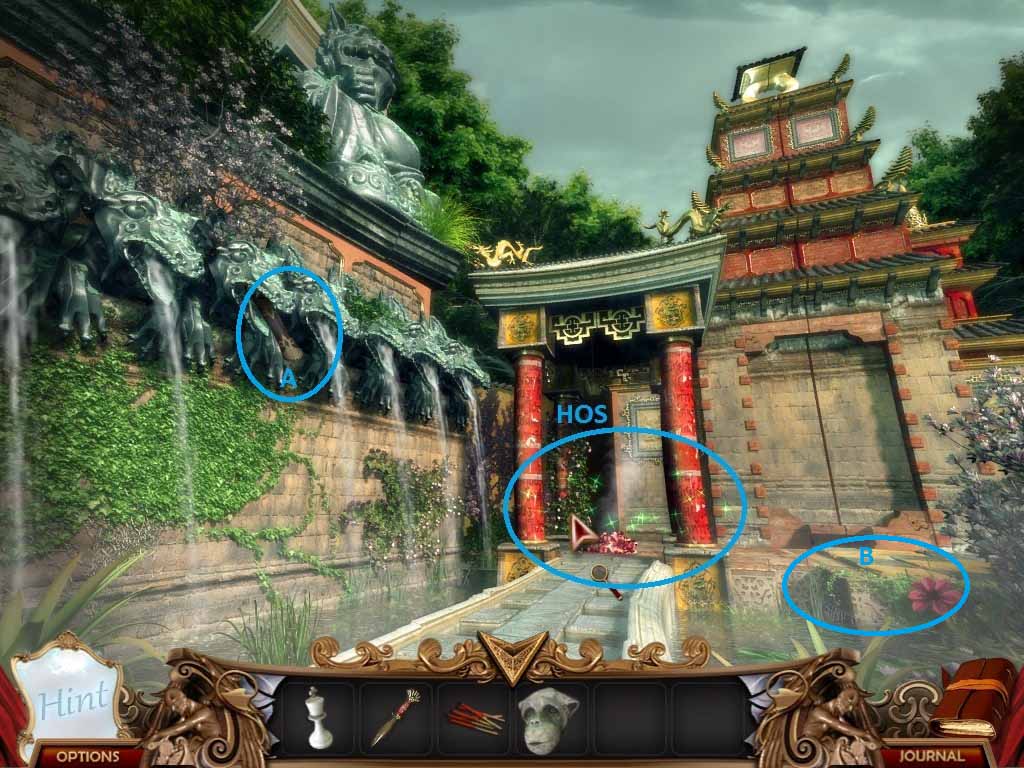
- The final showdown with the magic mirror approaches! You exit the mirror looking at an Asian-style gate with some freaky statues in front of it. It looks like one of them is breathing.
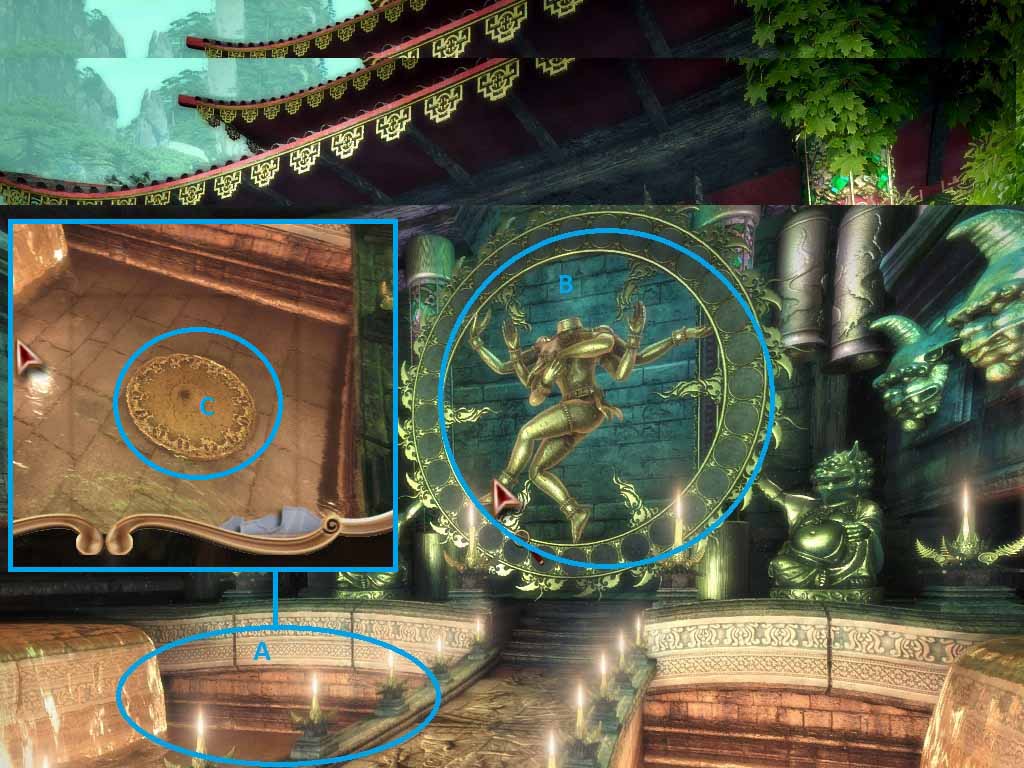
- Right off the bat, you’re confronted with a HOS.
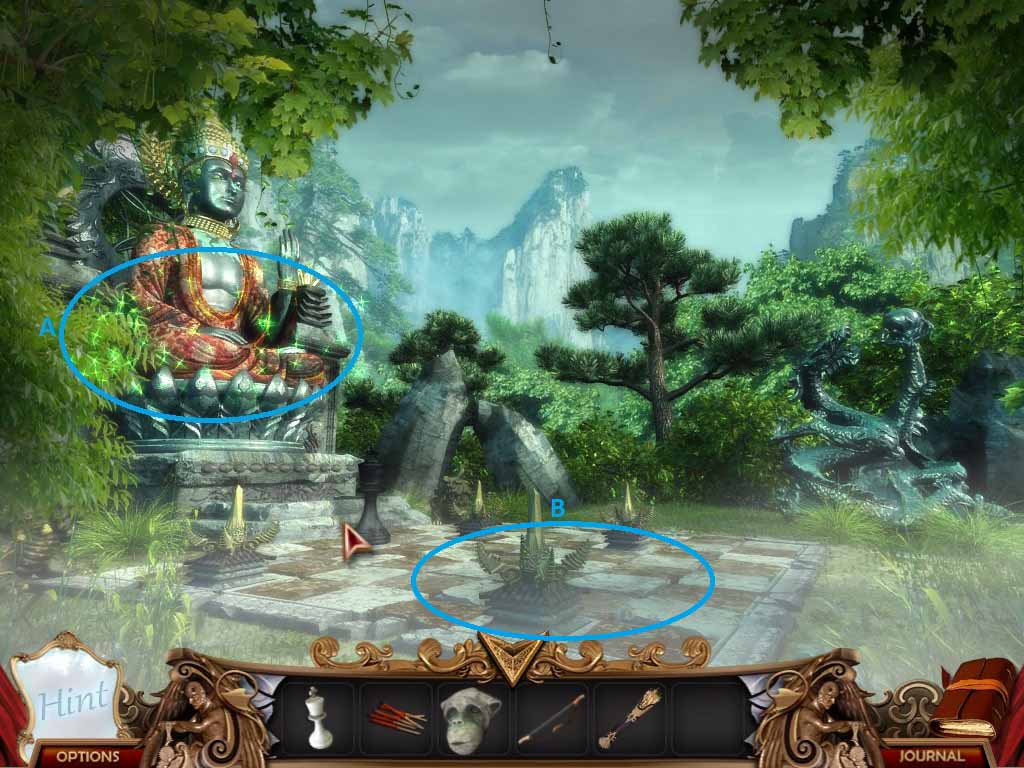
- At B, is the puzzle that will unlock the door – work on the HOS at A first.
- 1 – Bird Feed; 2 – Half Emblem; 3 – Dagger; 4 – Statue Arm; 5 – Full Emblem
- This one’s honestly a little tricky – good thing you have this guide, right?
- Start with the bird food, as it’s the only one you can complete right off the bat.

- Putting the feed in the bird feeder will cause the bird to fly over and eat before flying away.
- One the bird takes wing, take the last piece of the full emblem to use on the base of that dog-thing statue.
- Placing the first emblem on the statue will cause it to twist around, letting you take the last piece of the second emblem.
- Putting the half-emblem in place will, somewhat redundantly, cause THAT emblem to spin around, dropping the stone hand that will let you finish the statue.
- Once you add the statue’s missing arm, its mouth will pod open, revealing the dagger.
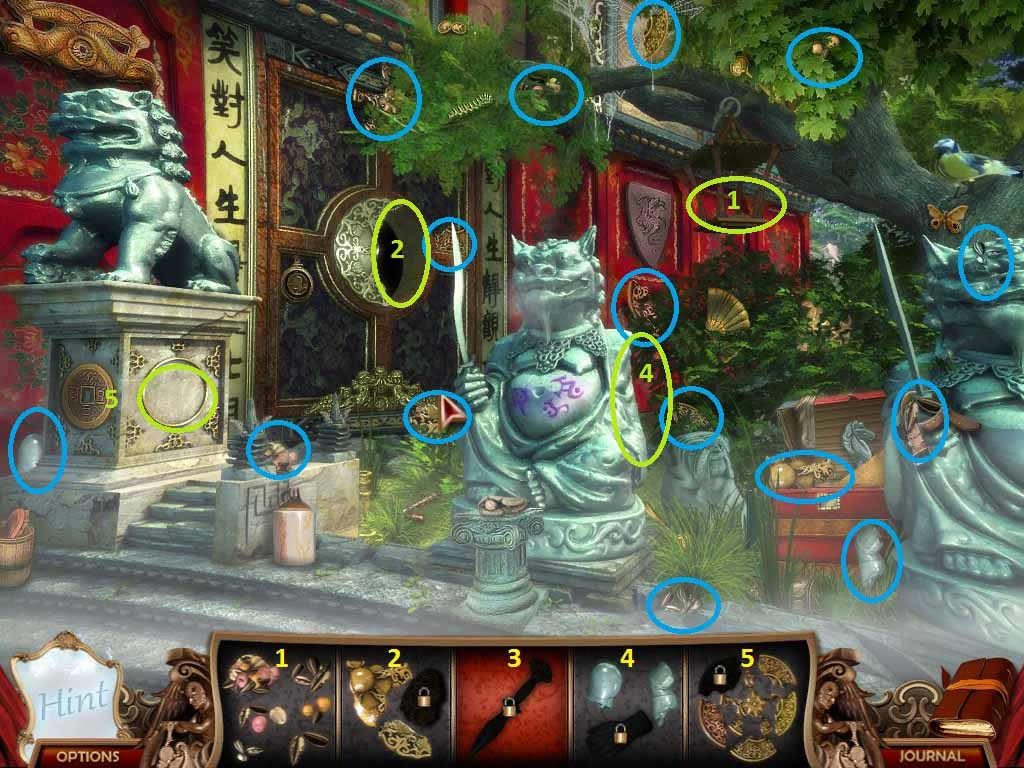
- Twist one of the top handles (A or B) to start them turning.
- Once they pass the halfway point, let go and press on the corresponding bottom handles (C or D, respectively) and they should link up in the middle.
- Do both sides.
- The doors should open now.

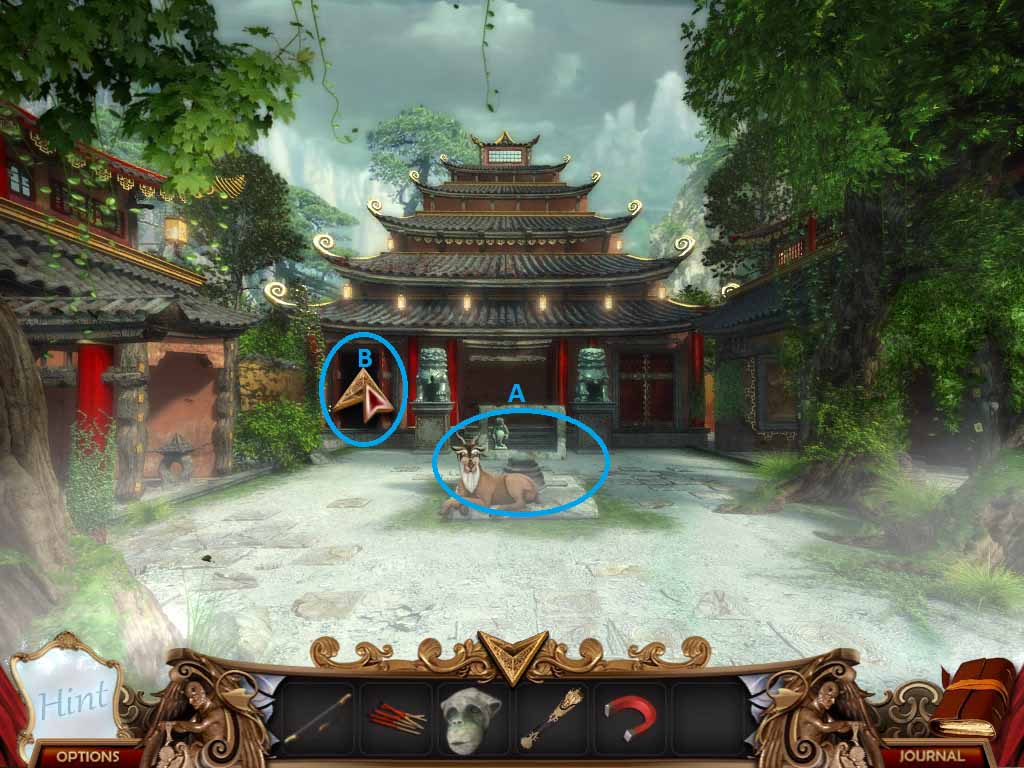
- Enter the shrine’s courtyard and a deer will start talking to you and offer to help, which is pretty nice, considering it hardly knows you.
- If you check by the deer at A, you’ll see what it’s talking about, you need 3 statues in order to proceed.
- Go to B to move on.
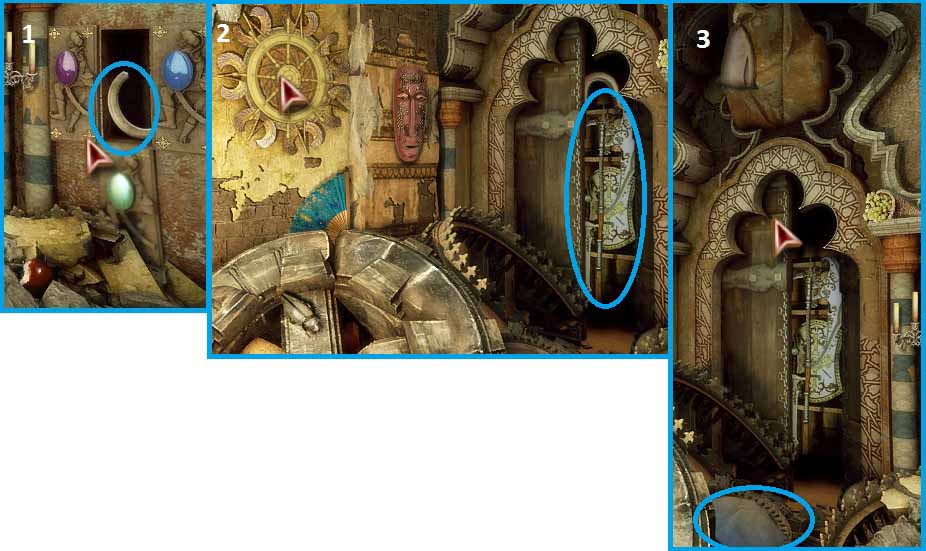
- I mainly included this picture because it’s pretty nice-looking.
- Click to start the next HOS.
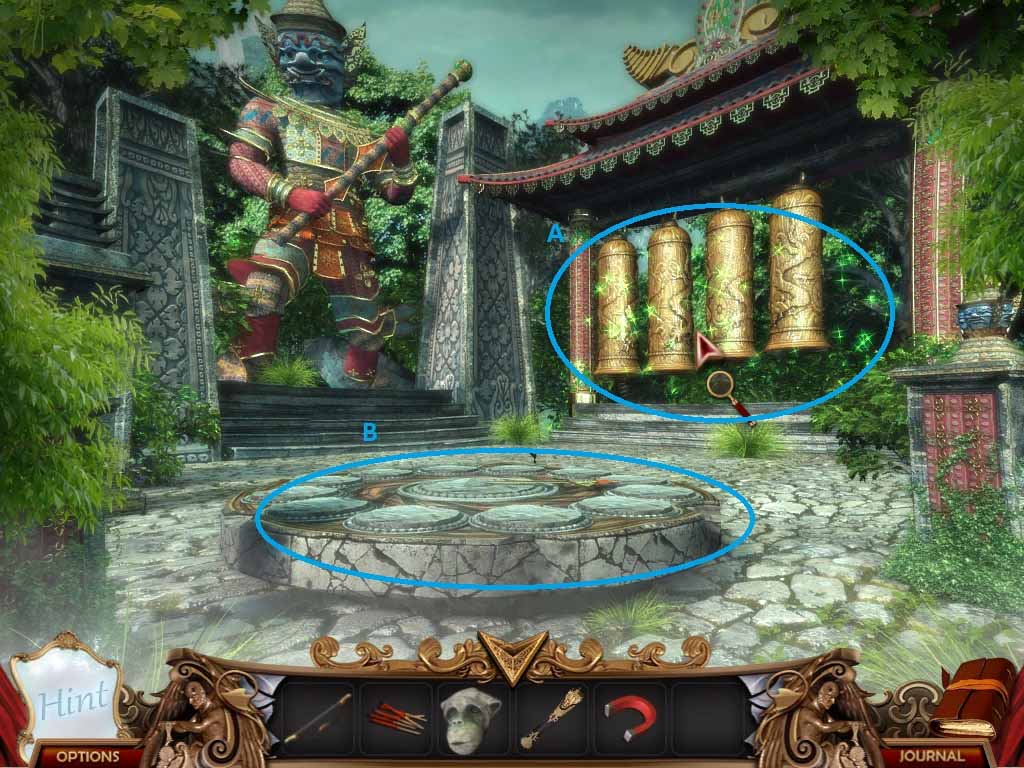
- Remember where A and B are, though, because we’ll be going back there in a second.
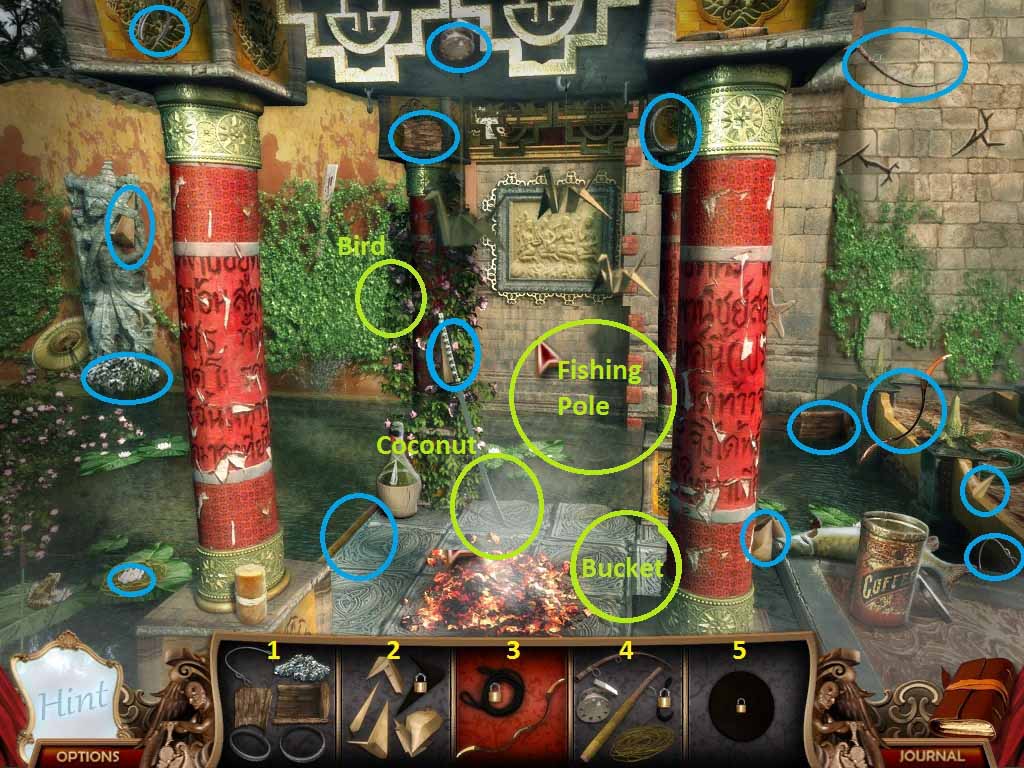
- 1 – Bucket; 2 – Origami Bird; 3 – Bow; 4 – Fishing Pole; 5 Coconut
- Collect the bucket first and use it to douse the fire.
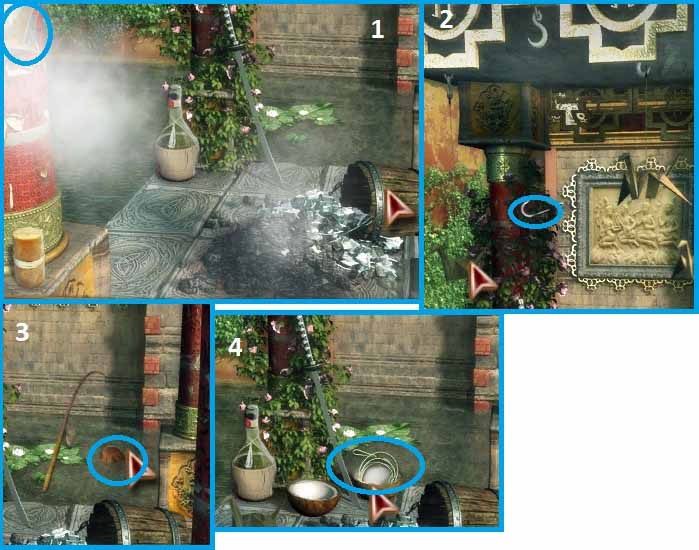
- This one had me looking around for a second… the steam from the fire actually peels back some of the wrapping on one of the columns, revealing the last piece of the bird.
- Place the finished origami on the mobile and it will cause one of the birds to fall off, revealing a fish hook.
- Finish the fishing pole and then use it to fish out the coconut.
- Slice the coconut open to find that a bowstring has randomly grown inside of it…
- Take your bow and go back to the A. Use your dagger on the dragon’s mouth and you can pry out a quiver of arrows.
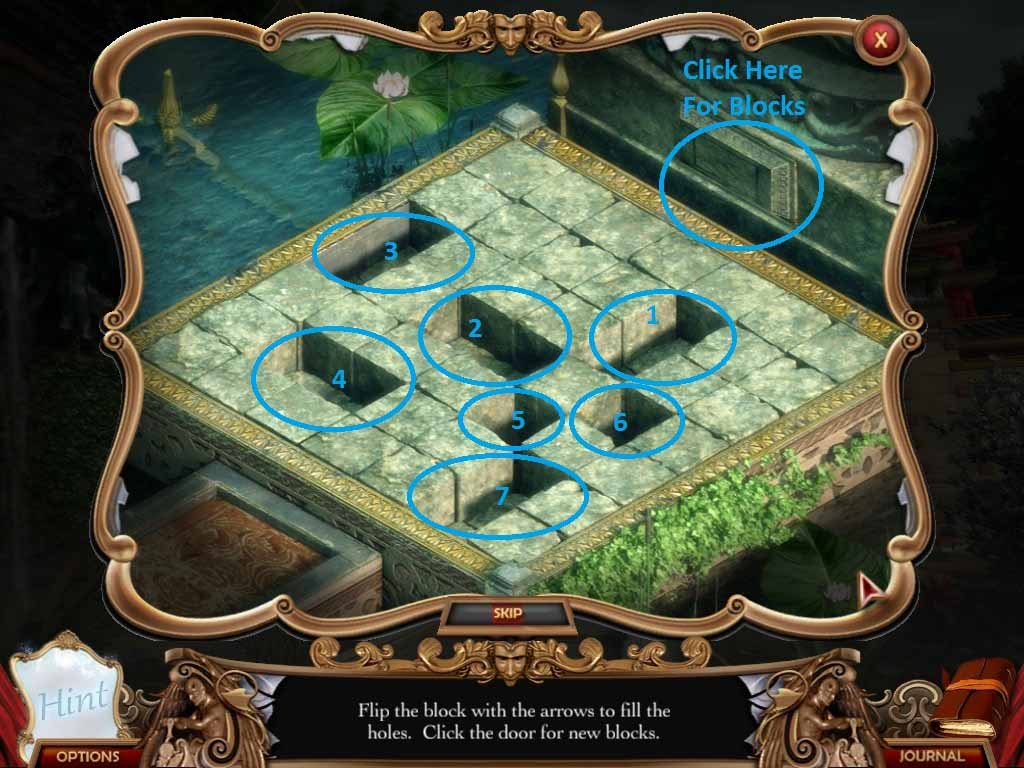
- This is hands-down my favorite puzzle of the game. I put the order I normally solve it in on the picture above.
- You click the slot to get a new stone block, then use the arrows to ‘turn’ the blocks in the direction.
- There are 4 directions, NE, NW, SE, and SW
- Solutions: 1 – SE, then SW; 2 – SW x3; 3 – SW, NW, SW, NW; 4 – SW x2, SE, SW, NW, SW, NW; 5 – SW x4, SE; 6 –SE, SW, SE, SW; 7 – SW, SE, SW, SE, SW x2
- When the block puzzle is complete, the wall will slide open and allow you into the chess garden.
- Once inside, you can jump straight into the next HOS (A), or take a moment to preview B, your next puzzle.
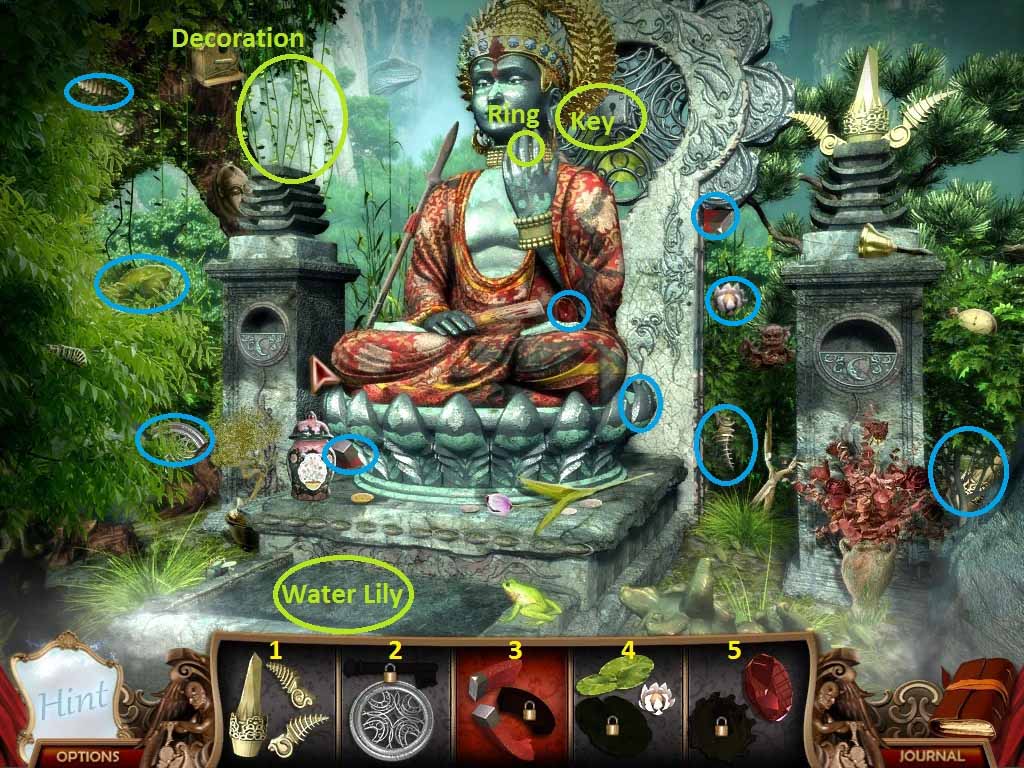
- 1 – Decoration; 2 – Key; 3 – Magnet; 4 – Water Lily; 5 – Ruby Ring
- This HOS is pretty quick because it doesn’t have a lot of individual pieces.
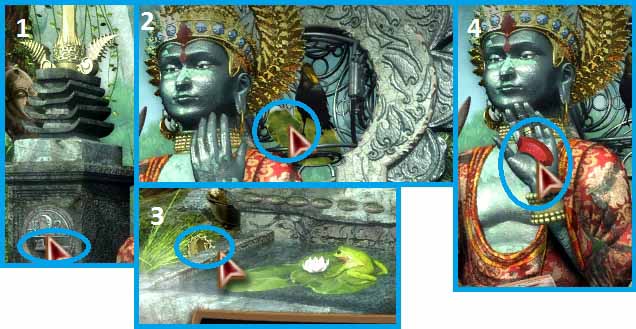
- Start with the decoration and place it on top of the bare column to the left.
- When you place the ornamentation on the column, a slot will open underneath, letting you finish the key.
- Using the key to unlock the birdcage will allow you to finish the water lily.
- Use the lily pad on the pond to unlock the last part of the ring.
- Place the ring on Buddha’s hand and it will twist around, revealing the last part of the magnet.
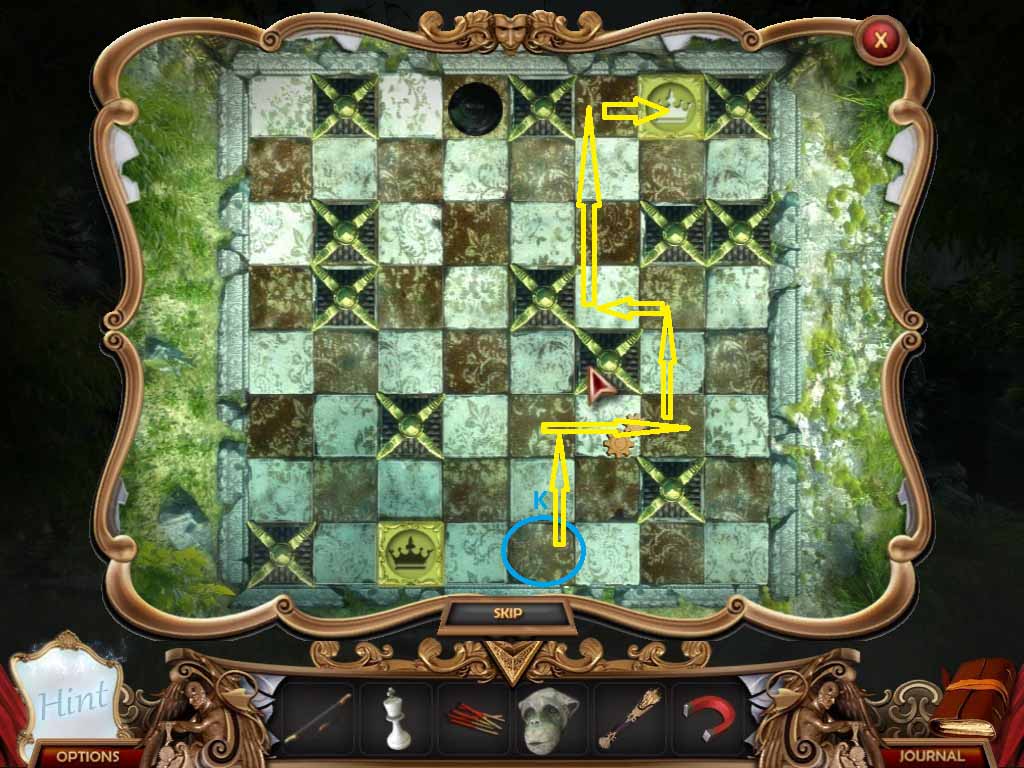
- This one, on the other hand, is a little brutal. You need to get both kings to their ending locations at the same time.
- Use your white king on the chess board to start the puzzle, then follow the course on the map to complete the puzzle.
- Your reward for all this is the first monkey statue, so take it and run (well, click) back to the shrine.
- Place the statue in its slot at A.
- Head through the open door at B.
-
This is just like the chess garden in that you have a HOS at A, and a hint at a puzzle involving the zodiac is at B.
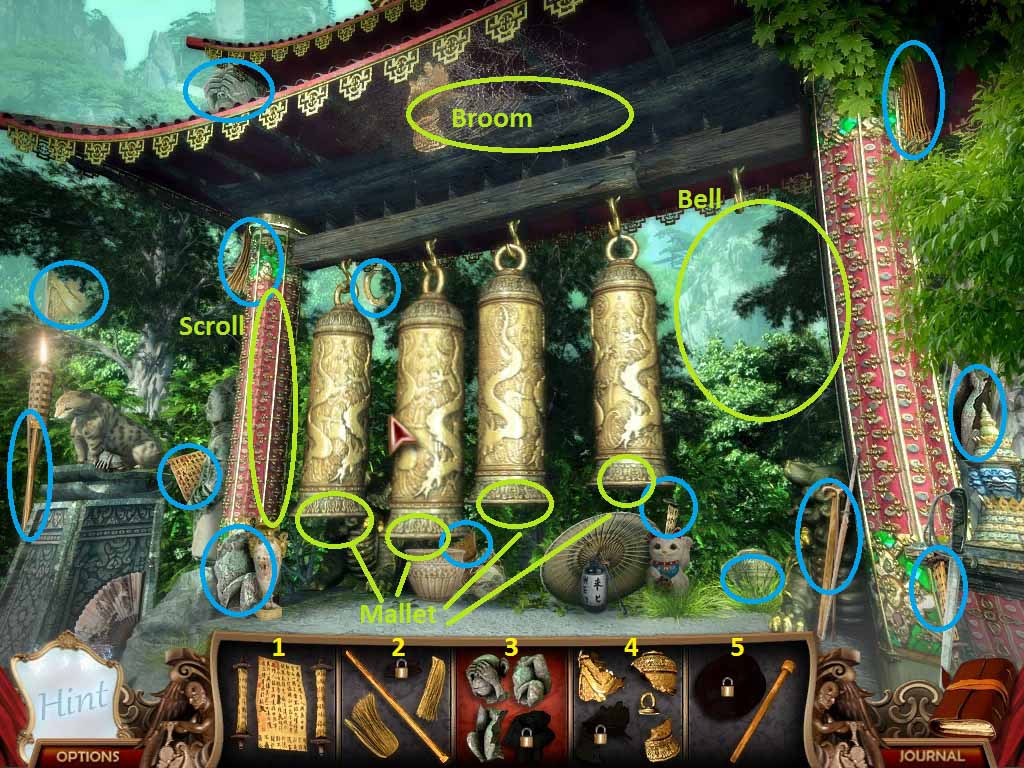
- 1 – Scroll; 2 – Broom; 3 – Monkey Statue; 4 – Bell; 5 – Mallet
- Start off by collecting the scroll and then nail it to the post.

- The last piece of the broom will reveal when the scroll unravels. Use the assembled broom to sweep away the cobwebs and finish the last bell.
- Add the fat bell to the chimes and the last piece of the mallet will appear.
- Playing the chimes with the mallet will scare away the cat, revealing the last piece of the monkey.
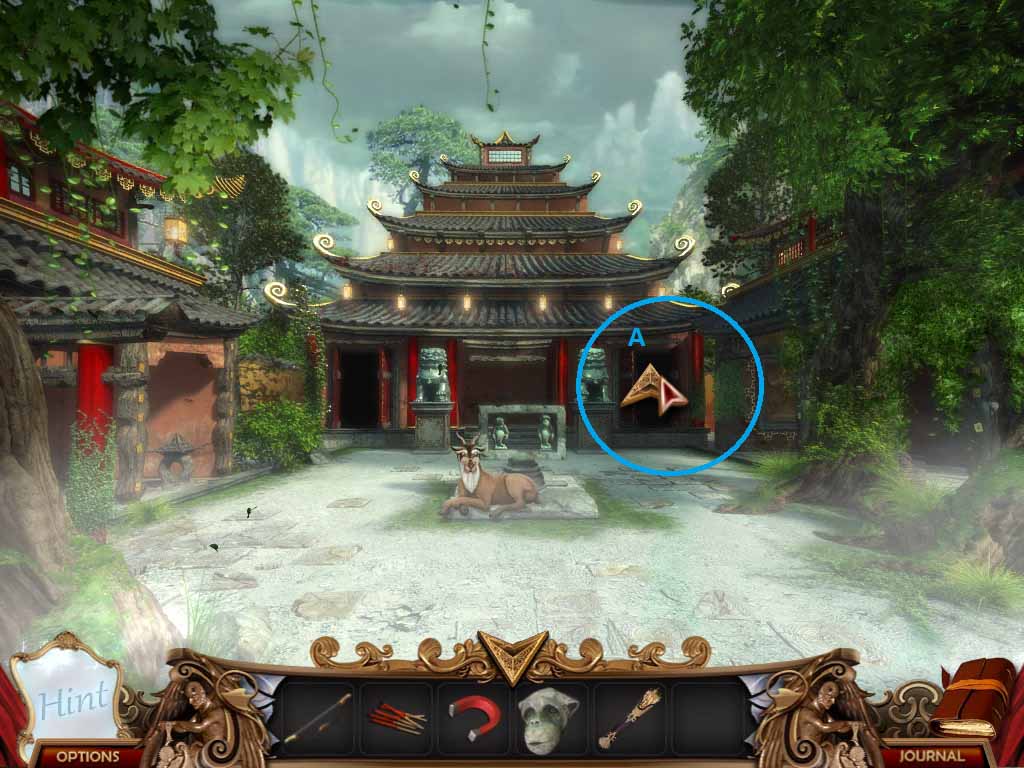
- Take the finished statue and head back to the courtyard and place it in the altar.
- The next door will open at A.
- You have to grab something from the next room before you move onto the zodiac puzzle.
- All you need to do right now in the next room is look at A, then use your magnet to attract the object in the fountain (C) to you.
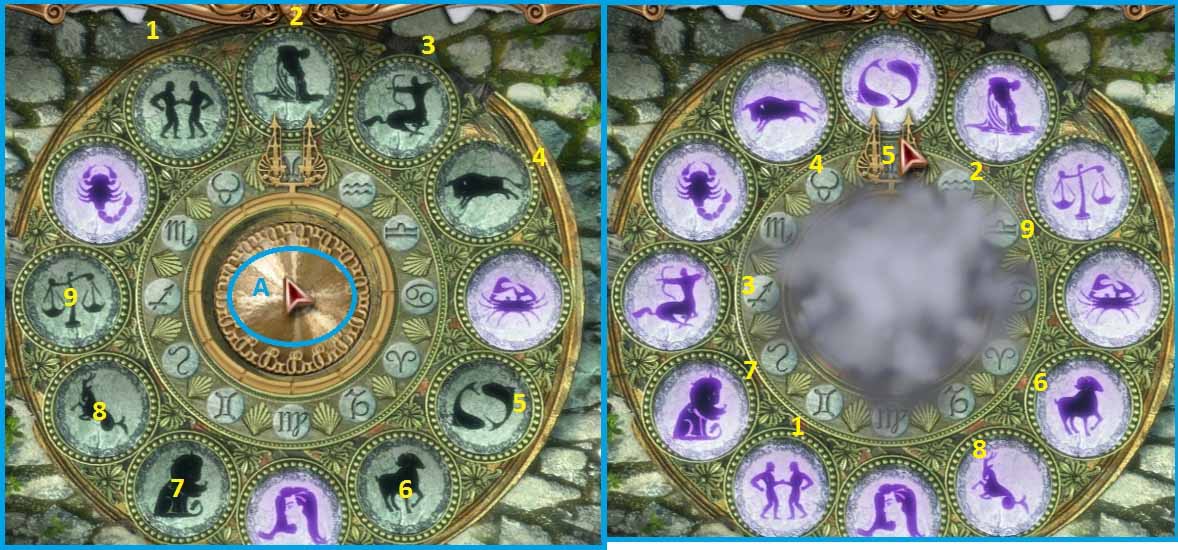
- Head back to the bells and zoom into the puzzle on the ground (B from before).
- Place the circular plate in the center of the puzzle, at A.
- Select one of the 9 open zodiac tiles (the glowing purple ones are locked into place) and begin moving them to match the pattern.
- This nets you the an idol head. Now where could that be useful…
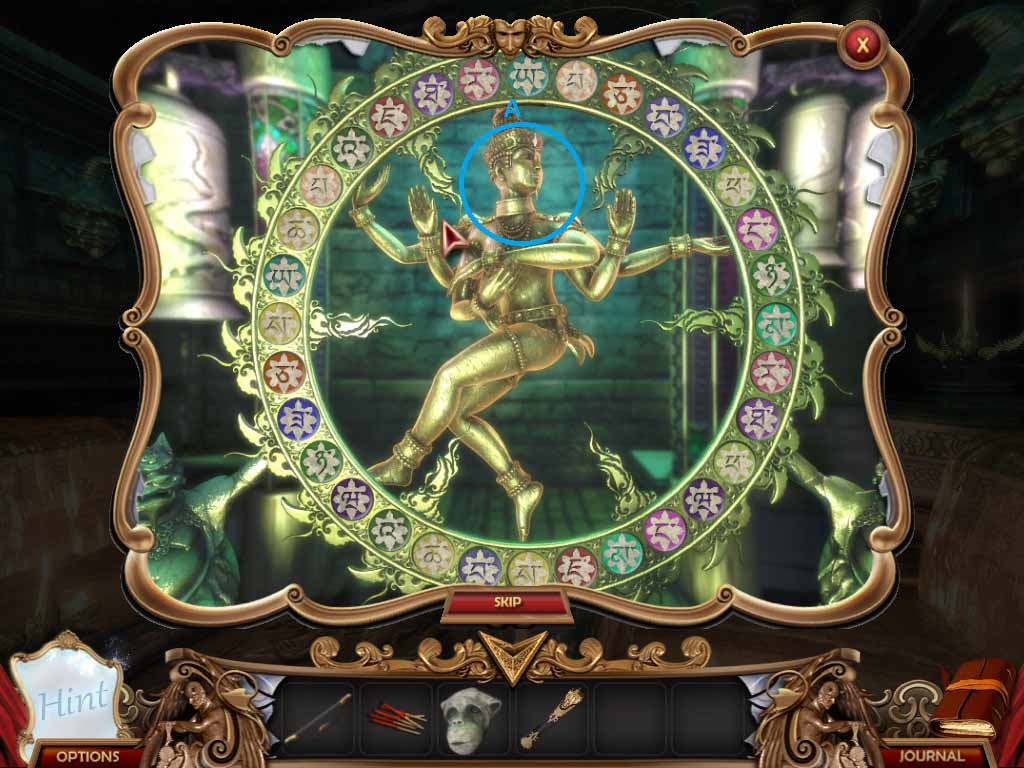
- Head back to the last room you unlocked with the head and zoom into the giant circle in the middle of the room.
- Place the head back in position at A and you’ll start a matching game.
- You can click on the idol at any point to reveal half the tiles for a few seconds, but that honestly isn’t as helpful as you’d think. It tends to border on information overload and not really help.
- The pattern is fixed, however, so feel free to use the picture as a guide.
- Go back to where the deer (goat?) is and use the last monkey statue to almost finish the statue.
- You’ll notice that it’s missing its head, which is thankfully something you can correct.
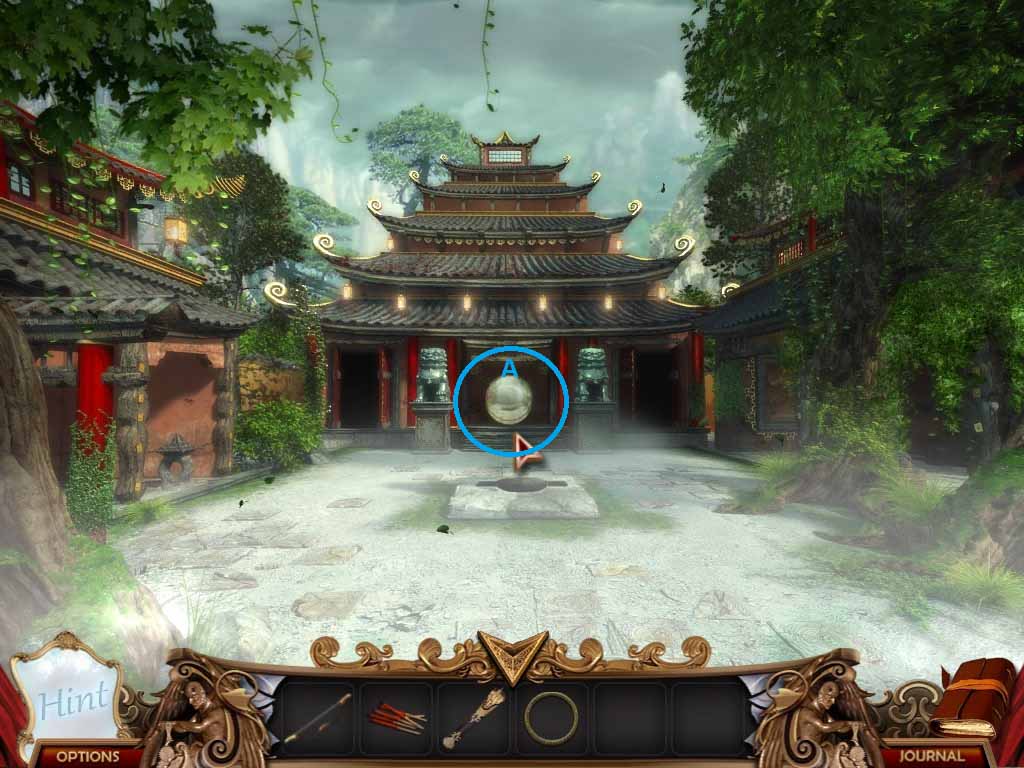
- Once the statues are finished, the deer-goat will give you a frame and new mirror will rise into view.
- Use the frame at A to open the portal to the final stage.
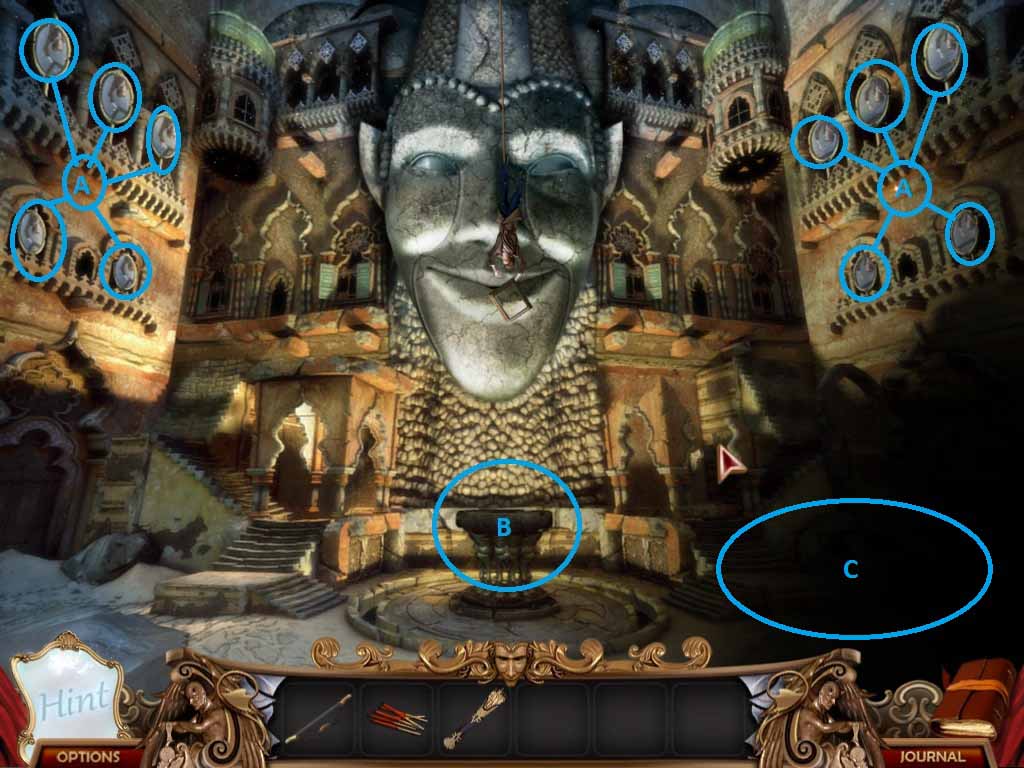
- So, once you pop out of the purple wormhole, you’ll notice it looks like the mirror is about to sacrifice Tommy to itself. It now becomes your job to stop that.
- The way to do that (apparently) is to first shoot all the mirrors marked A in the picture above.
- Use your long bow on the mirrors to shatter them all.
- The statue will begin crying oil-blood tears.
- Go to B to get a look at the altar.
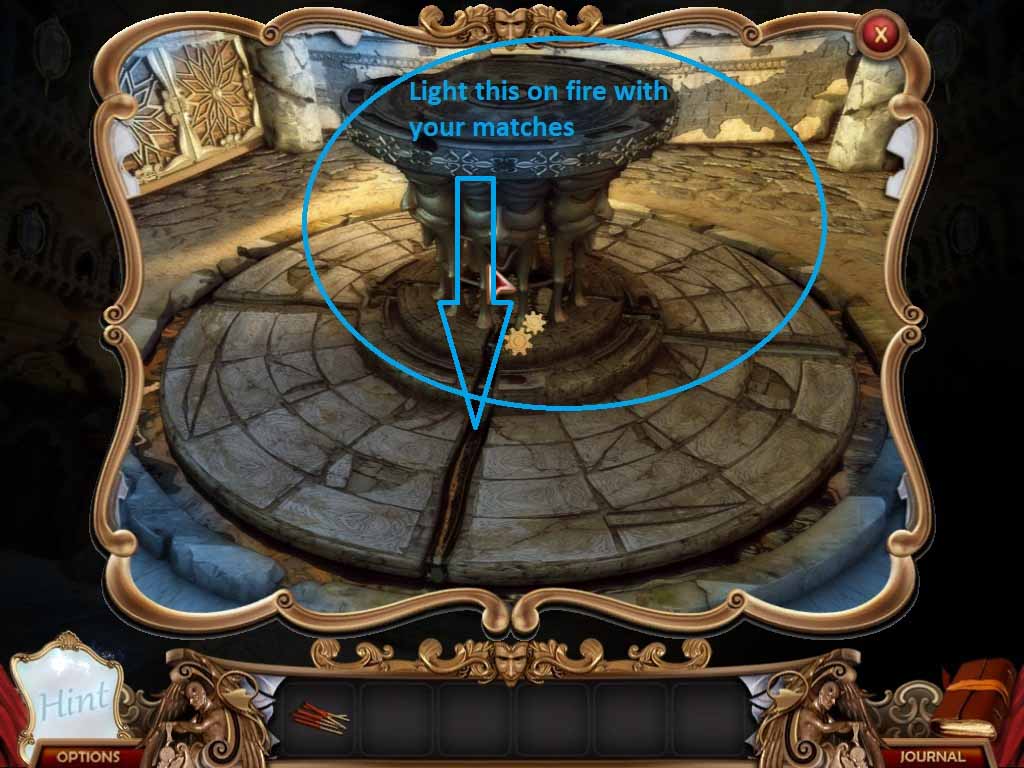
- Follow instructions, light the oil on fire.
- By the way, if Tommy’s annoying you by whining at you while you’re trying to save his life, you’re not alone. I purposefully went and made a sandwich to see if he falls. He won’t.
- Once you’re finished, a new HOS will be visible to the right of the altar (at about C in the last picture).
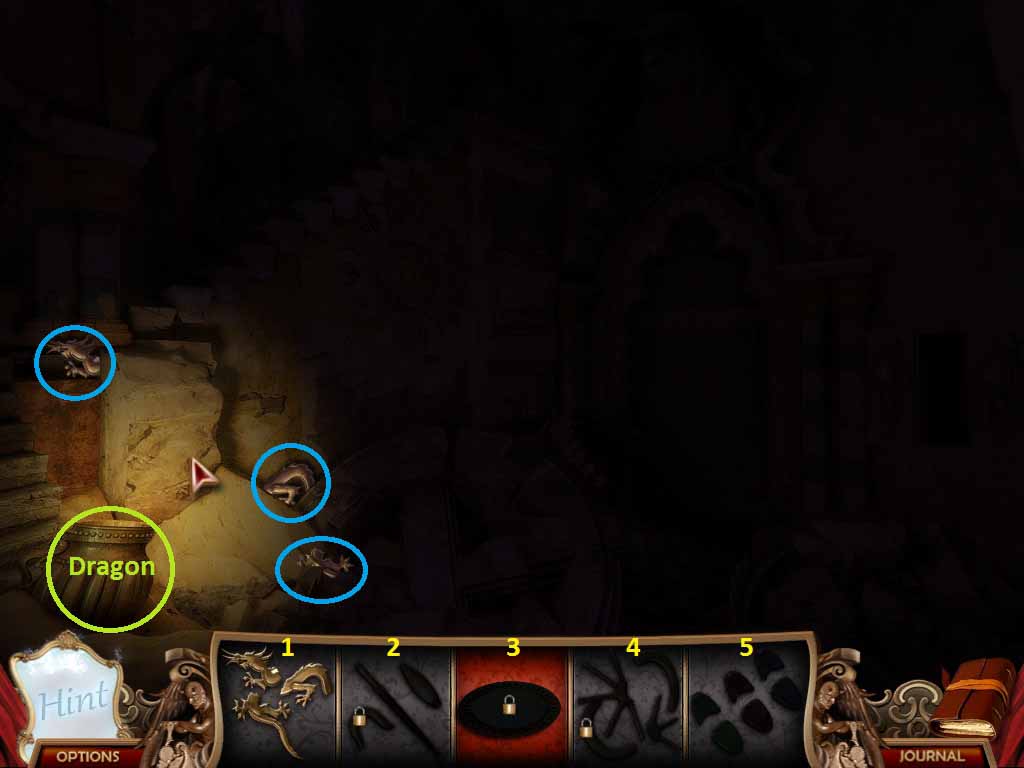
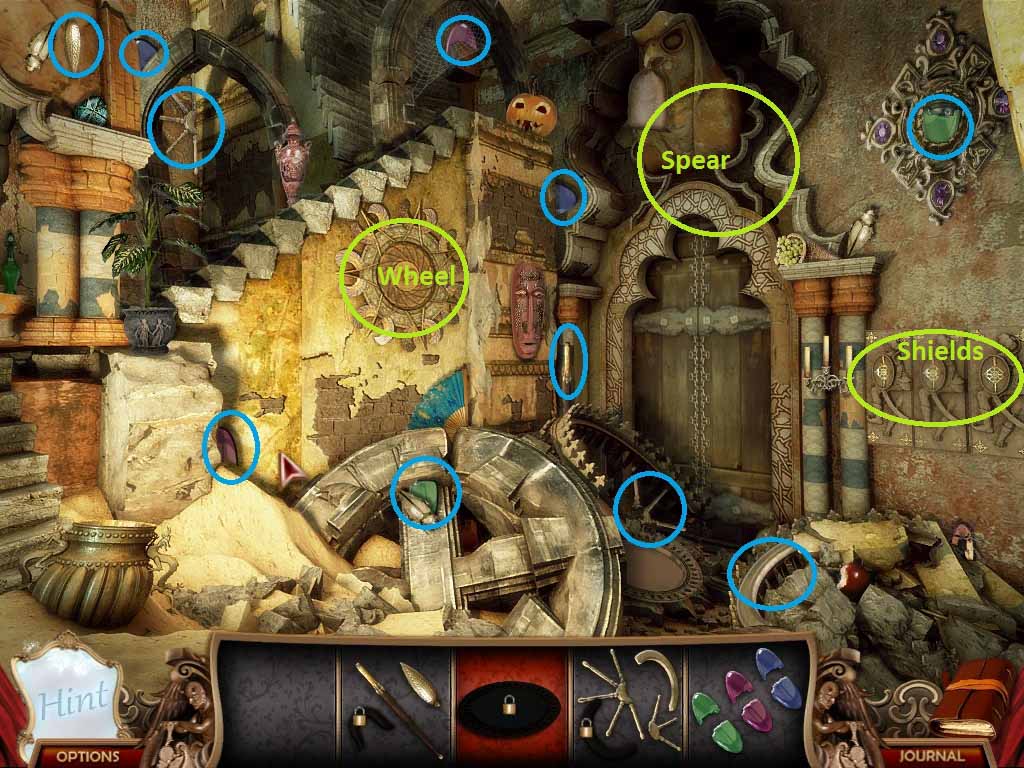
- 1 – Dragon; 2 – Spear; 3 – Sand; 4 – Wheel; 5 - Shields
- Well… this starts out simply enough.
- Collect the 3 dragons and use them on the jug to light up the rest of the screen.
- This scene really makes me wish I had a magical fire dragon lamp in my house.
- Anyway, now that you can REALLY begin this HOS, collect the shields and use them on the wall.
- One of the shield panels will slide down and allow you to complete the wheel.
- Use the wheel on the wall to unlock the door into the armory so you can grab the last spear piece.
- Stab the hanging bag and the sand will pour out of it.
- Grab the sand then hurry (or don’t hurry) back to the altar.
- Pour the sand into the altar, and guess what…
- You just won the game!
- Now all you need to do is enjoy the last cut-scene of your escape with Tommy while glass shatters and the house vaporizes.