
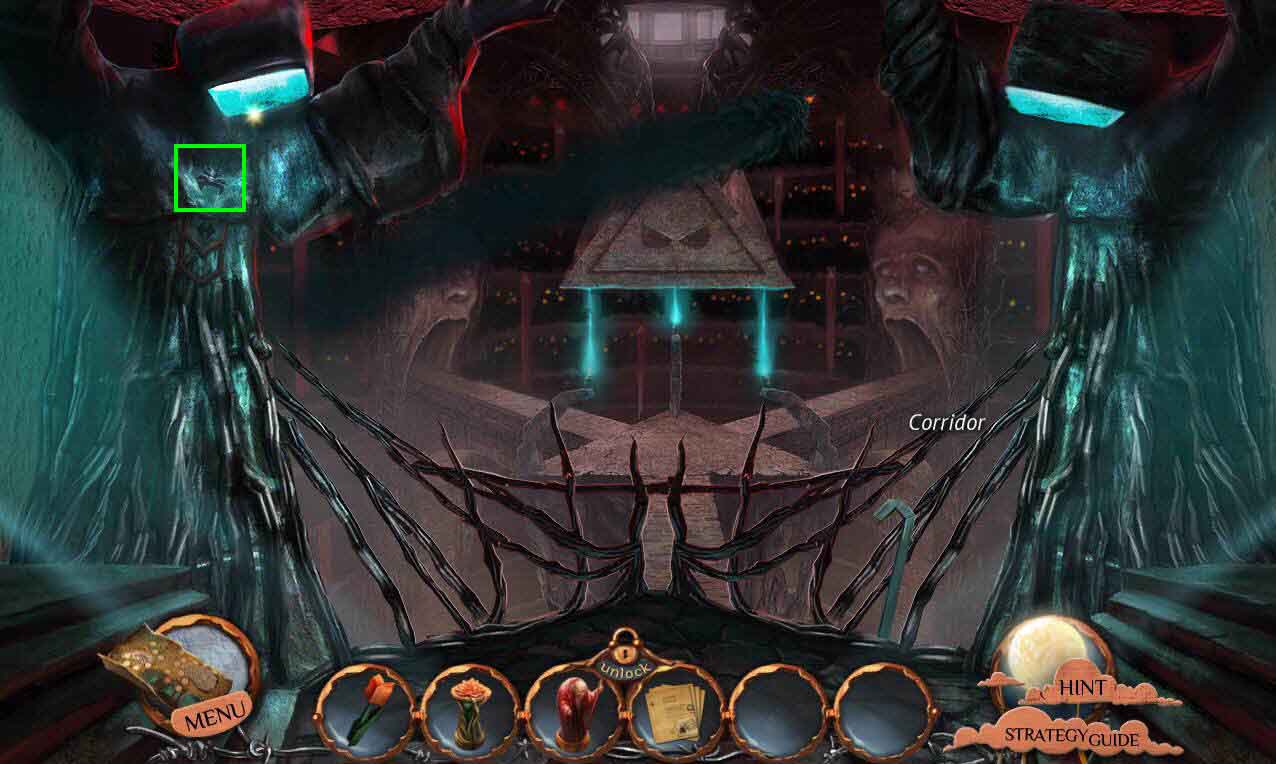
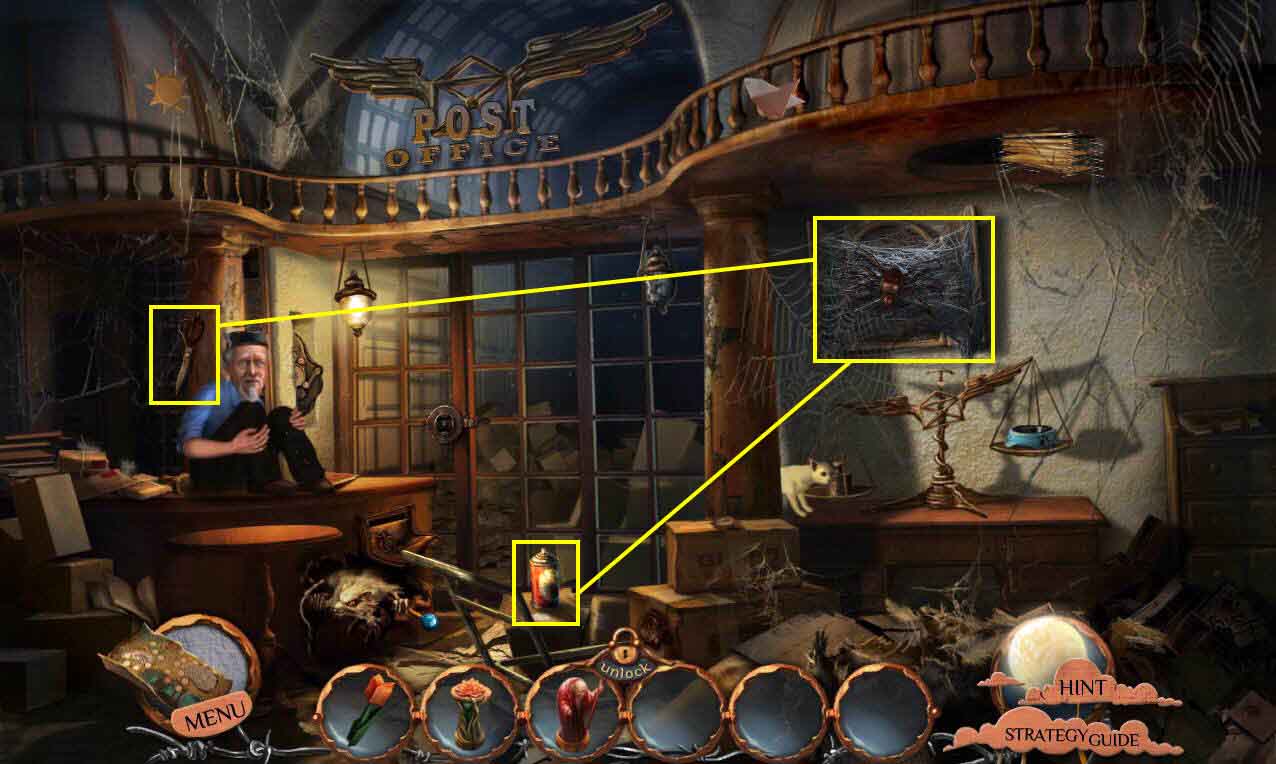
- Click on the left statue to zoom in.
- Take the SPIDER ORNAMENT.
- Go to the left to the archives.
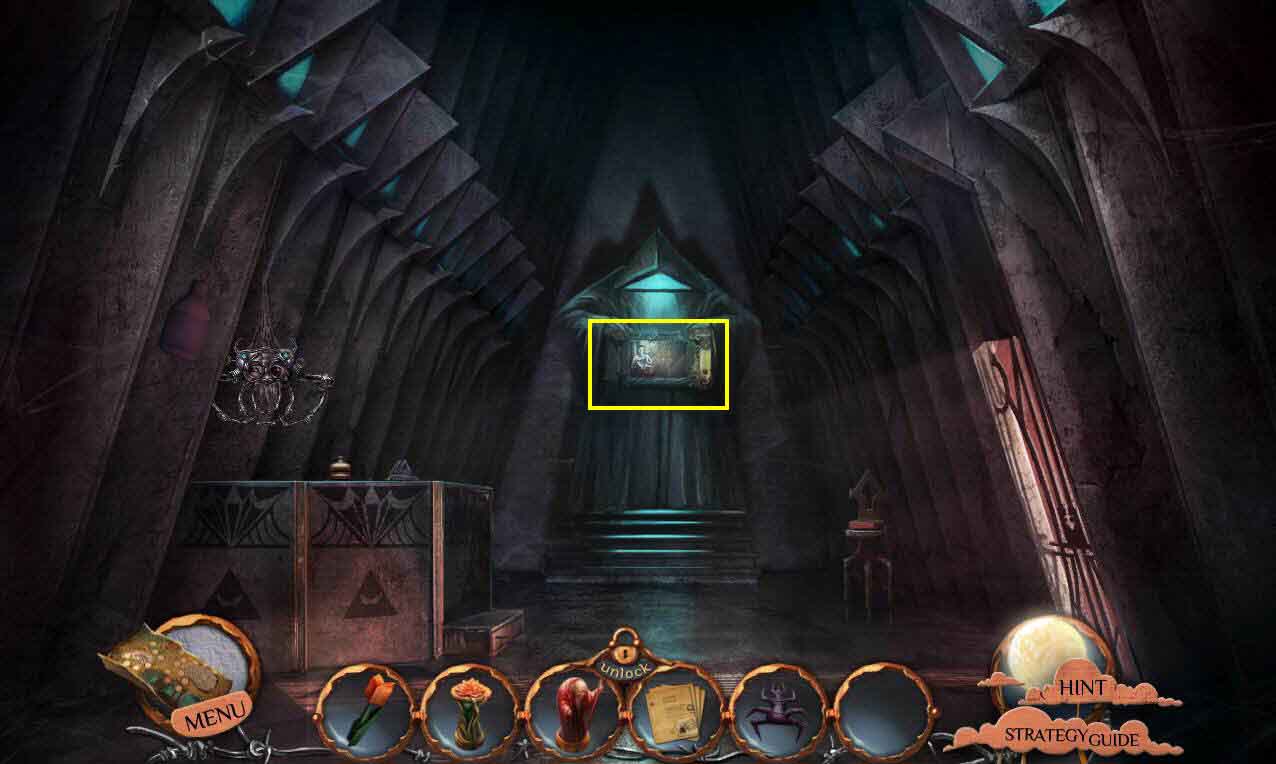
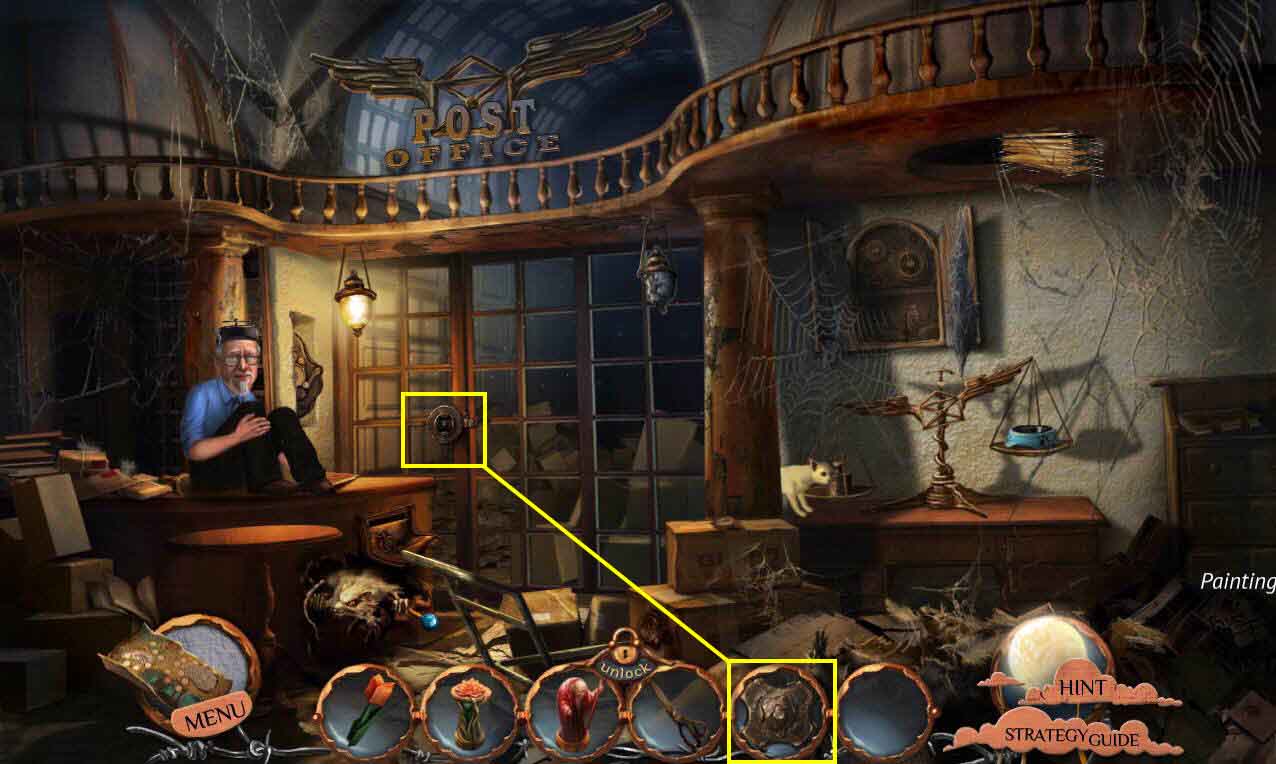
- Click on the painting that the statue is holding to zoom in.
- Click on the painting again. You will start sorting through the files in your inventory until you find the right one.
- Zoom out.
- Click on the archivist.
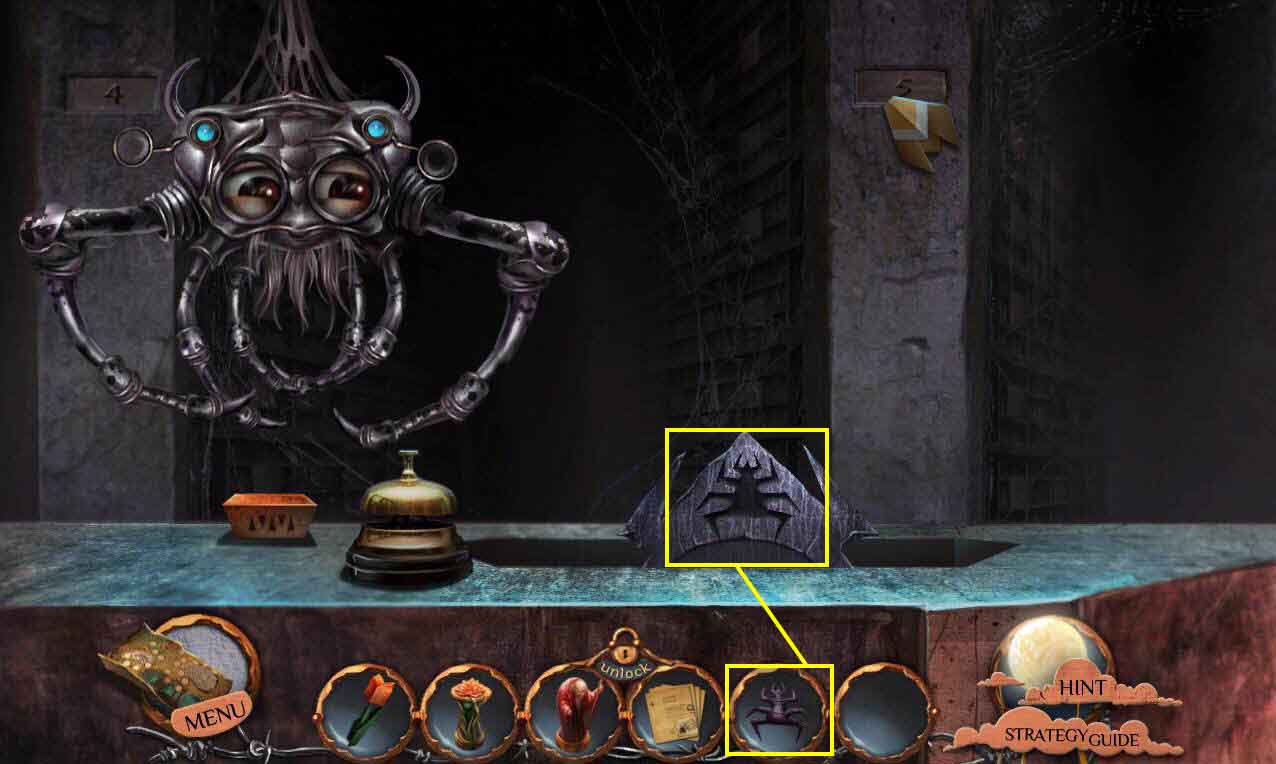
- Use the SPIDER ORNAMENT on the empty slot.
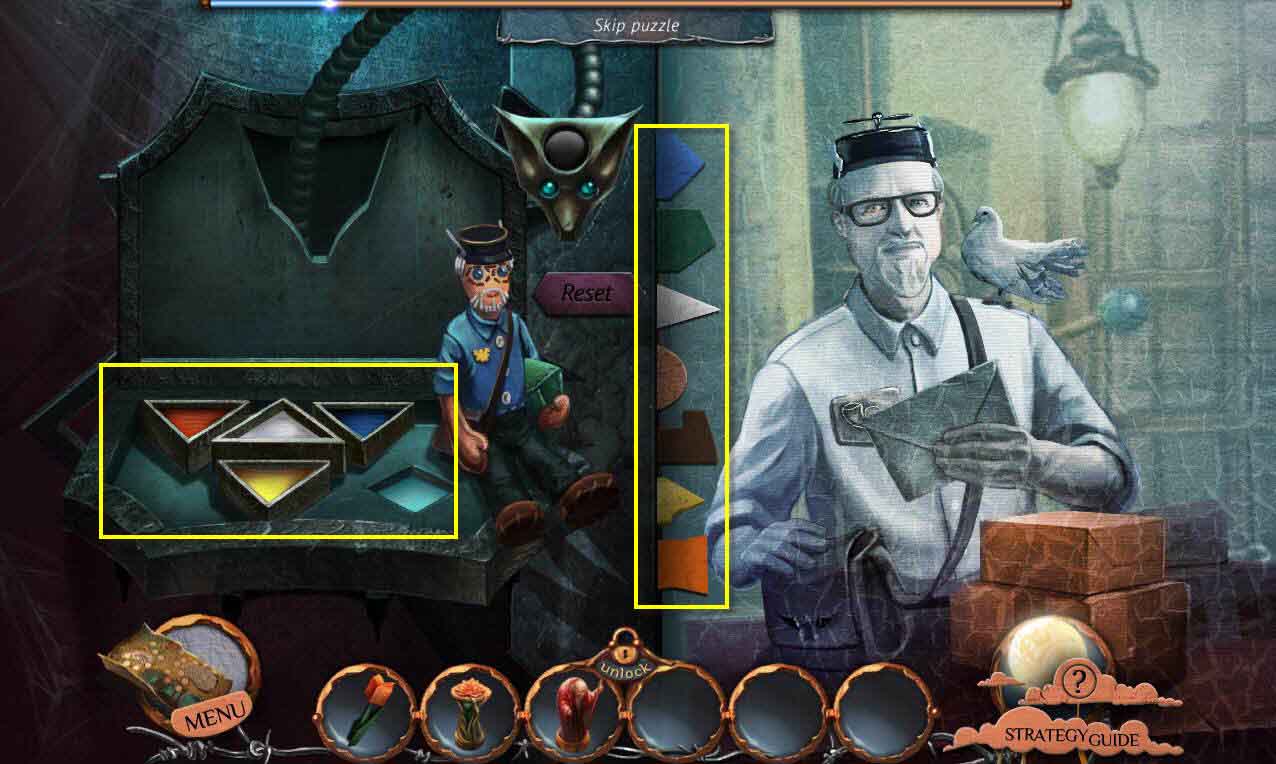
- This will start a mini-game.
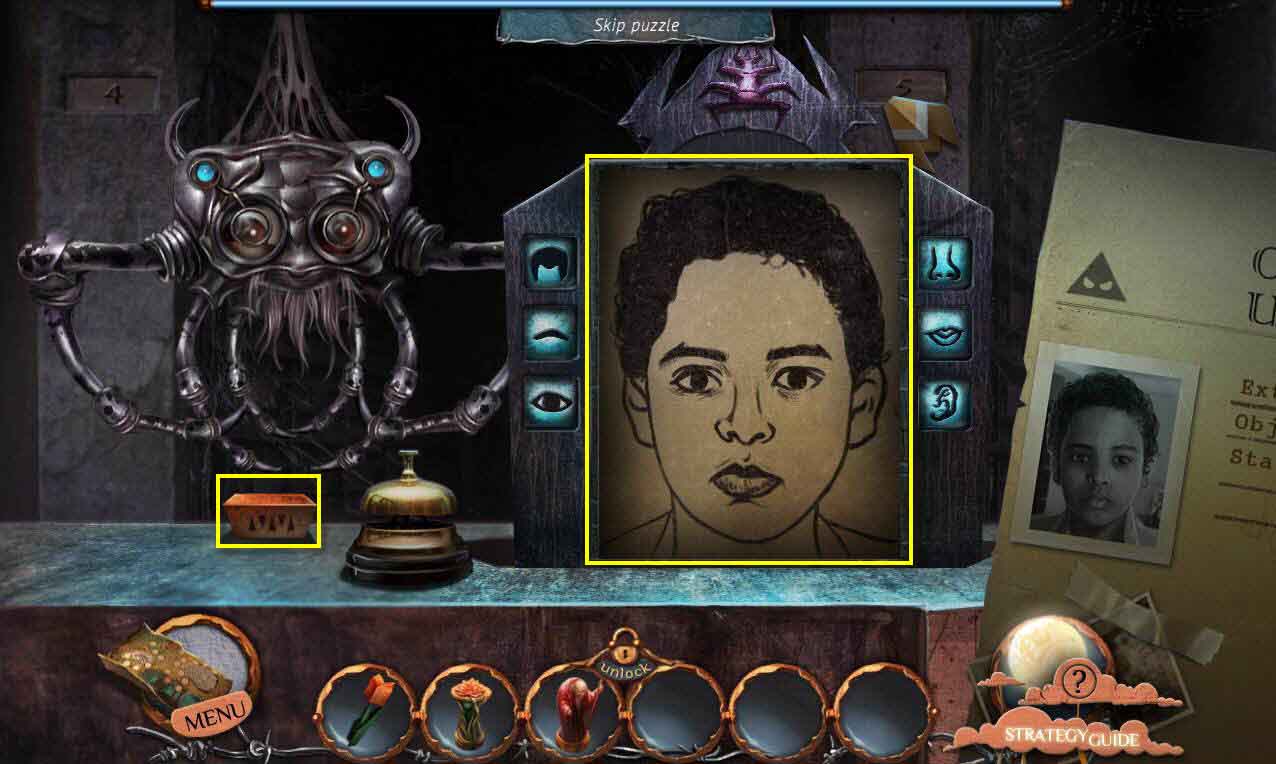
- The goal of the game is to match the features to the photo.
- Click on the blue buttons to change the features.
- Click on the bell to check to see if you've got it right.
- Take the POSTMAN DOLL and the WEIRD KEY when you are finished.
- Zoom out.

- Click on the case on the chair to zoom in.
- Use the WEIRD KEY on the lock to open it.
- Take the REPAIR KIT.
- Click on the painting again to zoom in.
- Use the REPAIR KIT on the holder on the side.
- Click on the kit to open it.
- Use the POSTMAN DOLL on the kit.
- This will start a mini-game.
- The goal of the game is to pain the picture the right colors based on the doll.
- However, it's a little trickier than that, as the colors need to be painting in the right order as well.
- Click on the blue tab - click on the blue paint and then the white paint. Paint the image.
- Click on the dark brown tab - click on the blue and orange paints. Paint the image.
- Click on the yellow tab - click on the yellow paint. Paint the image.
- Click on the green tab - click on the yellow and blue paint. Paint the image.
- Click on the orange tab - click on the orange paint. Paint the image.
- Click on the light brown tab - click on the orange and white paints. Paint the image.
- Click on the white tab - click on the white paint. Paint the image.
- When you are done, enter the painting.
- Take the INSECTICIDE and the SCISSORS right behind the postman.
- Click on cabinet to zoom in.
- Use the INSECTICIDE on the spider.
- Use the SCISSORS on the web.
- Take the GLASSES.
- Use the GLASSES on the postman.
- You will receive a KEY.
- Click on the door to zoom in.
- Use the KEY on the lock.
- Click to turn it and then click on the sparkles to play the HOS.
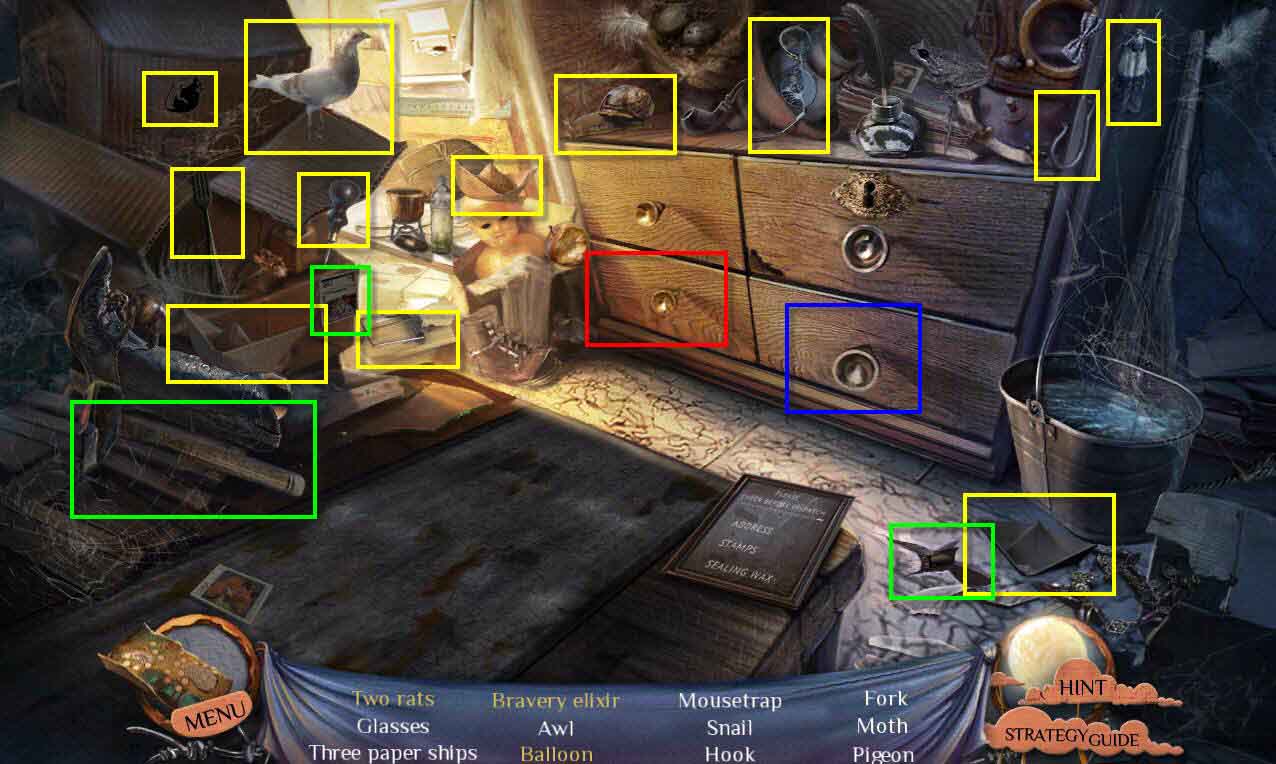
- Find all the items on the list.
- This one is a bit tricky.
- Find all the regular items.
- Click on the hammer and use it on the floor.
- Take the knife and use it on the stamp on the box.
- Now, click on the table to zoom in.
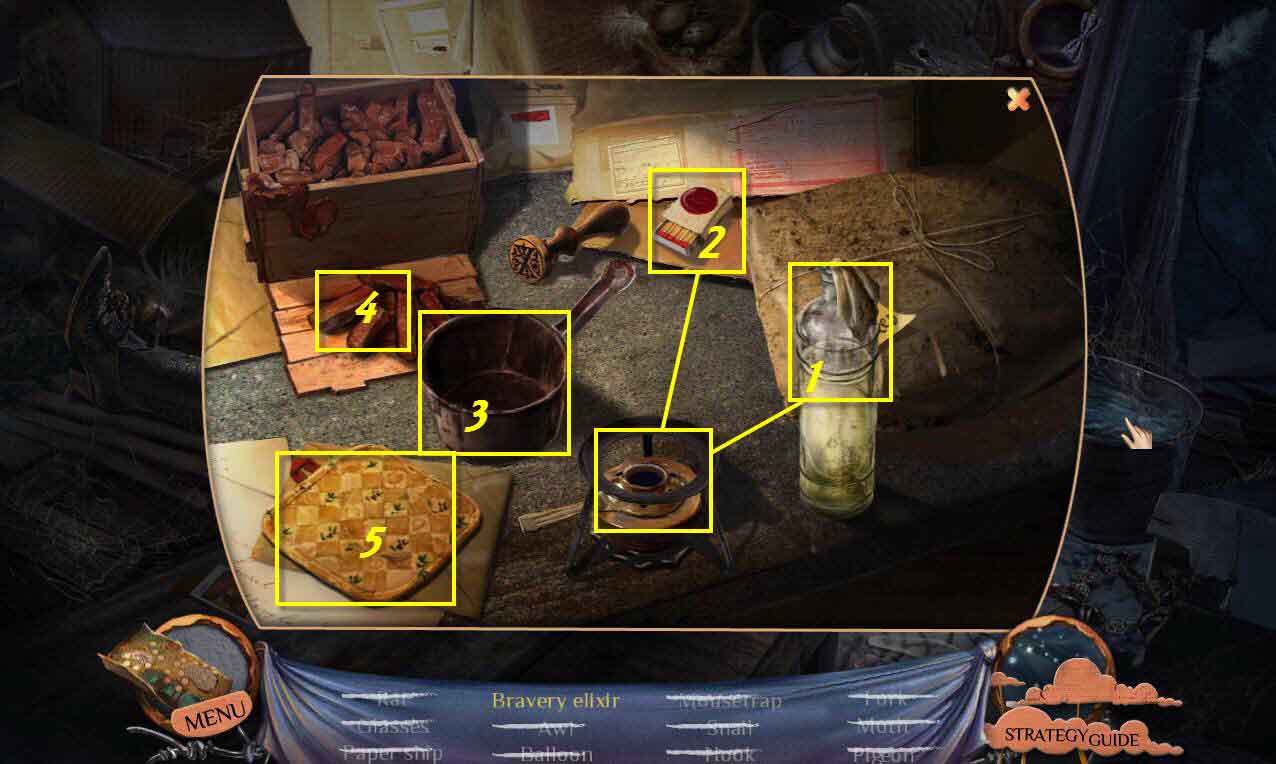
- Use the alcohol on the burner.
- Light the burner with the matches.
- Put the pot on the burner.
- Put the wax in the pot.
- Use the potholder to get the pot.
- Use the water in the bucket to put out the flames.
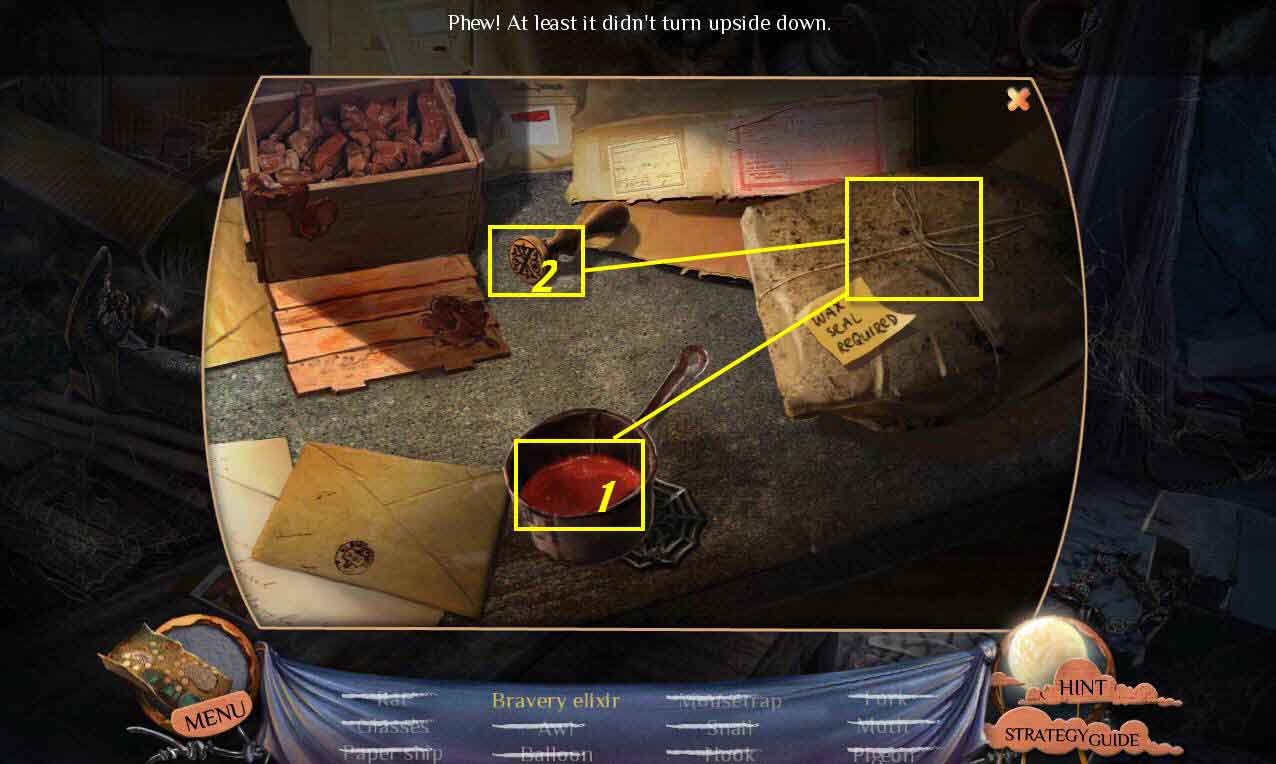
- Click on the table to zoom in again.
- Use the wax on the package.
- Use the seal on the wax.
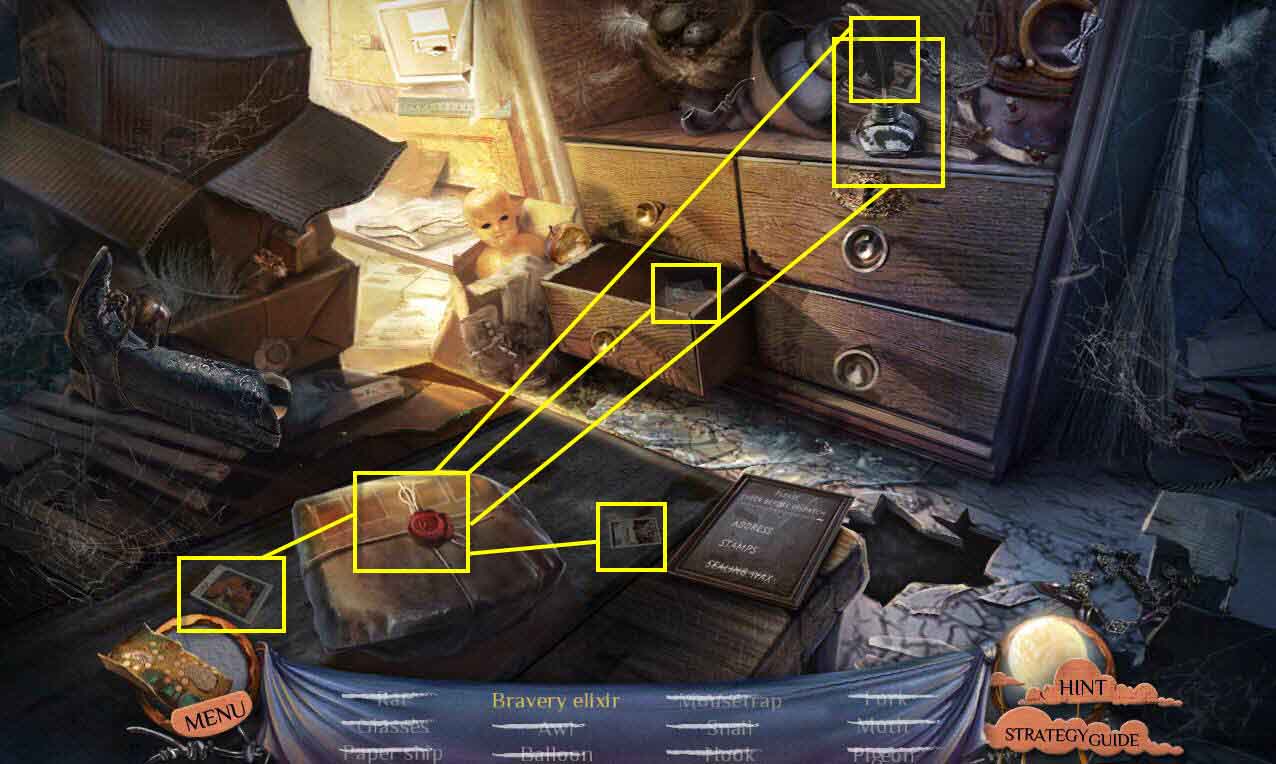
- Take the quill from the table and then use it on the package.
- Open the left bottom drawer and use the stamp on the package.
- Use the other two stamps on the package.
- Take the key and then use it on the locked upper right drawer.
- Take the BRAVERY ELIXIR.
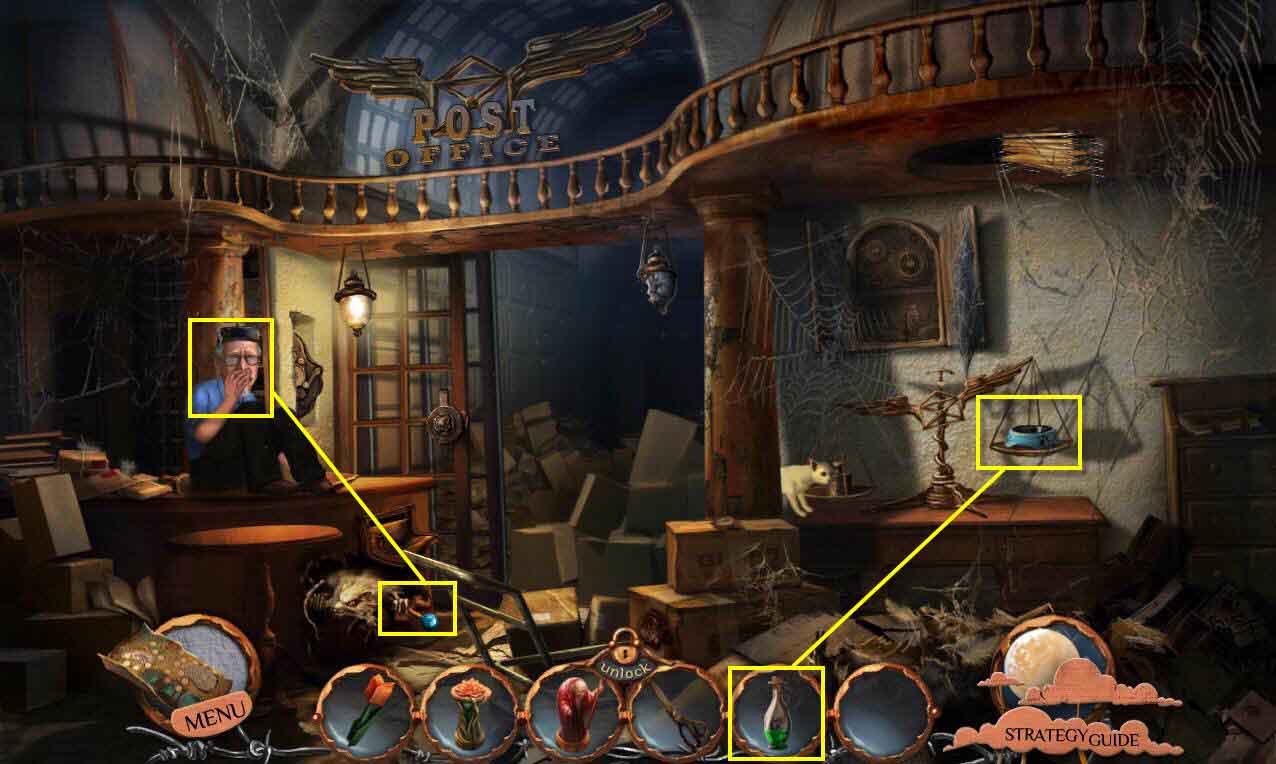
- Use the BRAVERY ELIXIR on the cat dish.
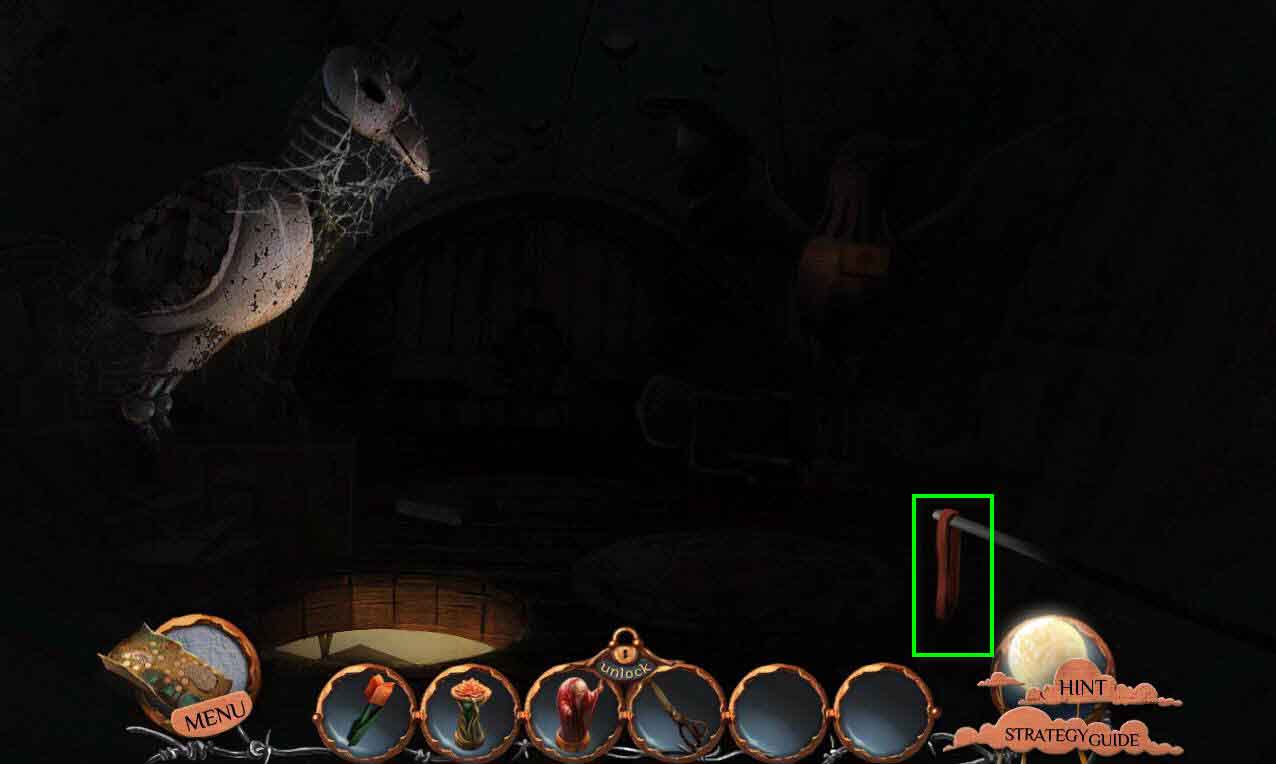
- Take the LEVER.
- Use the LEVER on the postman.
- Go up the ladder.
- Take the BELT.
- Go back downstairs.
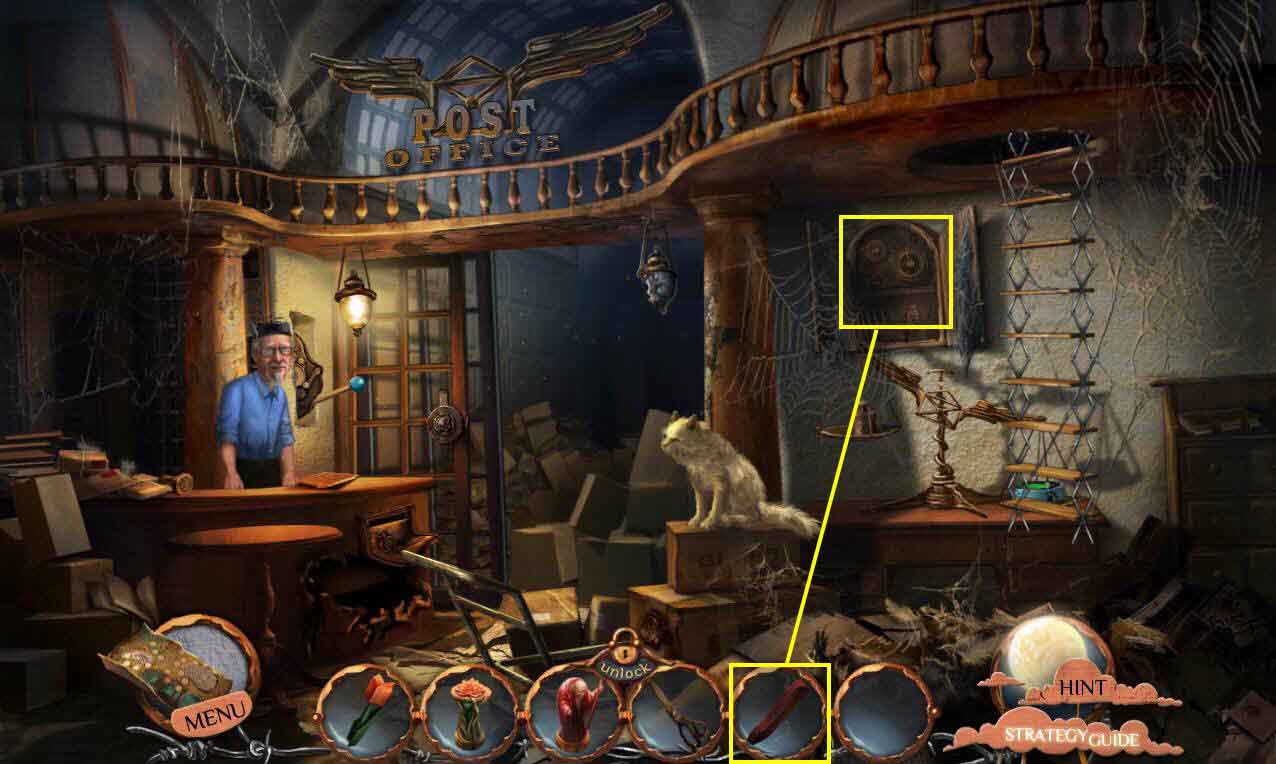
- Click to zoom in on the cabinet.
- Use the BELT on the gears.
- Click on the switch.
- Go back up the ladder.
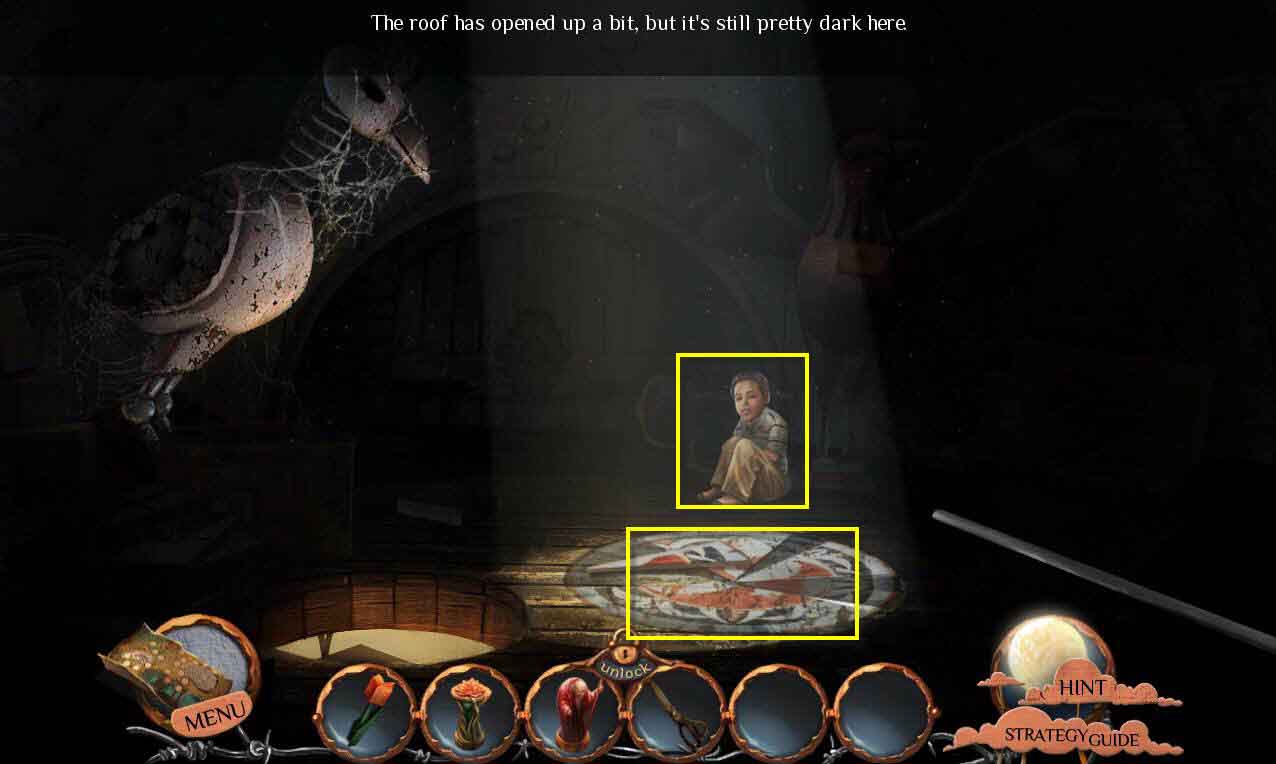
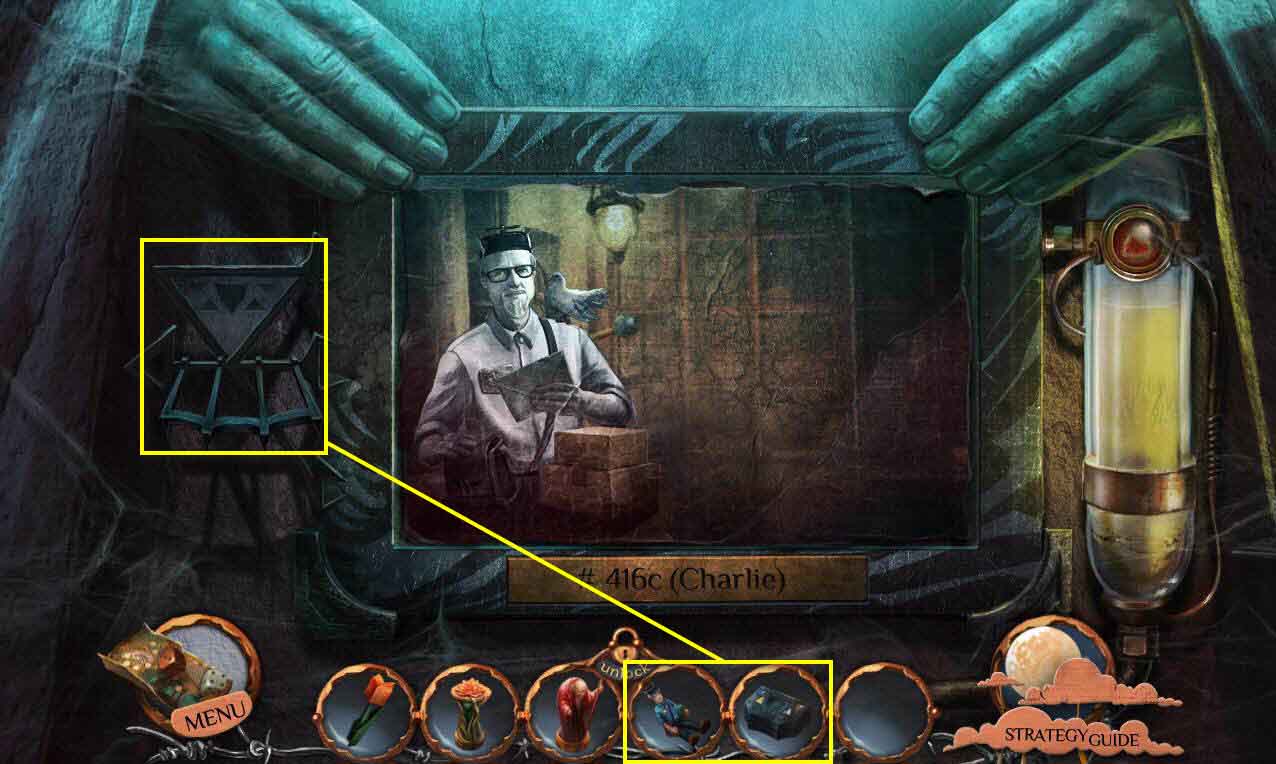
- Click to talk to Charlie.
- Click on the mosaic to zoom in.
- This will start a mini-game.

- The goal of the game is to put the picture back together by moving the tiles.
- See the screenshot for the solution.
- Click to talk to Charlie again.
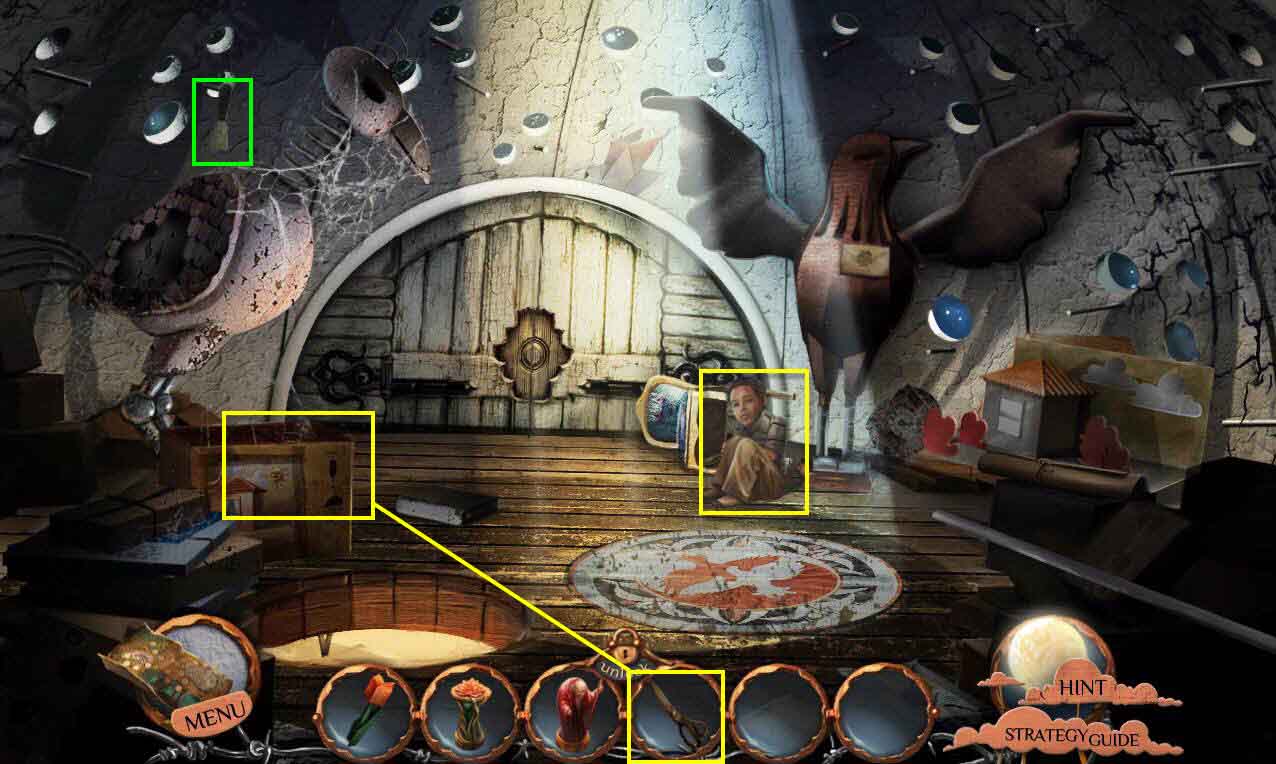
- Click on the box to zoom in.
- Use the SCISSORS to cut the string.
- Click on the box to open it.
- Take the MAILBAG and the WAX SEAL ORNAMENT.
- Click on the bird statue on the left.
- Take the SPATULA.

- Click on the bird statue on the right.
- Use the WAX SEAL ORNAMENT on the letter.
- Take the TURTLEDOVE.
- Click to zoom in on the dollhouse.
- Use the MAILBAG on the mailman.
- Click to pull the lever.
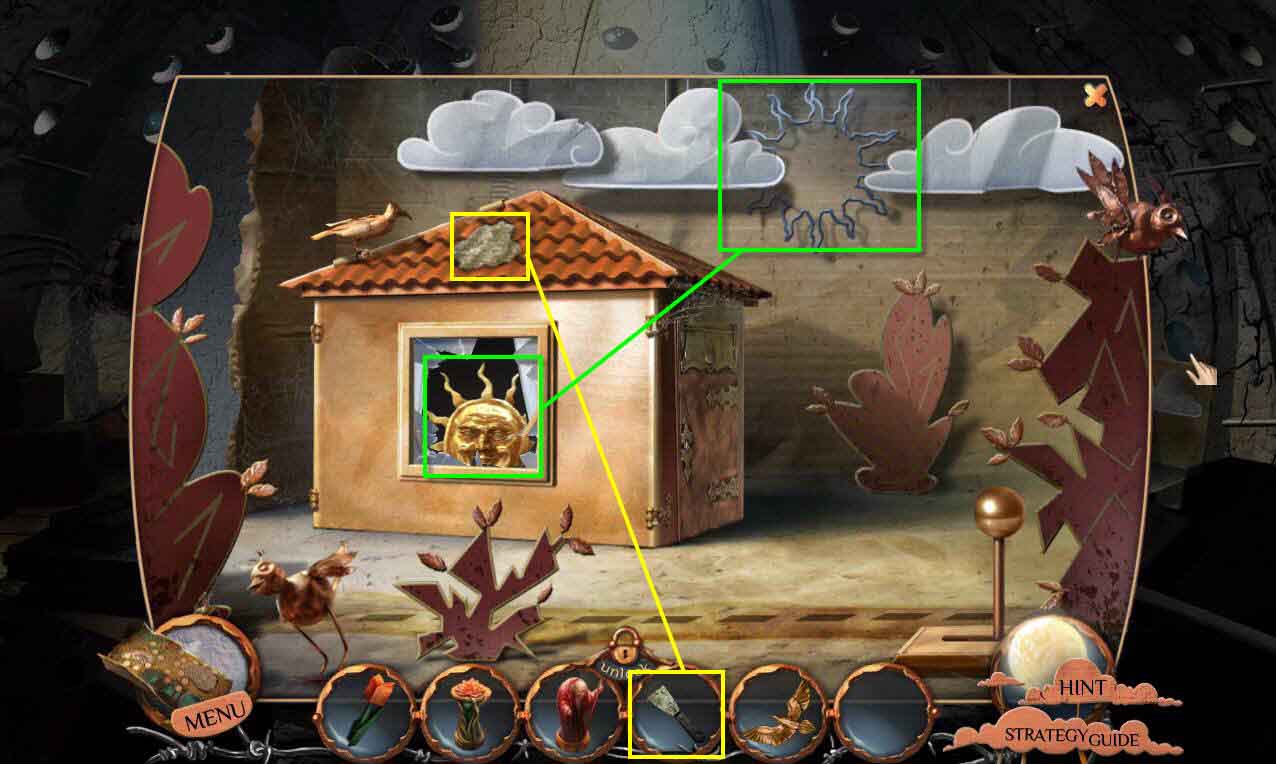
- Take the SUN ORNAMENT.
- Use the SPATULA on the bat poop on the roof.
- Use the SUN ORNAMENT on the spot in the sky.
- This will reveal the roof tile behind the clouds.
- Take the ROOF TILE.
- Use the ROOF TILE on the spot on the roof.
- Take the GLASS EYE.
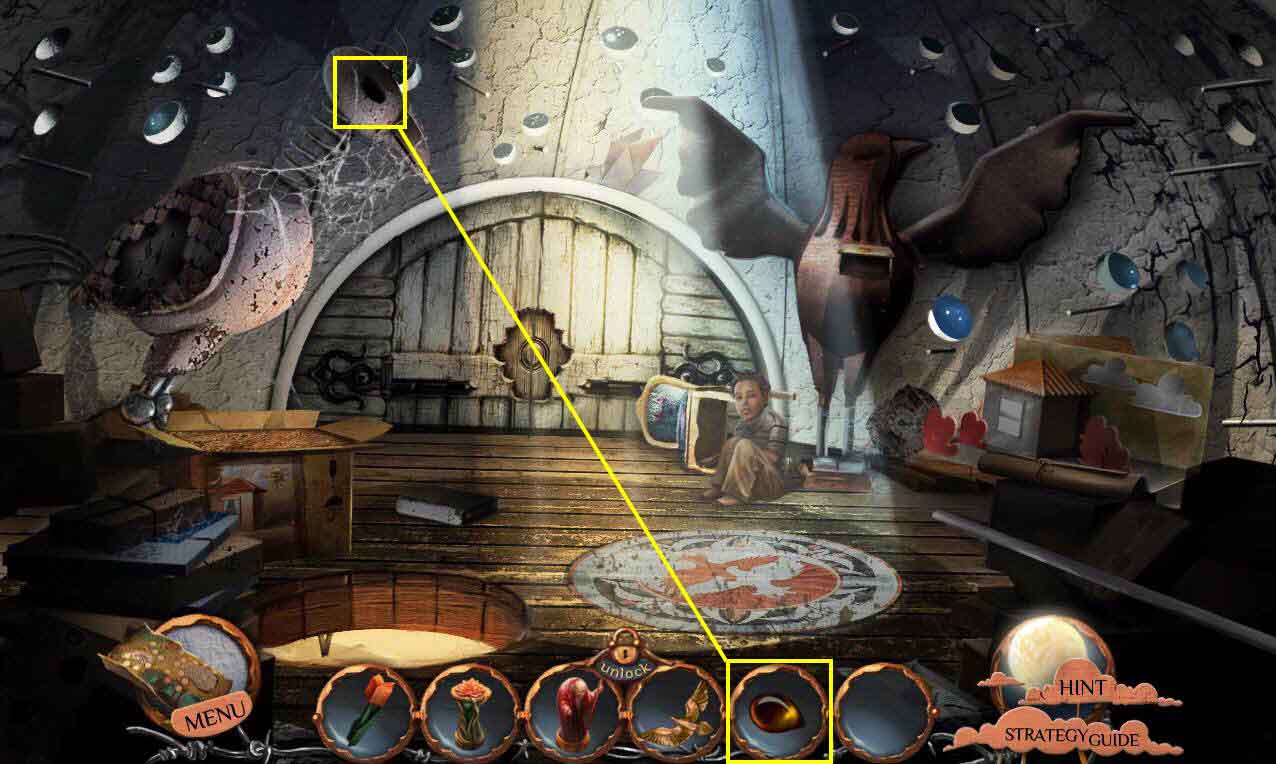
- Click on the bird statue on the left to zoom in.
- Use the GLASS EYE on the bird's missing eye.
- Take the TURTLEDOVE.
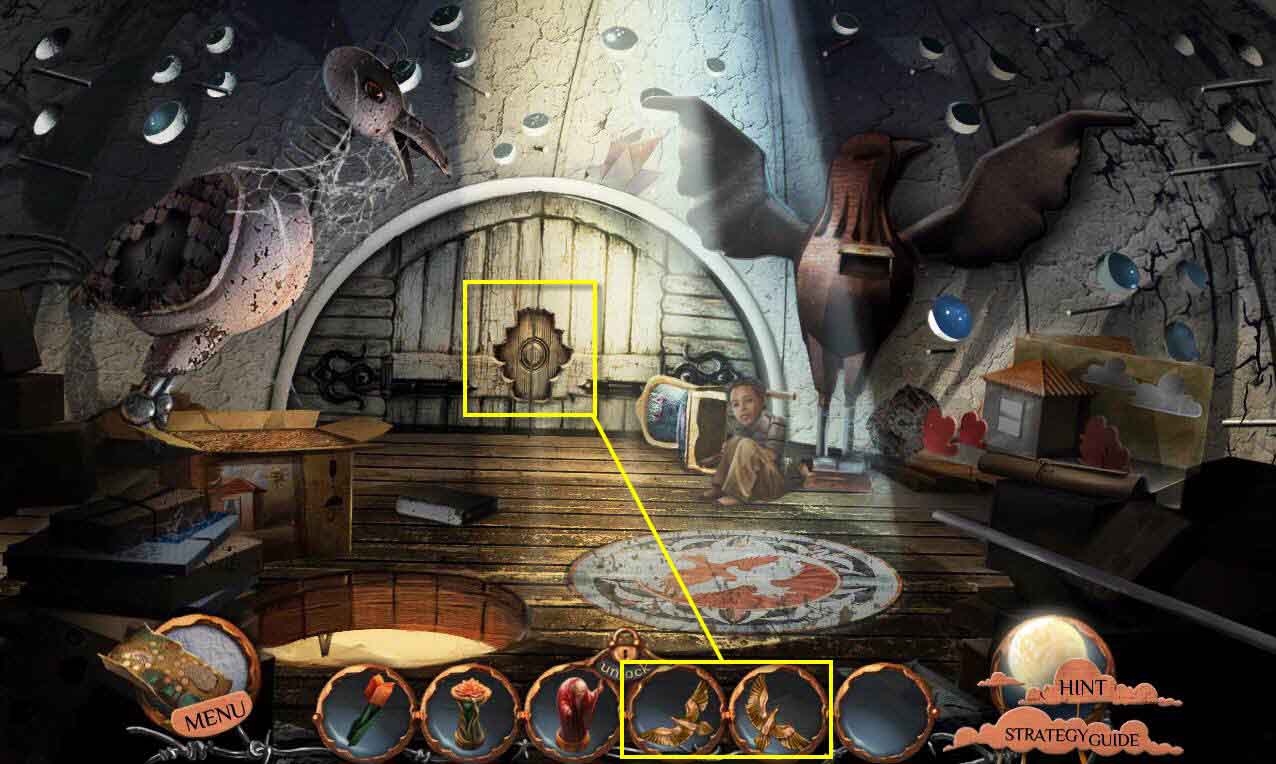
- Click to zoom in on the doors.
- Use the TURTLEDOVES on the lock.
- Click to open the doors.
- Click on the clock.
- This will start a mini-game.
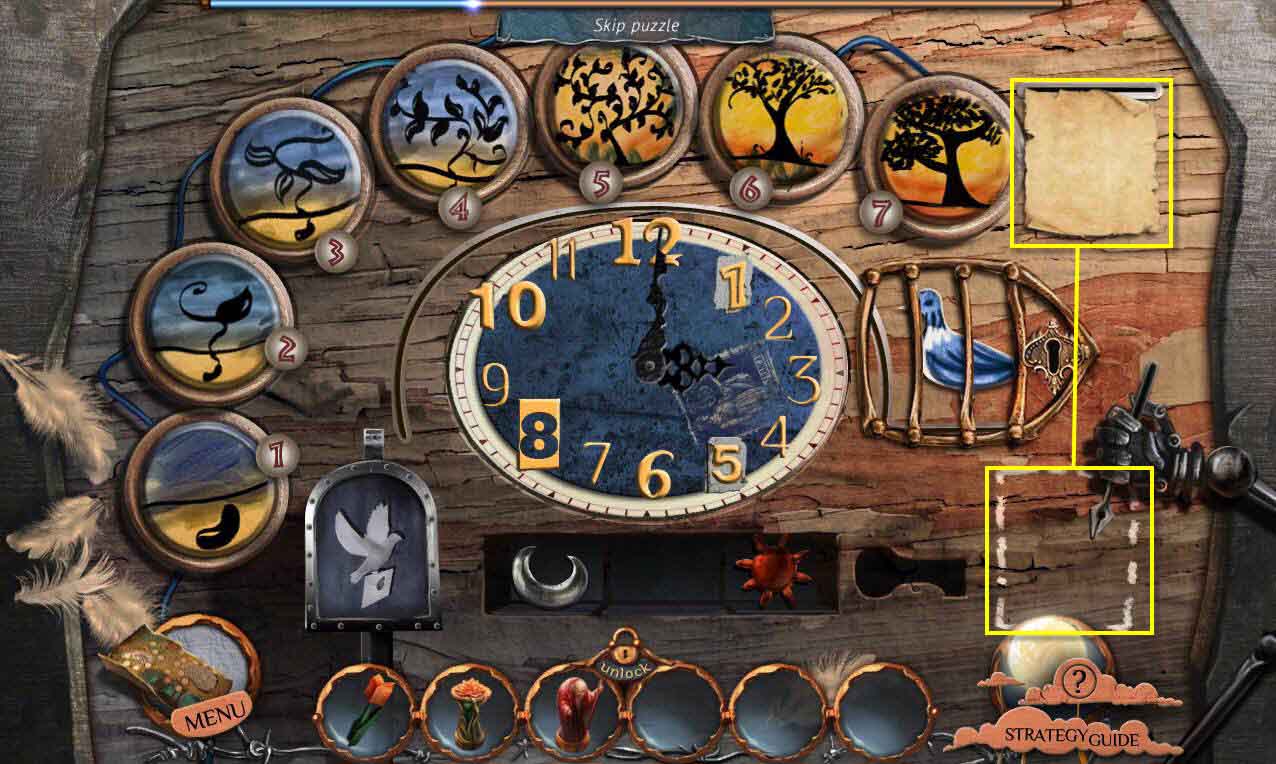
- The goal of the game is to put the discs in order of the life cycle of a tree.
- Click on two discs to swap their positions.
- See the screenshot for the solution.
- Click on the paper and put it in the outline below.
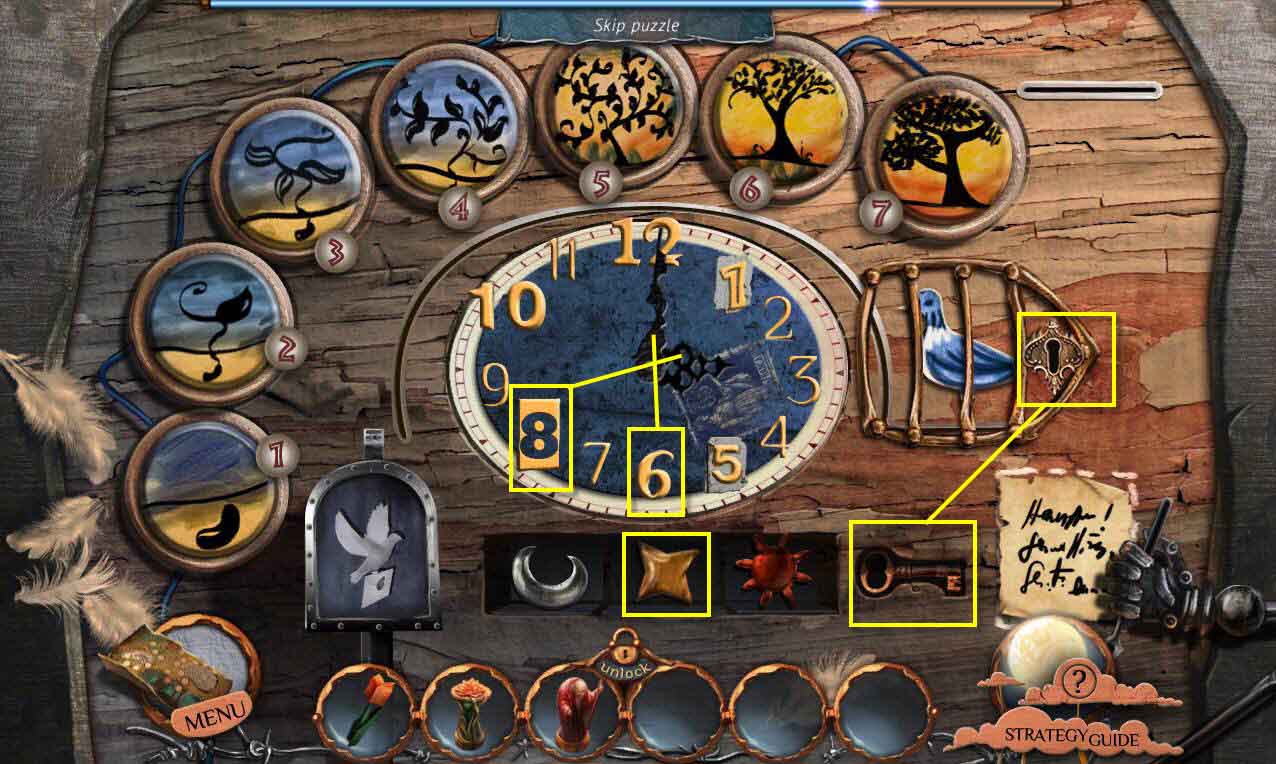
- Move the star that was behind the mechanical hand to the empty slot between the sun and the moon.
- Take the key and use it on thee locked cage.
- Take the note that was in the mailbox and note the time on the note is half-past eight.
- Set the clock to 8:30.
- When you are done, click on Charlie to talk to him.
- Go down the ladder.
- The postman will give you the POSTMAN FIGURINE.
- Go back three screens.
- Go back to the junkyard.
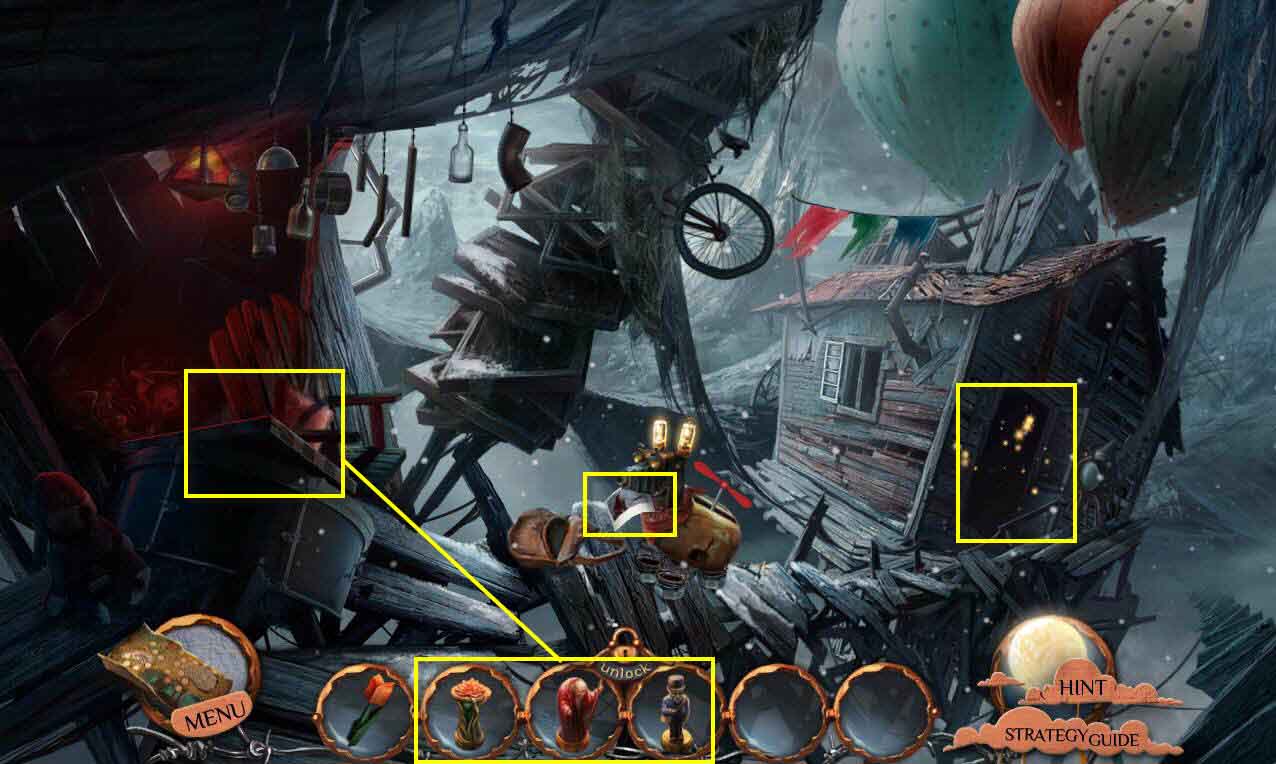
- Click on the photo the dog is holding to see what happened to his master.
- Click on the chessboard to zoom in.
- Use the three figures in your inventory, the DRYAD FIGURE, the OLD MAN FIGURE, and the POSTMAN FIGURE.
- Take the ANCIENT TABLET.
- Click on the sparkles to play the HOS.
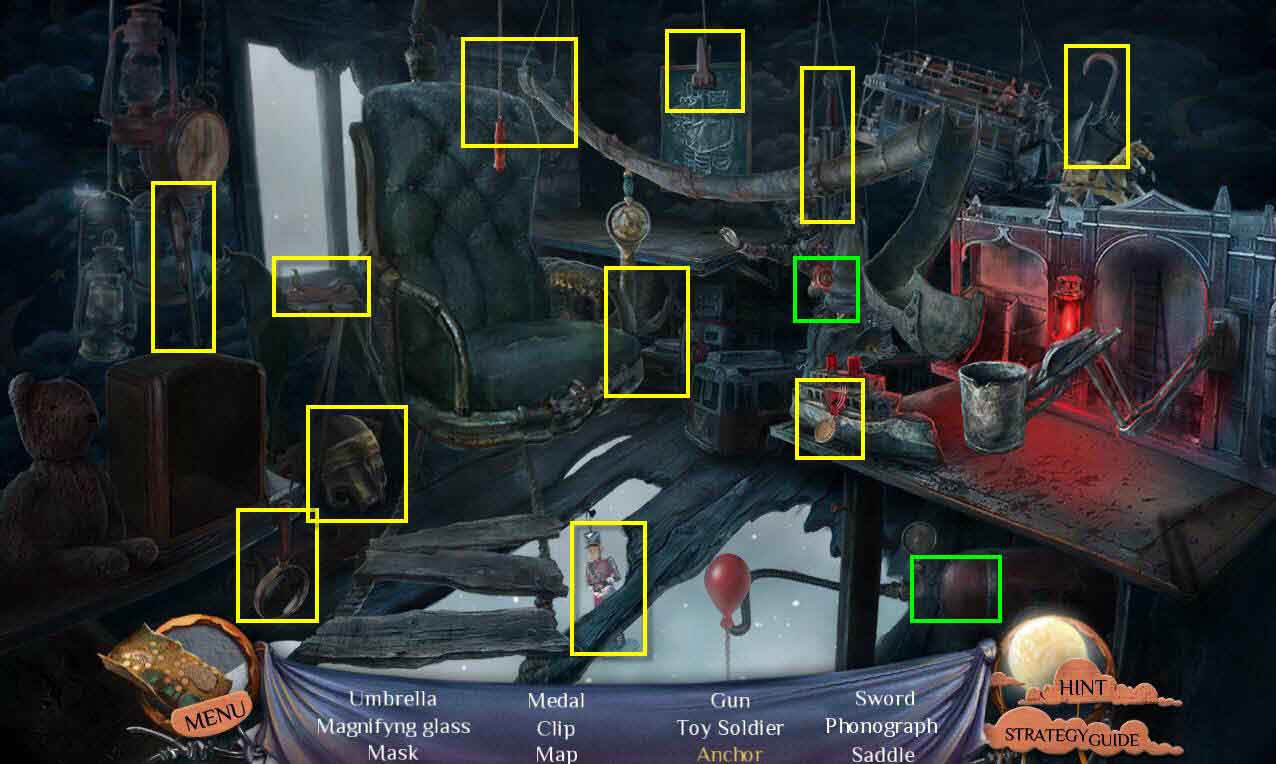
- Find all the items on the list.
- You will receive the CURATOR'S MASK.
- Go back to the tower and go to the right down the corridor.