
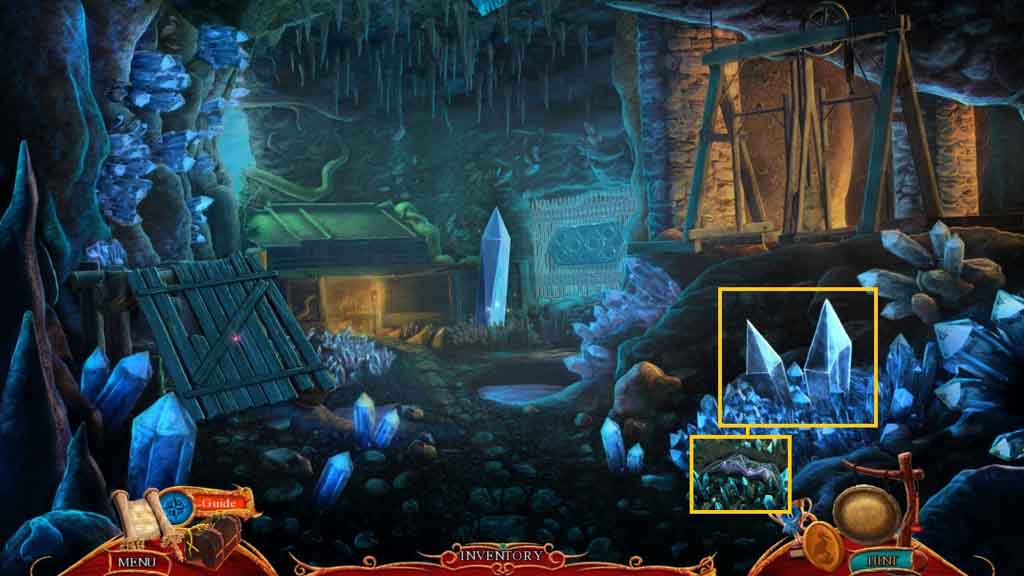
- Click the crystals 3 times; collect the crystal piece 1 /4.
- Move to the Farm Interior.
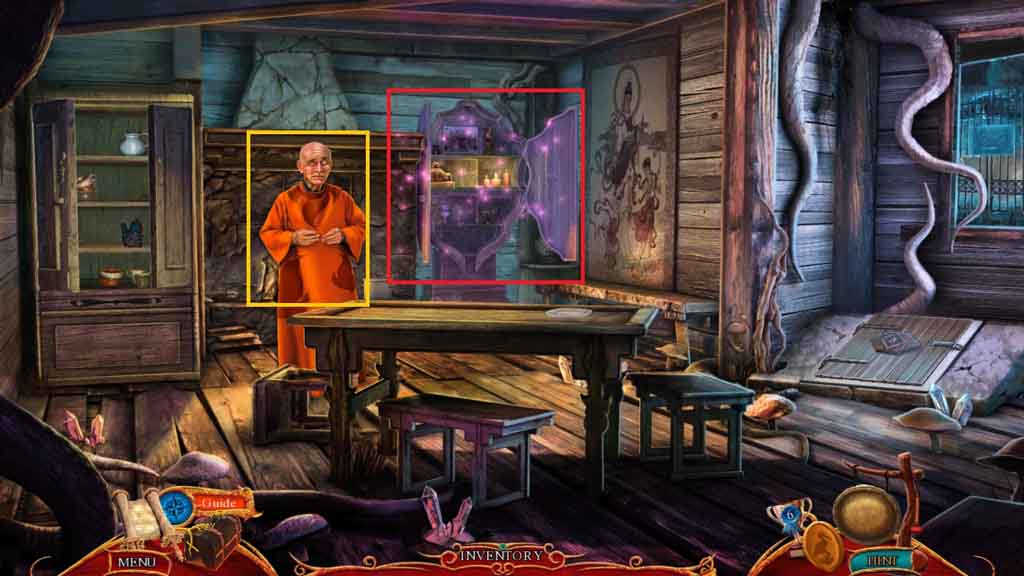
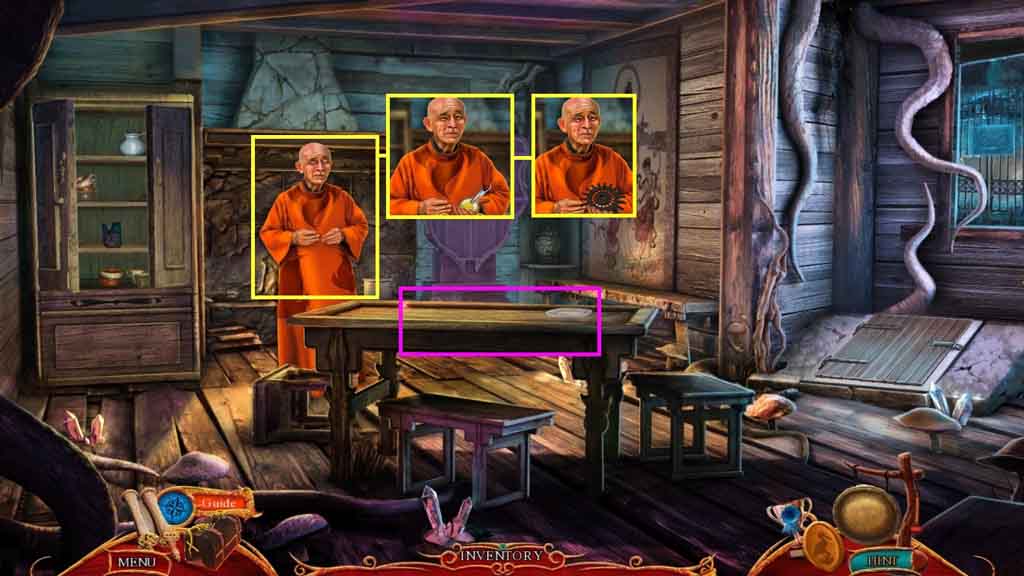
- Speak to the man.
- Click the hidden objects area.
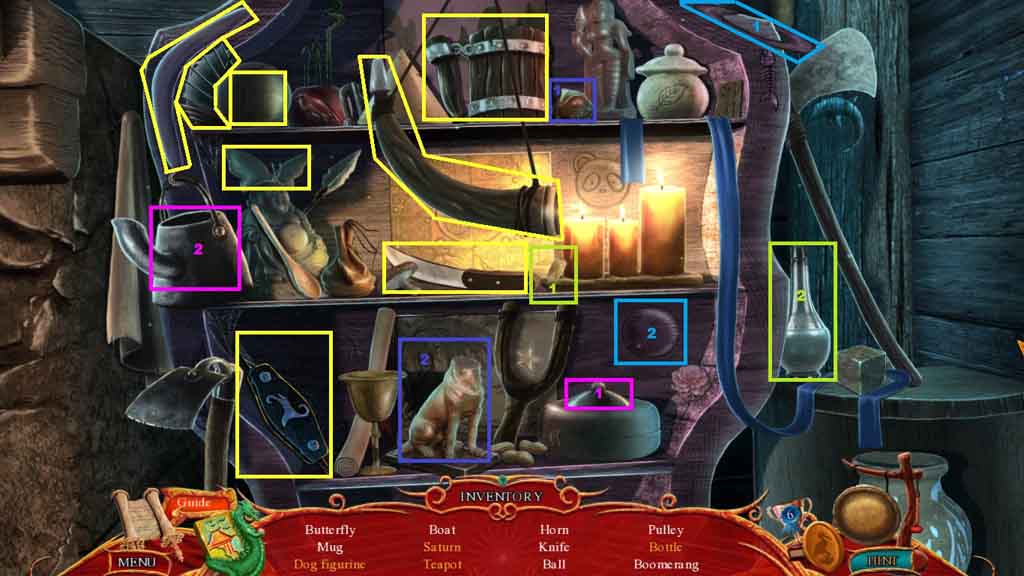
- Find the listed items.
- Select the dog head and attach it to the body; collect the dog figurine.
- Select the rings and place them onto the planet; collect Saturn.
- Select the lid and place it onto and collect the teapot.
- Select the cork and insert it into the bottle; collect the bottle.
- Collect the pulley.
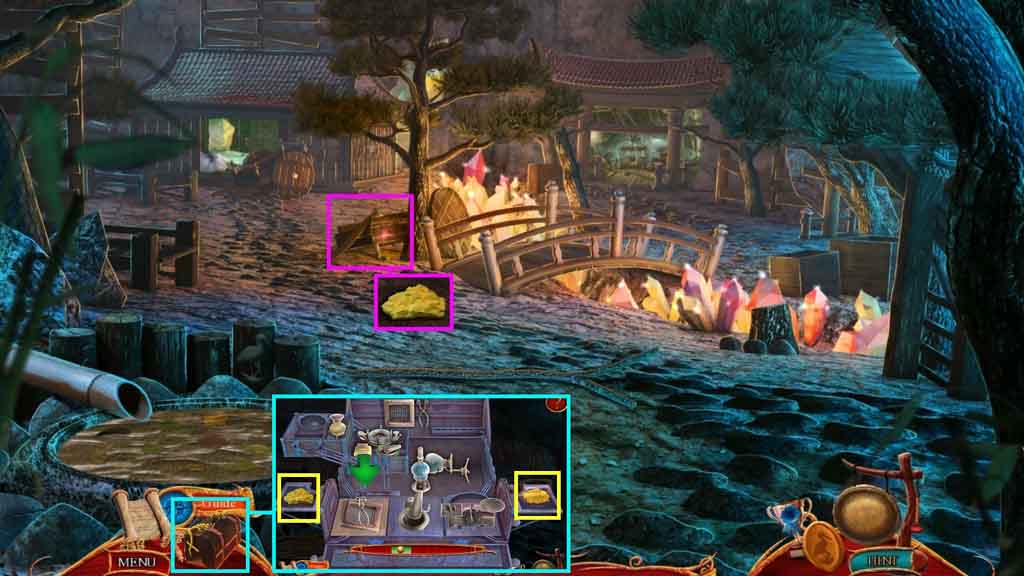
- Click the cabinet.
- Click the statue and collect the porcelain figure.
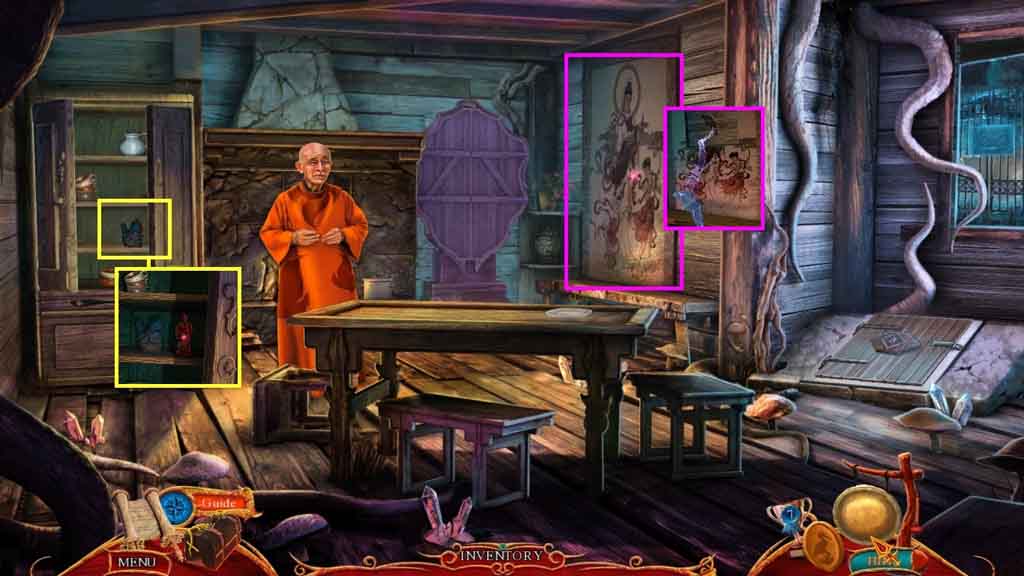
- Click the picture 2 times; collect the crystal piece 2 / 4.
- Move down.
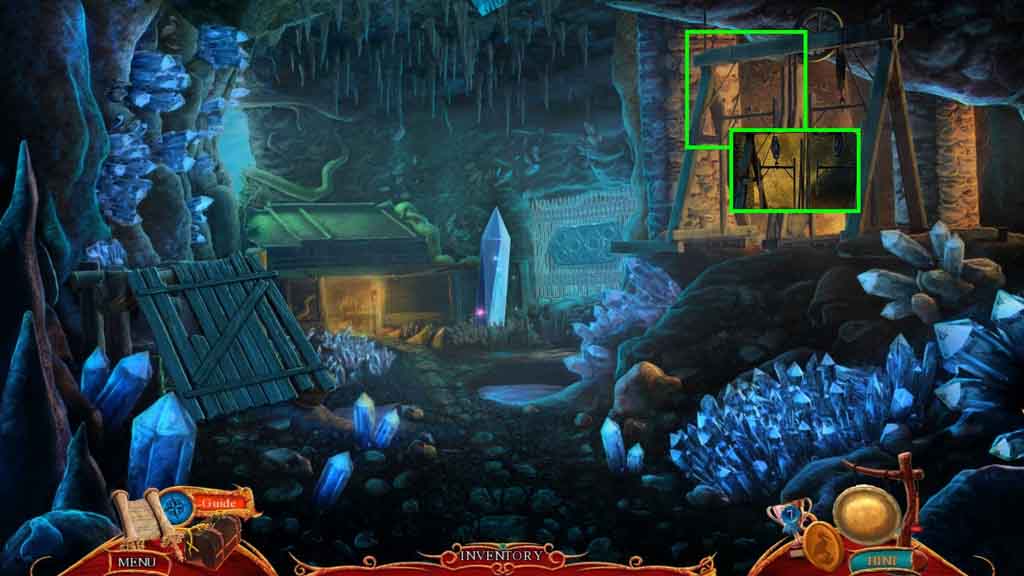
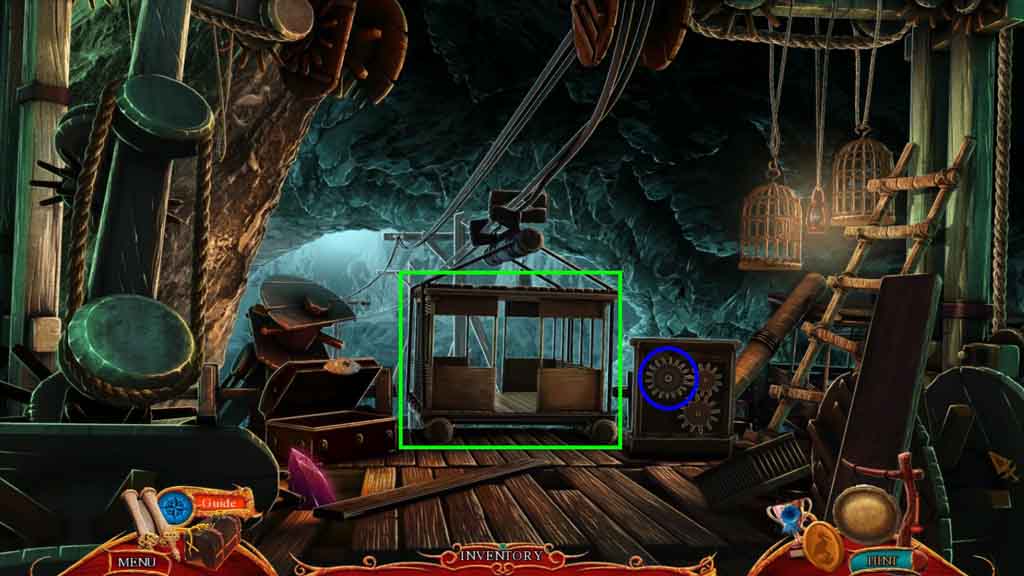
- Click the elevator and attach the pulley.
- Take the elevator to the Cavern Ceiling.
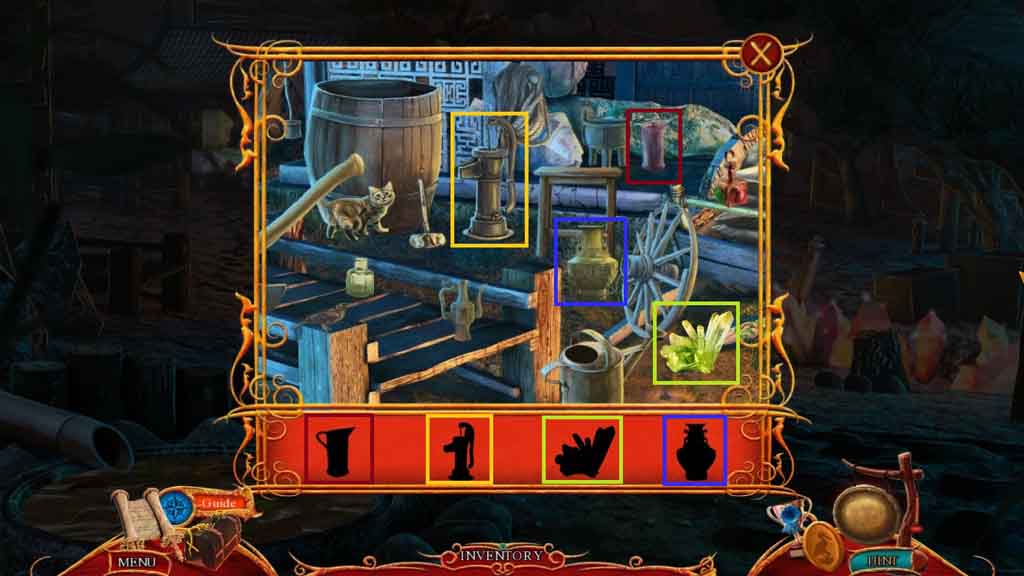
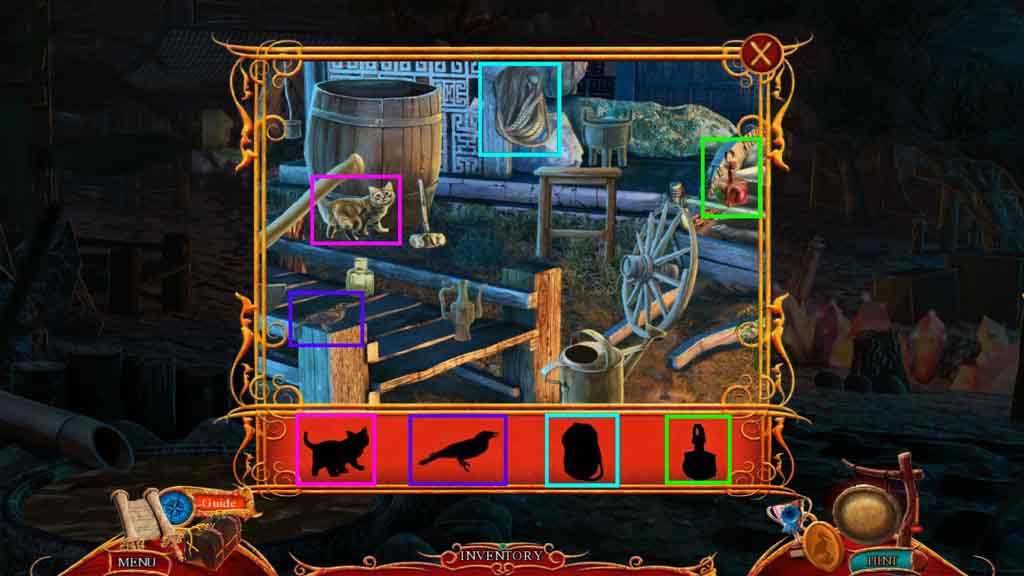
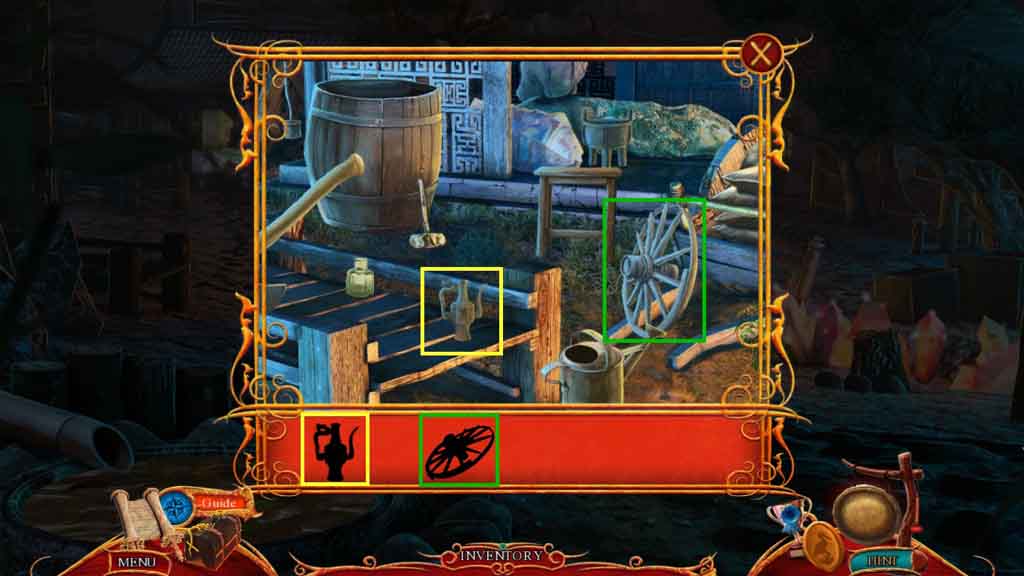
- Play the hidden objects area.
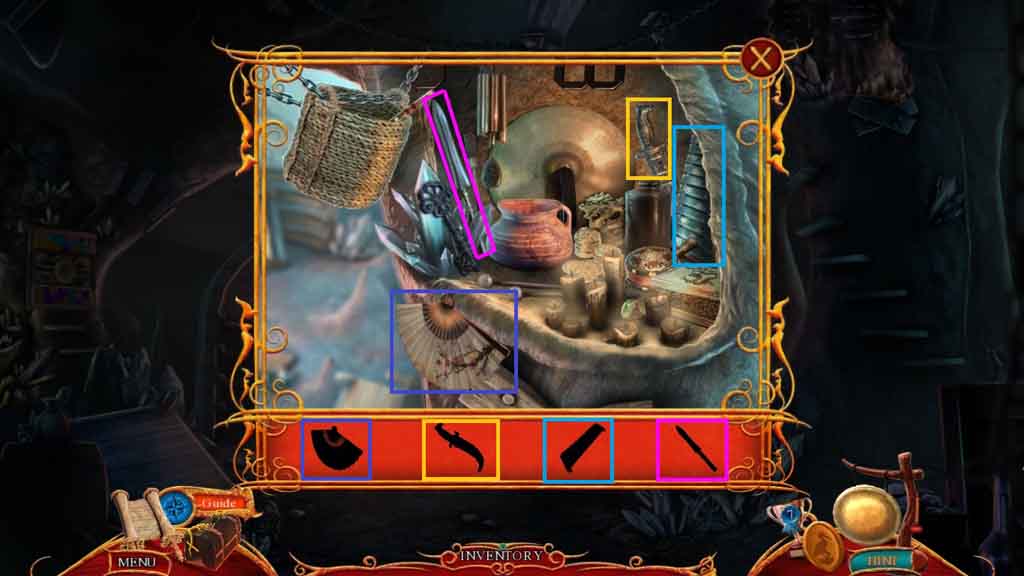
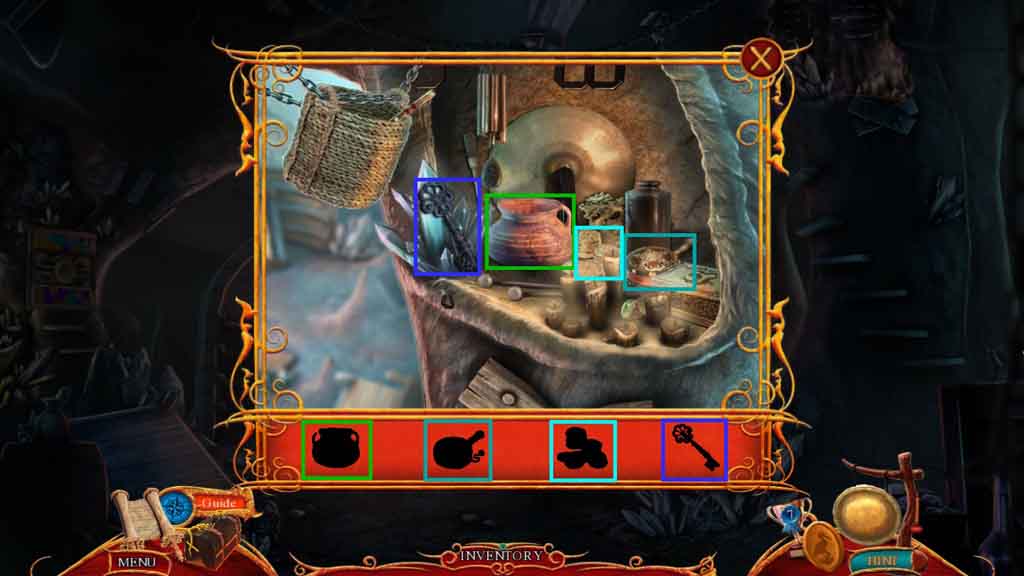

- Find the silhouetted items.
- Collect the trapdoor key.
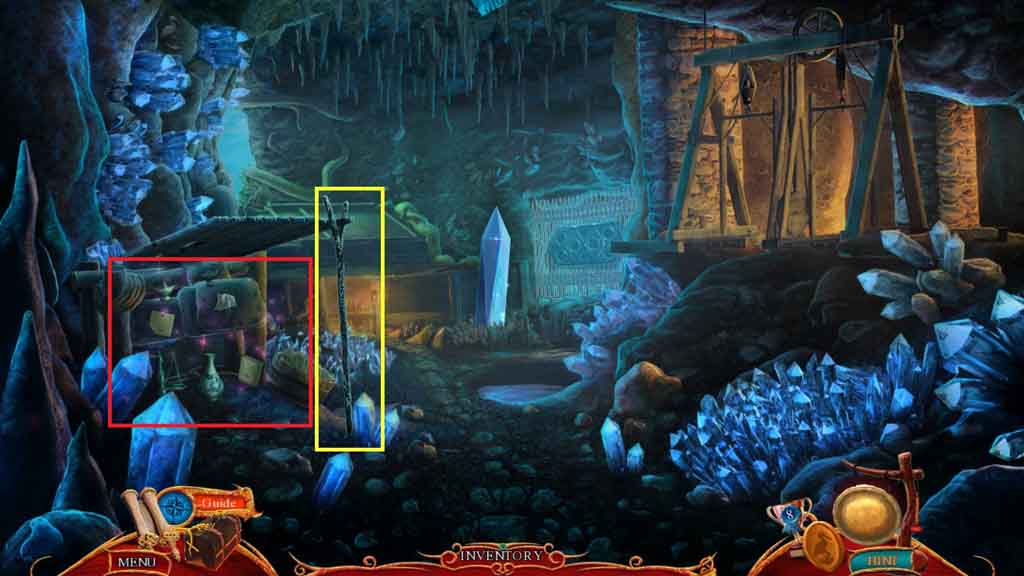
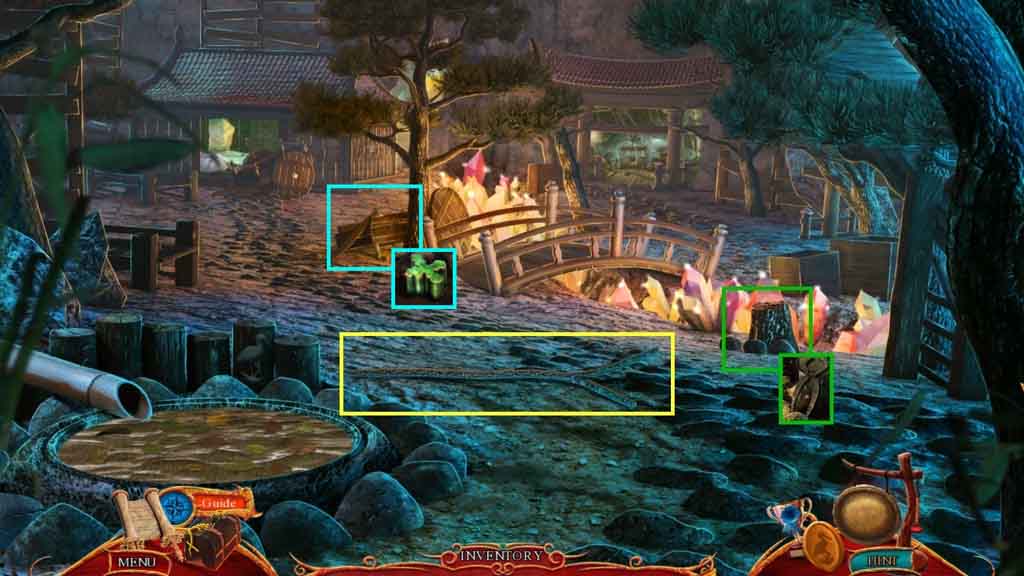
- Click the well; collect the wooden handle.
- Move to the Farm Interior.

- Click the trapdoor and insert the trap door key.
- Click the door to trigger a puzzle.
- Click the buttons into the correct spots as shown above.
- The solution is random.
- Move through the trap door to the Farm Cellar.

- Collect the ladder and the supporting branch.
- Click the stump.
- Attach the wooden handle onto the hatchet head; collect the hatchet.
- Move to the Farm.
- Place the supporting branch onto the plank to trigger a hidden objects area.
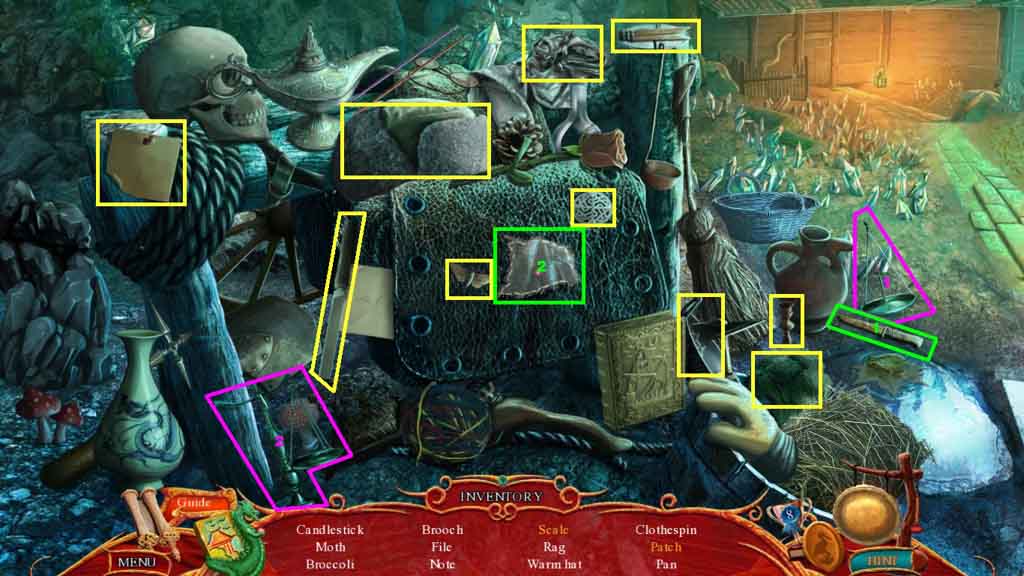
- Find the listed items.
- Select the scale and place it onto the balance; collect the scale.
- Select the knife and use it to remove and collect the patch.
- Collect the file.
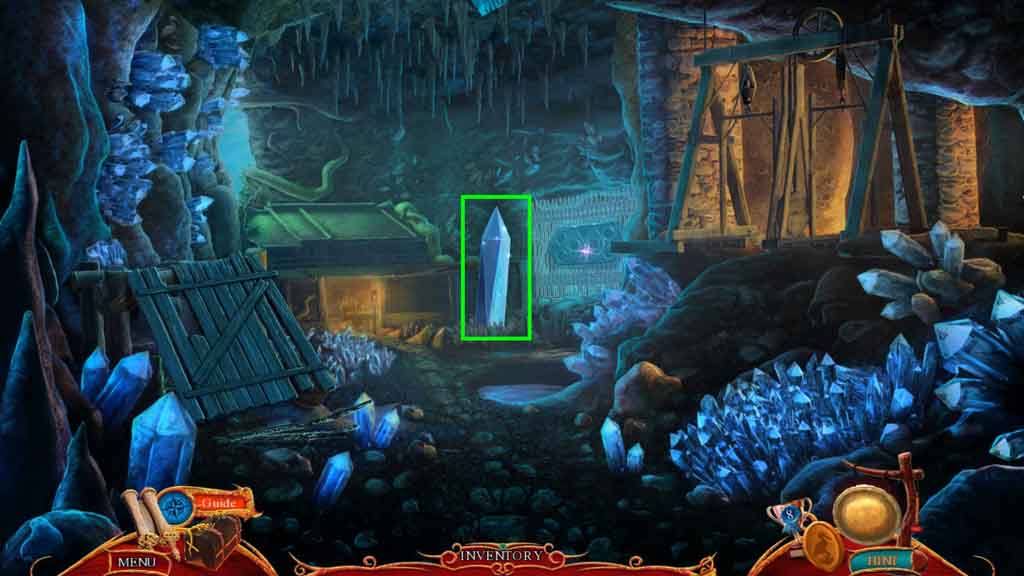
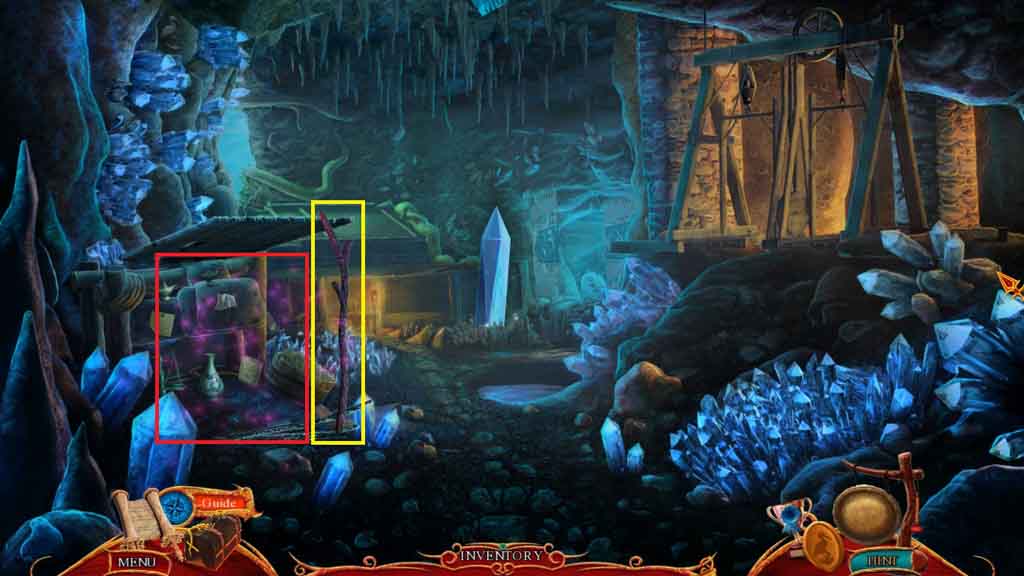
- Click the crystal.
- Select the hatchet to collect the crystal chunk.
- Move to the Farm Cellar.
- Click the table and place the crystal chunk down.
- Select the hammer to break the chunk; click the crystal to collect the crystal piece 3 /4.
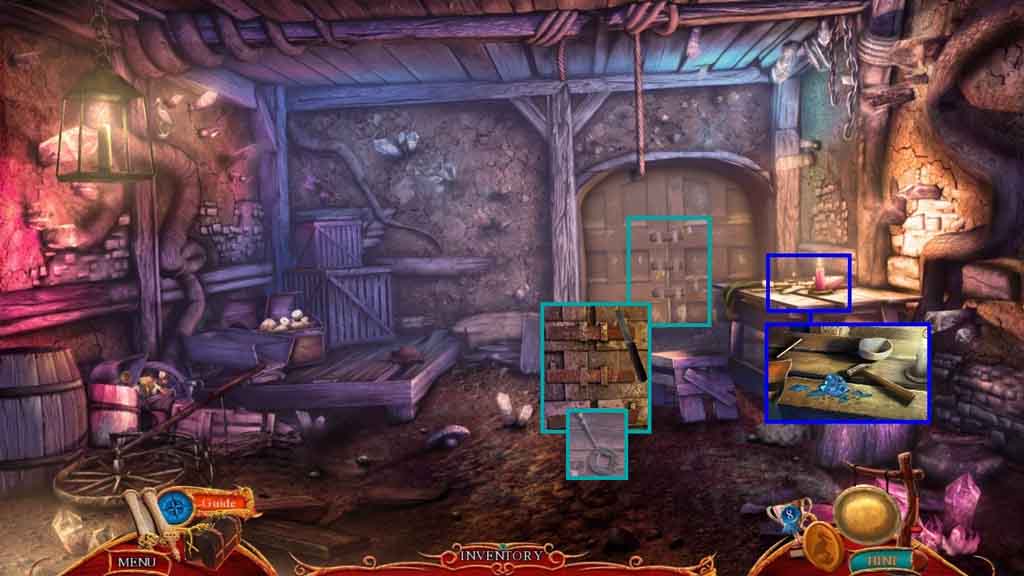
- Click the door and use the file on the latches.
- Collect the crystal well handle.
- Move to the Cavern Ceiling.
- Click the well and place the crystal well handle onto it.
- Click the handle 2 times; collect the crystal piece 4 / 4.
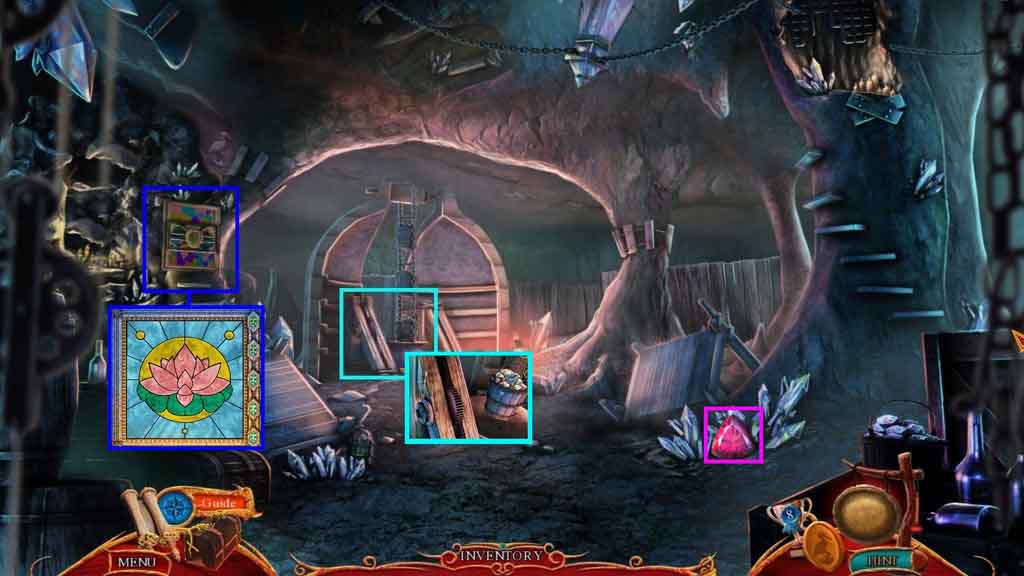
- Click the wall and insert the 4 crystal pieces to trigger a puzzle.
- Solve the puzzle by assembling the stained glass.
- Collect the amaranthine jewel.
- Move down.

- Click the door to trigger a puzzle.
- Click the symbols in numerical order using the clue to solve the 1st puzzle.
- Clicking button 6 will trigger the 2nd puzzle.
- Click the buttons as follows to solve:
- C – C – B – A – C – C- C – B – B – B – C –C – B – A – A –A- A- A – B – C – C – C- C
- Move ahead to the Foundry.
- Click the hidden objects area.
- Find the silhouetted items.
- Collect the light crystal.
- Click the stump; collect the wire cutters.
- Collect the strong supporting branch.
- Click the bench; collect the ornate button.
- Move to the Cargo Tram.
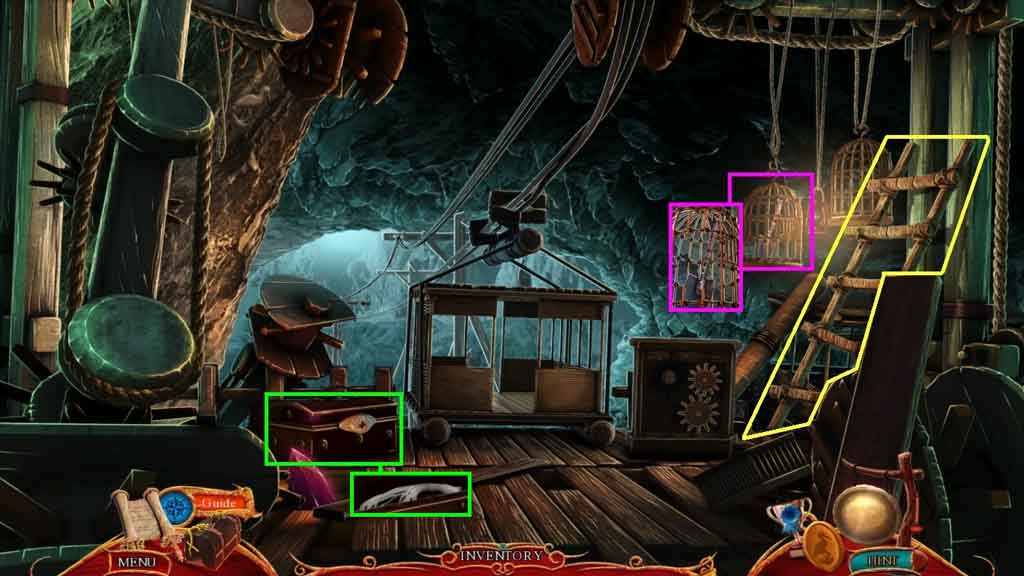
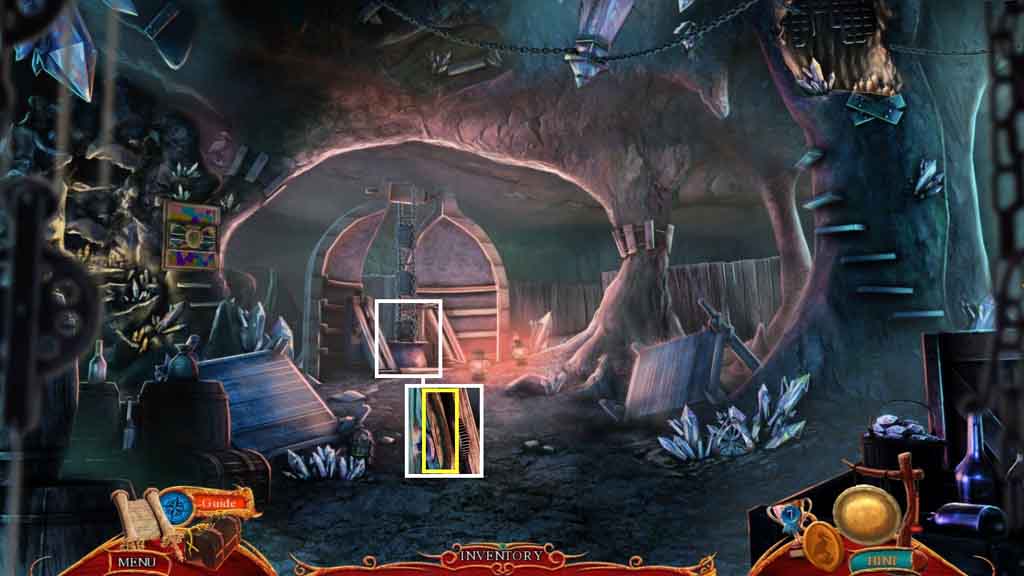
- Lean the ladder against the wall.
- Click the cage.
- Select the wire cutters to cut the bars; collect the garden shovel.
- Click the chest and insert the ornate button; click it once.
- Collect the wick.
- Move down.
- Click the bench.
- Select the garden shovel to dig the dirt; collect the sulfur rock.
- Click the healer’s kit and place down the sulfur rock.
- Click the object that the arrow is indicating when the ball is on the green line; collect the sulfur powder.
- Move down once.
- Select the strong supporting branch and use it on the door to trigger a hidden objects area.

- Find the listed items.
- Select the flower and insert it into the vase; collect the flower in a vase.
- Select the needles and insert into the yarn; collect the knitting.
- Collect the empty flask.
- Move to the Farm Interior.
- Place down the wick, sulfur powder and the empty flask onto the table.
- Collect the explosive.
- Collect the cog.
- Move to the Cargo Tram.
- Insert the cog into the mechanism.
- Take the lift to the Jade Plantation.