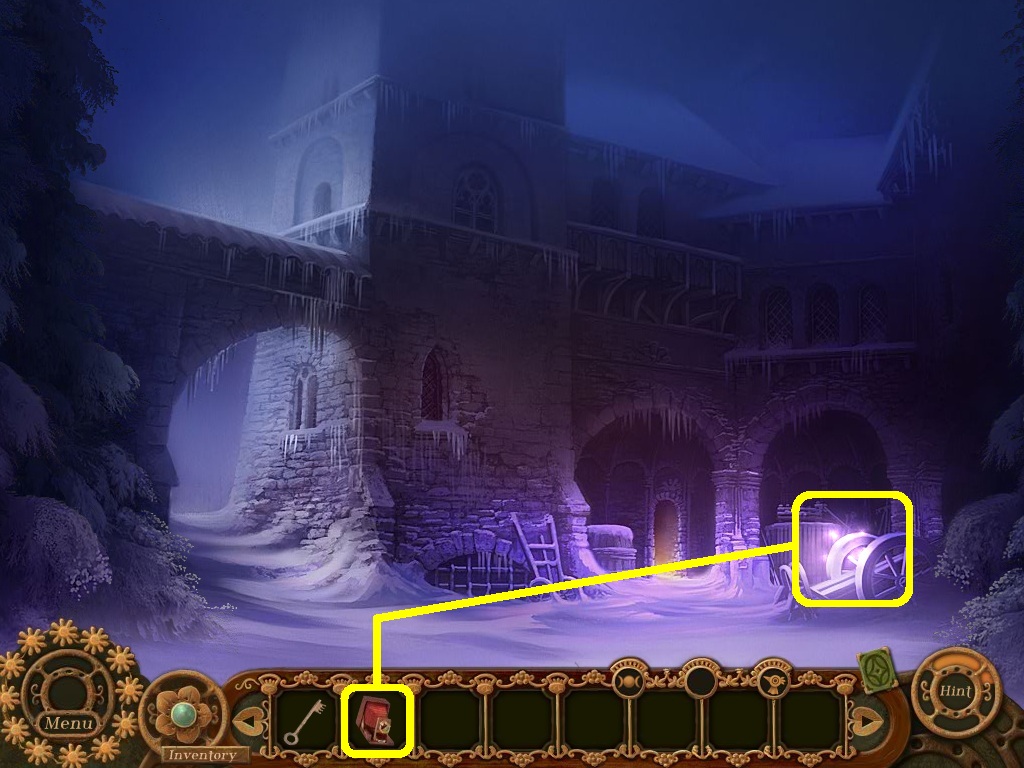
- Pick the spirit camera (yellow square); take a picture of the orbs.
- Click the matching pairs of orbs.
- Go under the arch (green arrow).
- Click Afi (orange circle).
- Send him to the window (green circle); collect the box (white circle).
- Go to the courtyard and into the wine cellar.
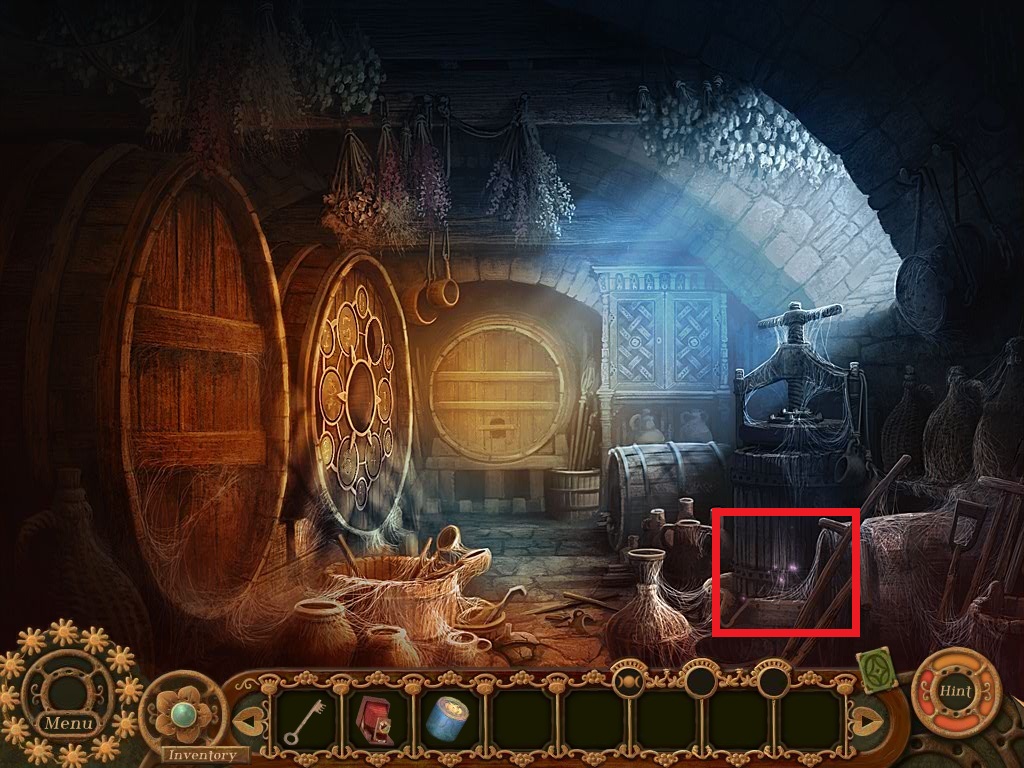
- Zoom into the hidden object area (red rectangle).
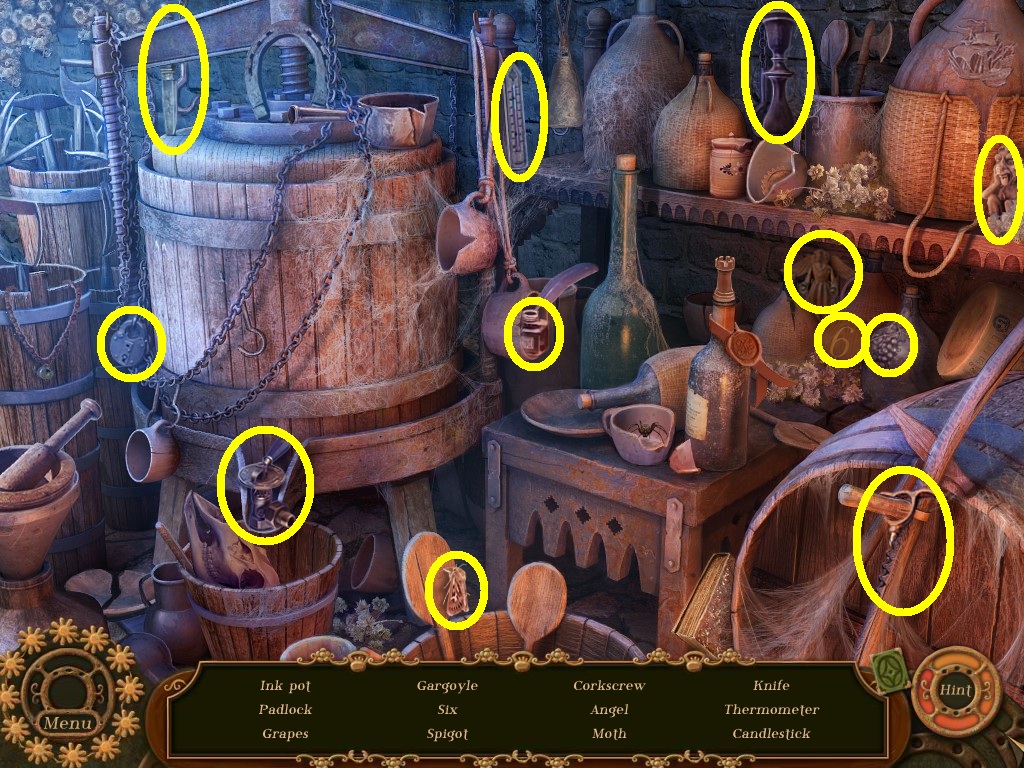
- Find all the listed items (yellow circles).
- Collect the wooden 6 disc.
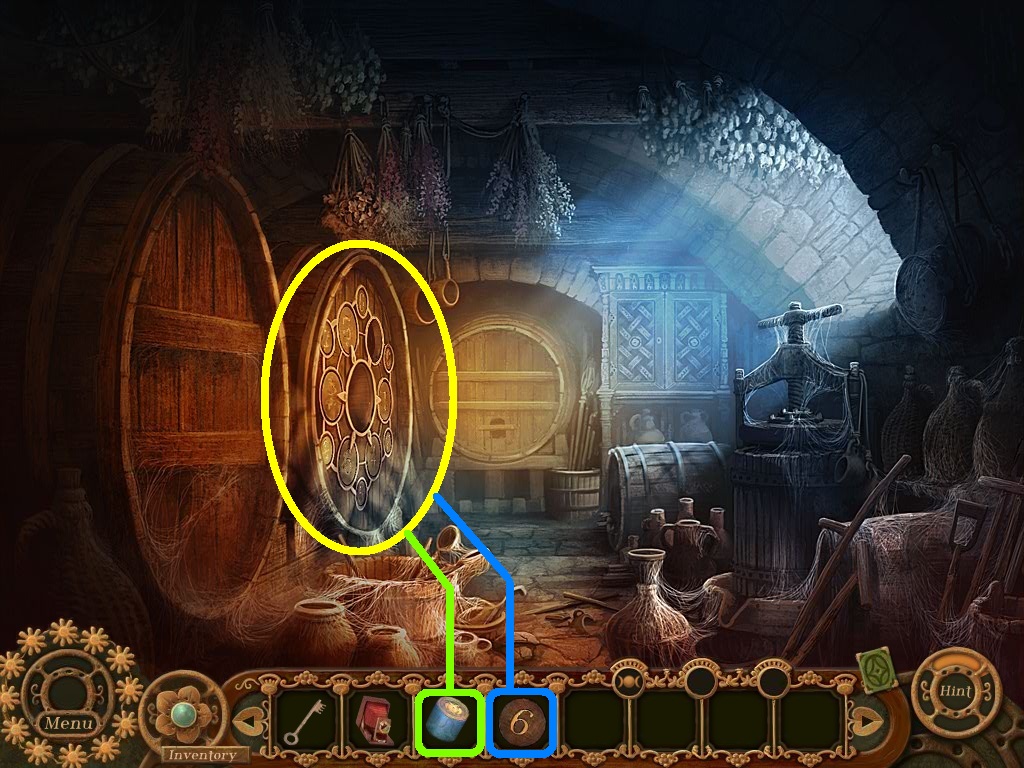
- Zoom into the barrel head (yellow circle).
- Pick the puzzle box (green square) and insert it into the barrel head.
- Pick the wooden 6 disc (blue square) from the inventory; add it to the barrel head to trigger a puzzle.
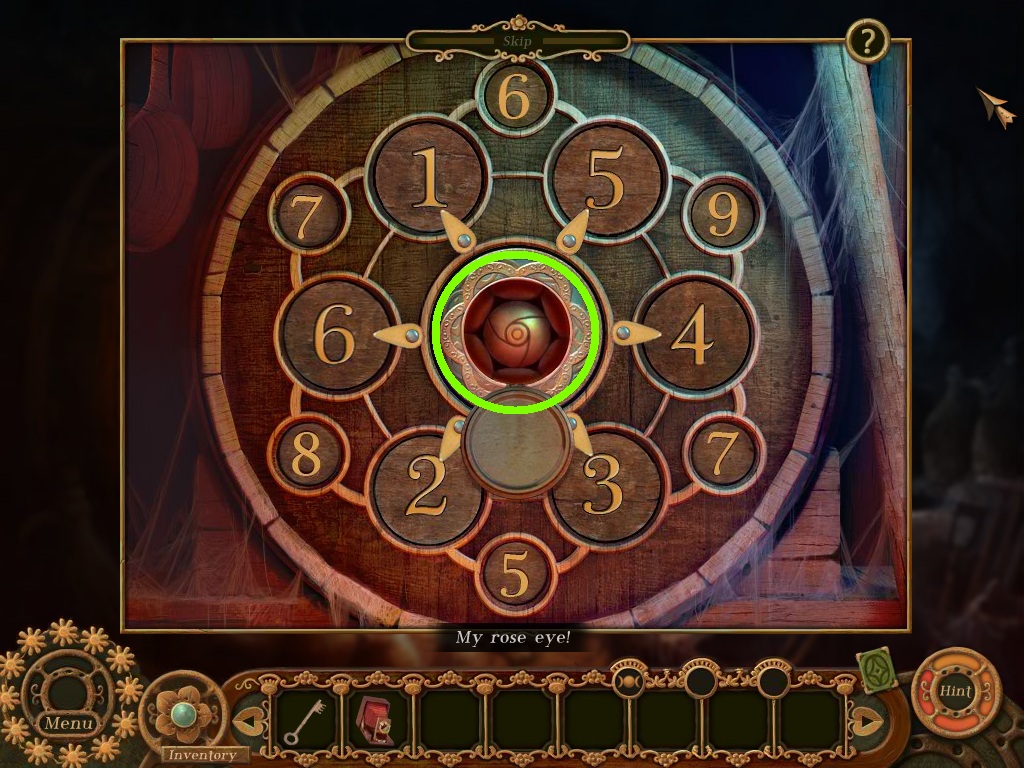
- Solve the puzzle as shown above.
- Collect the rose eye (white circle).
- Go to the precipice.
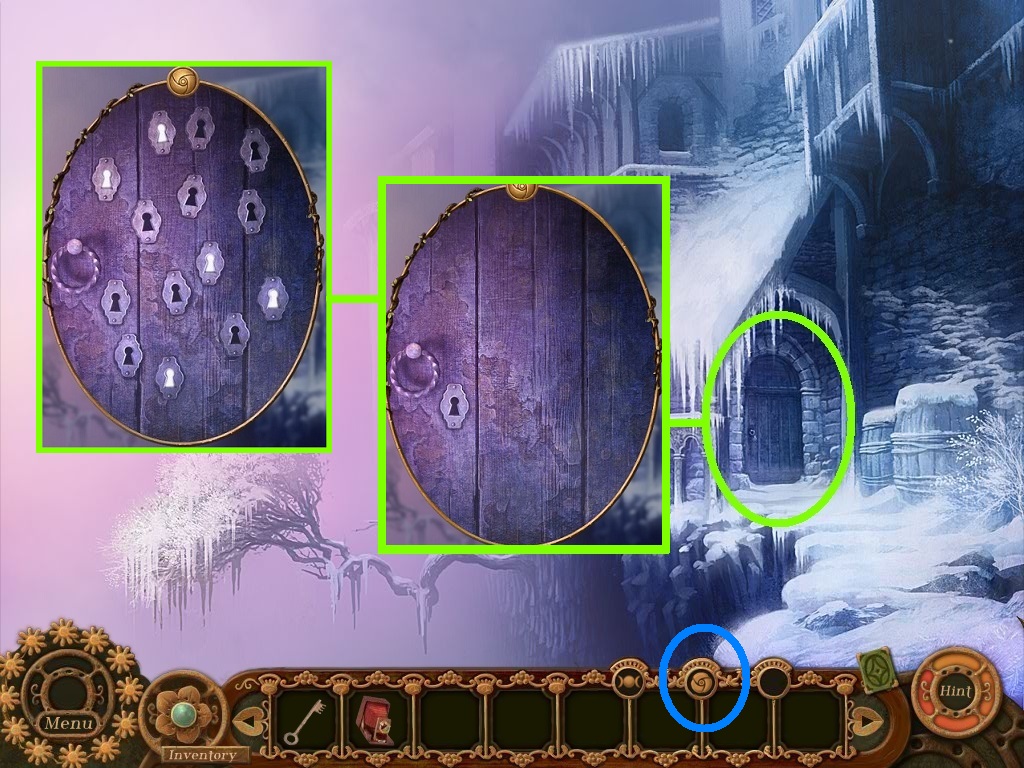
- Zoom into the monastery door (green circle).
- Select the rose eye (blue circle); use it to reveal the keyholes.
- Refer to the spirit photo for a guide of the correct key holes to unlock.
- Solve as shown above.
- Go into the monastery.
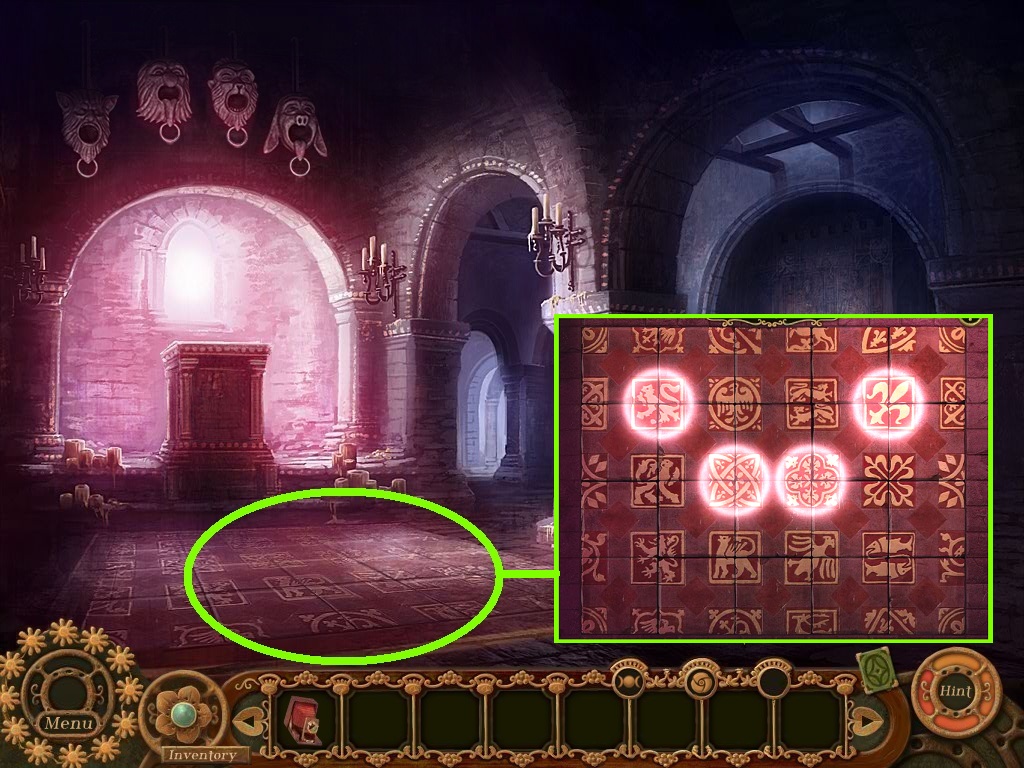
- Zoom into the floor tiles (green circle).
- Click on the tiles to rearrange.
- Solve as shown.
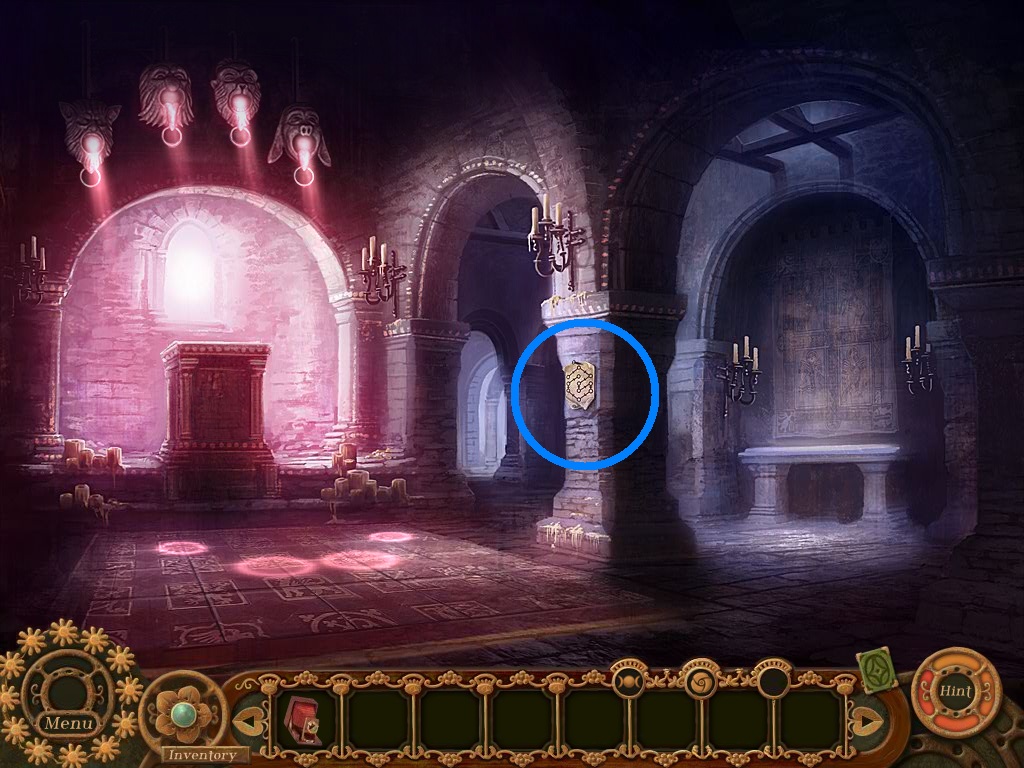
- Collect the pattern from the pillar (blue circle).
- Go to the scriptorium.
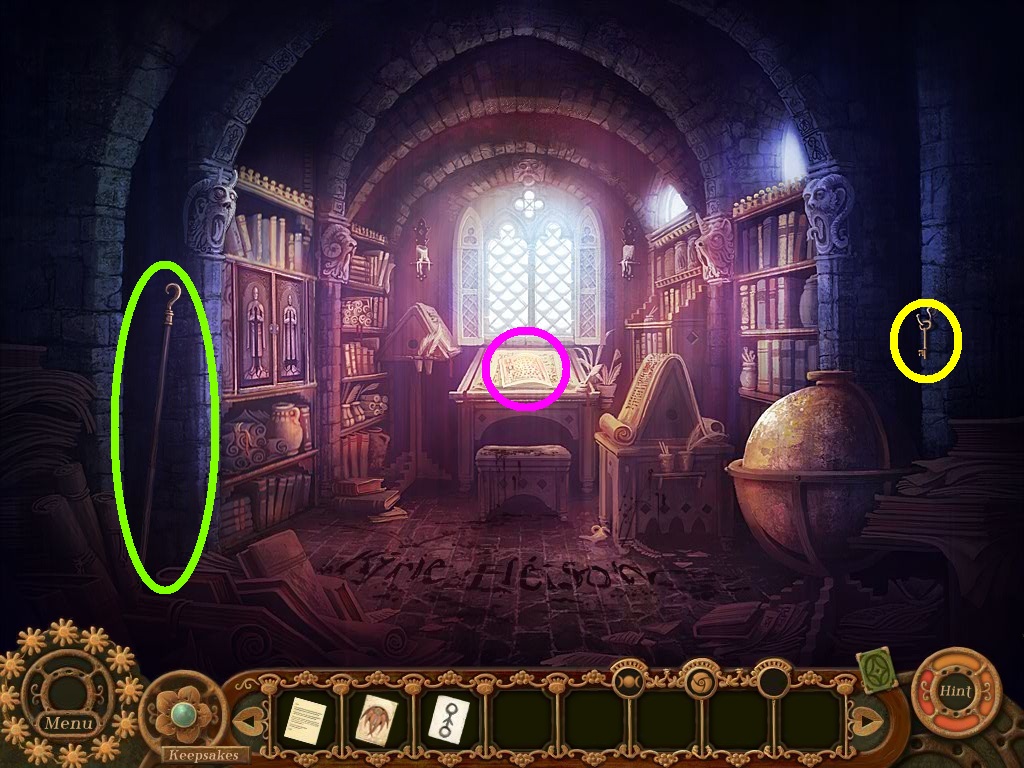
- Collect the pole hook (green circle).
- Collect the small key (yellow circle) from the hook on the wall.
- Collect the manuscript (pink circle) from the desk.
- Go to the chapel.
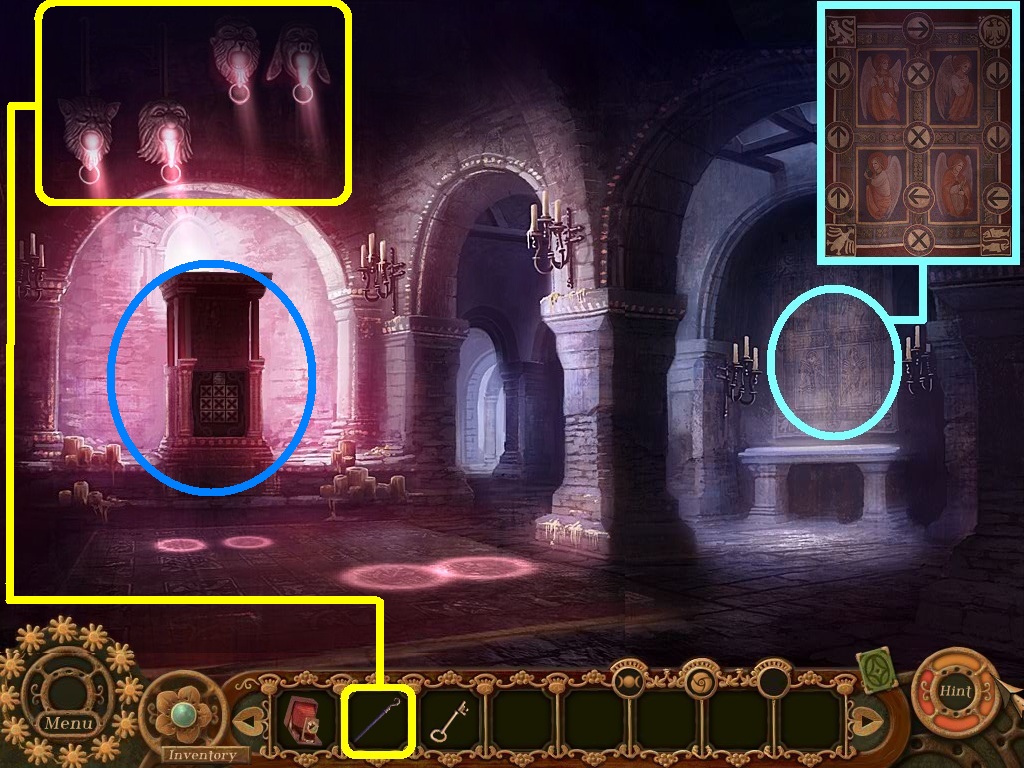
- Zoom into the wall tapestry (aqua circle).
- Locate the matching four symbols on the tile floor.
- Arrange the light on the symbols; pick the pole hook (yellow square) to arrange the lighting.
- Zoom into the altar panel (blue circle).
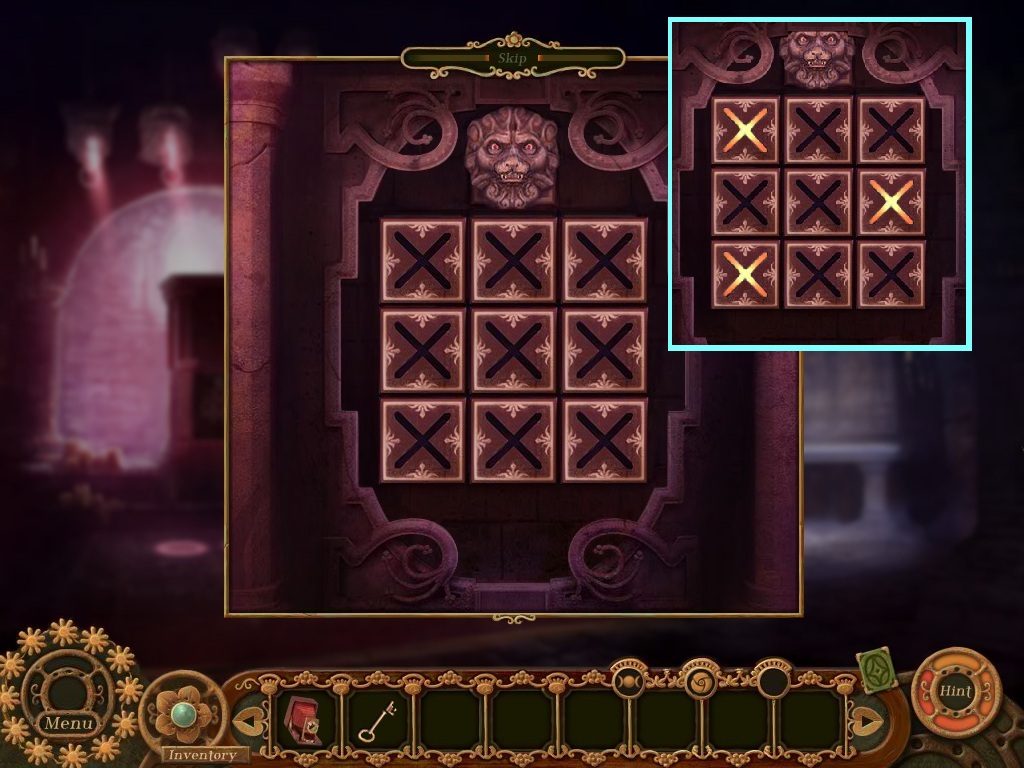
- Refer to the chapel pattern for the correct sequence pattern.
- Once the puzzle is completed as shown above; collect the wooden sword.
- Go to the courtyard and go into the wine cellar.
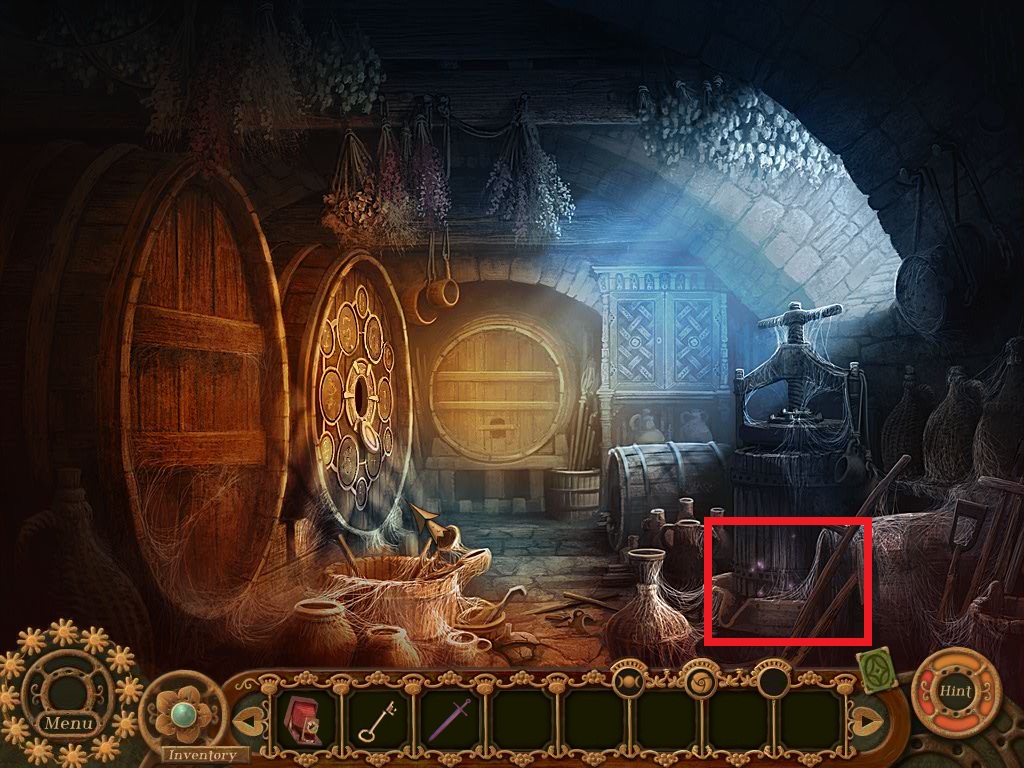
- Zoom into the hidden objects area (red rectangle).
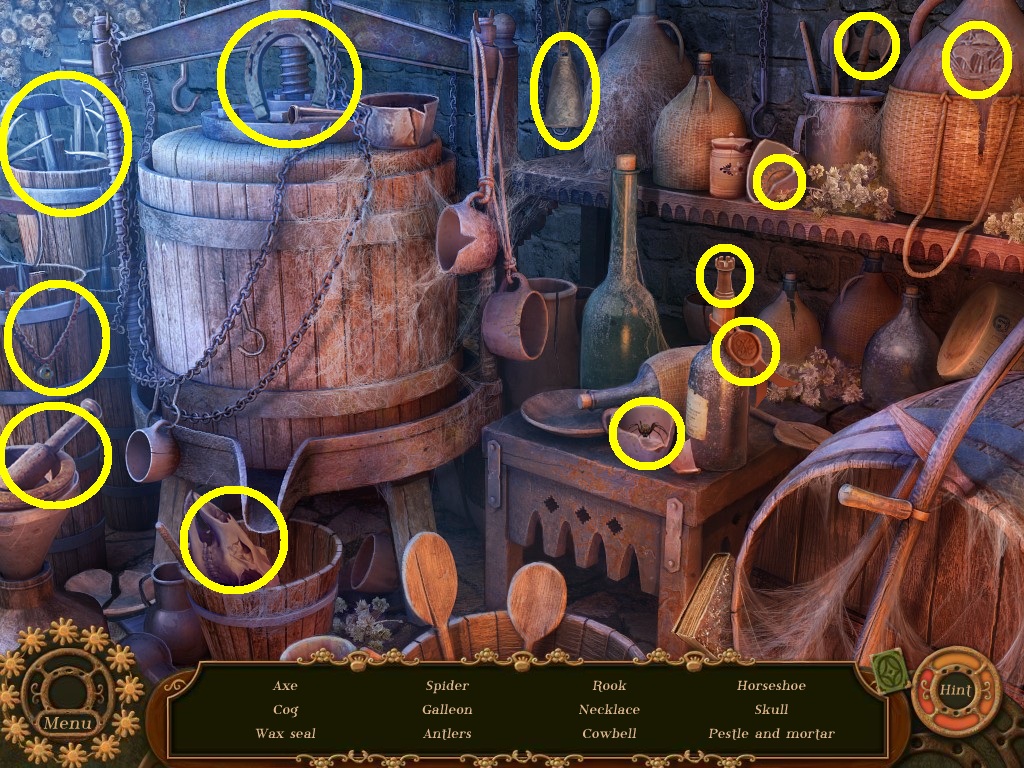
- Find all of the listed items (yellow circles).
- Collect the wooden axe.
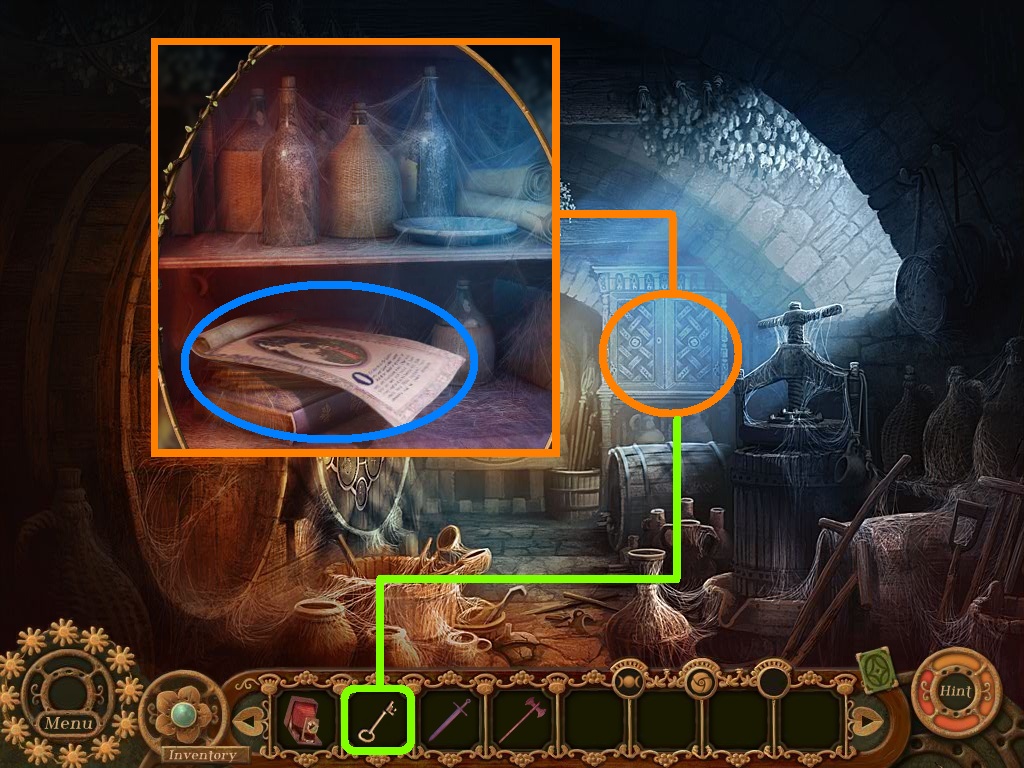
- Zoom into the cabinet (orange circle).
- Pick the small key (green square) and use it to unlock the cabinet.
- Collect the manuscript (blue circle).
- Go to the scriptorium.
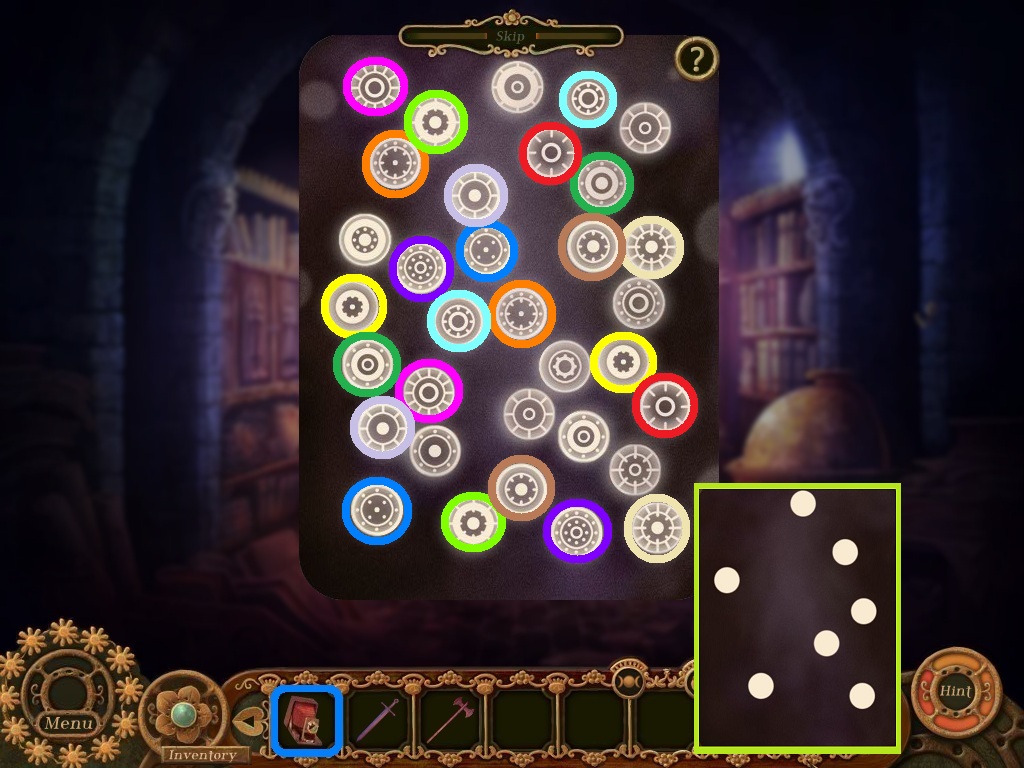
- Select the spirit camera (blue square) use it to take a picture of the orbs.
- Pick the matching pairs of orbs.
- Collect the second orb photo.
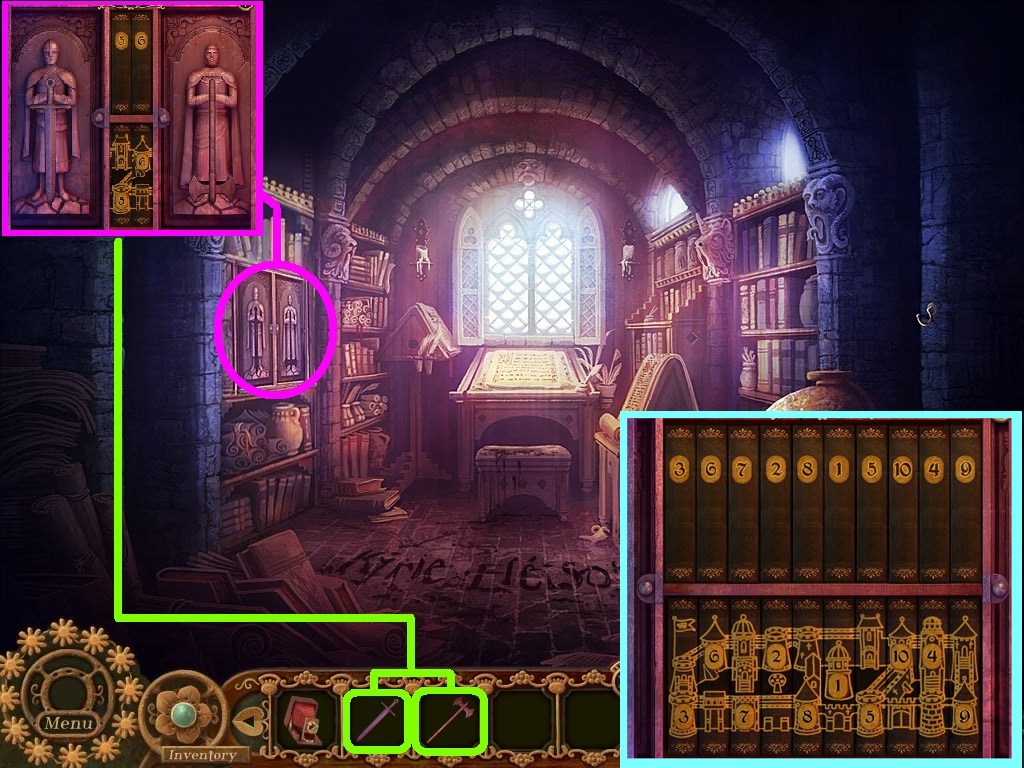
- Zoom into the bookcase (pink circle).
- Pick the wooden axe and wooden sword (green squares); insert them into their matching spaces.
- Move the books around to reveal a picture of a town.
- Solve as shown above.
- Go through the door to the loom chamber.
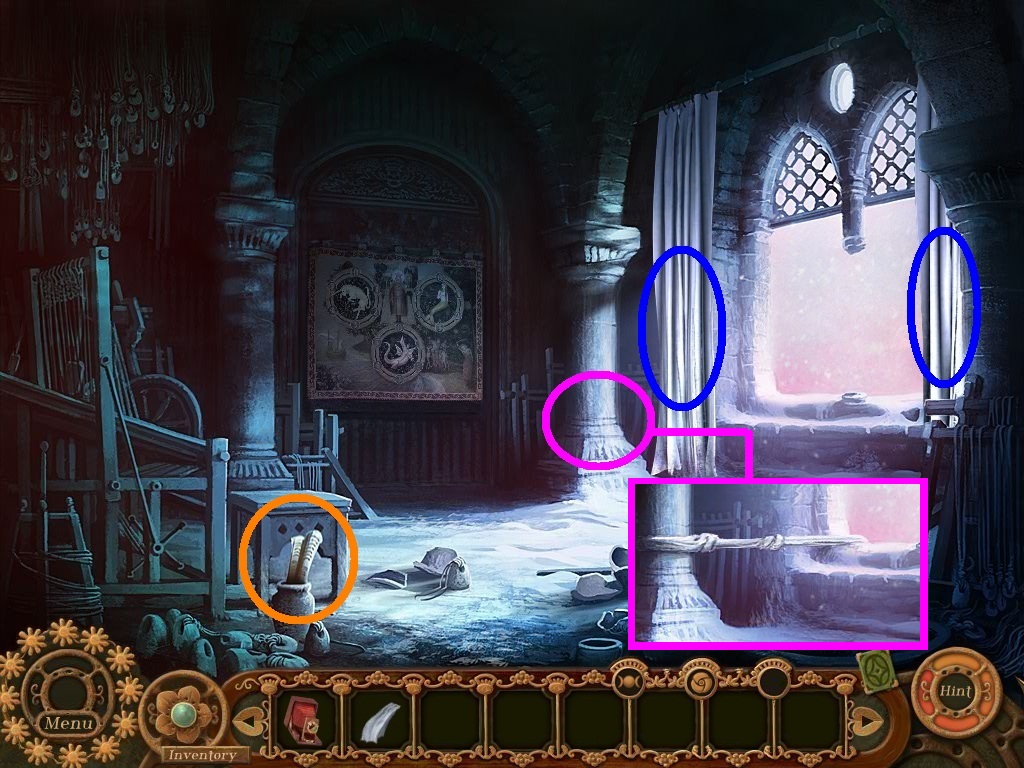
- Click the curtains (blue circles).
- Place the curtain (pink circle) on the column.
- Place the curtain (aqua circle) on the end of the last curtain.
- Collect the manuscript (orange circle).
- Exit through the window.
- Go into the monk’s cell.
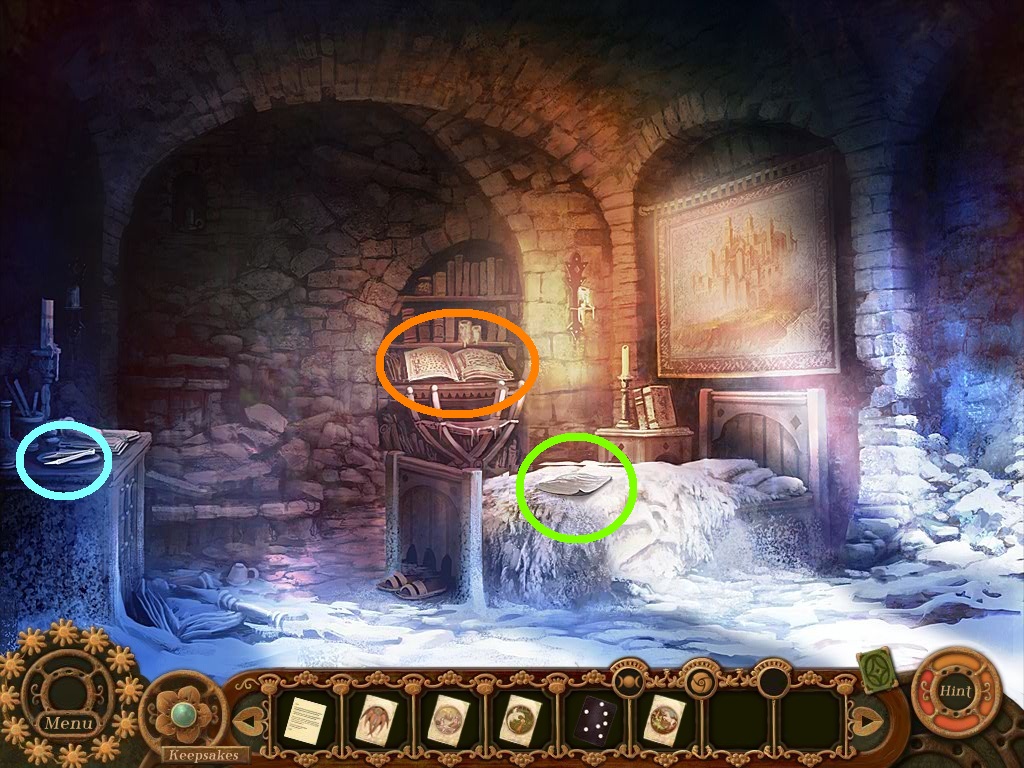
- Collect the journal page (green circle).
- Collect the manuscript (orange circle).
- Collect the tweezers (aqua circle).
- Climb back to the loom chamber.
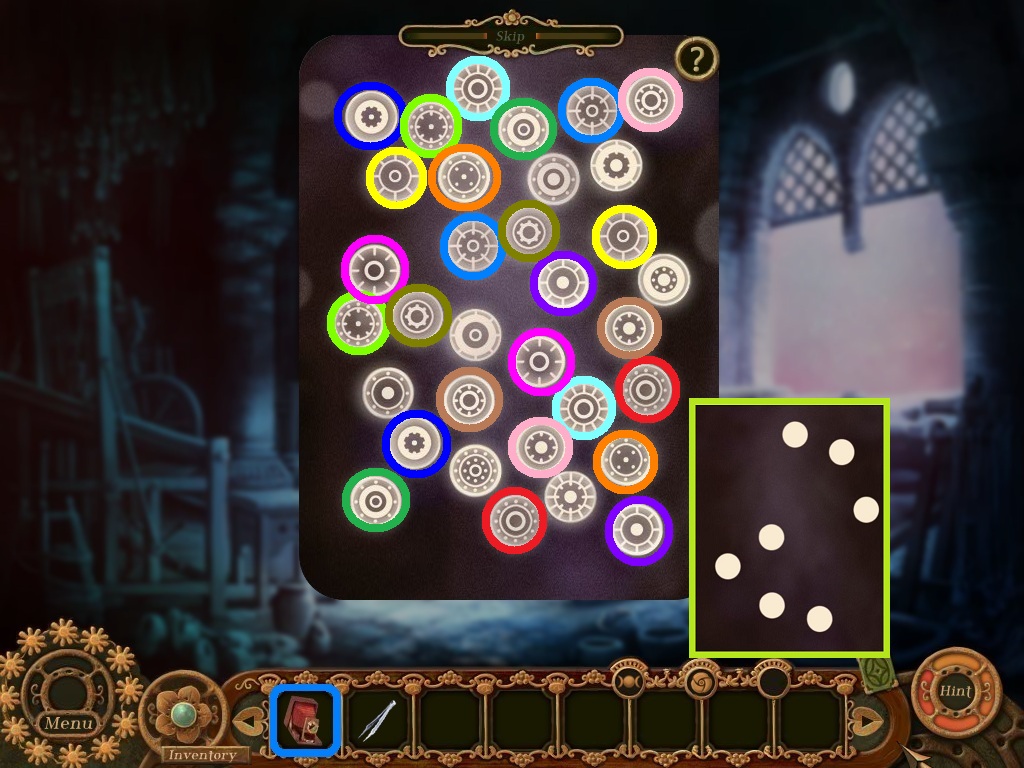
- Pick the spirit camera (blue square) to take a picture of the orbs.
- Pair off the matching orbs; collect the orb photo.
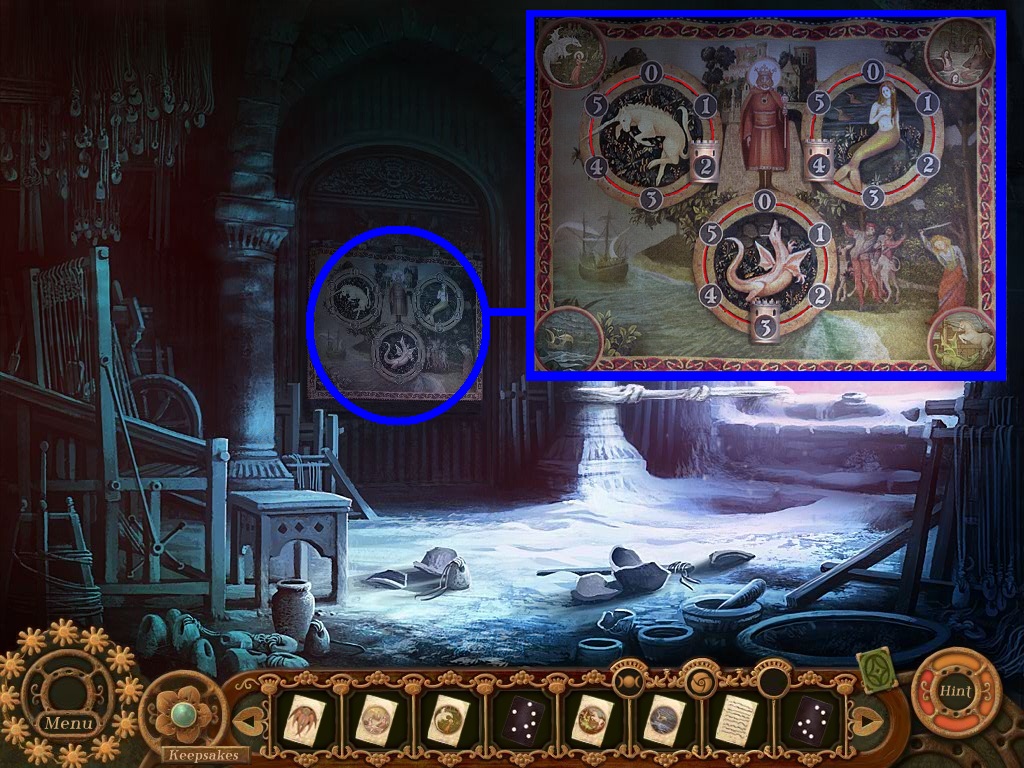
- Zoom into the tapestry (blue circle).
- A puzzle will trigger.
- Solve the puzzle as shown above.
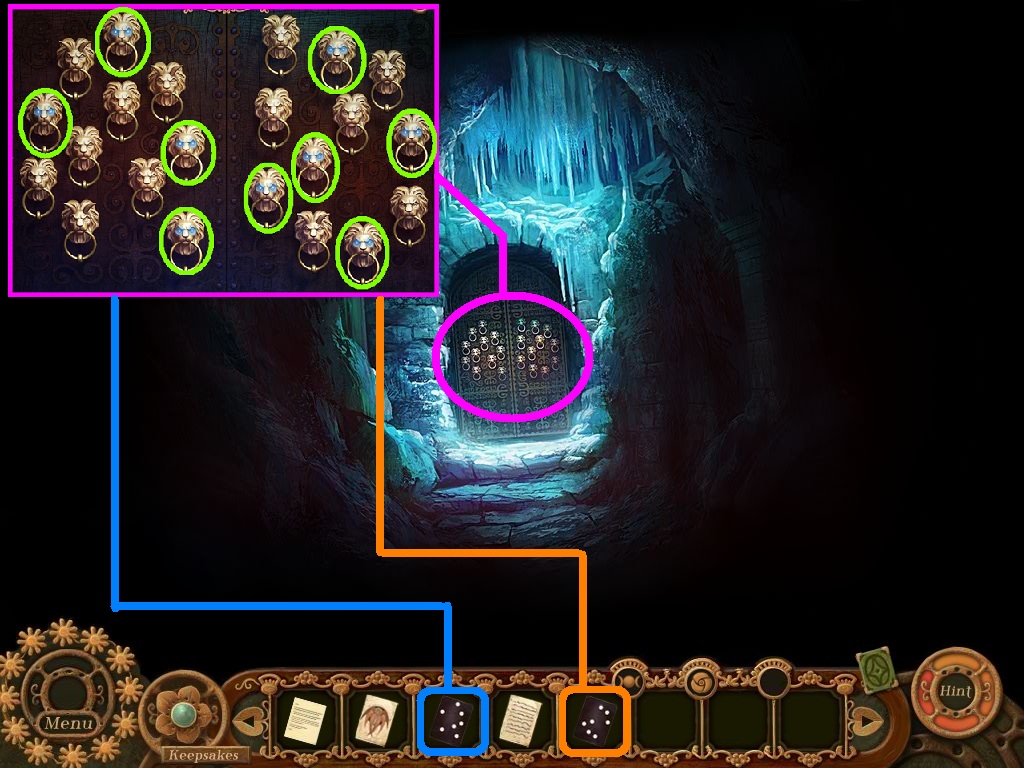
- Zoom into the studded wooden doors (pink circle).
- Pick the orb photos and match the patterns to the door knockers (green circles).
- Go into the tunnel to the mountain top.
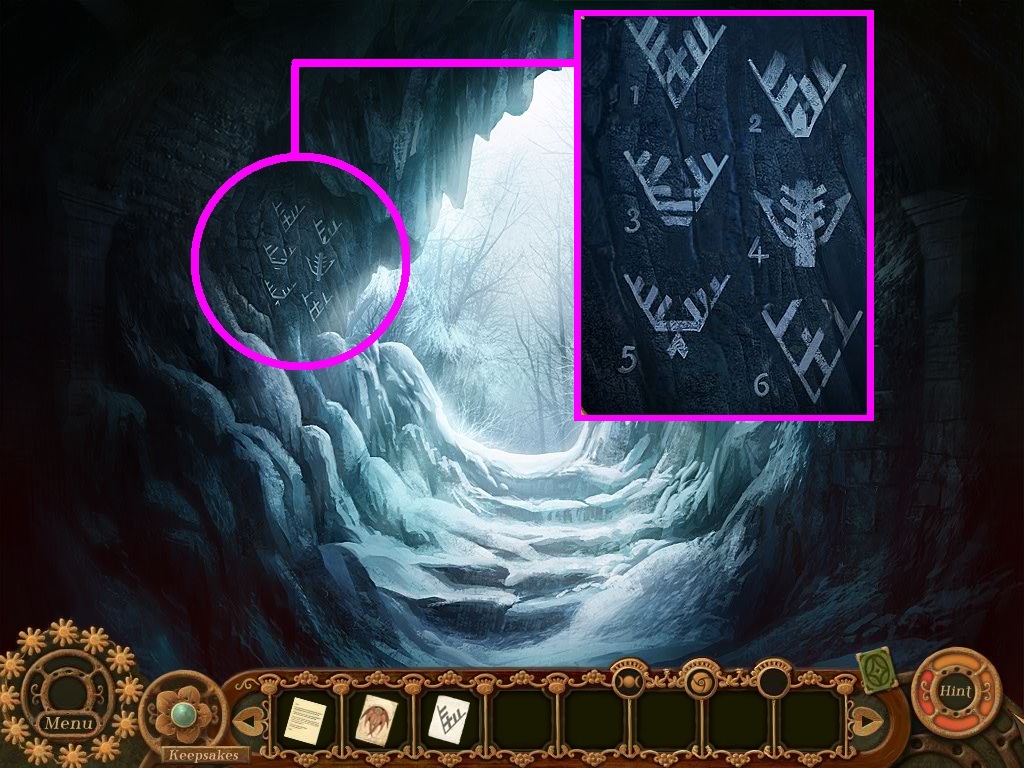
- Zoom into the glyphs (pink circle) on the wall.
- Collect the sketch.
- Go into the snow forest.