
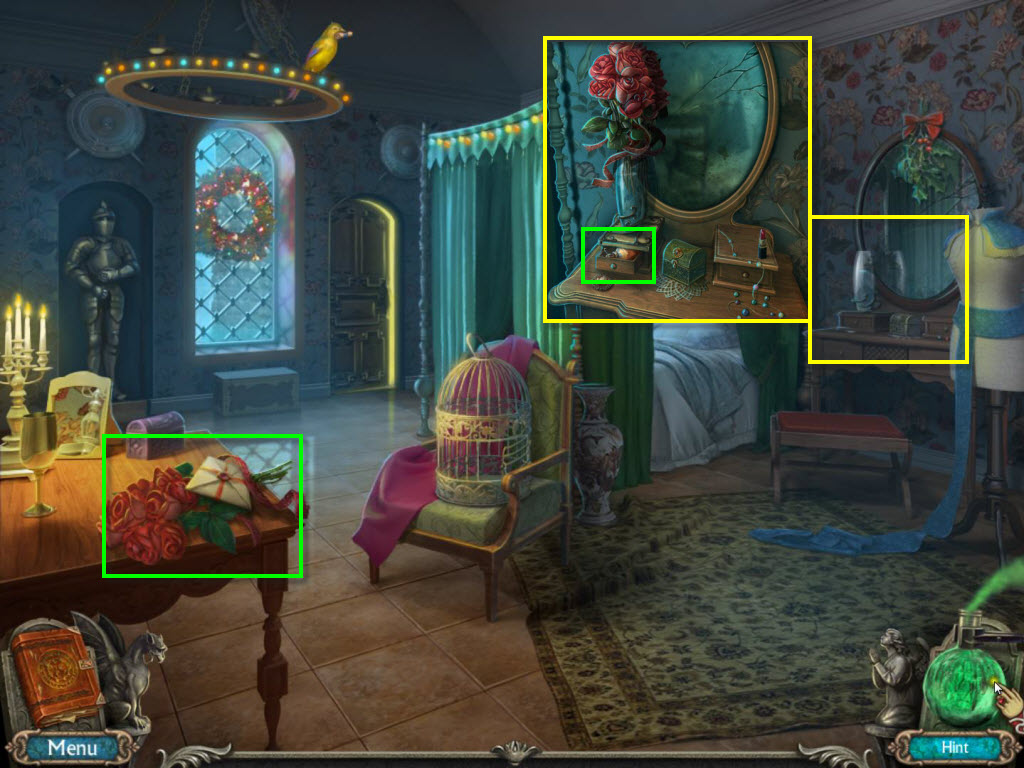
- Take the Roses.
- Click to zoom in on the mirror.
- Use the Roses on the Vase.
- Take the Oiler.
- Go forward into the living room.
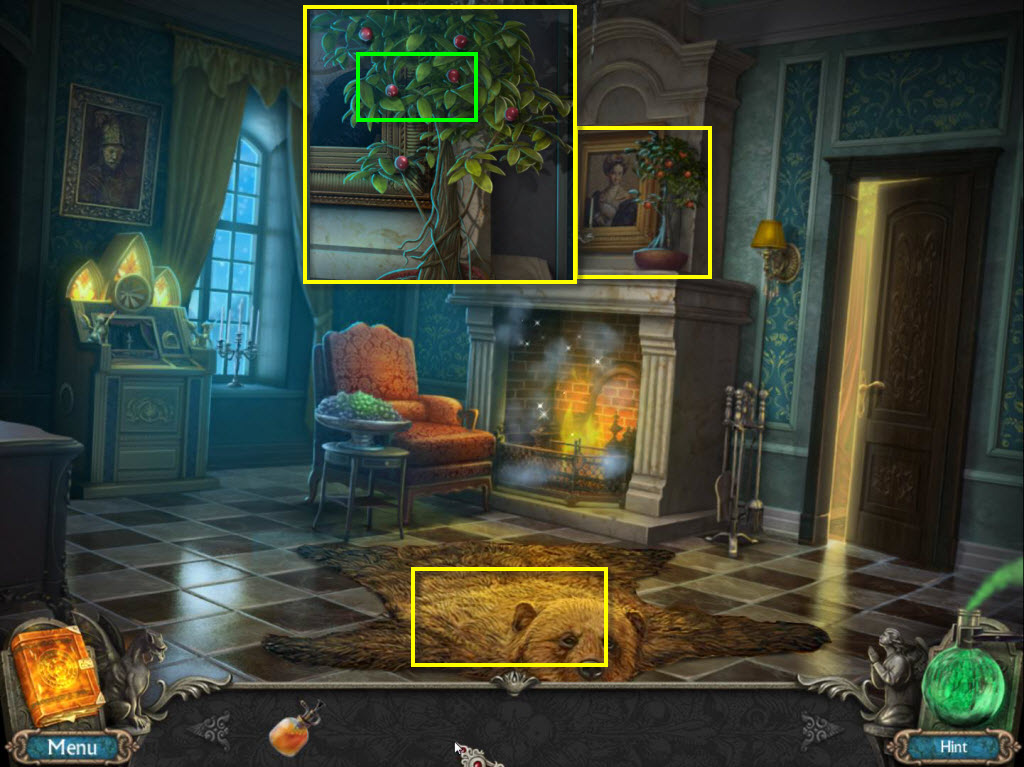
- Click on the bear skin to move it and reveal the hatch.
- Click to zoom in on the tree.
- Take the Berries.
- Click on the sparkles to play the hidden object game.
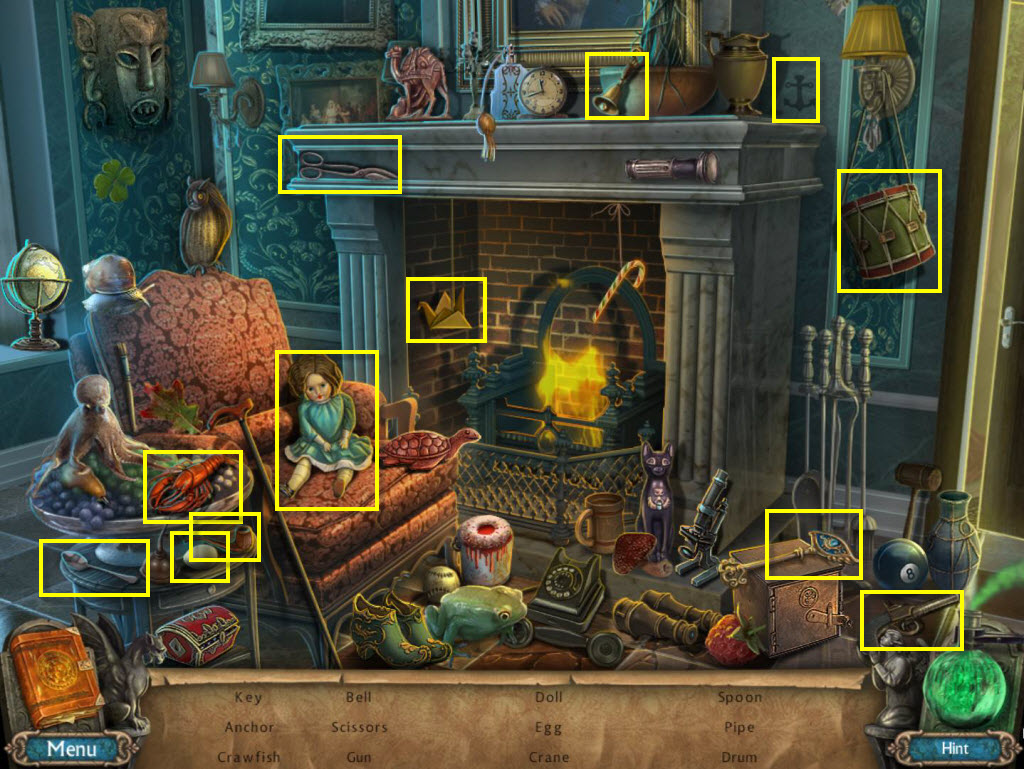
- Find all the items on the list.
- You will receive the Key.
- Go back one screen.
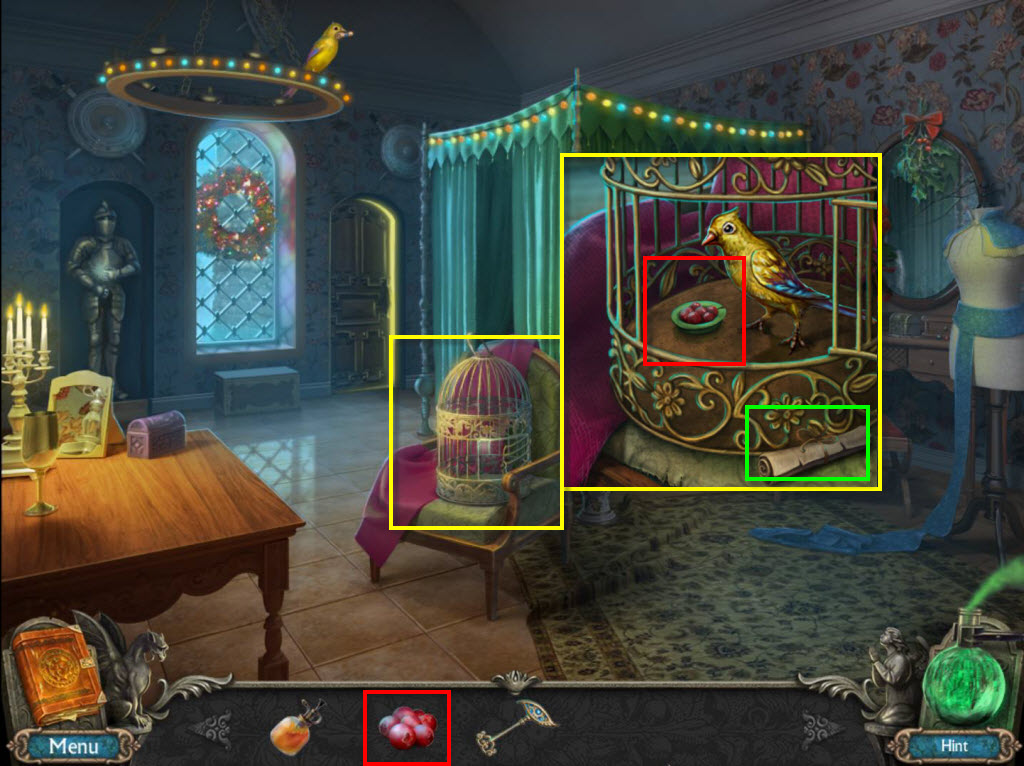
- Click to zoom in on the cage.
- Use the Berries on the empty bowl.
- Take the note.
- You will receive the Rope.
- Go forward two screens.
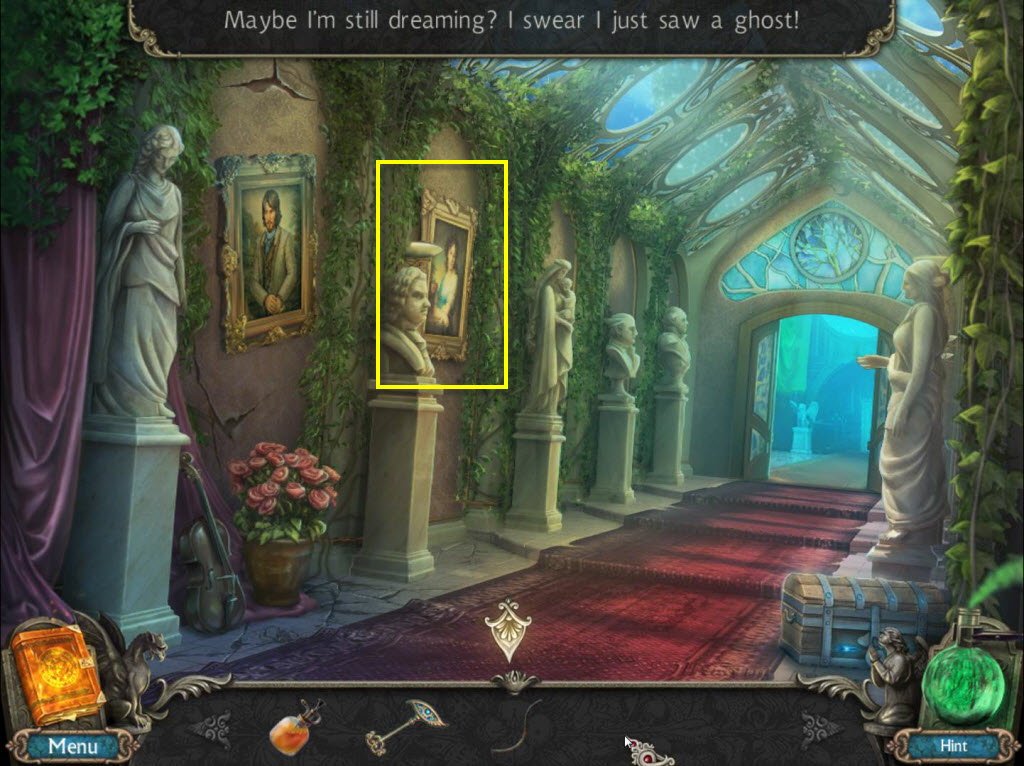
- Click on the painting of the woman to reveal the safe.
- Go forward one screen.
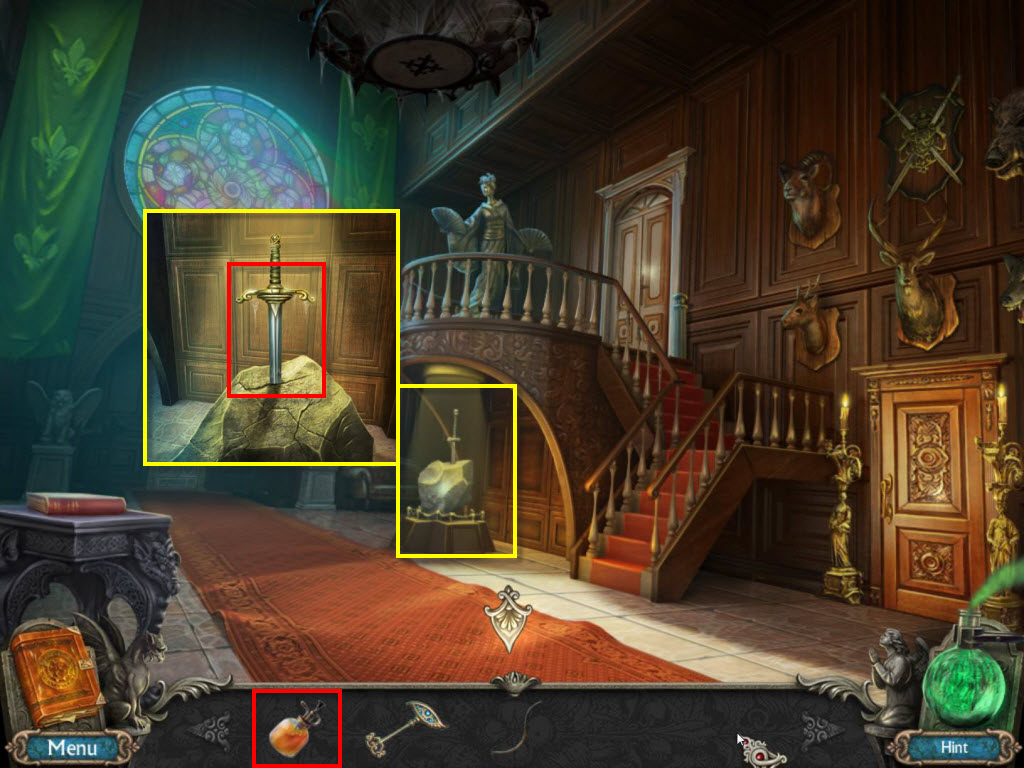
- Click on the sword to zoom in.
- Use the Oiler on the sword.
- You will receive the Sword.
- Go back three screens.
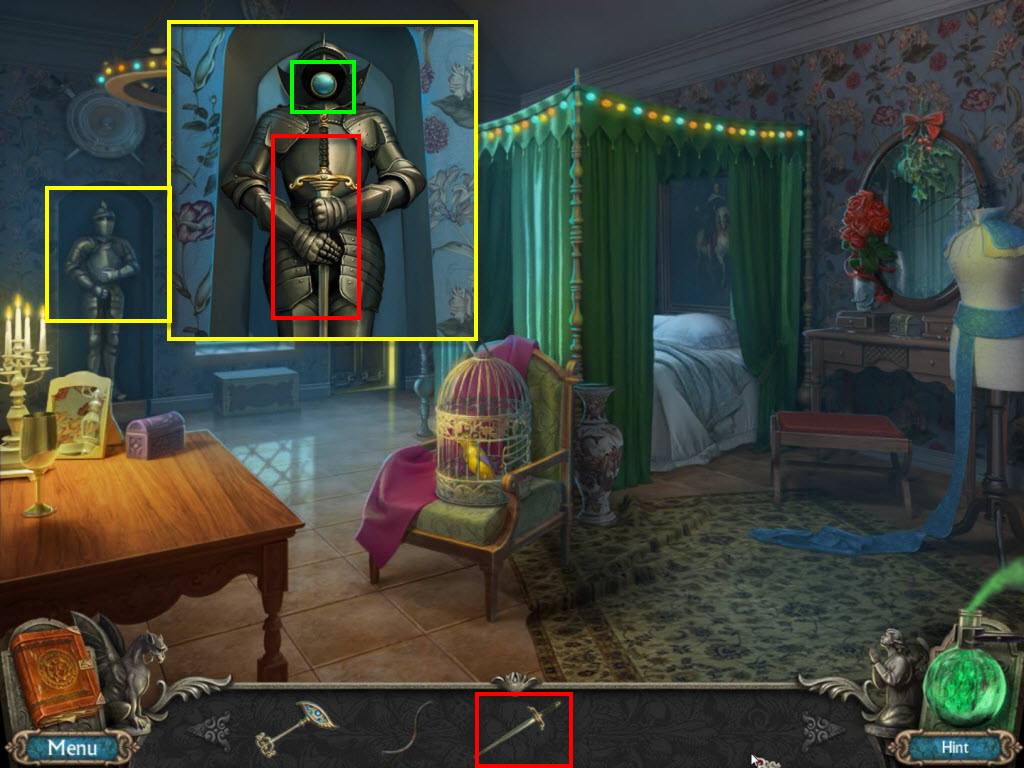
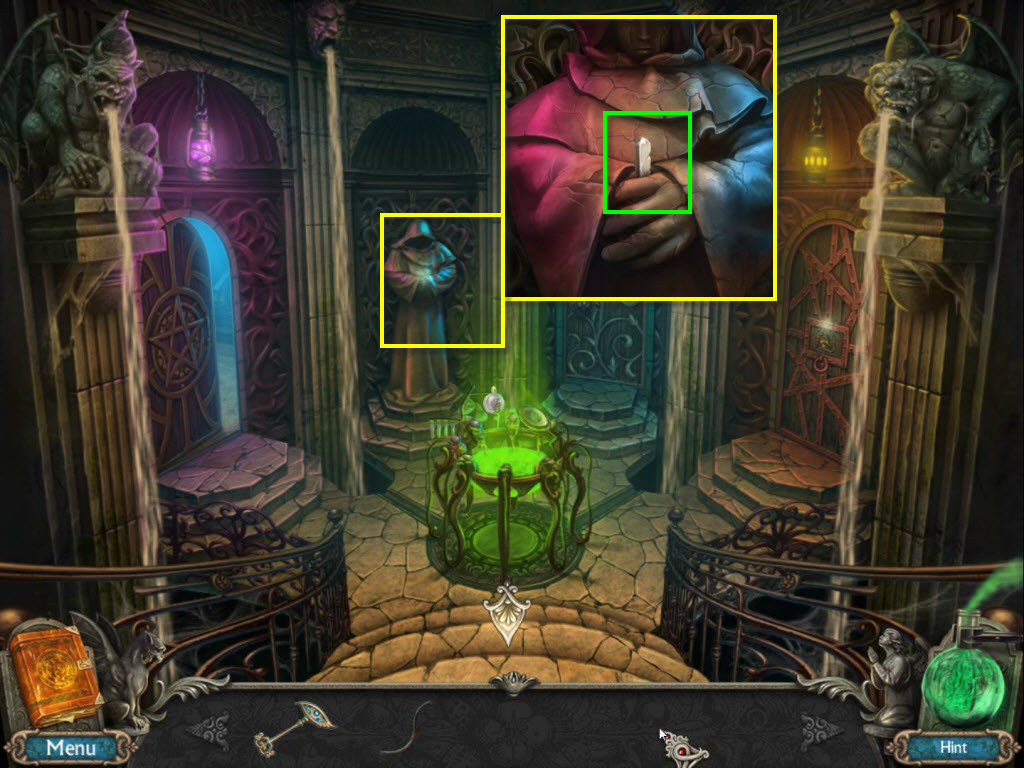
- Click on the knight to zoom in.
- Use the Sword on the knight.
- Take the Button.

- Click to zoom in on the desk.
- Use the Button on the empty slot.
- Play the mini-game
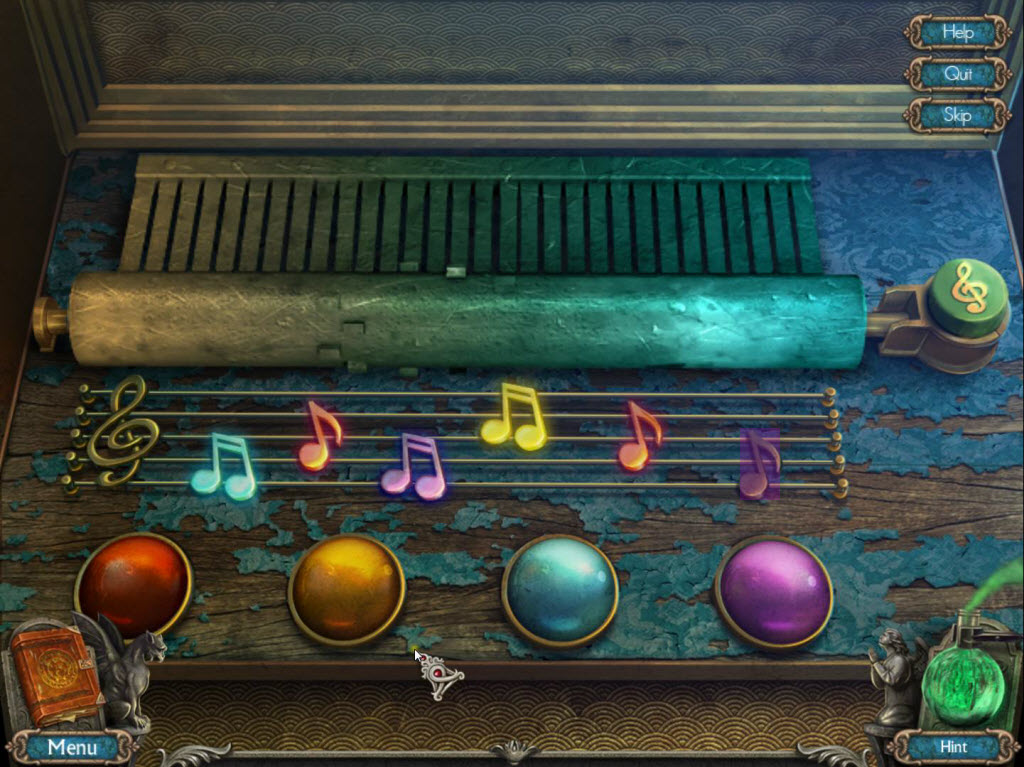
- You will need to select the buttons in the right order.
- The solution is: Blue, Red, Purple, Yellow, Red, Purple.
- You will receive the Coin.
- Go forward one screen.
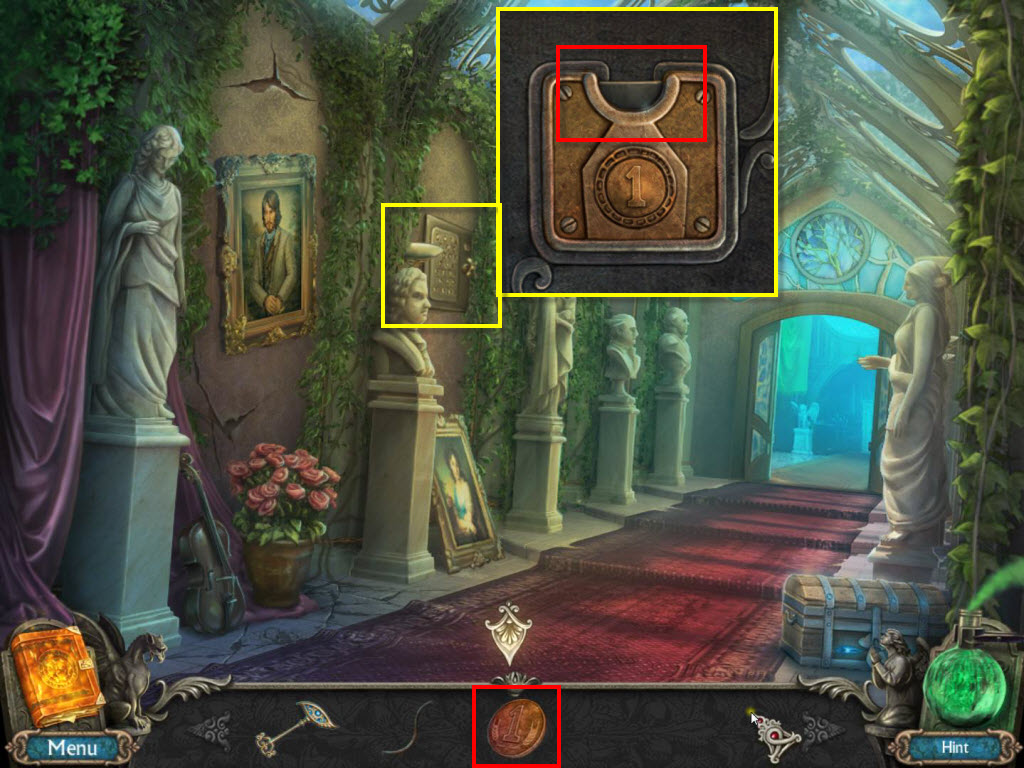
- Click to zoom in on the safe.
- Use the Coin on the safe.
- Play the mini-game

- The goal of the puzzle is to get the diamond in the middle to be red. No other areas can be red.
- See the screenshot for the solution.
- You will receive the Star.
- Go back one screen.
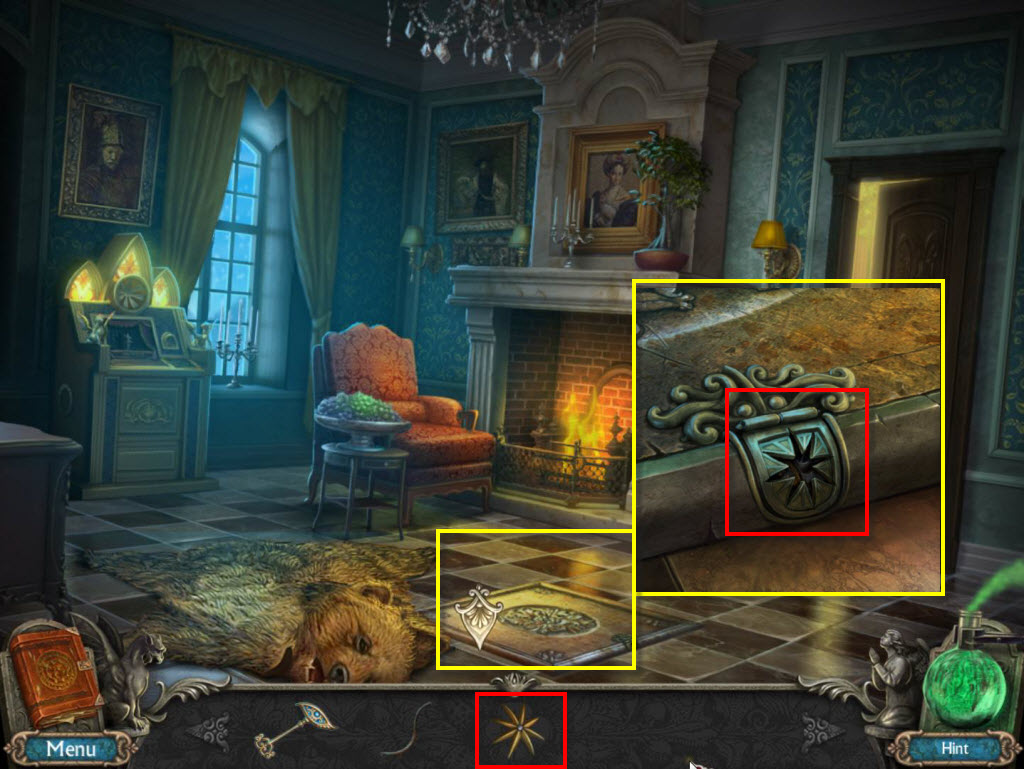
- Click to zoom in on the trap door.
- Use the Star on the lock.
- Go down the trap door.
- Click on the statue to zoom in.
- Take the Chalk.
- Enter the Alchemy Lab.
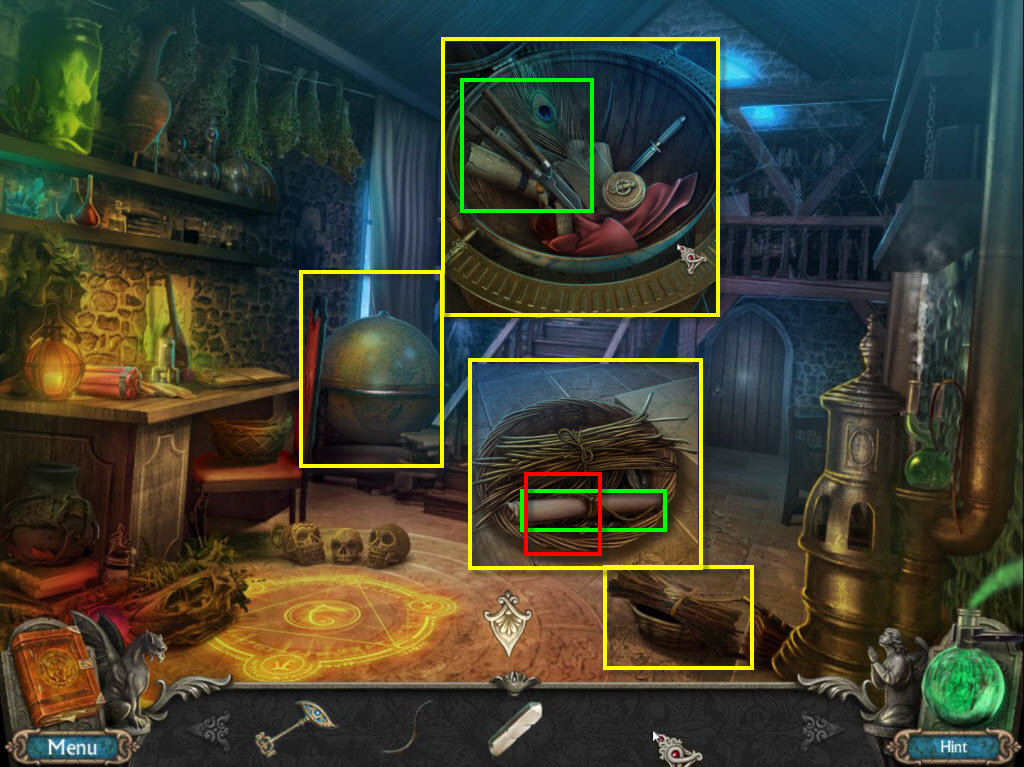
- Click on the globe to open it.
- Click to zoom in on the globe.
- Take the Pruning Shears.
- Click on the basket on the floor.
- Take the note.
- Take the Lighter.
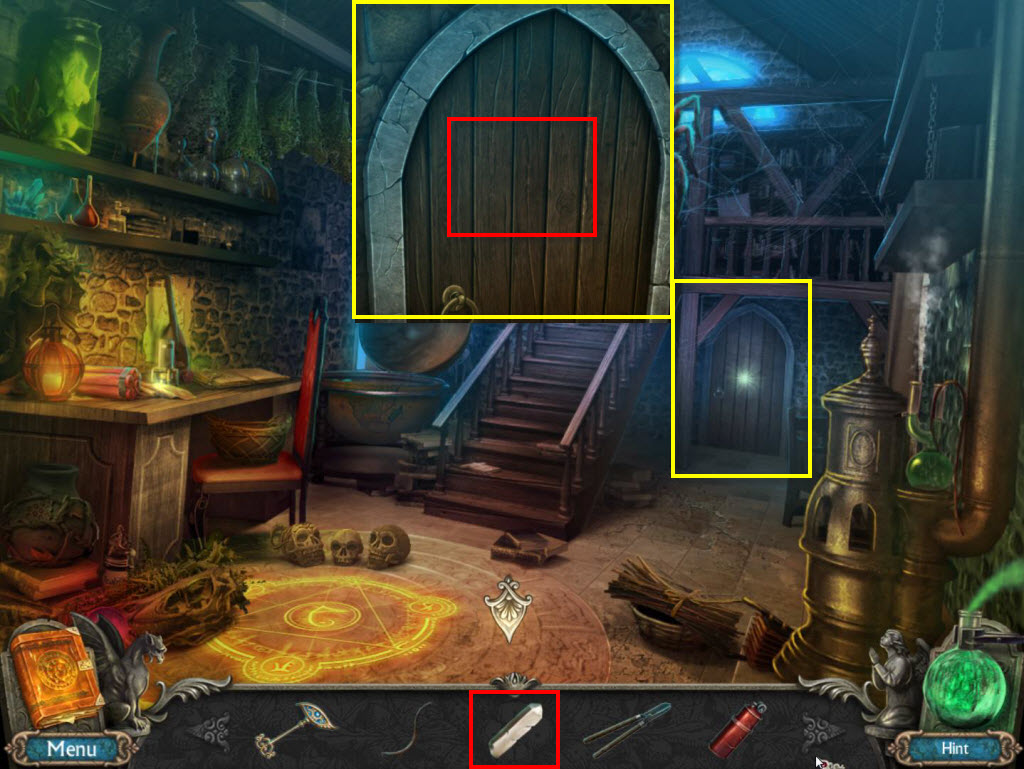
- Click to zoom in on the door.
- Use the Chalk on the door.
- Enter the Harem.
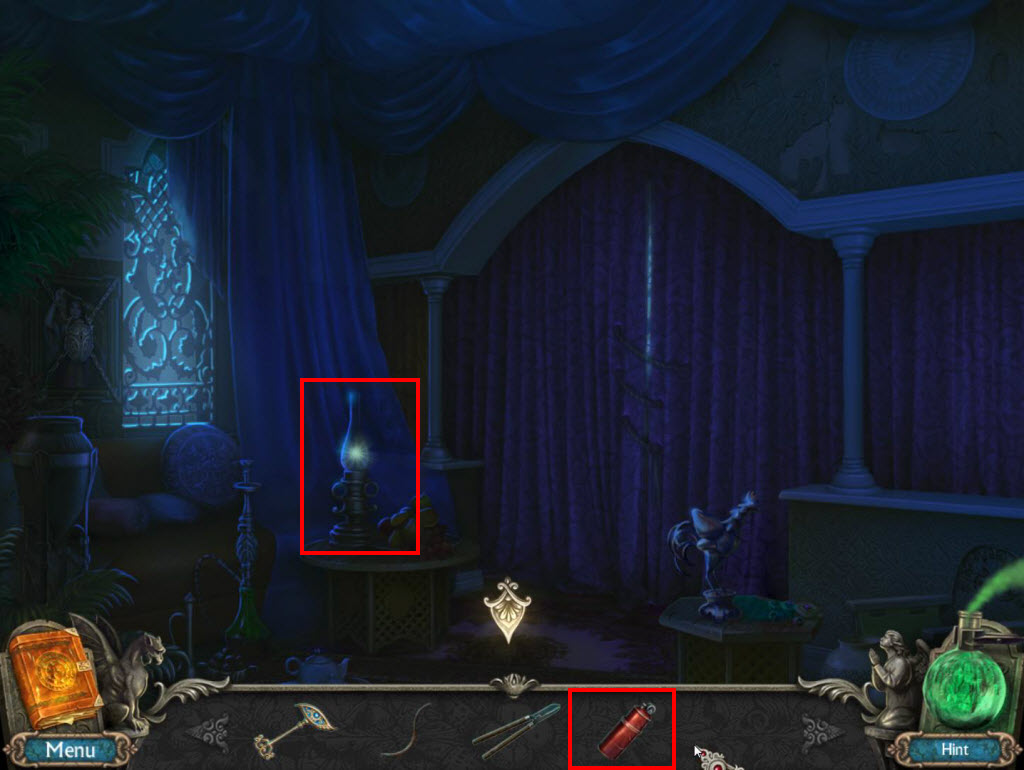
- Use the Lighter on the Lamp.
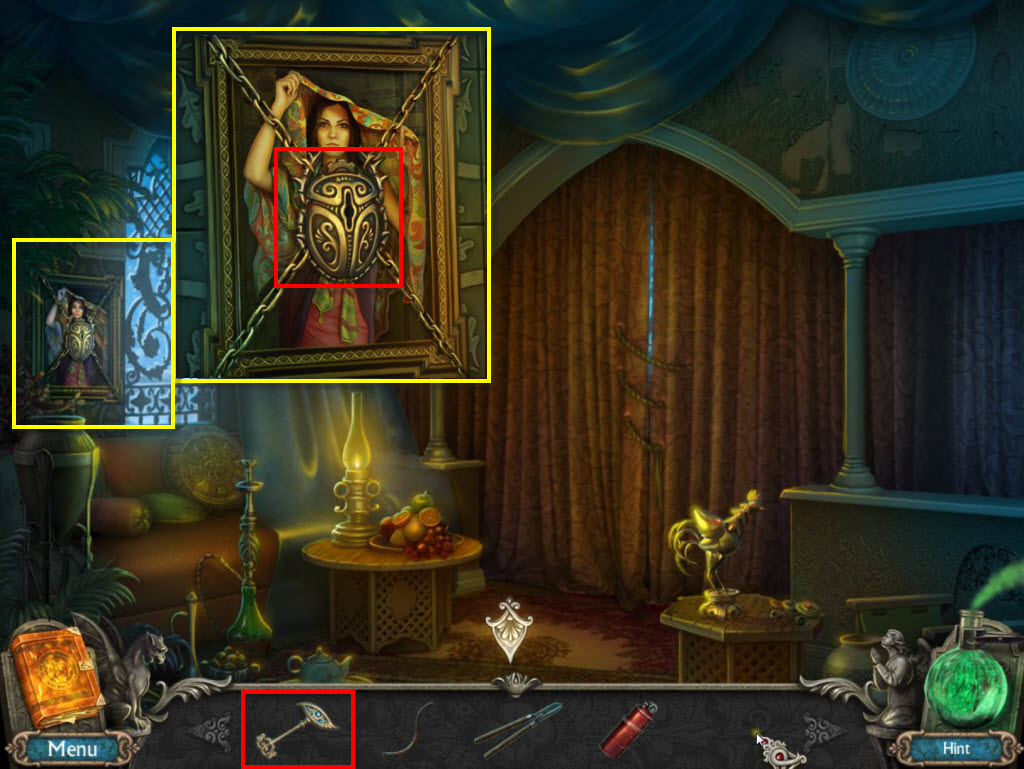
- Click to zoom in on the painting.
- Use the Key on the lock.
- Enter the painting.