
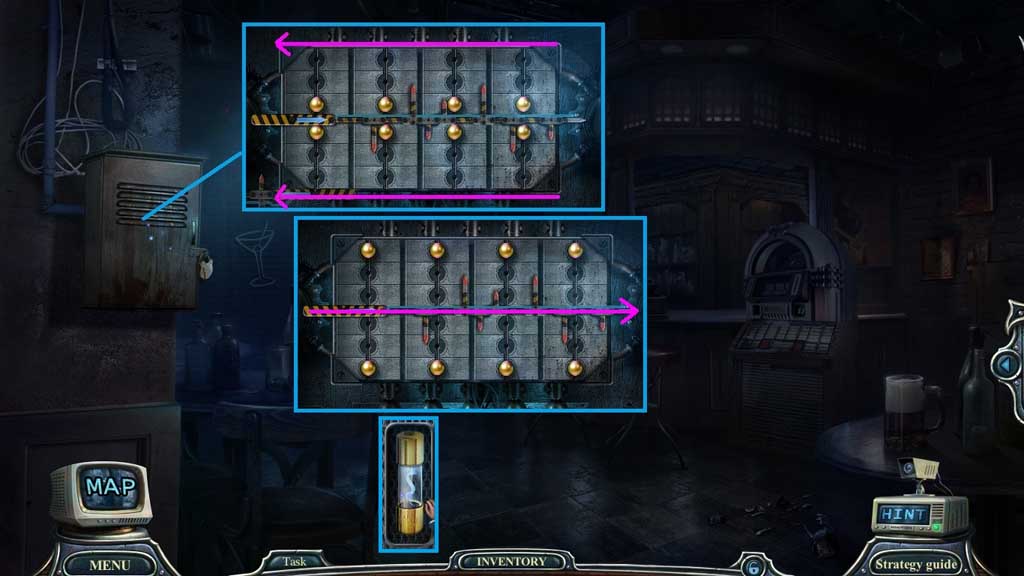
- Select the bolt cutters to cut the lock; click the panel to trigger a mini game.
- Solve the game by aligning the marbles correctly and guiding the sliders.
- Collect the fuse.
- Click the glass and collect 1 /3 triangles.
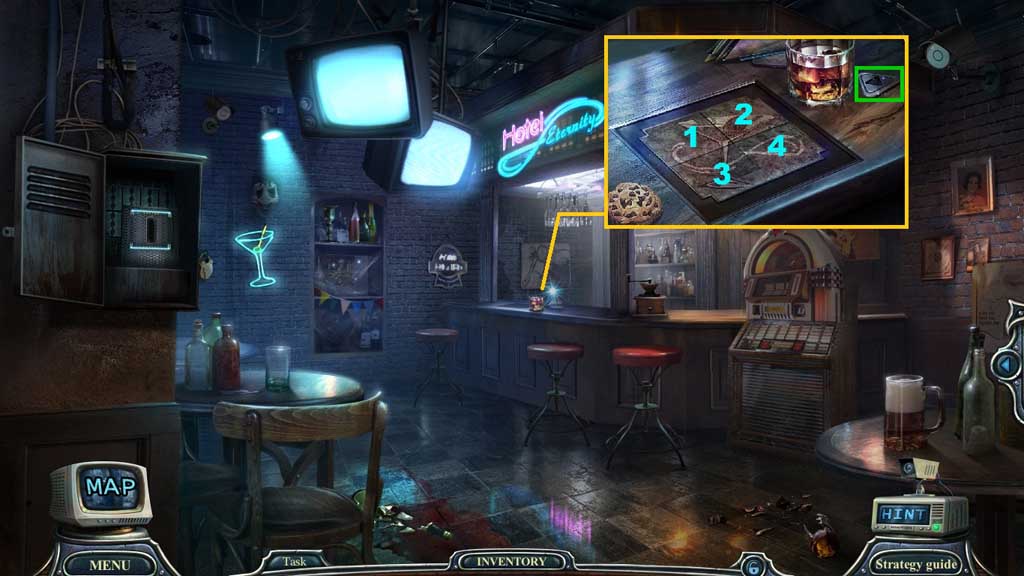
- Insert the martini tile to trigger a mini game.
- Solve the game by clicking the tile in the correct order.
- Solution: 1 – 4 – 2 – 3; collect the registry log.
- Move to the Game Room.
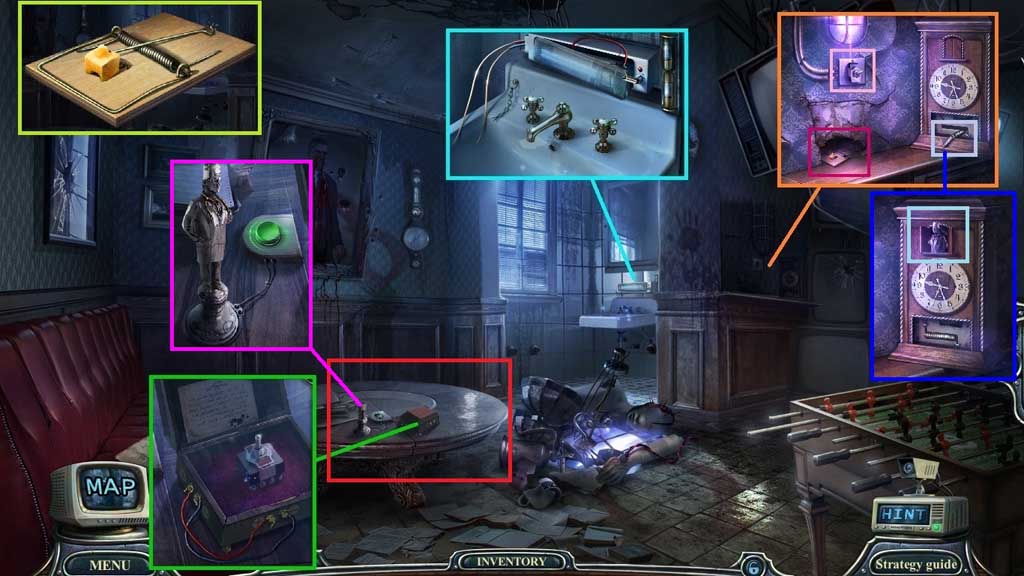
- Insert the fuse; click the switch and collect the wire.
- Insert the wire; click the box and collect the switch.
- Insert the switch; click the switch and collect the mousetrap.
- Click the cheese and the wire; collect the spring.
- Click and replace the spring; collect the figurine part.
- Insert the figurine part and click the button to trigger a hidden objects area.
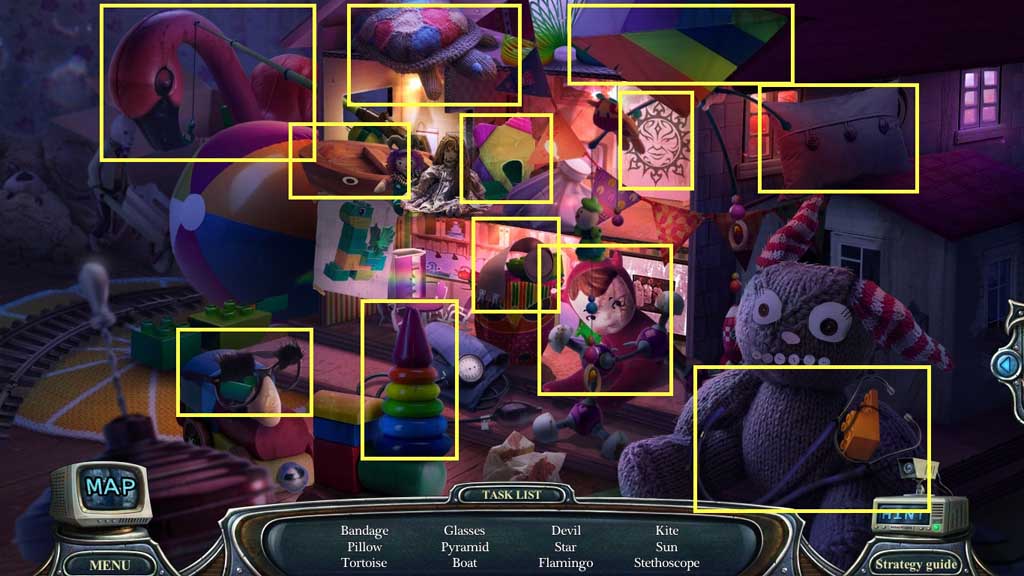
- Find the items.
- Collect the hammer.
- Move to the Bar.
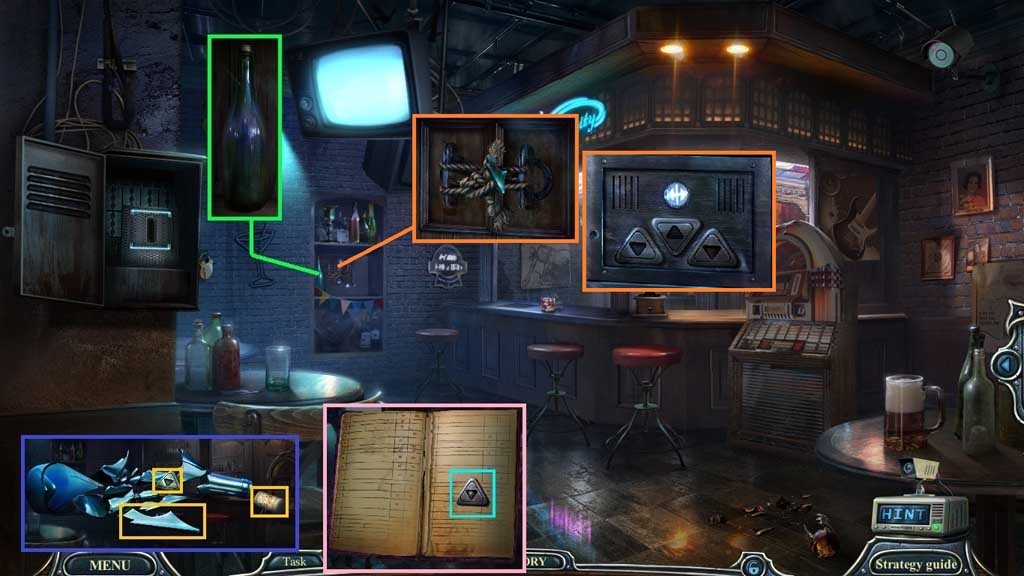
- Click the cobwebs away; collect the bottle and select the hammer to smash it.
- Collect the sharp shard, 2 /3 triangles and the cork.
- Click the registry log 4x’s; collect 3 /3 triangles.
- Select the sharp shard to collect the rope.
- Click the panel and insert the 3 triangles; click the button.
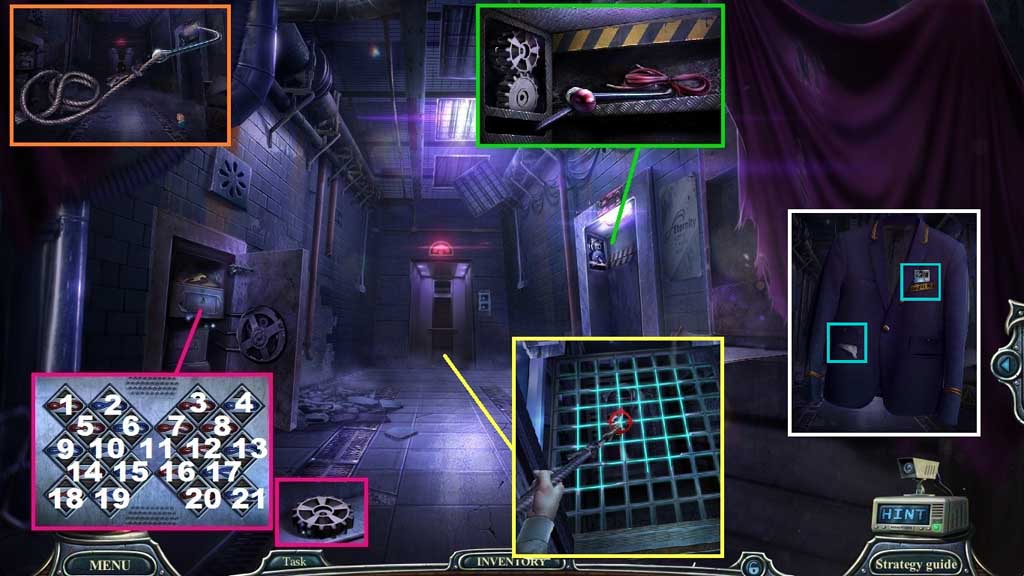
- Zoom into the door to trigger a mini game.
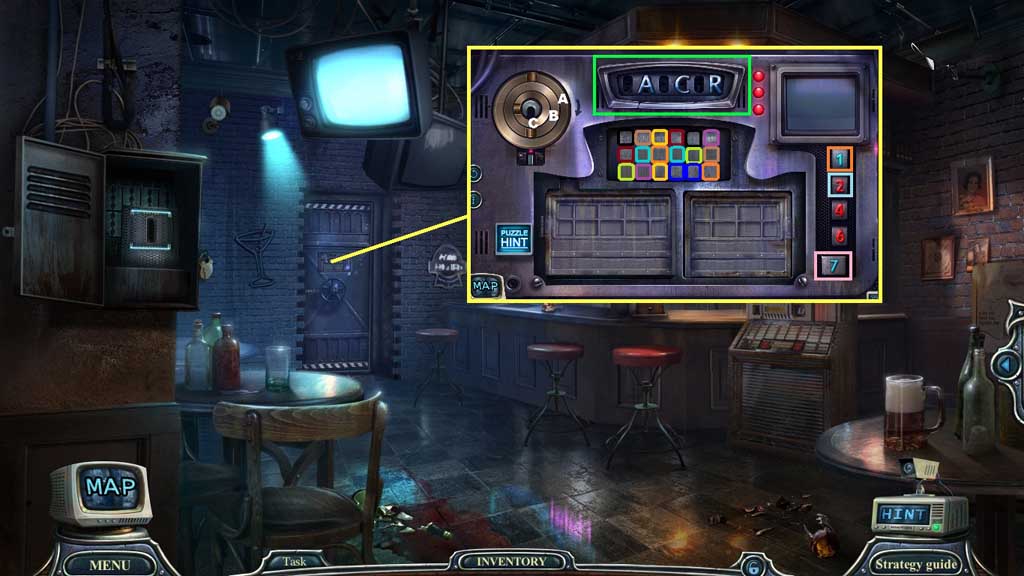
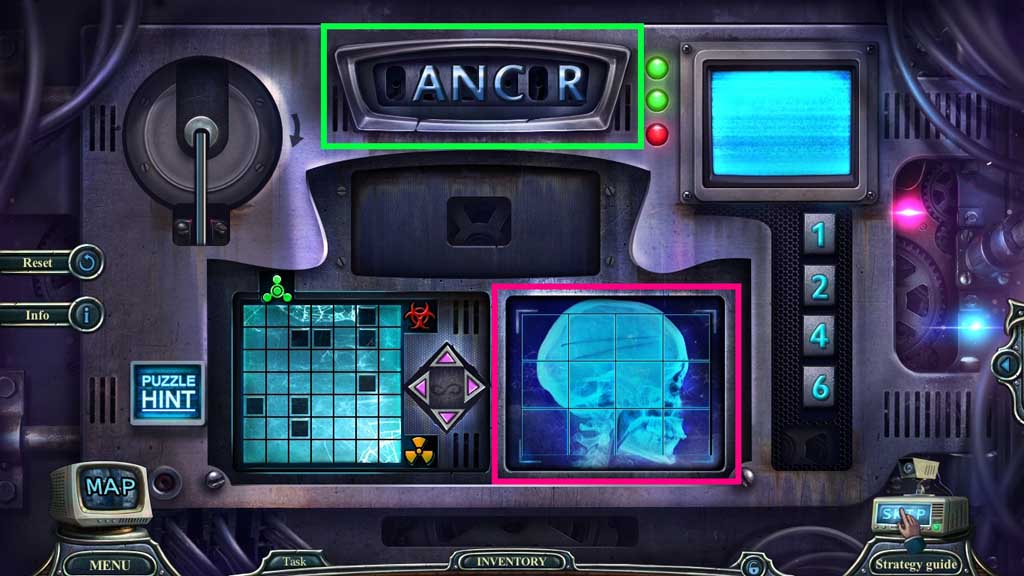
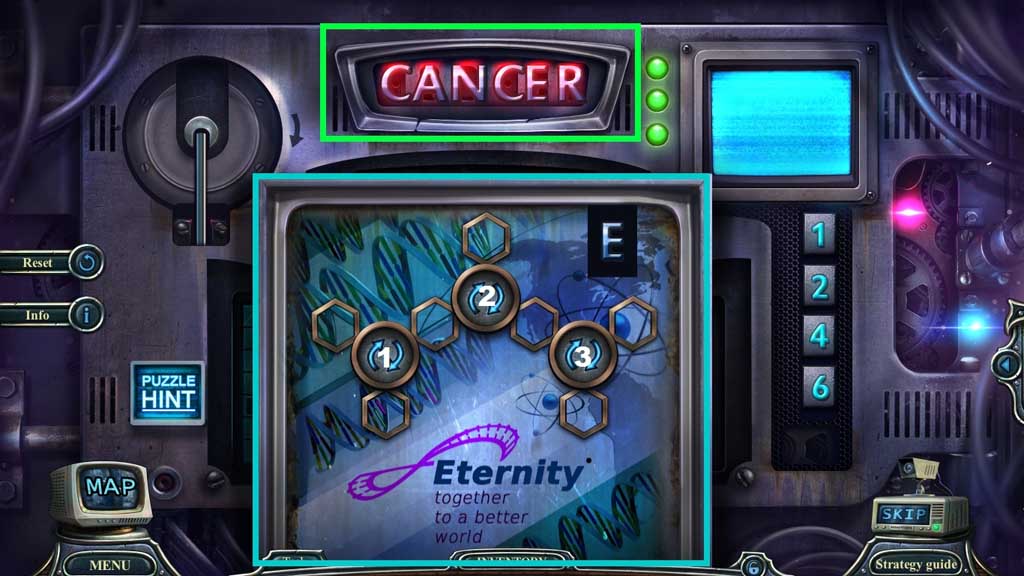
- Solve the game by following the prompts.
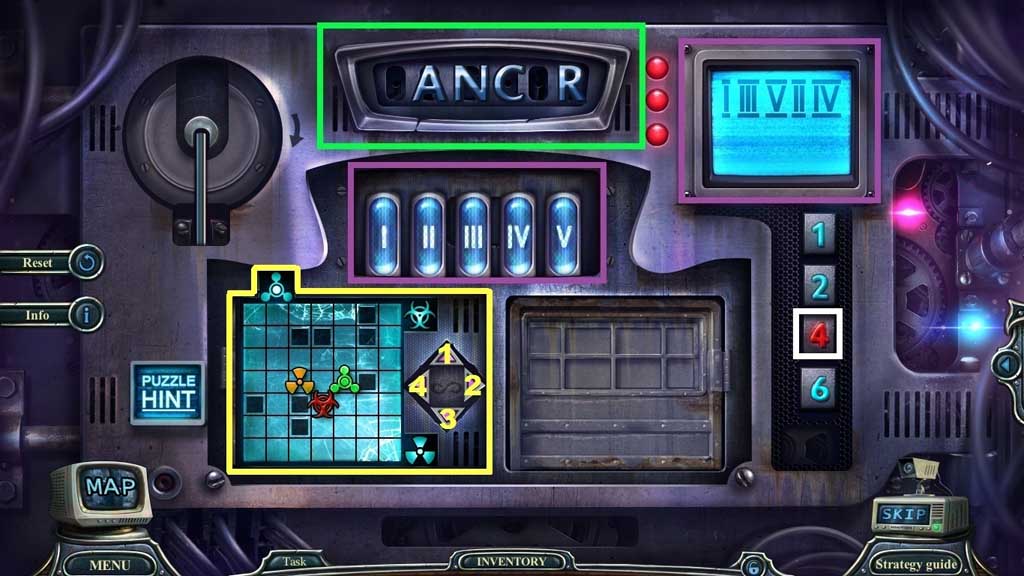
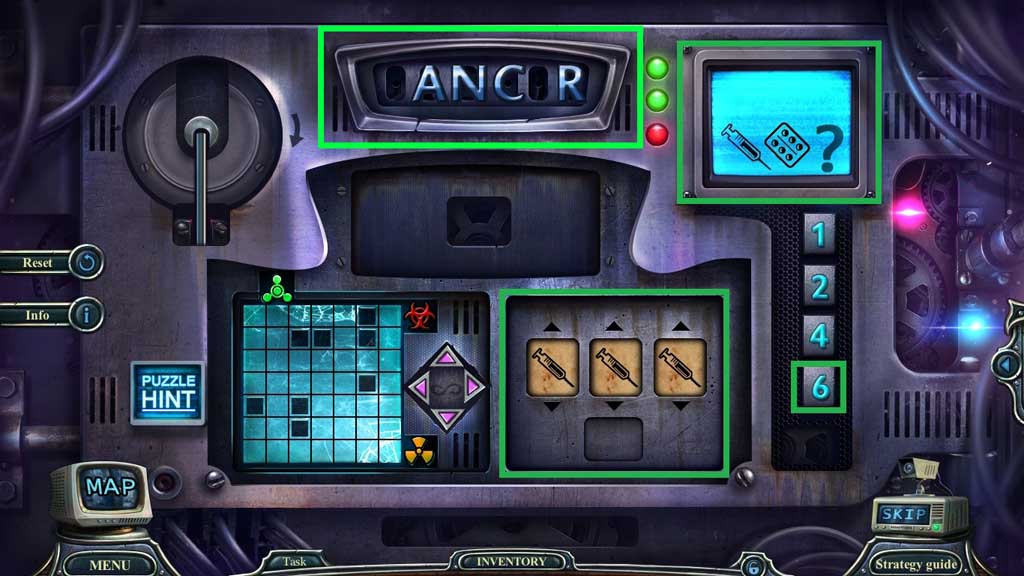
- Click the number 1 (orange square) 2x’s; click the rings in the following order: B – B – A- A – C; select the letter “A” and place it into the green box.
- Click the number 7 (pink square); select the letter “C” and place it into the green box.
- Click the number 2 (light blue square); match the icons.
- Click the capsules in the order shown on the screen (purple boxes); place the letter “N” into the green box.
- Click the number 4 (white square); guide the icons correctly (yellow square) use the following solution: 4 – 1 – 2 – 1 – 2 – 3 – 2.
- Click the number 6; match the icons as shown on the screen (dark green squares).
- Complete the image by arranging the tiles (hot pink square); place the letter “C” into the green square.
- Swap the tiles (teal square); use the following solution: 3 – 2 – 3 – 3 – 2 – 3.
- Place the letter “E” into the green box.
- Enter the doorway.
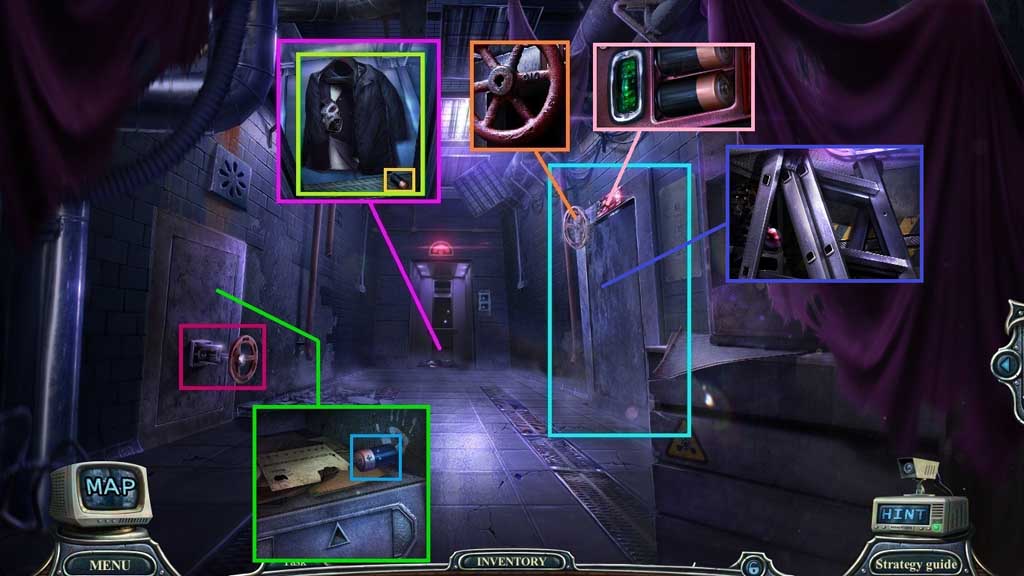
- Collect 1/ 2 batteries; attempt to collect the jacket.
- Click the panel; clear the cobwebs and collect the wheel handle.
- Attach and click the wheel handle.
- Click the drawer; collect 2 /2 batteries and insert them into the doorway.
- Collect the step ladder.
- Move to the Courtyard.
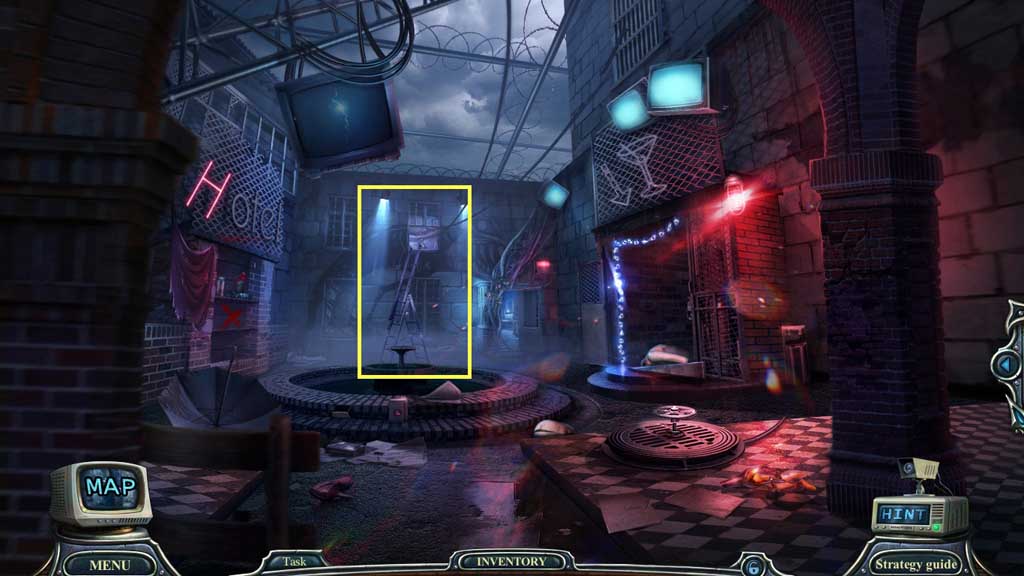
- Place the step ladder down.
- Move into the Children’s Room.
- Select the anti-rust spray to use on the shutters.
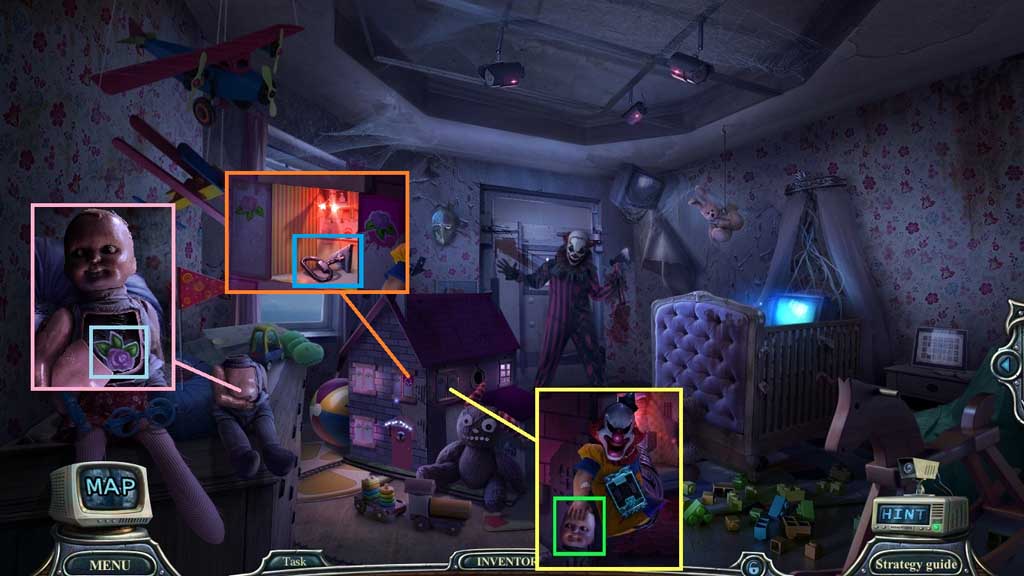
- Collect the doll head and attach it onto the doll; collect the dollhouse part and place it onto the dollhouse.
- Collect the triangle key.
- Move to the Corridor.
- Insert and click the triangle key to trigger a mini game.
- Solve the game by clicking the tiles in the correct order.
- Solution: 7 – 17 – 12 – 21 – 17 – 20 – 13 – 8 – 16 – 12 – 4 – 8 – 3 – 11- 15 – 5 – 10 – 1 – 5 – 2 – 11- 7 – 15 – 10 – 6 – 14 – 10 – 18 – 14 – 19- 11 – 16 – 6 – 11- 20 – 16 – 12 – 7 – 15 – 10 – 6 – 16 – 11
- Collect the roller.
- Attempt to click the lever.
- Insert the roller and click the lever; collect the red wire and the hook.
- Attach the rope onto the hook and use it to trigger a mini game.
- Solve the game by guiding the hook correctly to collect the clothing.
- Collect Douglas’ belongings and examine the pockets.
- Collect the handkerchief and Douglas’s ID.
- Move to the Children’s Room.
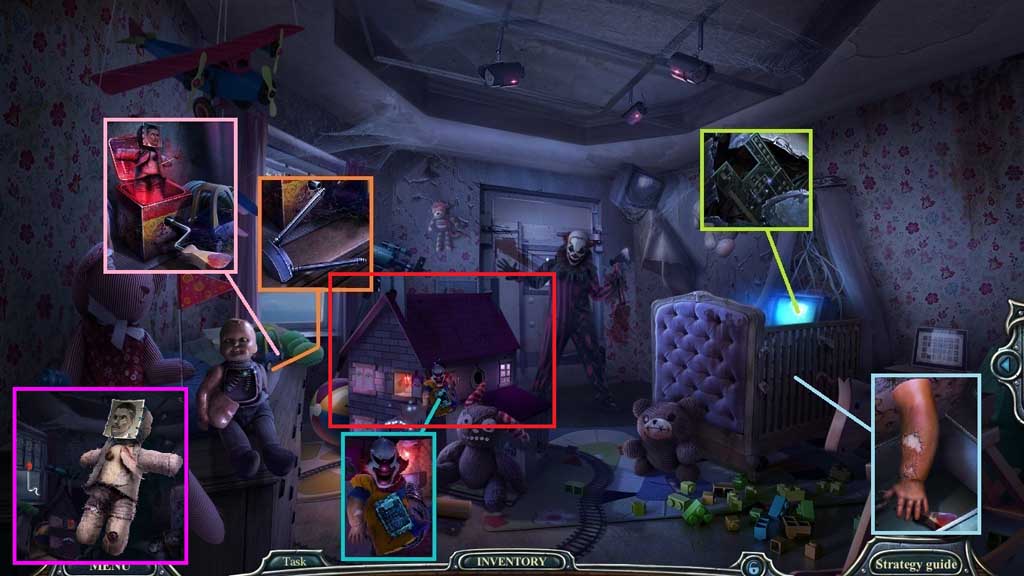
- Select the handkerchief to remove the cobwebs; collect the antenna and place it onto the TV.
- Collect the circuit board and insert it into the clown body; collect the dummy hand.
- Click the blanket; select the dummy hand to collect the handle.
- Attach and click the handle; collect the voodoo doll and click it 3x’s to collect the pin.
- Click the pin 2x’s to collect the tiny lock pick; insert it into the dollhouse to trigger a hidden objects area.

- Find the items.
- Click the building pieces fragments.
- Collect Kevin’s ID card.
- Move to the Corridor.
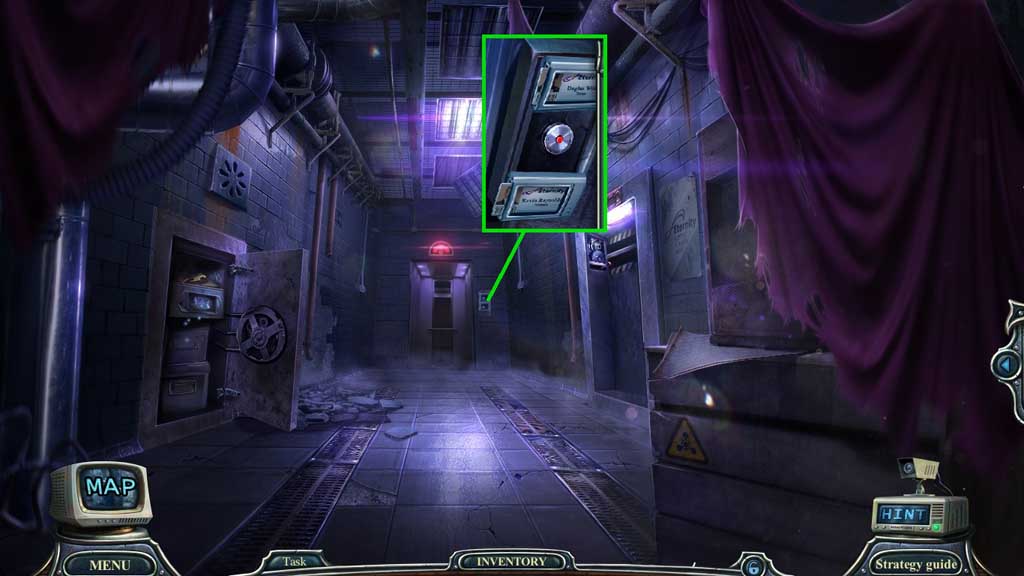
- Insert Douglas’ and Kevin’s ID cards.
- Click the button and move down to the Lower Level.