
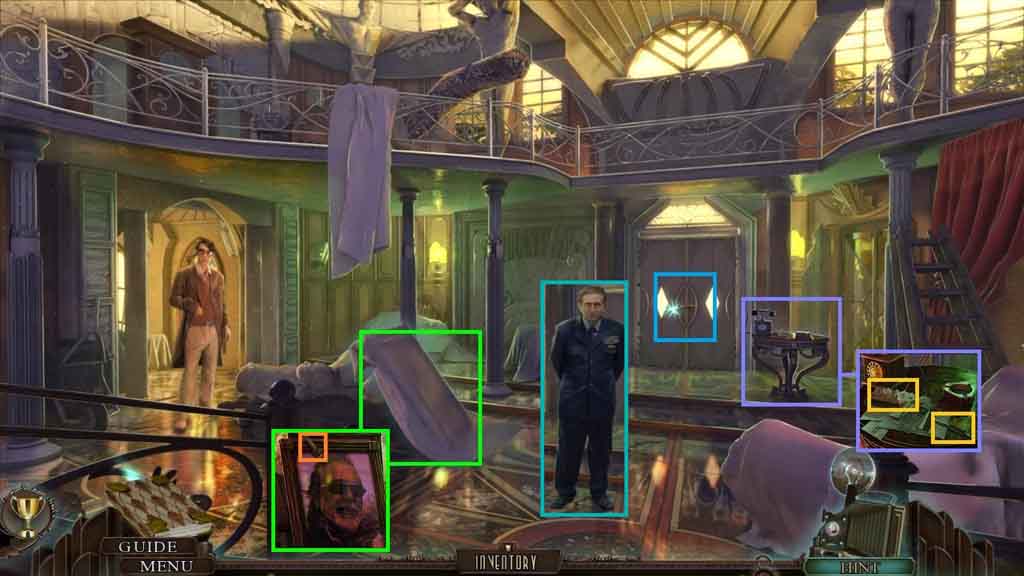
- Zoom into the table; collect the letter opener and the paper weight.
- Click the sheet and zoom into the painting; collect the crank handle.
- Zoom into the door.
- Click the latch and use the letter opener on it.
- Speak to the General.
- Move to the left to the East Hall.
- Zoom into the carpet; collect the newspaper clippings.
- Select the paper weight to collect the wooden wedge.
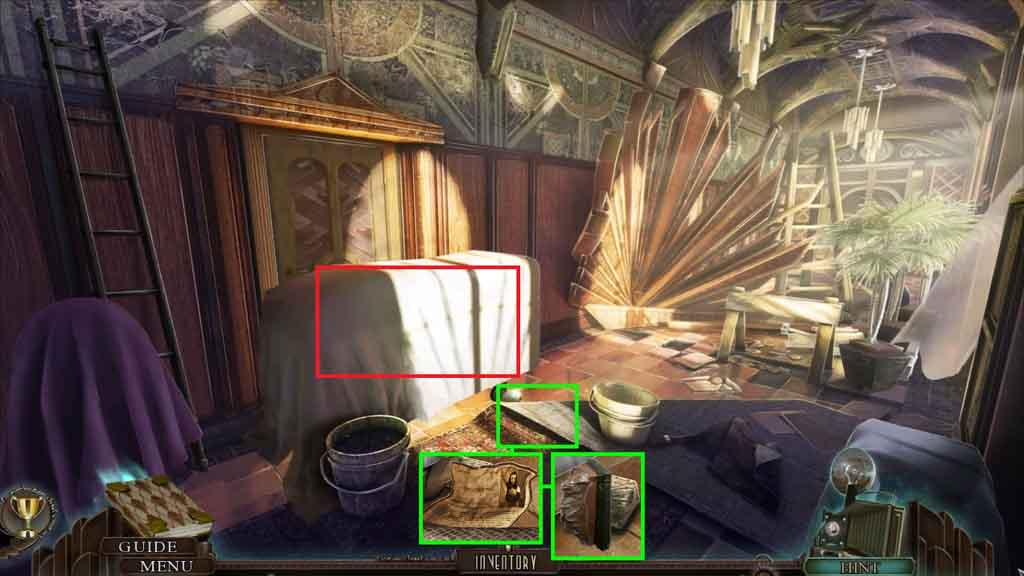
- Click the dolly 2 times to trigger a hidden objects area.
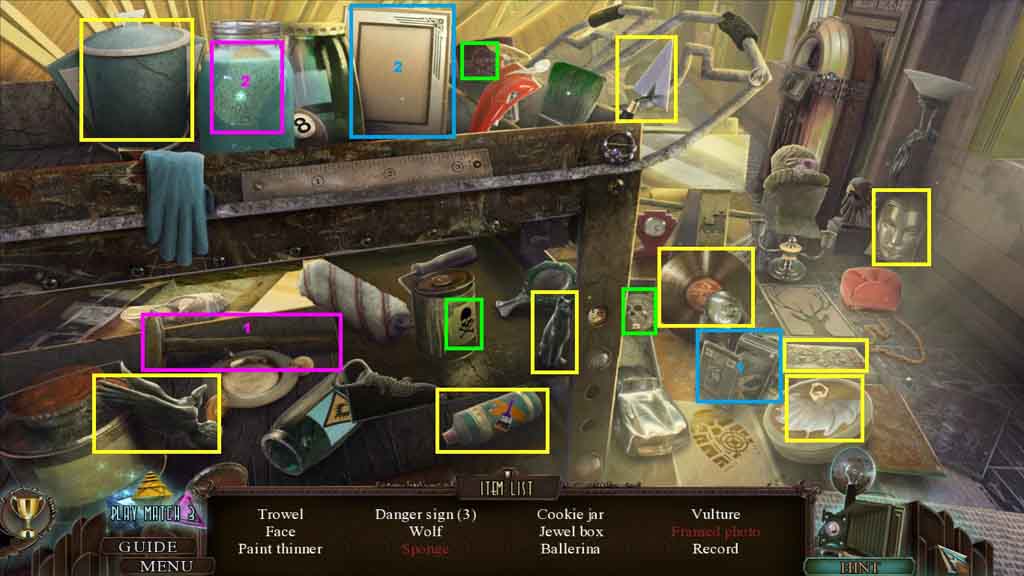
- Find the listed items.
- Select the hammer and use it to smash the jar; collect the sponge.
- Click the camera and collect the photo; insert the photo into the frame to collect the framed photo.
- Collect the paint thinner.
- Move ahead to the Library.

- Click the blanket and zoom into the register.
- Insert the crank handle and use the wooden wedge on the crank.
- Click the desk and collect the old cloth.
- Click the folder until you collect father’s old photo.
- Zoom into the wall; use the paint thinner – the cloth – the letter opener on it.
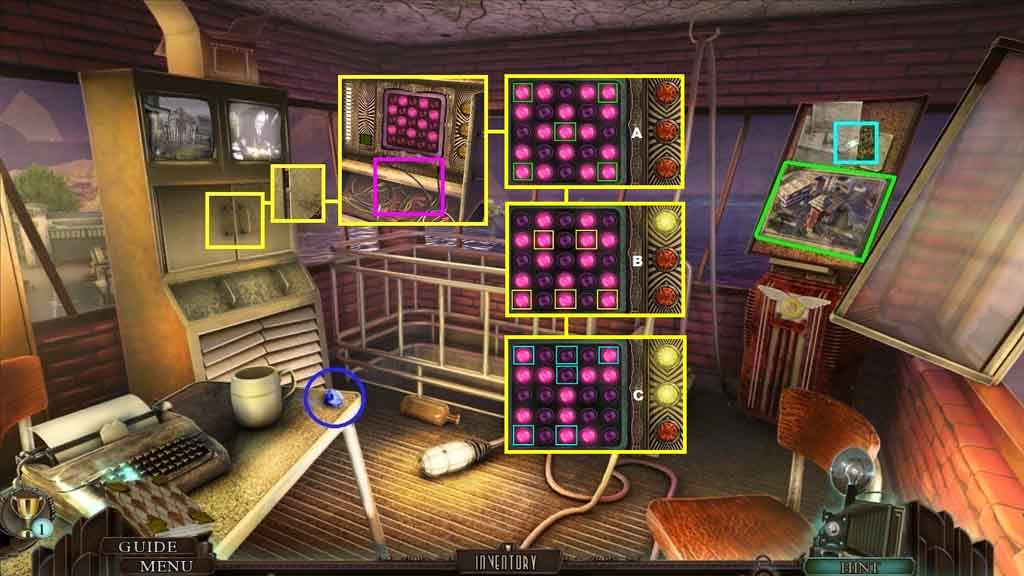
- Attach father’s photo to trigger a mini-game.
- Solve the mini-game by clicking the dials to match the note.
- Use the following sequence to solve.
- A – A – A – A – B – B – B – B – B – B – B – C – C – C- C – C
- Collect the projector iris.
- Move to the foyer and go outside to the Fountain.
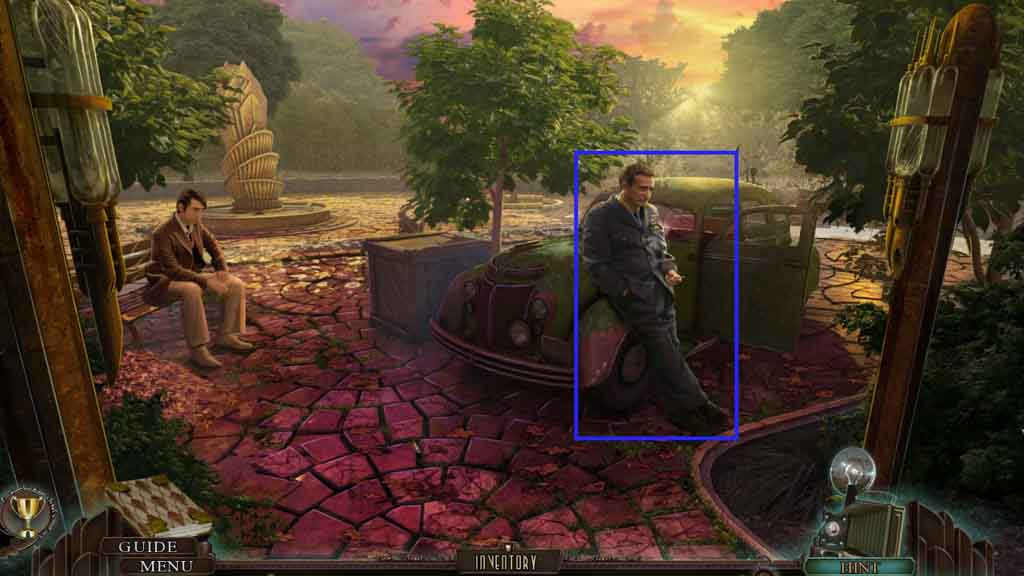
- Give the General the projector iris.
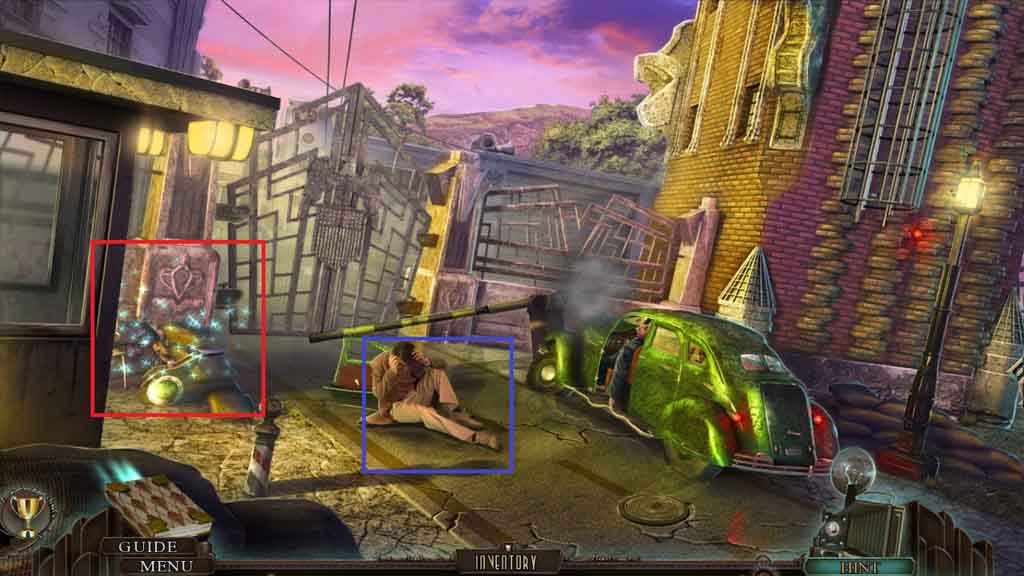
- Speak to Fredrick.
- Click the hidden objects area.
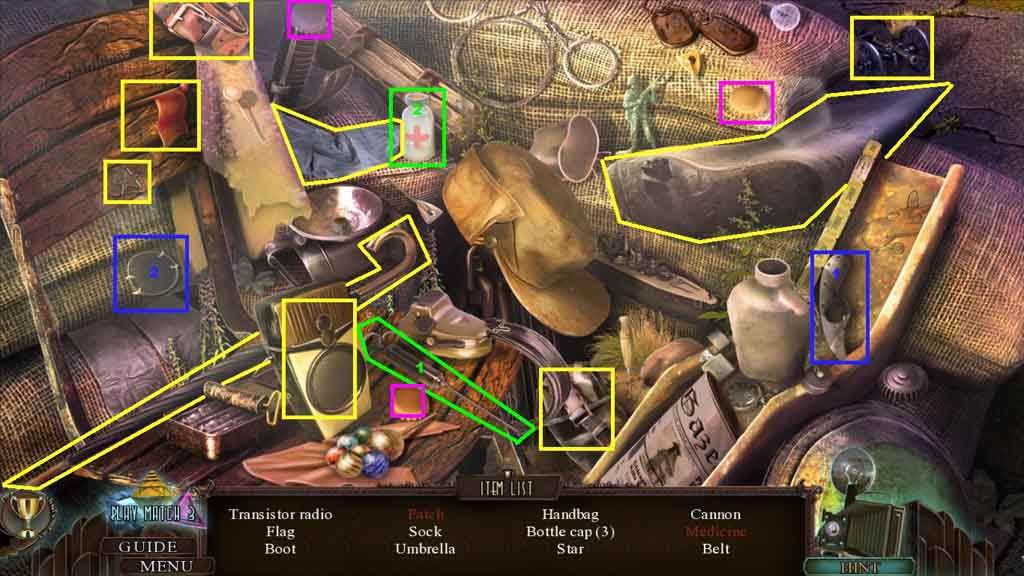
- Find the listed items.
- Select the knife and use it on the material; collect the patch.
- Select the syringe and insert it into the vial; collect the medicine.
- Collect the umbrella.
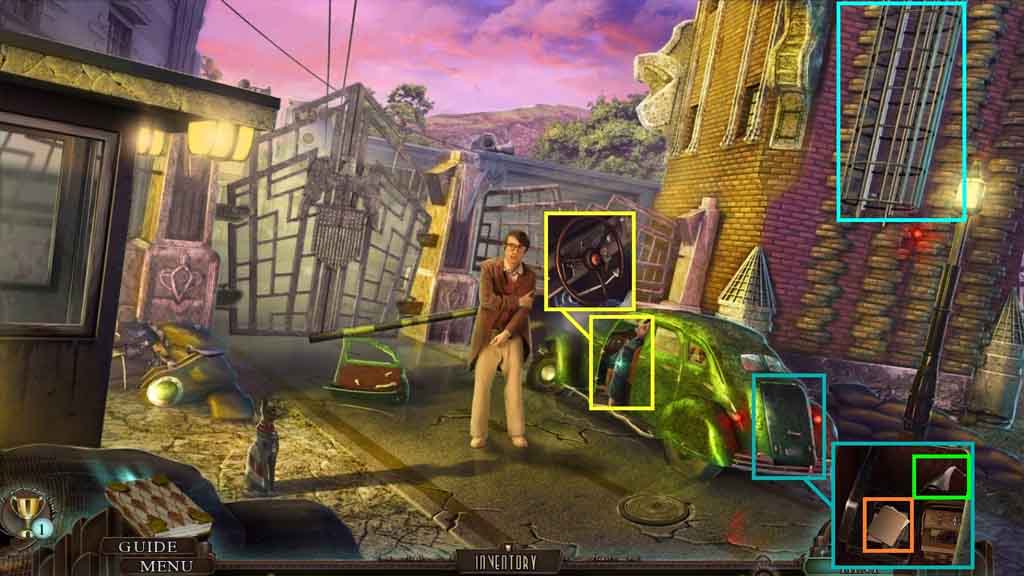
- Click the car.
- Click the steering wheel and collect the car key.
- Click the trunk and insert the car key; collect the silk napkin and the tire iron.
- Click the suitcase.
- Click the medical files until they are collected and collect the piece of wire.
- Click the ladder and use the umbrella on it.
- Move up the ladder to the Guard Tower.
- Collect the 1 / 5 sapphires.
- Click the bulletin board; zoom into the aerial photo and collect the in-game Map.
- This map allows you to travel quickly between locations.
- Collect the paper clip.
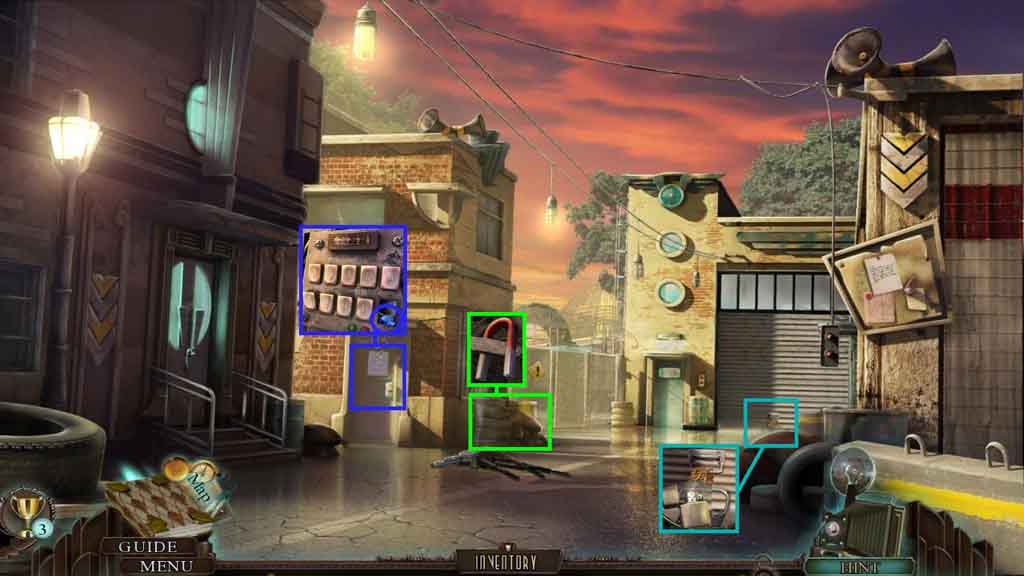
- Zoom into the console; zoom into the doors and use the paper clip on the latch.
- Click the panel and put the piece of wire with the other wires.
- Click the buttons to trigger a puzzle.
- Solve the puzzle by turning off all the lights 3 times to illuminate the light bulbs.
- Use the buttons shown to solve the puzzle.
- Click the button.
- Move to the Base Entrance.
- Click the debris to trigger a hidden objects area.
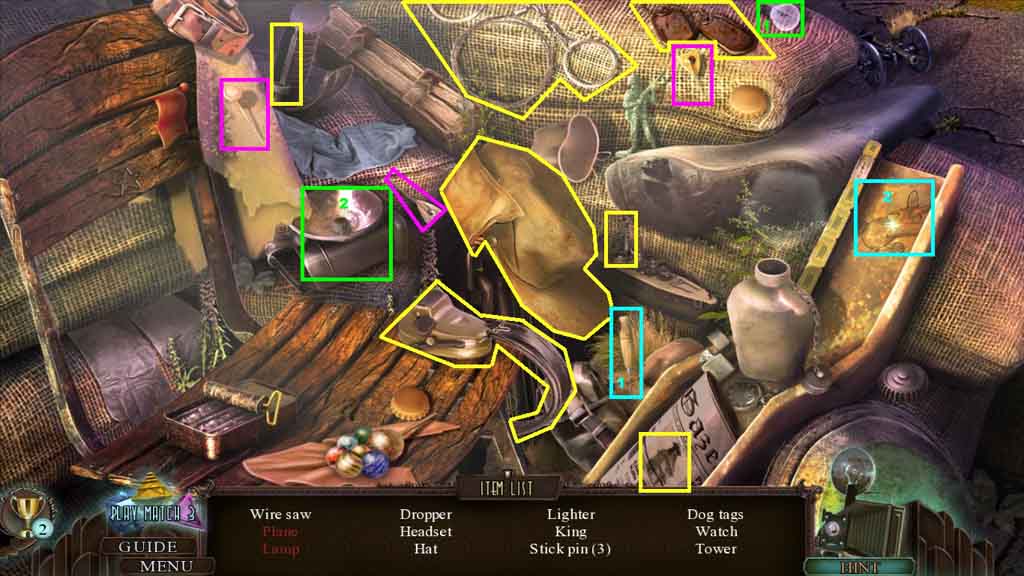
- Find the listed items.
- Select the light bulb and place it into the lamp; collect the lamp.
- Select the awl and use it to finish carving the plane; collect the plane.
- Collect the lighter.
- Move ahead to the Road Fork; click the projector.
- Zoom into the door; collect the 2 /5 sapphires.
- Zoom into the junk pile; collect the magnet.
- Zoom into the garage door and select the lighter to use on the rope.
- Move to the Maintenance Service Room.
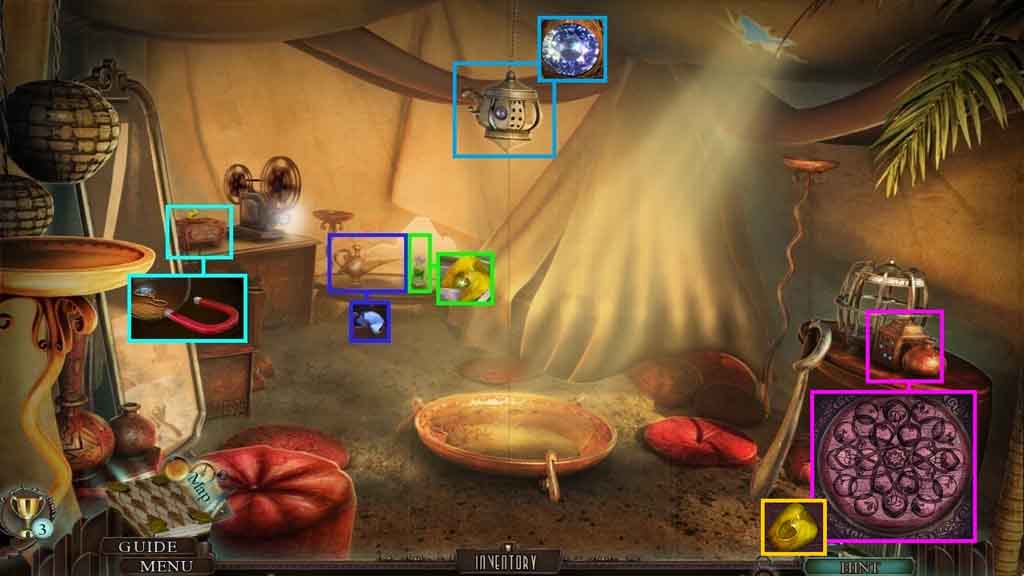
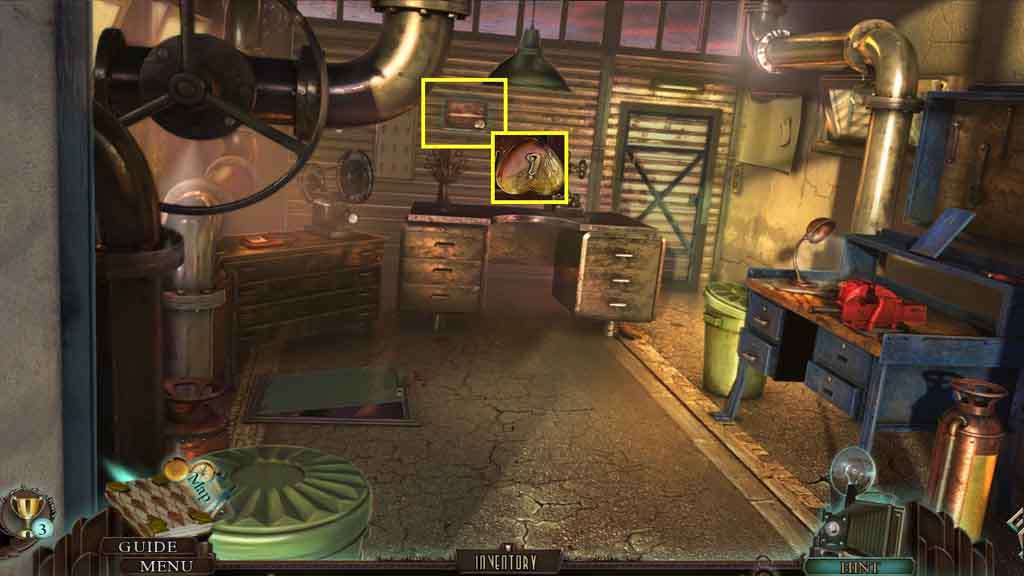
- Zoom into the table.
- Select the lighter to ignite the oil lamp; collect the 3 / 5 sapphires.
- Select the tire iron to use on the golden apple; collect the 1 /2 gold apple slice.
- Zoom into the chest and view the area underneath it; select the magnet to collect the 4 / 5 sapphires.
- Zoom into the hanging lamp; collect the 5 / 5 sapphires.
- Zoom into the puzzle box and insert the 5 /5 sapphires to trigger a puzzle.
- Move the circles around to complete the picture.
- Collect the 2 / 2 gold apple slice.
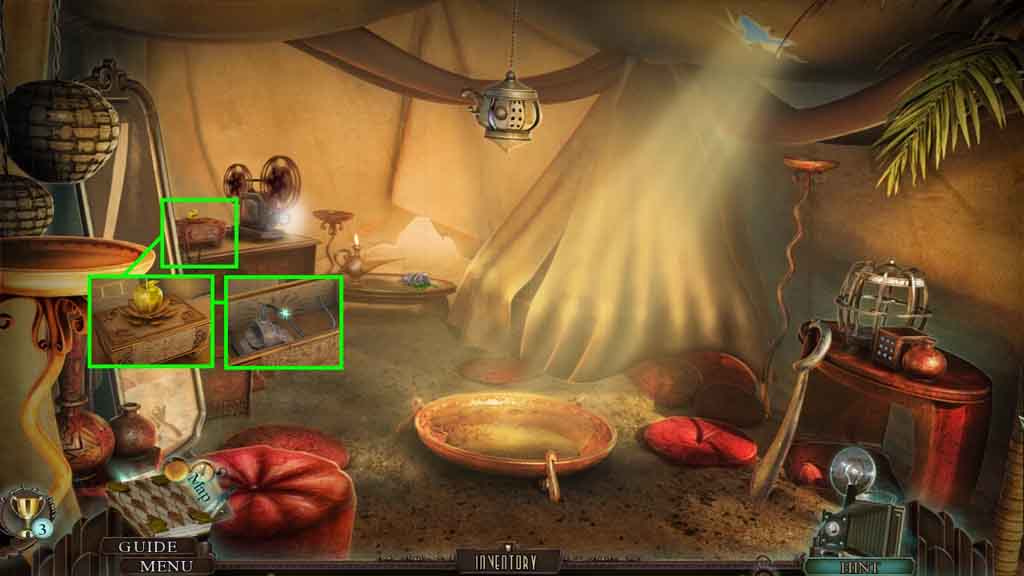
- Click the chest and put the 2 / 2 gold apple slices with the apple.
- Unplug the cord.
- Zoom into the key holder; collect the 1 / 2 heart locket.
- Move ahead to the Bay Dock and click the boat to access a hidden objects area.
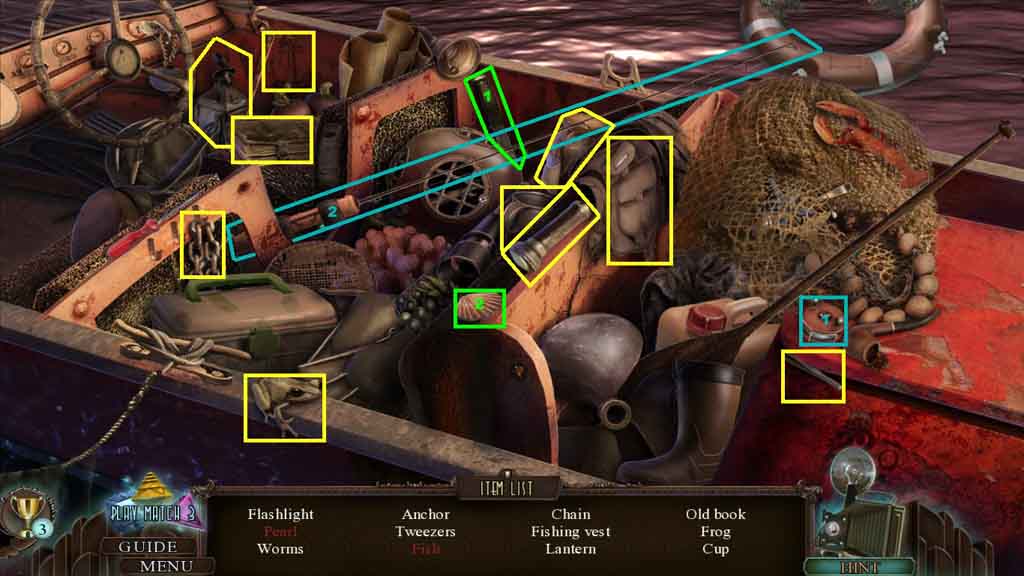
- Find the listed items.
- Select the knife and use it to open the shell; collect the pearl.
- Select the reel and place it onto the rod; collect the fish.
- Collect the pair of tweezers.