
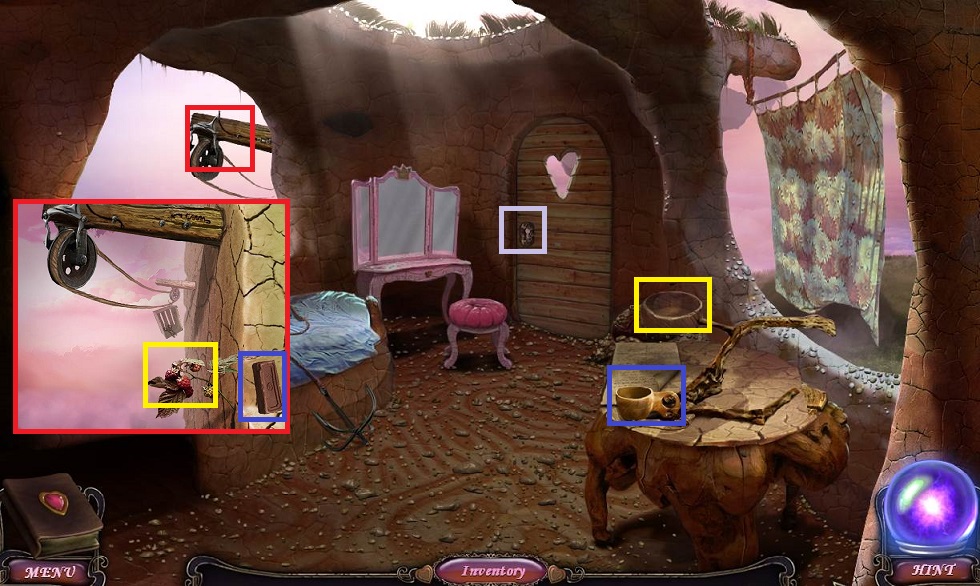
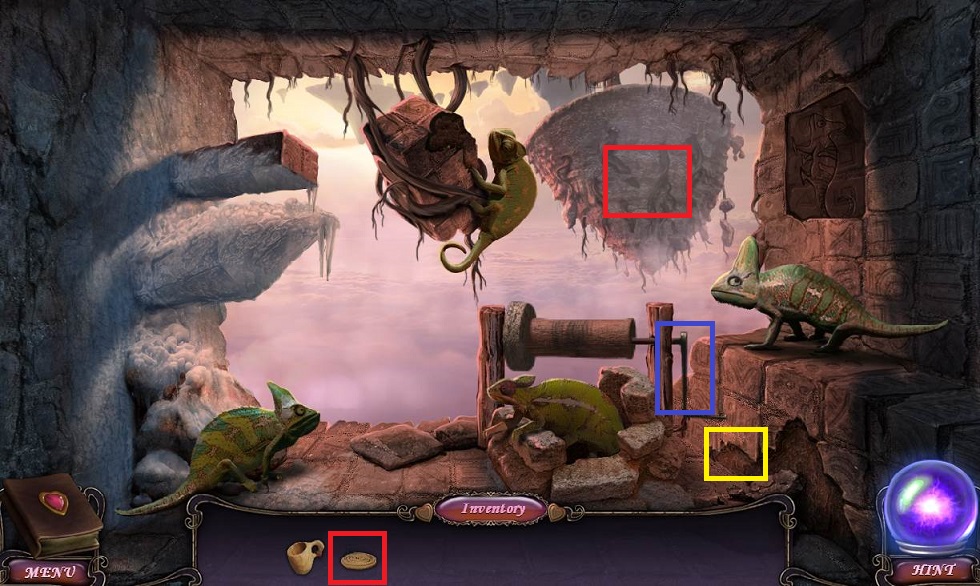
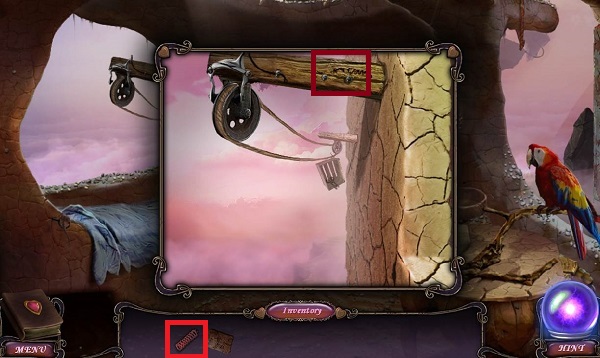
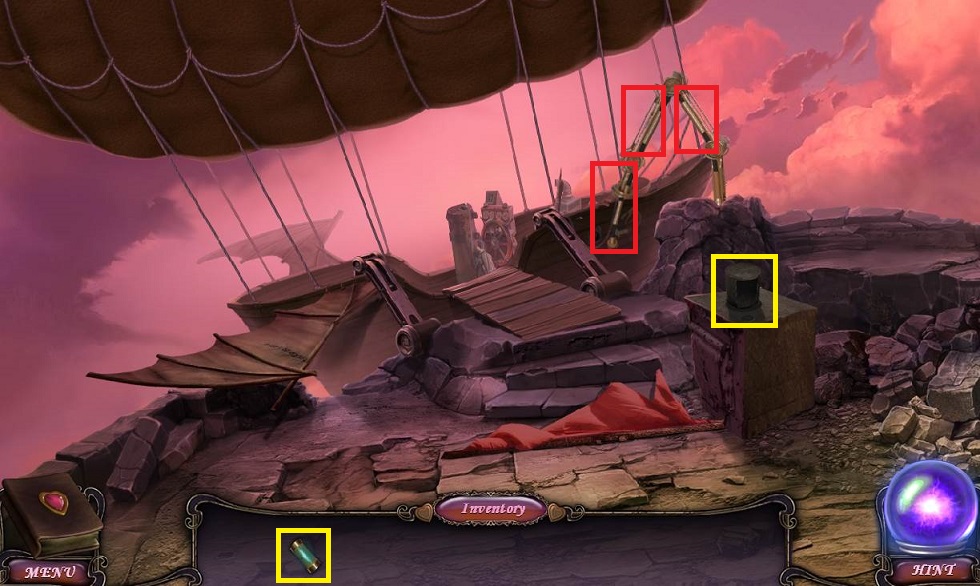
- Examine the pulley
- Pick up the RASPBERRIES and the BRICK
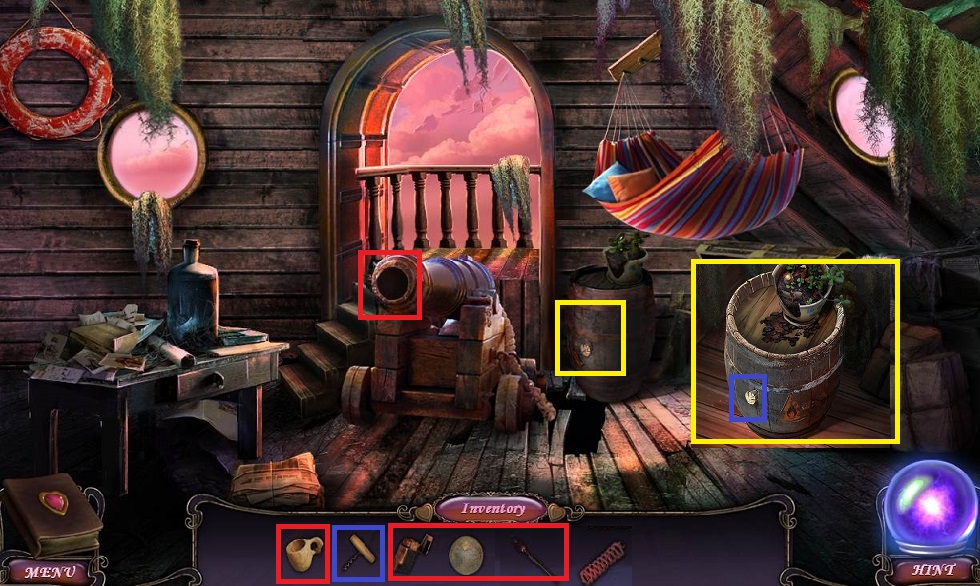
- Examine the table
- Pick up the WOODEN CUP
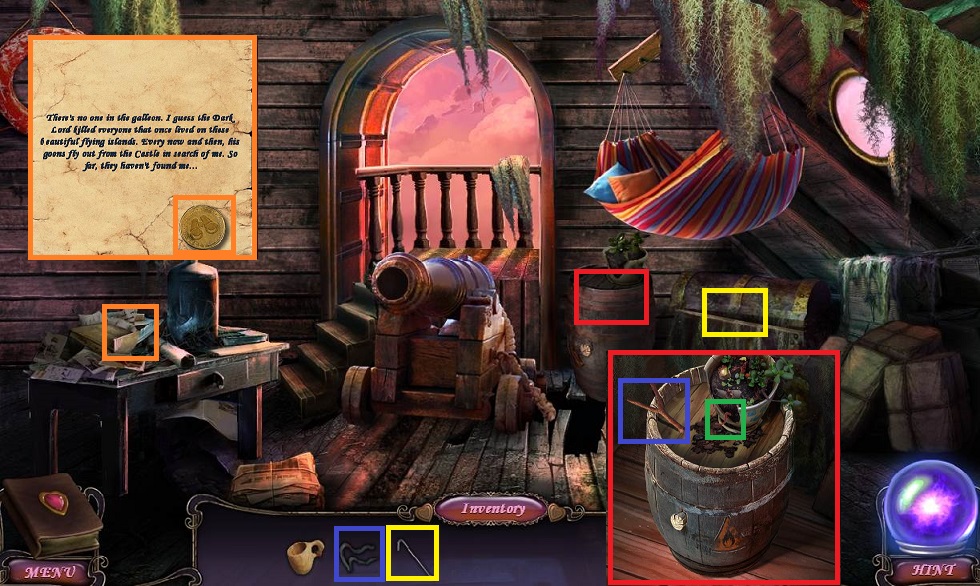
- Read the note
- Place the RASPBERRIES in the bowl
- Pick up the blue FEATHER
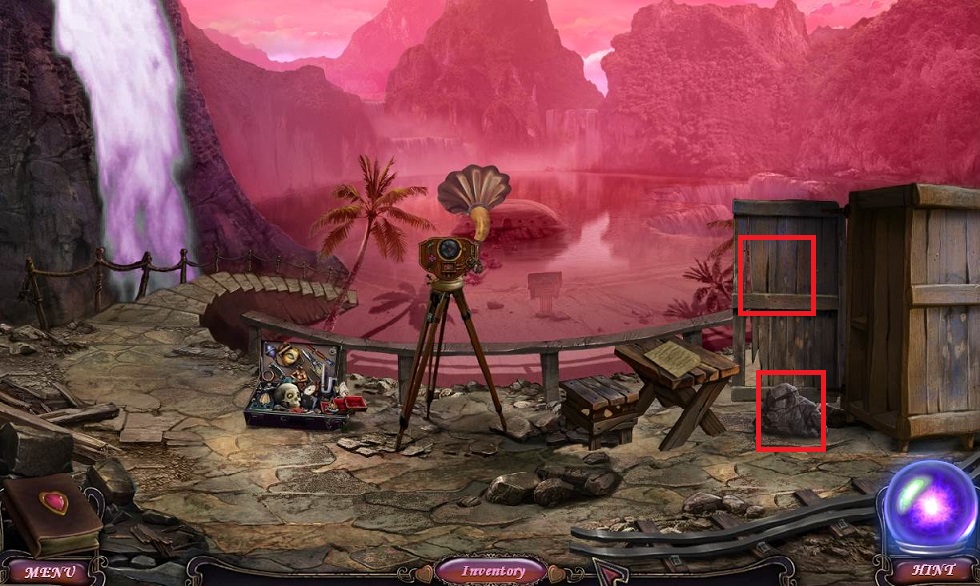
- Examine the door
- Use the FEATHER in the lock
- Examine the door in the mound
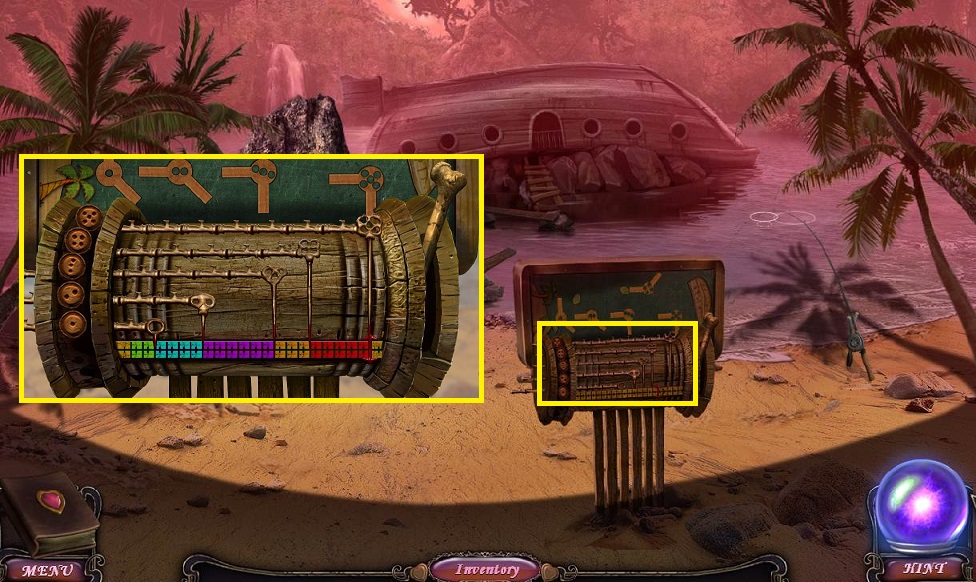
- Solve the puzzle by moving gems from left to right
- Slide the red gem over to it's slot
- Slide the yellow gem right two spaces
- Click center bottom arrow and click on gem
- Click center up arrow twice and click on gem
- Click left bottom arrow, center down arrow twice, and right down arrow to finish path
- For blue gem, click left up arrow, center up arrow, and click gem twice
- Slide center down arrow once and right top arrow twice and click on gem to finish
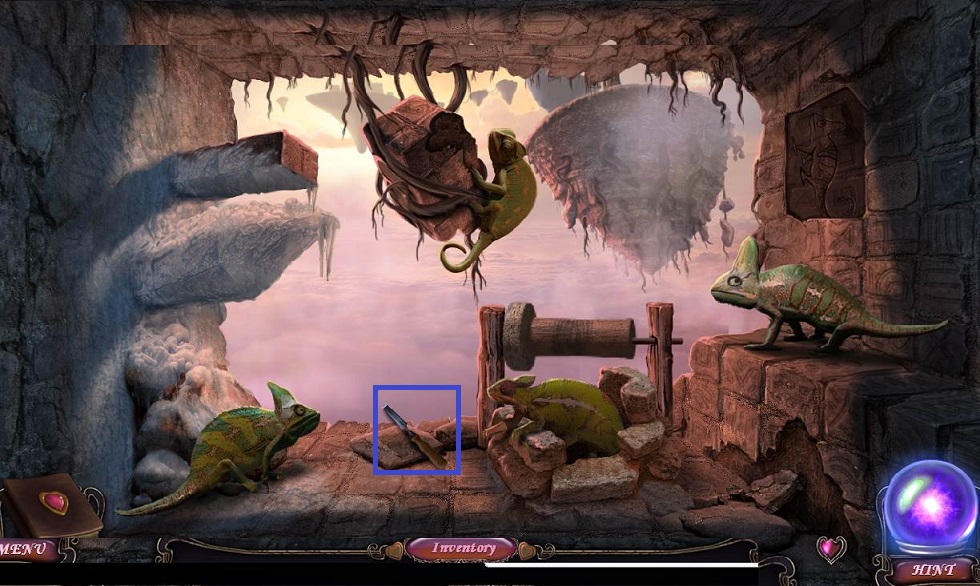
- Enter the chameleon room`
- Pick up the CHISEL
- Exit to outside
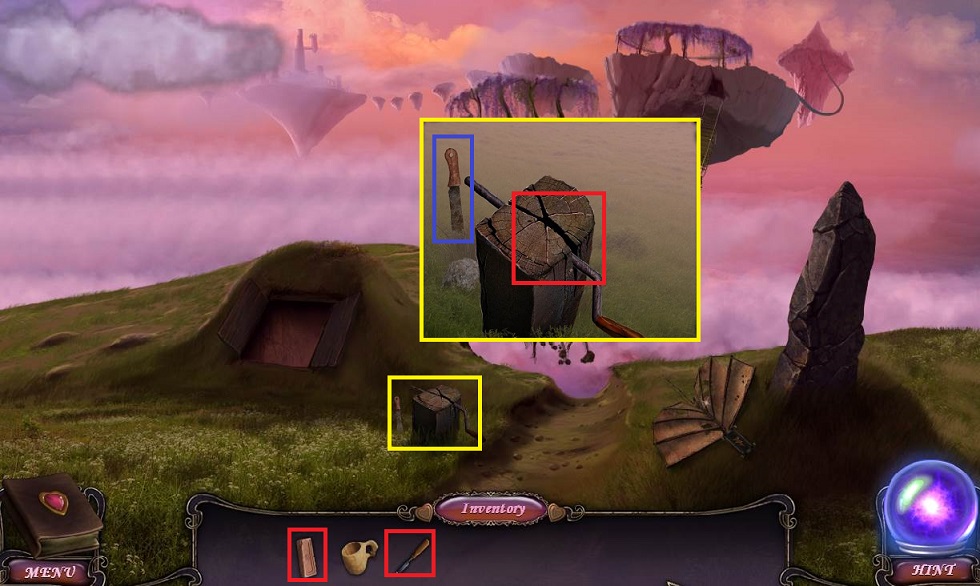
- Examine the post
- Pick up the MACHETE
- Place the CHISEL and use the BRICK
- Pick up the HANDLE
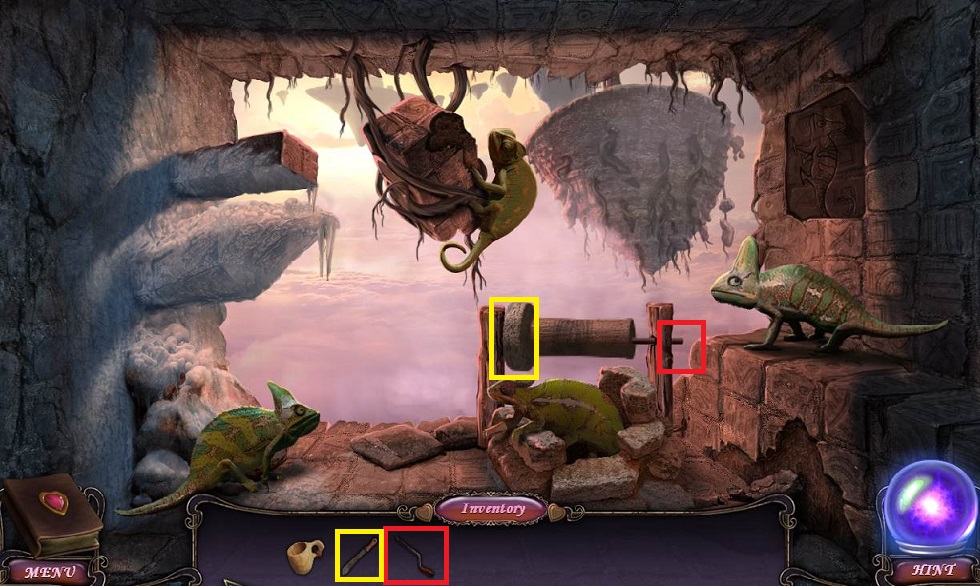
- Go in the lizard room
- Place the CRANK
- Use the BLUNT MACHETE on the grindstone and click on the crank
- Receive SHARP MACHETE
- Back up twice
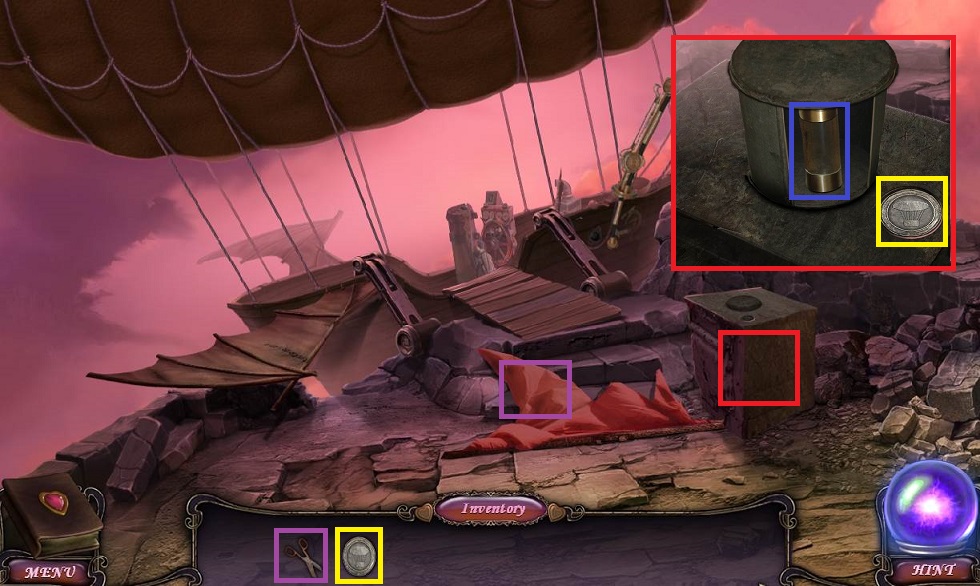
- Use the MACHETE on the bed
- Pick up the ROPE AND HOOK
- Return to crank
- Use the ROPE AND HOOK on the floating island
- Click on the rope then click on the crank
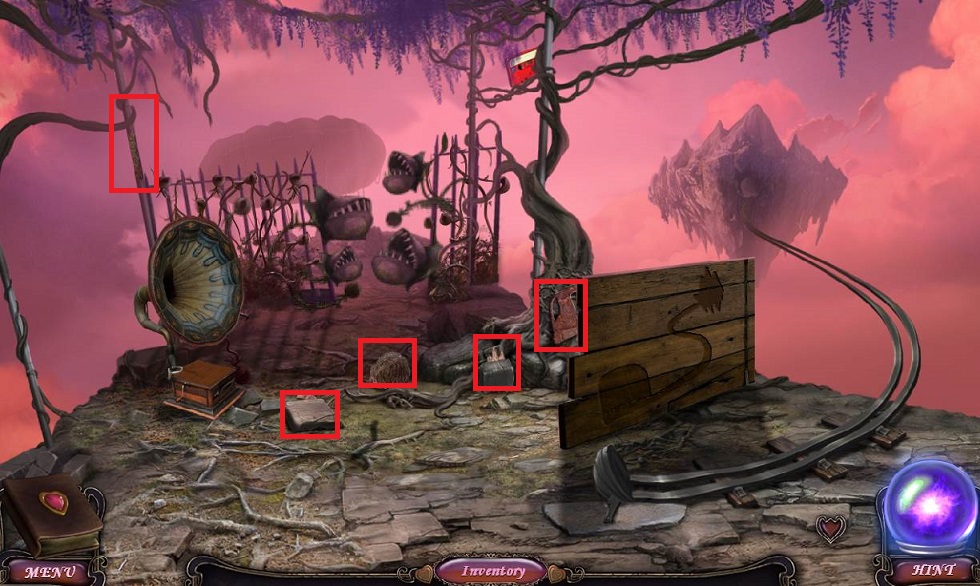
- Return outside and go forward
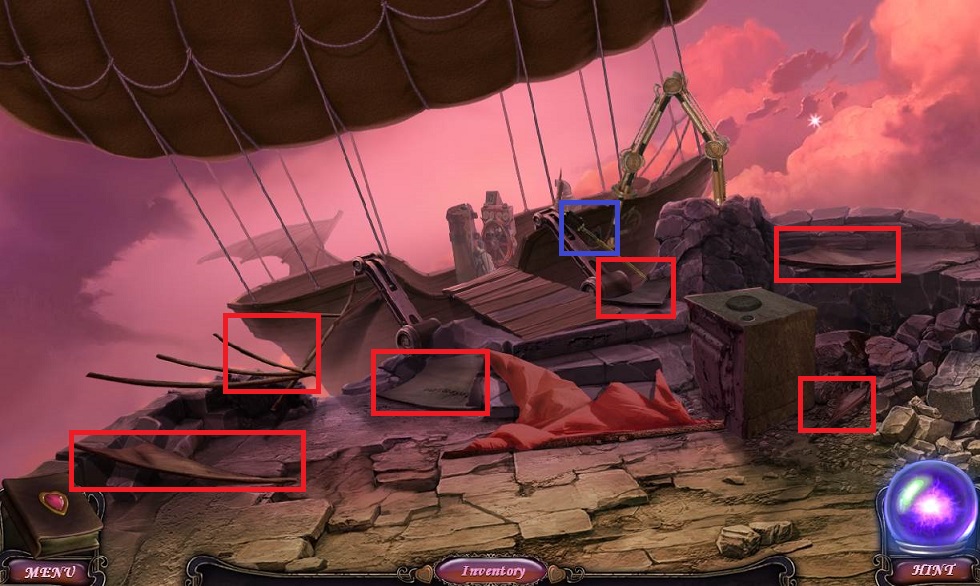
- Click on the stones on ground to pick them out of the way.
- Pick up the pieces for the image and place on board
- Three pieces are under stones and two are out in the open.
- Click on the far island to go forward
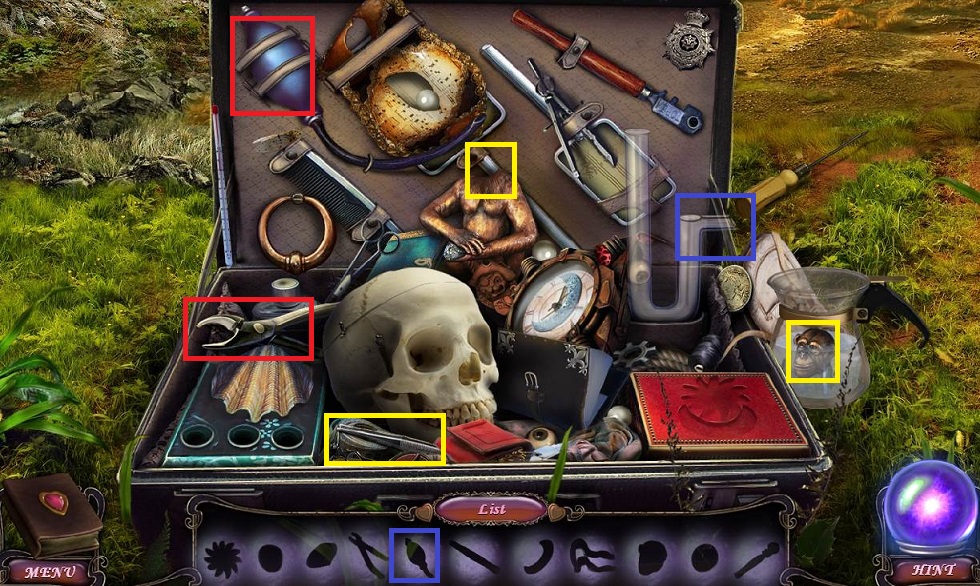
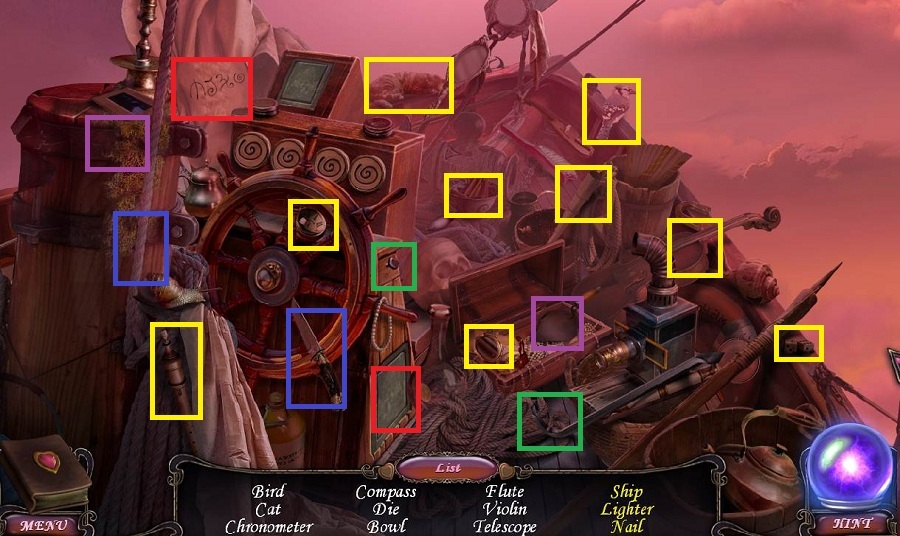
- Do the HOS
- Use the pliers on the bellows
- Pick up the bellows and use it on the glass tube
- Pick up the tweezers and use it on the monkey head
- Put the monkey head on the monkey
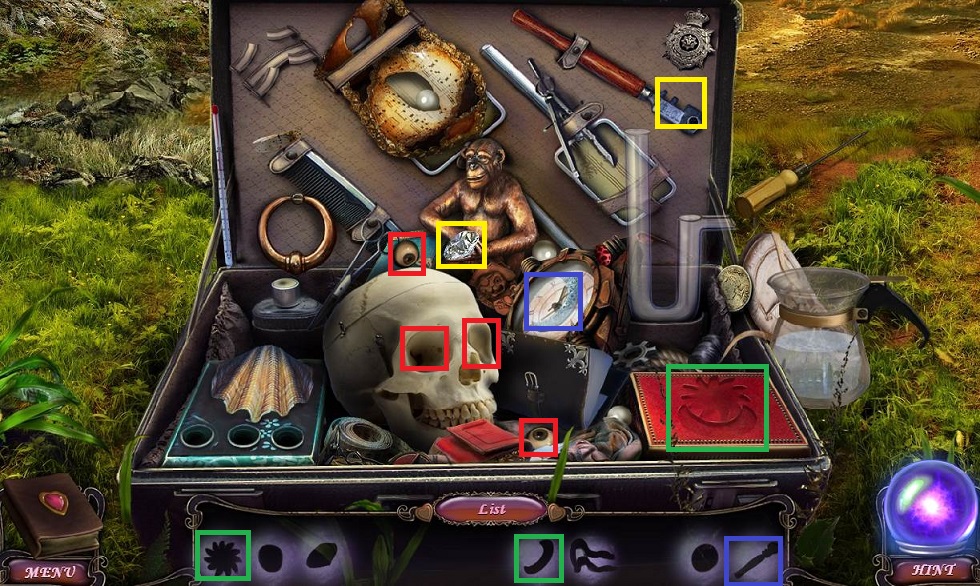
- Pick up the eye on top of the skull now and place it in the skull
- Pick up the other eye and place it on the skull
- Pick up the now exposed sun
- Pick up the diamond and put it on the glass cutter
- Pick up the glass cutter and use it on the clock face
- Pick up the moon and sun and place them on the red box
- Receive RUBBER
- Click on the rock and then the door
- Pick up the CROWBAR
- Go forward examine the bridge mechanism
- Slide the pins as placed in the screenshot
- Go forward
- Examine the barrel
- Use the RUBBER
- Pick up the SLINGSHOT
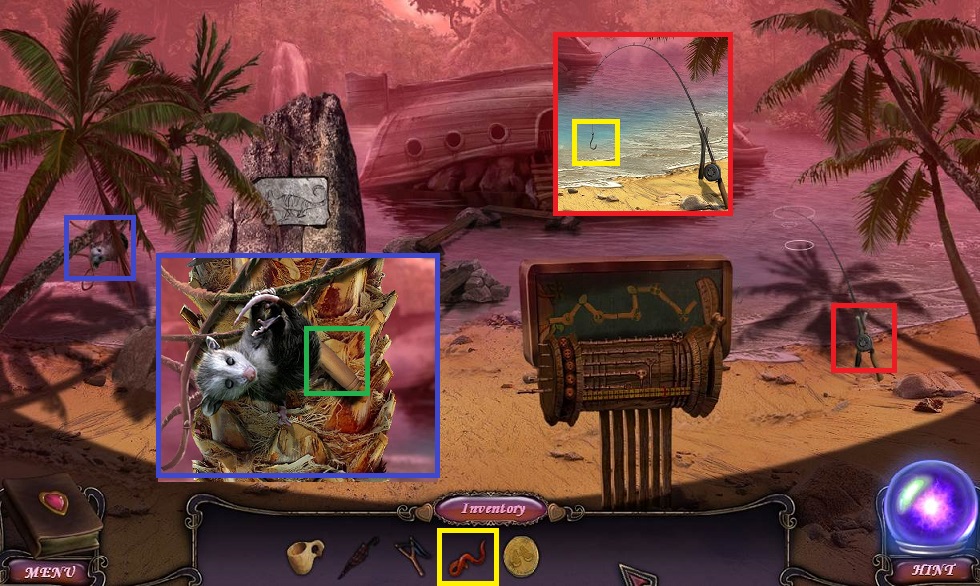
- Pick up the WORM
- Use the CROWBAR on the chest
- Pick up the UMBRELLA
- Examine the table
- Pick up the COIN
- Back up
- Examine the fishing pole
- Place the WORM on the hook
- Pick up the FISHING ROD
- Use the FISHING ROD on the water and it will go back on its stand
- Click on it and pick up the FISH
- Give the FISH to the animal in the tree
- Pick up the CORKSCREW
- Back up twice
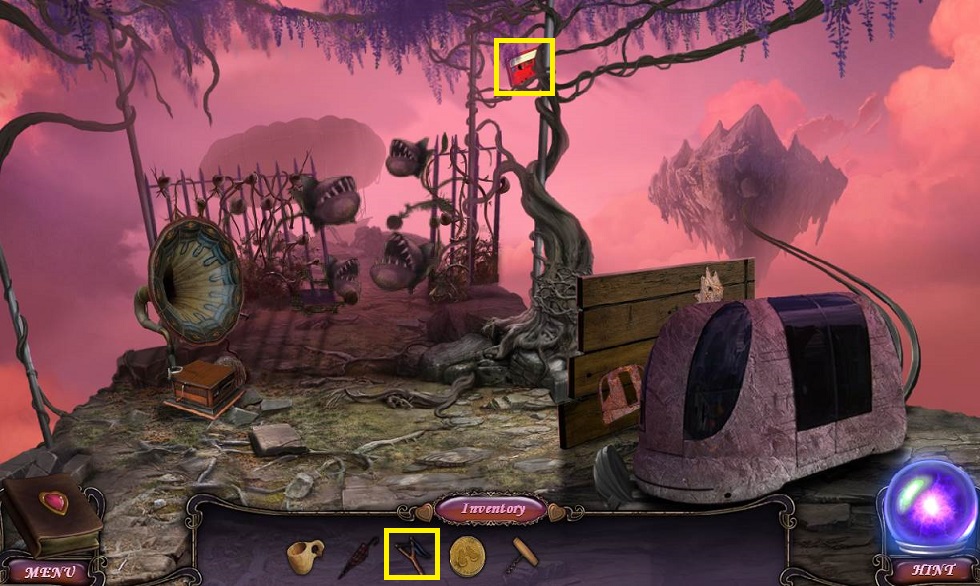
- Use the SLINGSHOT on the CASSETTE TAPE and pick it up
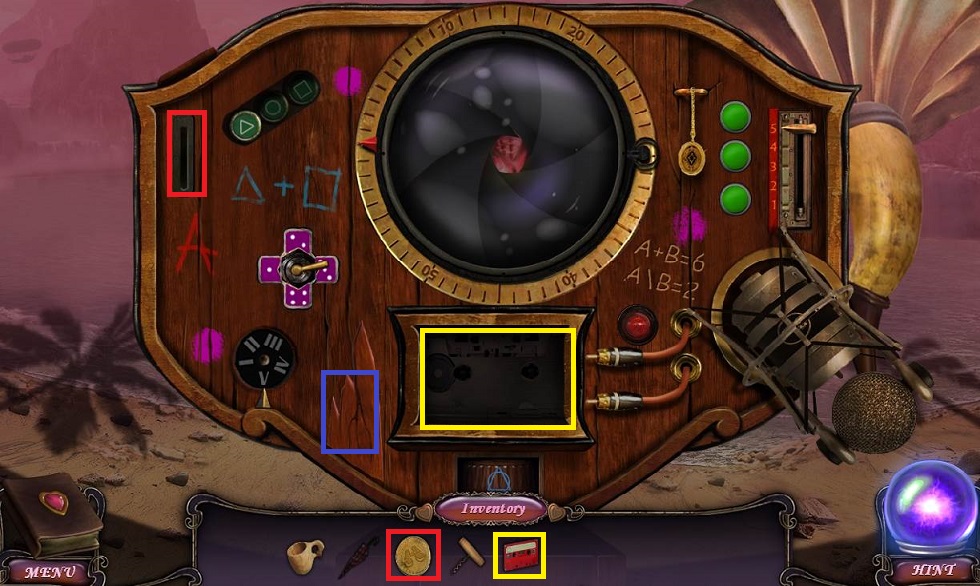
- Go forward once and examine the recorder
- Place the CASSETTE TAPE and COIN
- Click on the wood piece on the bottom left
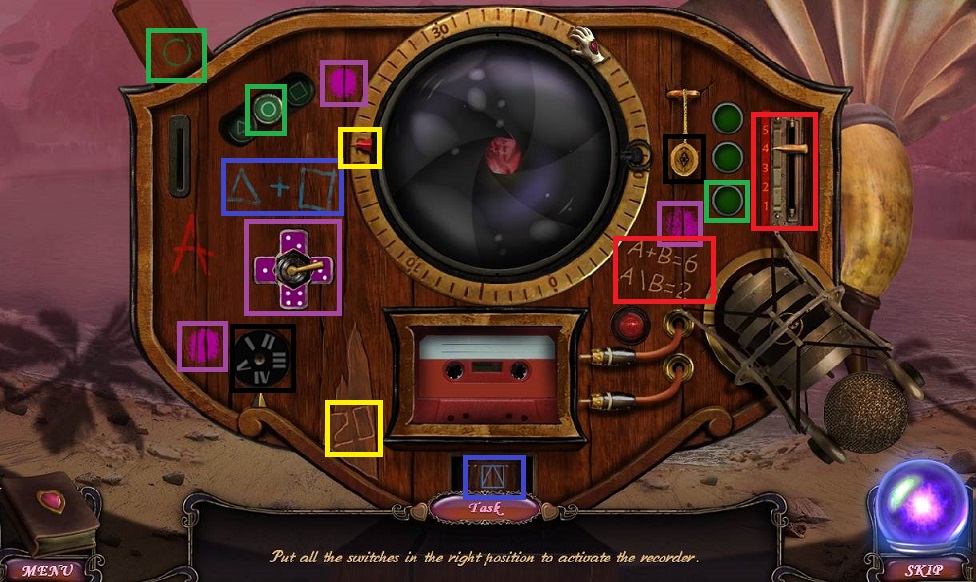
- For the purple switch, count the number of purple dots
- At the bottom, the blue dial needs to match the blue marks
- Click on the hanging medallion to get it to swing and enter that number in the bottom left dial
- On the green dots, press the bottom one. A panel will rise on the left, click on the green button that matches the panel image.
- For the red slider, you need some algebra. A + B = 6 and A / B = 2; if you can't figure it out look at the image
- Use the number exposed from under the wood piece and match it with the red arrow.
- Pick up the CASSETTE TAPE
- Back up once
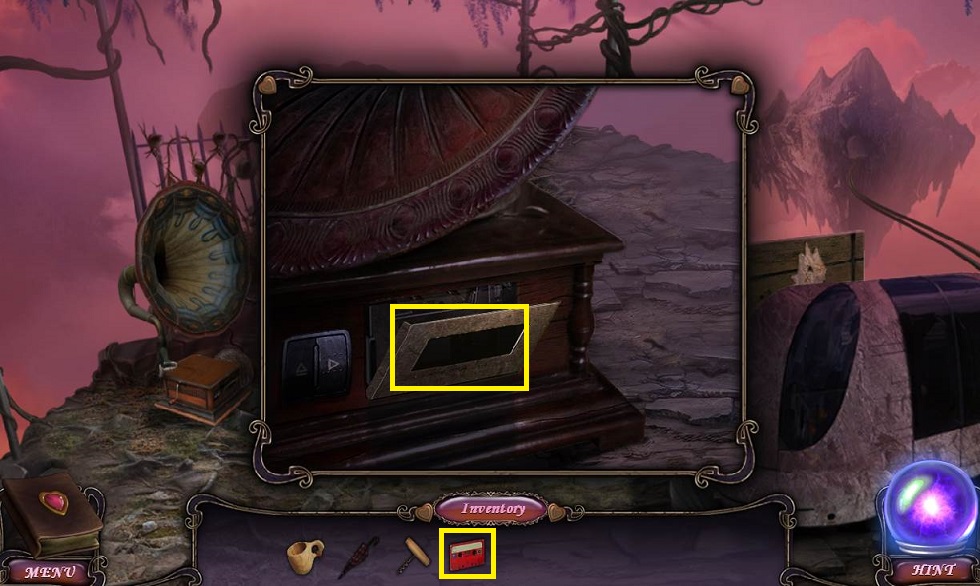
- Examine the gramophone and click on it
- Place the CASSETTE TAPE
- Close the lid and click play
- Go forward
- Click on the HOS on the airship
- Use the knife on the rope to expose the code
- Enter the code on the buttons over the wheel and pick up the lighter
- Use the crowbar to pull the nail out
- Use the trowel on the moss to expose the ship
- Receive the LIGHTER
- Repair the wing by picking up the pieces and placing on the wing
- Pick up the RAMROD
- Back up once and go forward once to return to the microphone
- Do the HOS in the suitcase
- Place the 3 pearls in the holes and receive the SPRING
- Use the screw driver on the handle and pick it up
- Receive the SPRING
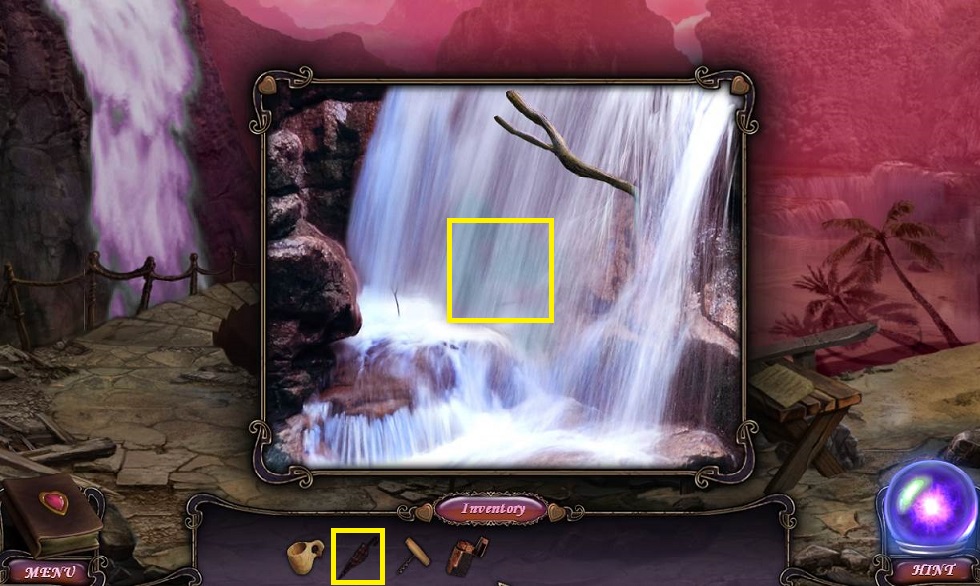
- Examine the waterfall
- Use the UMBRELLA
- Pick up the CANNON BALL
- Go forward twice
- Examine the barrel
- Use the CORKSCREW
- Place the WOODEN CUP on the gunpowder to get a CUP OF GUNPOWDER
- Examine the cannon
- Use the GUNPOWDER in the cannon
- Use the RAMROD
- Place the CANNONBALL
- Click on the cannon to turn it
- Use the LIGHTER
- Back up and pick up the CHAMELEON TILE that fell during the cut scene
- Back up to the beginning room
- Examine the pulley in the window
- Place the SPRING
- Pick up the SCISSORS
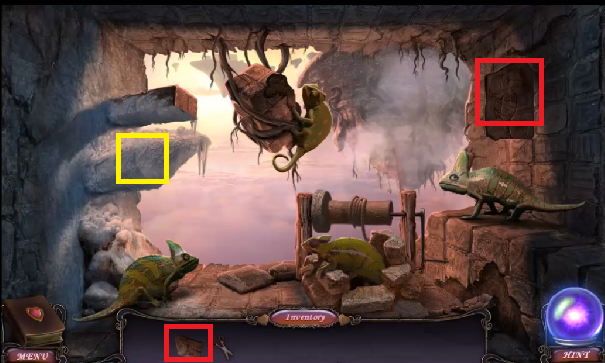
- Go forward and to the left into the chameleon room
- Place the CHAMELEON TILE on the right wall
- Click the right chameleon twice and click the tile
- Click the top chameleon once and click the wall twice
- Click the bottom chameleon twice and click the tile
- Examine the melted post and pick up the ZEPPELIN MEDAL
- Back up, go forward, go left to the zeppelin
- Examine the pedestal to the right
- Place the ZEPPELIN MEDAL
- Pick up the BATTERY
- Use the SCISSORS on the orange fabric
- Pick up the FABRIC piece
- Back up twice
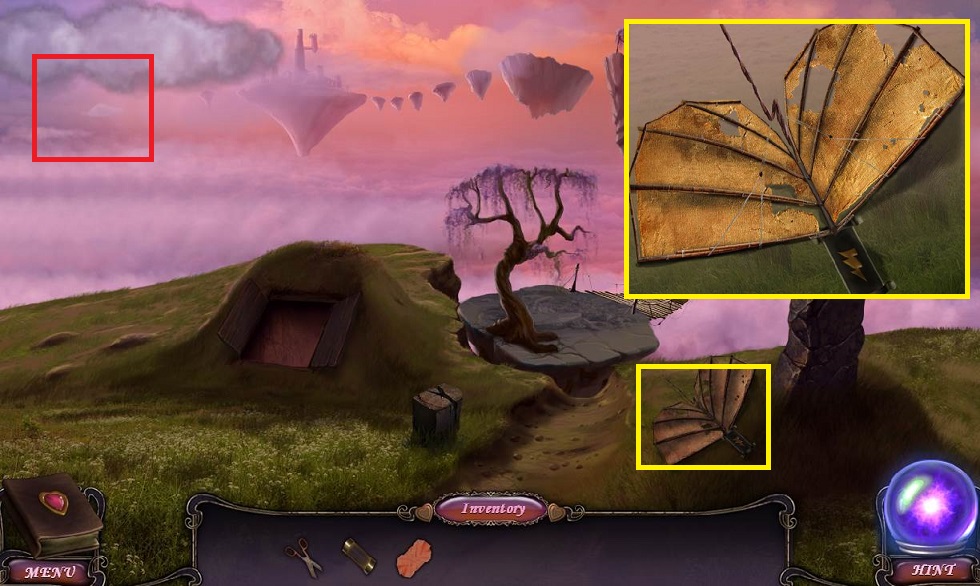
- Examine the kite
- Click on the top and then the old fabric to remove it
- Place the FABRIC and click on the top
- Use the SCISSORS
- Place the BATTERY
- Pick up the KITE
- Place the KITE in the clouds
- Examine the kite again
- Pick up the BATTERY
- Return to the zeppelin
- Replace the BATTERY
- Connect the arm to fuel the ship
- Click each arm piece once