
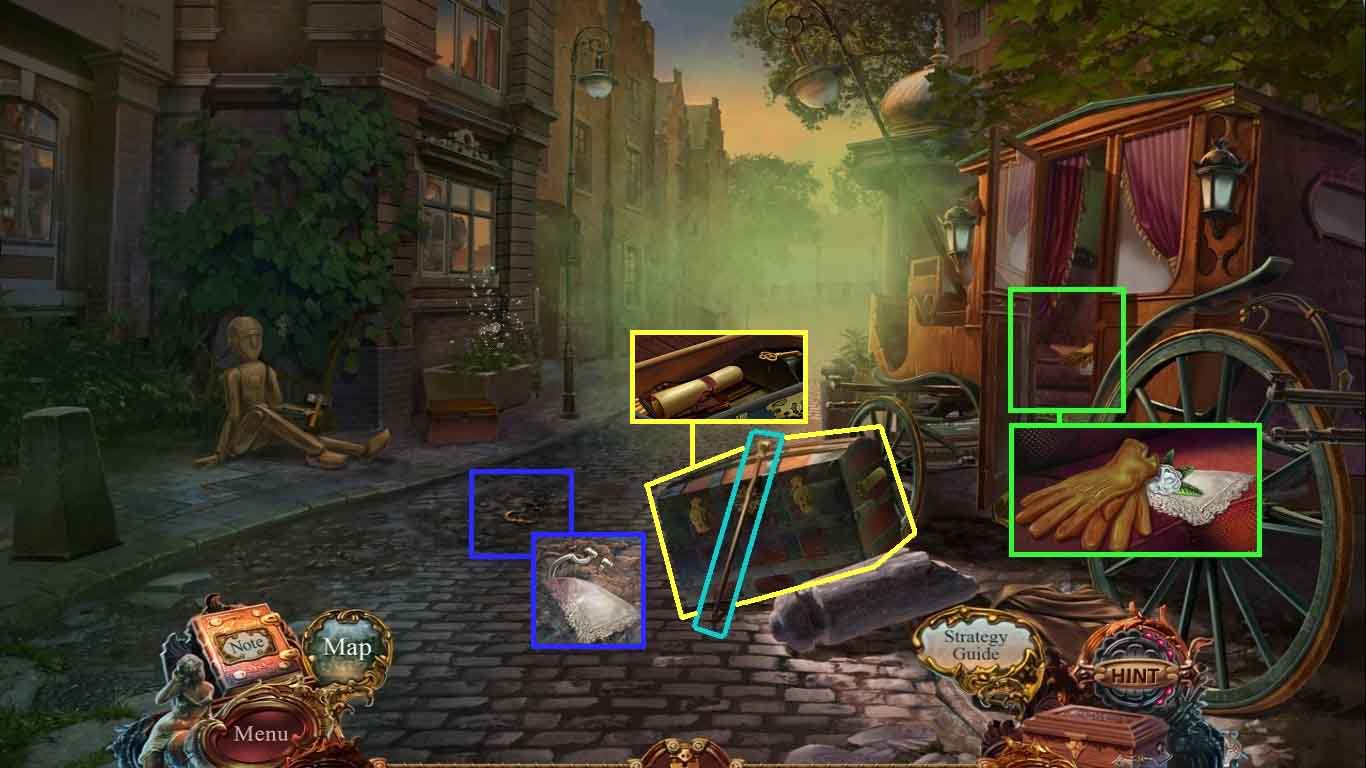
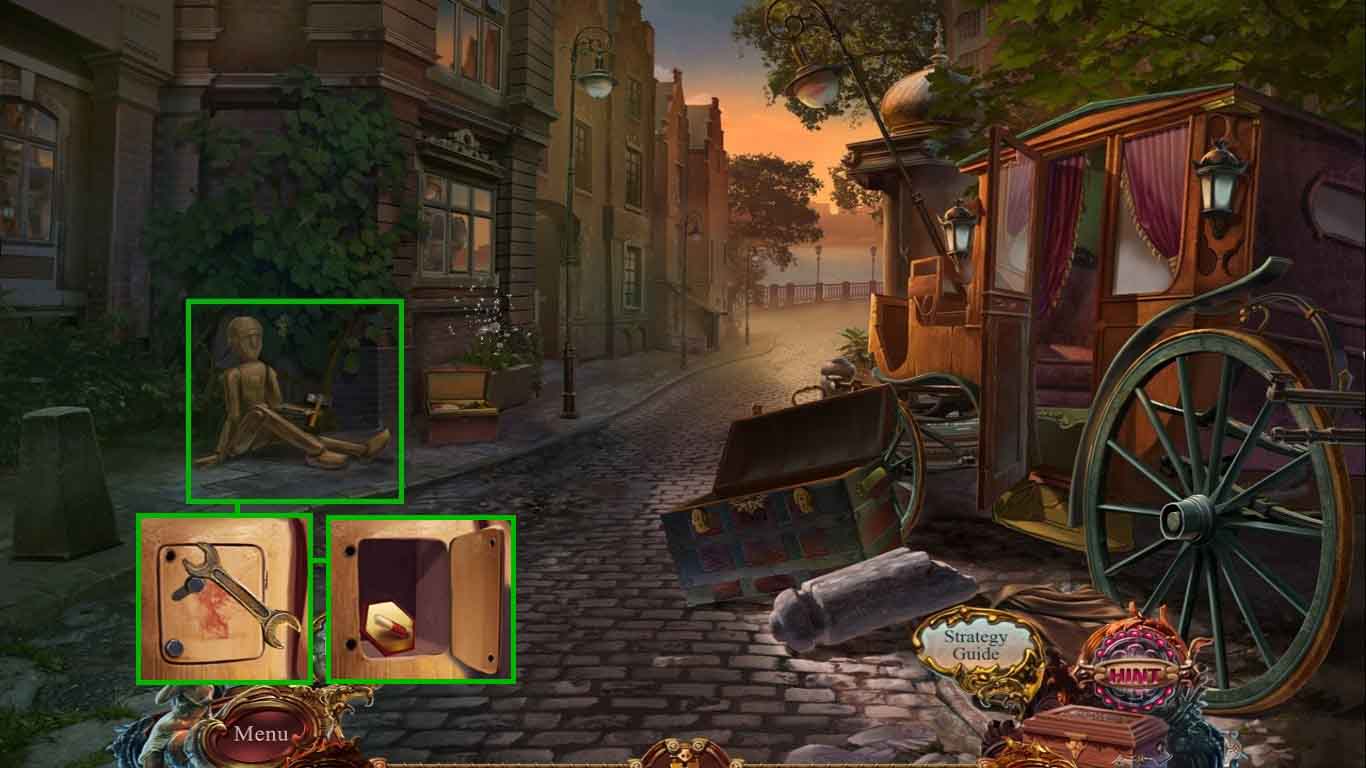
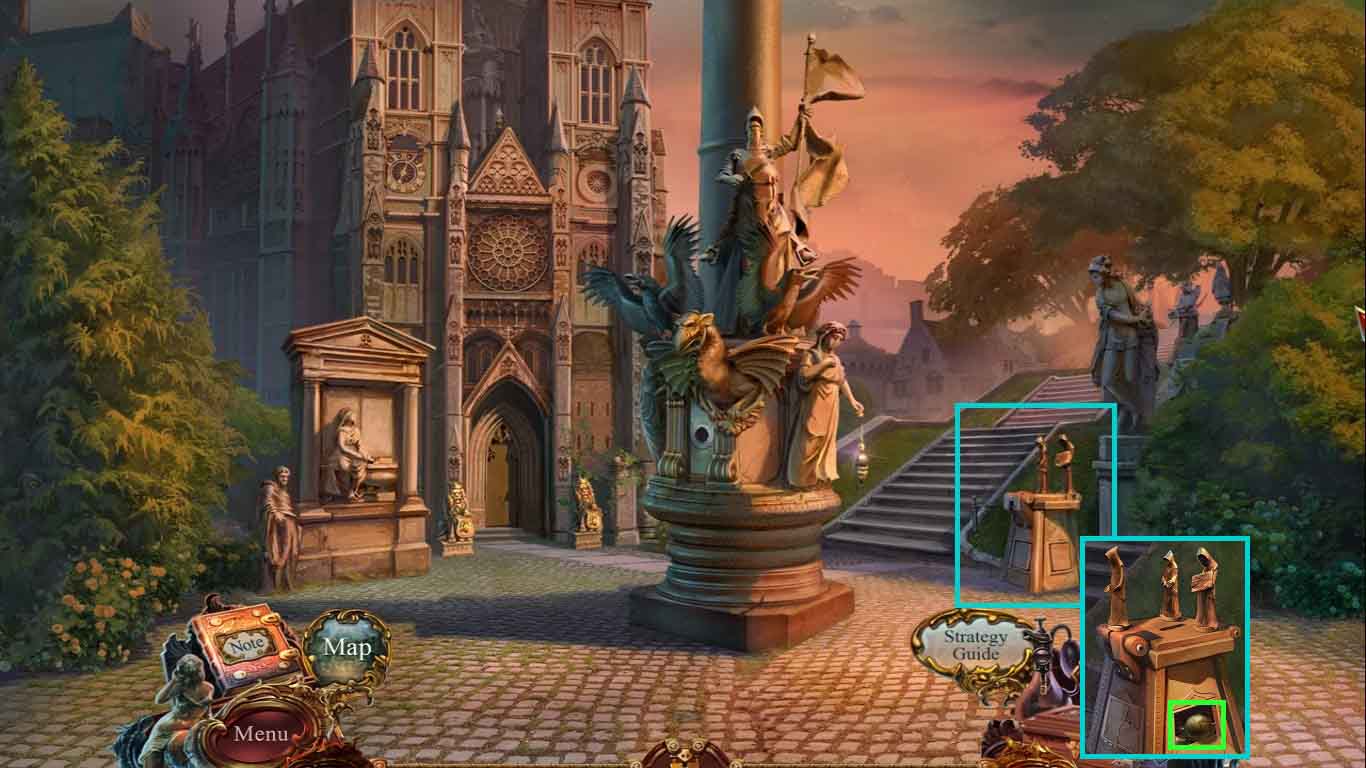
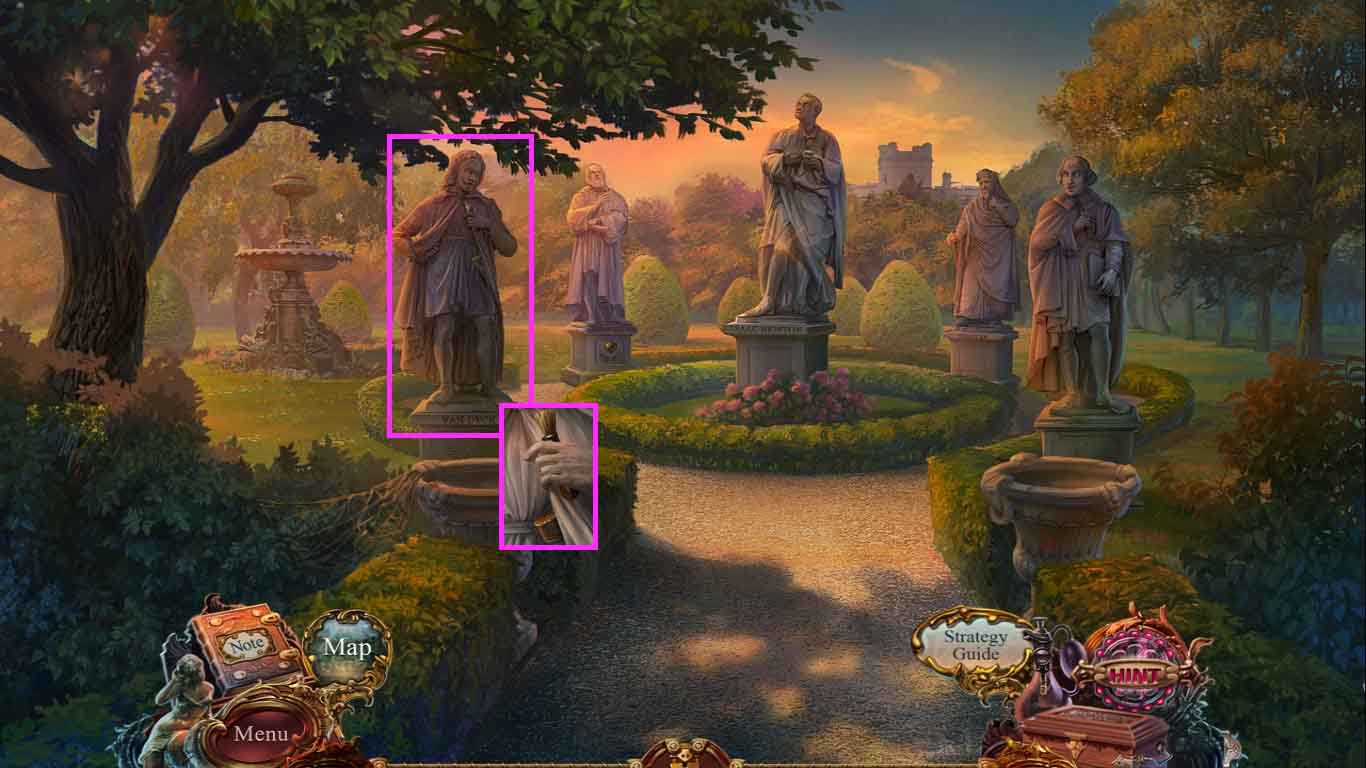
- Collect the walking stick.
- Examine the carriage; collect the gloves, the white rose and the handkerchief.
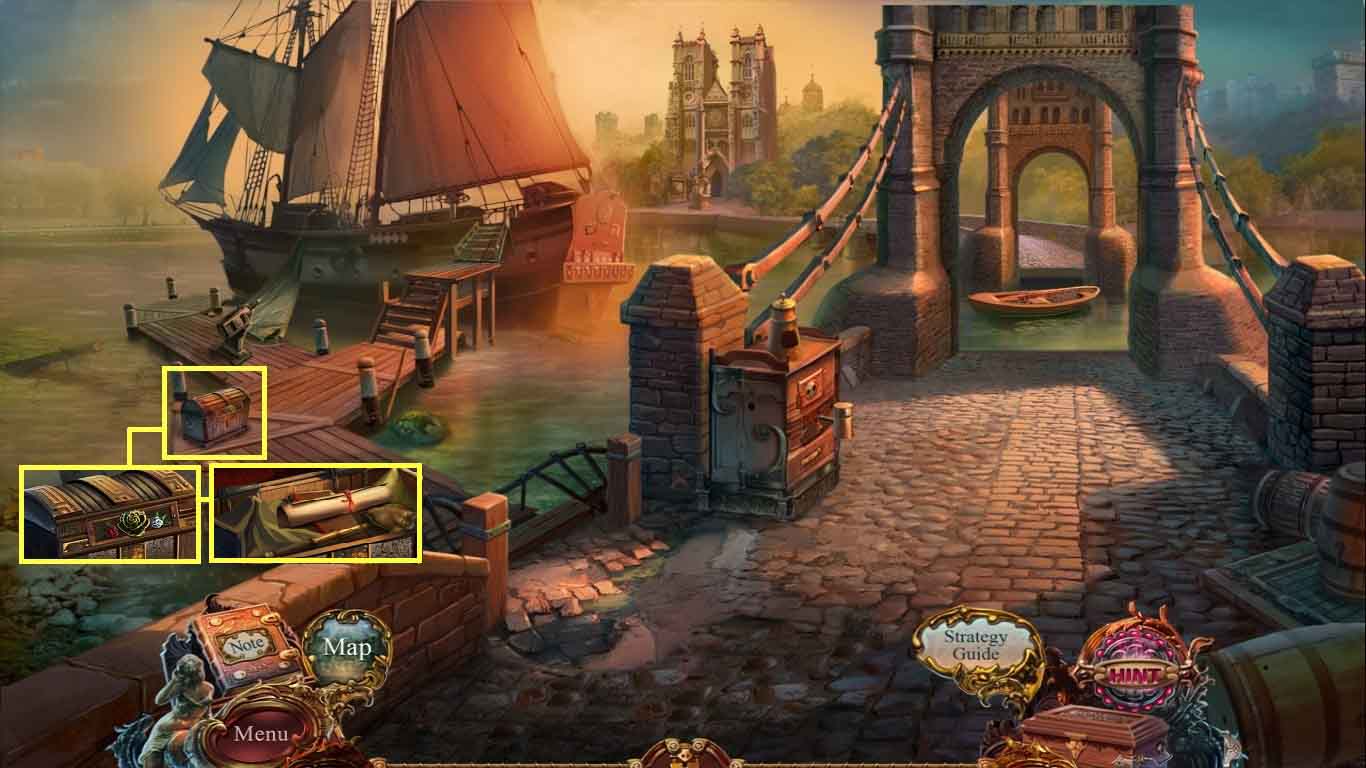
- Examine the ground.
- Clear the dirt using the handkerchief; collect the chest handle.
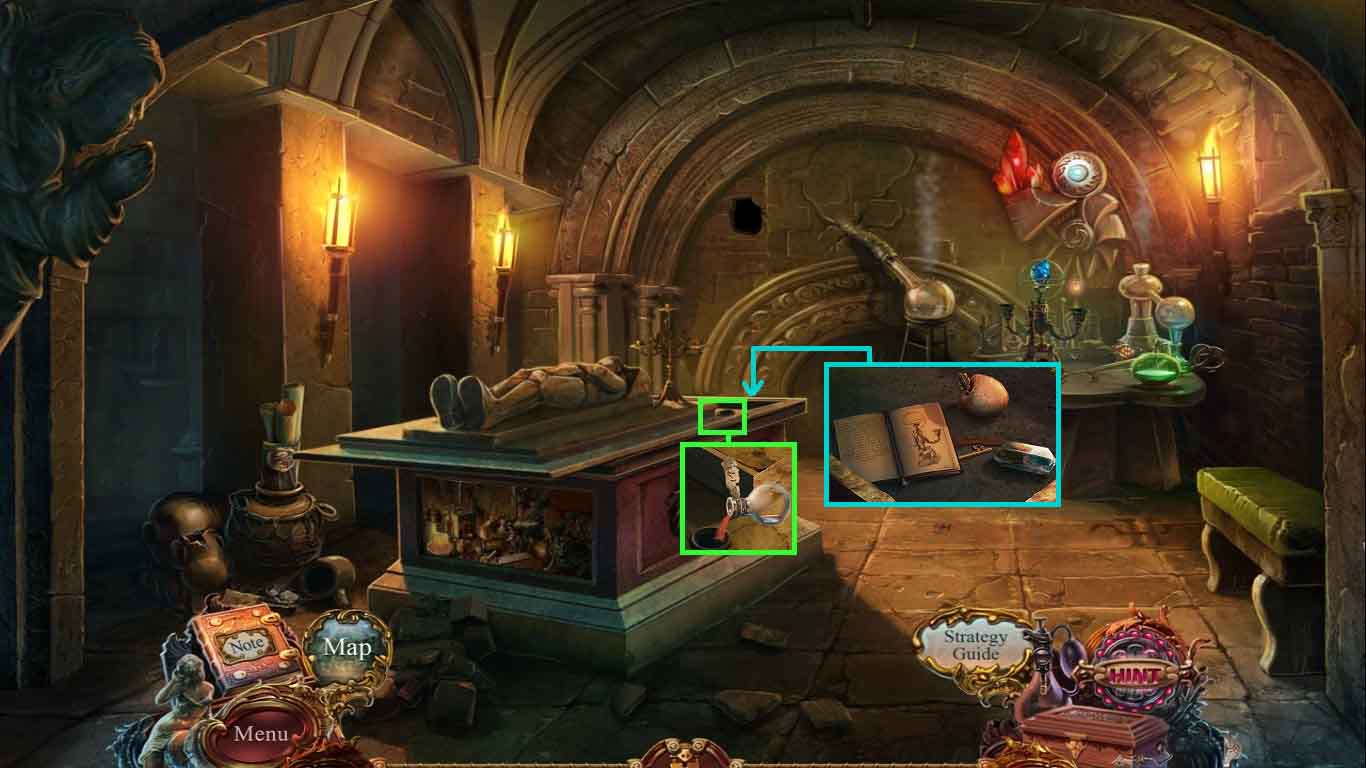
- Examine the chest; attach the chest handle.
- Read the scroll and collect the key.
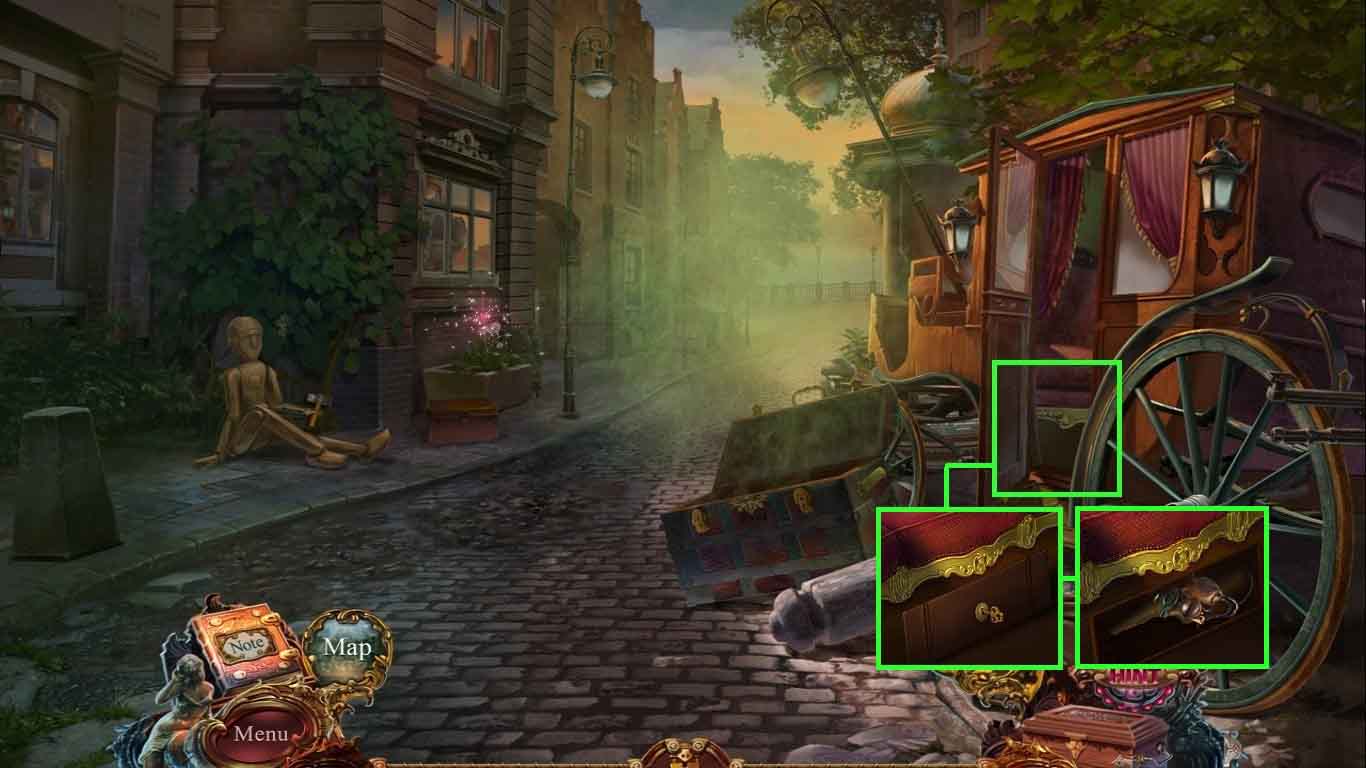
- Examine the carriage; insert the key into the lock and click it once.
- Collect the broken scent catcher pieces and the mask.
- Put on the mask.
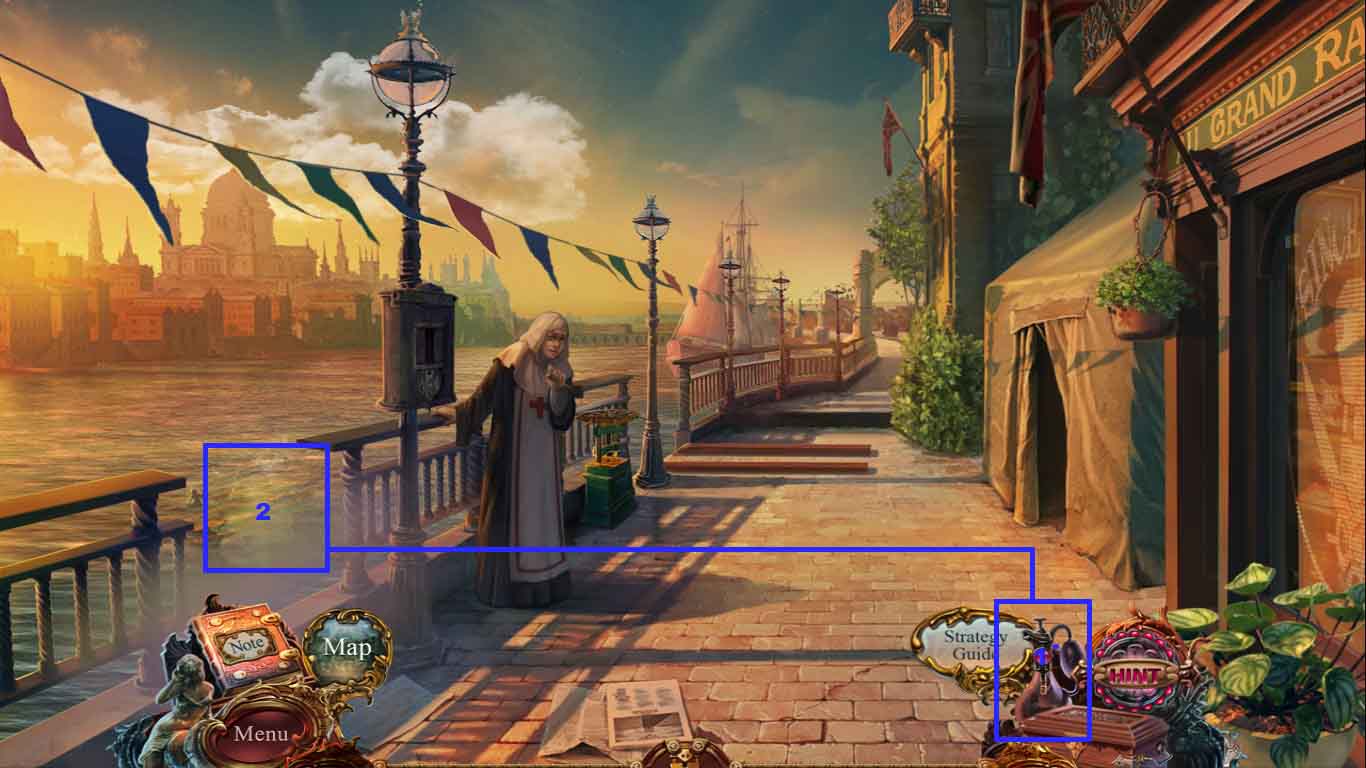
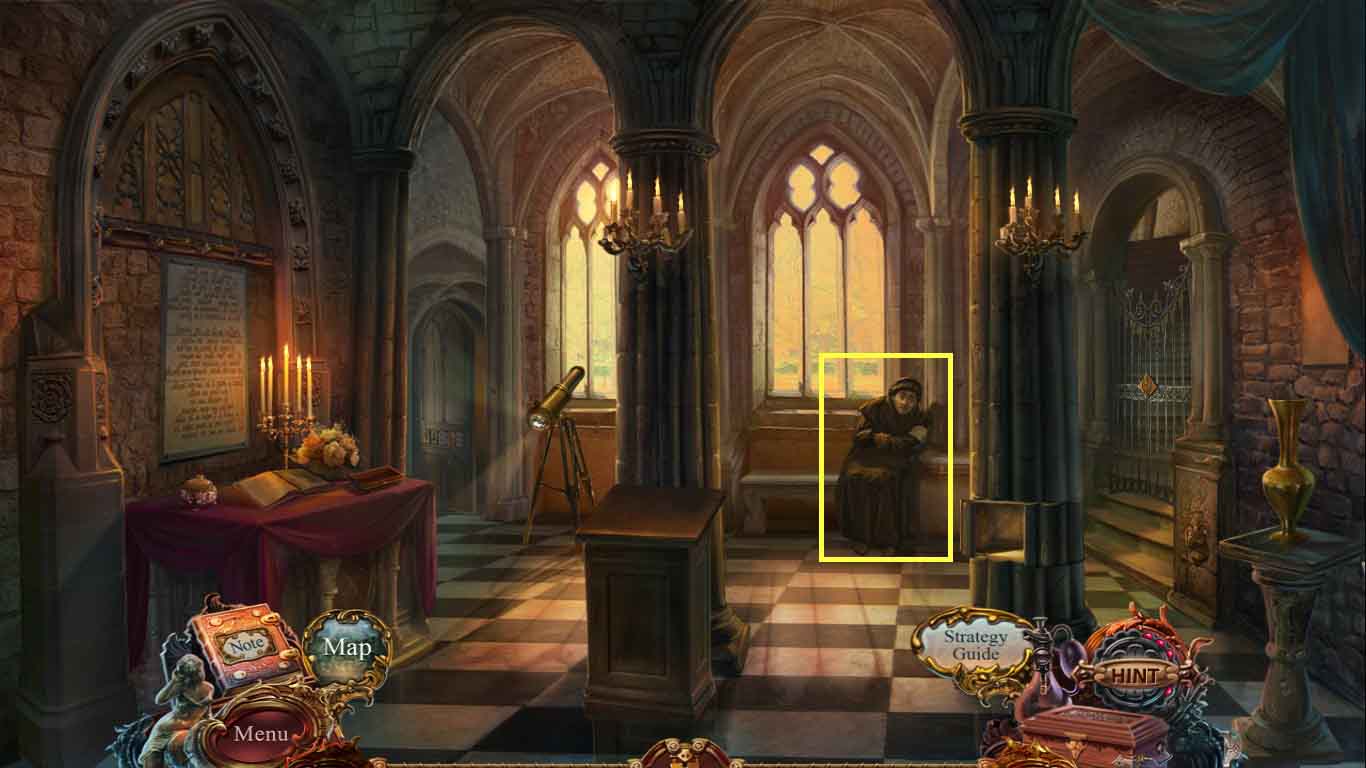
- Move to the embankment.
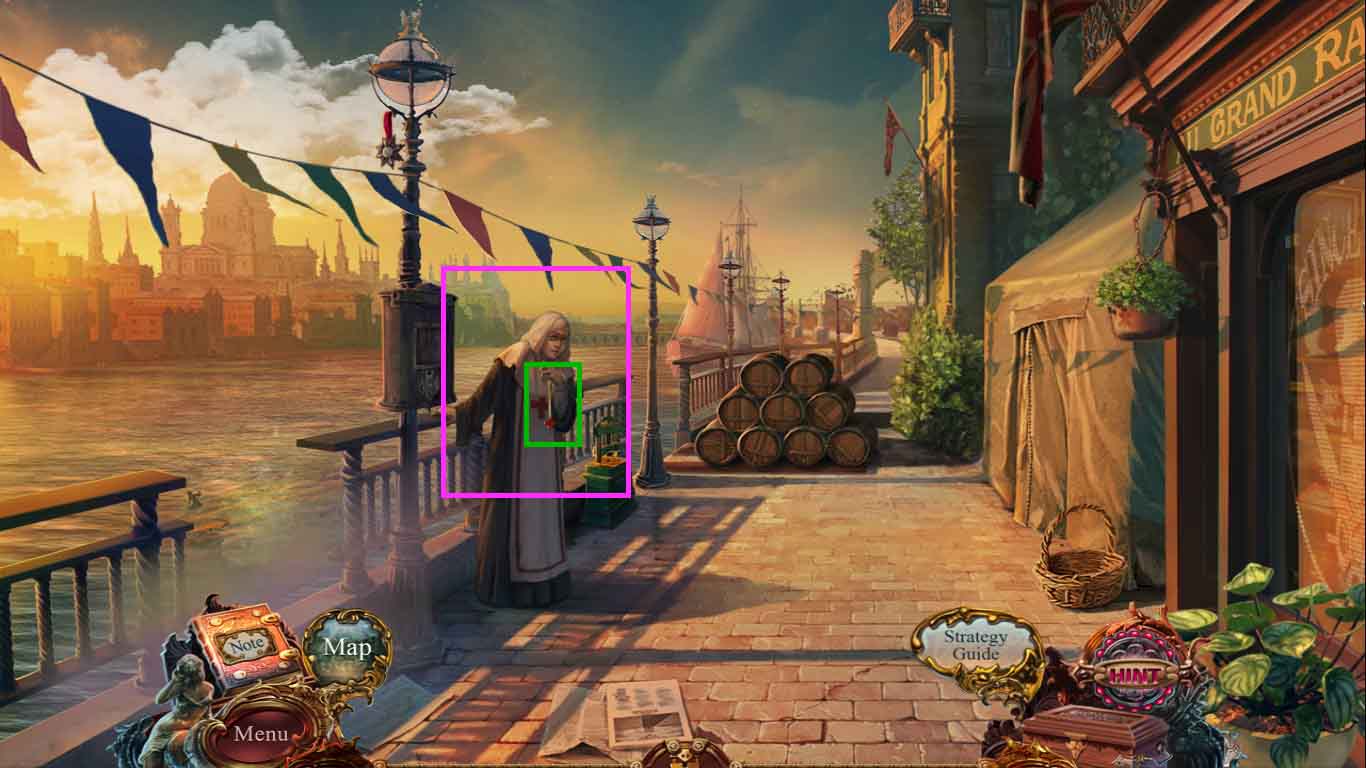
- Speak to the woman.
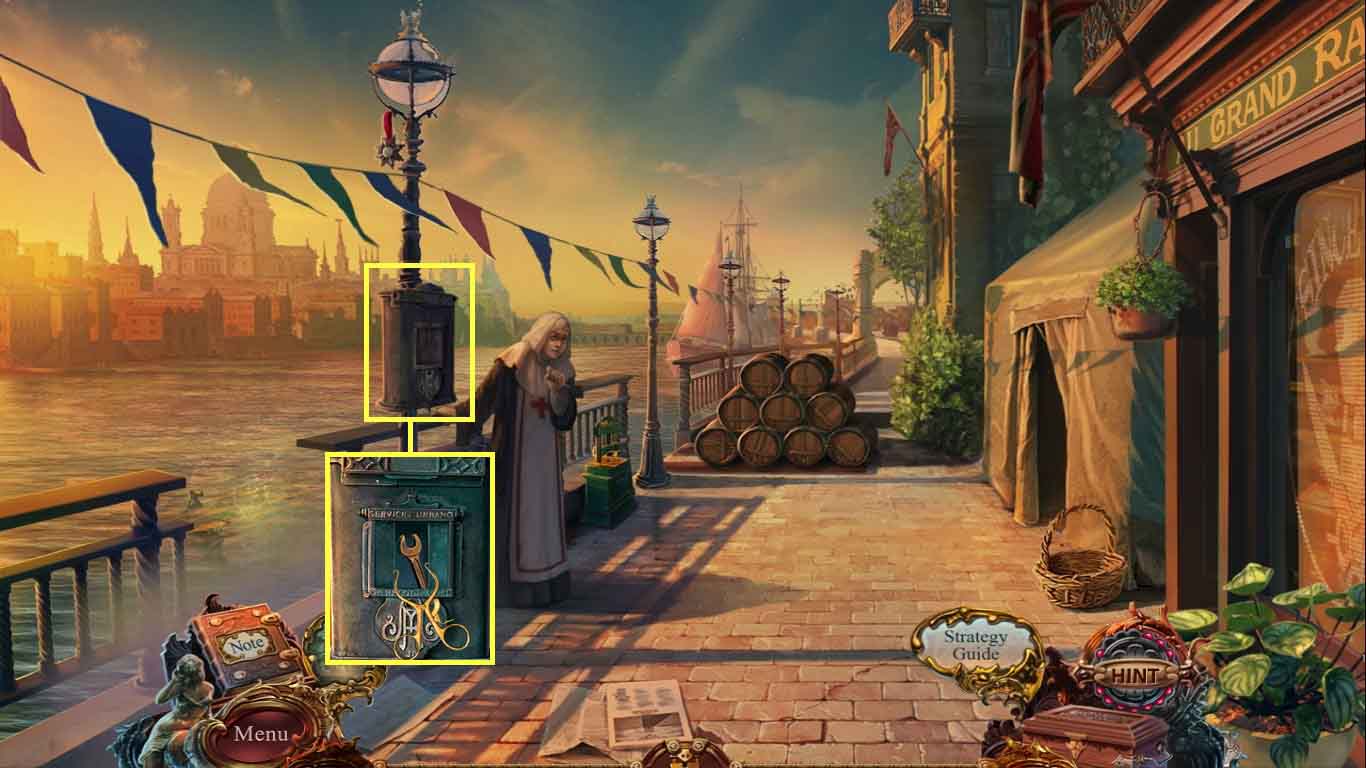
- Collect the medical symbol.
- Move down once.

- Examine the box; insert the medical symbol.
- Collect the scalpel and the bandage.
- Move ahead.
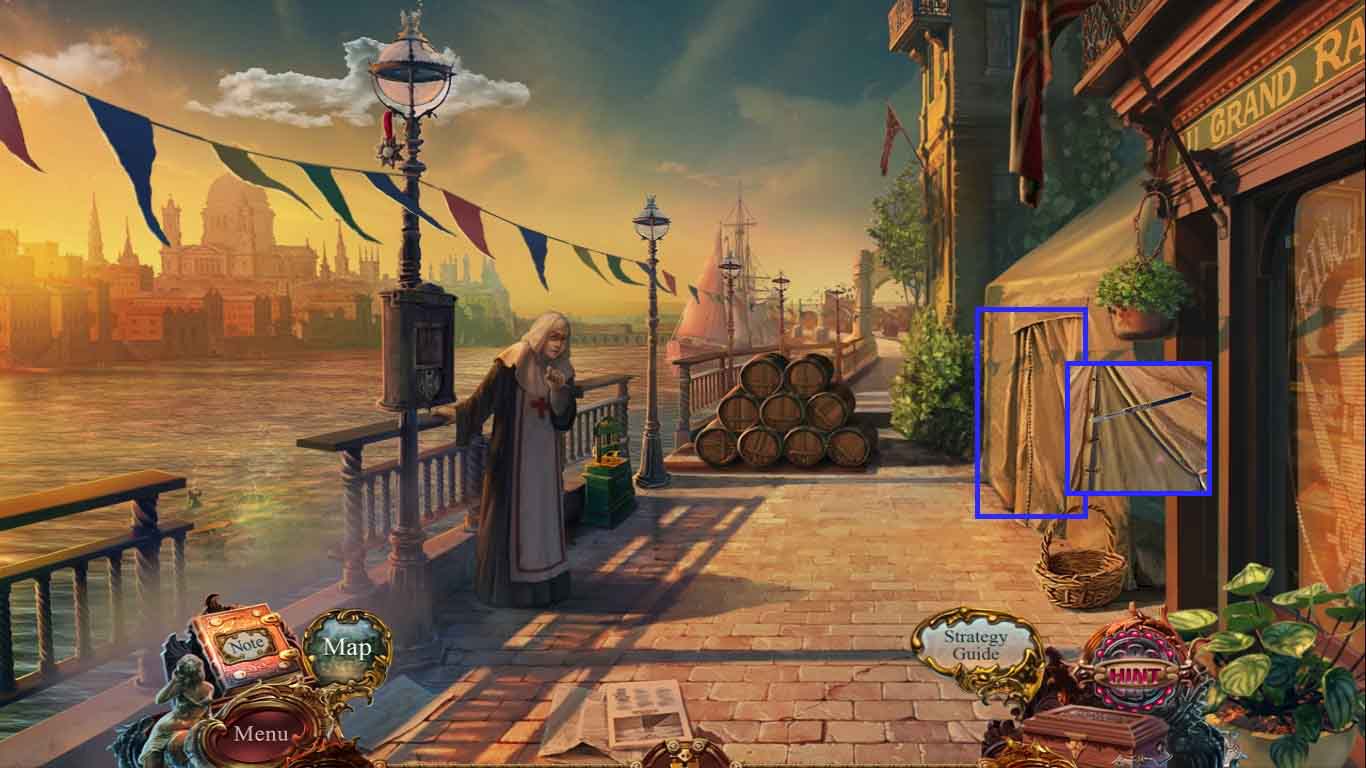
- Examine the tent; use the scalpel to cut it open.
- Go into the medical tent.
- Click the hidden objects area.
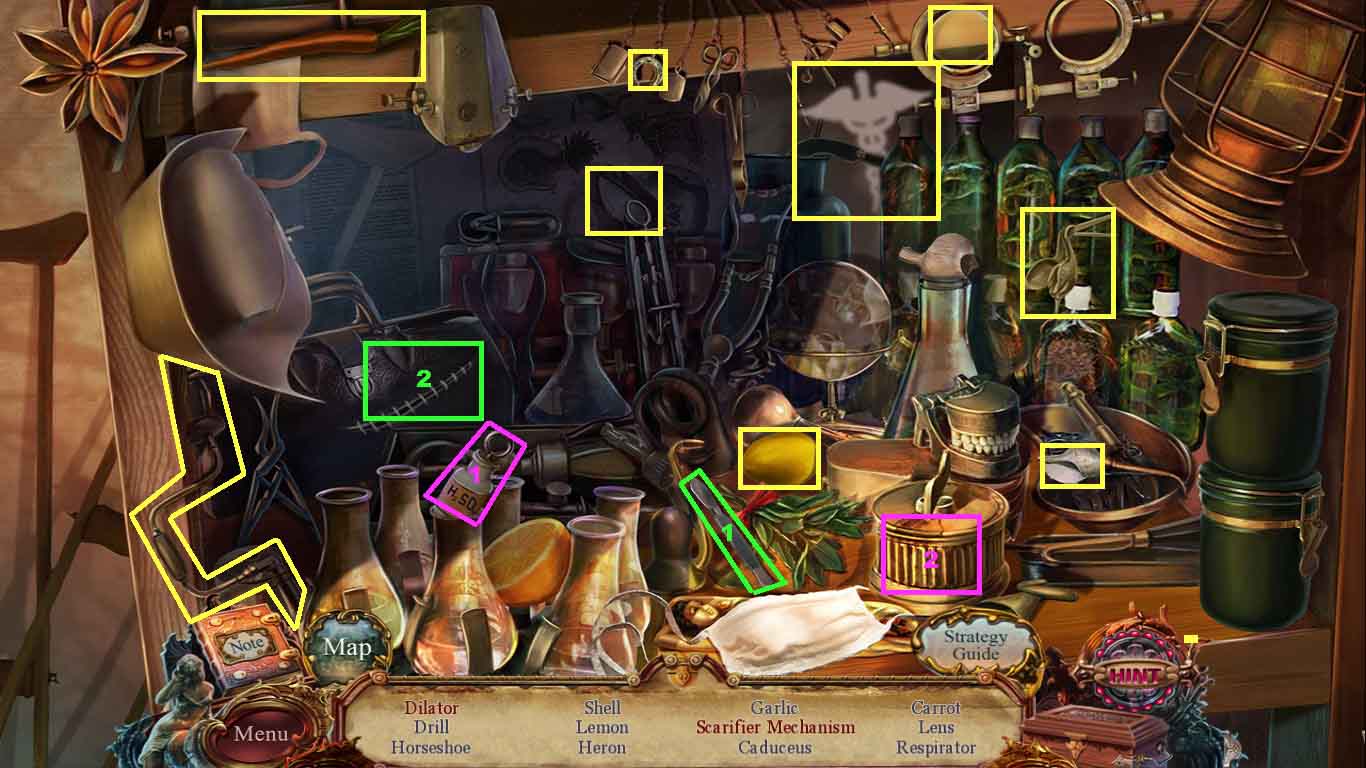
- Select the scalpel and use it to cut the bag open.
- Collect the dilator.
- Select the acid bottle and pour it onto the metal box.
- Collect the scarifier mechanism.
- Collect the dilator.
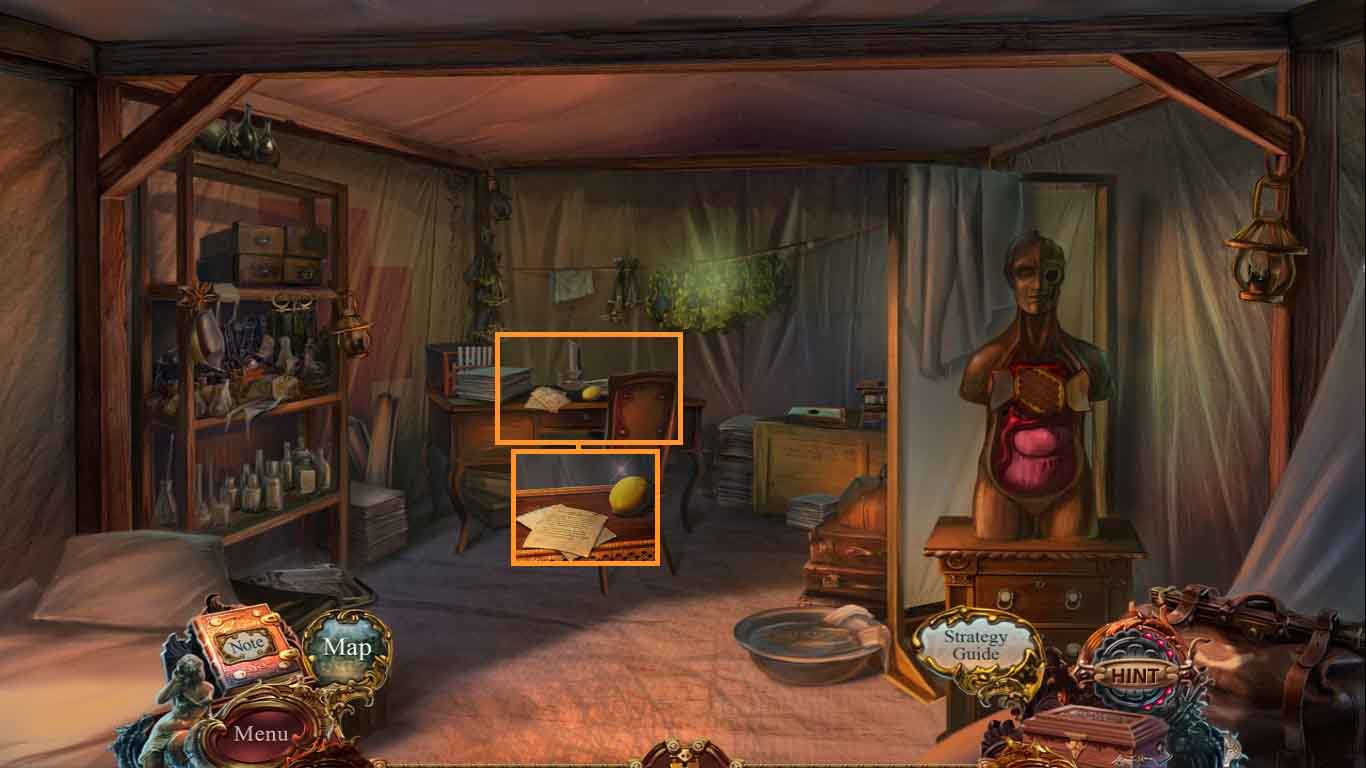
- Examine the desk; collect the lemon.
- Read the medical report.
- Collect the tincture recipe and the 1 / 2 mermaid.
- Move down one time.
- Examine the device.
- Use the dilator to open it and collect the wrench.
- Move down one time.
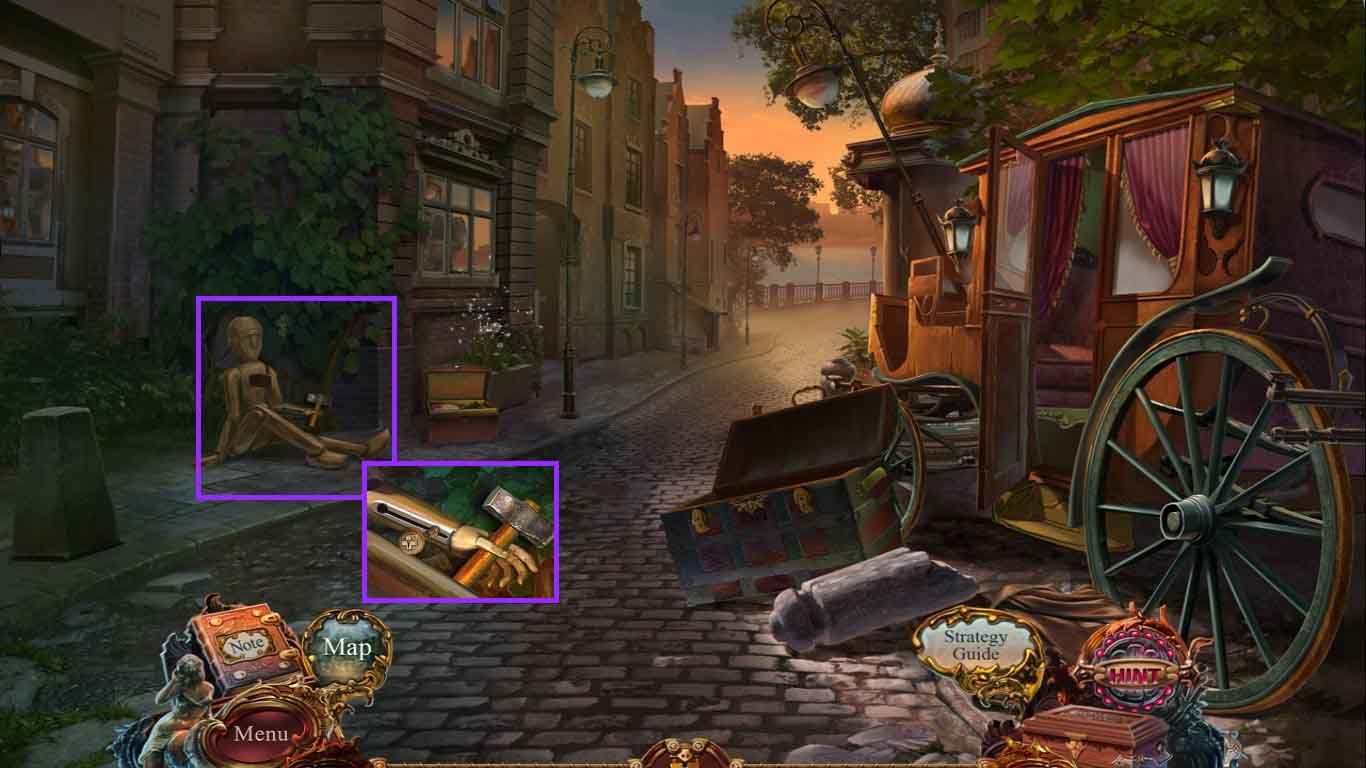
- Examine the puppet.
- Use the wrench to remove the bolts.
- Click the compartment and collect the medical tile.
- Move to the medical tent.
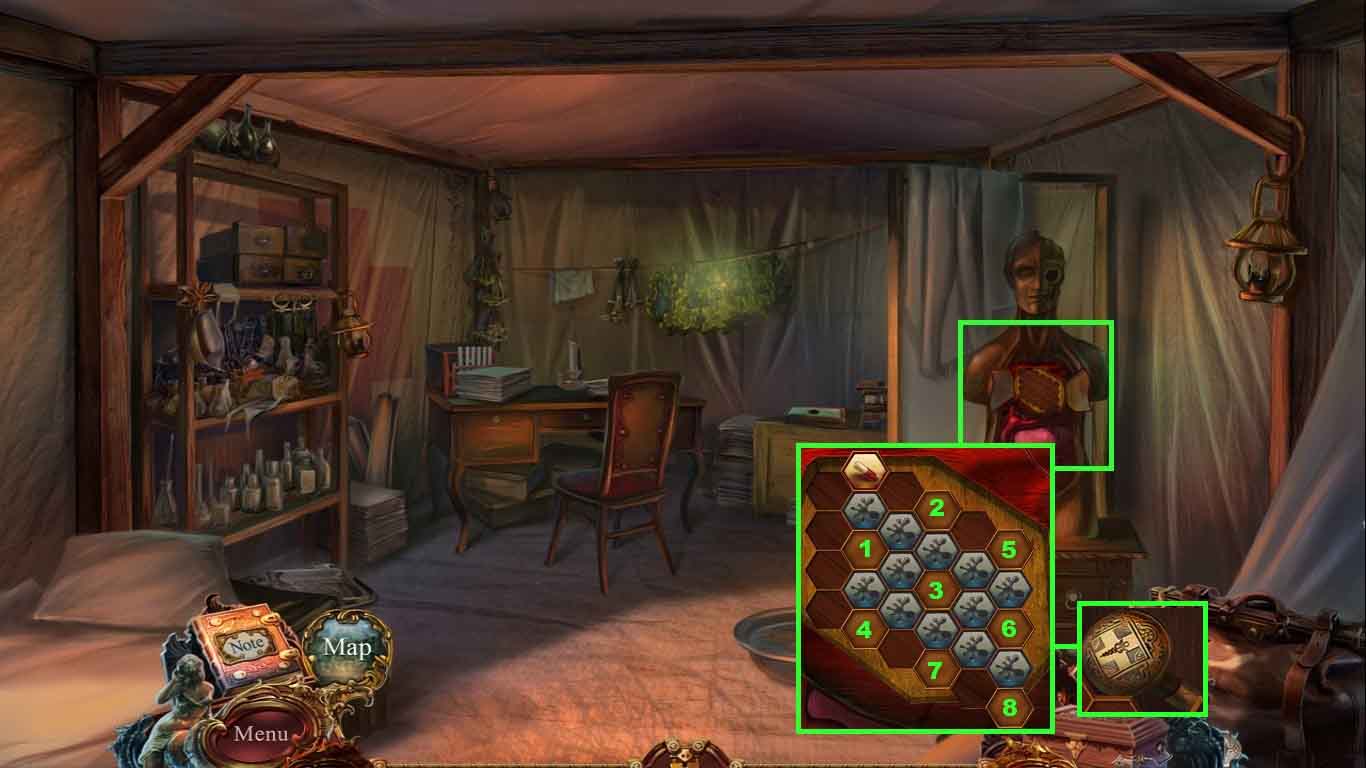
- Examine the puppet and place the medical tile onto the grid.
- A mini-game will trigger.
- Move the tiles as follows to solve the puzzle.
- 1 – 2 – 3 – 1 – 4 – 3 – 5 – 6 – 3 – 7 – 6 – 8
- Collect the lever.
- Move to the London Entrance.
- Examine the puppet and insert the lever.
- Click the lever and collect the sledgehammer.
- Move ahead.

- Examine the barrels.
- Lay down the walking stick.
- Select the sledgehammer to strike the walking stick.
- Move to the pier.
- Collect the lantern hook.
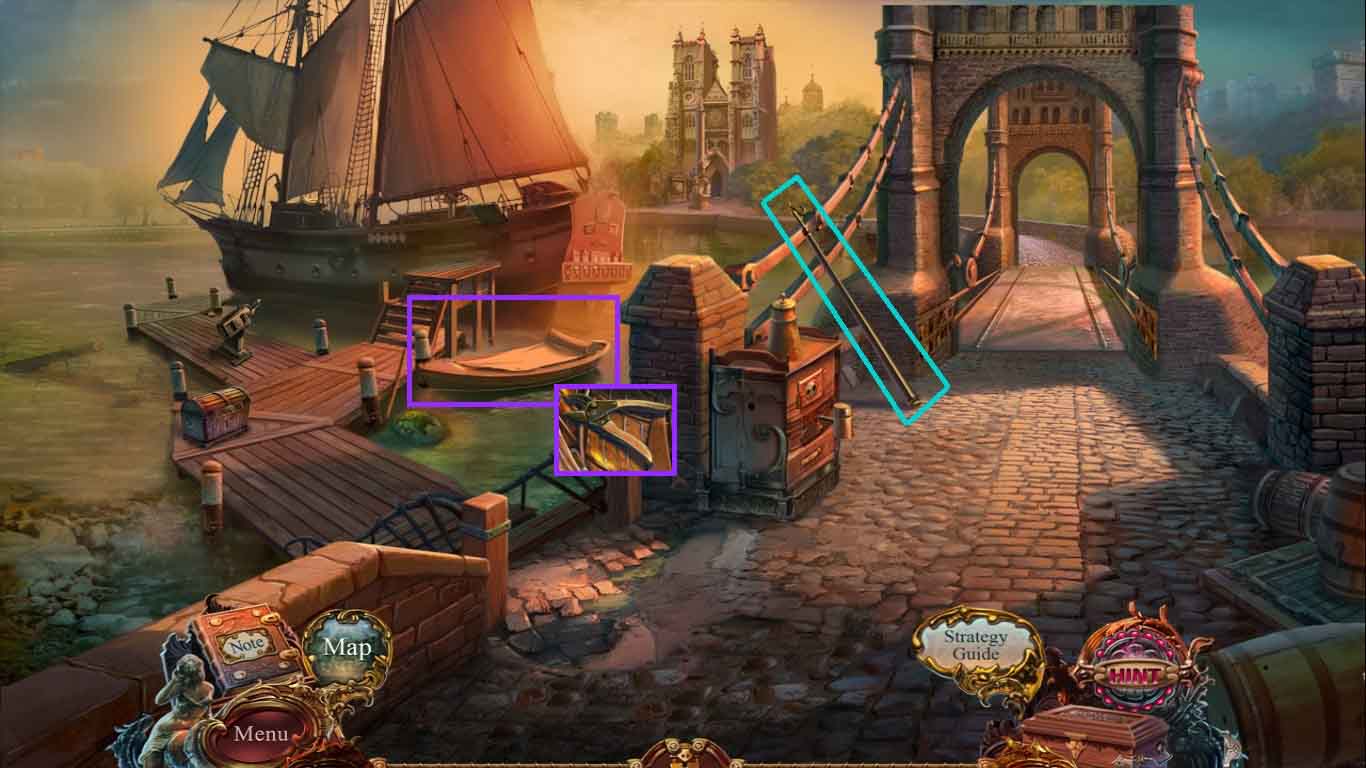
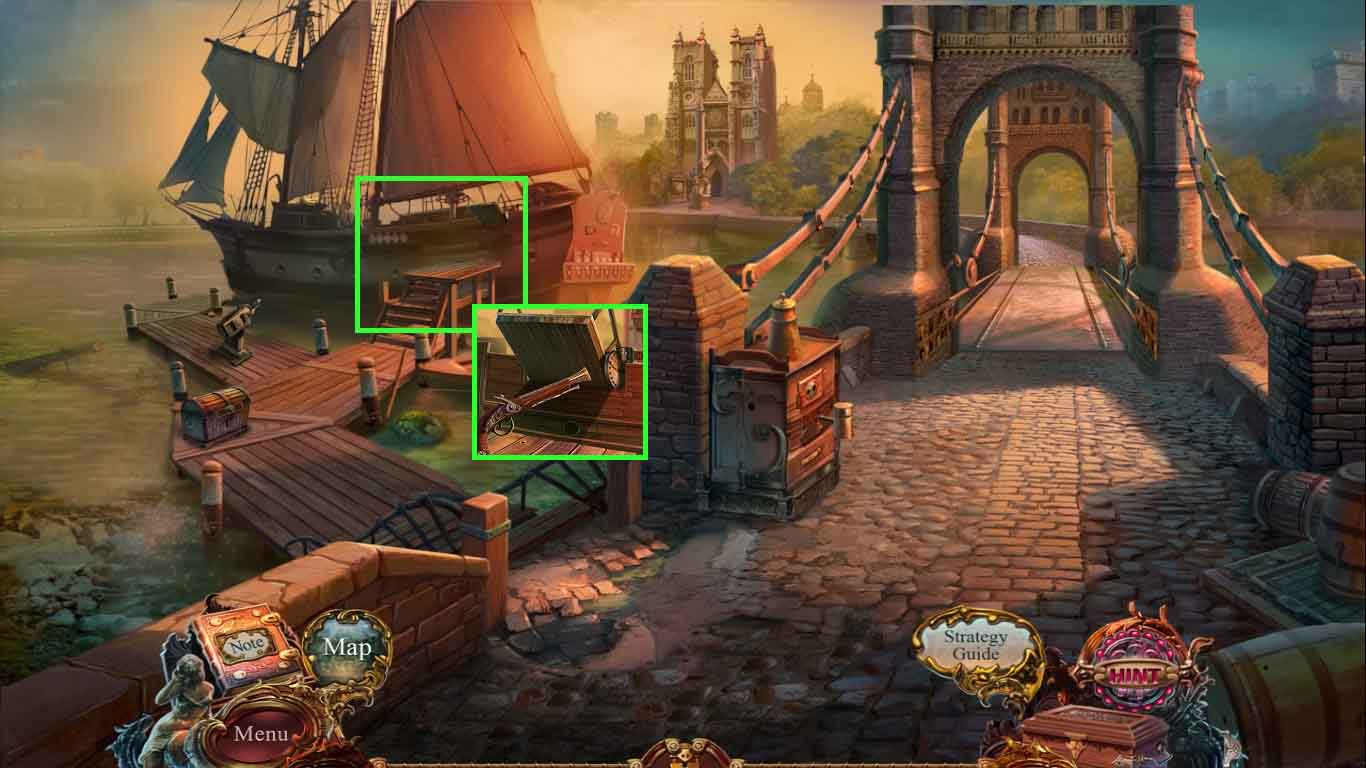
- Examine the boat.
- Collect the tarp and the pruners.
- Move down one time.

- Examine the streetlight.
- Collect the medal using the lantern hook.
- Move down one time.
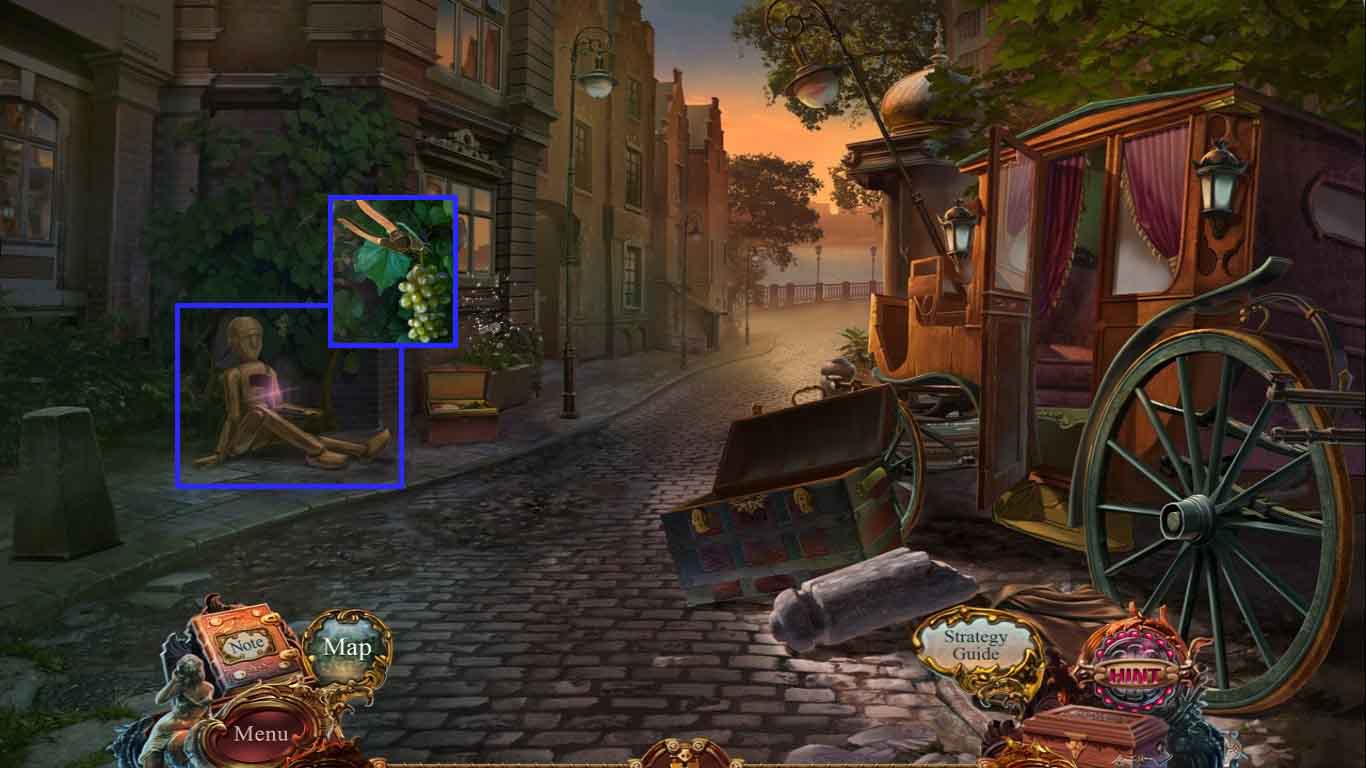
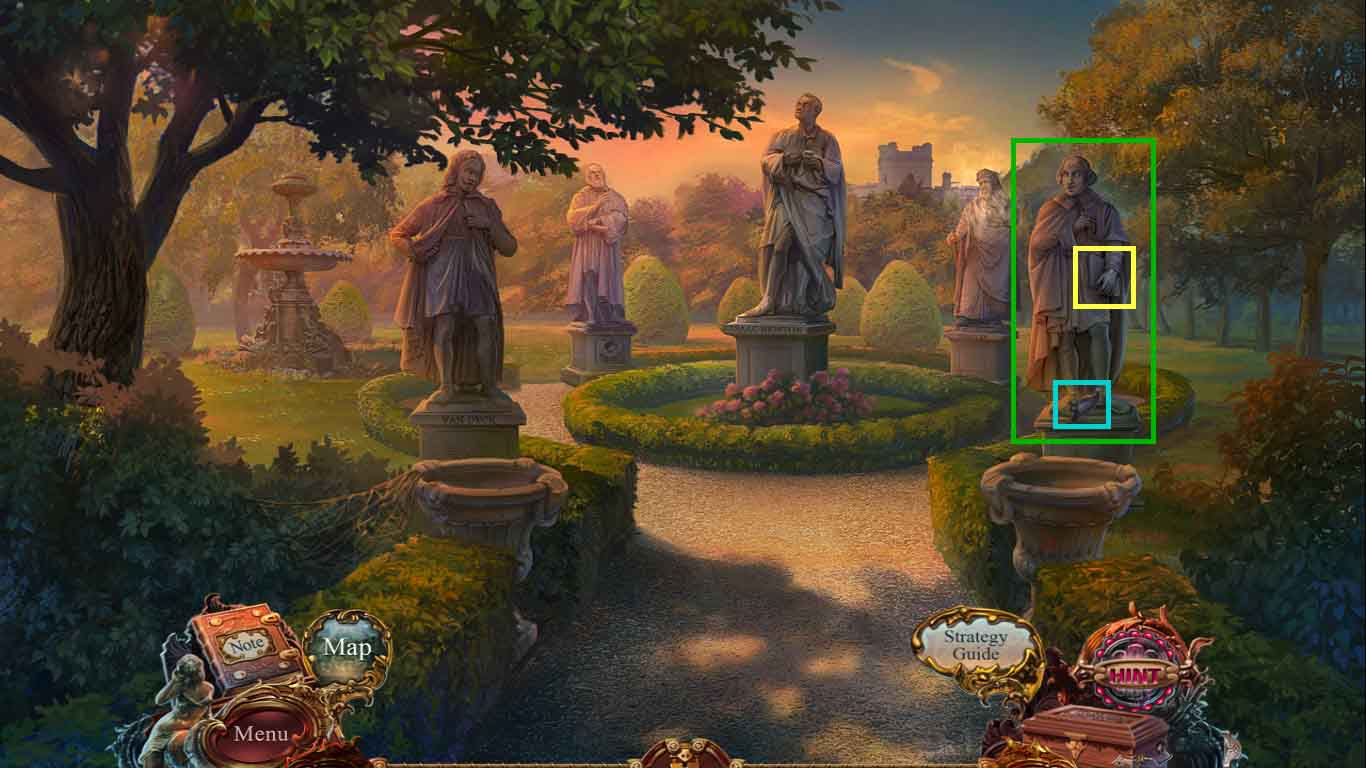
- Examine the puppet.
- Select the pruners to cut and collect the grapes.
- Move to the medical tent.

- Examine the casket; insert the medal.
- Collect the pistol.
- Move to the pier and attempt to cross over the stone bridge.
- Examine the ship; shoot the pistol toward the mechanism.
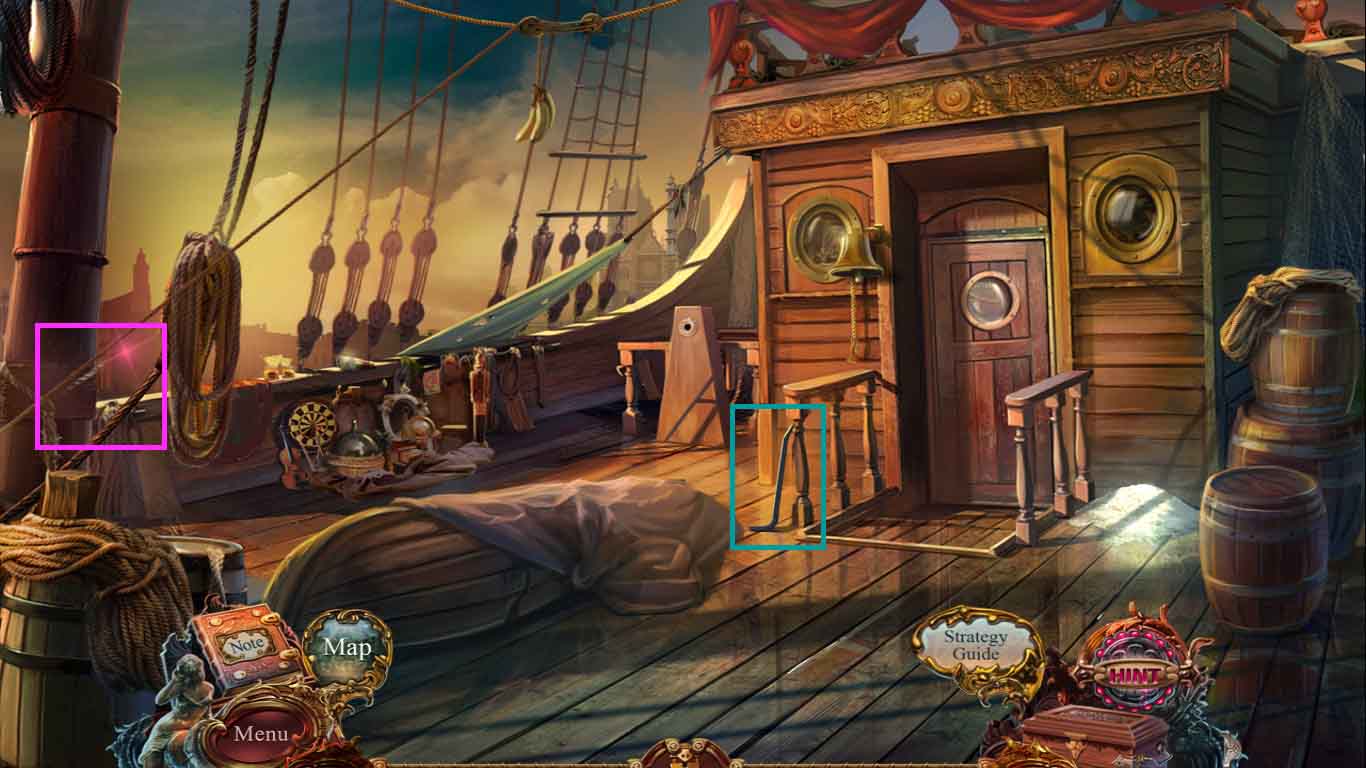
- Go onto the ship’s deck.

- Examine the wheel.
- Use the wrench to remove the bolt.
- Collect the control wheel.
- Examine the sack and use the scalpel to cut the rope.
- Click the hidden objects area.
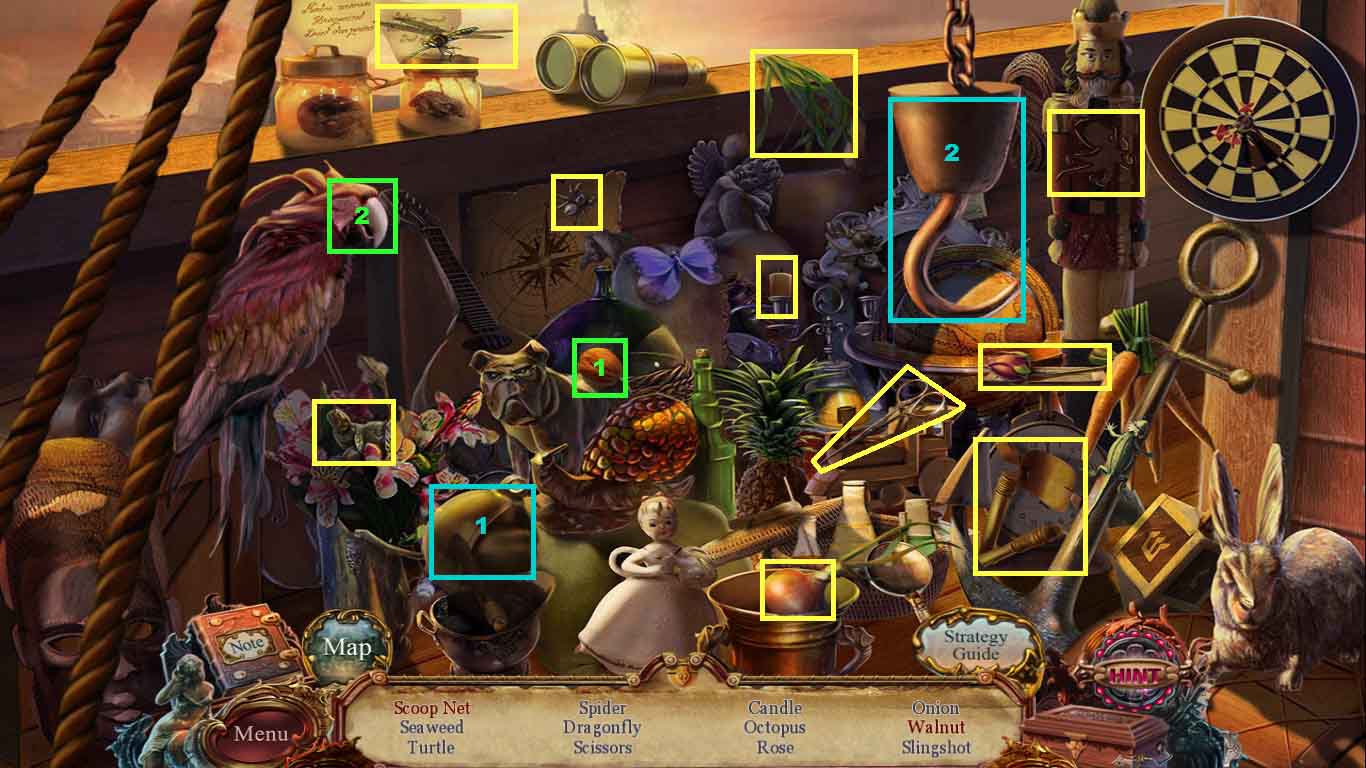
- Find the listed items.
- Select the walnut and give it to the parrot.
- Collect the walnut.
- Select the weight and attach it to the hook and collect the scoop net.
- Move down one time.
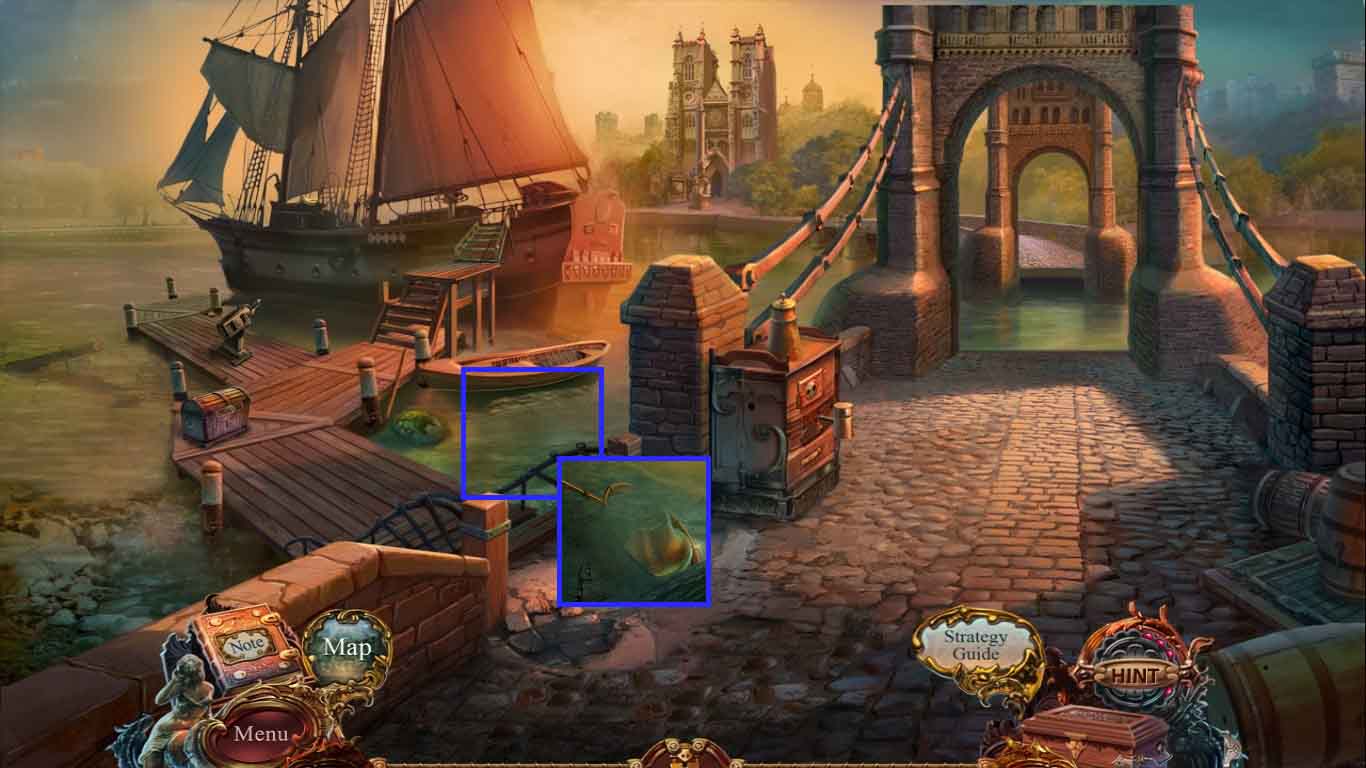
- Zoom into the water.
- Select the scoop net to collect the bell.
- Move to the ship’s deck.
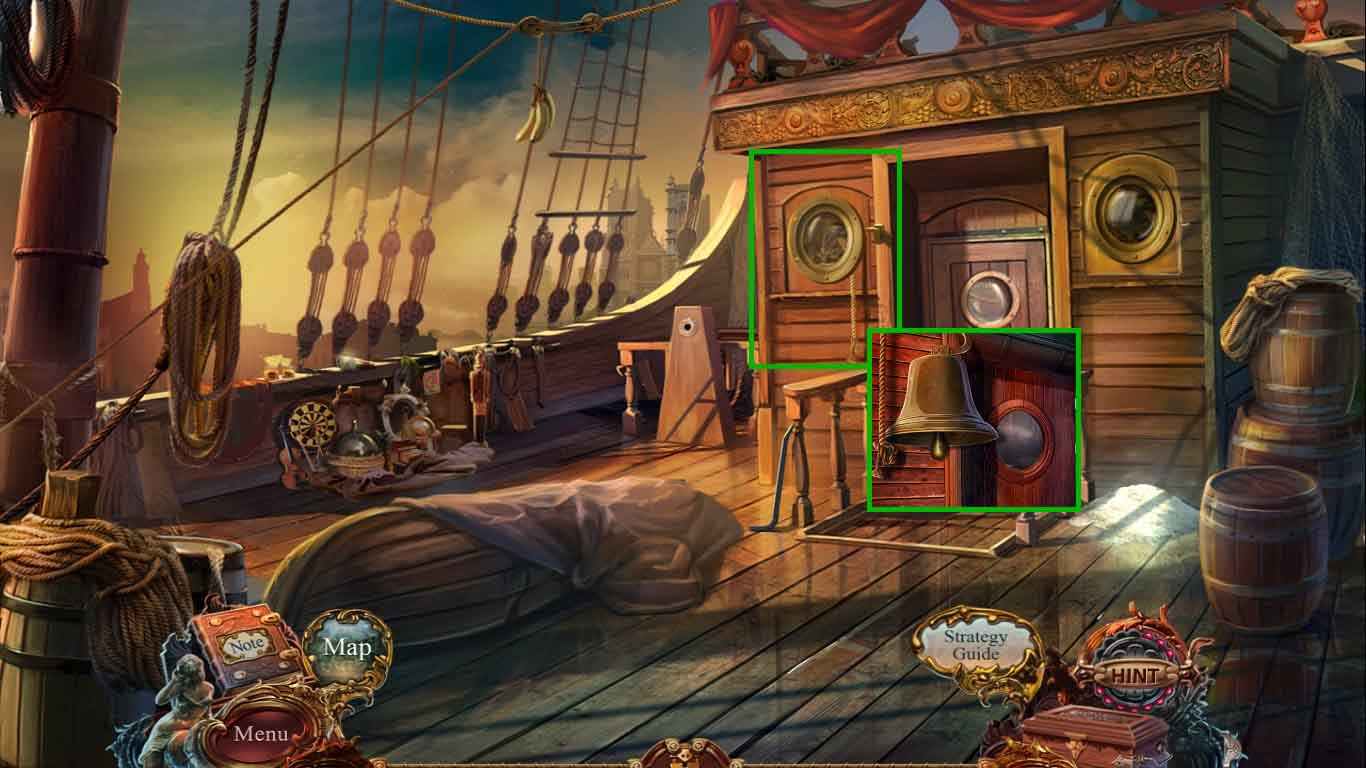
- Examine the door.
- Attach the bell to the hook.
- Click the rope.
- Go into the Captain’s cabin.

- Collect the harpoon.
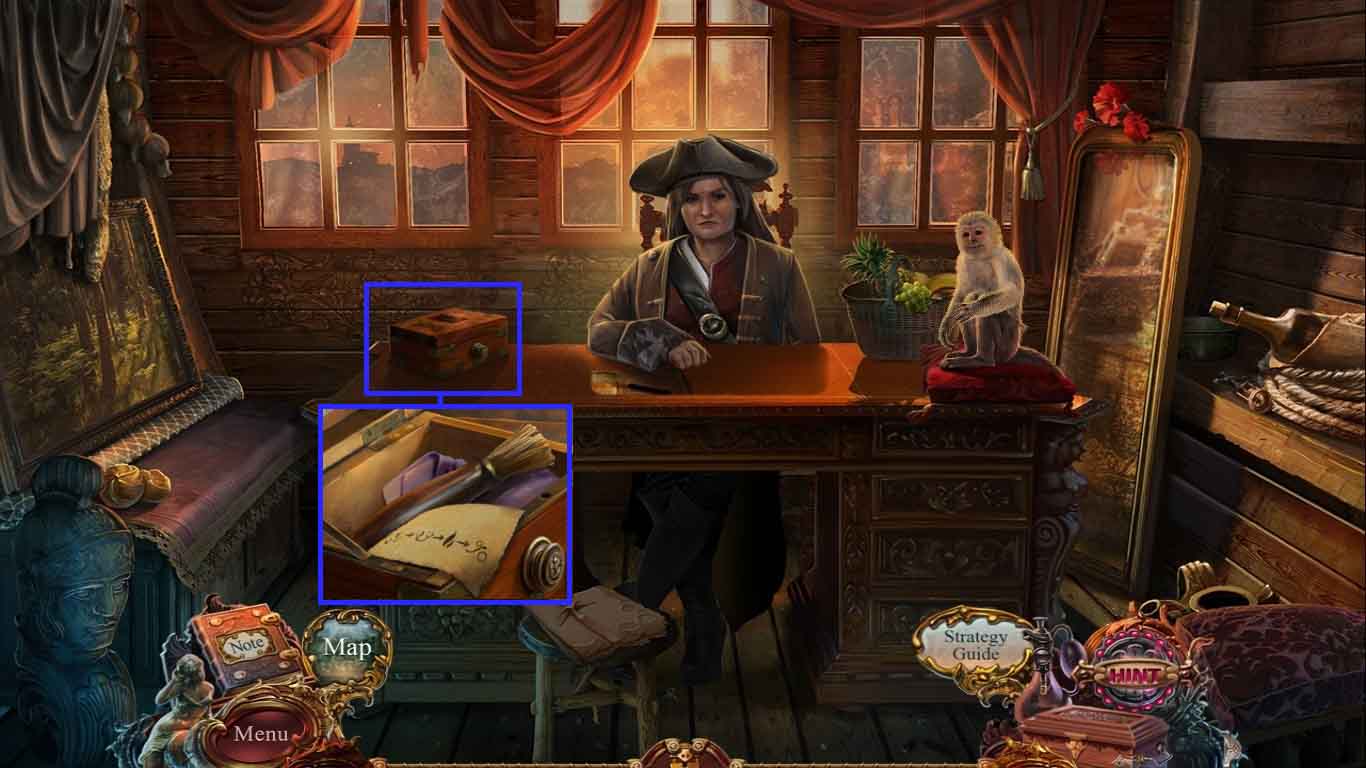
- Examine the desk.
- Collect the crest part and read the note.
- Speak to the Captain and collect the gold nugget.
- Move to the embankment.

- Examine the device.
- Attach the control wheel to the device.
- Insert the gold nugget and click the wheel; collect the token.
- Go ahead.
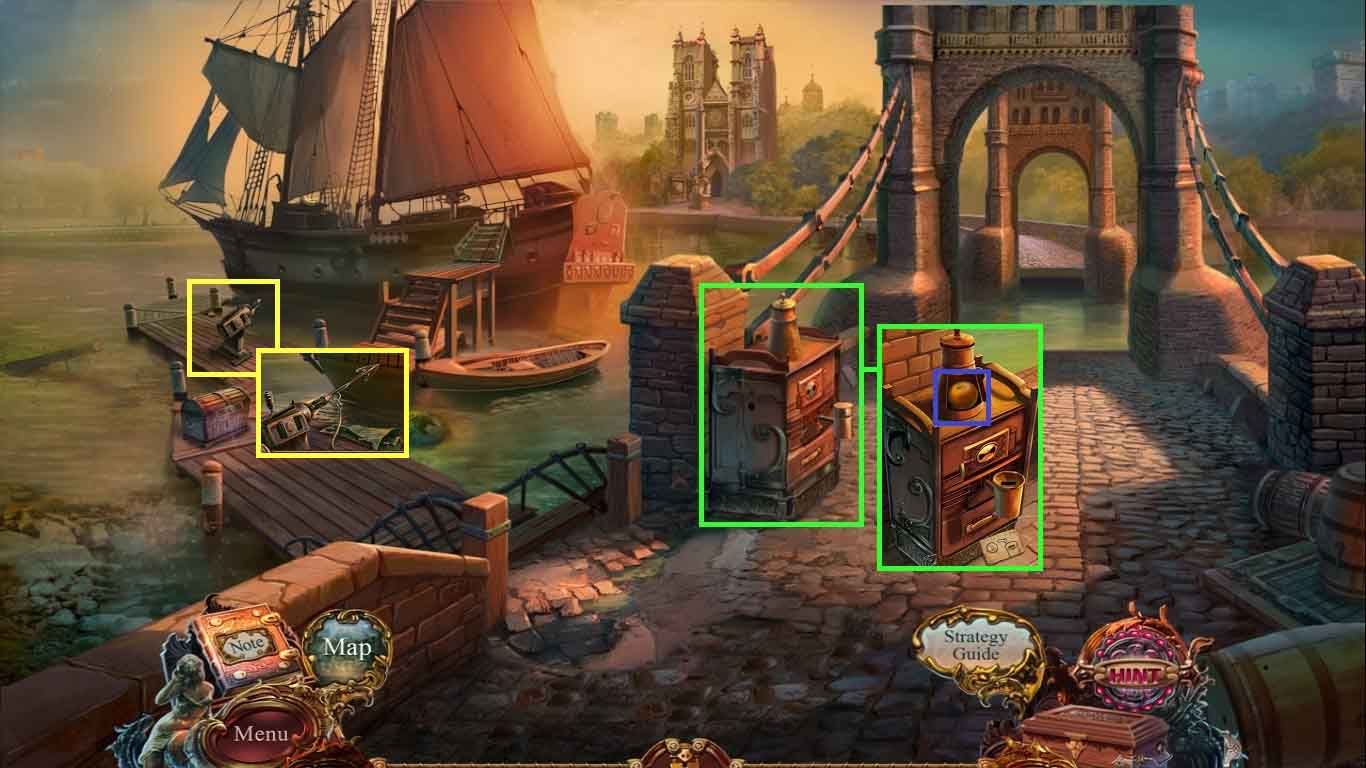
- Examine the machine and insert the token.
- Collect the orange.
- Examine the harpoon gun.
- Attach the harpoon and the tarp; shoot the harpoon.
- Move to the ship’s deck.
- Select the scalpel and use it to cut the rope.
- Collect the crowbar.
- Move down one time.

- Examine the boat.
- Use the crowbar to open the crate; collect the pineapple.
- Examine the harpoon gun; collect the banana.
- Move to the embankment.
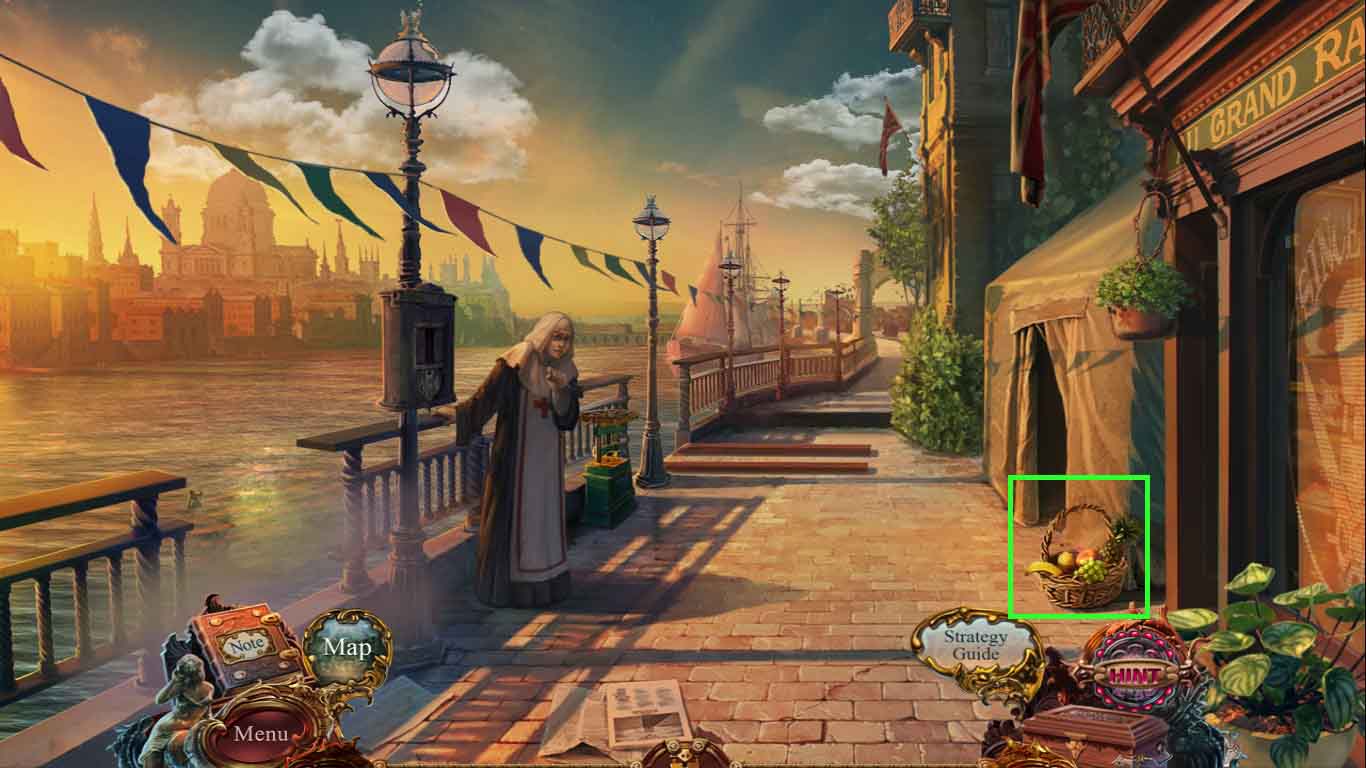
- Examine the basket.
- Place the lemon, grapes, orange, pineapple and banana into the basket.
- Collect the fruit basket.
- Move to the Captain’s cabin.
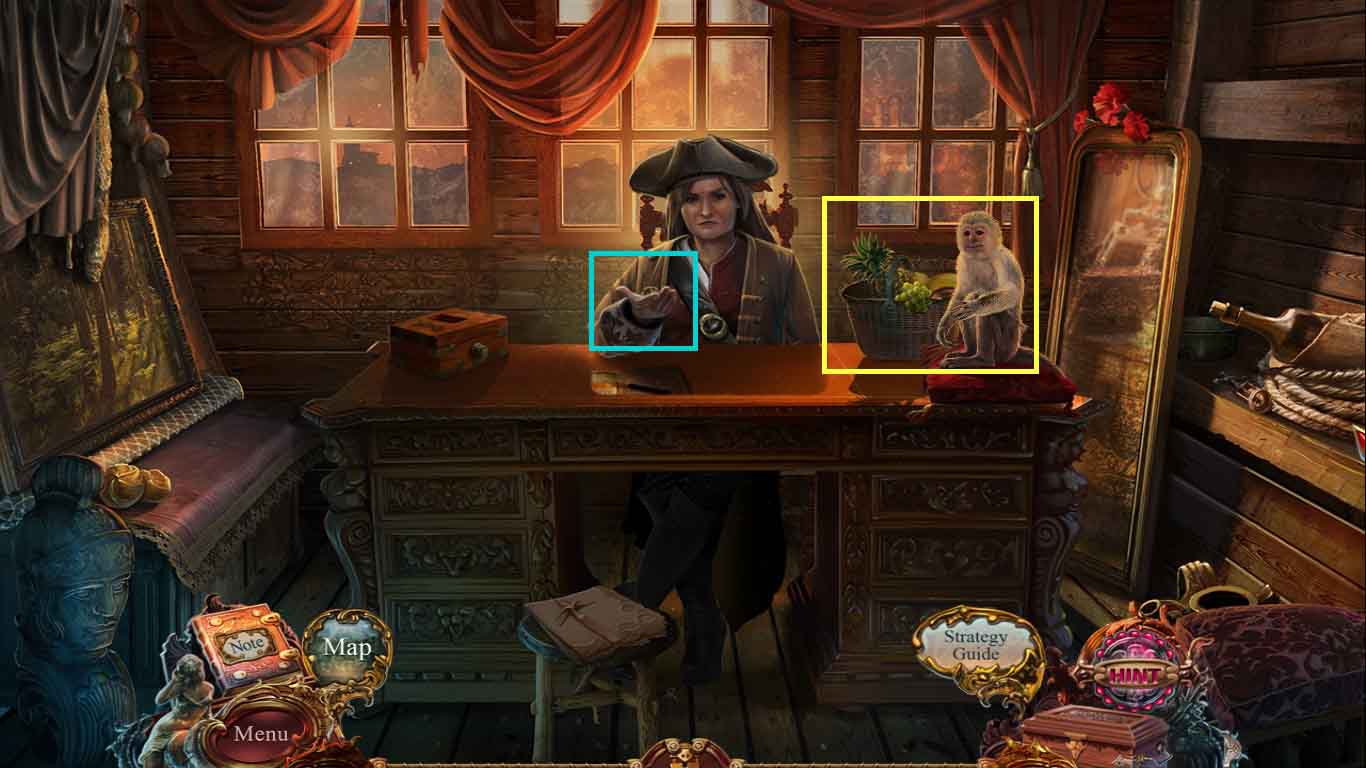
- Examine the monkey and give him the fruit basket.
- Collect the 2 / 2 mermaid from the Captain.
- Move to the pier.
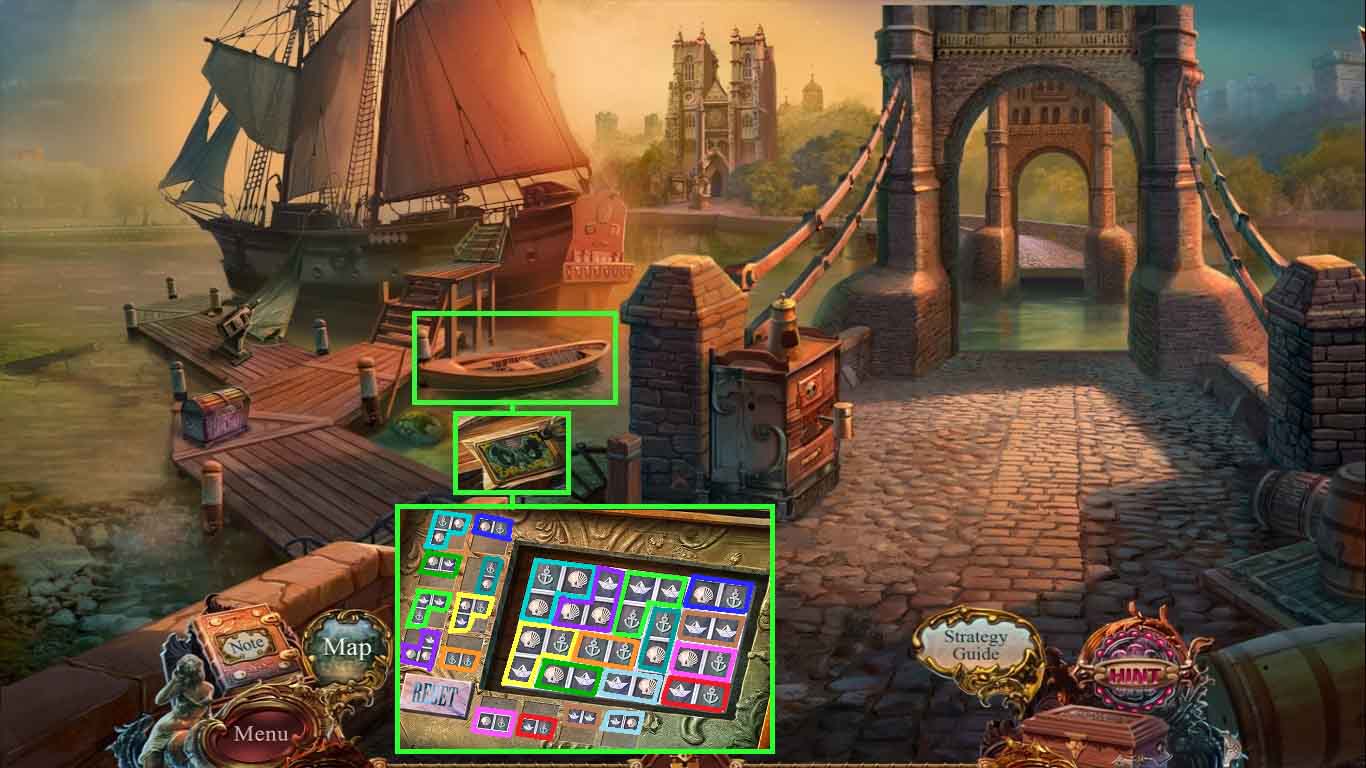
- Examine the boat and zoom into the compartment.
- Insert the 2 mermaids to trigger a puzzle.
- To solve the puzzle insert the tiles into the slots with the matching symbols.
- Move to the memorial.
- Click the hidden objects area.
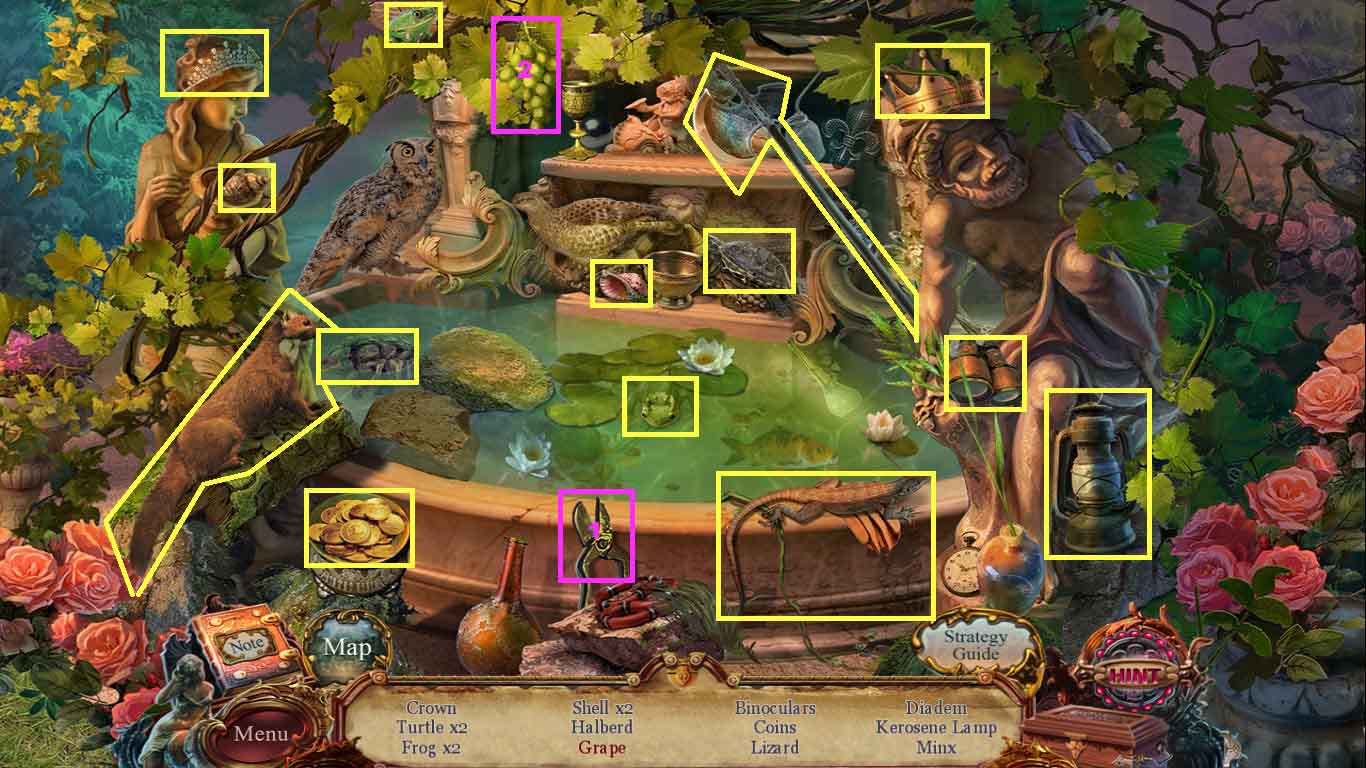
- Find the listed items.
- Select the pliers and use them to cut and collect the grapes.
- Collect the crown.
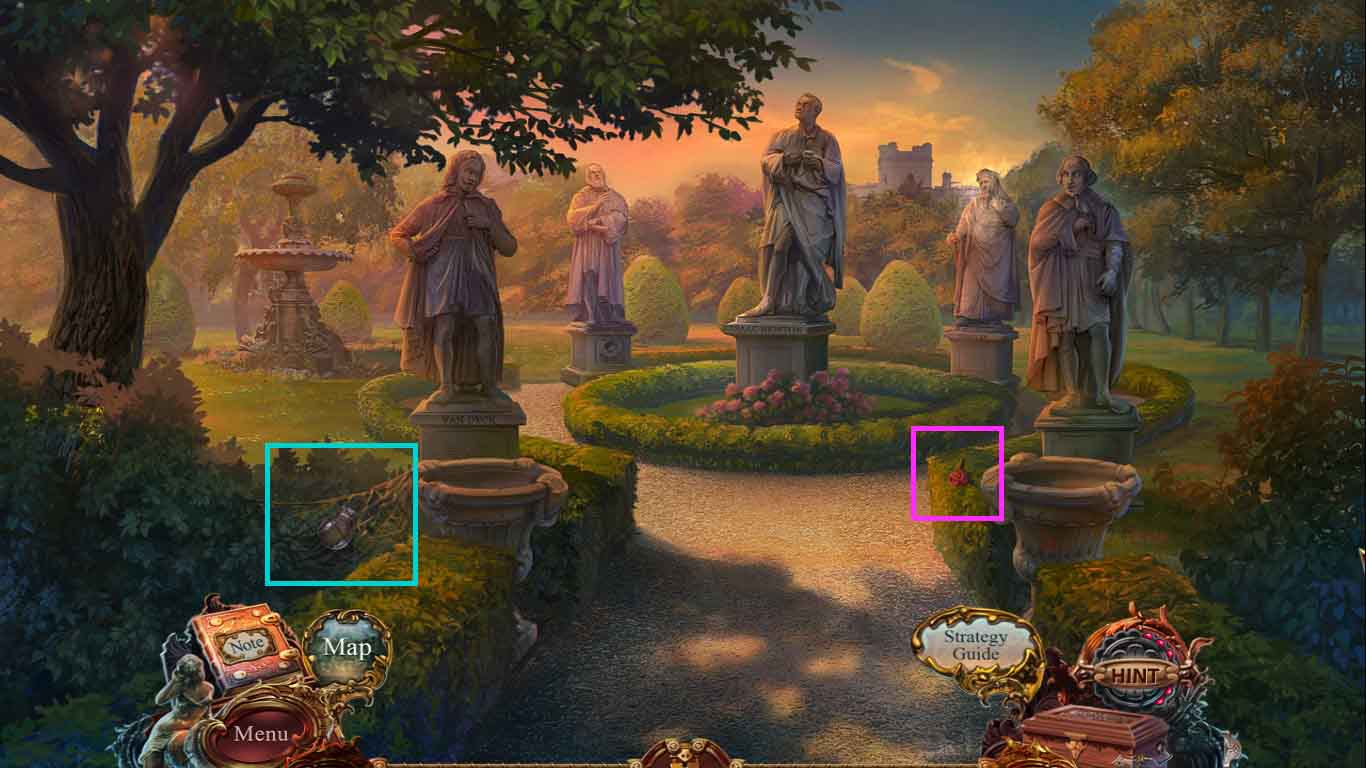
- Collect the red rose.
- Examine the net and use the pruners to cut it.
- Collect the flask.
- Move down one time.
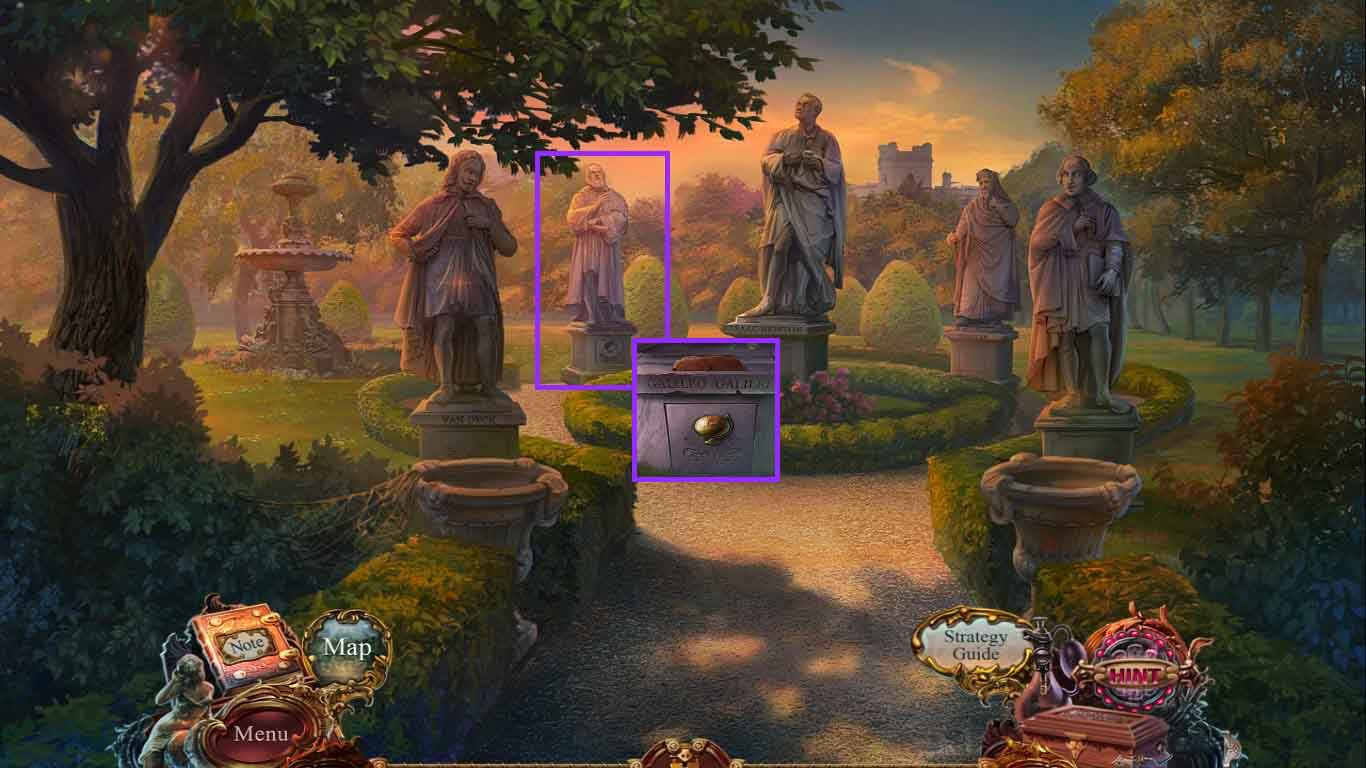
- Examine the statue and collect the clover.
- Move to the pier.
- Examine the chest and insert the red and white roses.
- Read the note and collect the lion paw.
- Move to the Abbey Courtyard.
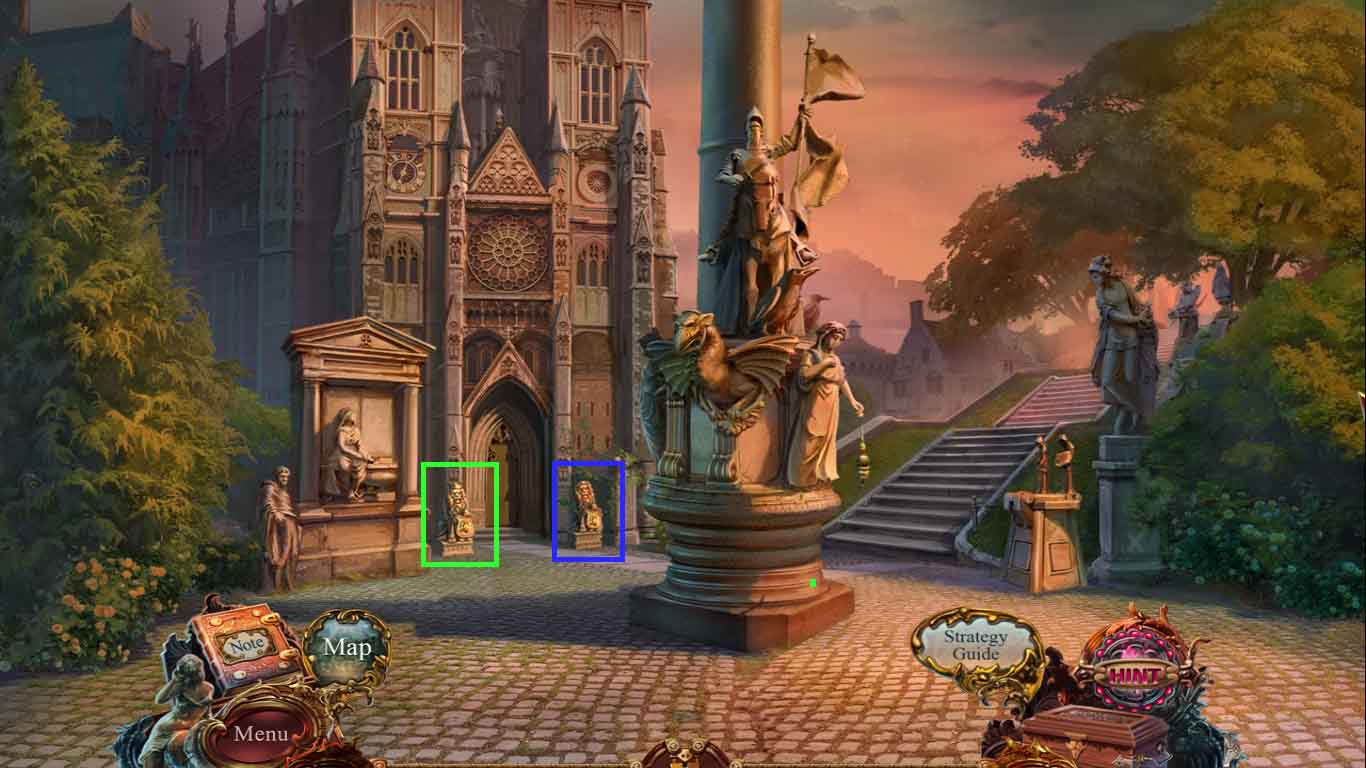
- Examine the lion statue on the right and place the crown and crest part onto the statue.
- Examine the other lion statue and attach the lion paw.
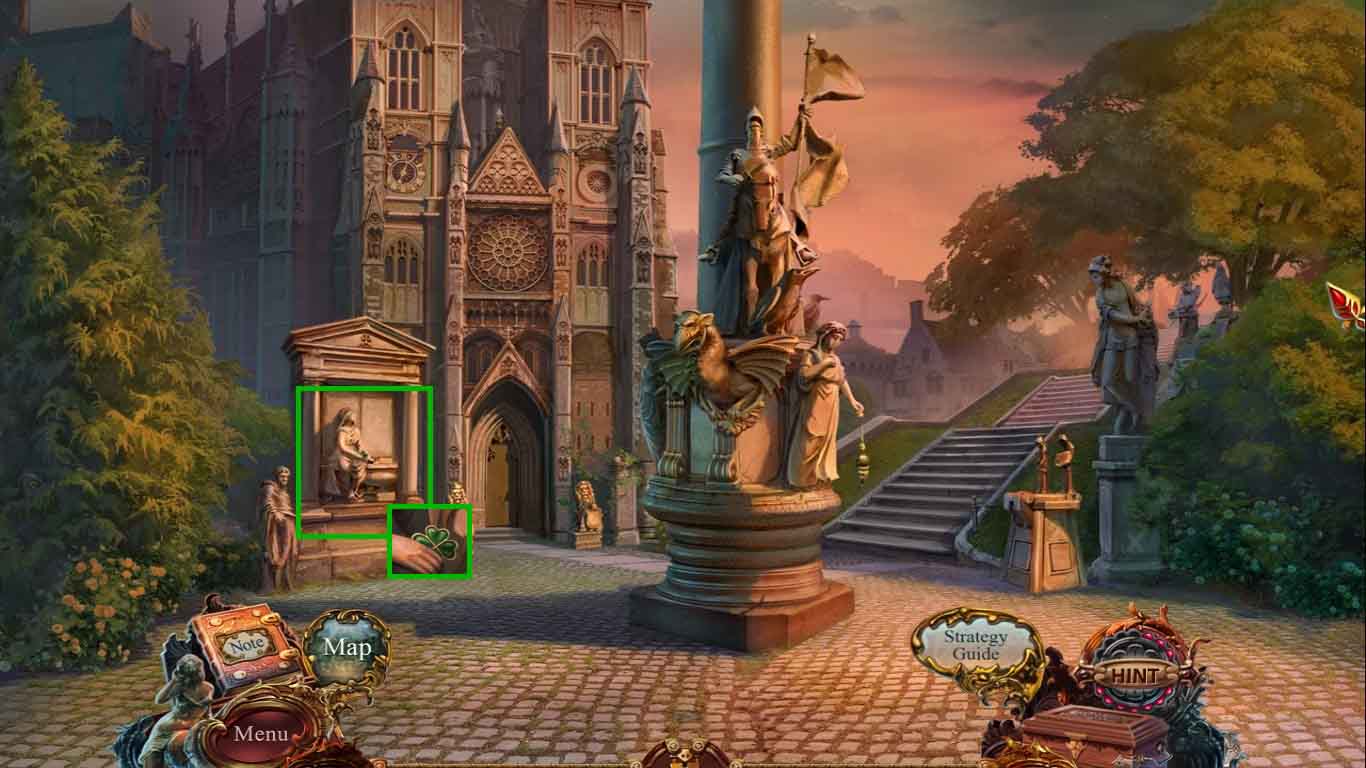
- Move into the Abbey.

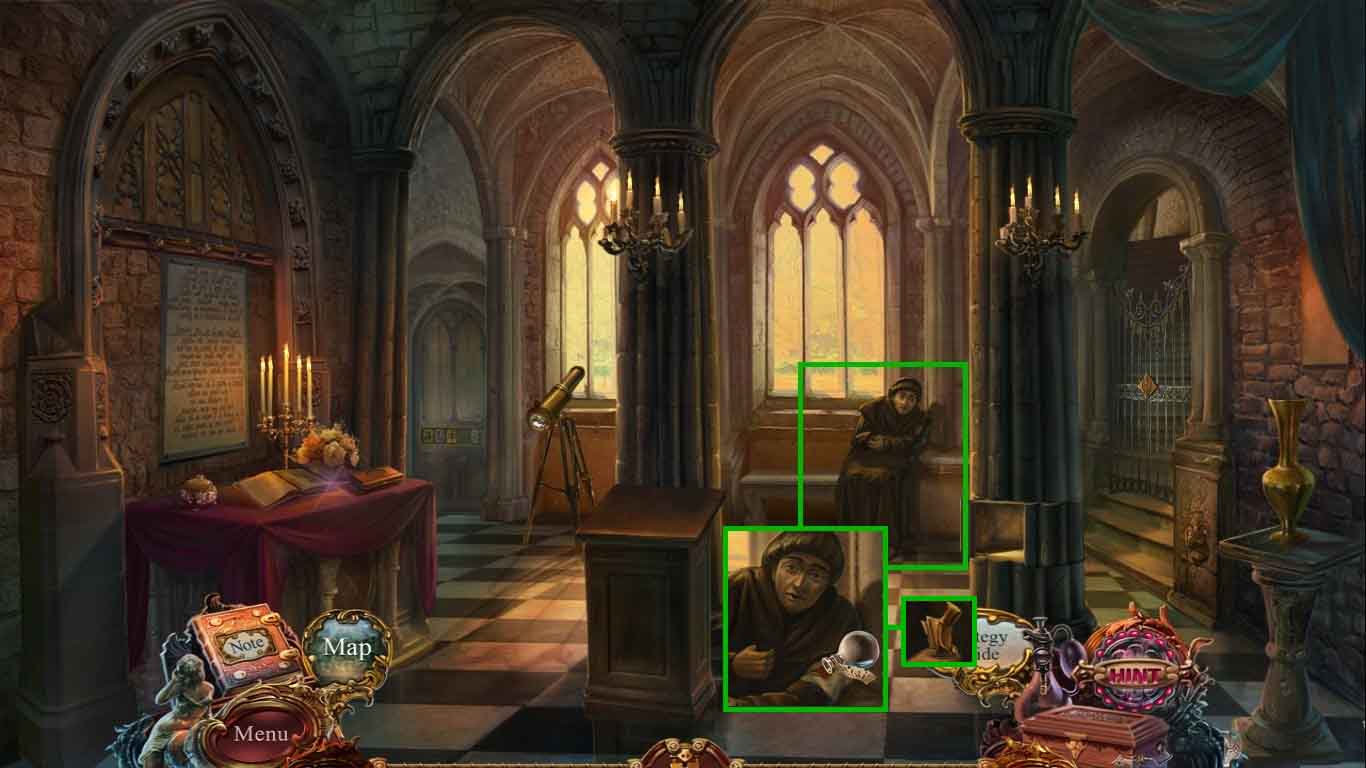
- Collect the book.
- Speak to the man.
- Move to the memorial.
- Examine the statue and lay the book down.
- Collect the raven.
- Move down once.

- Examine the statue; place the raven onto the column.
- Examine the opening; collect the lens.
- Move into the Abbey.

- Examine the telescope and attach the lens.
- Examine the column and read the note.
- Attach the flask, the broken scent catcher parts and the broken scent catcher.
- Collect the scent catcher.
- Move to the London entrance.

- Select the scent catcher (1) and click the chamomile scent to collect it (2).
- Move ahead.
- Select the scent catcher (1) and click the poisoned-water scent to collect it (2).
- Move into the medical tent.
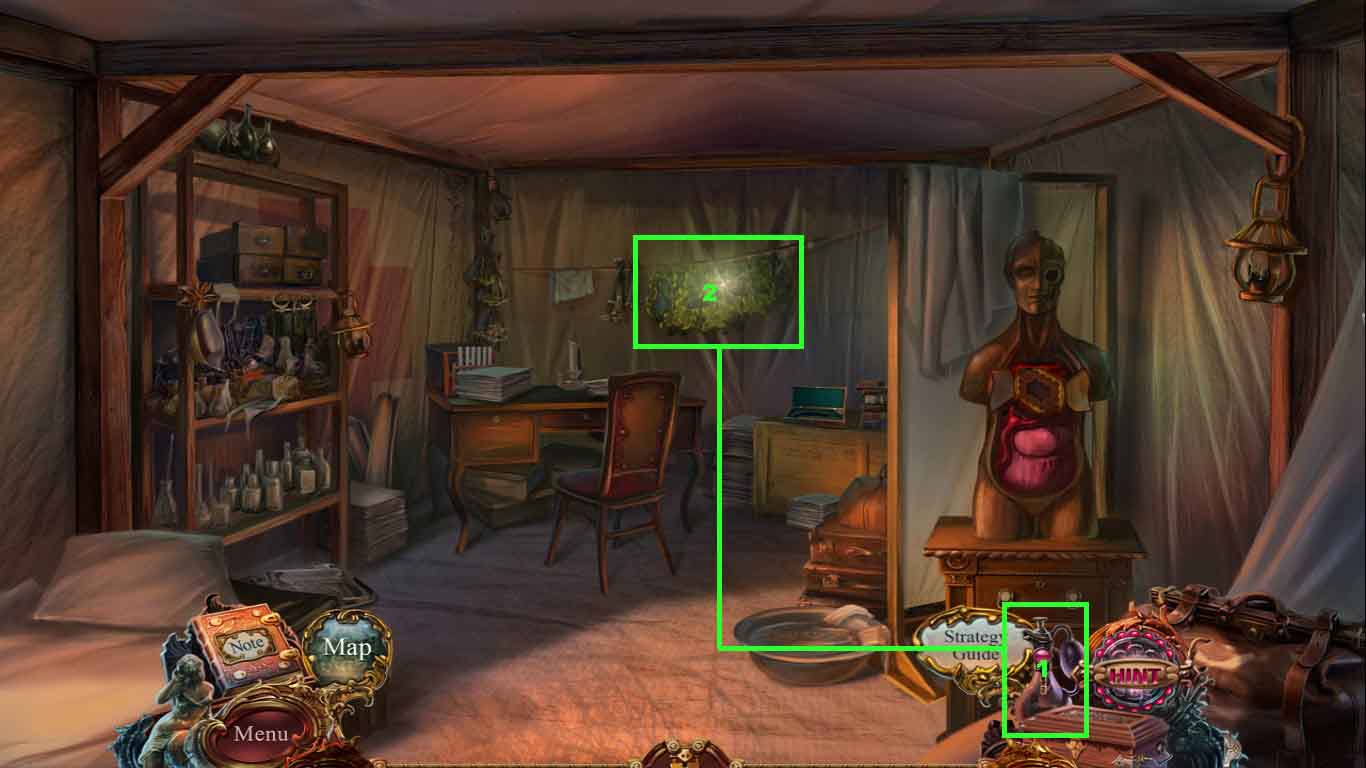
- Select the scent catcher (1) and click the mint scent to collect it (2).
- Move to the pier.
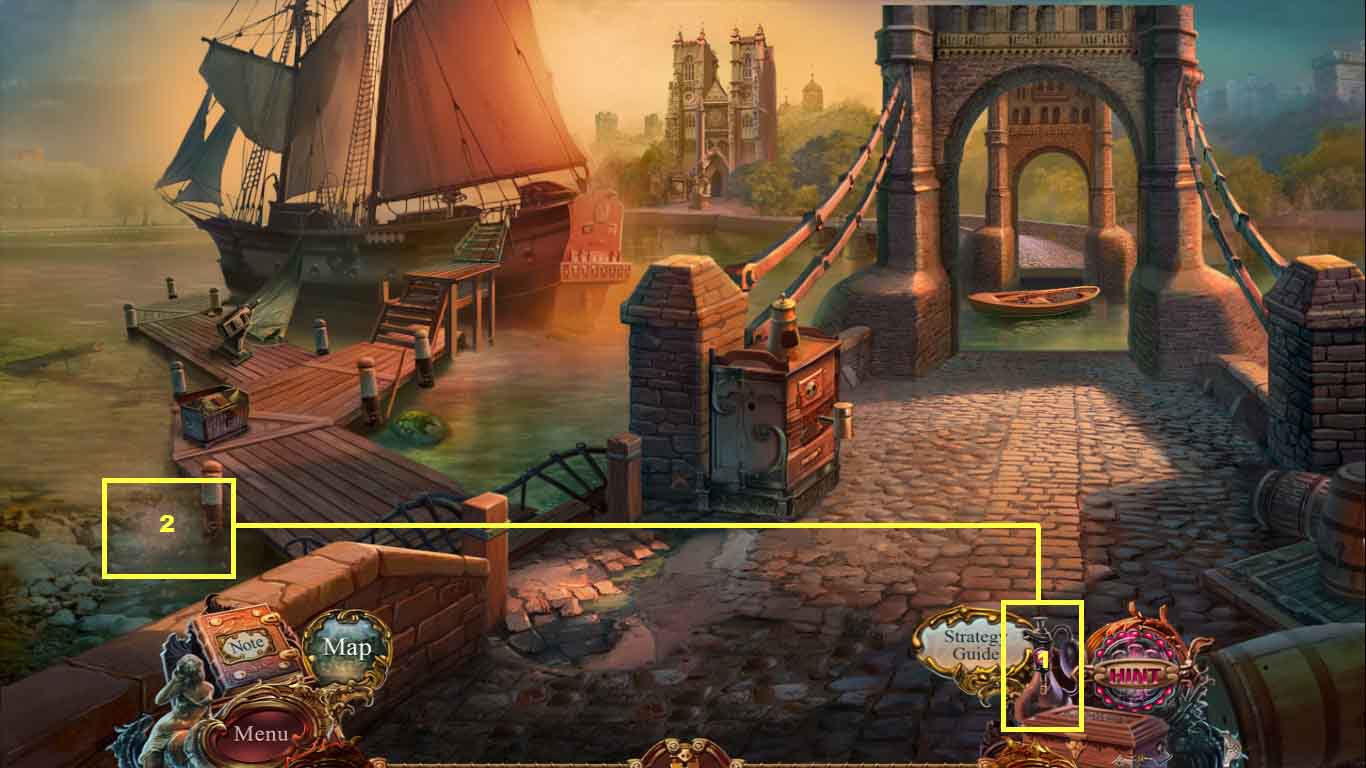
- Select the scent catcher (1) and click the iodine scent to collect it (2).
- Move to the ship’s deck.
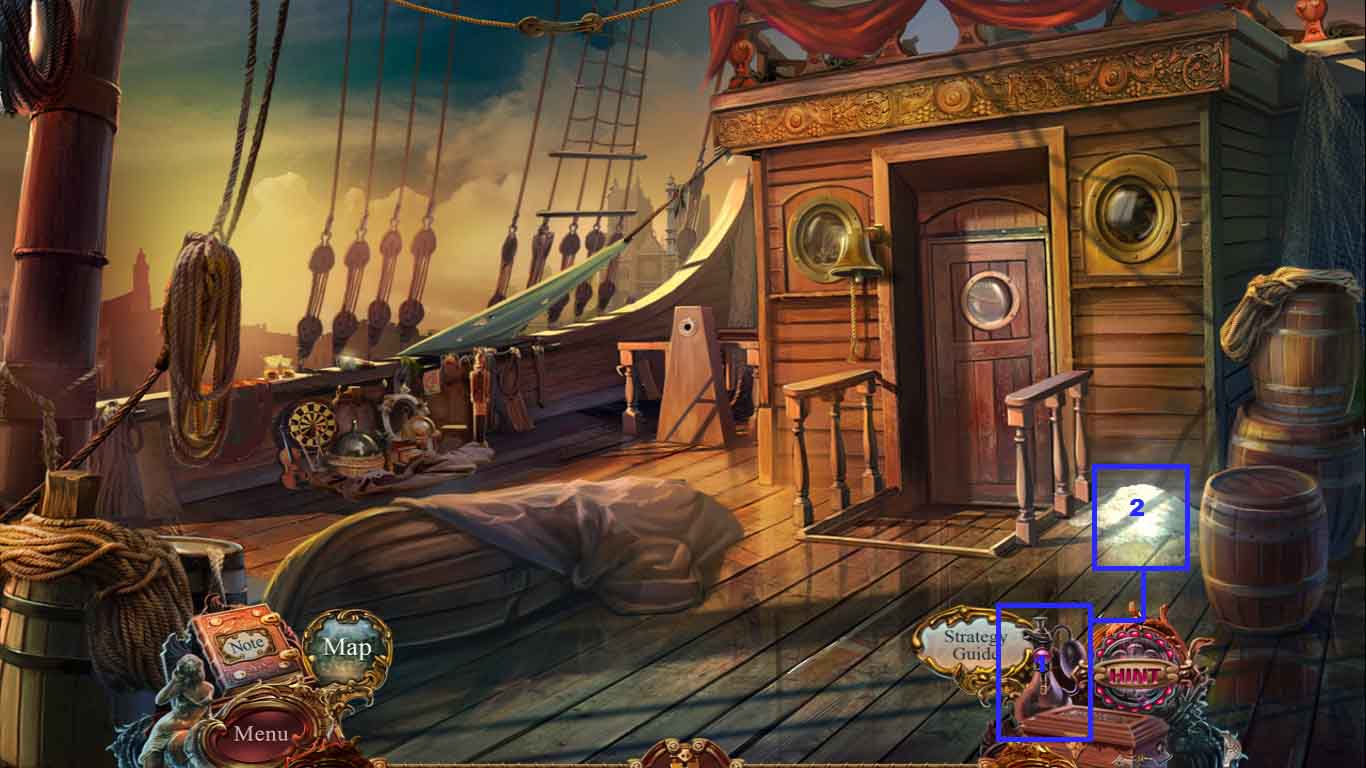
- Select the scent catcher (1) and click the sea-salt scent to collect it (2).
- Move to the memorial.
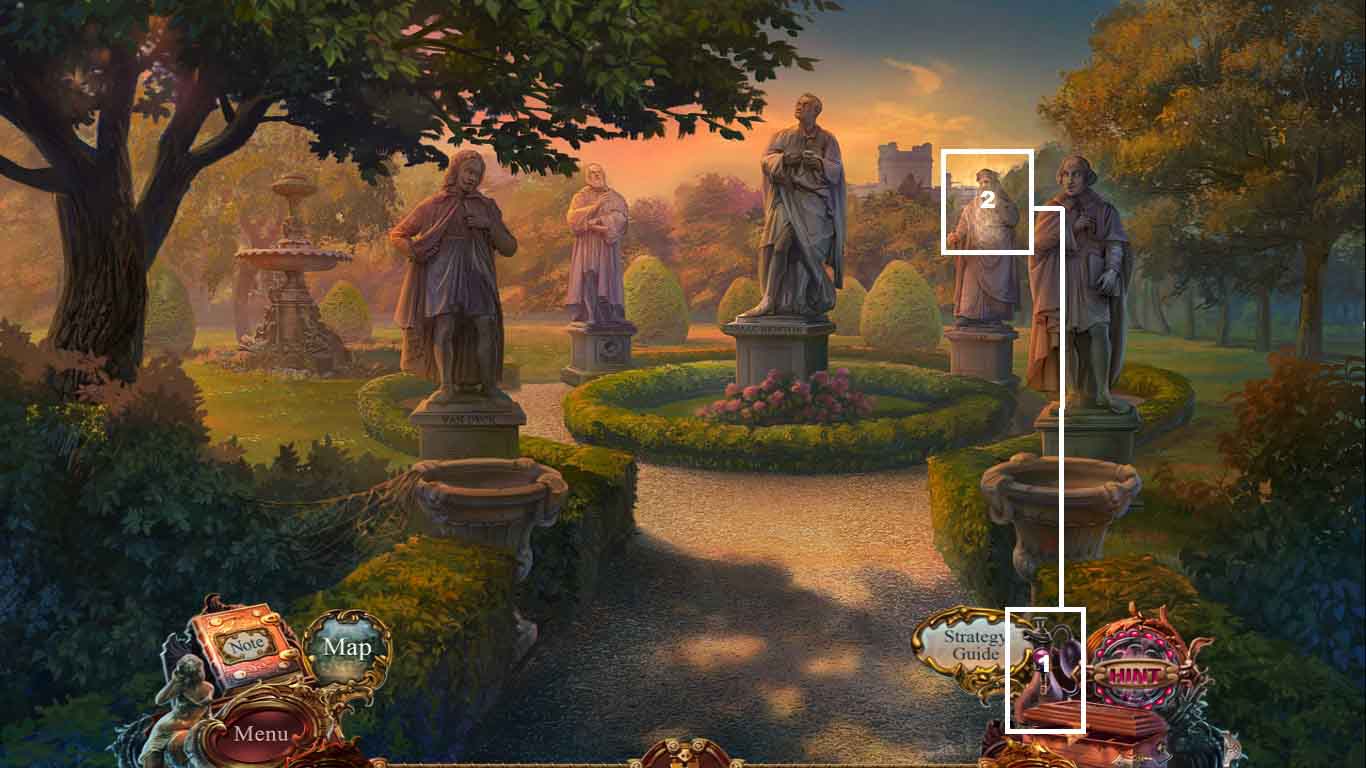
- Select the scent catcher (1) and click the archaic scent to collect it (2).
- Move into the Abbey.
- Select the scent catcher (1) and click the sanctity scent to collect it (2).
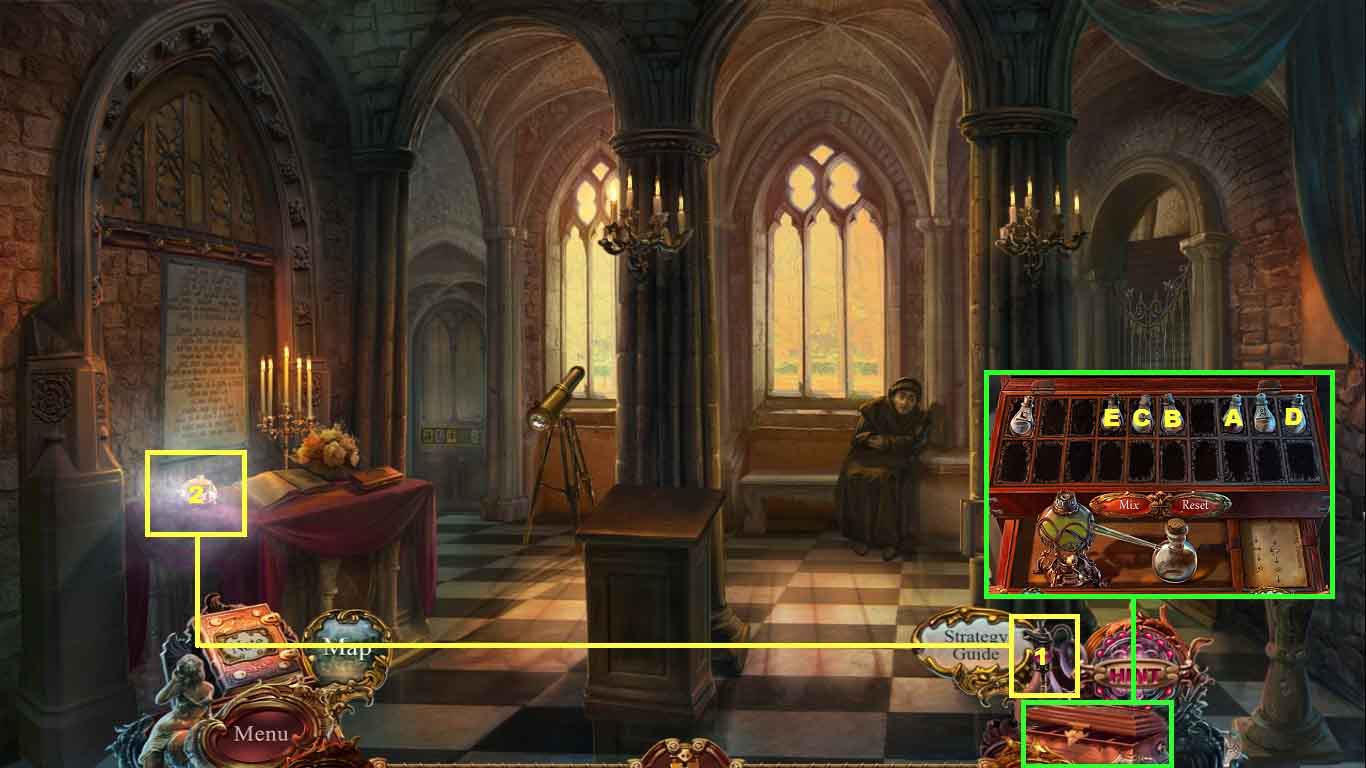
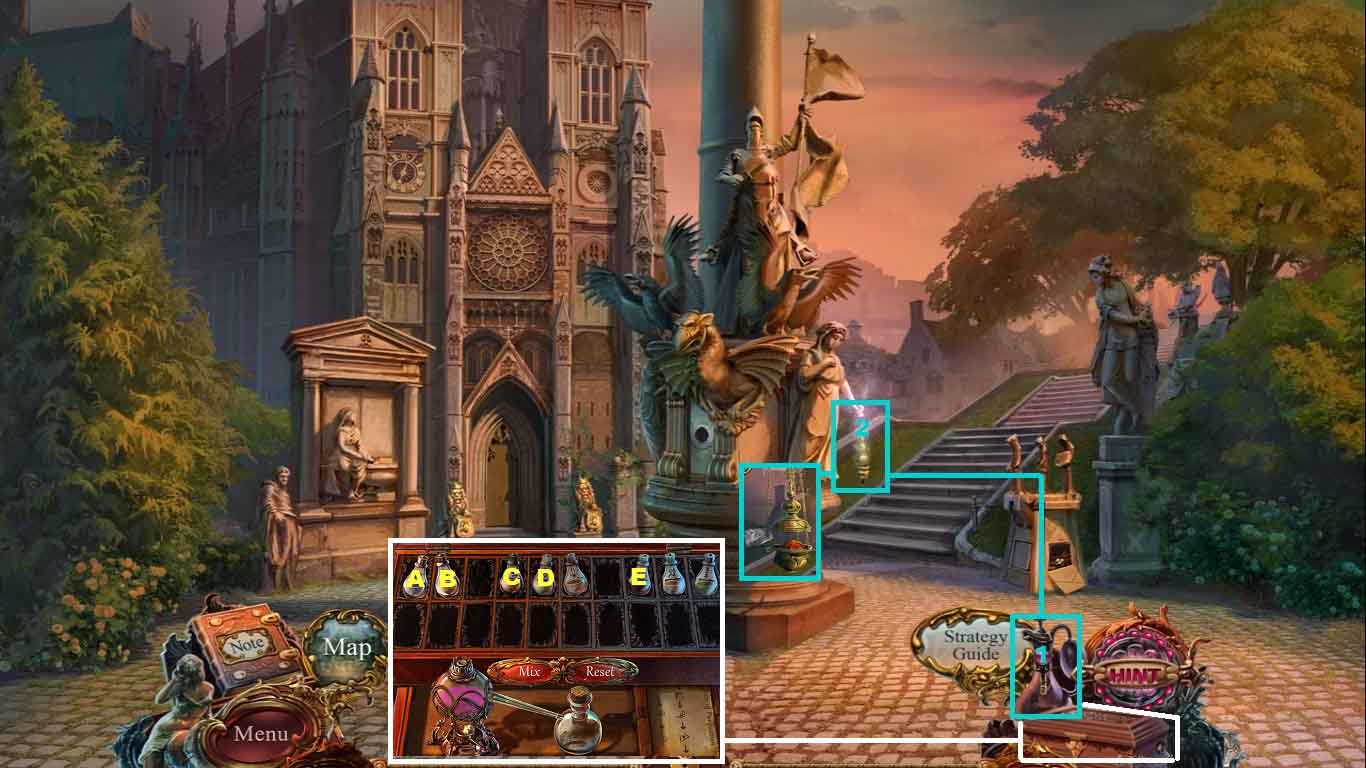
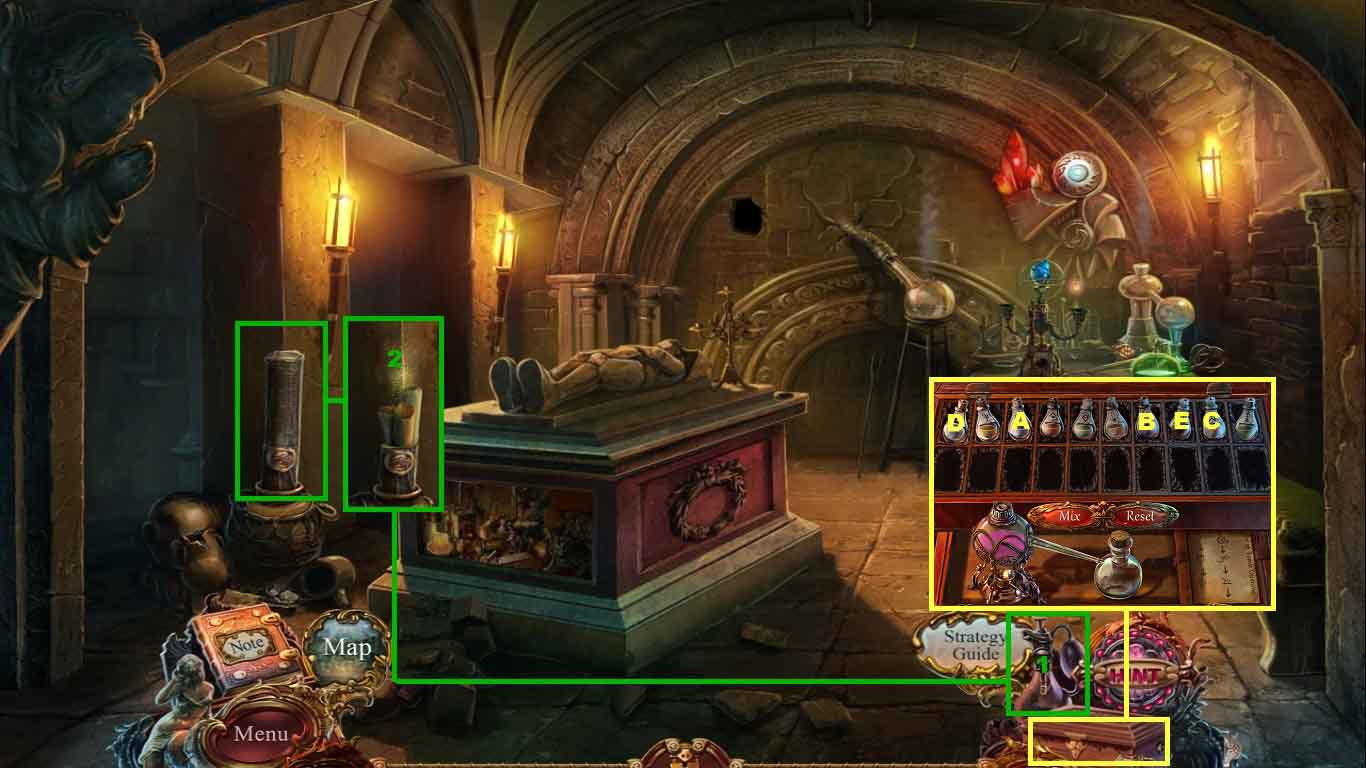
- Click the alchemy kit.
- Pour the scents (A-E) into the flask and click the mix button.
- Collect the curing tincture.
- Examine the man and bandage his wound.
- Pour the curing tincture onto the wound.
- Collect the monk figurine.
- Move down one time.
- Examine the device; insert the monk figurine.
- Collect the globe.
- Move to the memorial.
- Examine the 2nd statue; insert the globe.
- Collect the plate with symbol.
- Move into the Abbey.
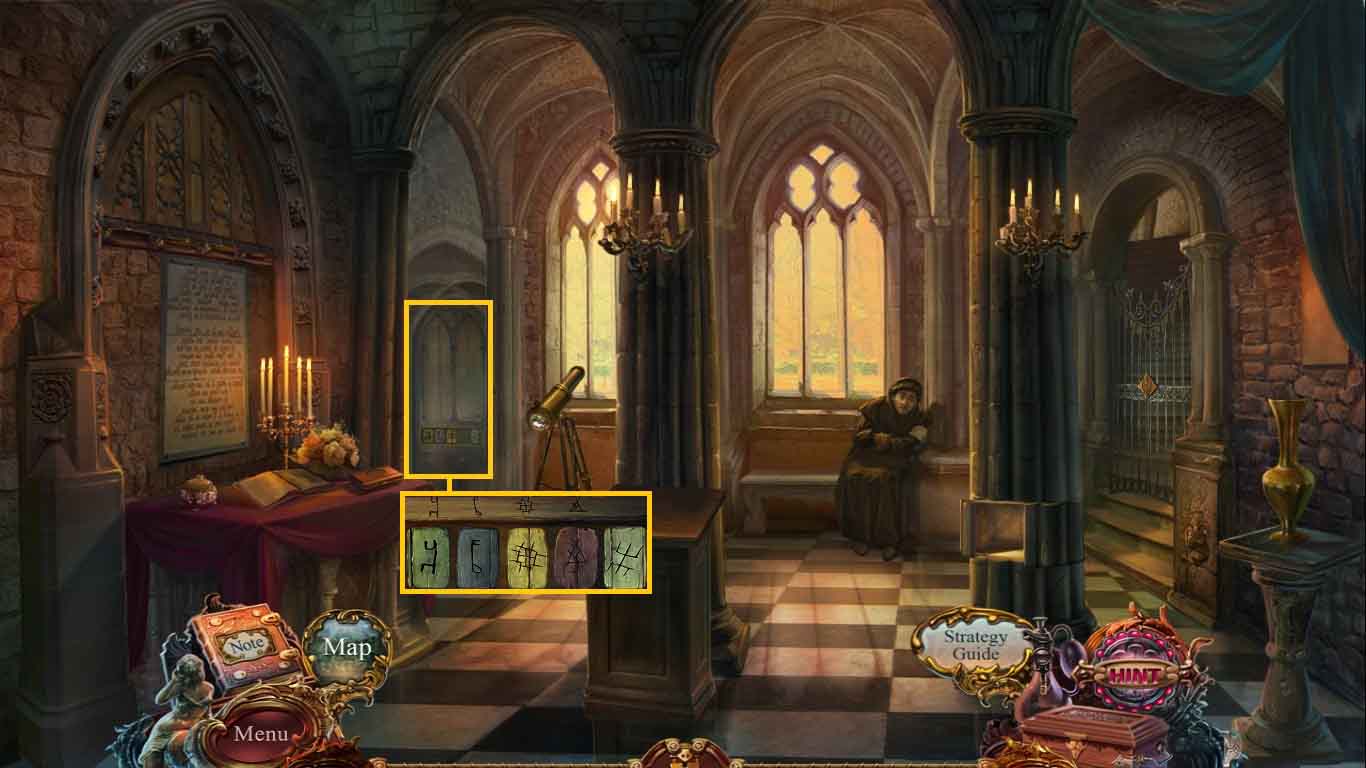
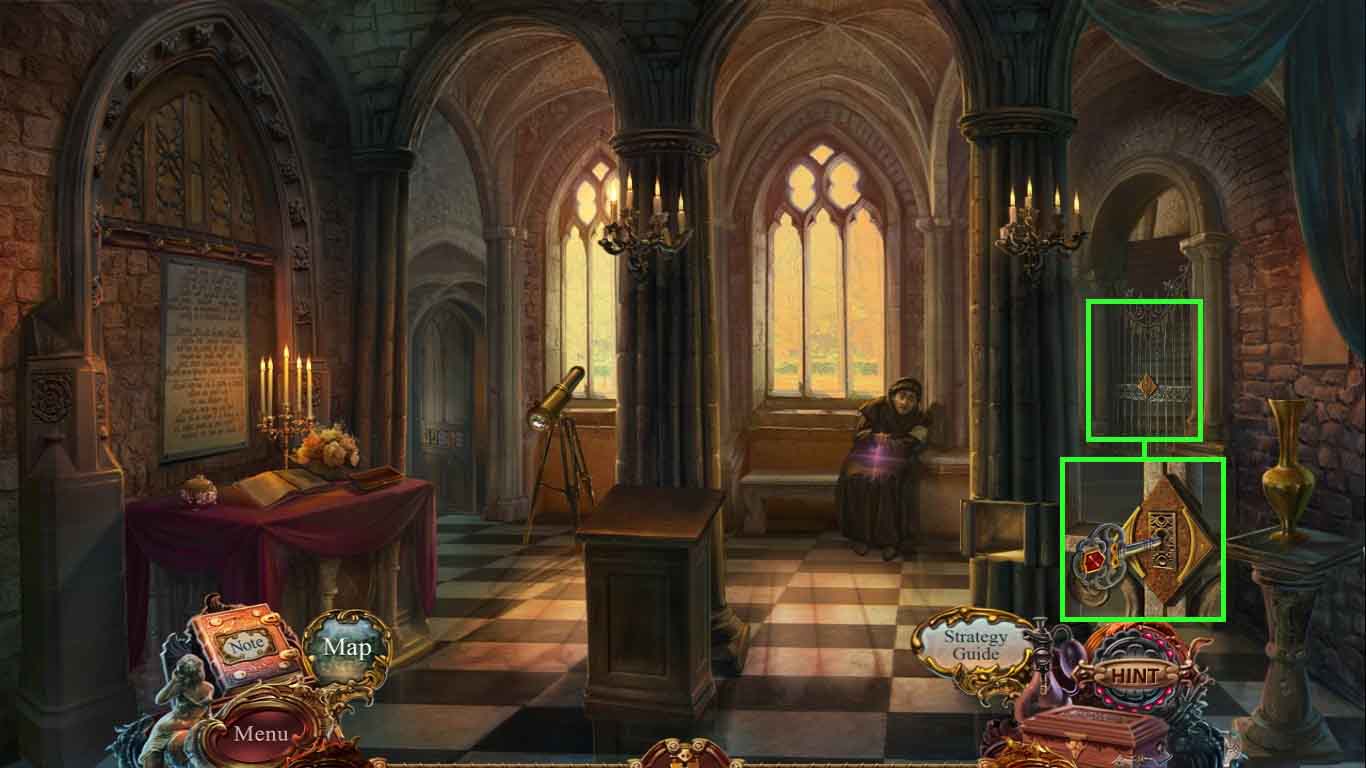
- Examine the door; insert the plate with symbol into the gap.
- Move the plates into the correct positions.
- Go into Newton’s tomb.
- Collect the box key.
- Click the plate.
- Move down one time.
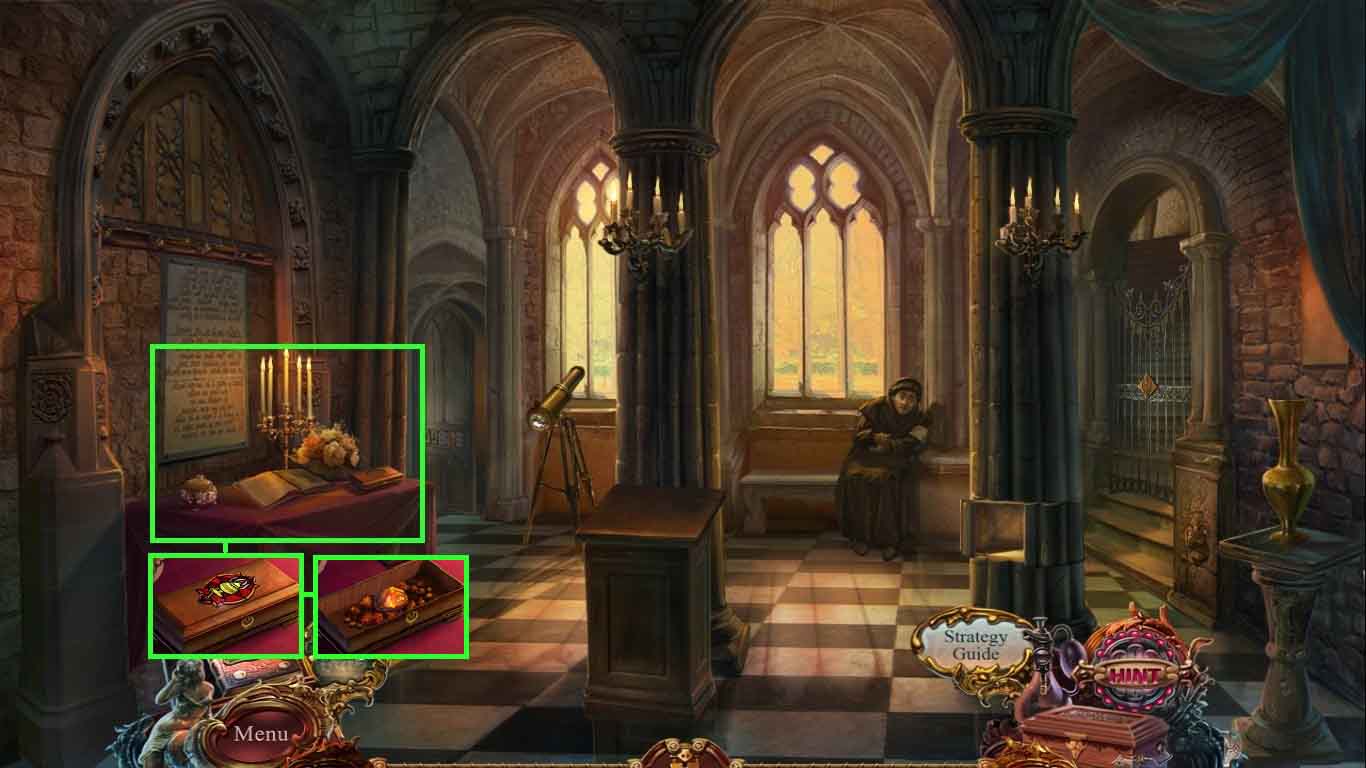
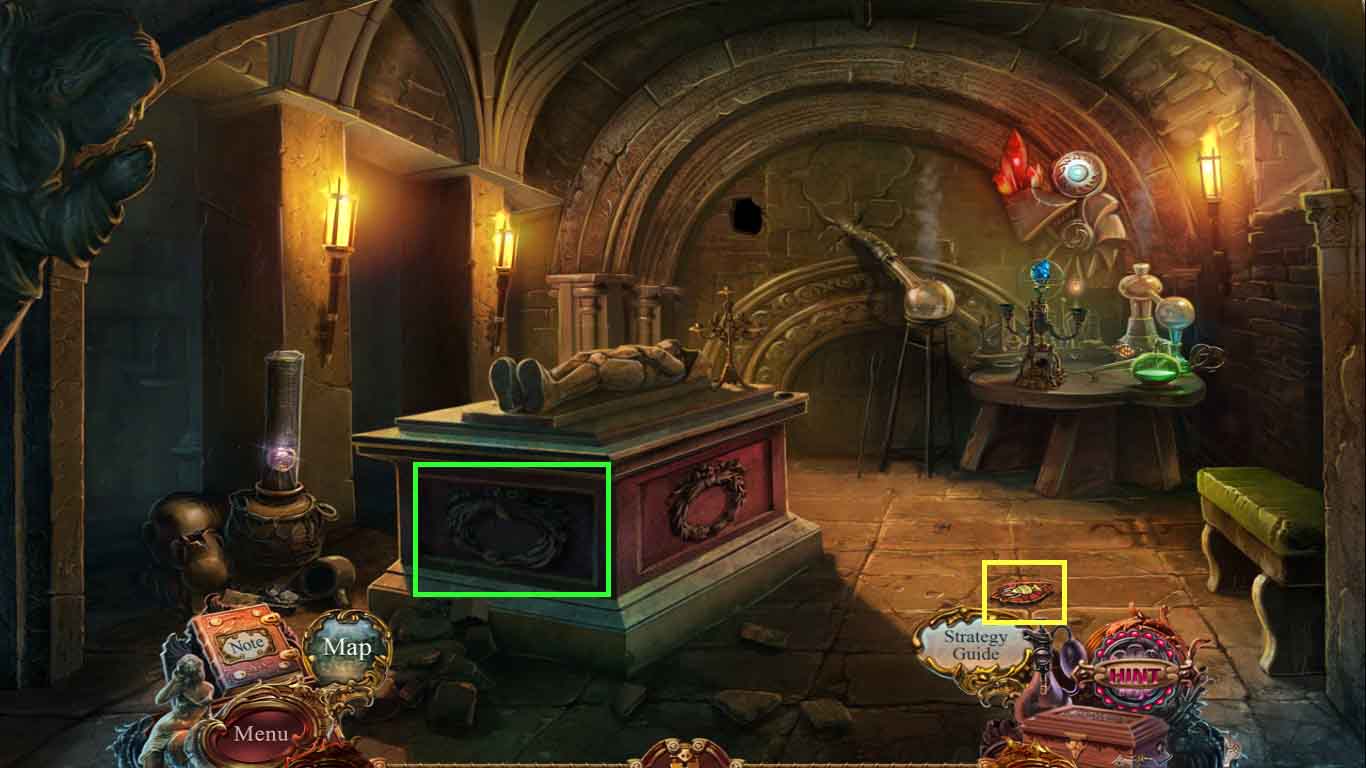
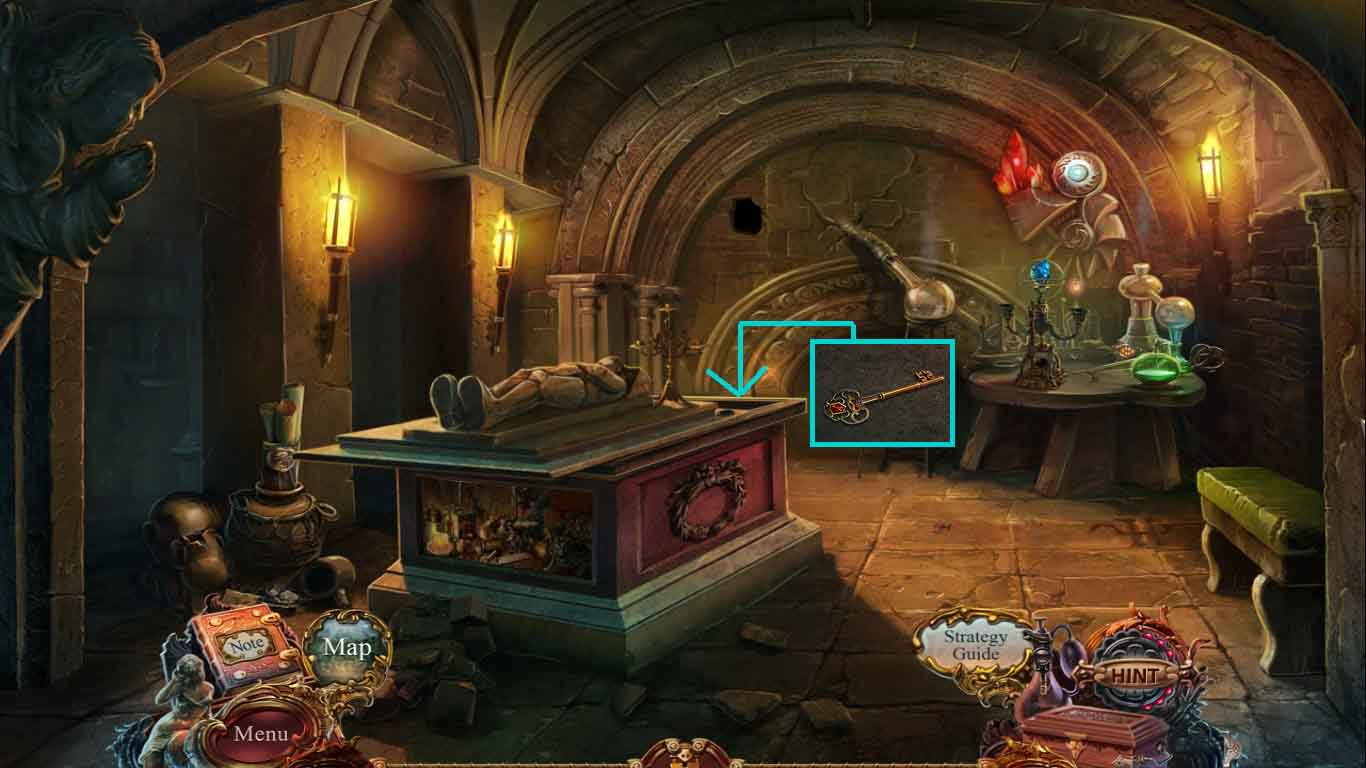
- Examine the altar and insert the box key.
- Click the box open and collect the Myrrh.
- Go into Newton’s tomb.
- Click the hidden objects area.
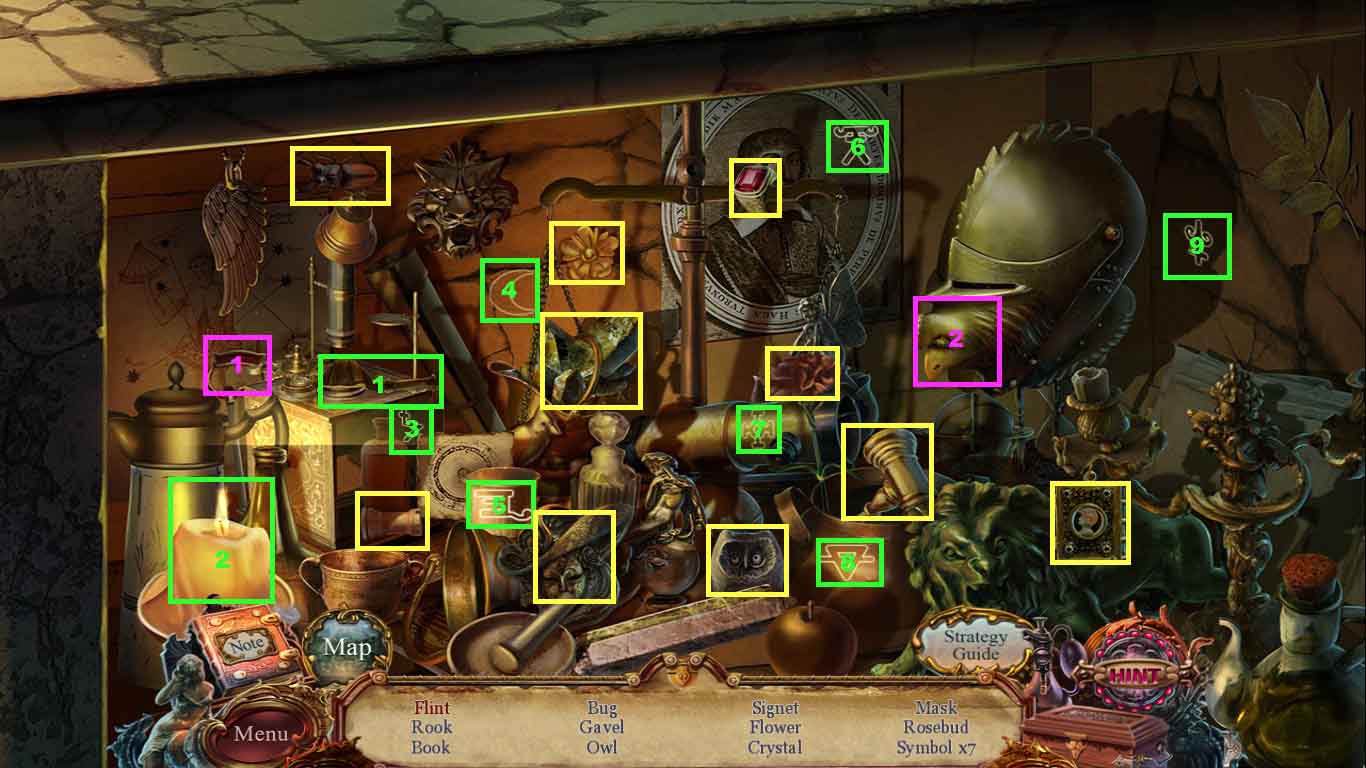
- Find the listed items.
- Select the cover and place it onto the candle.
- Collect the 7 symbols.
- Select the saw, click the front of the helmet and collect the flint.
- Move down one time.
- Examine the monk and collect the elixir of purification recipe.
- Move down one time.
- Examine the censer and insert the Myrrh.
- Use the flint to light the Myrrh.
- Click the scent catcher (1) and use it to collect the incense scent (2).
- Click the alchemy kit.
- Pour the scents (A-E) into the flask and click the mix button.
- Collect the elixir of purification.
- Move to the embankment.
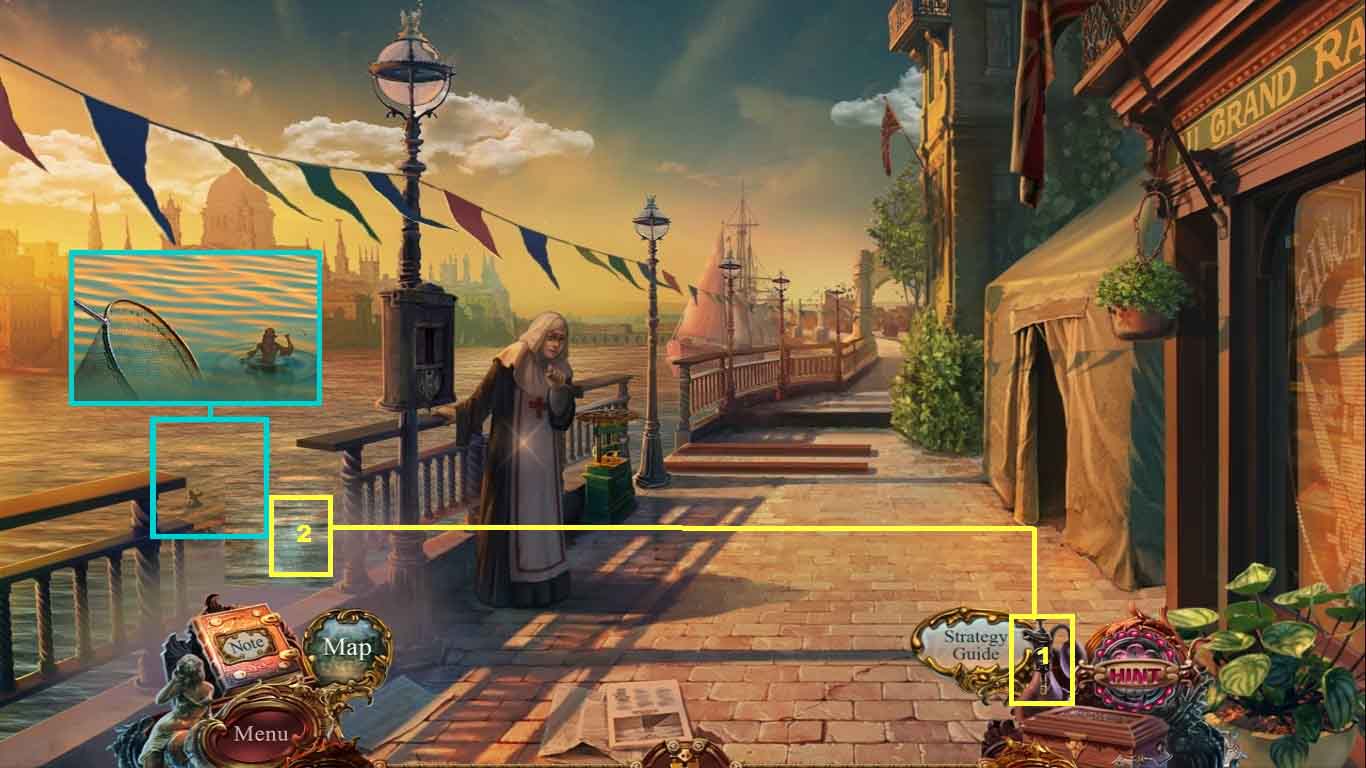
- Zoom into the water.
- Toss the elixir of purification into the water.
- Place the scoop net into the water and collect the Neptune statue.
- Click the scent catcher (1) and use it to collect the clean water scent (2).
- Move to the Captain’s cabin.
- Examine the box; insert the Neptune’s statue.
- Collect the elixir of tomb opening recipe and the brush.
- Move to the memorial.
- Examine the statue and place the brush into its hand.
- Collect the tube latch.
- Move to Newton’s tomb.
- Examine the tube and place the tube latch onto it.
- Click the scent catcher (1) and use it to collect the inspiration scent (2).
- Click the alchemy kit.
- Pour the scents (A-E) into the flask and click the mix button.
- Collect the elixir of tomb opening.
- Examine the tomb; pour the elixir of tomb opening onto the opening.
- Zoom into the tomb.
- Read the book and collect the stone apple and the 1 / 2 crystals.
- Move to the memorial.
- Examine the middle statue; attach the stone apple to it.
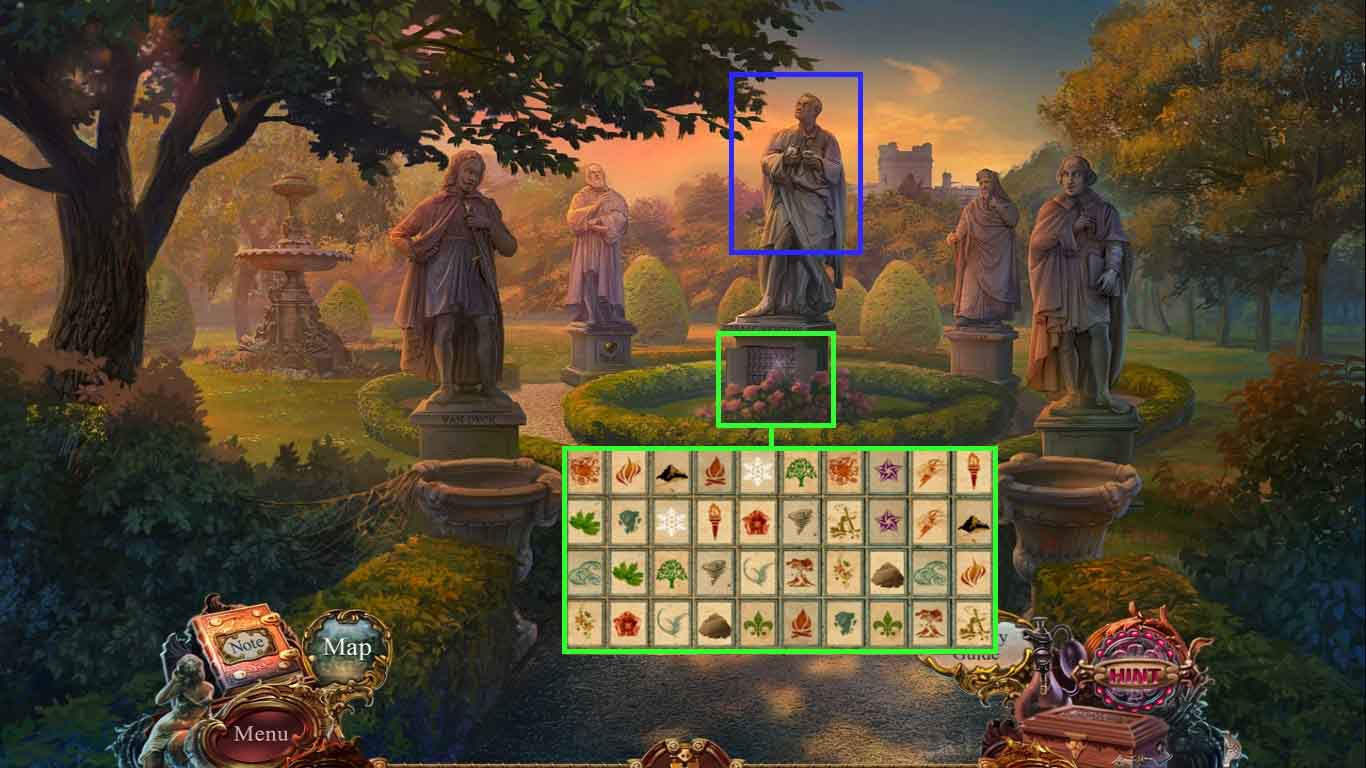
- Examine the secret compartment to trigger a mini-game.
- To solve the game match they pairs of symbols.
- Once the game is solved, click the hidden objects area.
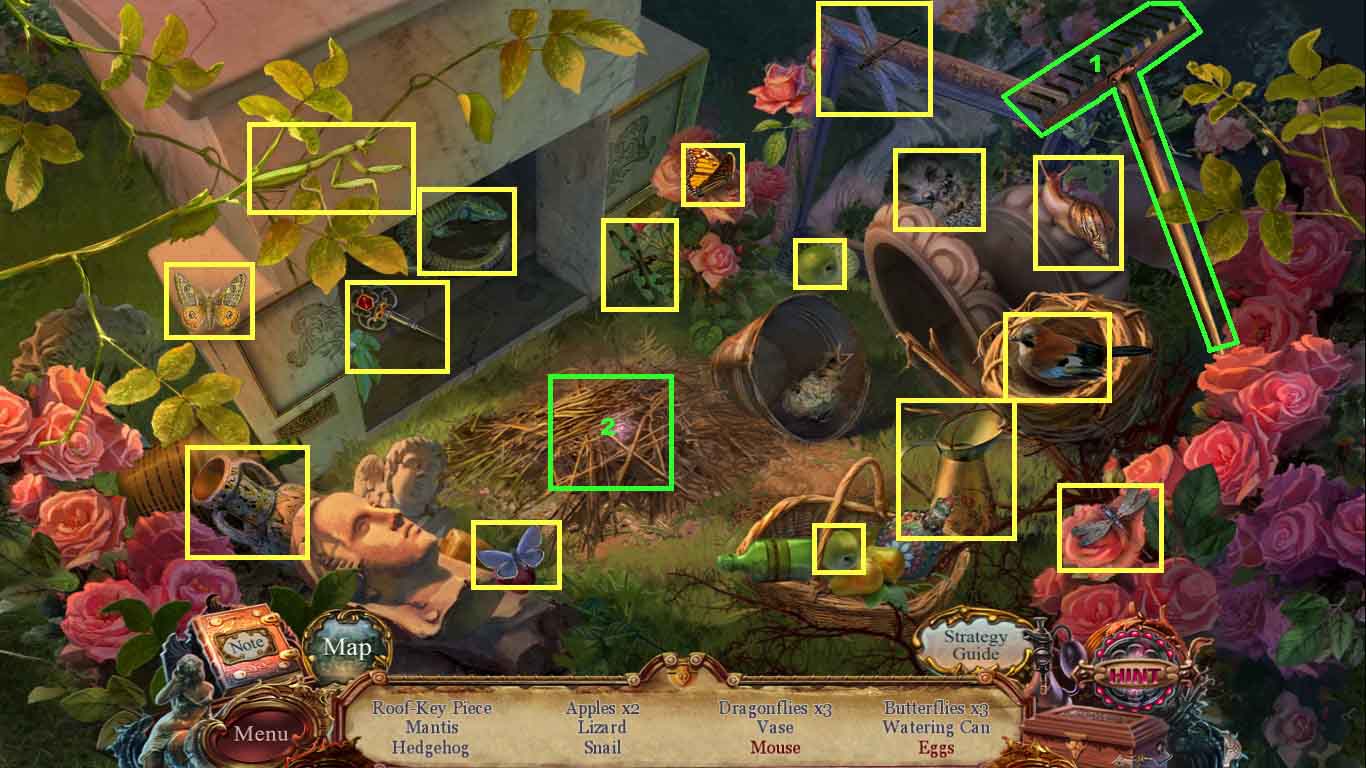
- Find the listed items.
- Select the rake; clear the branches with it and collect the mouse.
- Click the bird and collect the eggs.
- Collect the roof key piece.
- Go into Newton’s tomb.
- Examine the tomb.
- Attach the roof key piece to the other roof key piece and collect the complete roof key.
- Move down one time.
- Examine the gate.
- Insert the roof key into the lock and click it one time.
- Go onto the Abbey roof.
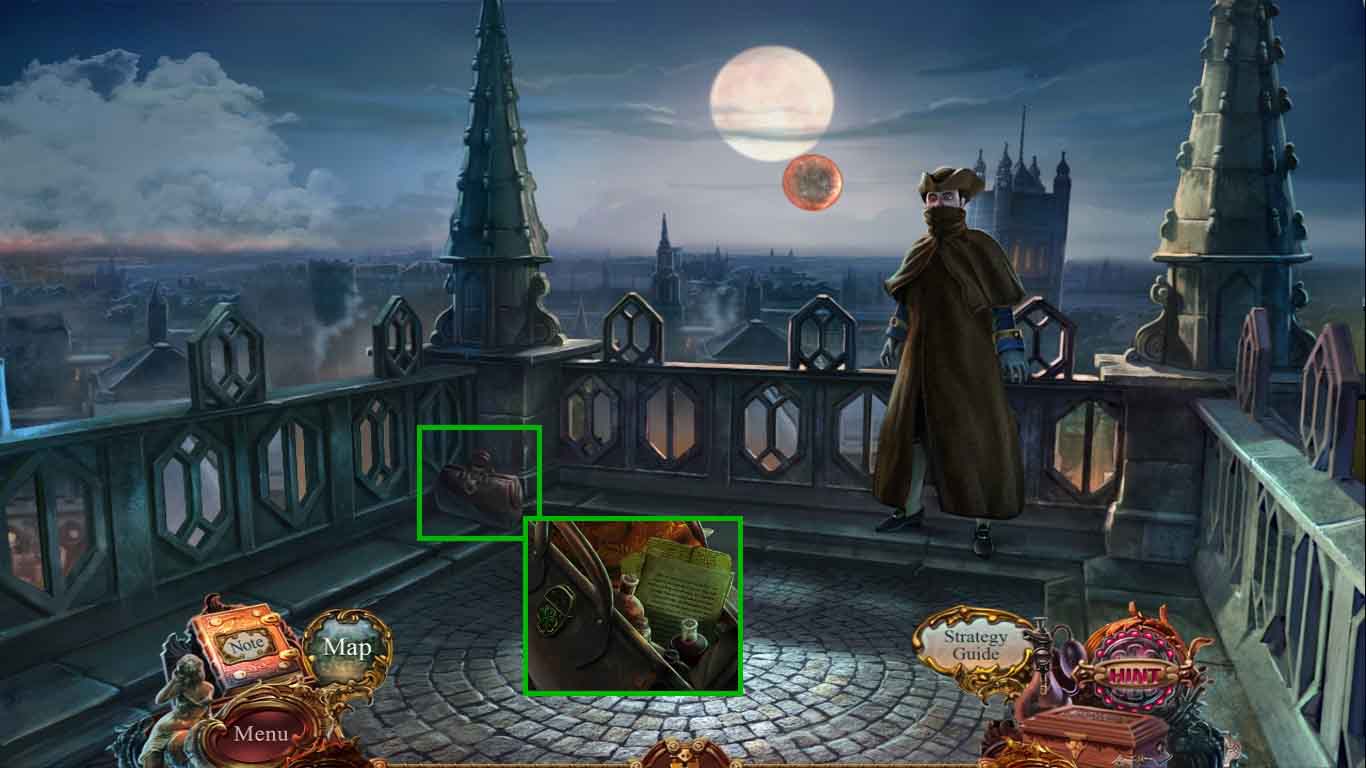
- Examine the bag; insert the clover.
- Read the notes and collect the 2 / 2 crystals.
- Move to Newton’s tomb.
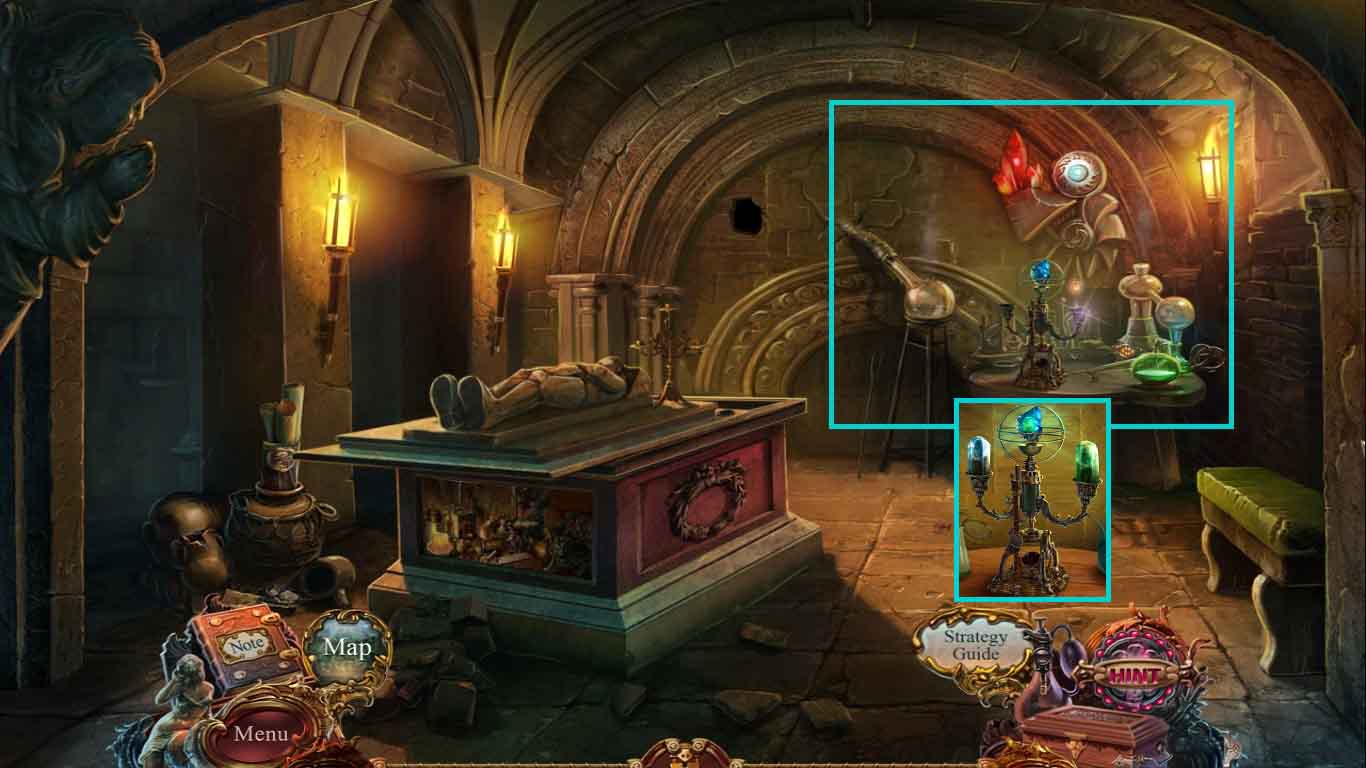
- Examine the alchemical device.
- Insert the 2 crystals into the holders.
- Use the gloves to collect the deactivator.
- Move to the Abbey roof.
- Place the deactivator near to the floating matter.
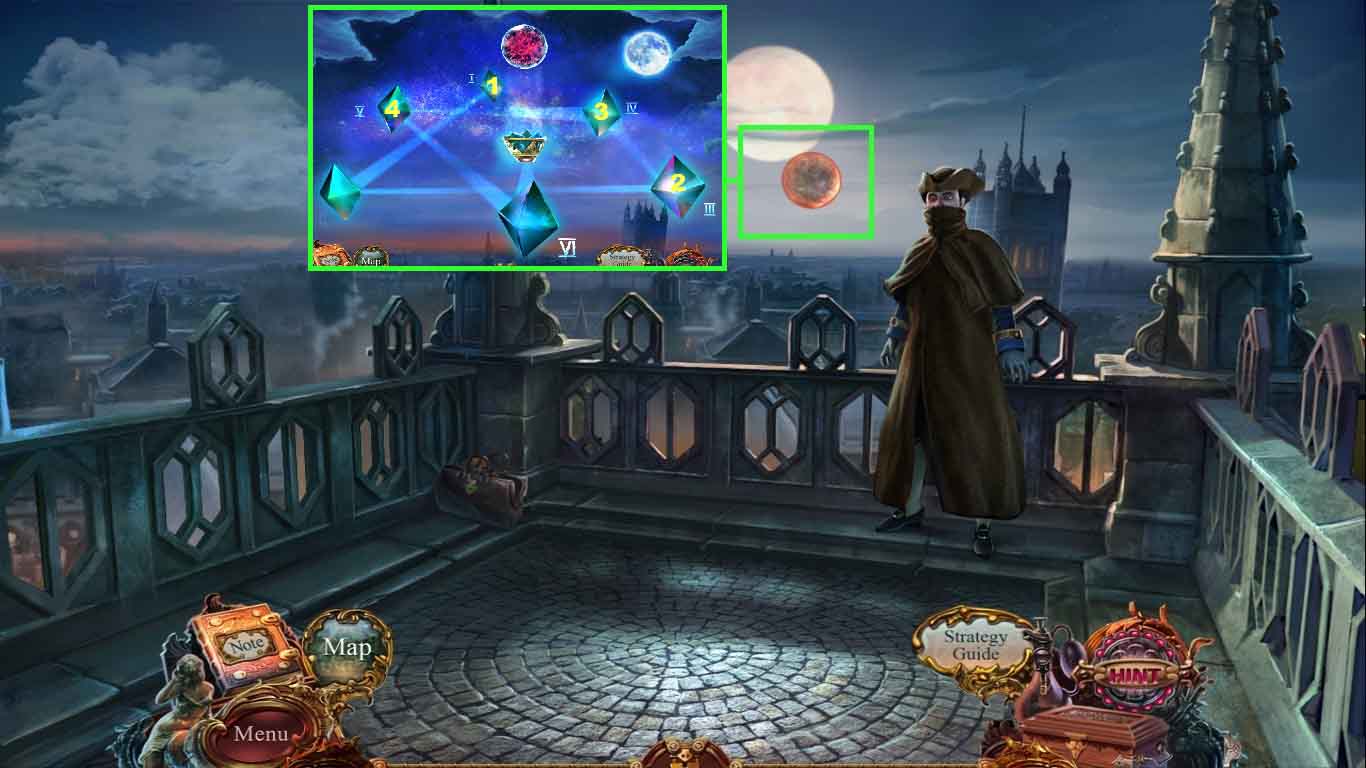
- A mini-game will trigger.
- Solve the puzzle by clicking the crystal in the following pattern:
- 1 – 2 – 3 – 3 – 4 – 4
- Congratulations! You have successfully completed European Mystery: Scent of Desire Collector’s Edition.