
Chapter Six: Secret
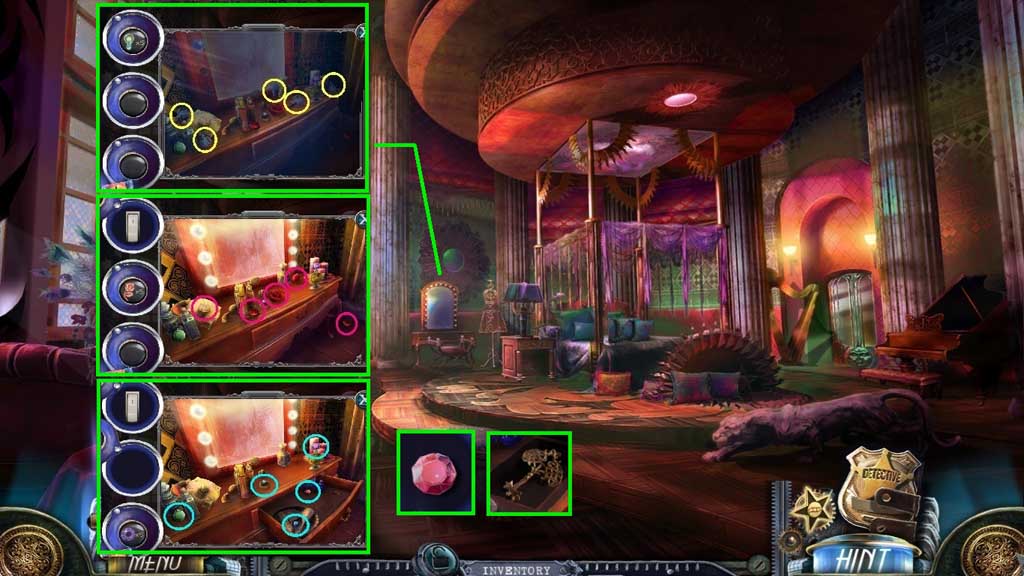
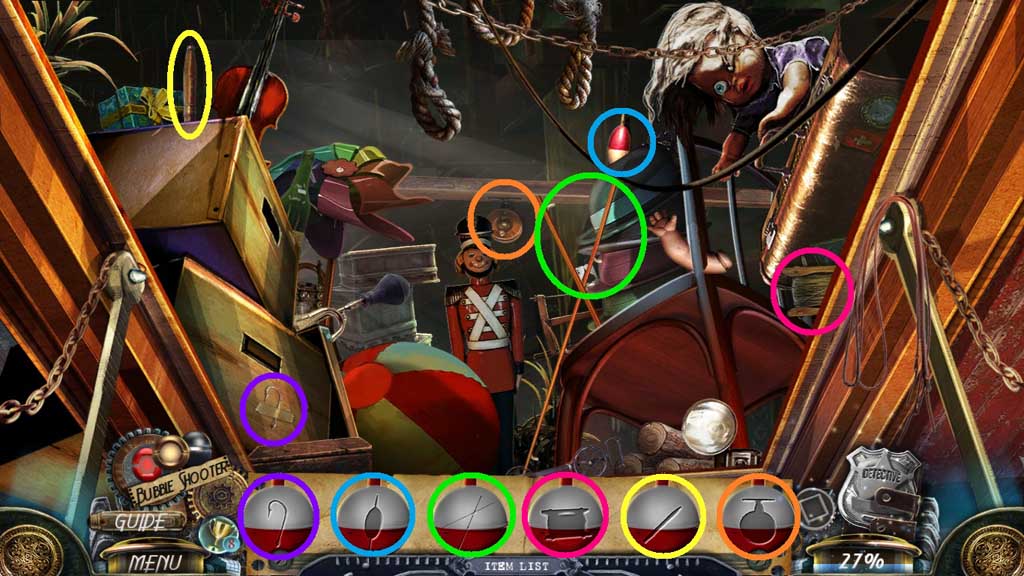
- Find the 5 bulbs.
- Click the light switch; find the 5 roses.
- Click the handle; find the 5 gems.
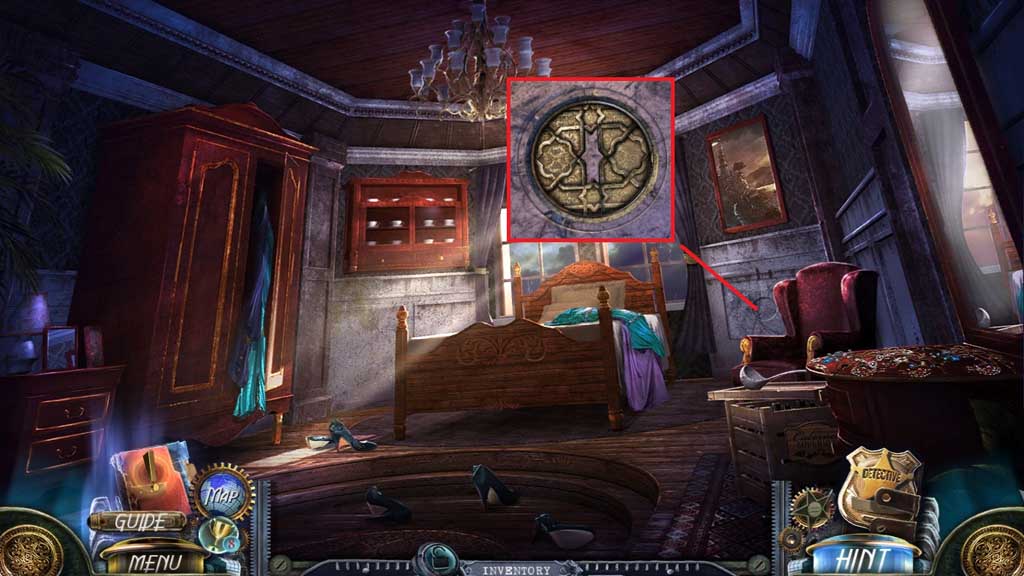
- Collect the gem and the diary key.
- Move to the right.
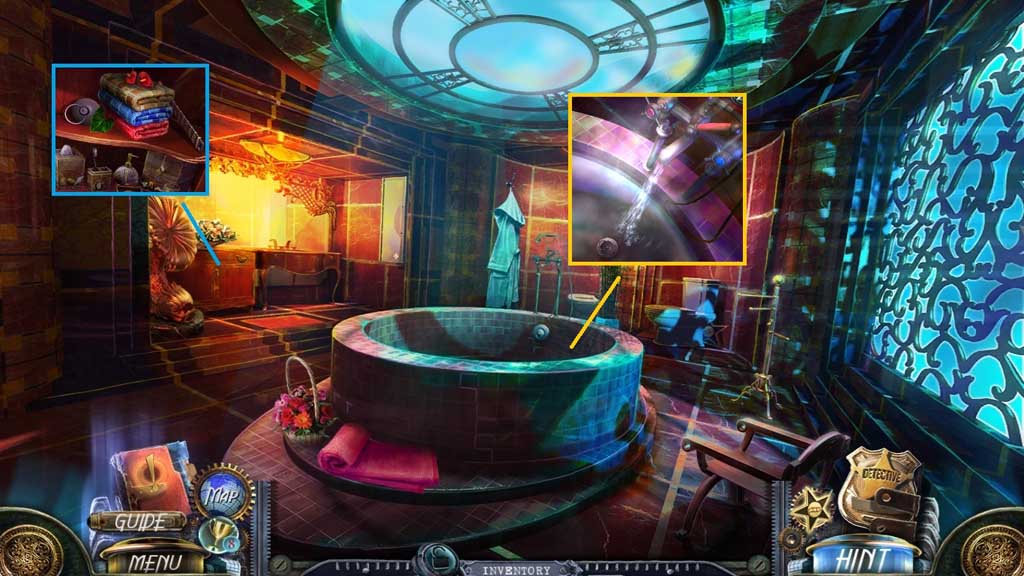
- Click the cabinet; collect the bathtub plug and 2 /3 numbered bars.
- Insert the bathtub plug and click the tap.
- Move down once.
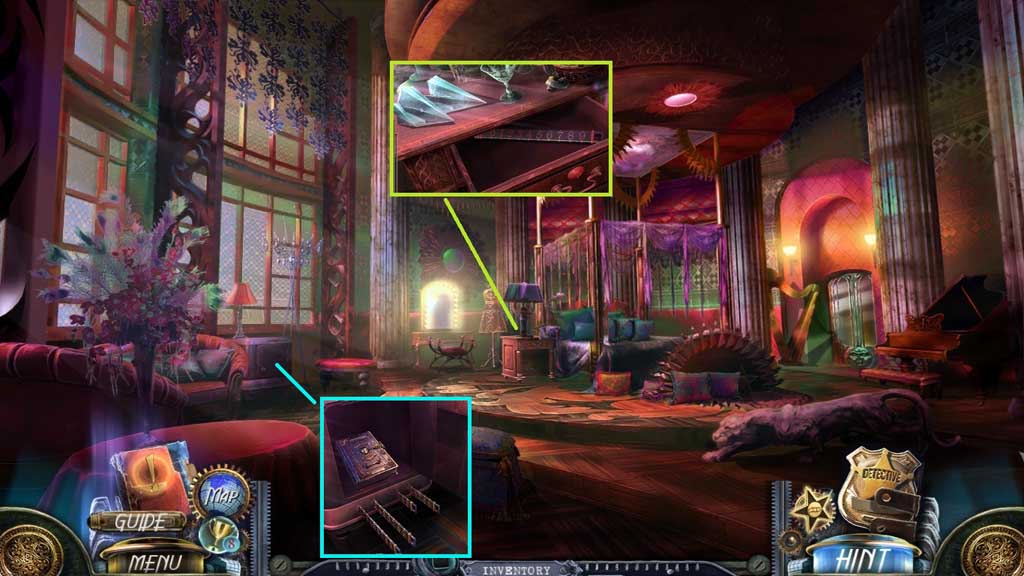
- Collect the award piece; click the drawer and collect 3 /3 numbered bars.
- Place the numbered bars into the safe to trigger a mini game.
- Solve the game by adjusting the bars to the correct code.
- Enter 1375 and collect Veronica’s diary.
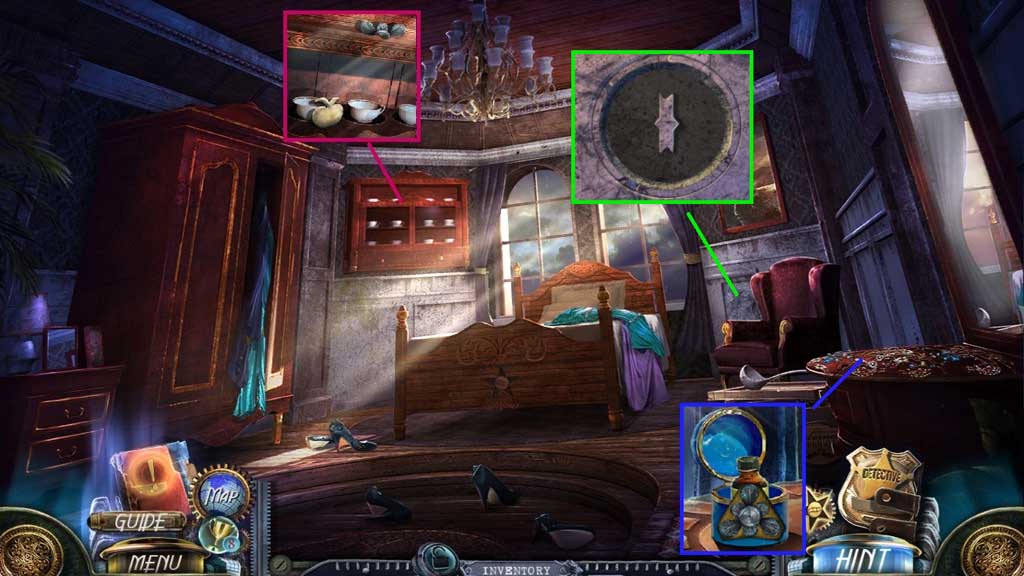
- Move to the right.
- Click Veronica’s diary and insert the diary key.
- Click the pages; collect the evidence and the bookmark.
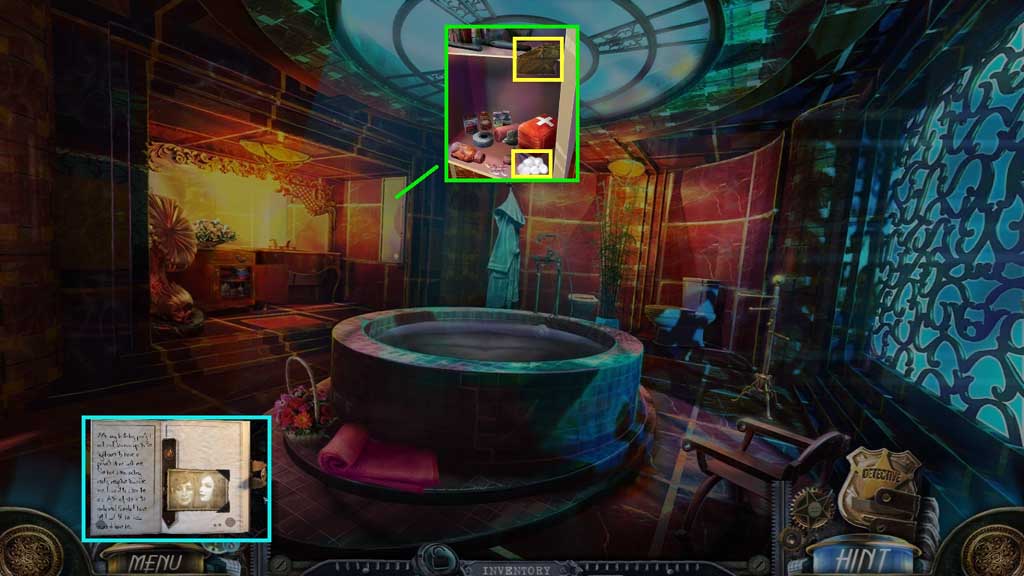
- Use the bookmark to open the cabinet; collect the smelling salts ingredient and 1 /4 wicks.
- Move down 2x’s and move into the door on the right.
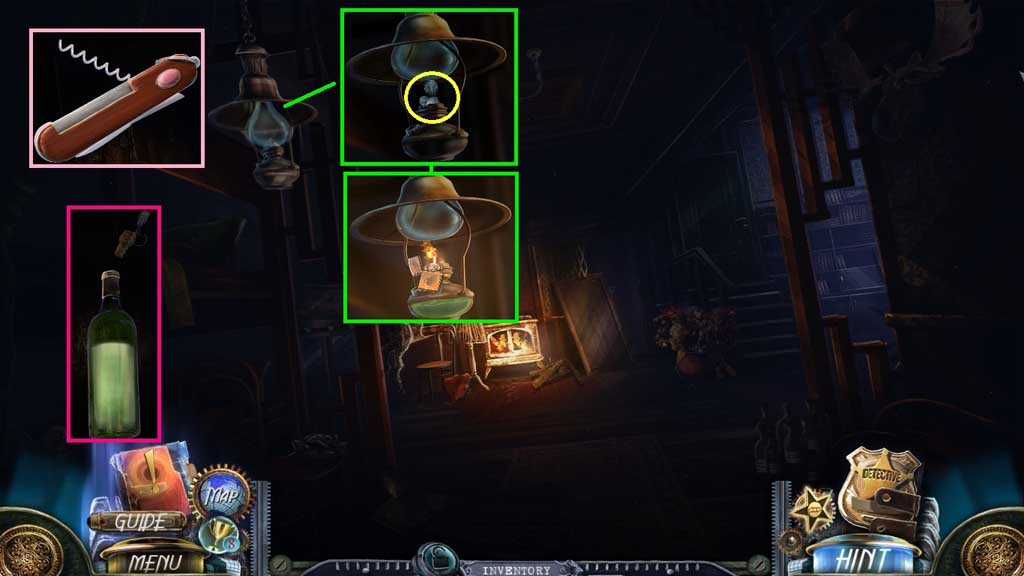
- Click the multi-tool and click the mini-corkscrew.
- Click the Absinthe and use the mini-corkscrew to open it; collect the strong alcohol.
- Click the lamp; collect 1 /3 flower emblems.
- Place the strong alcohol and the wick into the lamp and use the lighter to ignite it.
- Collect 2 /3 flower emblems.
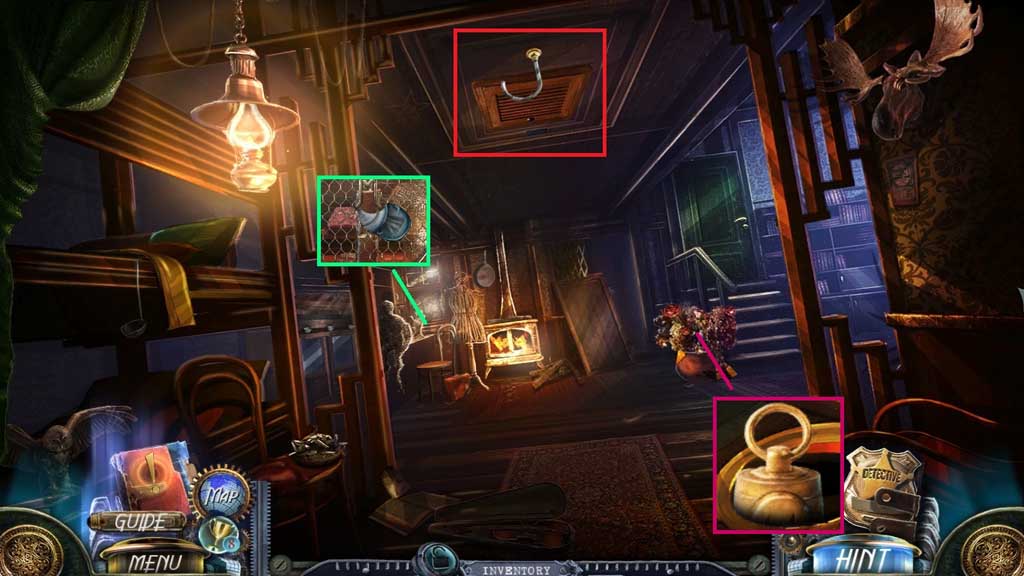
- Click the flowers; collect 2/ 4 small weights.
- Use the walking cane on the trapdoor to trigger a hidden objects area.
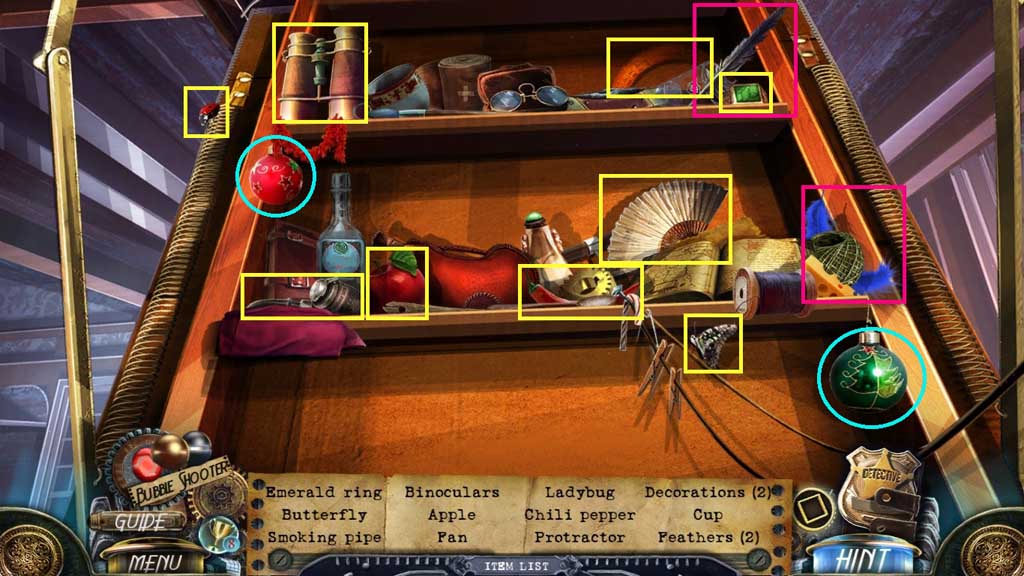
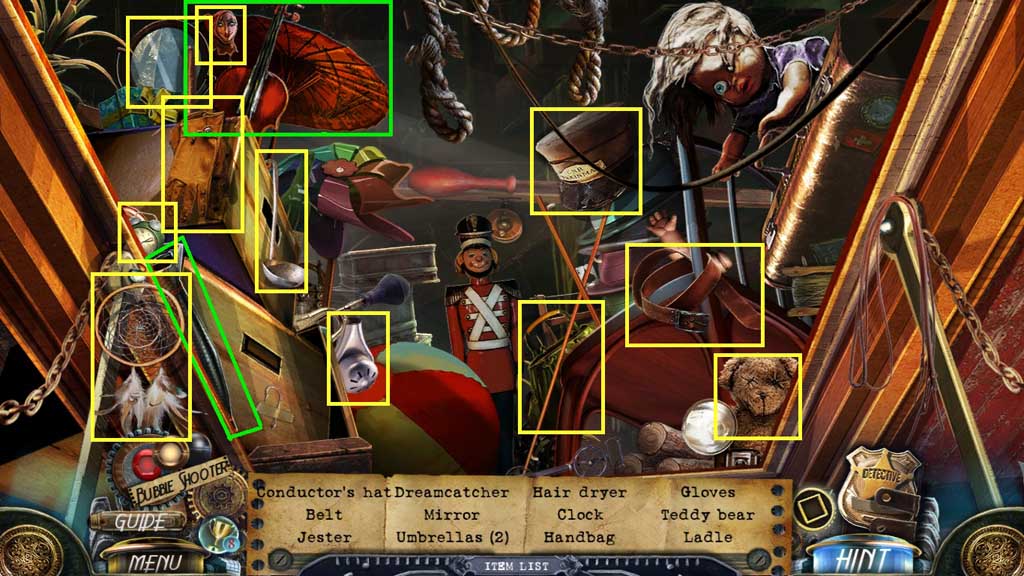
- Find the items.
- Collect the fishing pole.
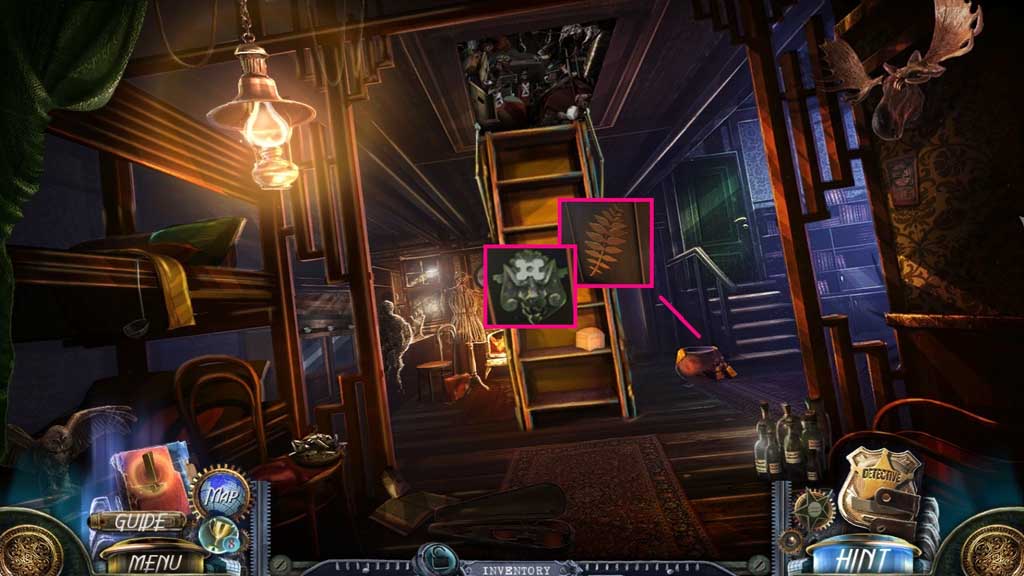
- Move ahead.
- Collect 3 /3 flower emblems and the apple key.
- Insert the flower emblem; collect 2/ 4 smelling salt ingredients.
- Click the chair; notice the missing token.
- Move to the Office Hallway.
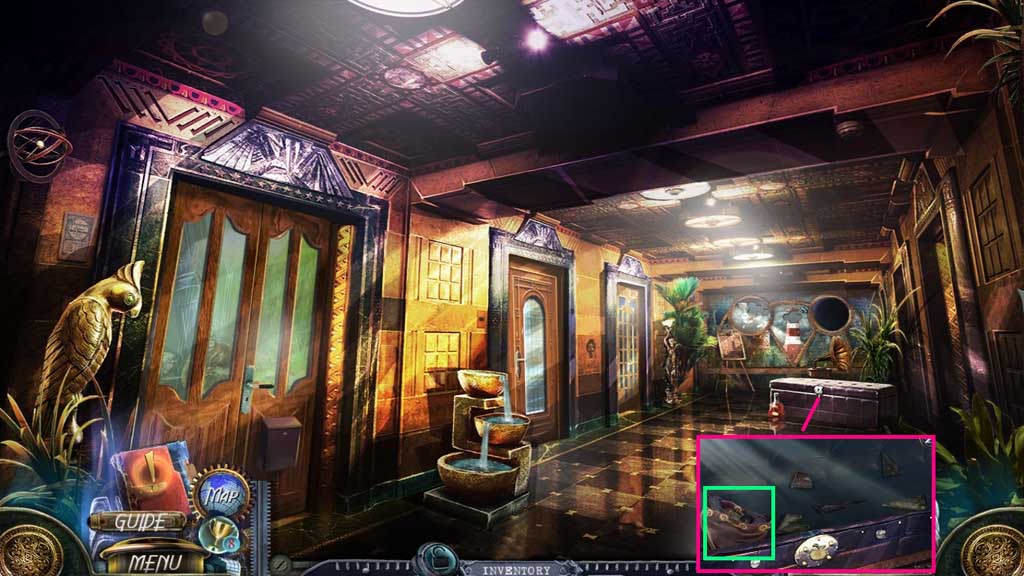
- Insert the apple key.
- Click the fragments into the pouch; collect the strange stone parts and 3 /4 small weights.
- Move to Hart’s Office.

- Insert the fishing pole into the tank.
- Click the plants and the rocks; collect the signet ring.
- Insert the signet ring; collect the evidence, 4 /4 small weights and the camera flash.
- Place the small weights onto the scale to trigger a mini game.
- Solve the game by placing a total weight of 35 in each scale.
- Use the following sequence: 19 – 11- 5 and 17 – 14 – 4.
- Collect the stone hexagons.
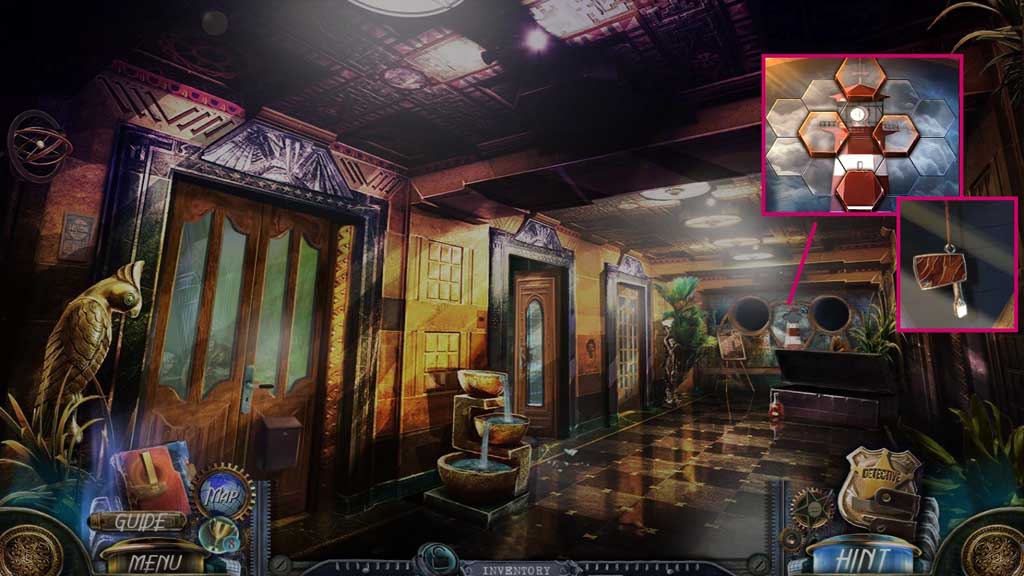
- Move down once.
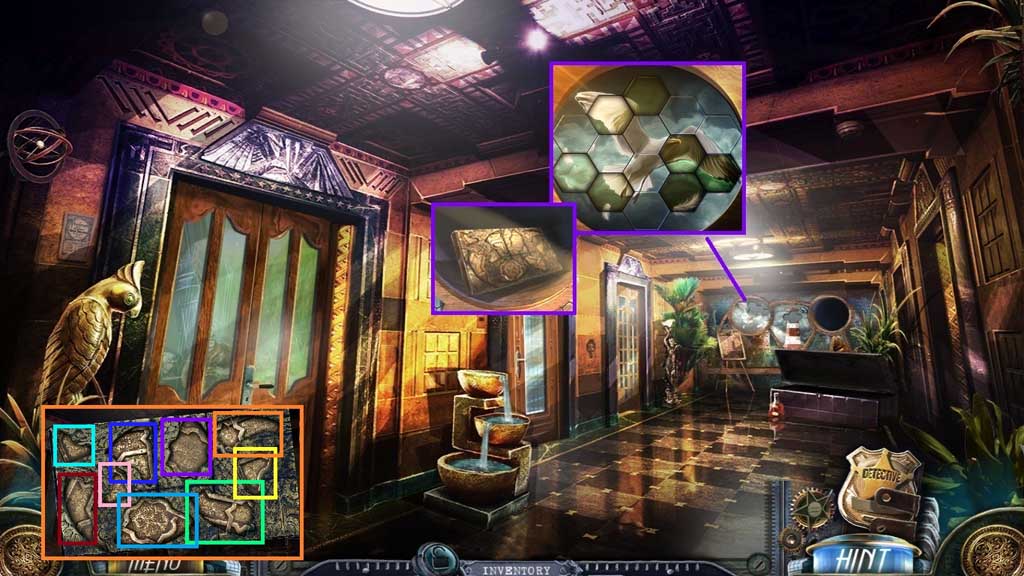
- Insert the stone hexagon to trigger a mini game.
- Solve the game by restoring the mosaic.
- Collect the metallic ornament.
- Click the metallic ornament; collect the ornament pieces.
- Move to the Servants Quarters.

- Place the ornament pieces into the frame to trigger a mini game.
- Solve the game by clicking and dragging the pieces into place.
- Collect the ornament lock.
- Move ahead.
- Insert the ornament lock into the wall to trigger a hidden objects area.
- Find the items.
- Collect the evidence and the golden leaf.
- Move down once.
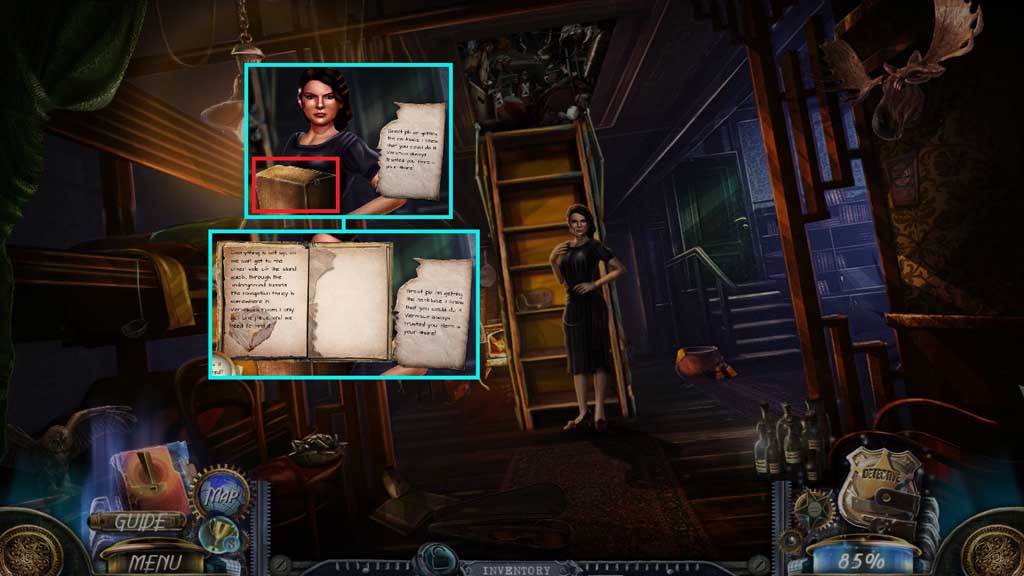
- Speak to Evelyn.
- Examine the paper and the book.
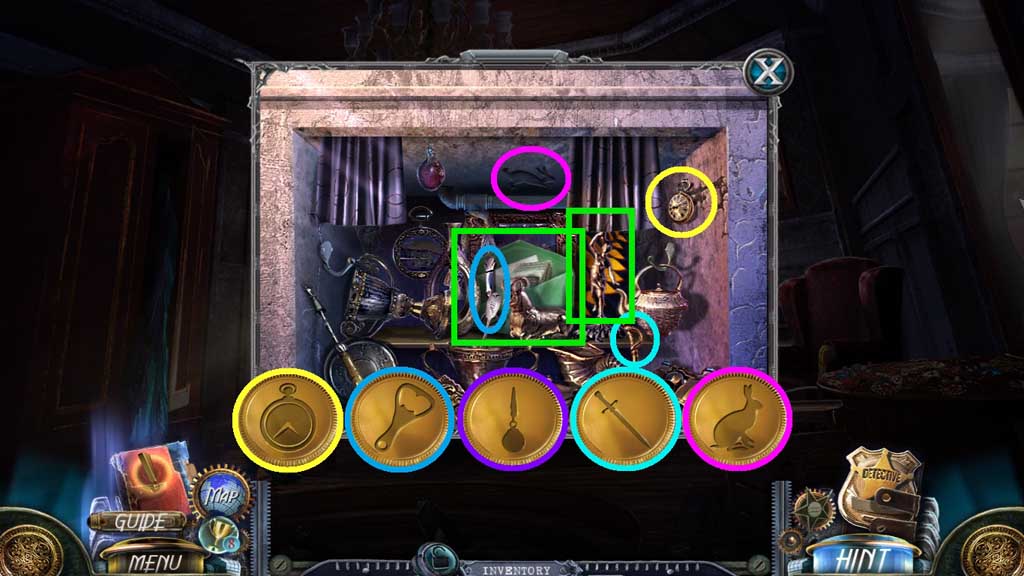
- Click the box to trigger a hidden objects area.
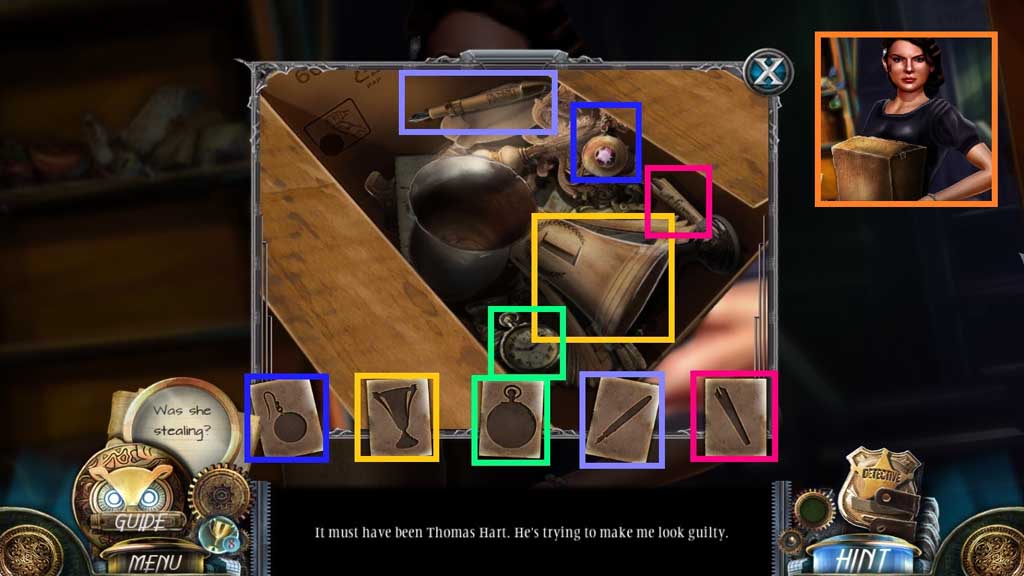
- Find the items.
- Collect the evidence and the box.
- Insert the golden leaf; collect the lion head.
- Move down once.
- Chapter-6-18-Lion
- Place the lion head into the fireplace exterior.
- Click the heads as shown in the symbols above.
- Collect the star of life.
- Move to the Doctor’s Office.
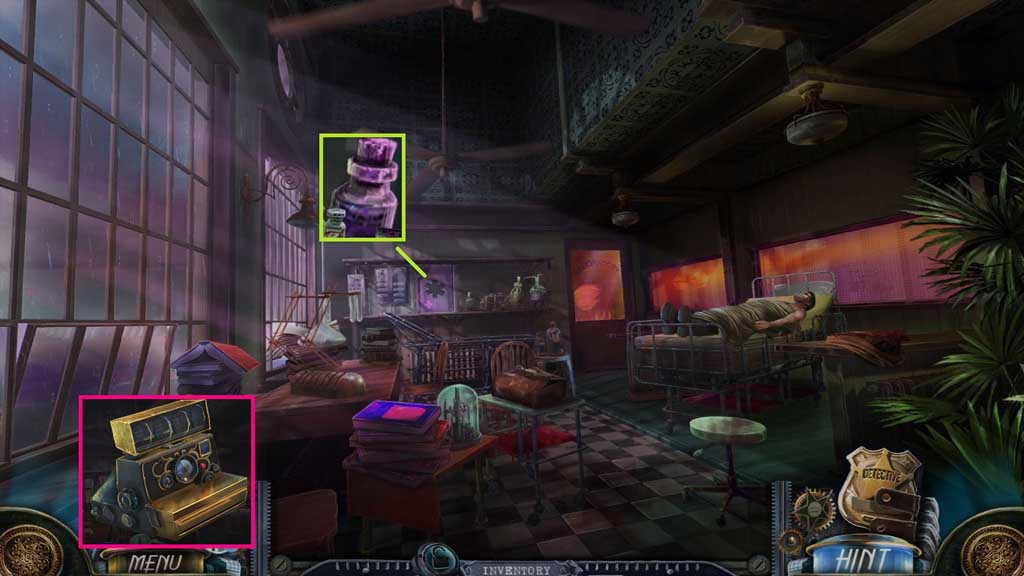
- Insert the star of life; collect 3/ 4 smelling salt ingredients.
- Click the photo camera.
- Remove and replace the camera flash.
- Move ahead.
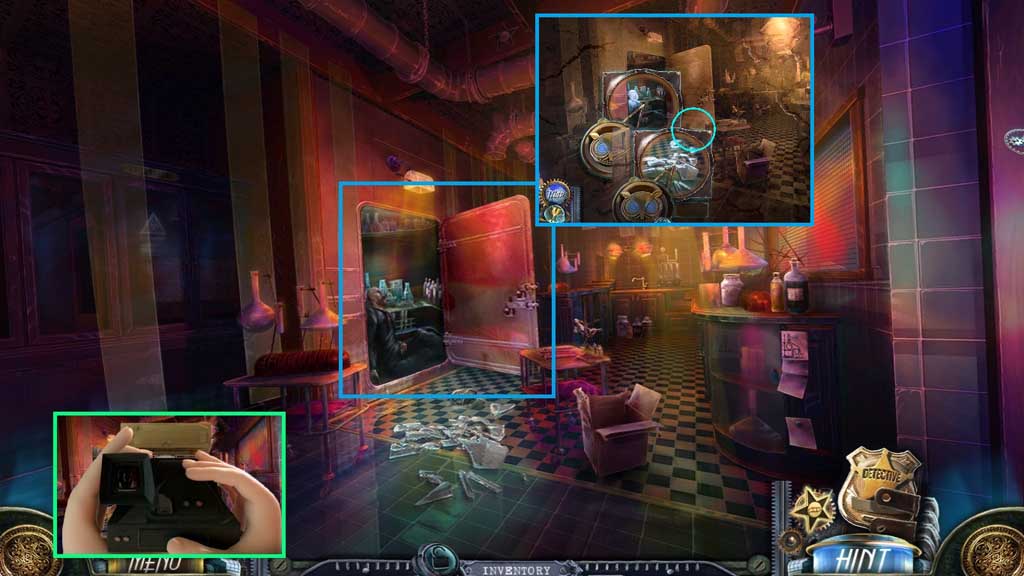
- Click the fridge.
- Click the camera.
- Click the doctor, the glass and the locket.
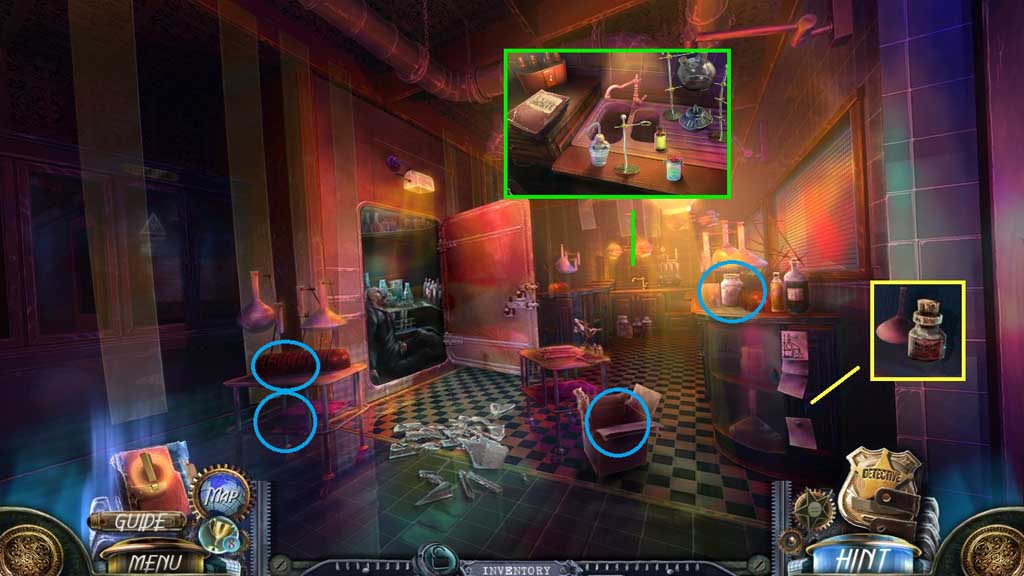
- Click the cabinet; collect 4 /4 smelling salt ingredients.
- Place the smelling salt ingredients onto the counter.
- Collect the 4 flasks.

- Place the flasks onto the counter to trigger a mini game.
- Solve the game by creating the smelling salts.
- Uncork the flask, click the vial and use it on the flask.
- Ignite the burner and turn it off.
- Click the tube, pour in the distillate into the tube and top it off with water.
- Click it open and add the reagent.
- Place the tube into the vortex; click the switch.
- Pour the solution into the flask; collect the smelling salts.
- Move down once.
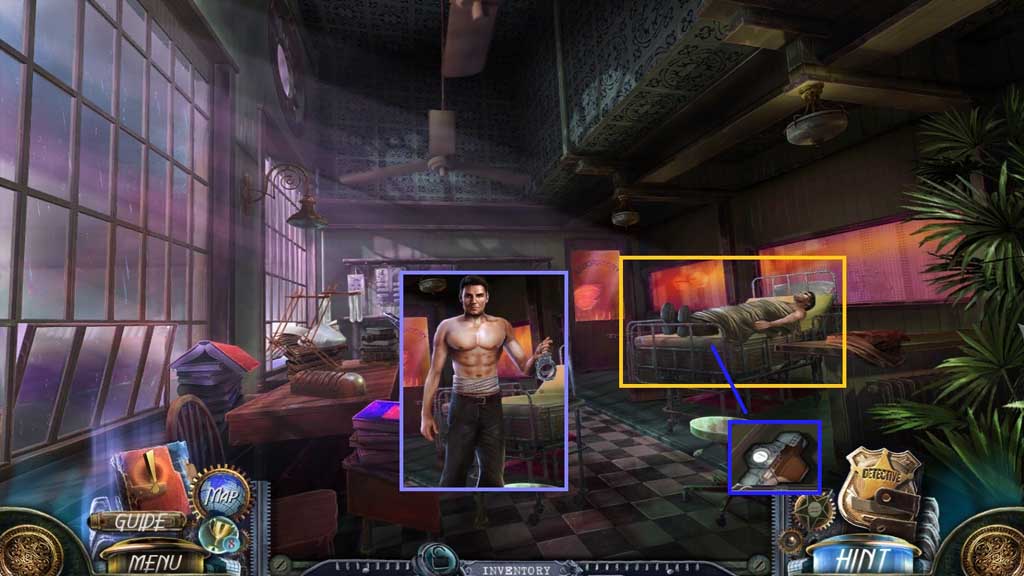
- Use the smelling salts to revive Daniel.
- Collect the handcuffs.
- Collect the stone hexagons.
- Move down once.
- Insert the stone hexagons into the mosaic to trigger a mini game.
- Click the tiles so that they all remain pressed in to solve.
- Collect the elevator key.
- Move down once.
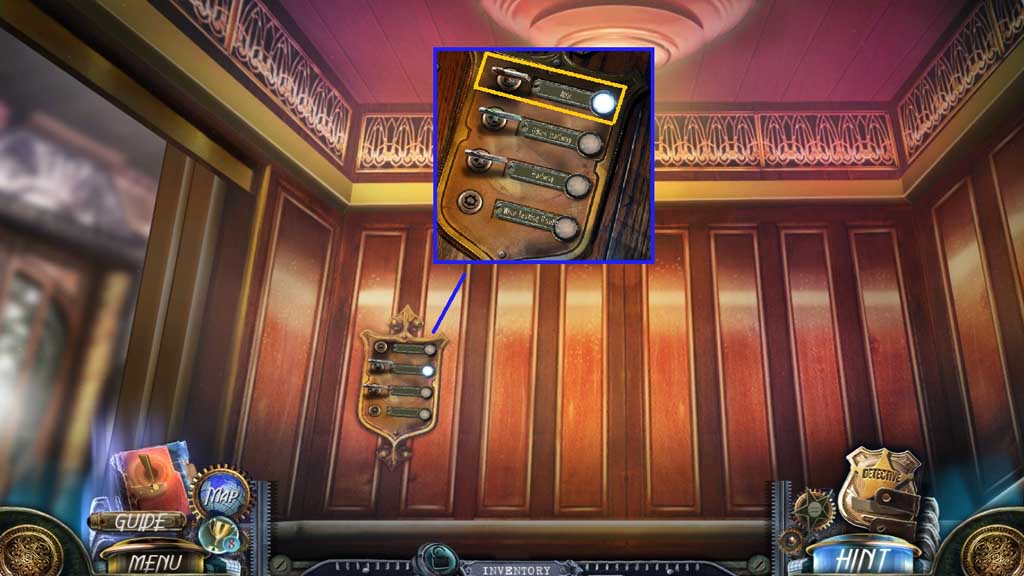
- Insert the elevator key and click the “Attic” key.
- Move to the left.