
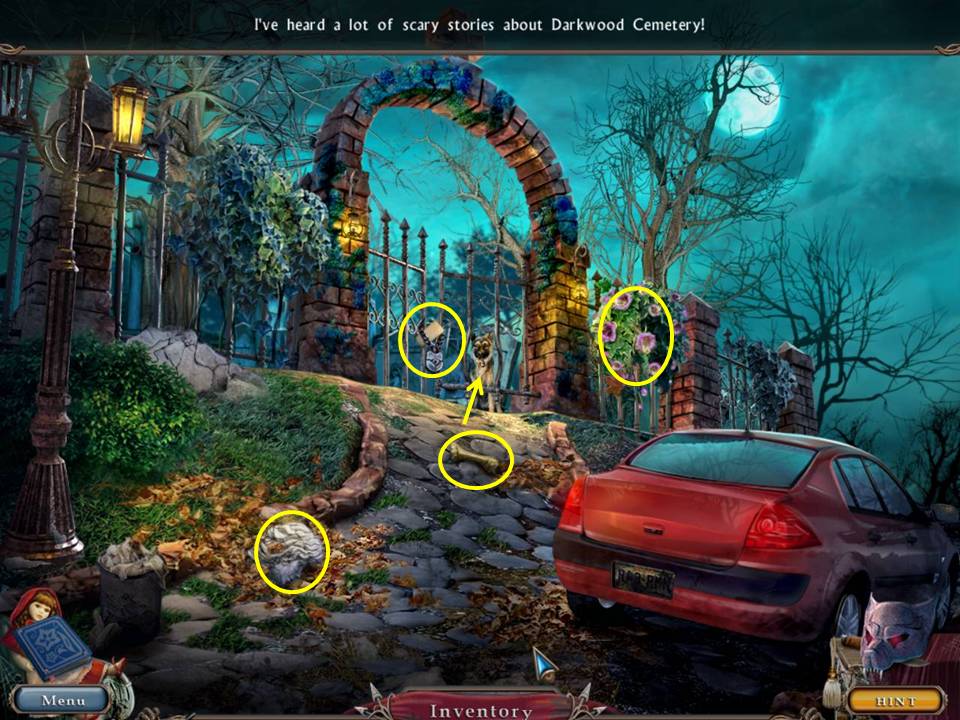
- Take the BONE and ANGEL’S HEAD.
- Zoom into the gate.
- Take the note.
- Give the dog the BONE.
- Zoom into the bush.
- Click the leaves to remove.
- Take the BRANCH.
- Zoom into the gate again.
- Pull the key forward with the BRANCH.
- Take the KEY.
- Open the car trunk with the KEY.
- Play the HOA.
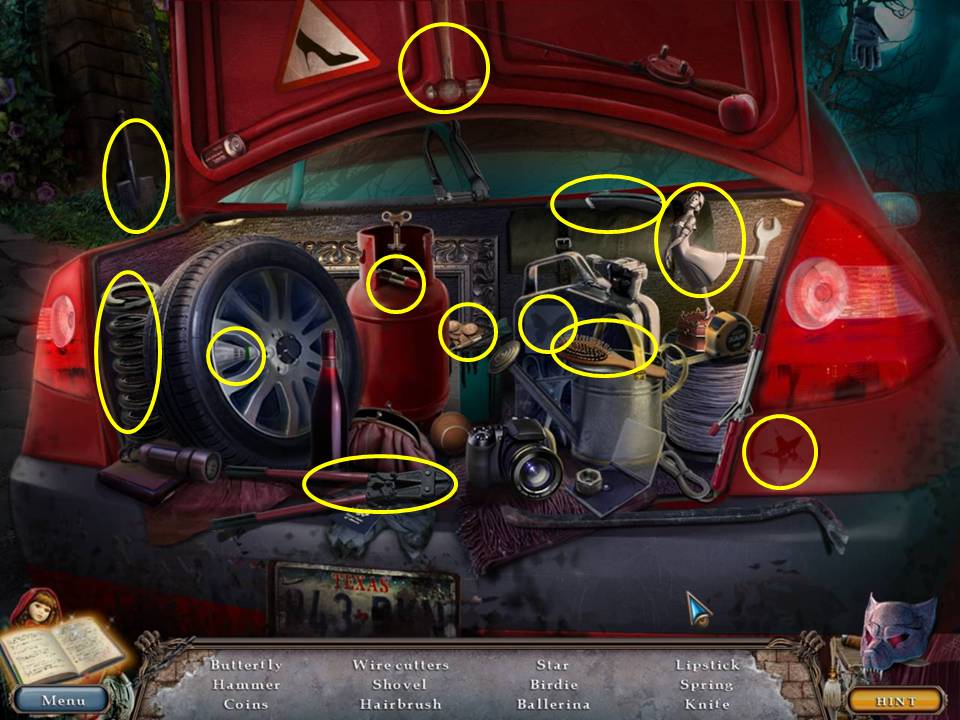
- Find the items listed. Receive the WIRE CUTTERS.
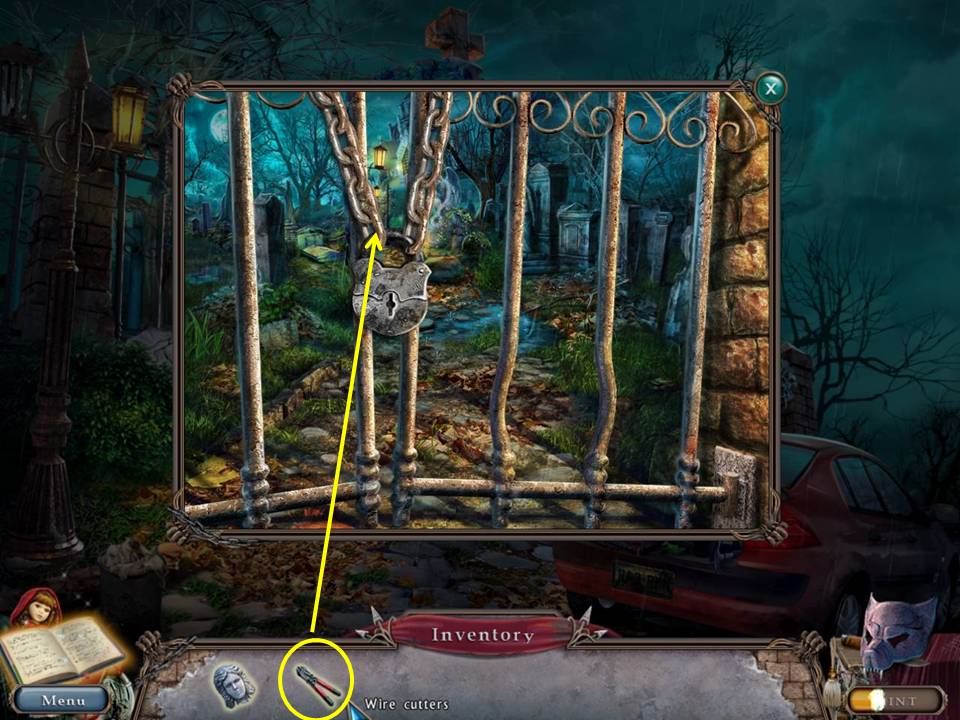
- Zoom back into the gate.
- Cut the chain with the WIRE CUTTERS.
- Go through the gate.
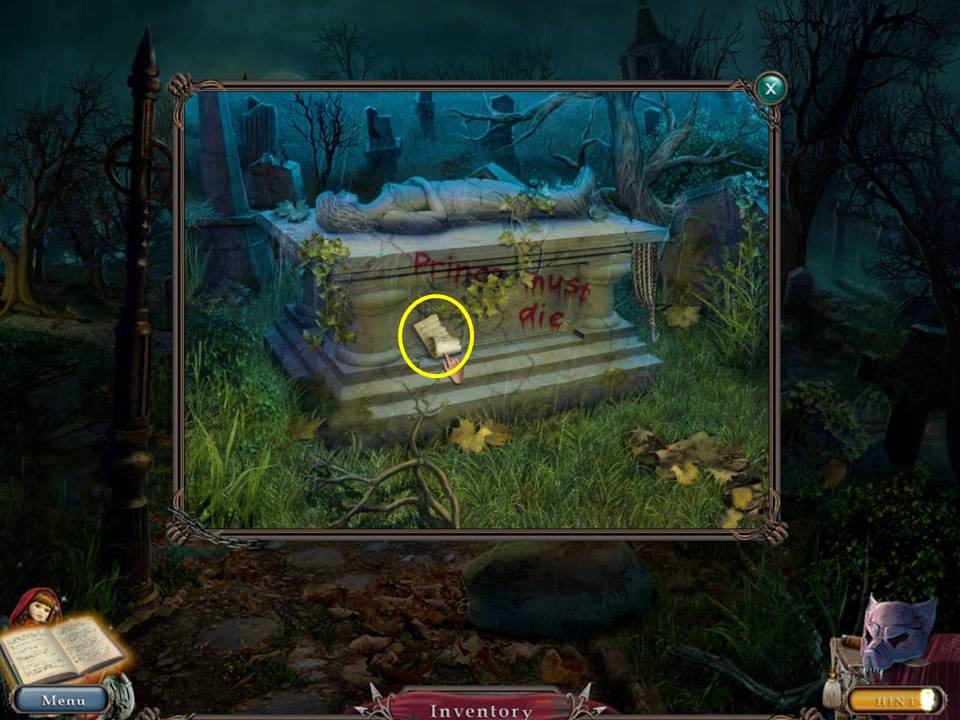
- Zoom into the pedestal.
- Take the SHEET MUSIC.
- Go left.
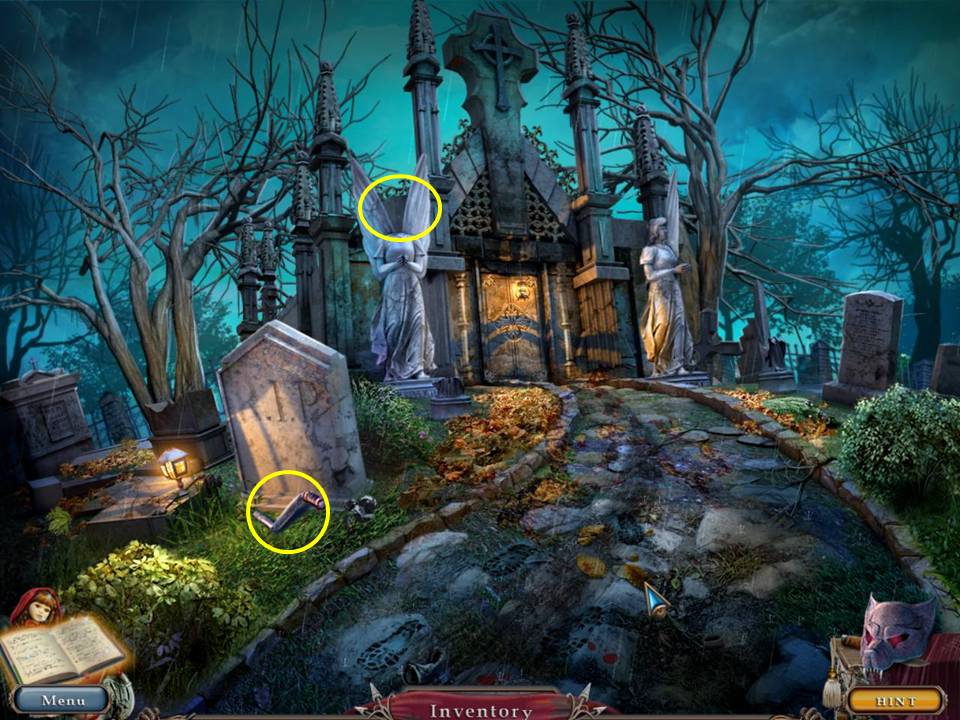
- Take the HANDLE from in front of the grave.
- Zoom into the angel at left.
- Replace the ANGEL’S HEAD.
- When finished, take the note and FIGURINE from the angel’s hands.
- Click down once and move forward.
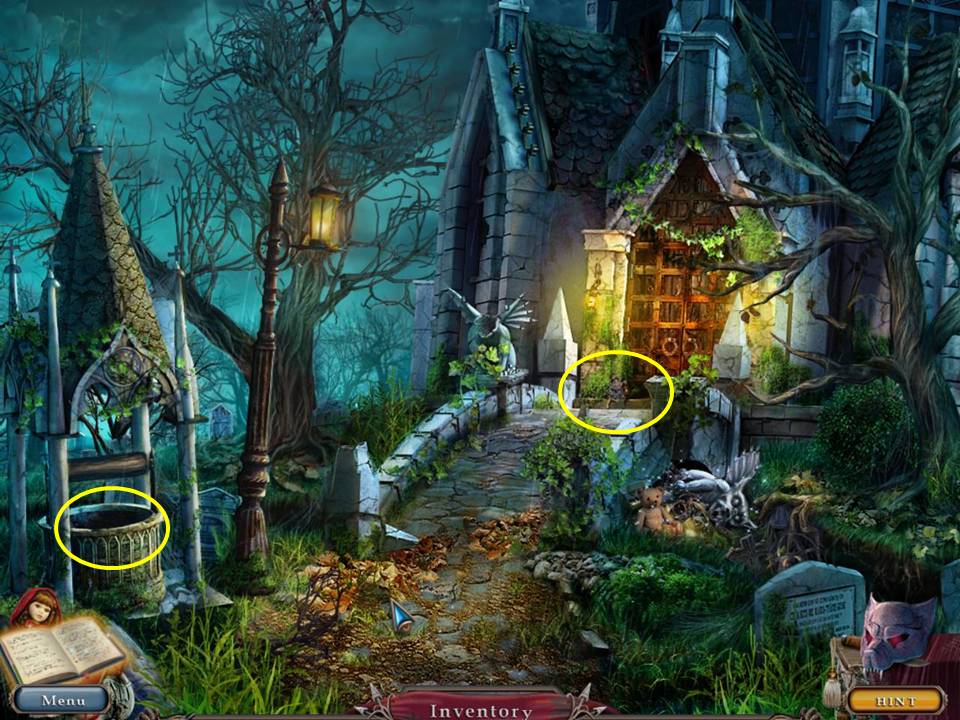
- Zoom into the well.
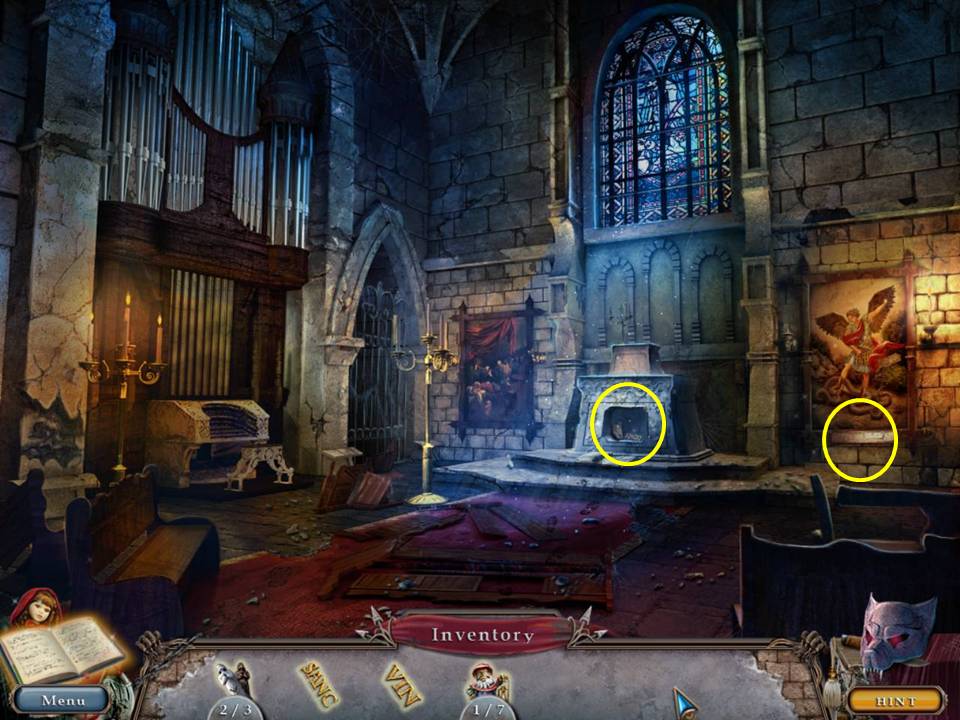
- Take the PART OF THE SIGN UNDER THE PAINTING.
- It’s to the right of the well and reads “SANC.”
- Zoom into the door.
- Take the note.
- Play the HOA.
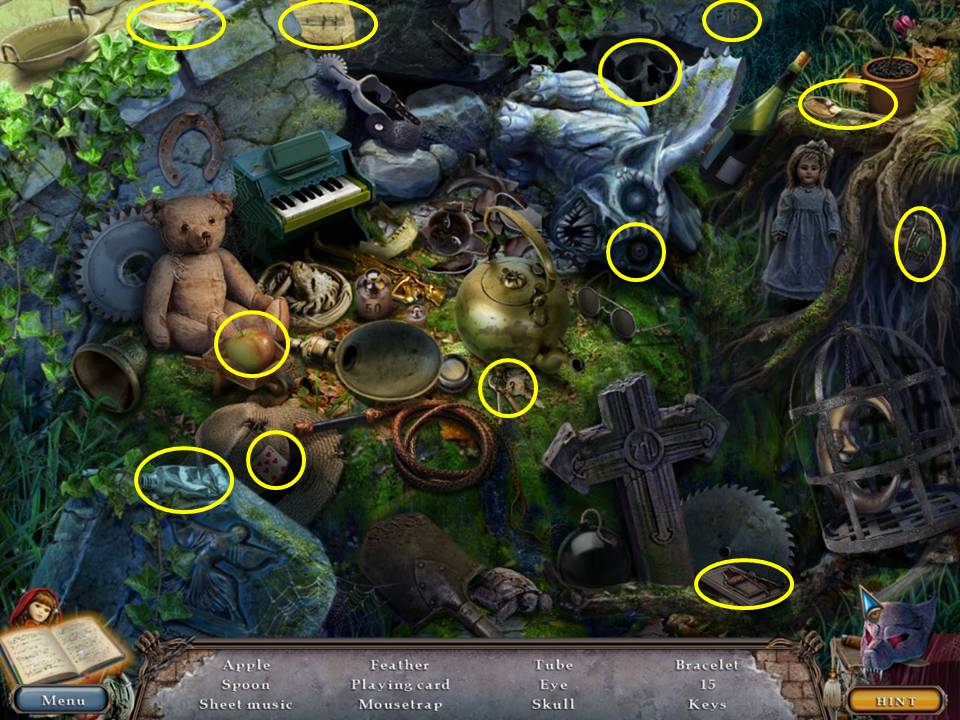
- Find the items listed.
- Receive the second SHEET MUSIC.
- Click down twice.
- Play another HOA by the car trunk.
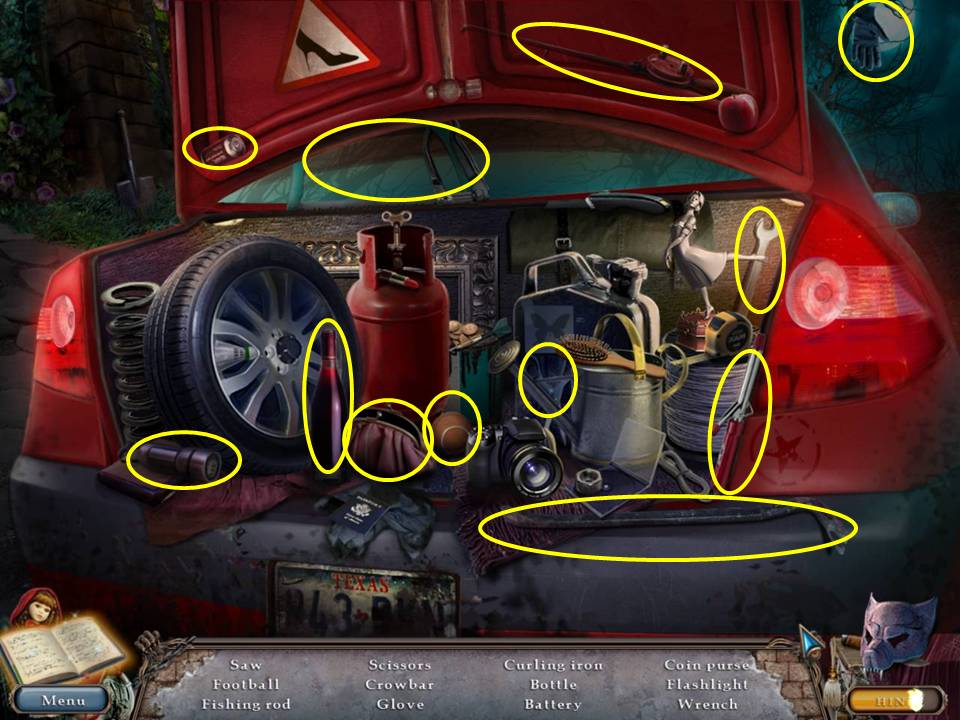
- Find the items listed.
- Receive the CROWBAR.
- Go forward.
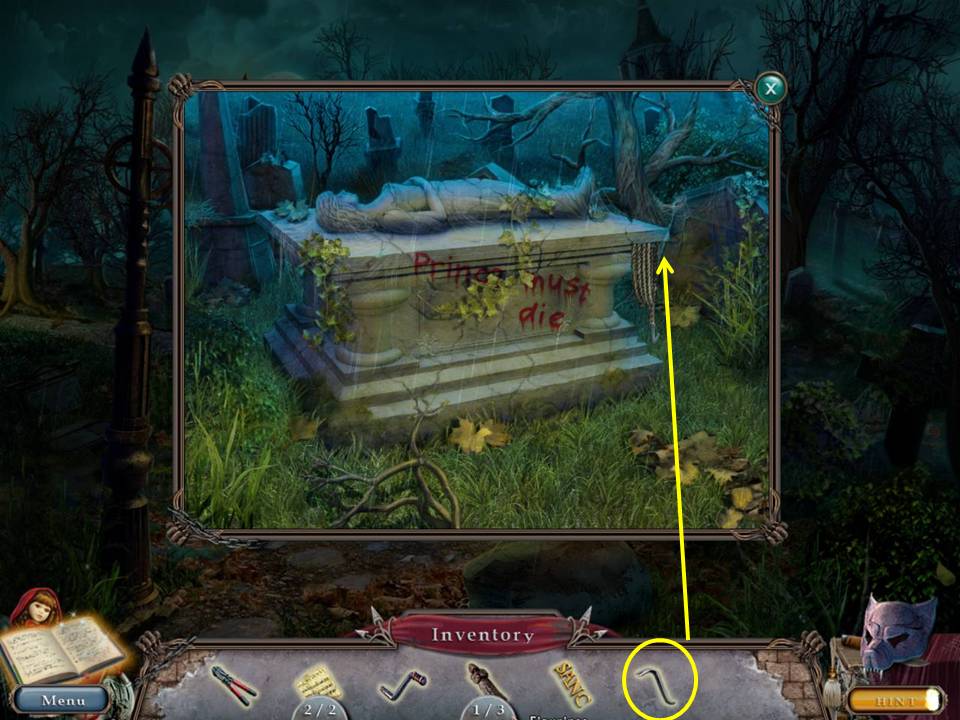
- Zoom into the pedestal.
- Smash the stone with the CROWBAR.
- Take the ROPE.
- When finished, zoom out and lever the large rock with the CROWBAR.
- Take the CHAPEL KEY.
- Go forward.

- Zoom into and open the door with the CHAPEL KEY.
- Enter the chapel.
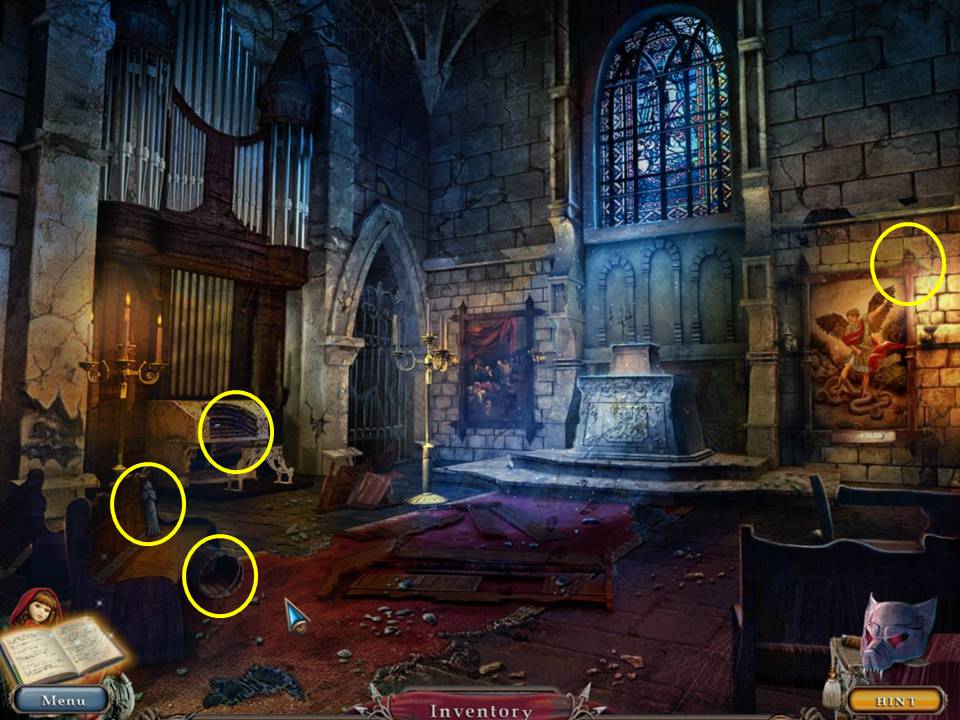
- Take the BUCKET and the second FIGURINE.
- Zoom into the piano.
- Take the STONE.
- Zoom into the painting.
- Take the second PART OF THE SIGN UNDER THE PAINTING at the top right corner.
- Click down once.
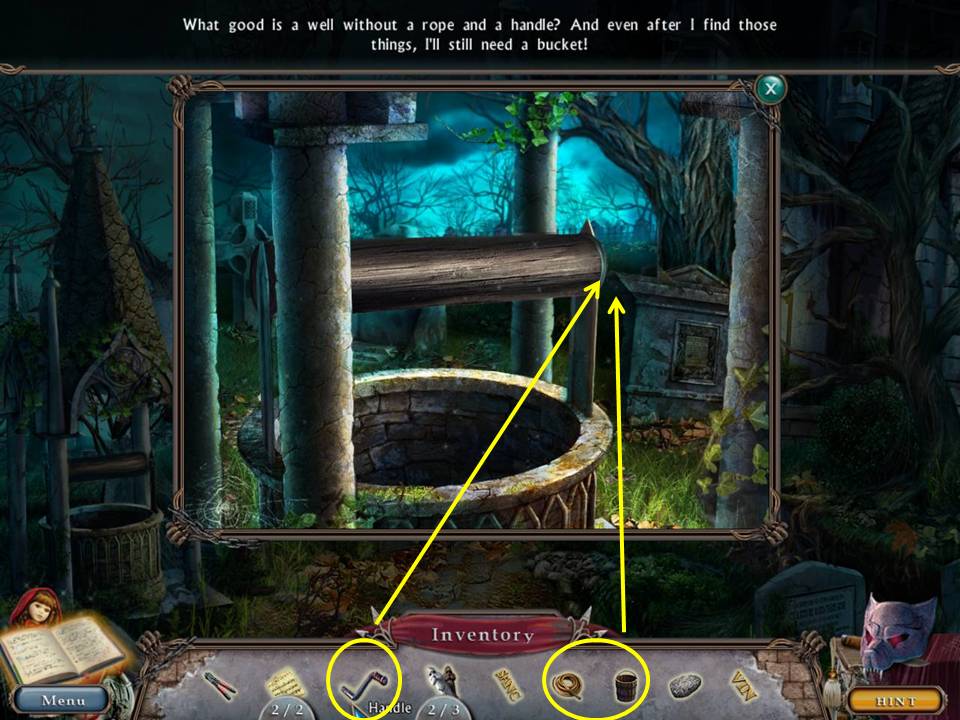
- Zoom into the well.
- Attach the HANDLE, ROPE and BUCKET.
- Click the handle two times.
- Take the ORGAN KEY.
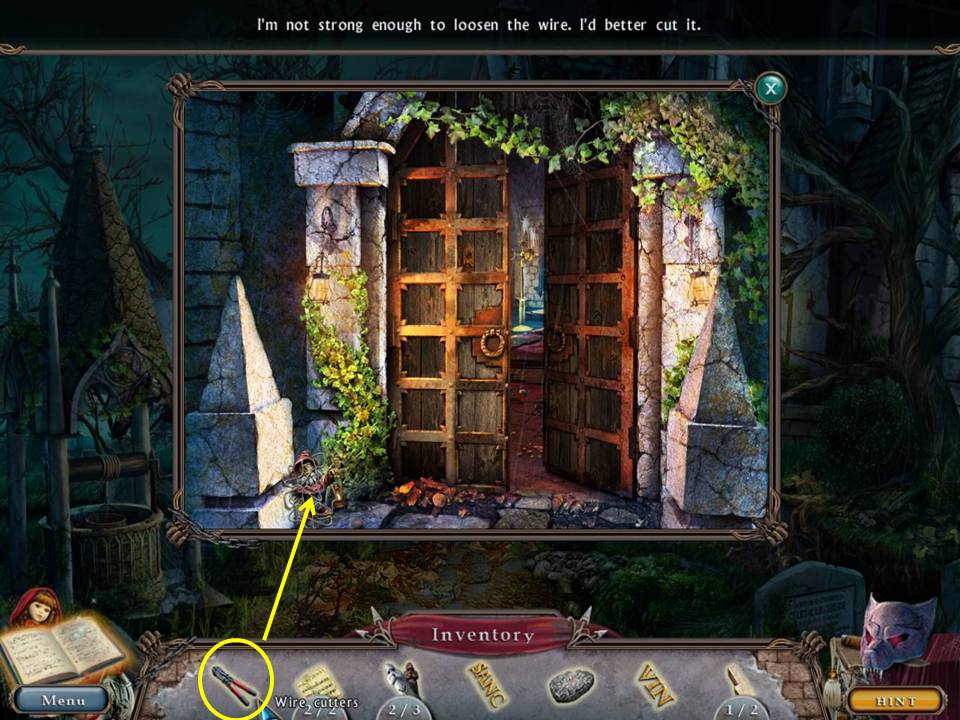
- Zoom into the door.
- Free the gnome with the WIRE CUTTERS.
- Take the GARDEN GNOME.
- Click down once.
- Shoo the crow on the left lamppost with the STONE.
- Play the HOA.
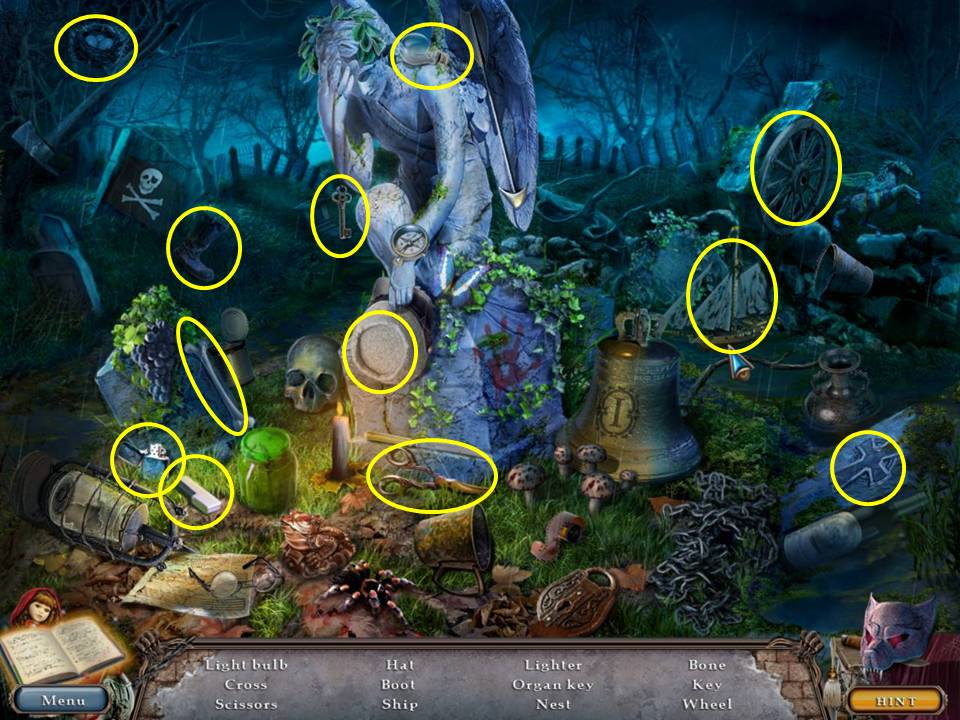
- Find the items listed.
- Receive the second ORGAN KEY.
- Go forward two times.
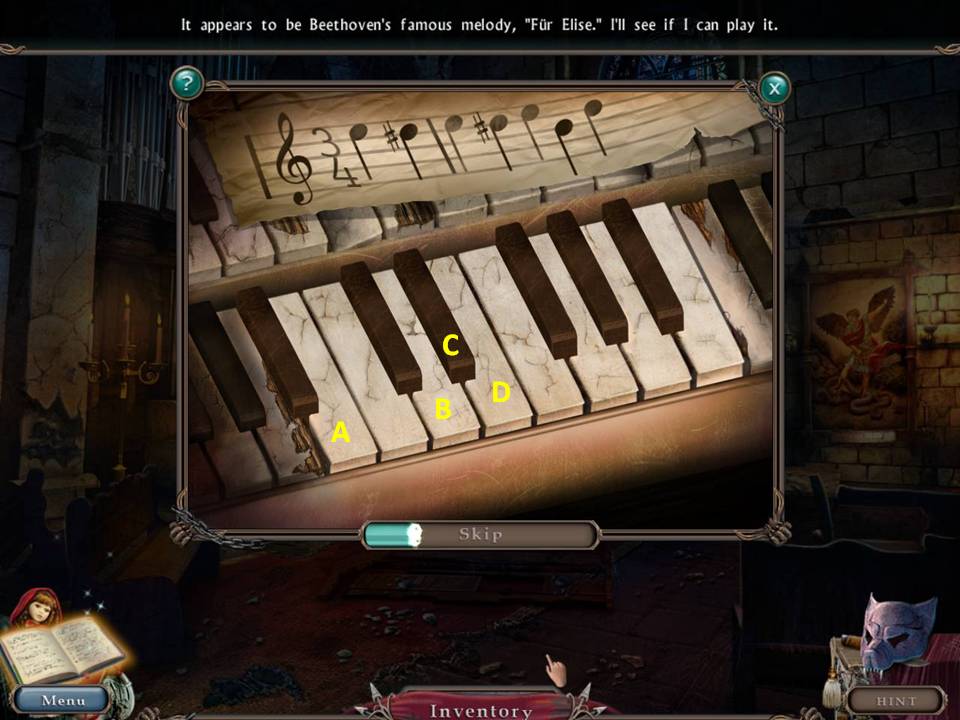
- Zoom into the ORGAN.
- Place the two ORGAN KEYS and two MUSIC SHEETS into the scene to initiate a mini-game.
- The object of the game is to play the keys in the proper sequence.
- Follow the music and play: D, C, D, C, D, A, and B.
- Zoom into the altar.
- Take the PART OF THE EPITAPH and the third PART OF THE SIGN UNDER THE PAINTING.
- Zoom into the painting and then zoom into the sign.
- Put the three PARTS OF THE SIGN UNDER THE PAINTING into the spaces.
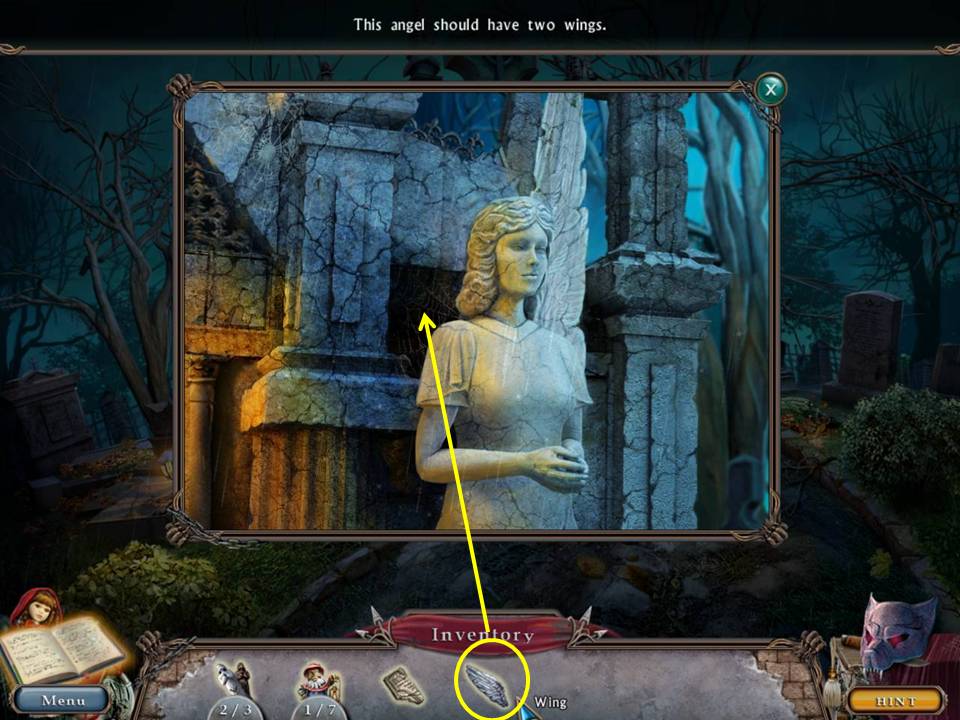
- Take the WING from behind.
- Click down two times.
- Go left.
- Zoom into the angel at right.
- Replace the WING.
- Take the note and the second PART OF THE EPITAPH from the angel’s hands.
- Click down.

- Zoom into the grave.
- Place the two PARTS OF THE EPITAPH into the spaces.
- Take the RAG.
- Zoom into the skeleton hand to initiate a mini-game.
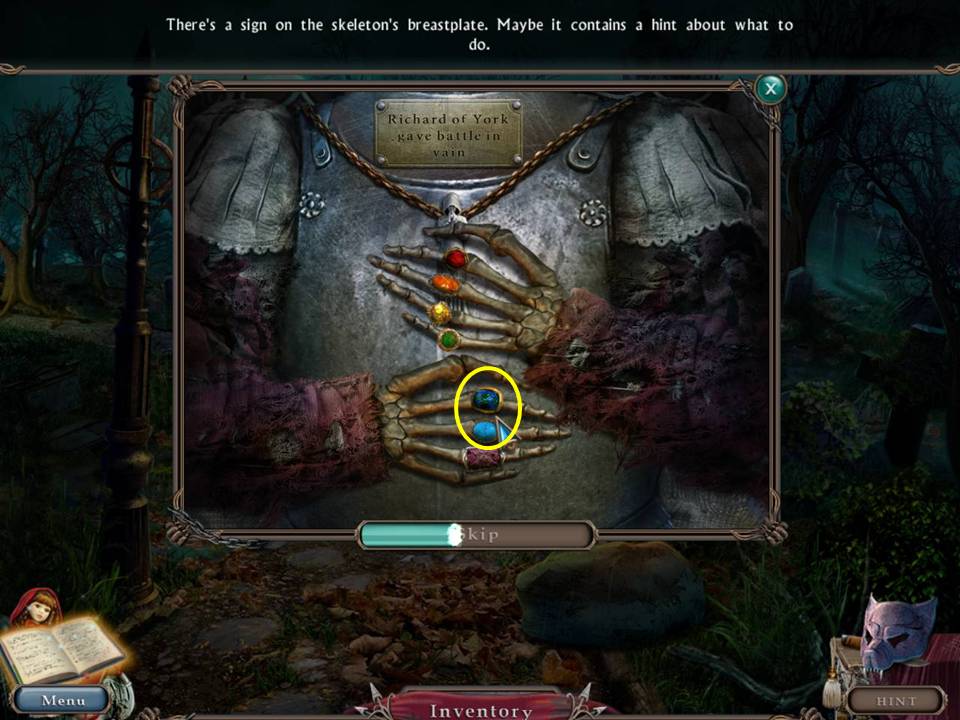
- The object of the game is to swap the rings into their correct positions.
- The rings, from top to bottom, follow the old ROY G BIV rainbow code (red, orange, yellow, green, blue, indigo, violet).
- On the screenshot, swap the two circled ones to complete the task.
- Receive the third FIGURINE.
- Go left.
- Zoom into the door.
- Wipe the dust with the RAG.
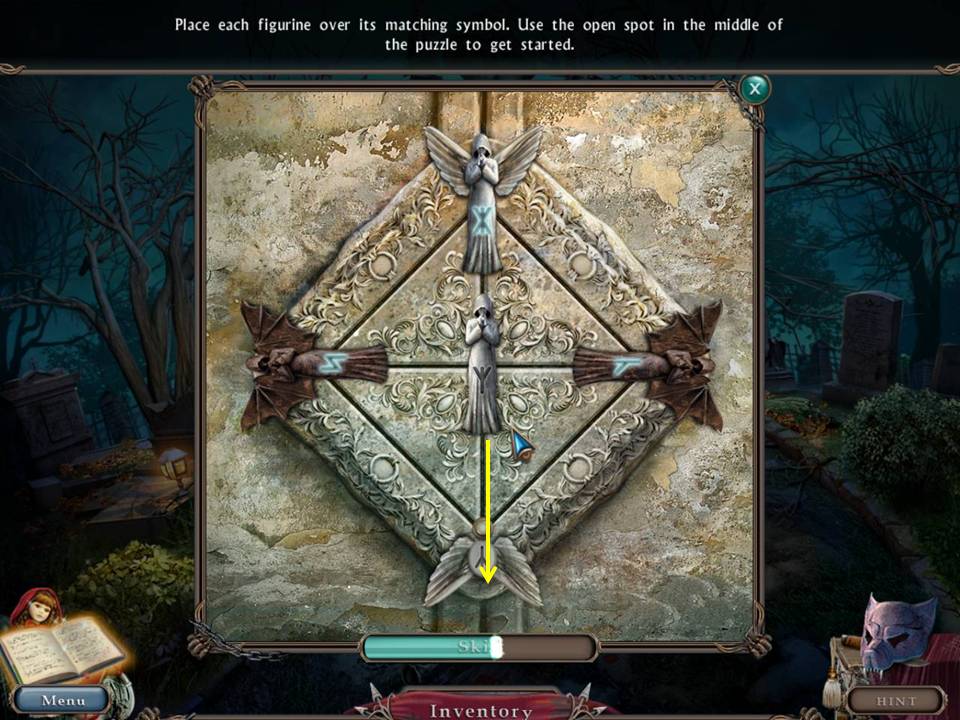
- Place the three FIGURINES on the board to initiate a mini game.
- The object of the game is to move the figurines into their proper spots.
- Screenshot shows final figure to slide into position.
- When finished, go through the door.
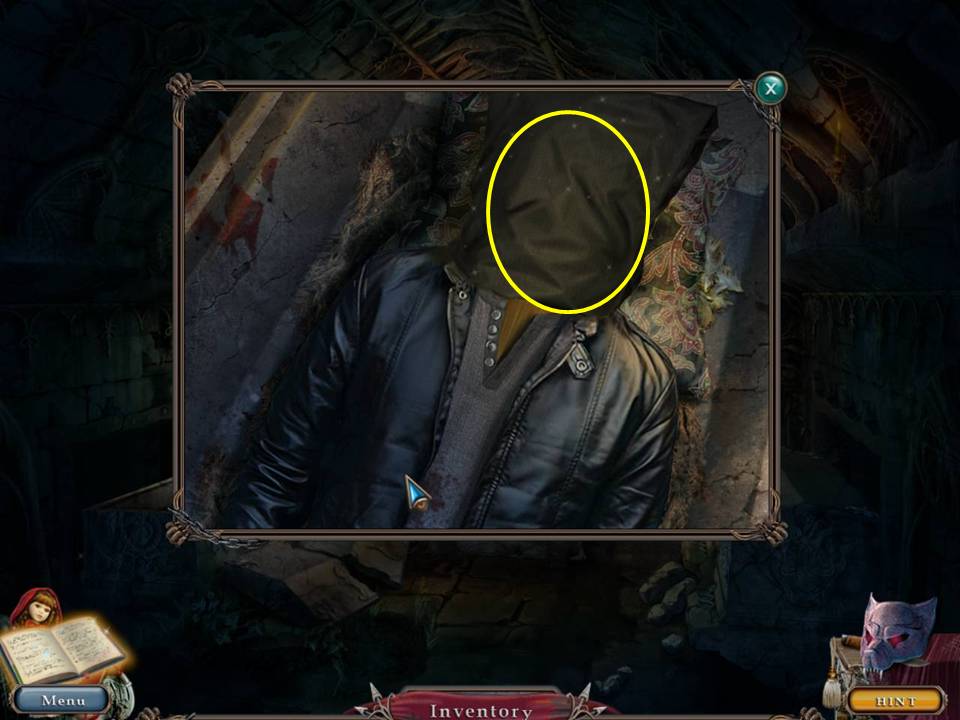
- Zoom into the casket.
- Click the hood on the body.
- Take the ROOM KEY.
- Zoom into the photo.
- Click down three times.
- Zoom into the car to play a mini-game.
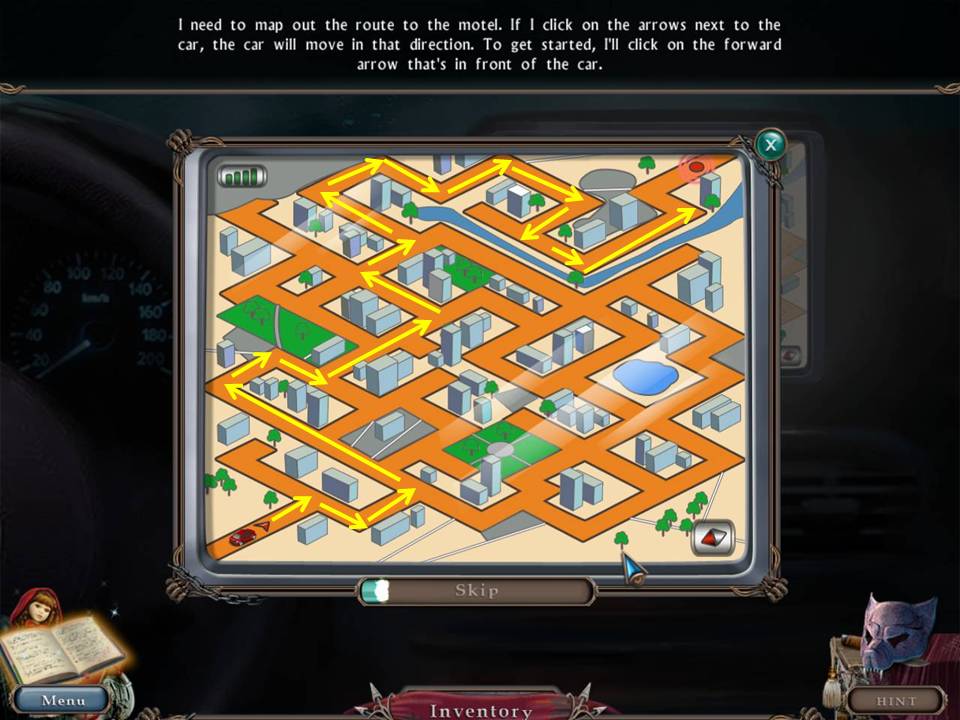
- The object of the game is to move the car from its starting position to the motel on the map by pressing the appropriate arrow keys. See screenshot for solution.