
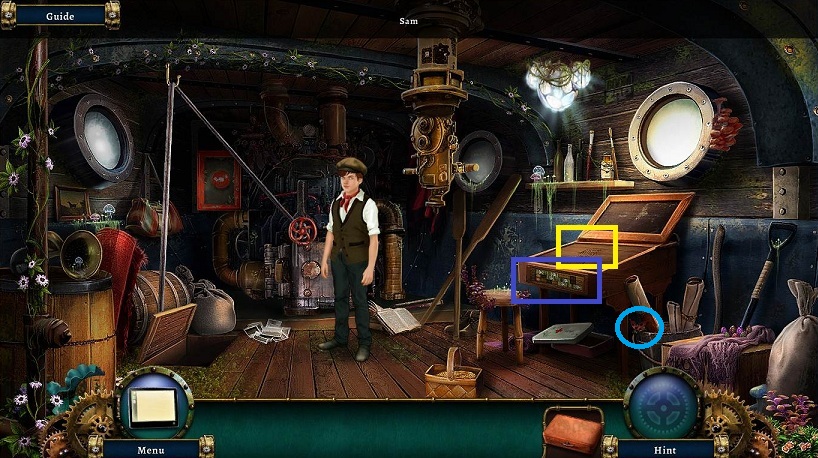
- Talk to Sam
- Need to find Ian's research
- Examine the desk to get the carvings into your journal
- Pick up collectible
- Examine the drawer of the desk
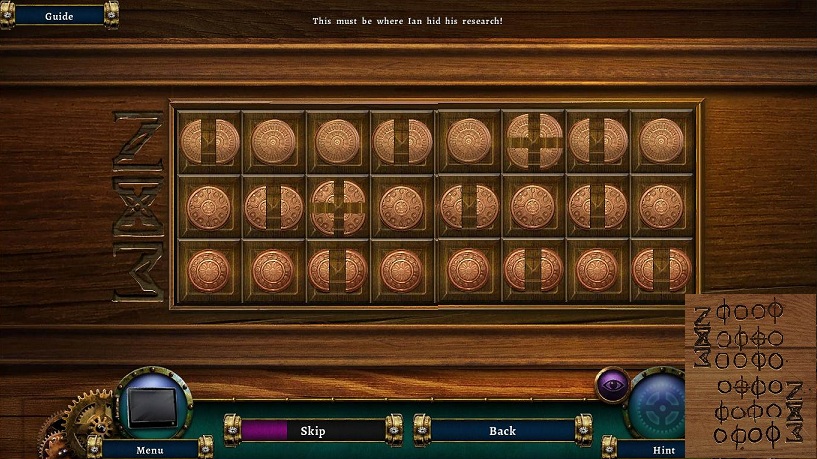
- Slide the green covers to the right and match the top code
- Slide the green covers to the left and match the bottom code
- Pick up the RESEARCH and place it on the desk
- Read the journal
- Leave the cabin
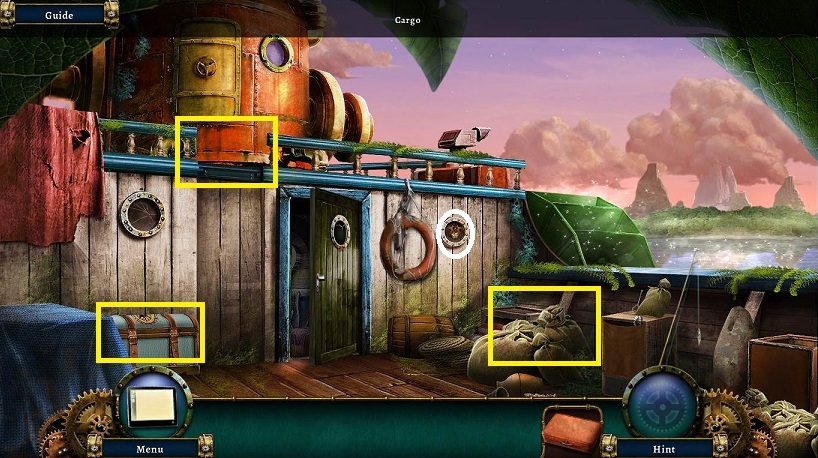
- Note the chest with the lock missing a compass
- Note the spot missing the ladder and bar
- Pick up collectible
- Examine the cargo to the right for a hidden object scene
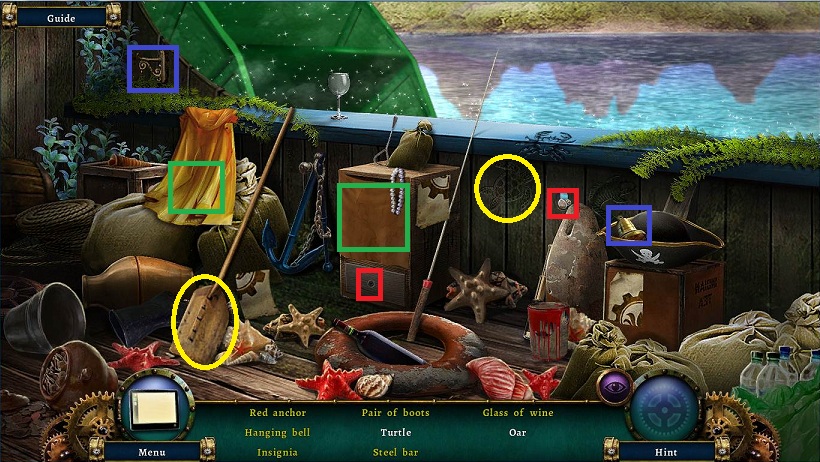
- Steel bar: Pick up drawer handle, place it on the drawer, and examine
- Hanging bell: Hang the bell on the hanger
- Click on the yellow slicker and brown cloth above the drawer
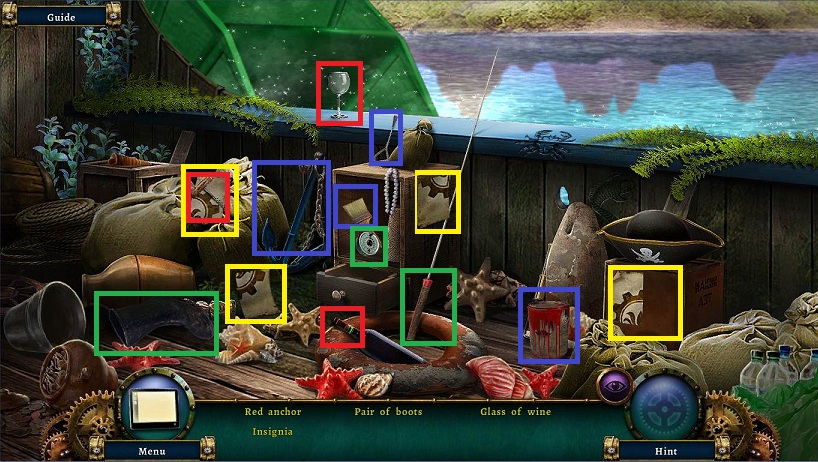
- Glass of wine: Use the corkscrew on the wine bottle; use the wineglass on the wine bottle.
- Insignia: Pick up 3 quarters of the insignia and place them on the 4th quarter in the proper position.
- Red anchor: Use the paint can key on the paint can; use the paint brush on the open paint can; use the red brush on the anchor.
- Pair of boots: Put the reel on the fishing pole and turn it; place the other boot next to the one from the water.
- Receive STEEL BAR
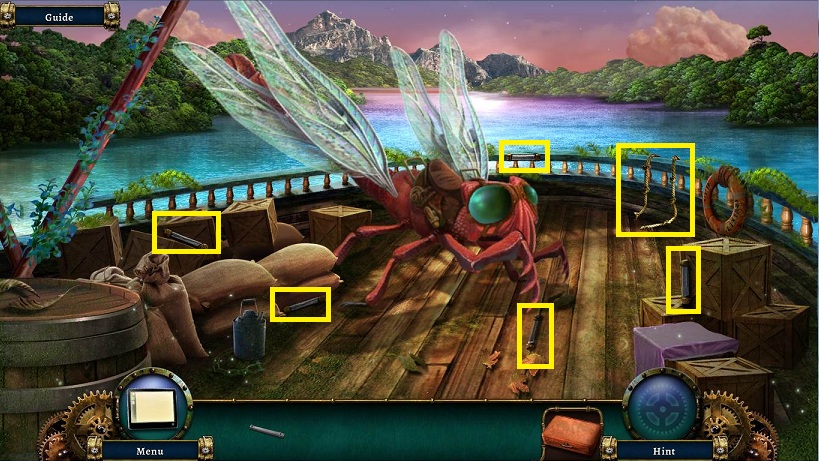
- Go to forward bow (to the right)
- Pick up 5 ROPE RUNGS
- Place the rope rungs on the ladder and receive ROPE LADDER
- Return
- Place the STEEL BAR at the top of the wall
- Place the ROPE LADDER
- Climb up

- Turn the valve on the door
- Pick up the COMPASS
- Pull down the green hatch to expose the lenses
- Pick up collectible
- Return to deck and examine the chest

- Place the COMPASS on the lock
- Click on the seahorse to move the outer ring until the sun is in the east (E)
- Click on the starfish to move the inner ring until ENE and ESE are surrounding the E on the outer ring
- Click on the jellyfish until the lightest purple spoke is pointing to the sun
- Click on the crab until the blue point is pointing to the blue wind (NW)
- Click on the fish until the puzzle is solved.
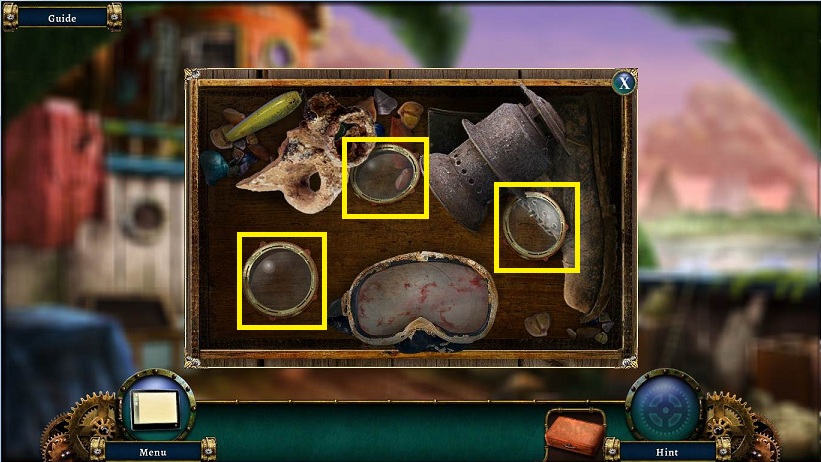
- Move the items around to find the lenses
- Pick up 3 LENS
- Go up the ladder and places the 3 LENS on the broken lenses
- Return to the cabin
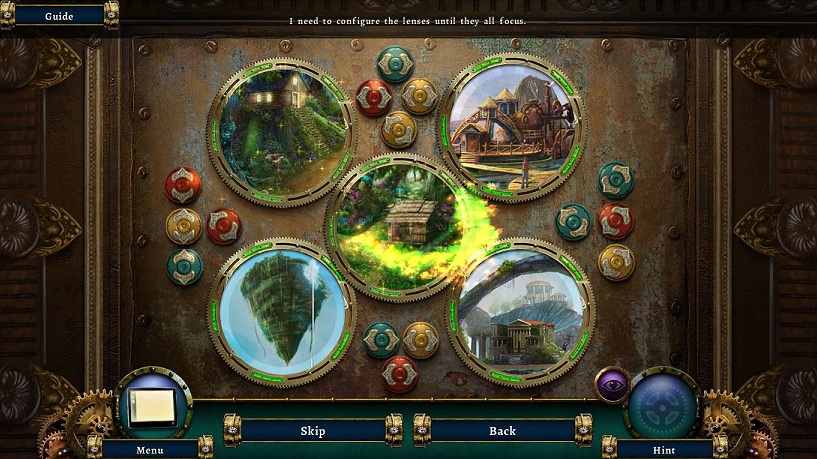
- Examine the periscope
- There are 3 layers to the lenses; the outer ring does not move and gives a clue as to what image should go there.
- Each color button represents a layer and they will swap the lenses in the direction of the arrows
- The diagonal buttons swap the top lens with the middle one
- When all 3 layers are correct the lens will light up green
- Start with the bottom right and then bottom left; finish off with another top corner and then the rest