
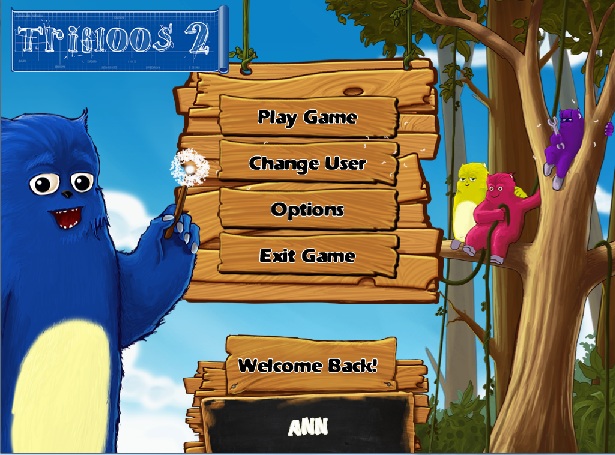
The Tribloos 2: General Information and Hints
Our Tribloos 2 Walkthrough will guide you through some of the most intense gameplay you've ever experienced in this charming but challenging time management game. Peruse our video solutions of each and every level for exact details on how to successfully achieve gold level every time.
Our Tribloos 2 Walkthrough is the complete guide for completing Tribloos 2 in expert time and gaining all of the achievements! We provide screenshots, step-by-step instructions, and video solutions for each level so that you can complete each in expert time. Whether you just need a hint about which building to make first or help throughout the entire level you will find it here in the Tribloos 2 Walkthrough.
Opening Story: Tribloo Island is in trouble as the tribloos are about to be blown away with giant storms. Join them as they try to discover the cause of these horrendous storms and venture to different worlds in their quest for finding out to stop the storms.
General Information:
The Top Bar provides the following information from left to right:
- Tribloos available / Total tribloos
- Wood for building (available from sawmills in batches up to 10 or logs or log substitues to be chopped with 5 available)
- Tools--made at Tool Sheds and occasionally in crates along the way (batches of 5)
- Stone--Collected from rock piles in batches of 5
- Scrap Metal--Collected from scrap piles in batches of 5
- Metal Sheets--made in the Foundry from scrap metal
In addition, each area provides unique items and buildings necessary for level completion.
Over each item, you will find one of three options:
- Blue circle with red bricks: This building or item is accessible and you currently have the resources to build or collect it.
- Nothing: The item or building is not accessible.
- Blue circle with axe: You can access this item that needs to be removed and you have the workers and (if needed) tools to do so.
- Green circles: A building is available to make items and you have the resources to do so.
- Faded circles of any type: You can access it but don't have the resources.
Hovering over an item will bring up the information about that item: how much it costs, the max workers it can take, and what it produces.
To send workers to an item you need to click on the circle itself and then multiple times to send the number of workers to it. Click the minus sign on either side to remove a worker. When you are building or clearing obstacles, as soon as you click the first time the resources will be allocated immediately.
All buildings can accept a minimum of one worker up to the stated maximum. For building and clearing additional workers will speed up the process. For producing, each worker will produce 1-2 items depending on the building. See table:
| Item/Building | Cost | Workers | Output | Cost | Workers |
| Wood Pile | 5 wood | 0 | Up to 5 | ||
| House | 10 wood | Up to 10 | 5 workers | ||
| Sawmill | 10 wood | Up to 10 | 10 wood | 0 | Up to 5 |
| Tool Shed | 10 wood | Up to 8 | 5 tools | 10 wood | Up to 5 |
| Rock pile | 5 stone | 5 tools | Up to 4 | ||
| Windmill | 10 wood | Up to 7 | 1 flour | 0 | 1 |
| Bakery | 20 wood | Up to 10 | 1 bread | 1 flour | 1 |
| Vine bush | 1 vine | 5 tools | Up to 4 | ||
| Weather Station | 10 wood | Up to 10 | |||
| Balloonage |
10 wood |
Up to 8 | 1 balloon | 0 | 1 |
| Hook | 1 balloon | 1 | |||
| Scrap piles | 2 scrap metal | 10 tools | Up to 5 | ||
| Foundry | 15 stone | Up to 12 | 2 sheet metal | 2 scrap metal | 1 - 5 |
| Pipe | 4 sheet metal | Up to 10 | |||
| Vapour Collector |
10 stone 5 wood |
Up to 10 | 3 water vapour | 0 | Up to 3 |
| Rubber plant | 5 rubber leaves | 0 | Up to 5 | ||
| Dive shop |
10 wood 1 metal sheet |
Up to 10 | 3 diving suits | 3 rubber leaves | Up to 3 |
| Coral stem | 1 coral stem | 2 tools | Up to 5 | ||
| Bubble catcher |
2 coral stems 2 metal sheets |
Up to 10 | 4 balloons | 0 | Up to 4 |
| Coral lamp |
2 coral stems 2 metal scraps |
Up to 5 | |||
| Dolphin | Dolphin | 0 | Up to 10 | ||
Basic strategies:
Starting the level: You will usually start off most levels with 5 wood and 5 workers.
- If there are 3 wood piles accessible, build a house first. If only 1 pile is available, build the sawmill first
- Build a sawmill next if the house was first or a house if the sawmill was first.
- The 3rd building will usually be a house if you have one to build.
- A tool shed should be built next if you have one; however, if you find yourself short on time--you can try again and build the toolshed 3rd and the 2nd house 4th to get those tools started earlier.
Always load up the sawmill and toolshed with 5 workers as almost everything is needed in sets of 10 wood or 5 tools.
Pipes: Those darn pipes! What can I say? I hate them. Due to distance from the start point, you will need to judge just when you have to send workers to get past the steam with each pipe on each level. Sometimes it is as soon as the steam comes or just as it stops. If your worker runs into the steam he will return home and not do what you need him to do.
Also, if workers are returning from the sawmill with wood and you send workers to a tool shed, they may very well turn around and crash into the steam and slow you down. So pay attention as you play or look at the guide for hints or watch the videos.
Good luck!