
Lost Lands: Dark Overlord: Chapter Six: The Castle
Our Lost Lands: Dark Overlord Walkthrough is the perfect companion to help you track down your missing son, Jimmy, through a strange new land. Trust our detailed instructions, custom marked screenshots, and simple puzzle solutions to help guide your steps as you being the frantic search for your son who's been taken by dark forces in a new exotic world.
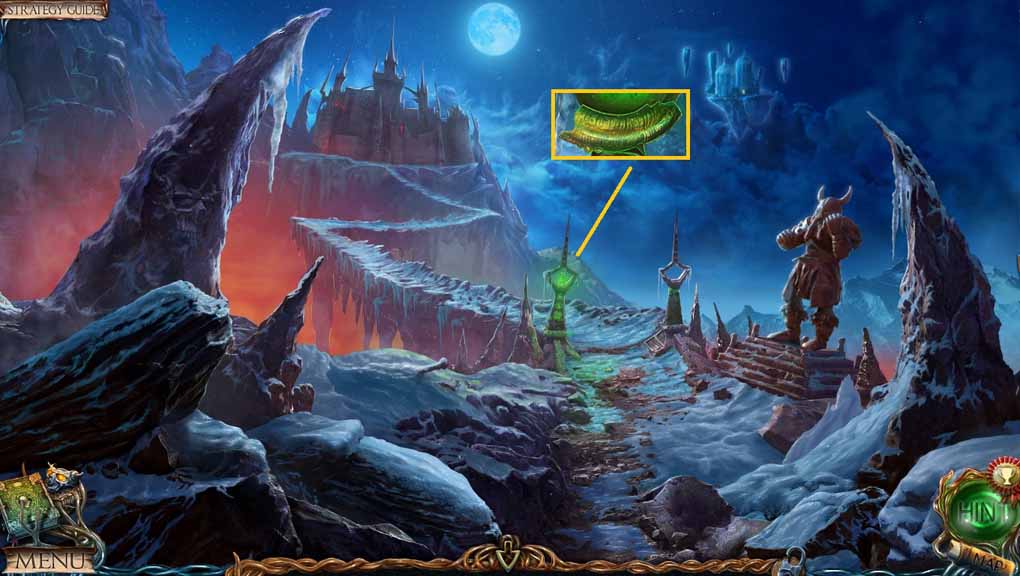
- Collect the 1st bas- relief piece.
- Move ahead.
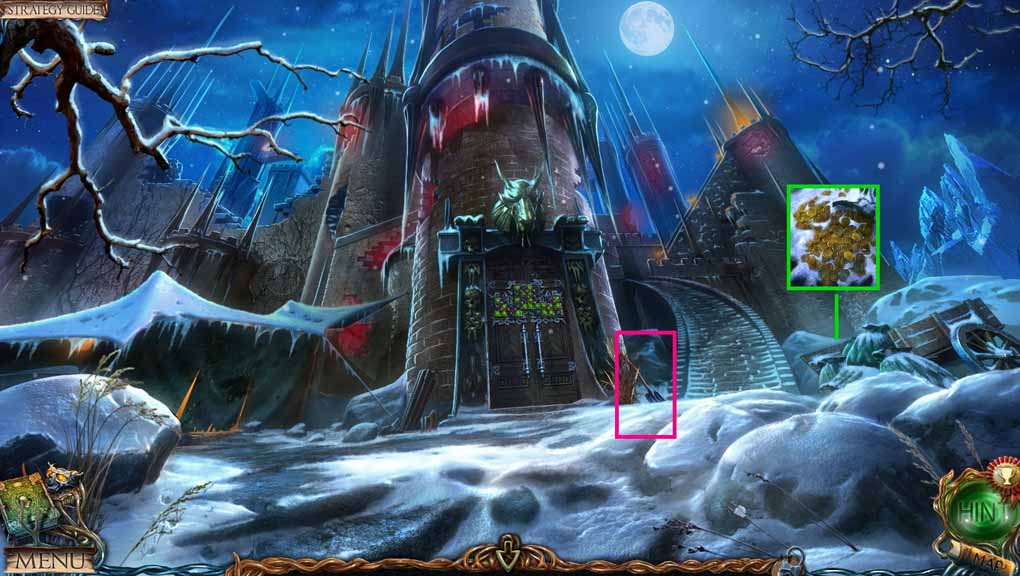
- Collect the shovel and the coins.
- Move back once.
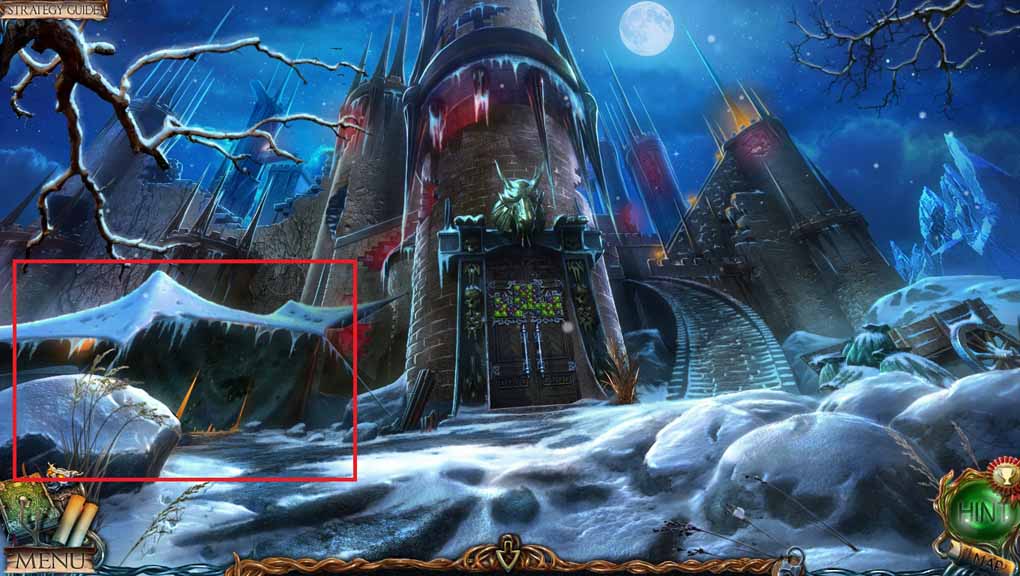
- Select the shovel to remove the snow; collect the hammer.
- Insert the hammer into the statue’s hands.
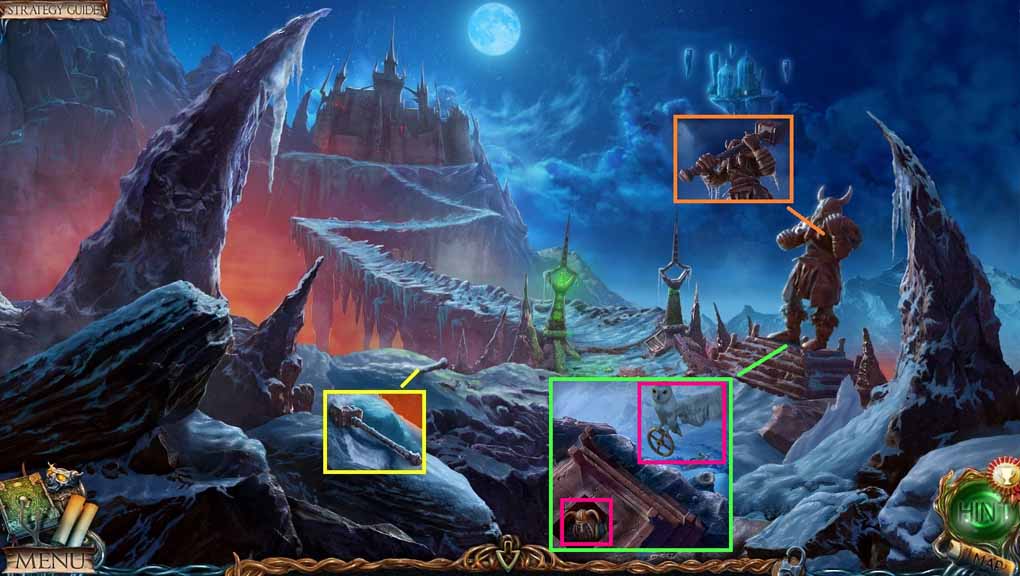
- Collect the 3rd statues head.
- Select the owl to collect the valve.
- Move ahead.
- Click the tent 2 times to trigger a hidden objects area.
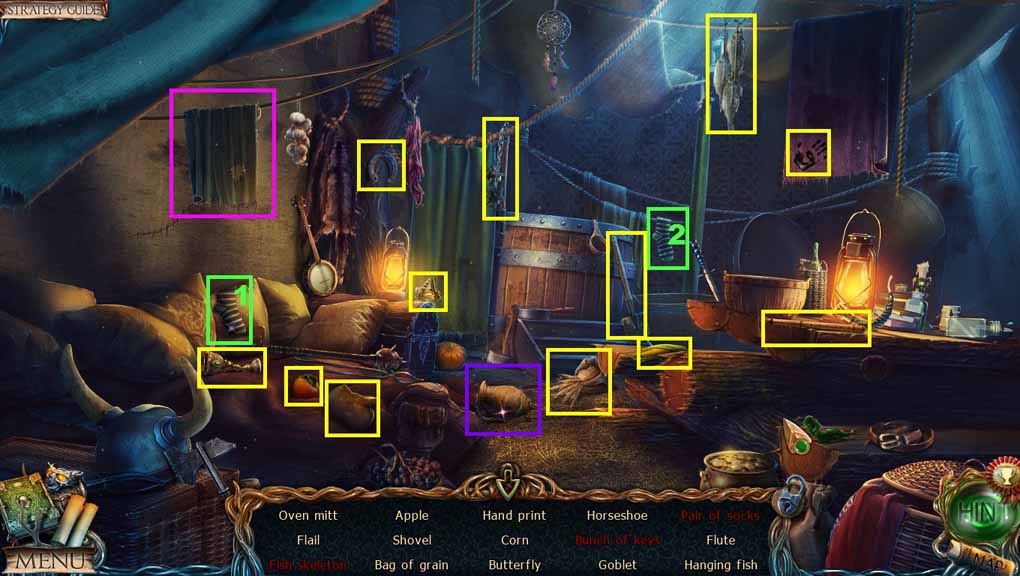
- Find the listed items.
- Click the jar; collect the fish skeleton.
- Click the cloth; collect the bunch of keys.
- Select the sock and place it with the other sock; collect the pair of socks.
- Collect the oven mitt.
- Move to the Caves.
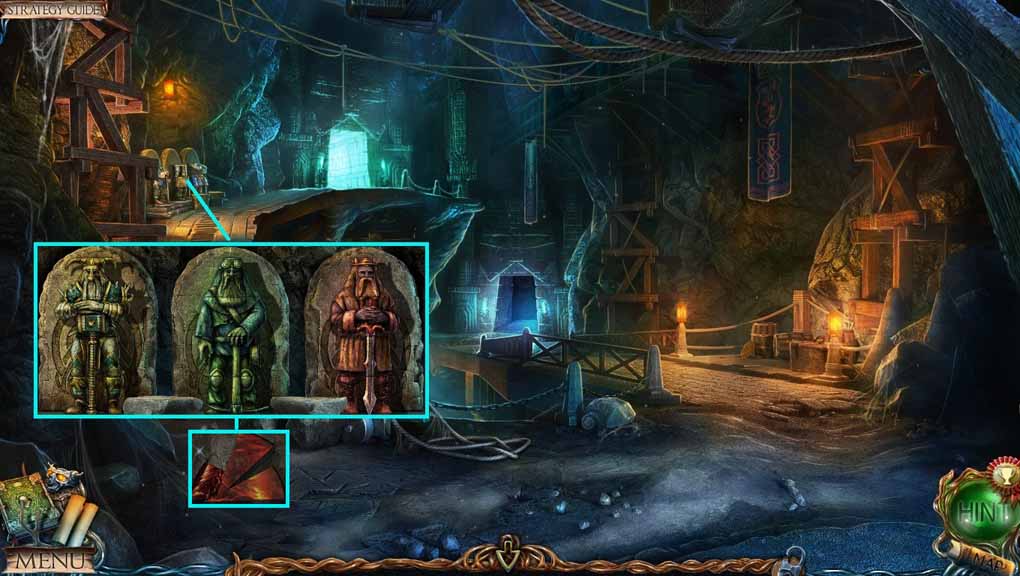
- Attach the 3 statue heads onto the statues to trigger a puzzle.
- Solve the puzzle by restoring the statues.
- Collect the mosaic pieces.
- Move to the Demon Statue.
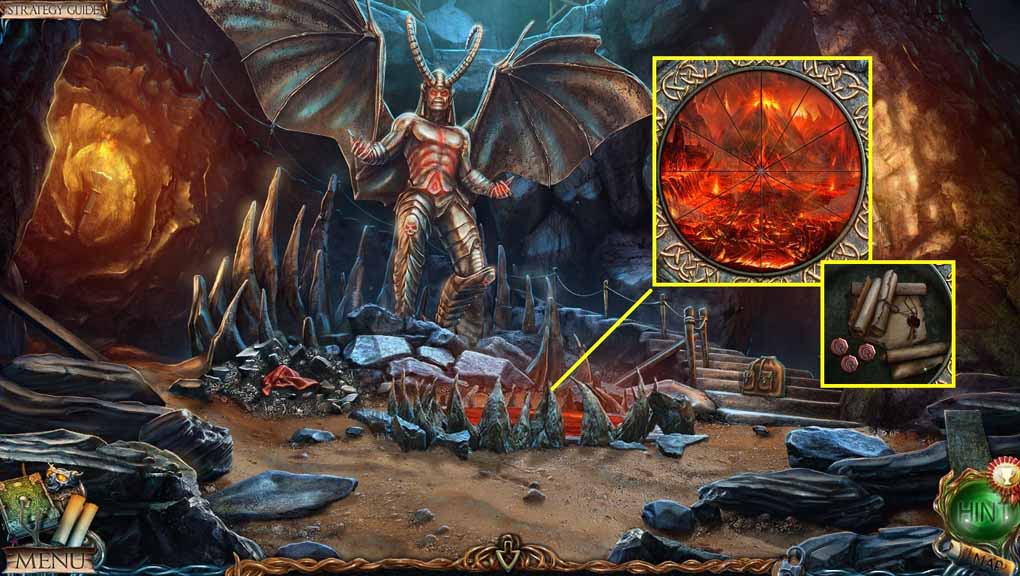
- Insert the mosaic pieces into the mosaic to trigger a puzzle.
- Solve the puzzle by completing the image correctly.
- Read the note and collect the buttons.
- Move to Outside the Castle.
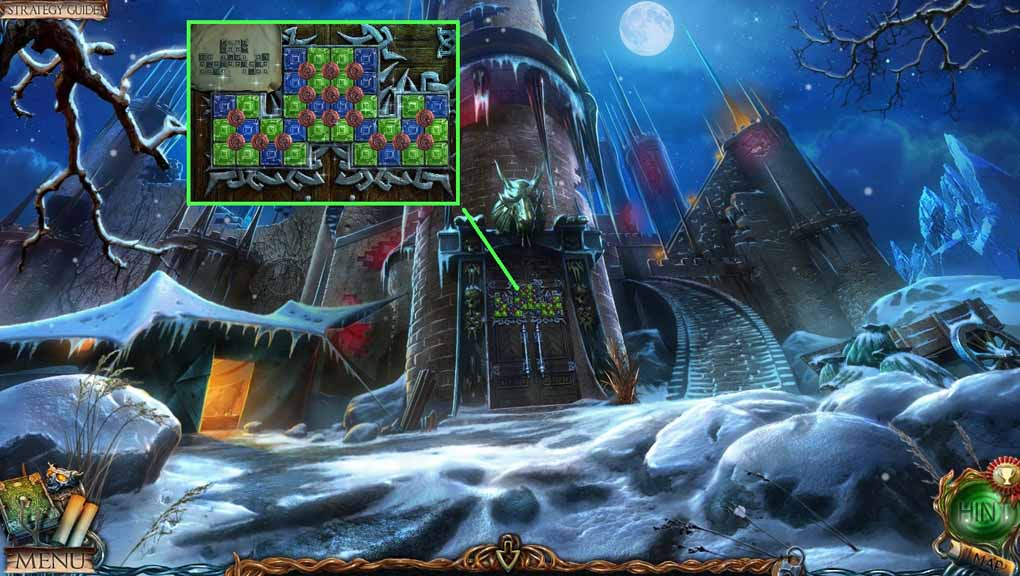
- Attach the diagram and the buttons onto the door to trigger a puzzle.
- Solve the puzzle by arranging the squares as shown on the diagram.
- Move ahead.
- Click anywhere in the scene; receive the key.
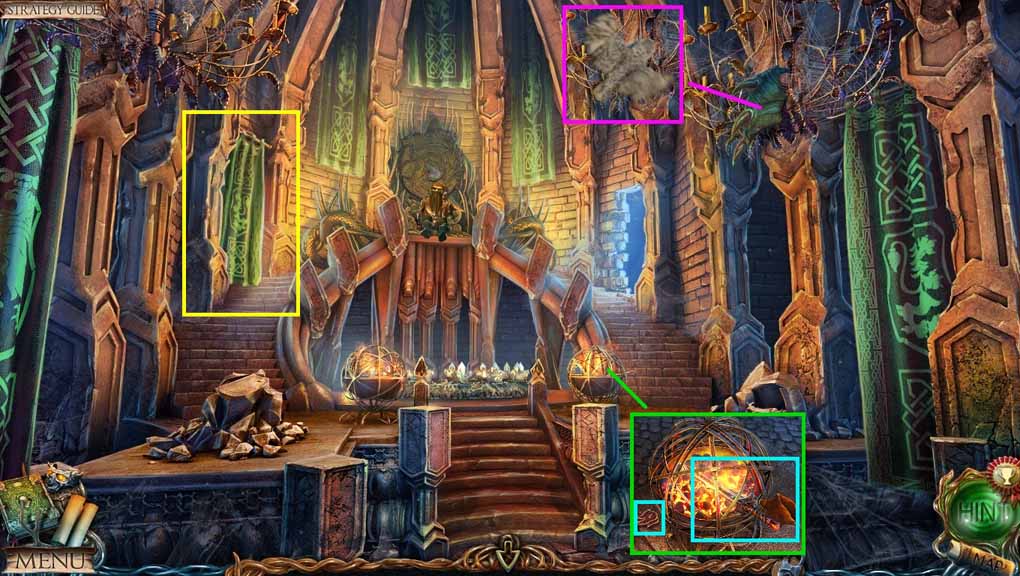
- Select the owl to collect the 2nd bas-relief piece.
- Select the oven mitt to collect the sword.
- Collect the fire symbol.
- Click the curtain.
- Move into the Corridors.
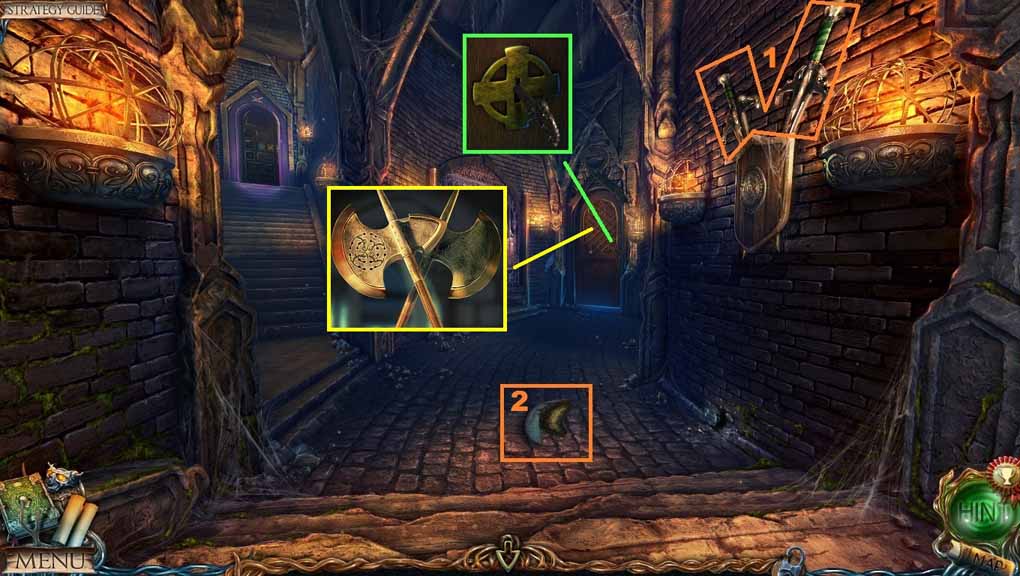
- Click both swords; collect the 3rd bas-relief.
- Insert the key into the lock.
- Zoom into the doorway and examine the sword; click the symbol for the clue.
- Move to the Exit to the Dirigible.
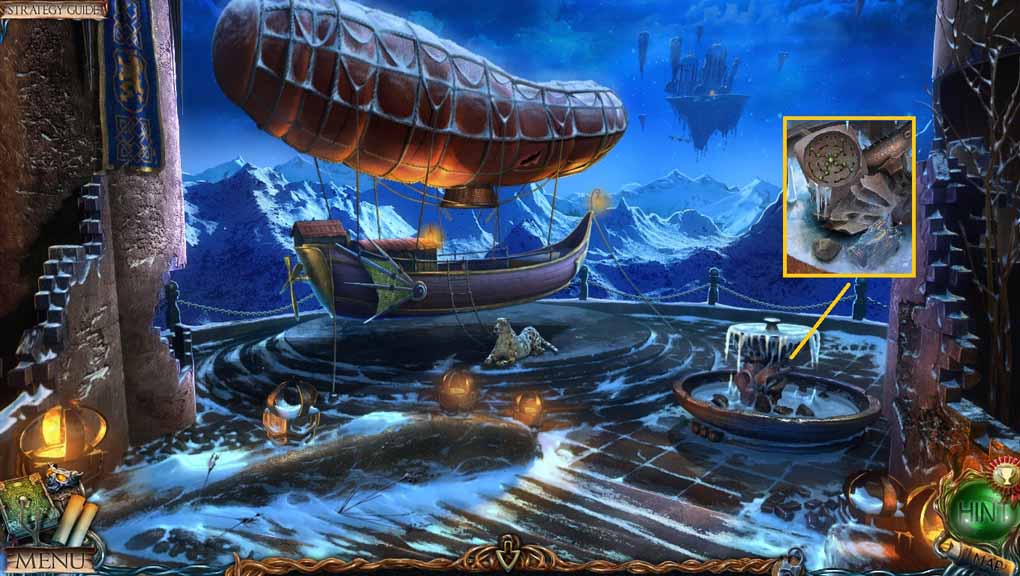
- Select the sword chip away the ice.
- Collect the object in ice.
- Click the clue.
- Move to the Corridors.
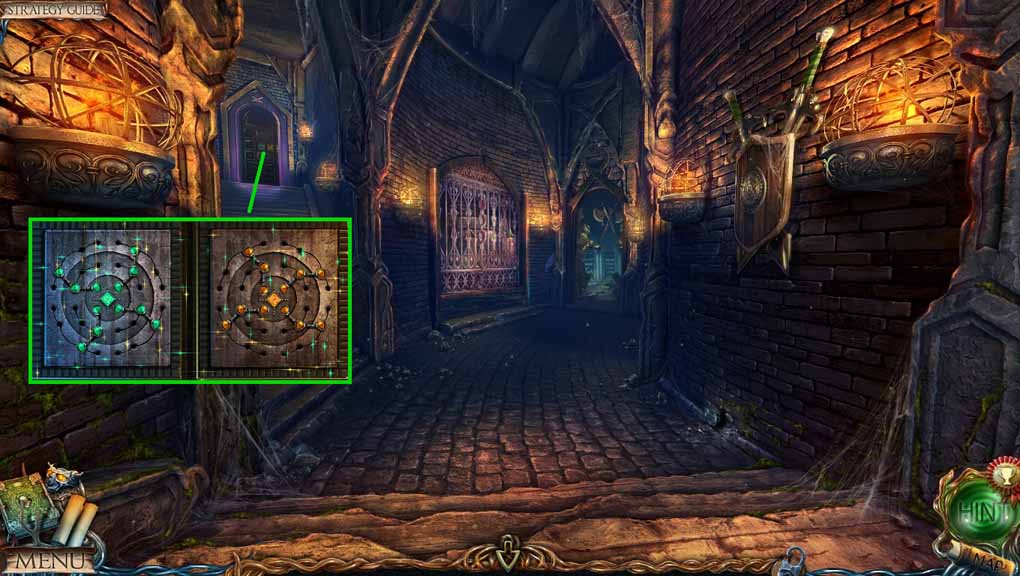
- Zoom into the door to trigger a puzzle.
- Solve the puzzle by duplicating the alignment as shown in the journal.
- Move up the stairs.
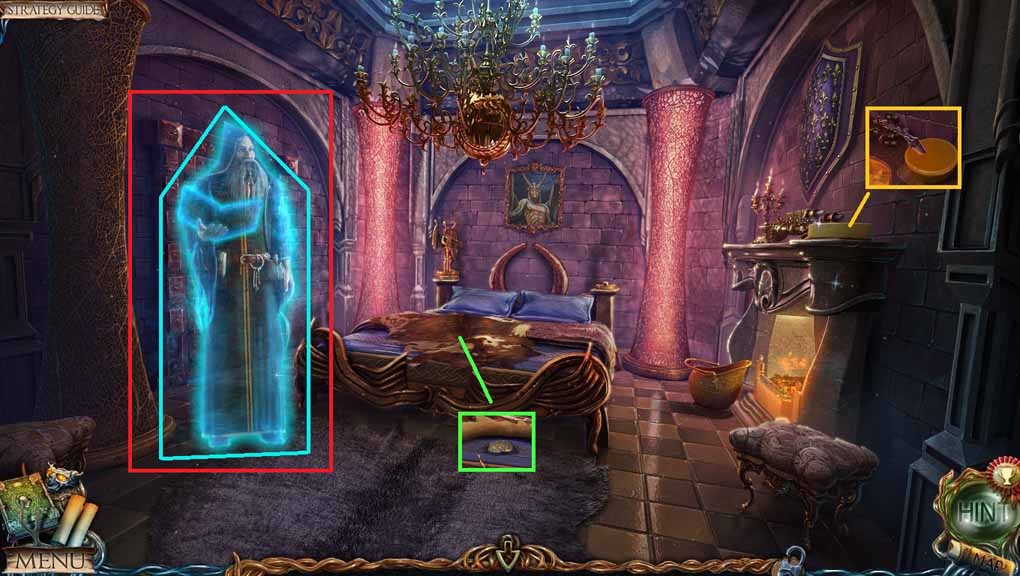
- Speak to the Alchemist.
- Select the dagger to slice and collect the piece of cheese.
- Click the hide; collect the symbol.
- Click the door open and zoom in to trigger a hidden objects area.
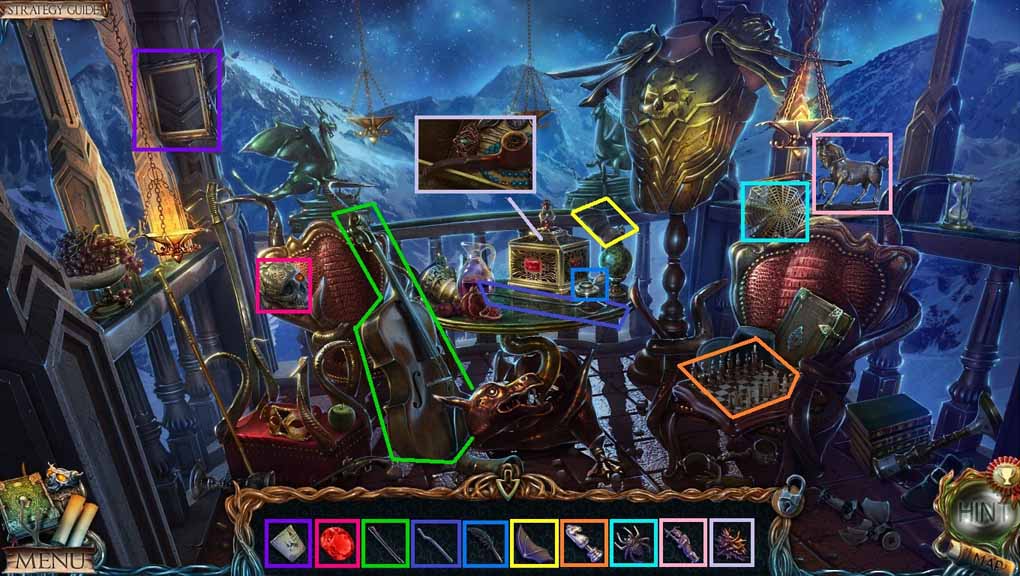
- Place the pictured items with their matching objects.
- Collect the pincers.

- Select the object in ice and place it onto the fire.
- Select the pincers to remove it and place it into the water; collect the statuette.
- Attach the statuette onto the bedpost; collect the pieces and read the note.
- Move back once.
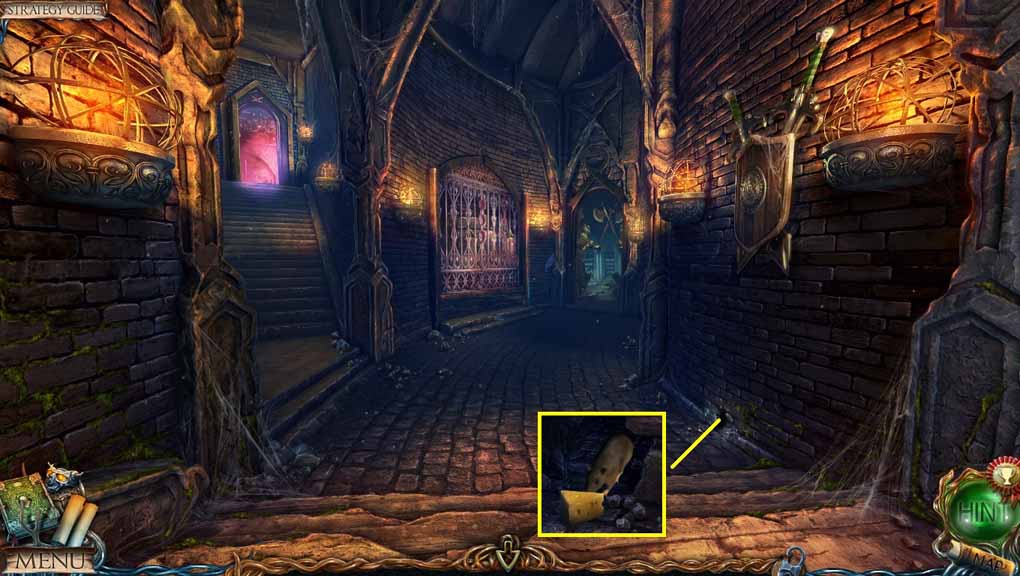
- Place the piece of cheese next to the hole.
- Collect the rat.
- Move back once.
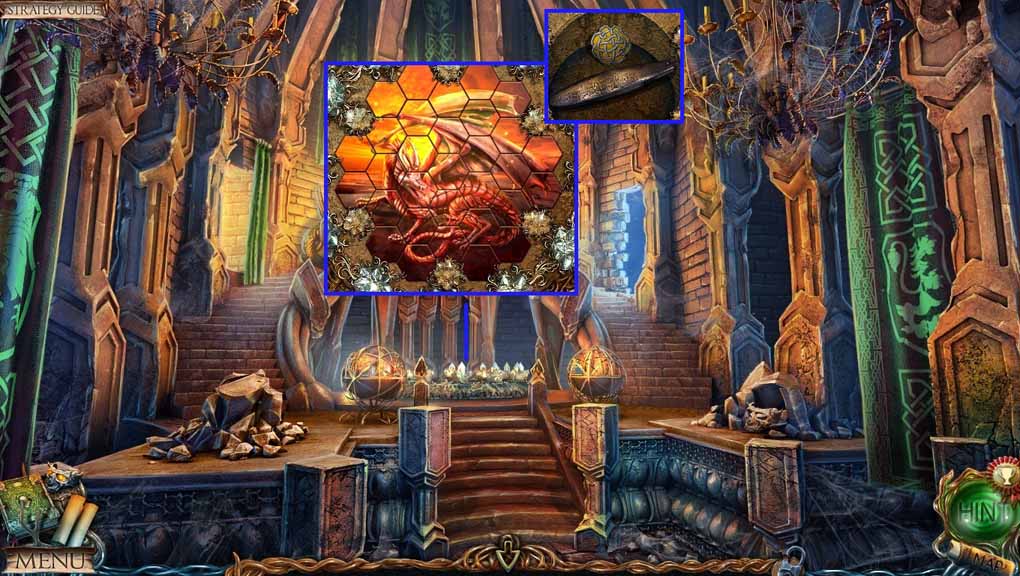
- Insert the pieces into the mosaic to trigger a puzzle.
- Solve the puzzle by completing the image.
- Collect the propeller blade and the 2nd symbol.
- Move to the Viewing Point.
- Collect the coal and the blank piece of paper.
- Move to the Exit to the Dirigible.
- Select the rat and use it to distract the leopard.
- Collect the air symbol and the 2nd valve.
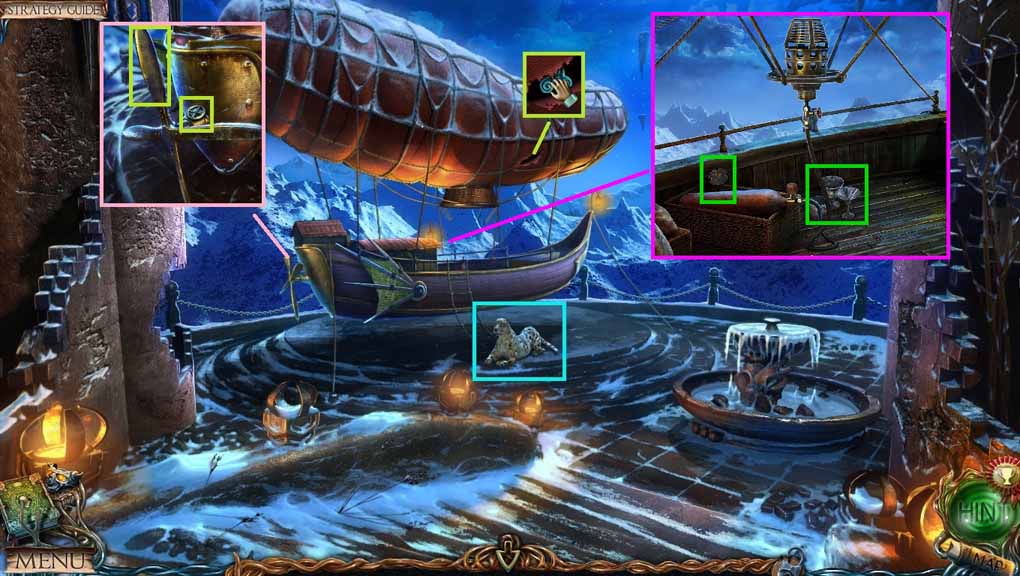
- Click the top propeller and attach the propeller blade onto it.
- Click the airship to trigger a puzzle.
- Solve the puzzle by assembling the burner.
- Collect the 3rd symbol and the cups.
- Move to the Corridor.
- Insert the 3 symbols into the matched slots.
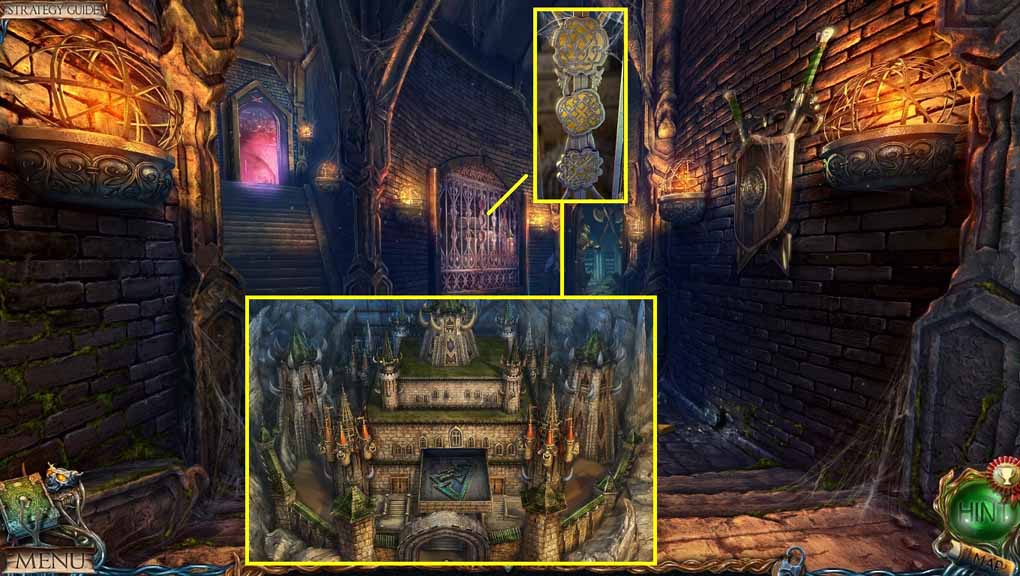
- Examine the alcove to trigger a puzzle.
- Solve the puzzle by assembling the castle.
- Collect the earth symbol.
- Move to the Lift.
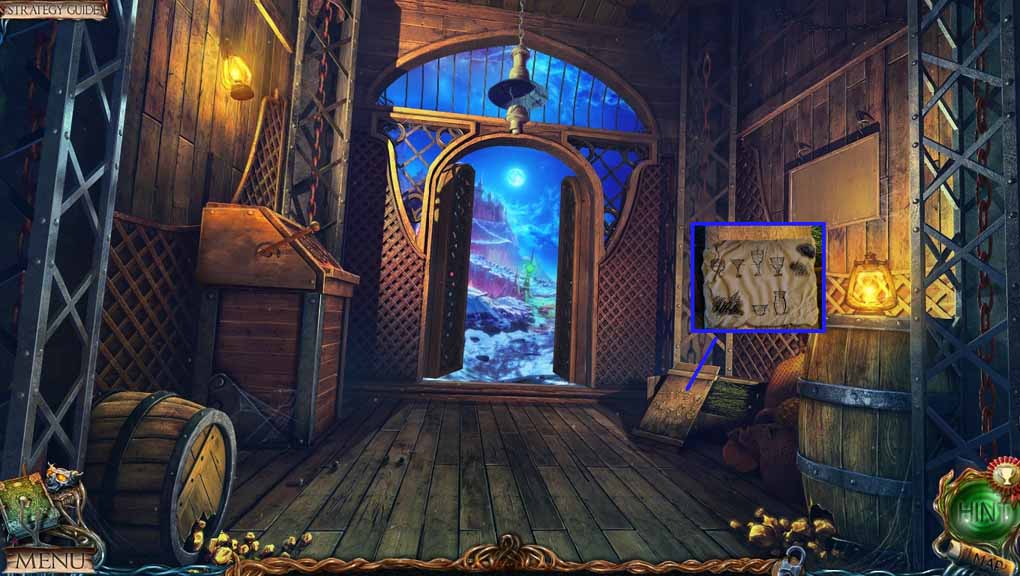
- Place the blank piece of paper onto the board and use the coal on it.
- Collect the dining set diagram.
- Move to the Captain’s Cabin.

- Place the cups and the dining set diagram onto the shelves to trigger a puzzle.
- Solve the puzzle by aligning the cups correctly.
- Collect the book.
- Move to the Library.
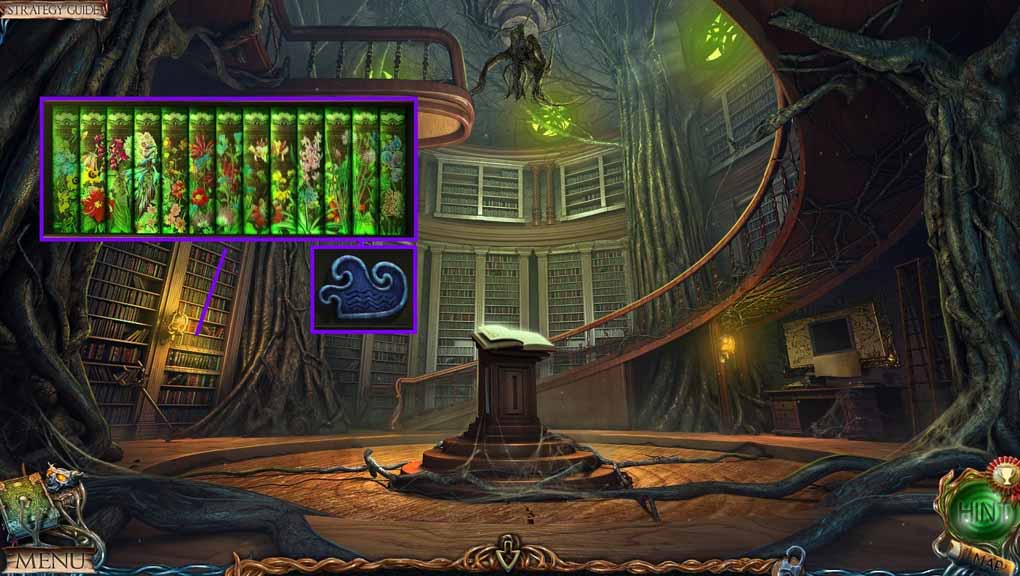
- Place the book onto the shelf to trigger a puzzle.
- Solve the puzzle by completing to the image.
- Collect the water symbol.
- Move to the Viewing Point.
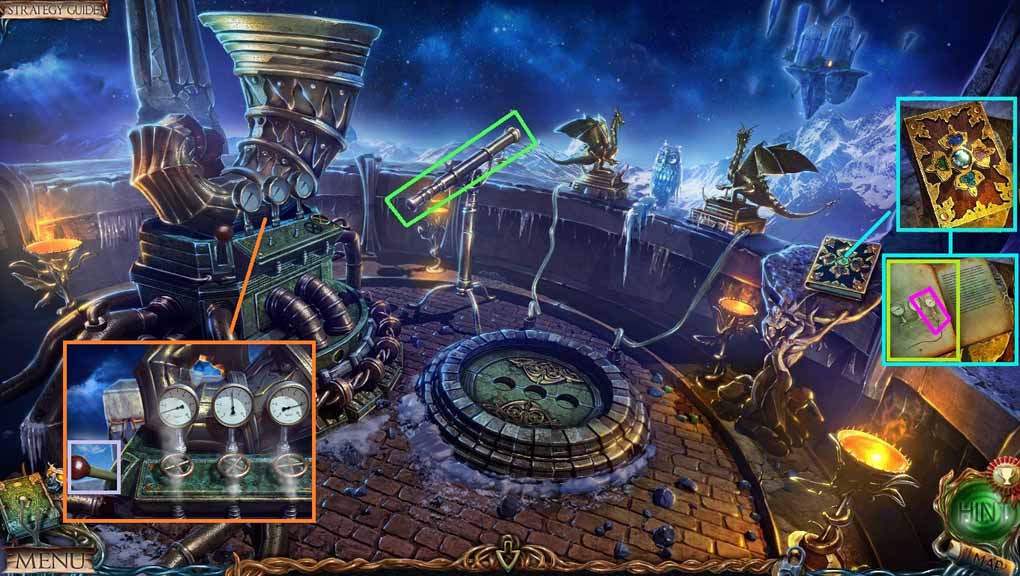
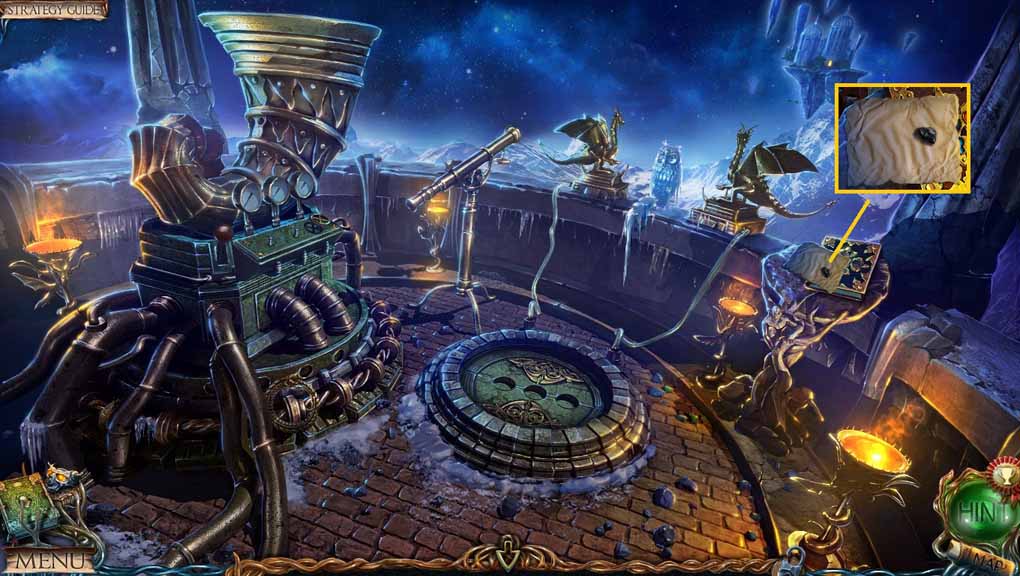
- Examine the telescope.
- Insert the fire, air, earth and water symbols into their matching slots.
- Collect the needle.
- Click the diagram for a clue.
- Attach the 2 valves onto the stems to trigger a puzzle.
- Solve the puzzle by rotating the gauges correctly.
- Click the lever.
- Move to the Exit to the Dirigible.
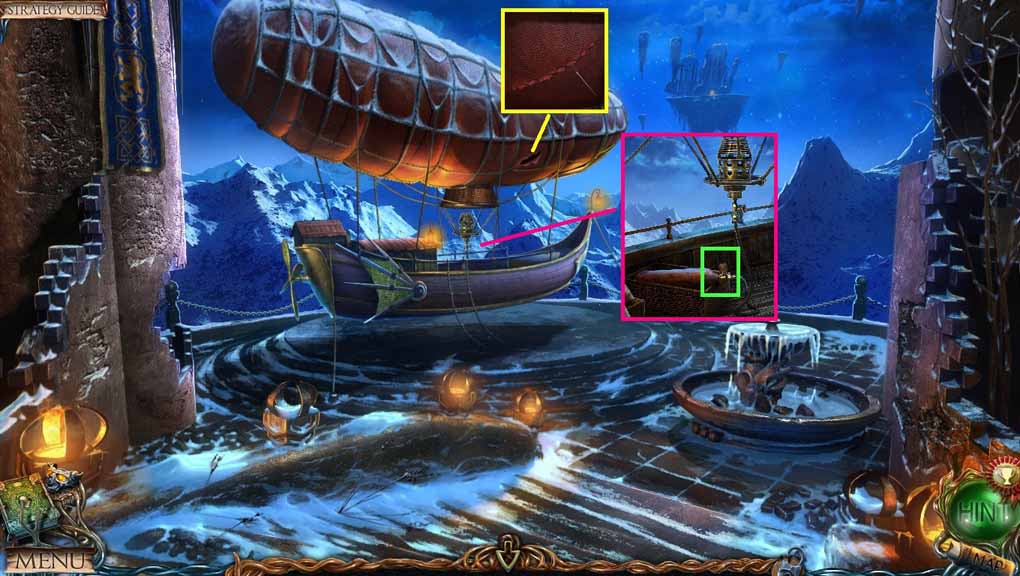
- Select the needle to mend the hole.
- Click the airship.
- Click the valve.
- Click the airship.