
Dark Parables: Ballad of Rapunzel: Chapter Four
Our Dark Parables: Ballad of Rapunzel Walkthrough will guide you through the kingdom of Floralia as you attempt to track down the culprit behind the release of a mysterious pollen. Use our clear instructions, custom screenshots, and simple puzzle solutions to discover the truth to what's been happening in this faraway kingdom.
General Information & Tips
Prologue
Chapter One
Chapter Two
Chapter Three
Chapter Four
Ask for help in the comments below!
Prologue
Chapter One
Chapter Two
Chapter Three
Chapter Four
Ask for help in the comments below!
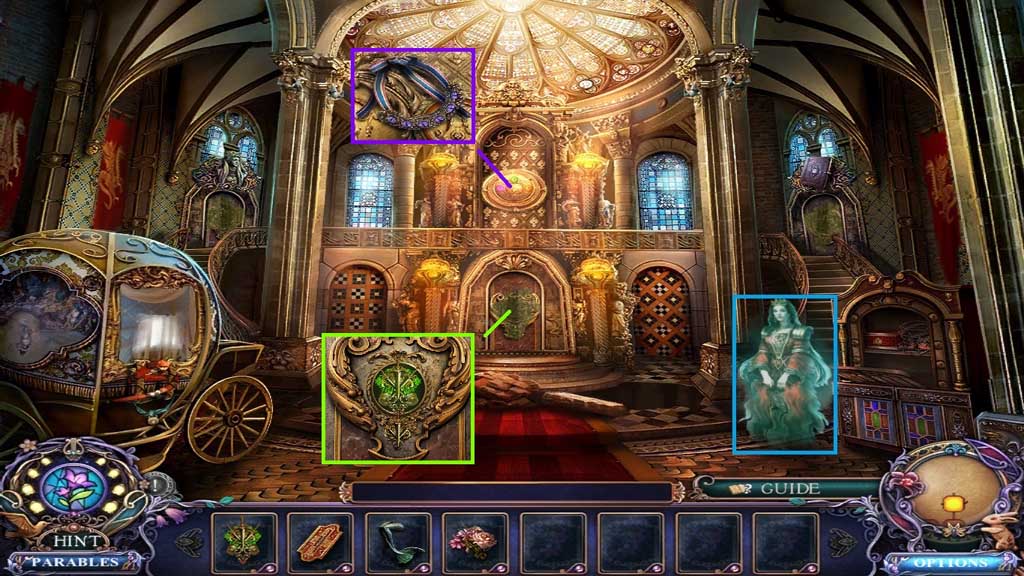
- Collect the drawer handles.
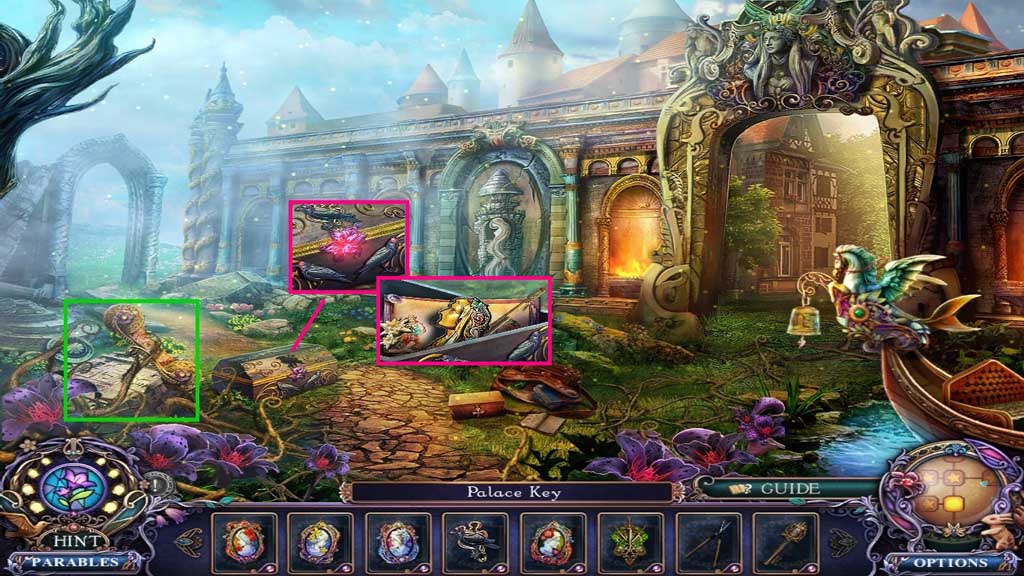
- Insert the raven badge; collect the gold brooch and the angel bow.
- Move to the left and click the hidden objects area.
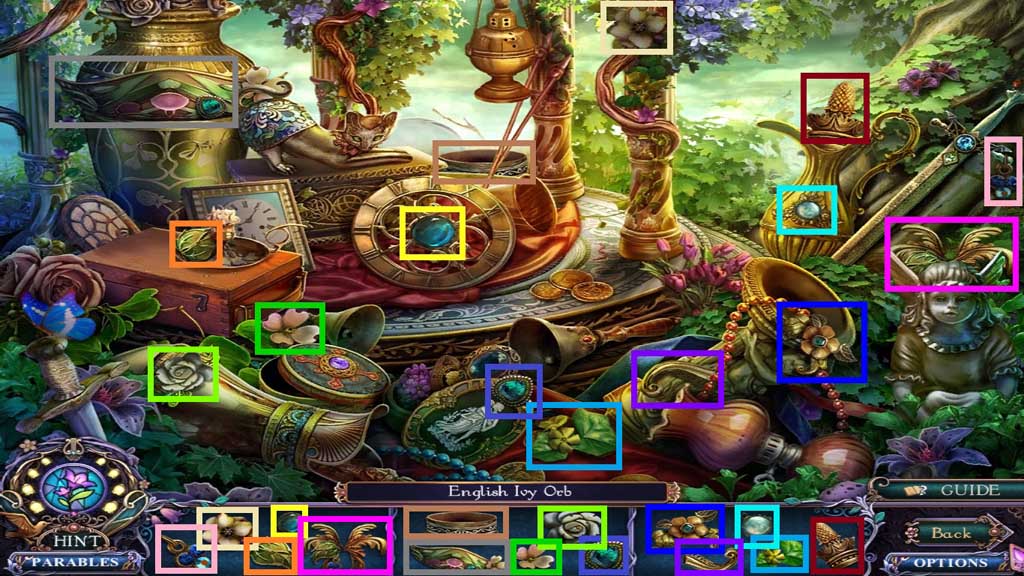
- Find the items.
- Collect the English ivy orb.
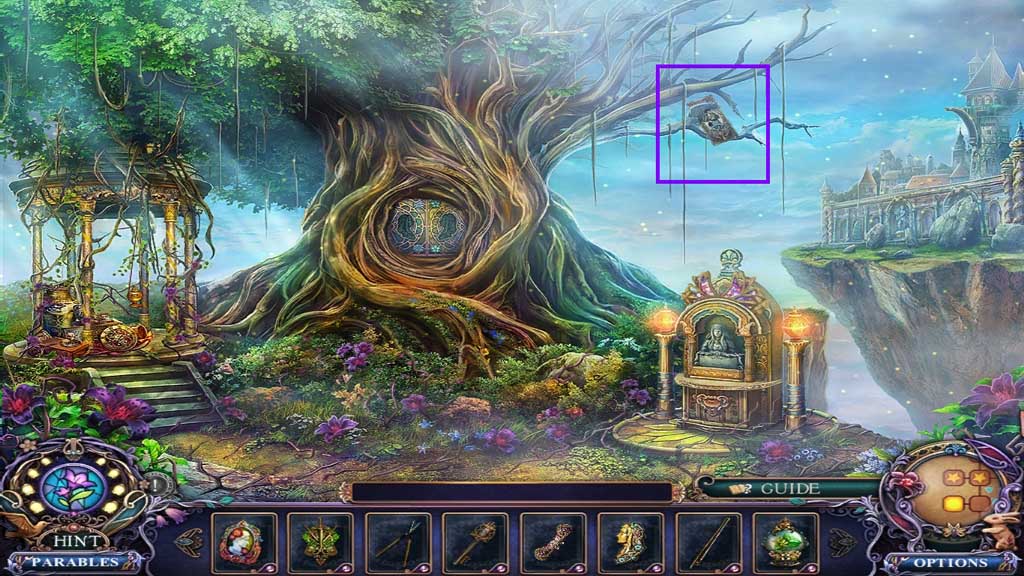
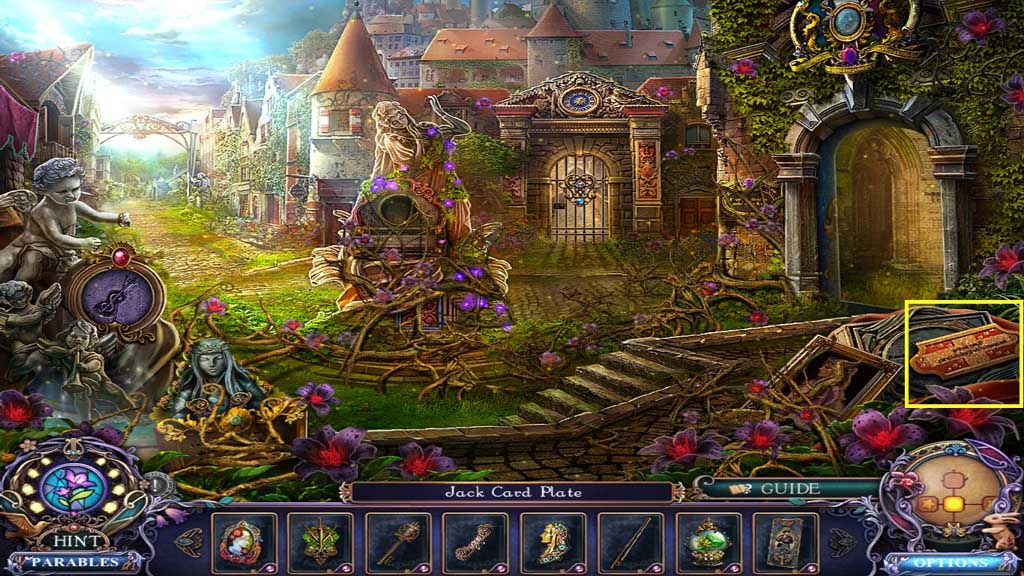
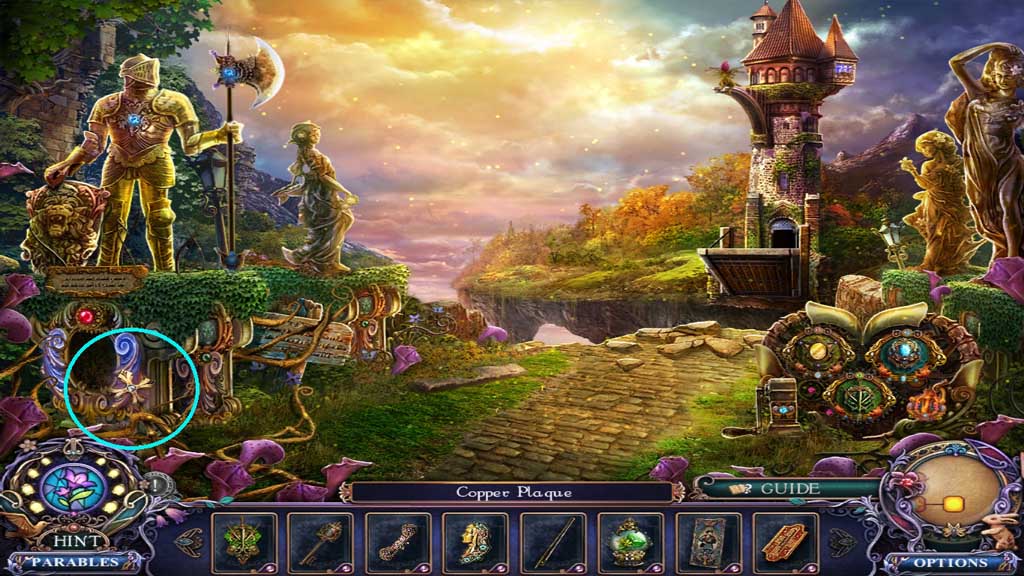
- Cut the branch using the branch cutter; collect the jack card plate.
- Move down once and go forward.
- Collect the copper plaque.
- Move to the right.
- Collect the cross key.
- Move down once and go to the left.
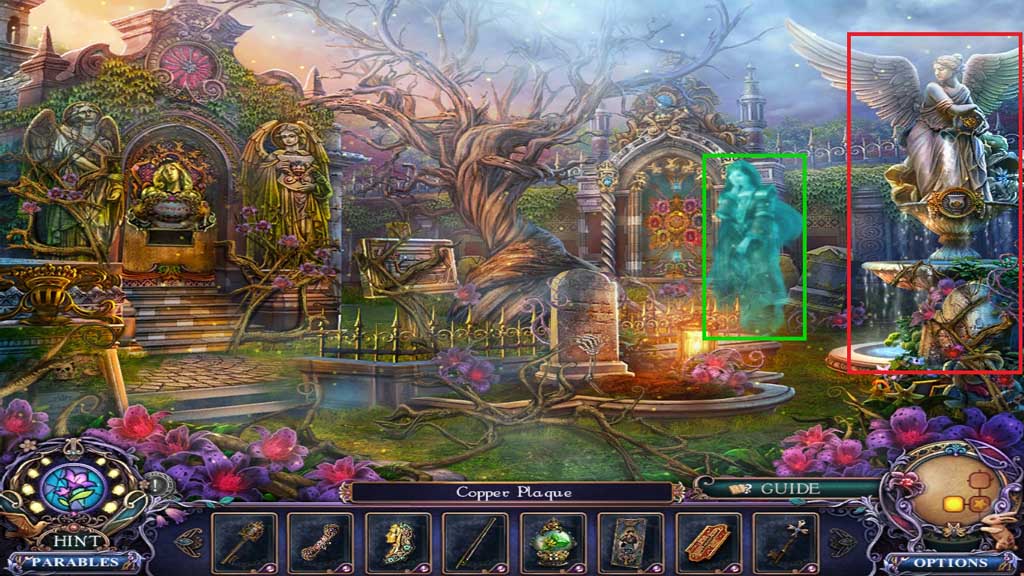
- Speak to the ghost to trigger a hidden objects area.

- Find the items.
- Collect the king card plate.
- Move down once.
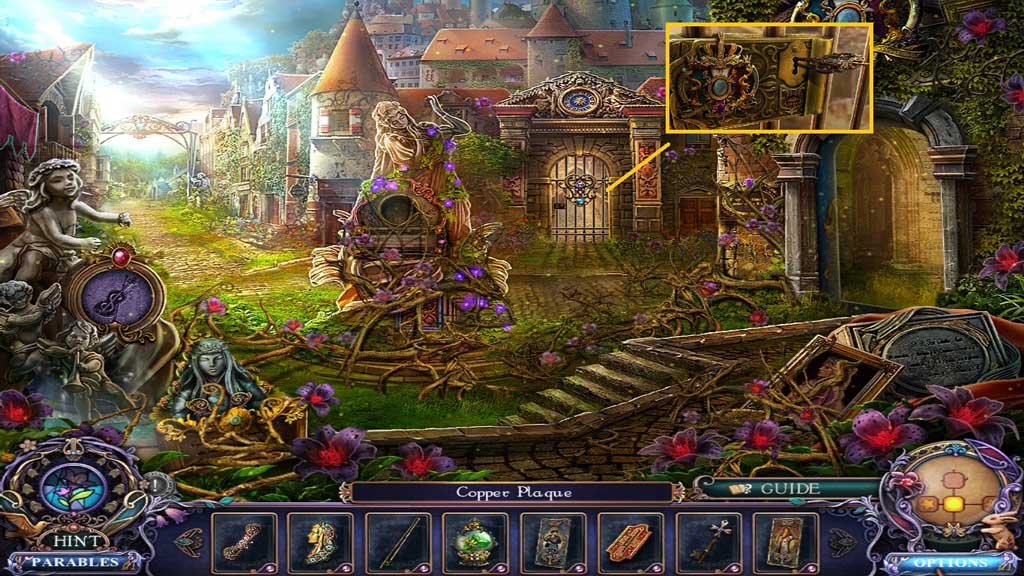
- Insert the palace key.
- Move ahead.
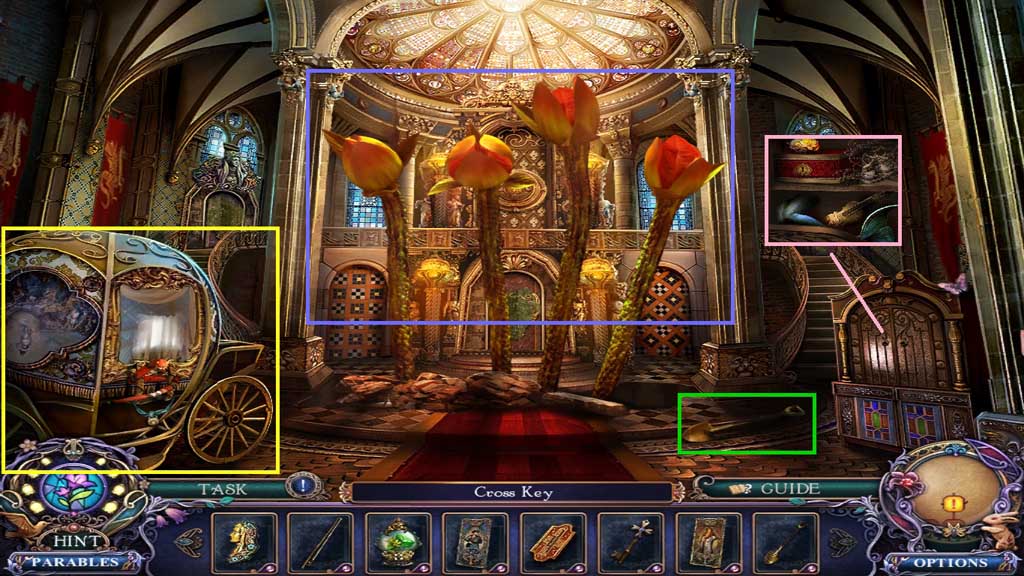
- Collect the shovel.
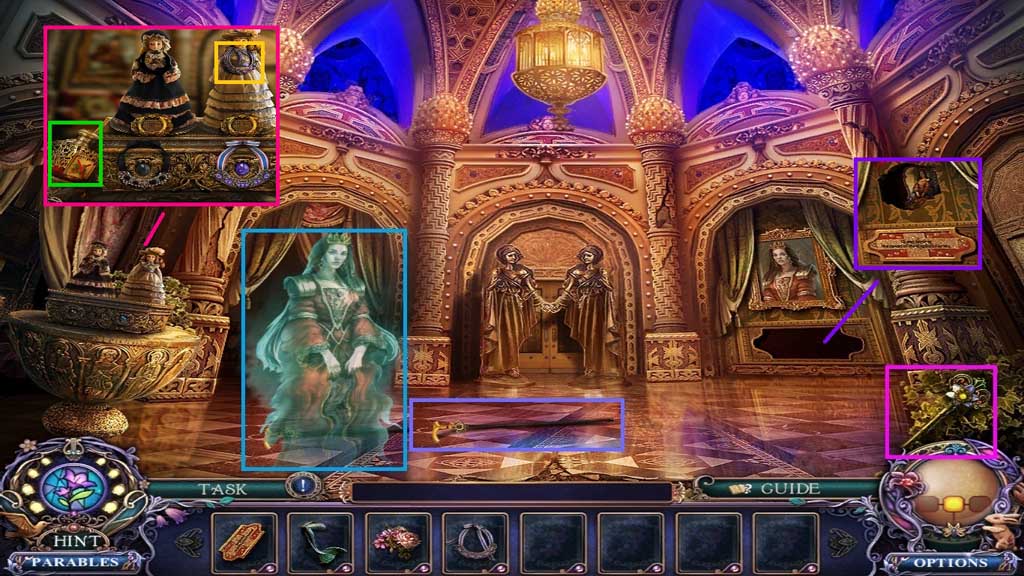
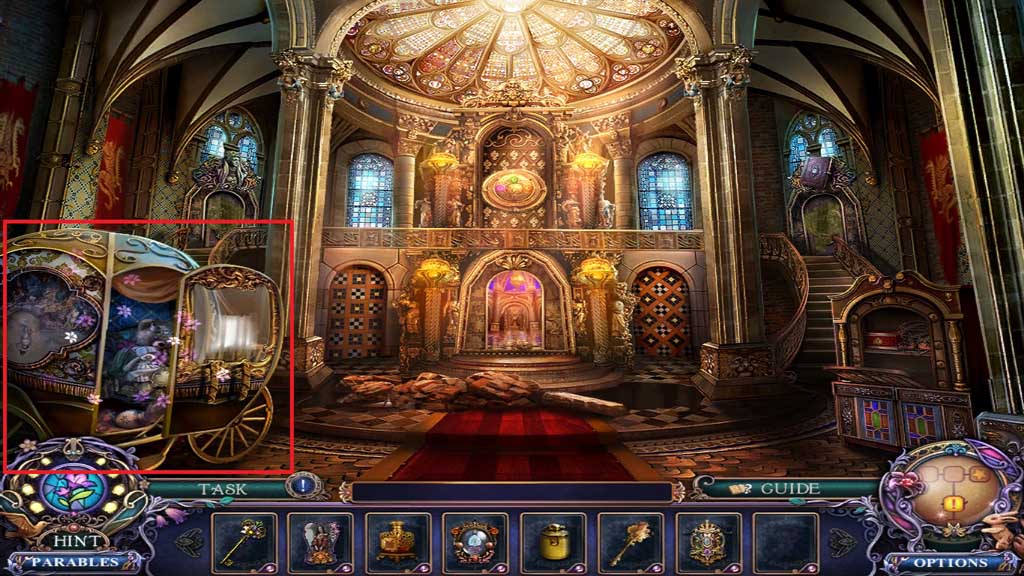
- Zoom into the center.
- Zoom into the carriage.
- Attach the drawer handles.
- Collect the mermaid tail and the angel violin.
- Move down once.

- Place the angel violin and the angel bow.
- Collect the floral heart and the silver brooch.
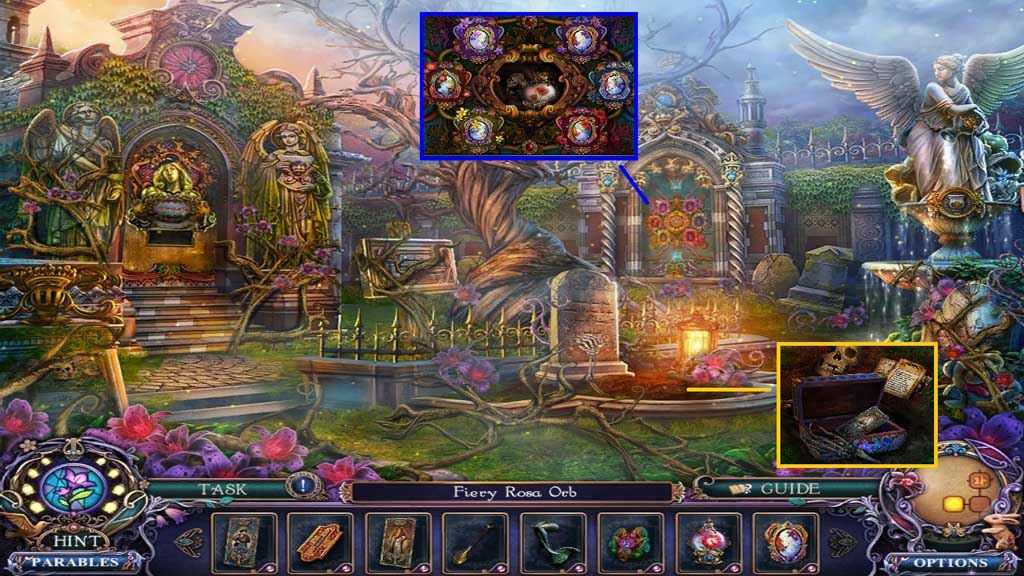
- Move down once.
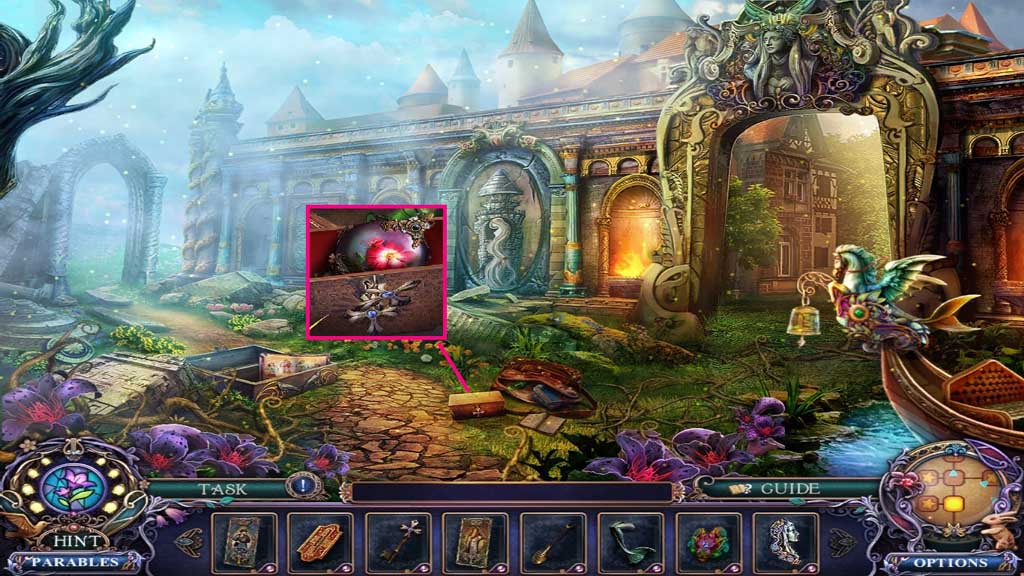
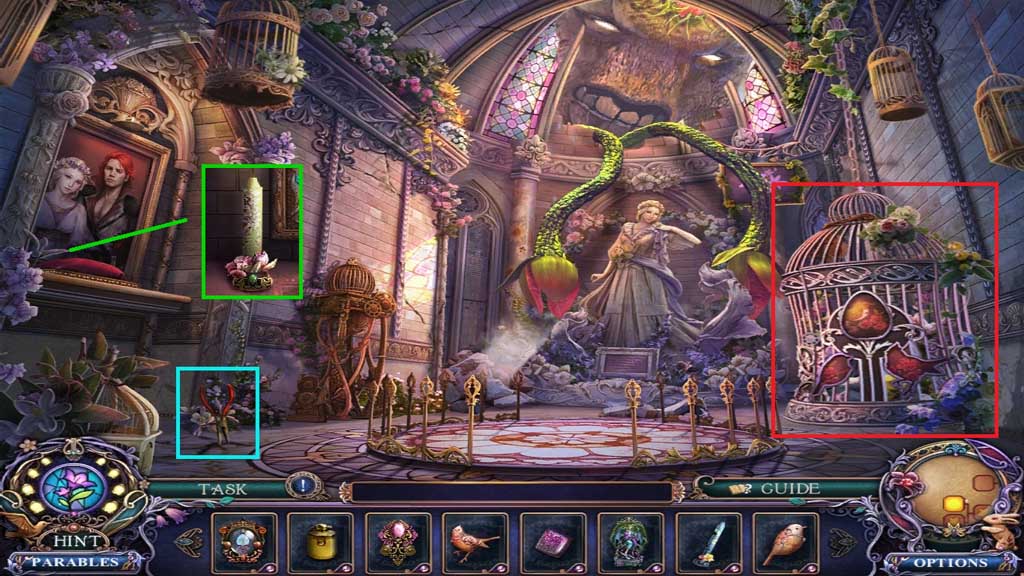
- Insert the cross key; collect the fiery Rosa orb.
- Move left.
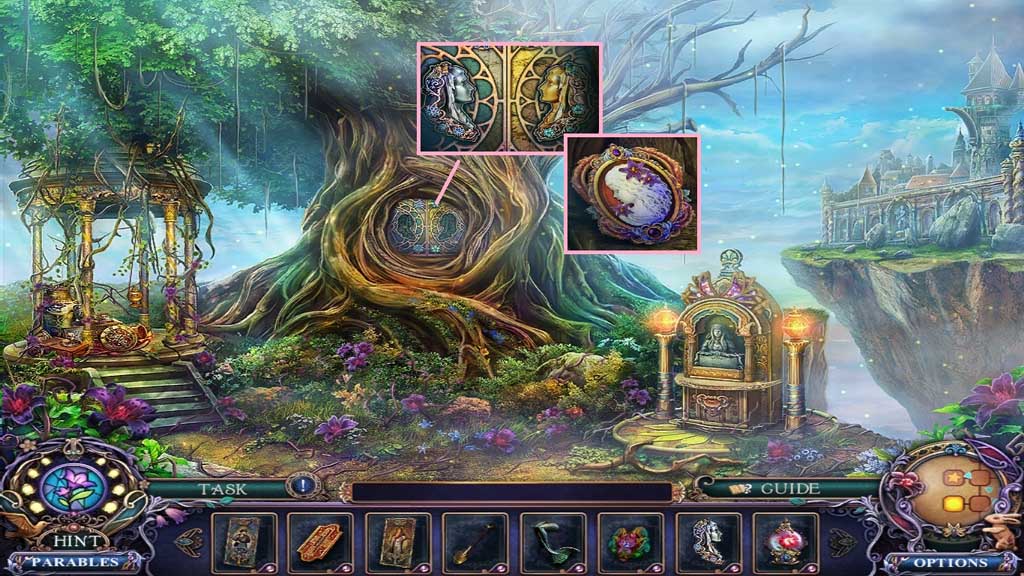
- Insert the silver and gold brooches.
- Collect the belladonna cameo.
- Move down once, move ahead and go to the left.
- Insert the Rapunzel, the ross red, ivy green, belladonna, snow white and briar rose cameos.
- Collect the thorned rose orb.
- Use the shovel to dig the dirt; insert the floral heart.
- Collect the queen card plate; read the note.
- Move down once and go to the right.
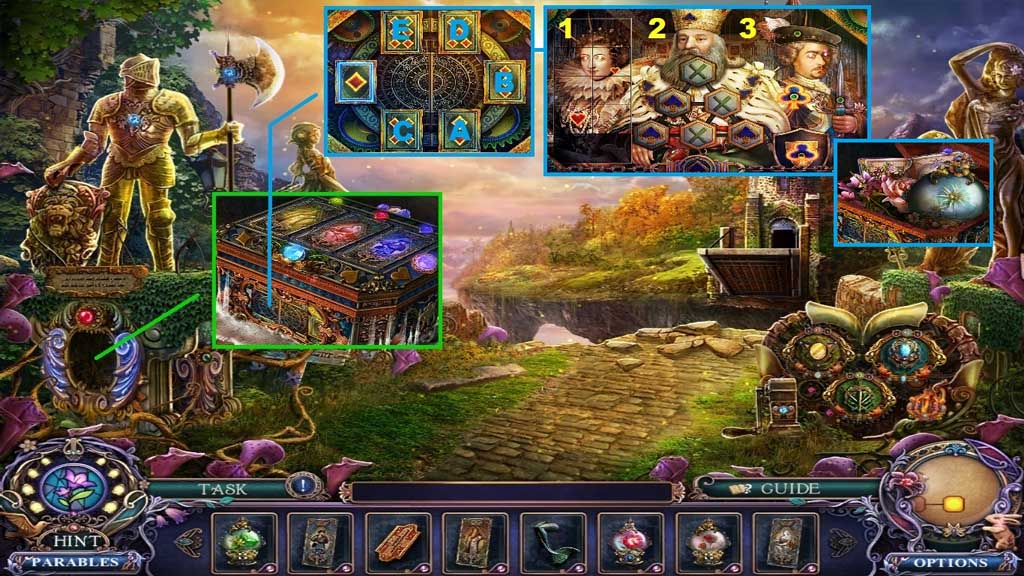
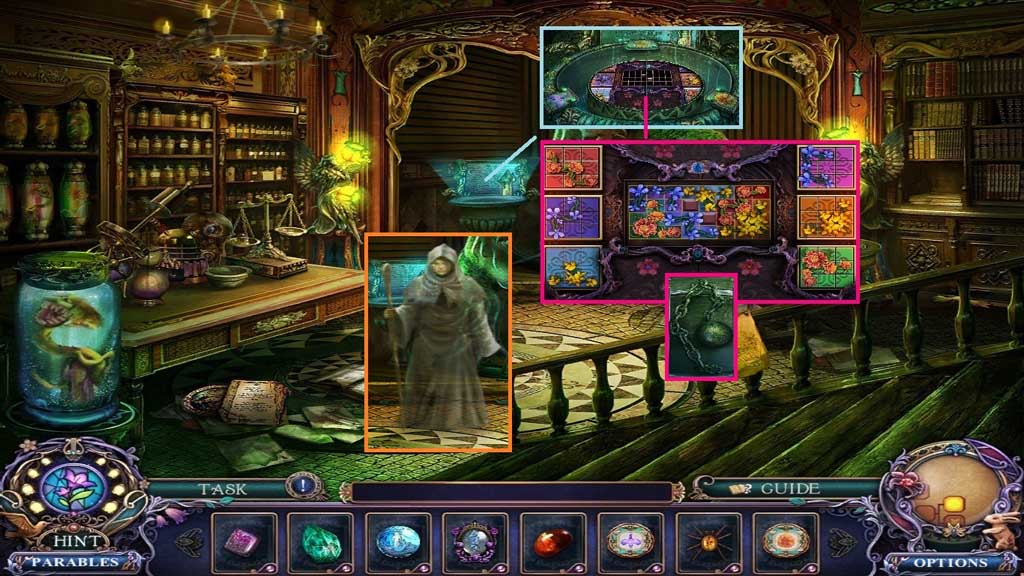
- Insert the king, queen and jack card plates.
- Zoom into the panel to trigger a mini game.
- Solve the 1st part of the game by clicking the cards in ascending order.
- Solve the 2nd part of the game by aligning the tiles correctly for segment 1, arranging the tiles to reflect all spades in segment 2 and finally, arranging the items correctly in segment 3.
- Collect the frost edelweiss orb and the spring bouquet.
- Move down once and go forward.

- Use the English ivy, fiery Rosa, thorned rose and frost edelweiss orbs to remove the overgrown plants.
- Speak to the ghost.
- Collect the striped ribbon necklace.
- Insert the sword blazon.
- Move ahead.
- Speak to the ghost.
- Collect the daffodil key.
- Attach the copper plaque.
- Collect the Melanie portrait.
- Collect the cane.
- Place the striped ribbon necklace; collect the moss remover.
- Move to the left.
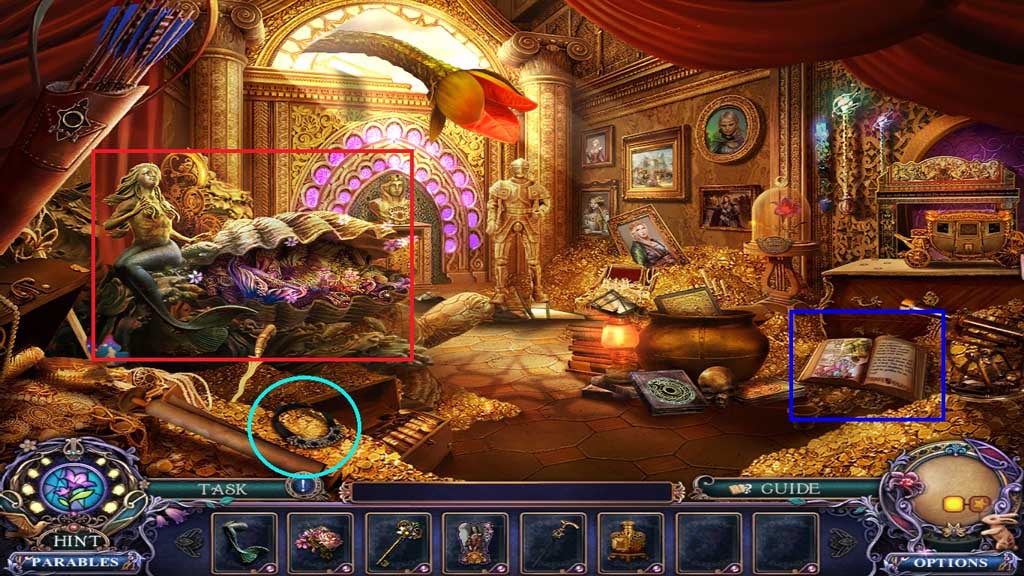
- Collect the black ribbon necklace.
- Read the book.
- Attach the mermaid tail to trigger a hidden objects area.
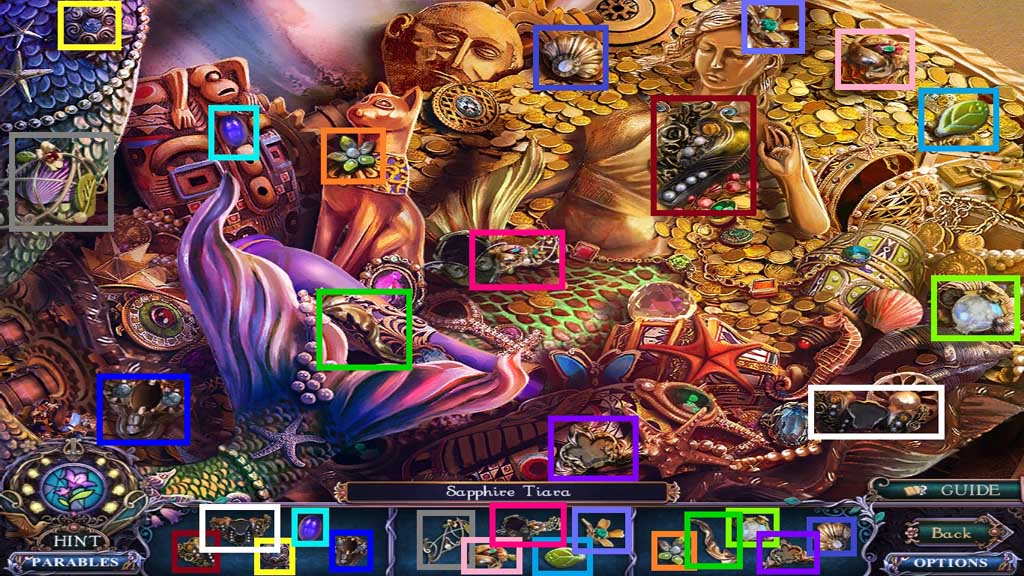
- Find the items.
- Collect the sapphire tiara.
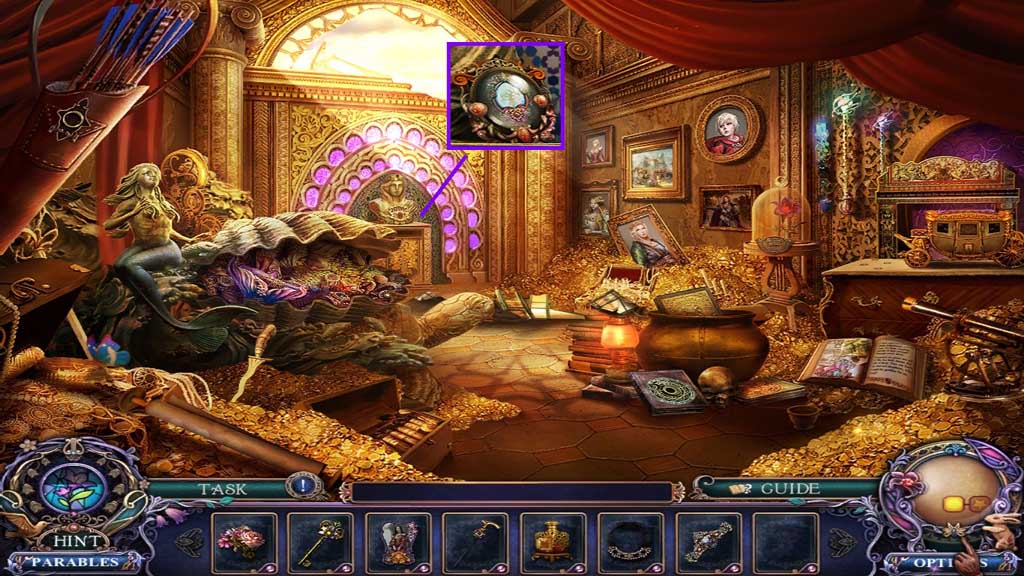
- Collect the mirror amulet.
- Move down once.
- Place the black ribbon necklace.
- Read the scroll.
- Collect the silver horse figurine and the scale weight.
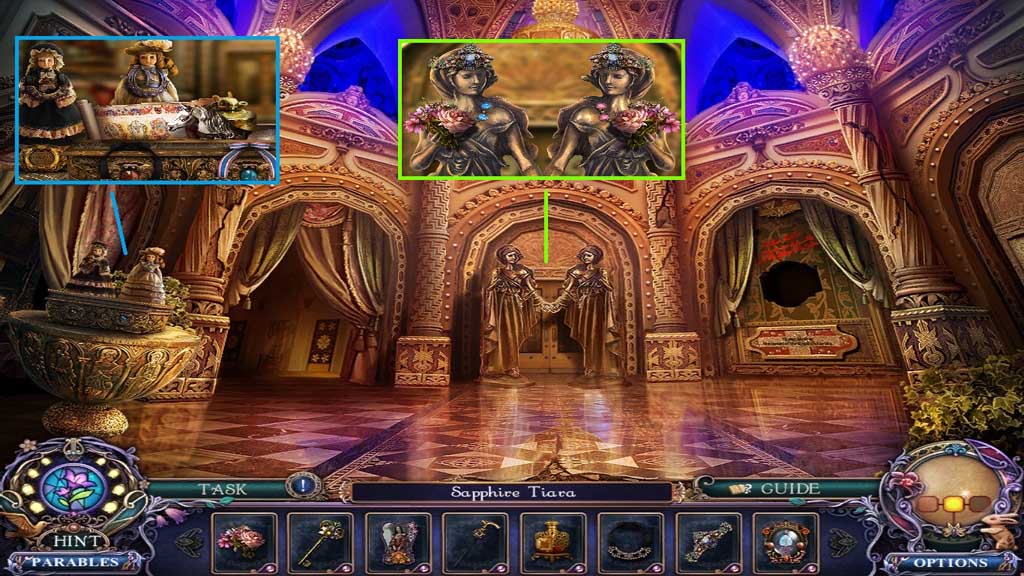
- Place the spring bouquet and the sapphire tiara.
- Move ahead.
- Collect the golden horse figurine.
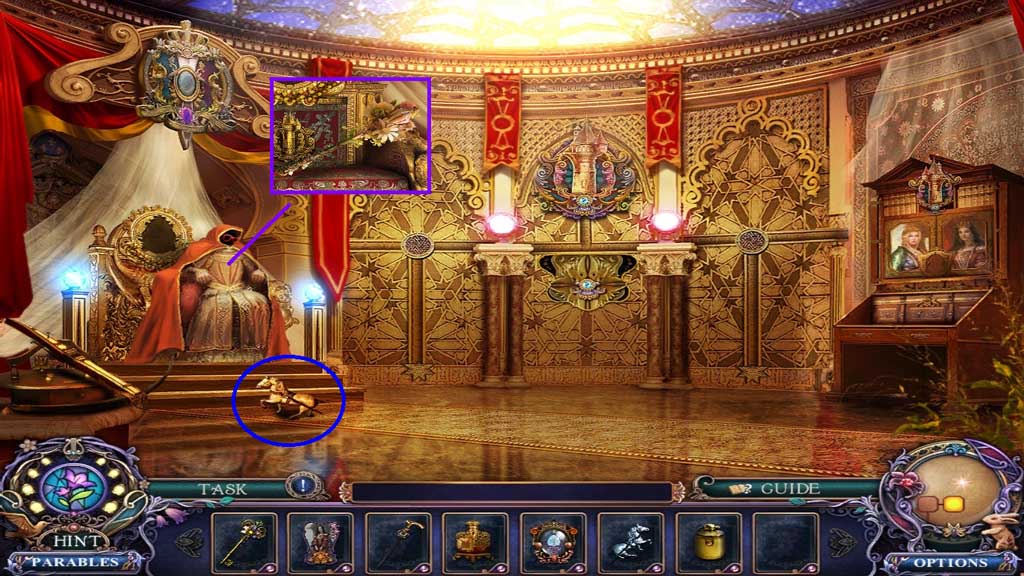
- Click the mannequin.
- Collect the nosegay baton.
- Move down once and go left.
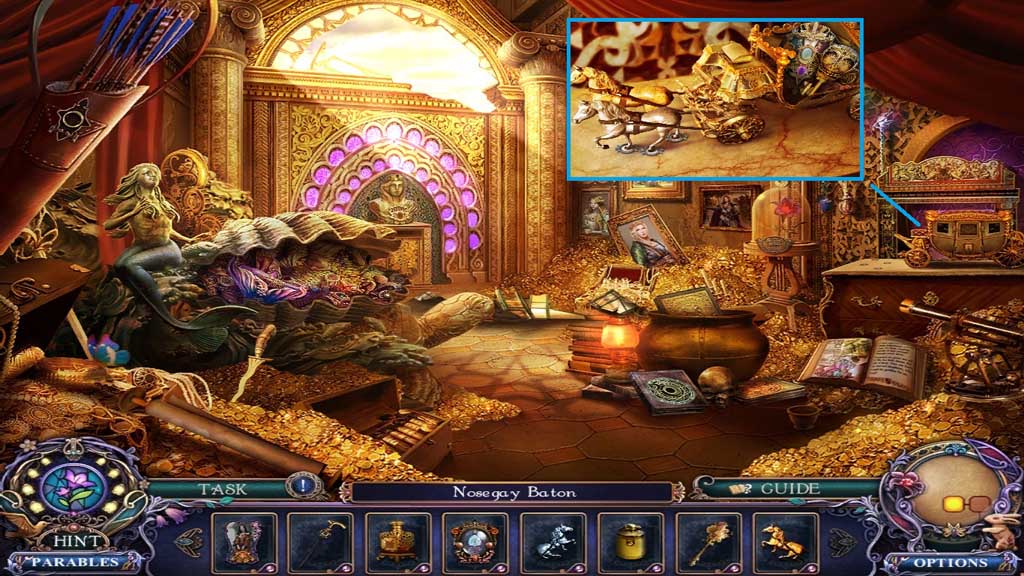
- Insert the golden and silver horse figurines.
- Collect the kingdom emblem and the carriage key.
- Move down 2x’s.
- Use the cane to remove the snake.
- Insert the carriage key to trigger a hidden objects area.
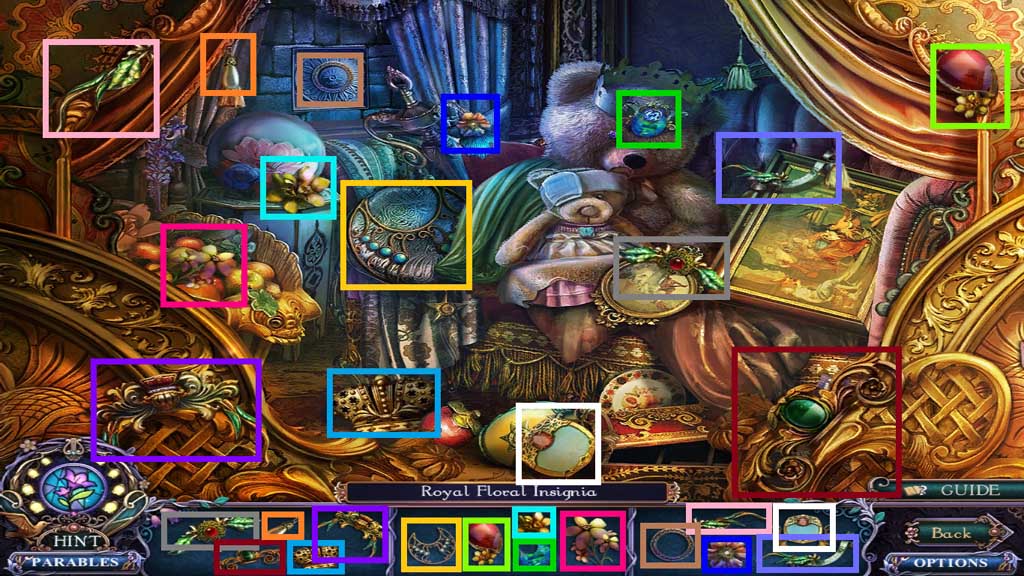
- Find the items.
- Collect the insignia.
- Use the moss remover.
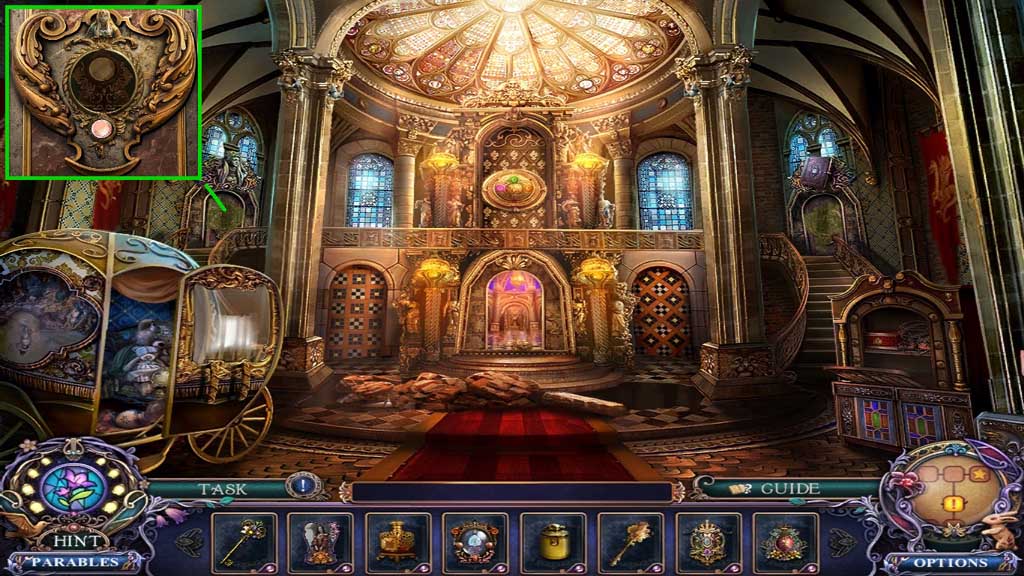
- Move ahead 2x’s.
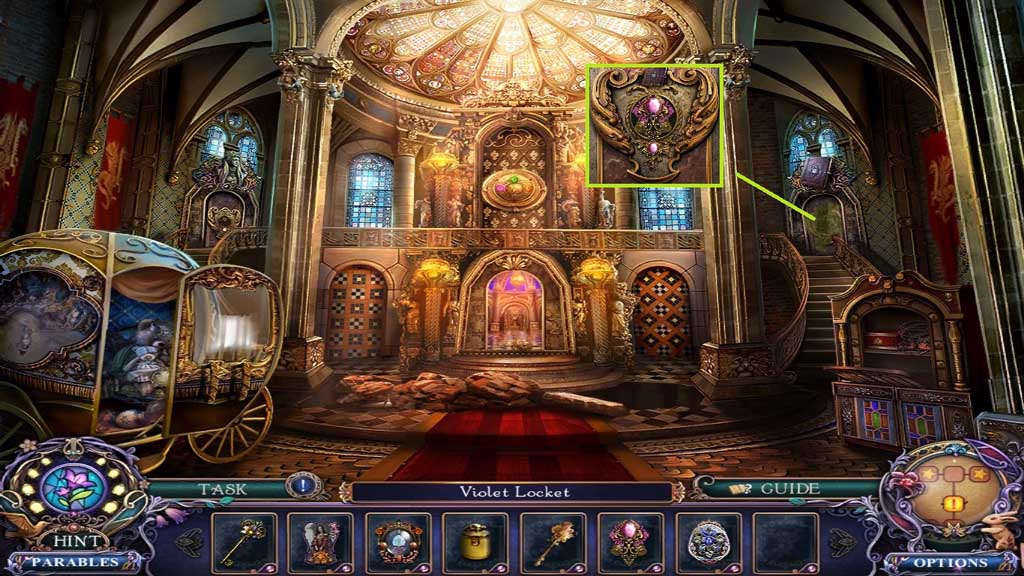
- Insert the royal floral insignia; collect the jewel blazon.
- Insert the kingdom emblem; collect the violet locket.
- Move down 2x’s.
- Use the moss remover.
- Insert the jewel blazon.
- Move to the right.
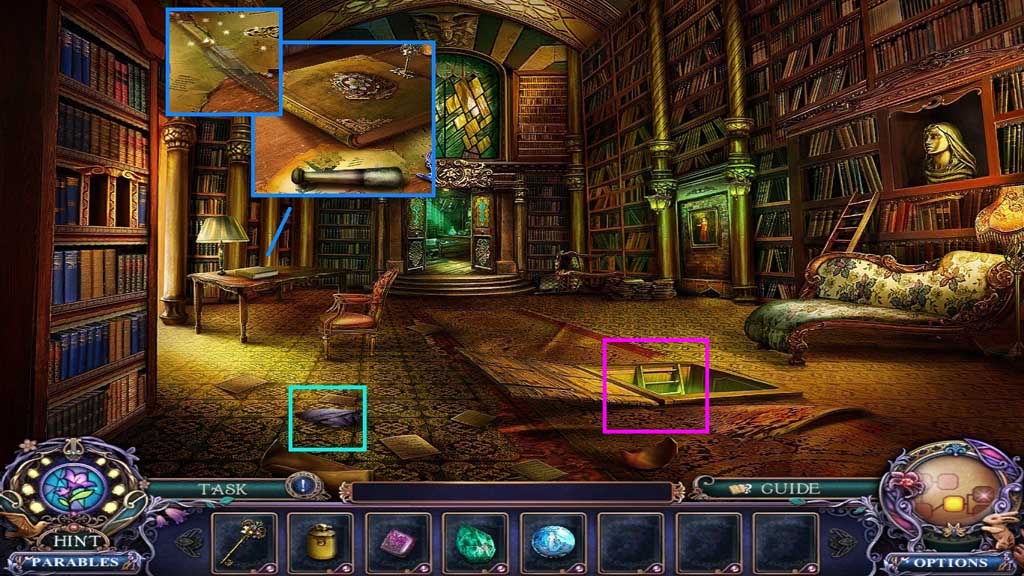
- Collect the healing herbs and the pestle.
- Insert the daffodil key; collect the letter opener.
- Move down the ladder.
- Click the curtain.
- Collect the sap solvent.
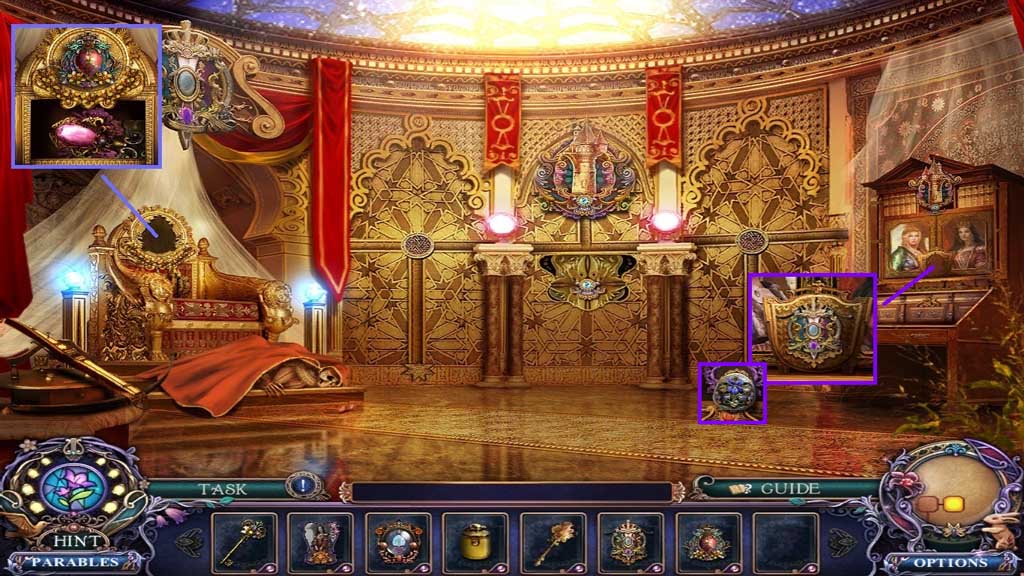
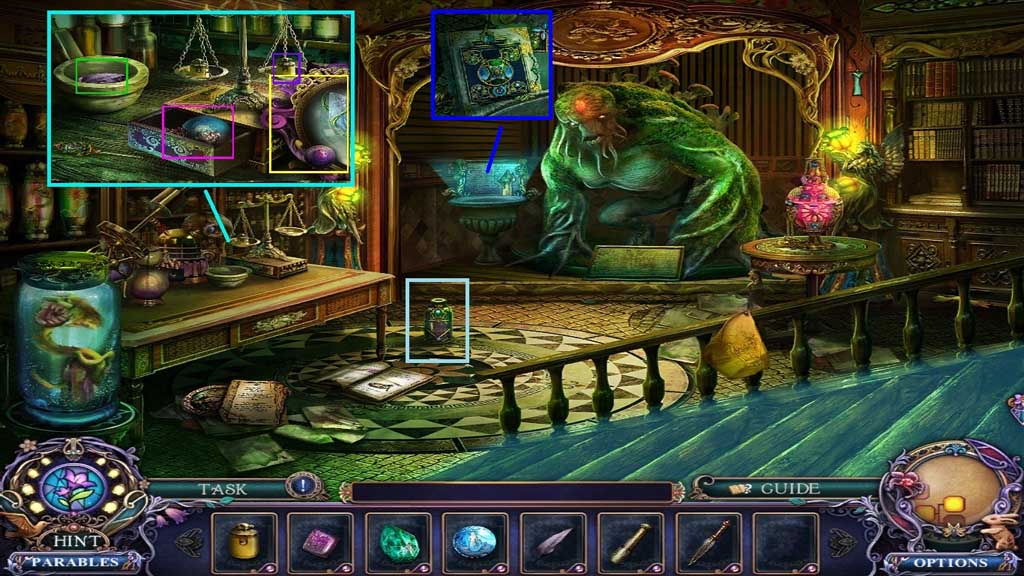
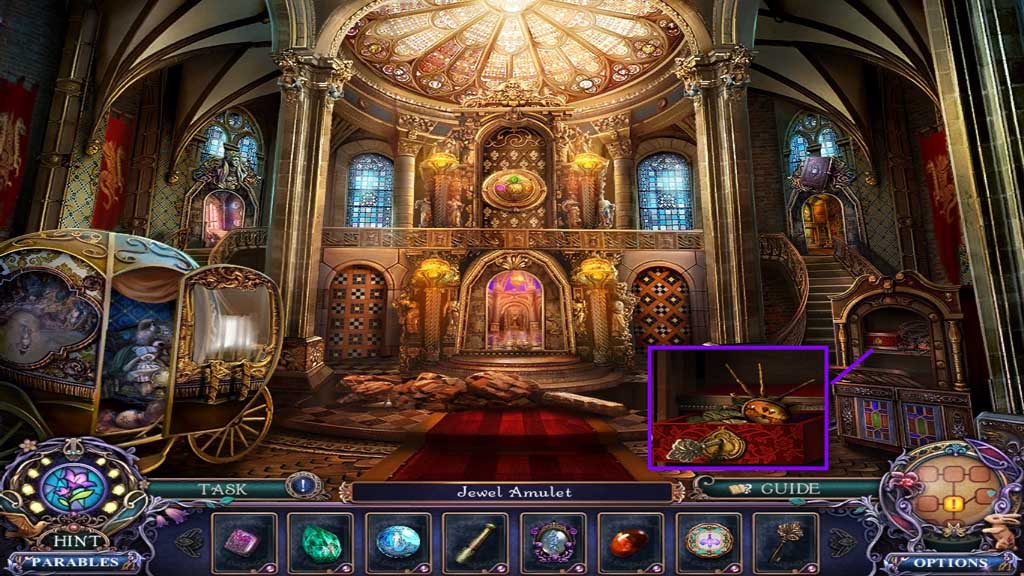
- Collect the jewel amulet.
- Place the scale weight; collect the lunar sphere.
- Insert the healing herbs.
- Collect the ivory leather bound book.
- Move down once and move ahead.
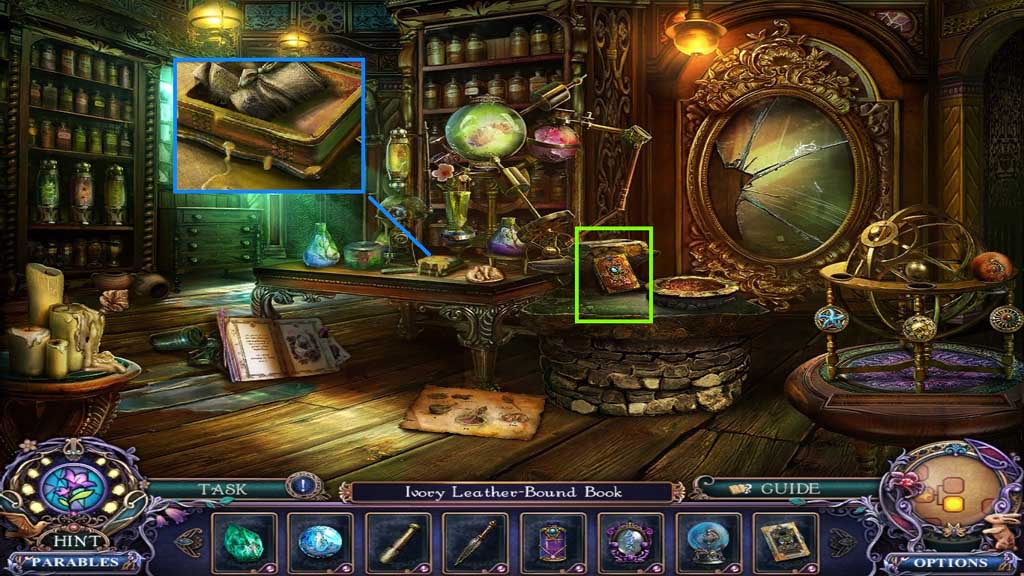
- Use the sap solvent to collect the bandage.
- Collect the mahogany leather bound book.
- Move down once.
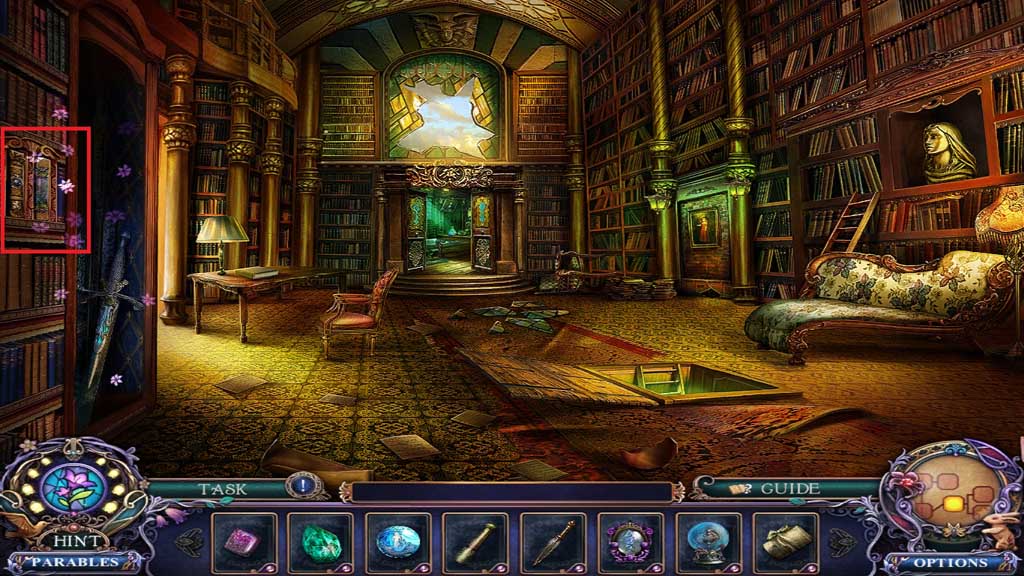
- Place down the ivory and mahogany leather bound books down to trigger a hidden objects area.
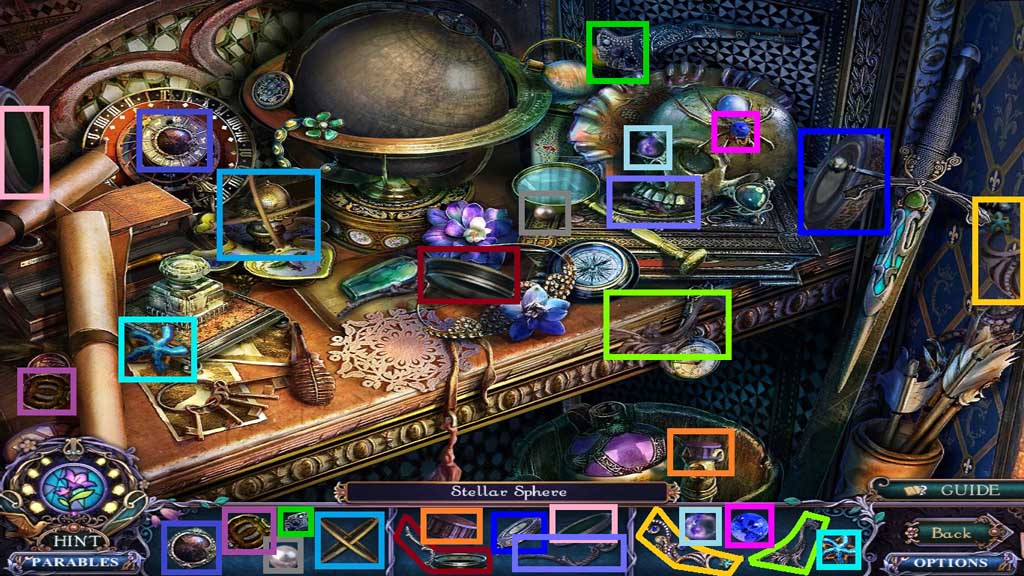
- Find the items.
- Collect the stellar sphere.
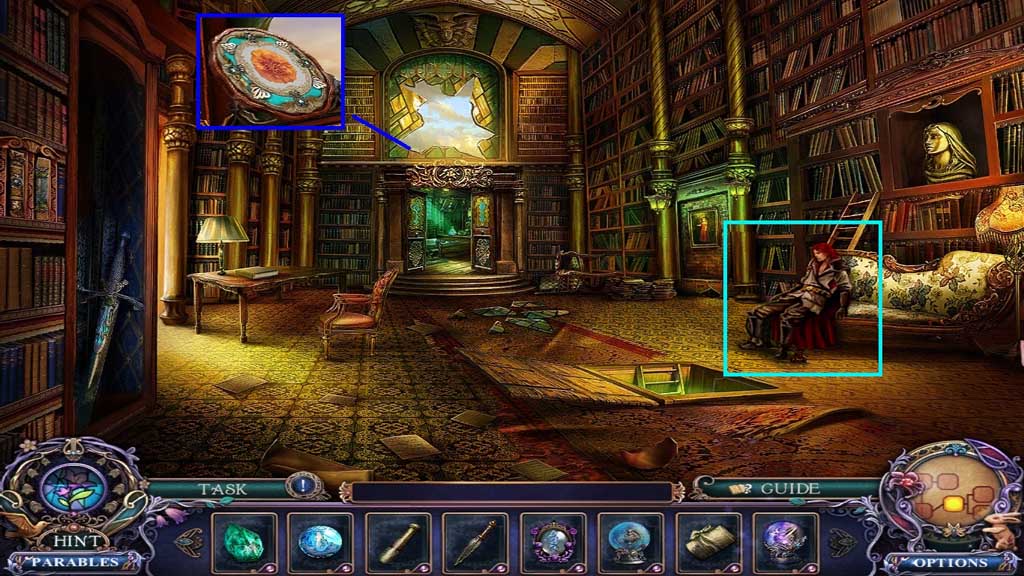
- Click the plate.
- Use the bandage on Ross; receive the fire agate.
- Move down once and go forward and turn left.

- Insert the violet locket; collect the Violante portrait.
- Move down once and go forward.

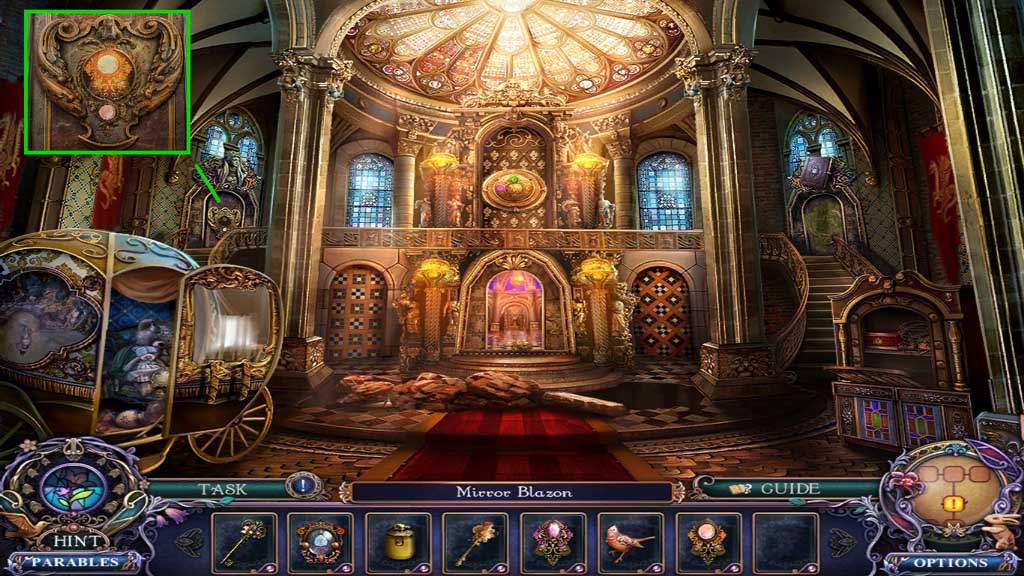
- Insert the Violante and Melanie portraits.
- Collect the porcelain bird and the mirror blazon.
- Click the lever.
- Speak to the ghost.
- Move down 2x’s, go to the right and move ahead.
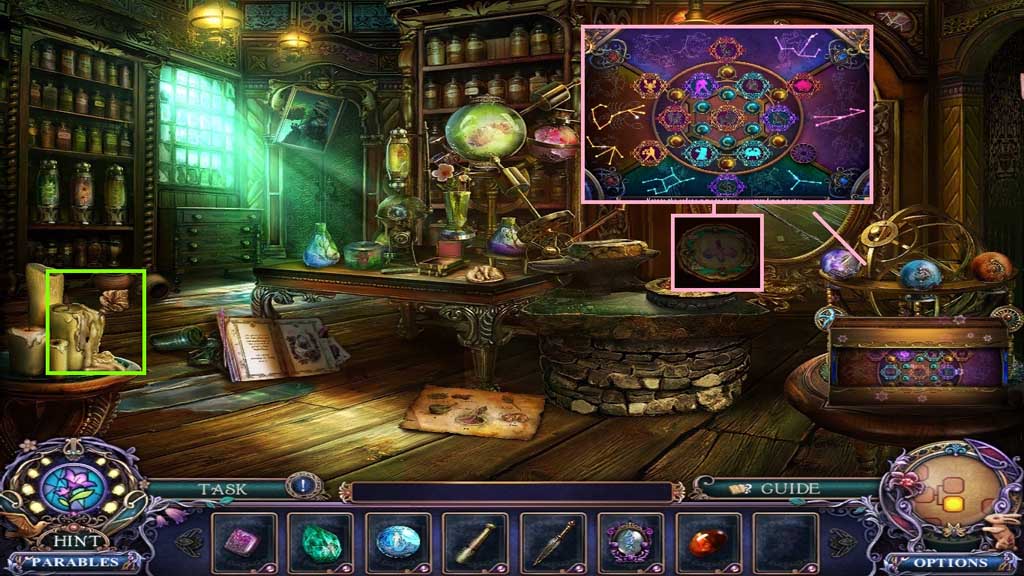
- Insert the lunar and stellar sphere.
- Zoom into the panel to trigger a mini game.
- Solve the game by arranging the zodiac signs correctly.
- Collect the lobelia plate.
- Use the letter opener on the candle; collect the small herbal key.
- Move down 2x’s.
- Insert the small herbal key; collect the amber spider and the sage leaves.
- Move to the right and down the ladder.
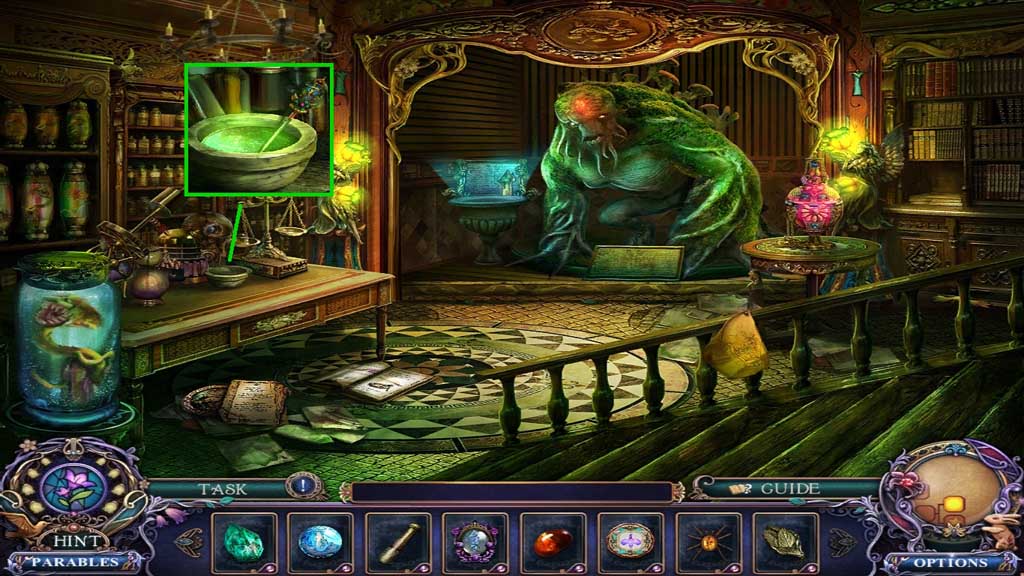
- Place the sage into the mortar.
- Crush the leaves using the pestle; collect the reviving elixir.
- Move down once and go forward.
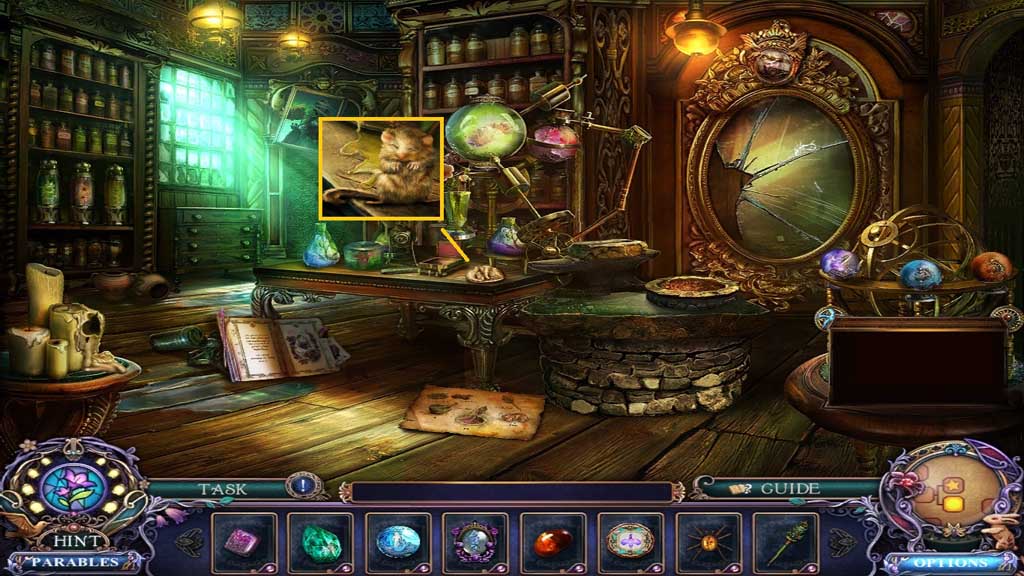
- Use the reviving elixir; collect the dormouse.
- Move down once.
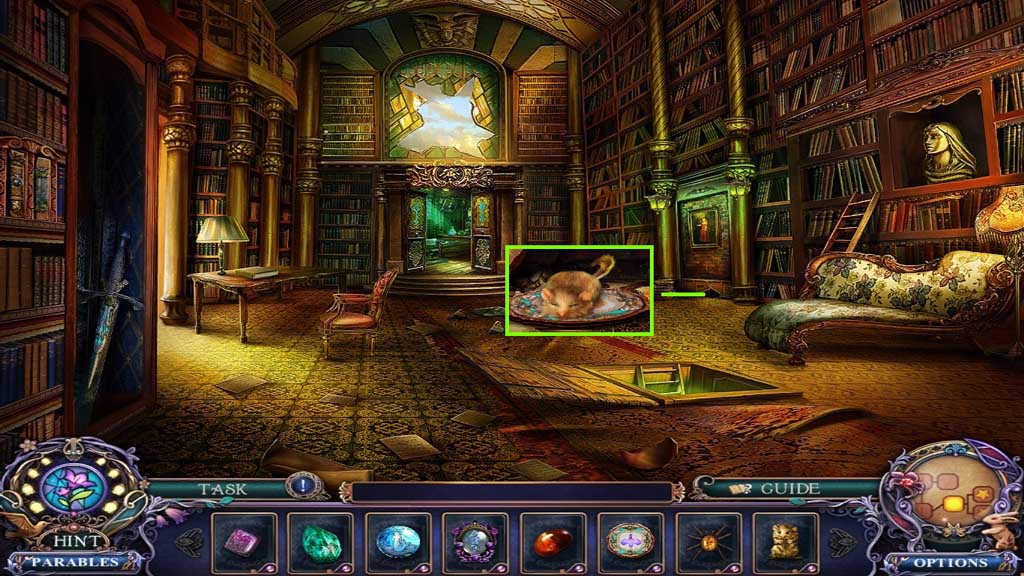
- Place the dormouse in the crevice; collect the marigold plate.
- Move down the ladder.
- Zoom into the water.
- Insert the lobelia and marigold plates.
- Zoom into the panel to trigger a mini game.
- Solve the game by aligning the flowers without overlapping.
- Collect the moss remover; click the chain.
- Speak to the ghost.
- Move down 2x’s.
- Use the moss remover; insert the mirror blazon.
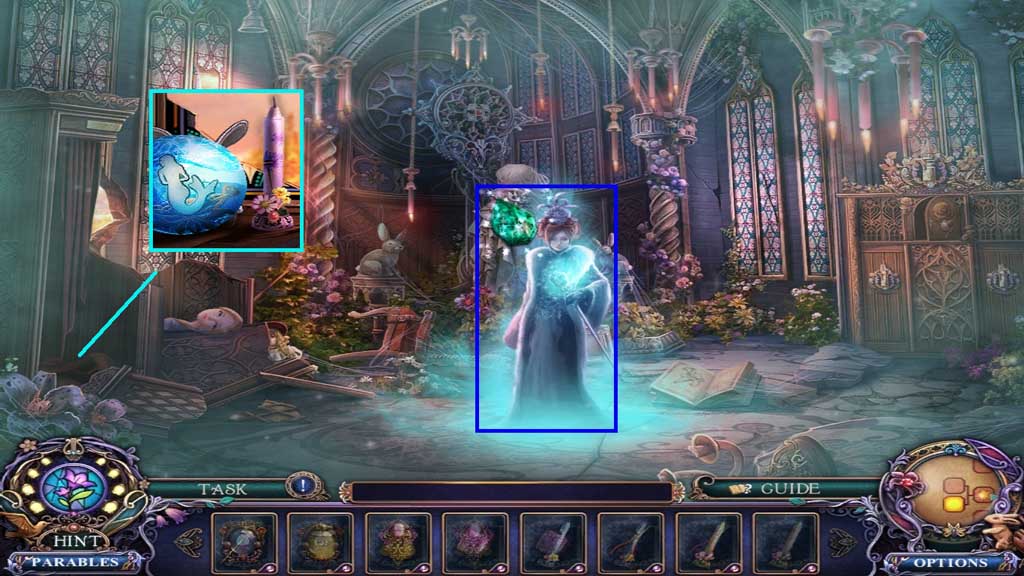
- Move to the left.
- Collect the porcelain egg.
- Click the curtain.
- Collect the sparkling stone; insert the nosegay baton.
- Collect the demon statuette and the wood enamel rose.
- Move to the left.
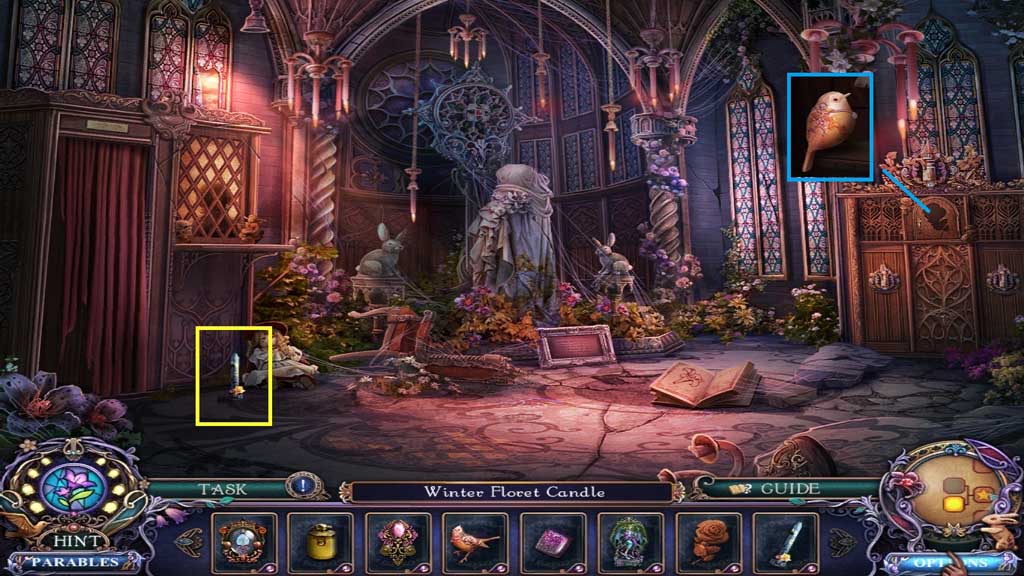
- Collect the winter floret candle.
- Insert the wood enamel rose; collect the porcelain nestling.
- Move down once and turn right.
- Collect the pliers and the spring floret candle.
- Insert the porcelain egg, bird and nestling to trigger a hidden objects area.
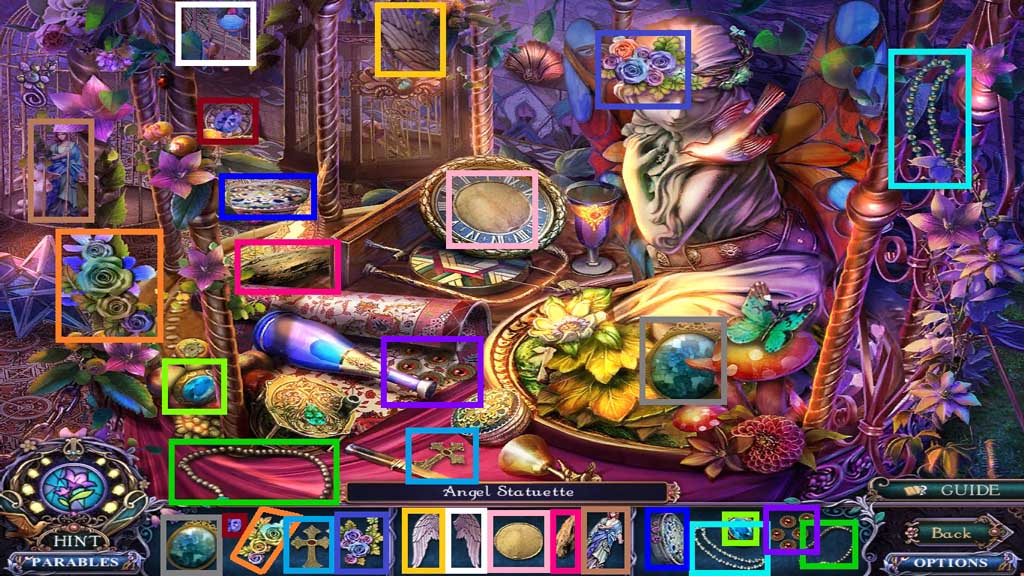
- Find the items.
- Collect the angel statuette.
- Move down once and go left.
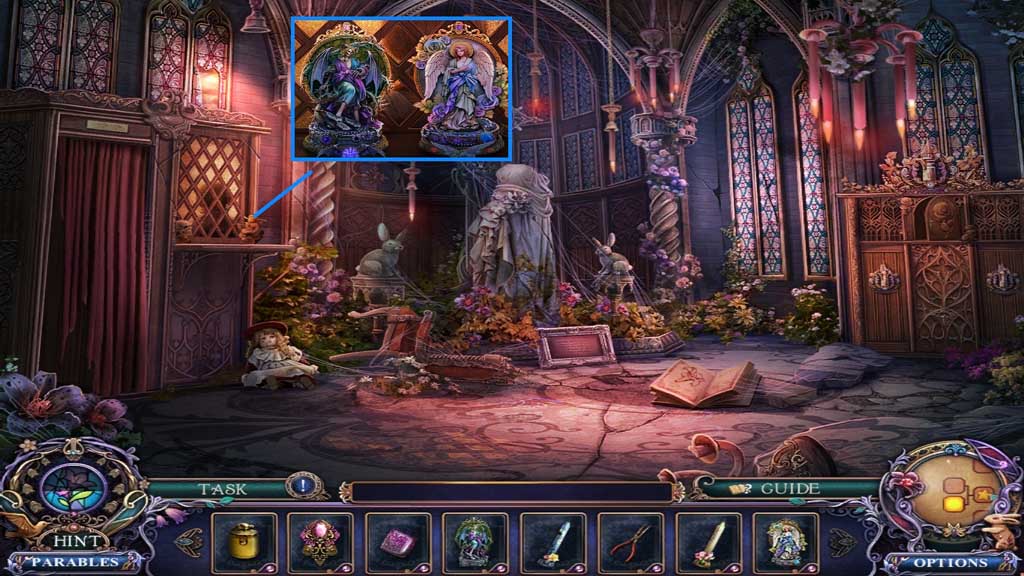
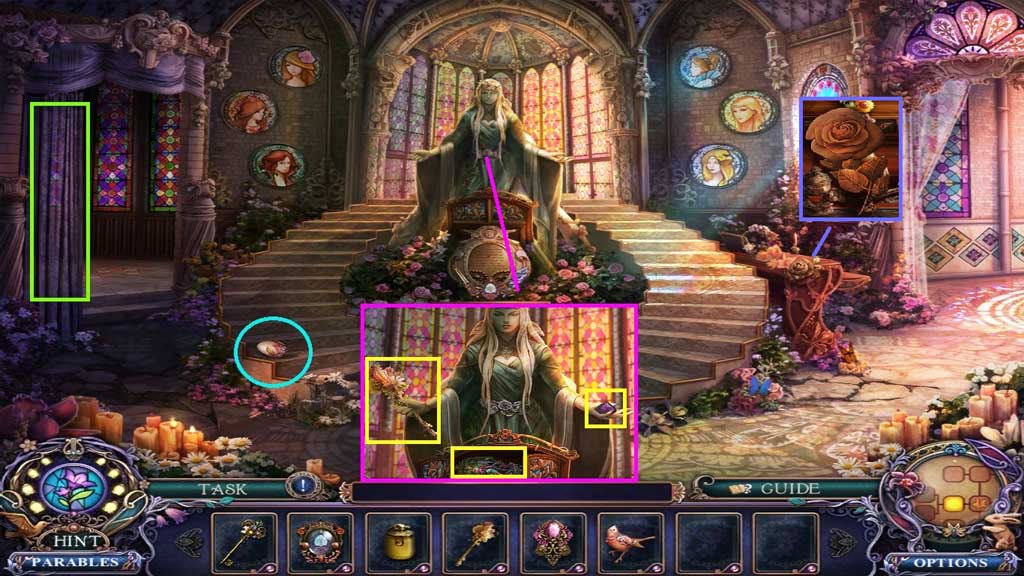
- Place down the angel and demon statuettes.
- Speak to the woman; receive the ice quartz.
- Collect the siren’s pearl and the autumn floret candle.
- Move down once.
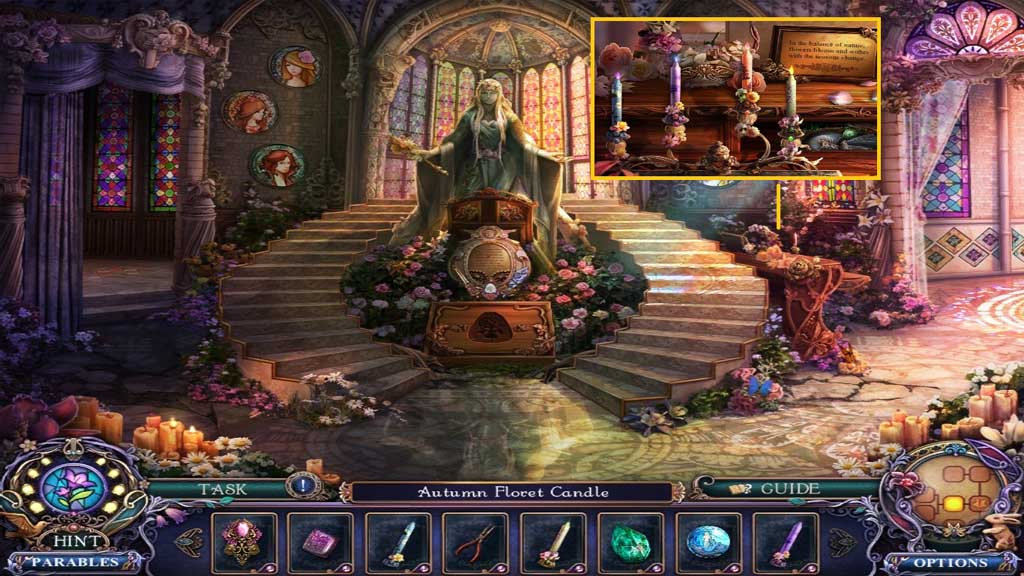
- Place down the winter, spring and autumn floret candles down.
- Collect the doll dress and the sword amulet.
- Move down once and click the hidden objects area.
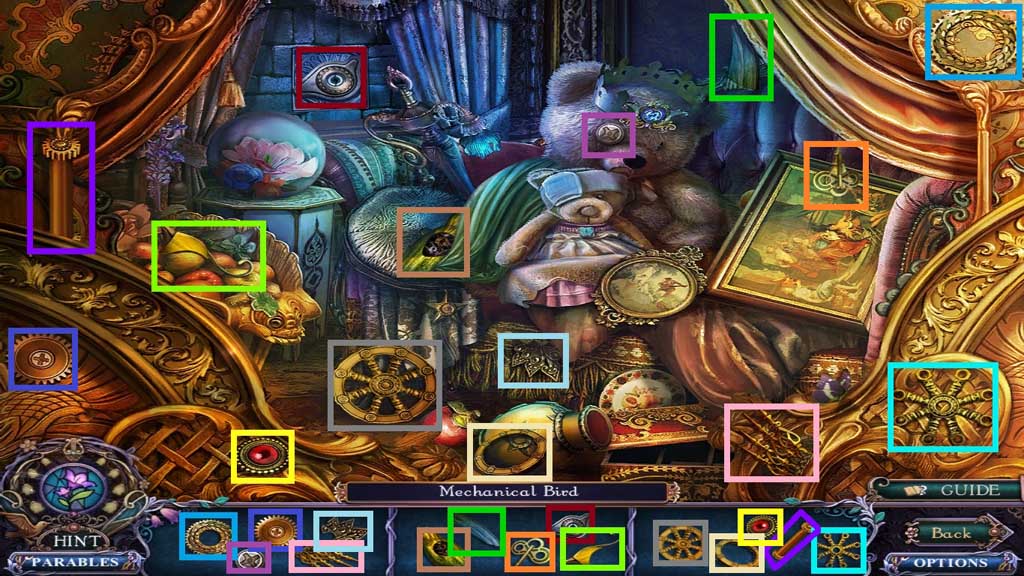
- Find the items.
- Collect the mechanical bird.
- Move to the left and turn to the right.

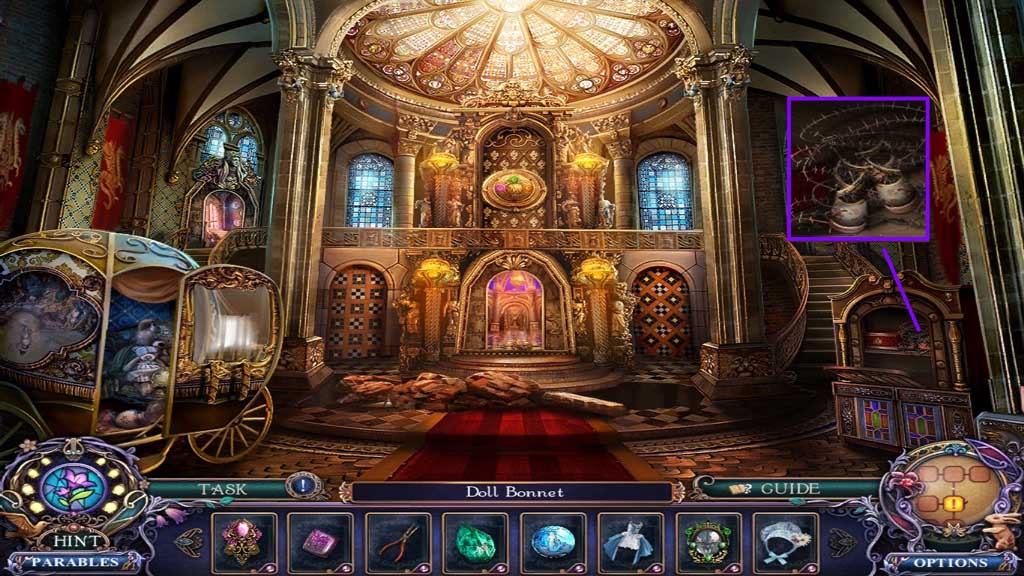
- Place down the mechanical bird.
- Collect the archery buckle and the doll bonnet.
- Move down 2x’s, go forward and move to the left.
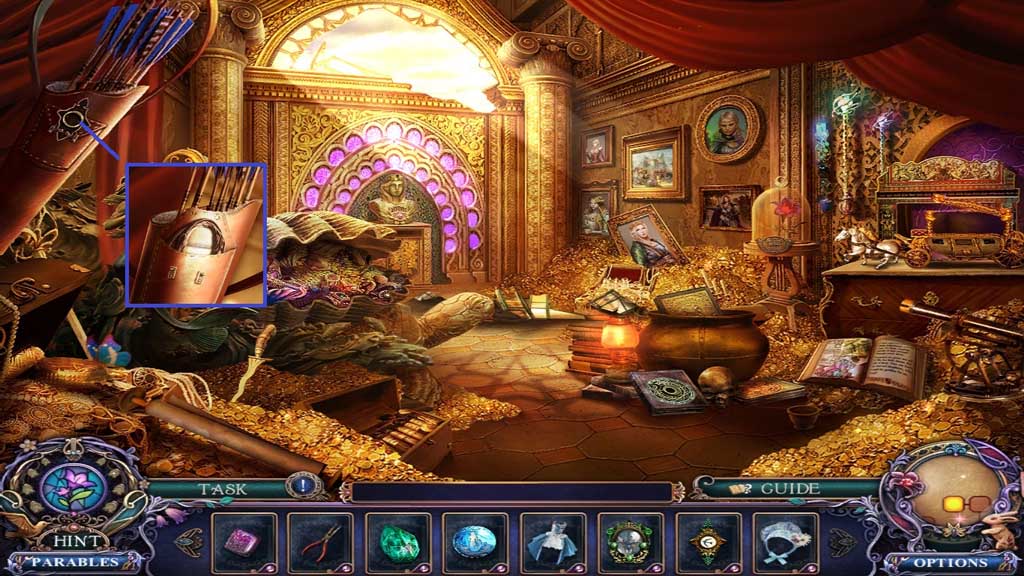
- Insert the archery buckle; collect the sturdy bowstring.
- Move down and go forward.
- Attach the sturdy bowstring.
- Move down 2x’s.
- Collect the doll shoes using the pliers.
- Move to the left 2x’s.

- Place the doll dress, bonnet and the doll shoes onto the doll.
- Zoom into the panel to trigger a mini game.
- Solve the game by matching the icon to dress the doll.
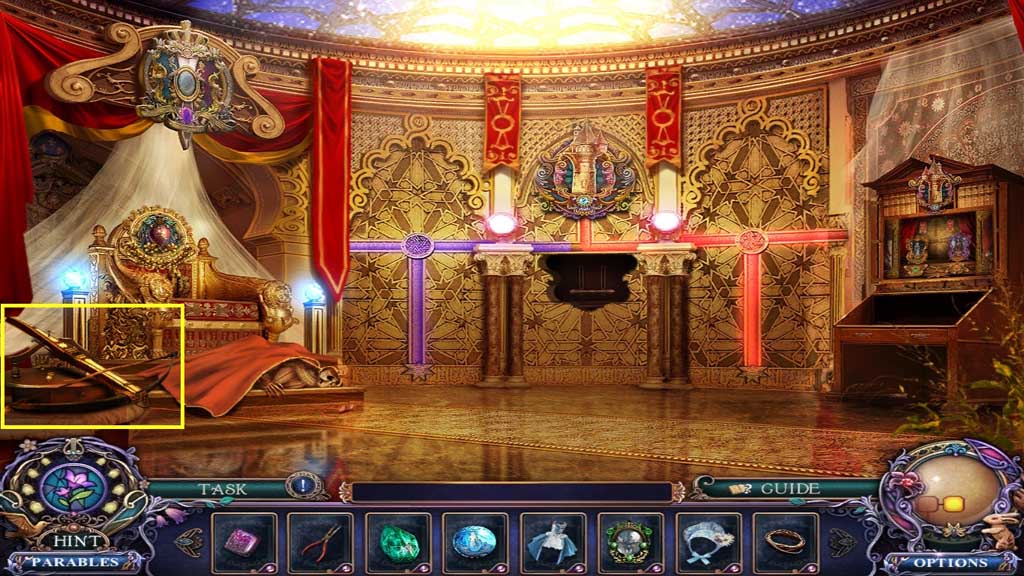
- Click the lever.
- Move down 2x’s.
- Insert the jewel, sword and mirror amulets.
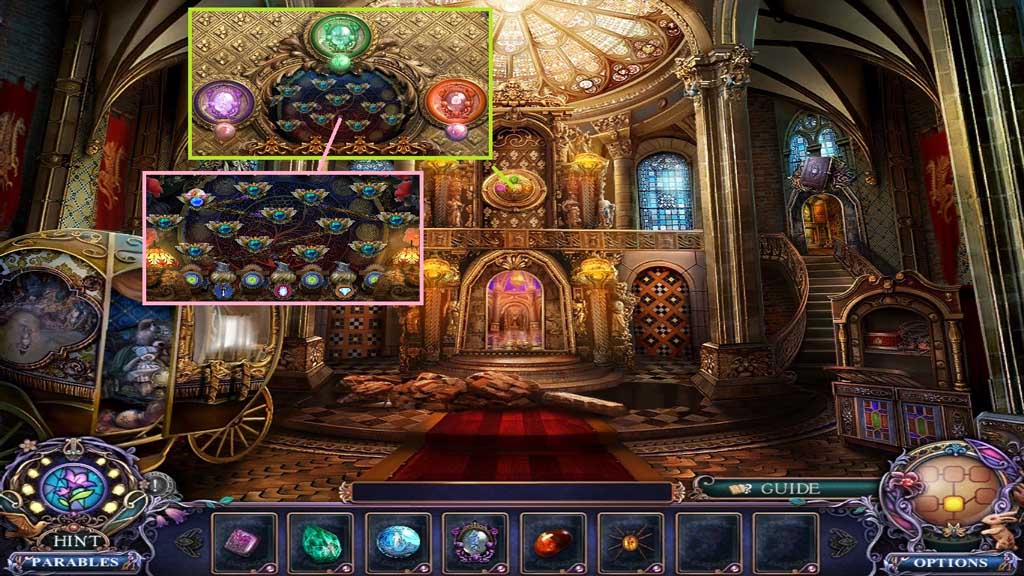
- Zoom into the panel to trigger a mini game.
- Solve the game by sorting the perfume beads into the correct bottles.
- Move ahead and go to the left and click the hidden objects area.
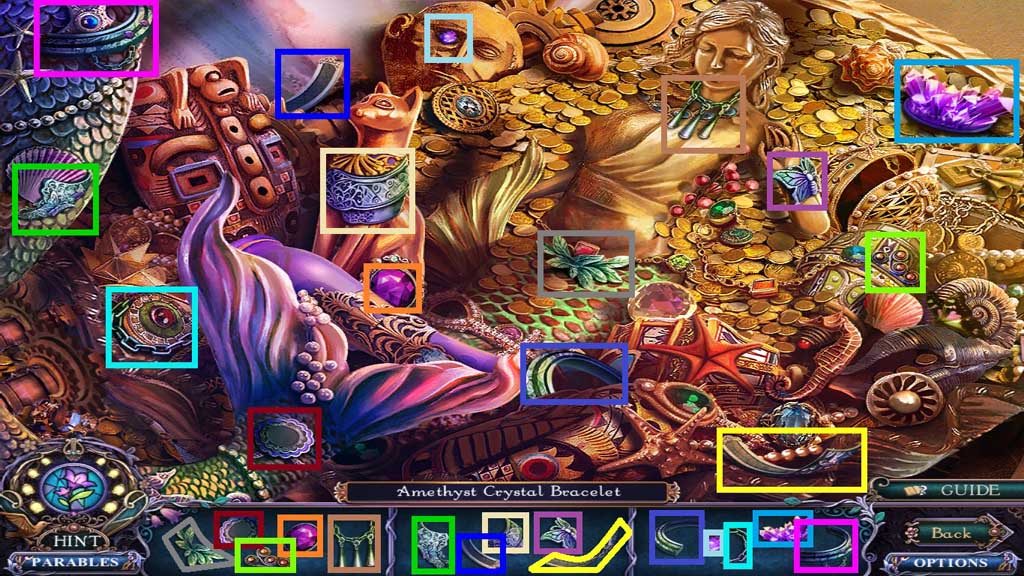
- Find the items.
- Collect the amethyst crystal bracelet.
- Move down 2x’s and go right; click the hidden objects area.
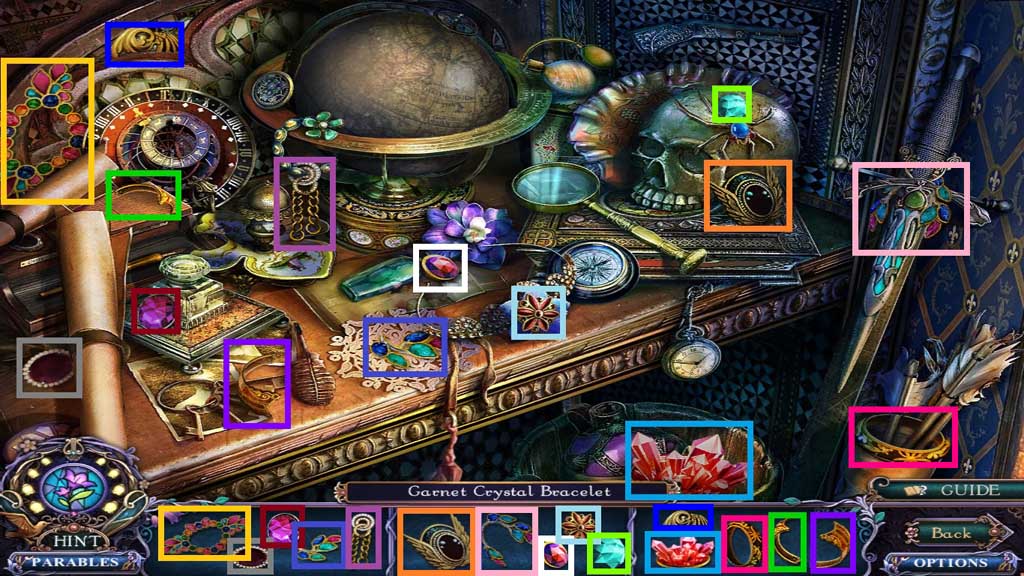
- Find the items.
- Collect the garnet crystal bracelet.
- Zoom into the mouse.
- Move down once, turn to the left and move to the right.
- Place the amethyst and the garnet crystal bracelets.
- Collect the yellow diamond chip.
- Click the hidden objects area.
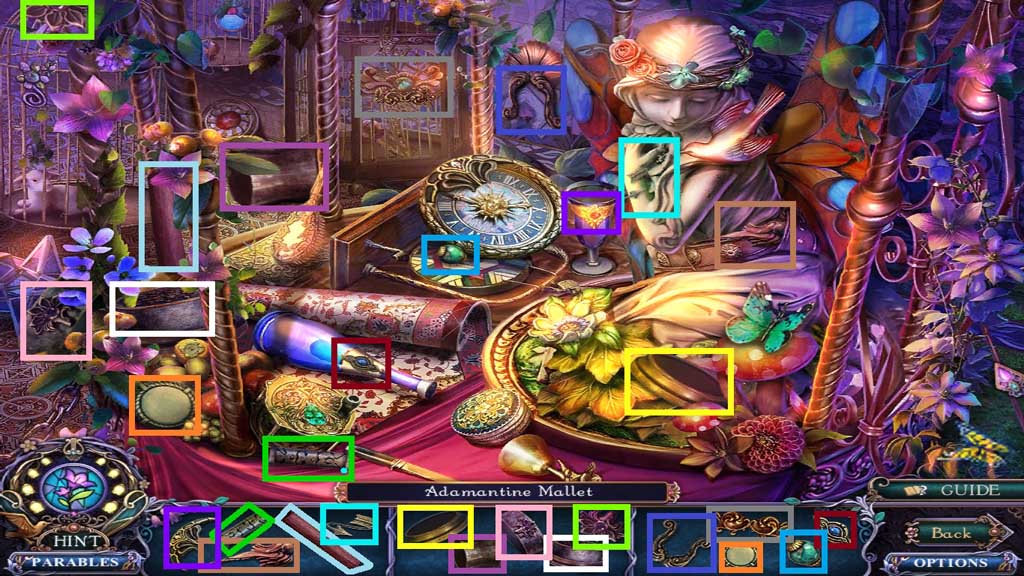
- Find the items.
- Collect the adamantine mallet.
- Move down 2x’s and turn right, then go forward.
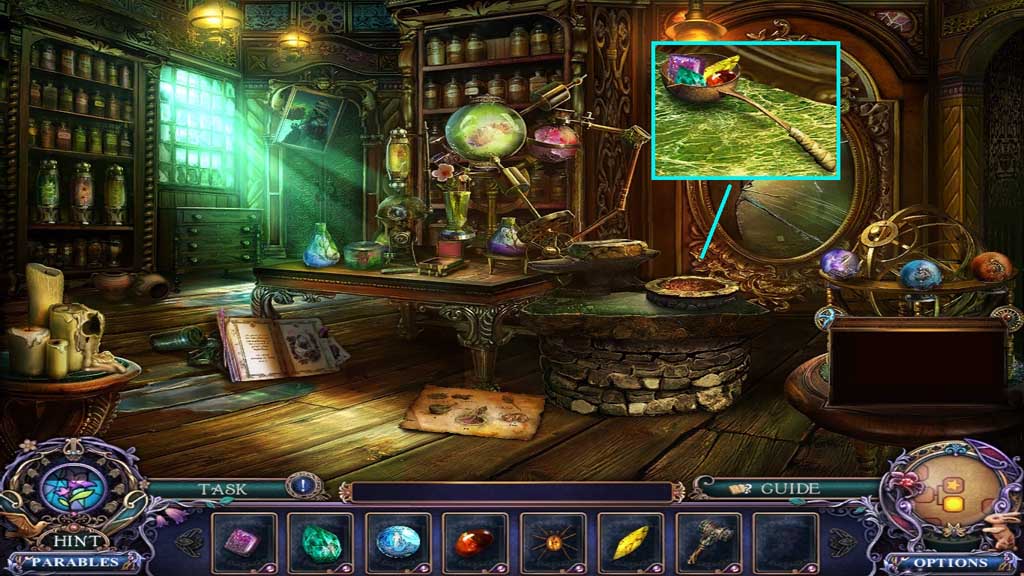
- Insert the fire agate, sparkling stone, the yellow diamond chip and the ice quartz into the ladle.
- Move down once and go down the ladder.
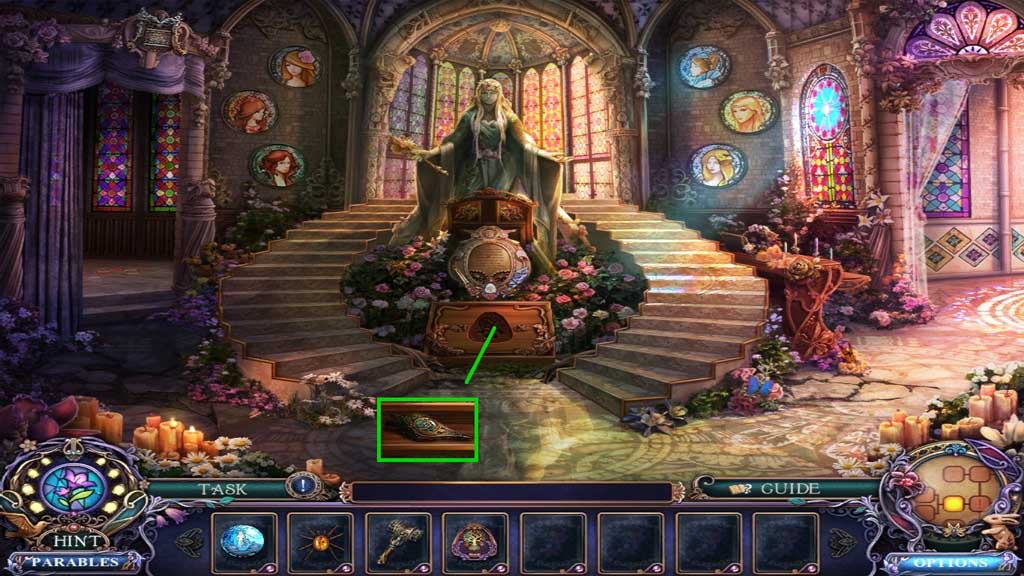
- Collect the sacred tree medallion.
- Move down 2x’s and go left.
- Insert the sacred tree medallion; collect the bellows.
- Move down once, turn right and move forward.
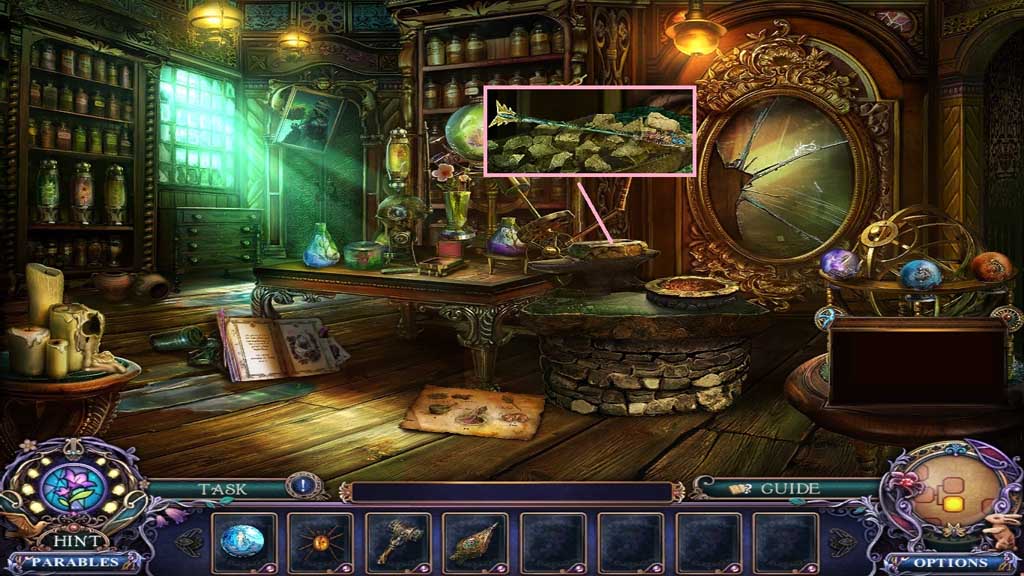
- Use the bellows and the adamantine mallet to create and collect the arrow of obliteration.
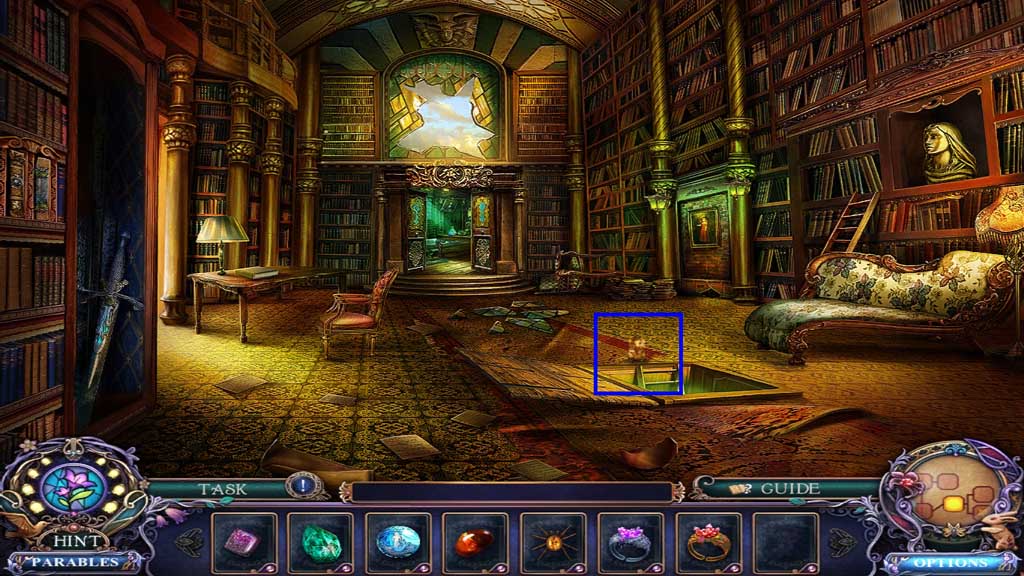
- Move down 2x’s and move ahead 2x’s.
![]()
- Insert the arrow of obliteration; collect the loaded crossbow.
- Move down 2x’s.
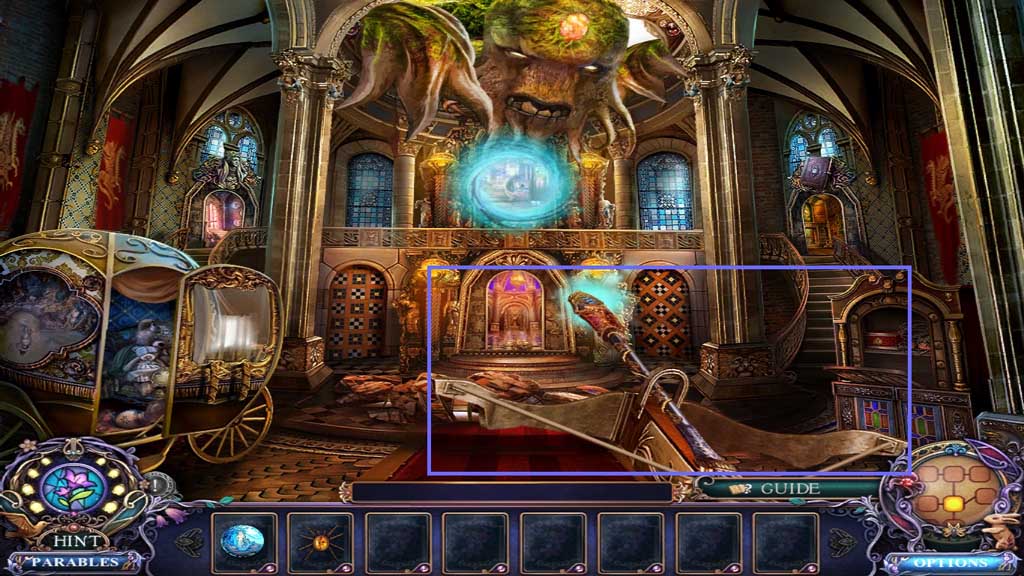
- Shoot the loaded crossbow toward the beast.
- Enter the portal.
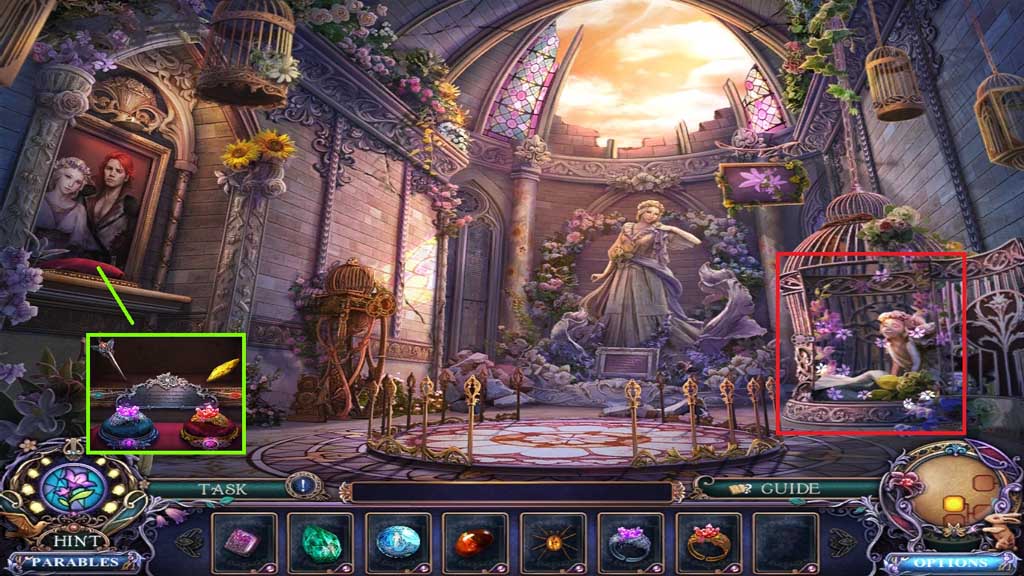
- Insert the siren’s pearl.
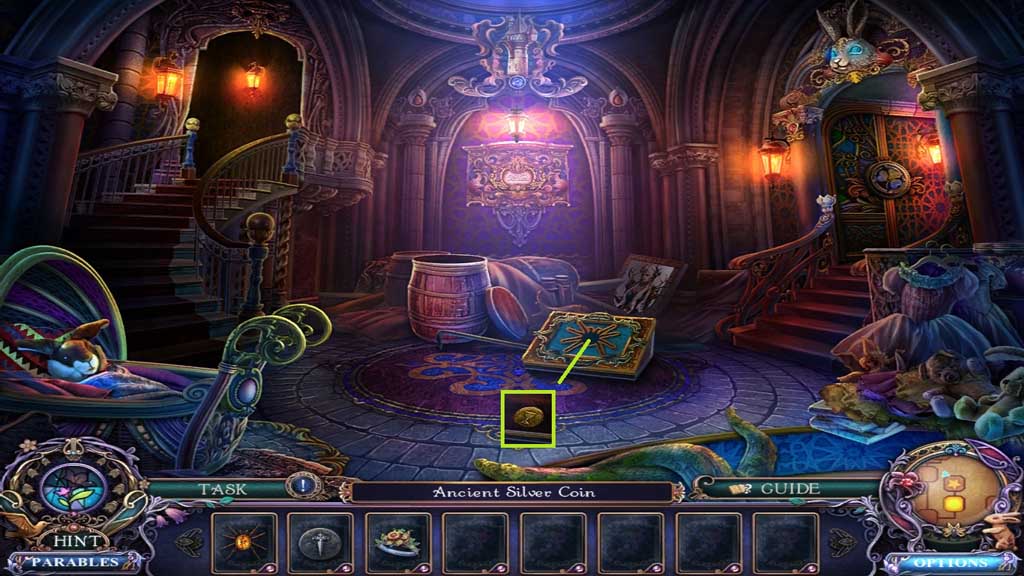
- Move to the right.
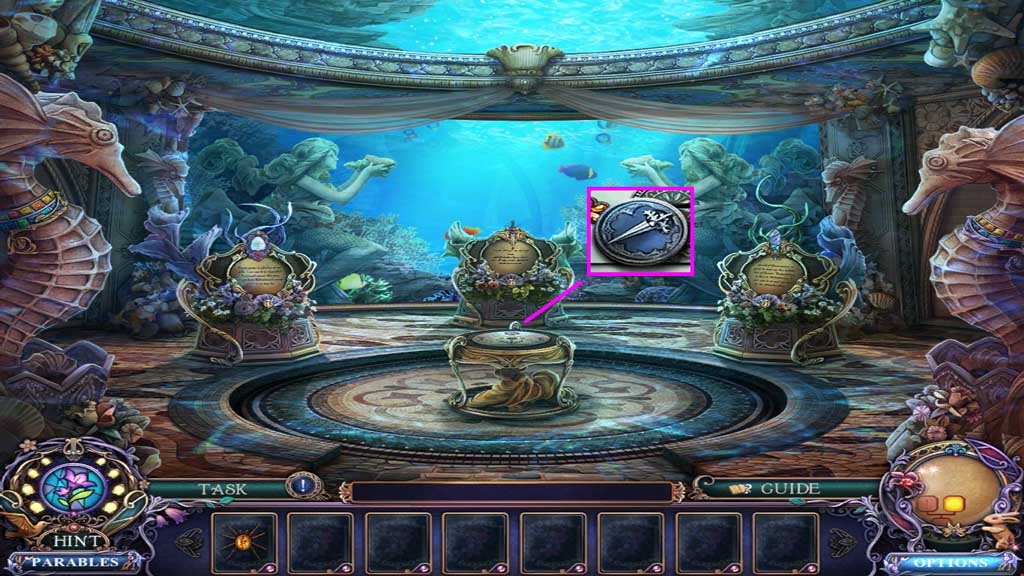
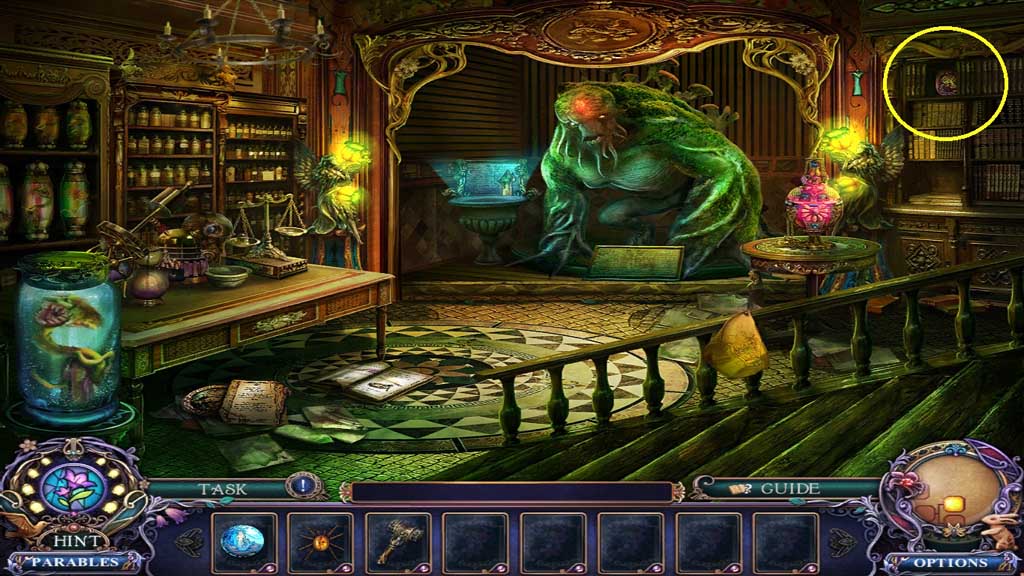
- Collect the ancient silver coin.
- Move down 2x’s and click the hidden objects area.
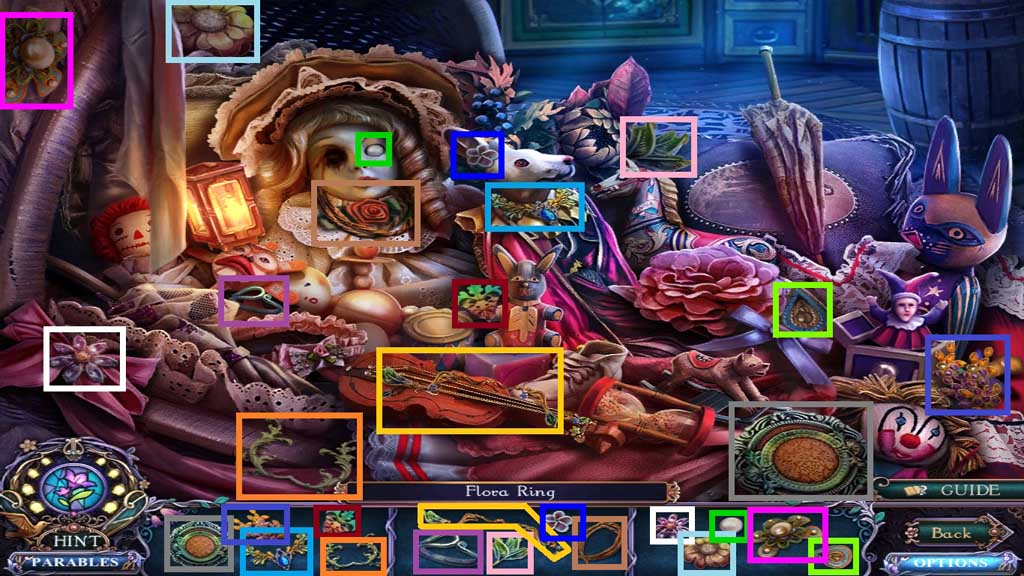
- Find the items.
- Collect the flora ring.
- Insert the amber spider; collect the ancient gold coin.
- Move to the left and turn to the right.
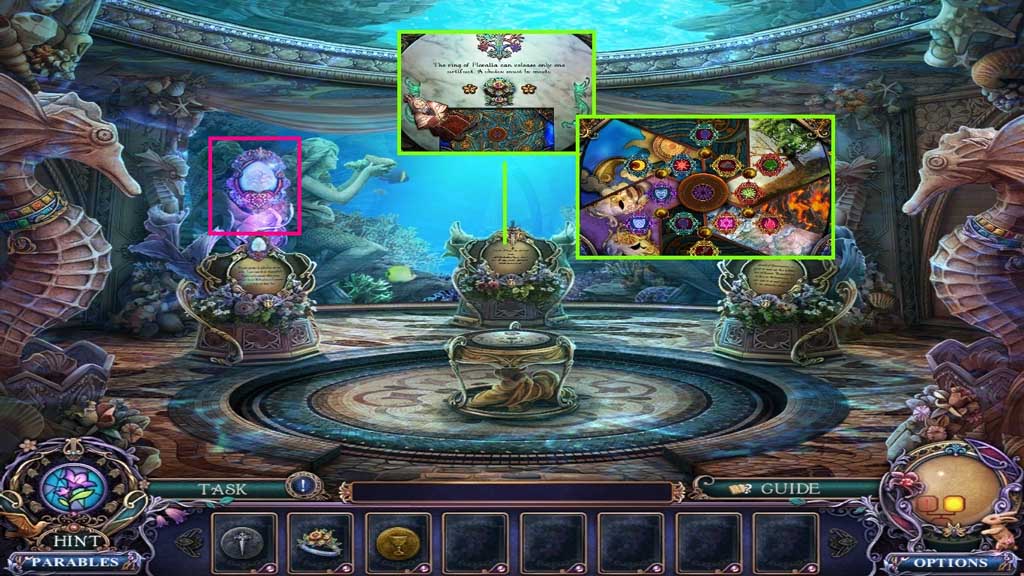
- Insert the flora ring.
- Zoom into the panel to trigger a mini game.
- Solve the game by matching the icons to the background.
- Collect the mirror of inversion.
- Move down 2x’s and turn right.
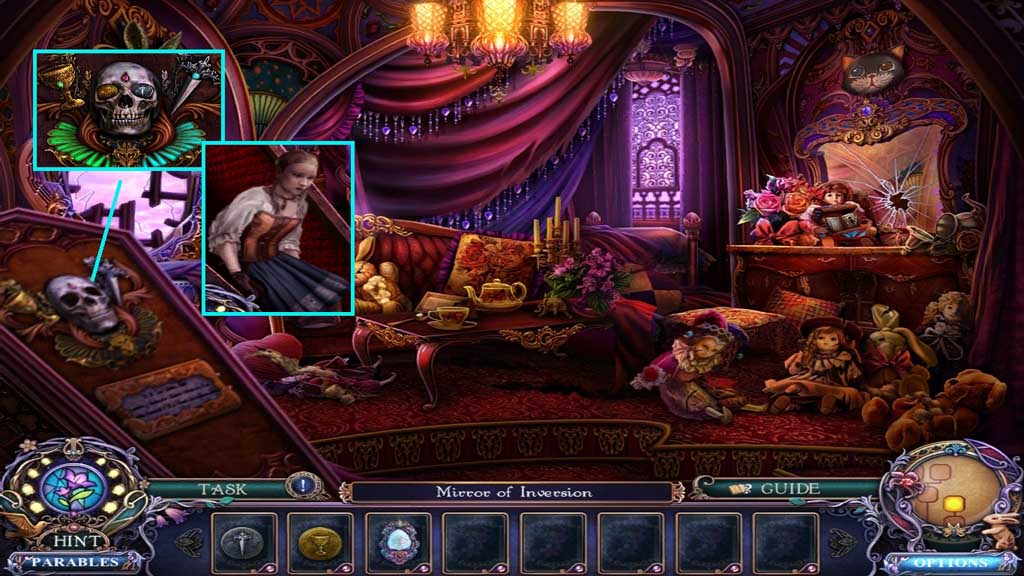
- Click the blanket.
- Insert the ancient gold and silver coins.
- Speak to the girl; receive the gargoyle handle.
- Move down once, turn left and go forward.
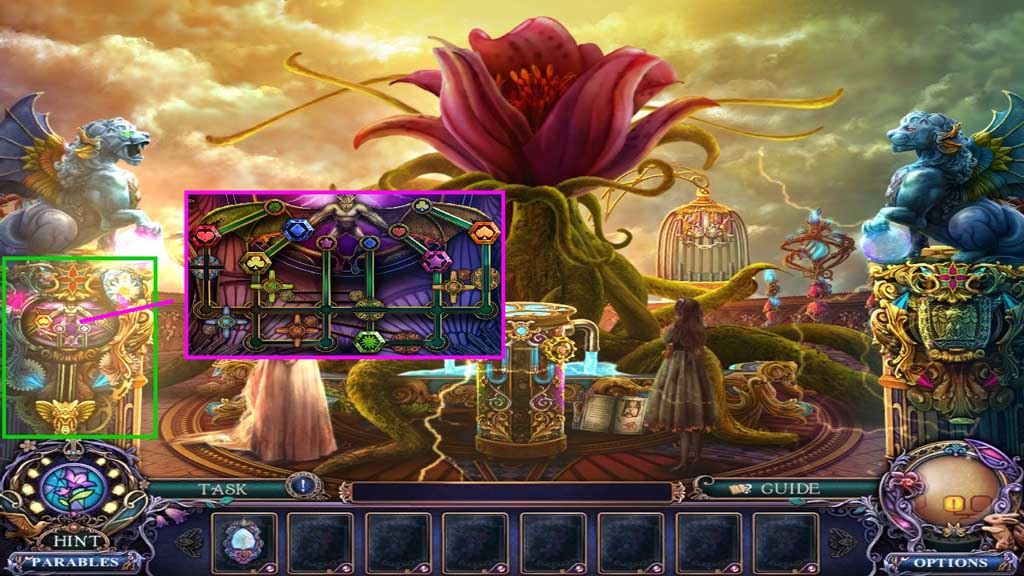
- Attach the gargoyle handle.
- Zoom into the panel to trigger a mini game.
- Solve the game by moving the symbols to the correct spaces.
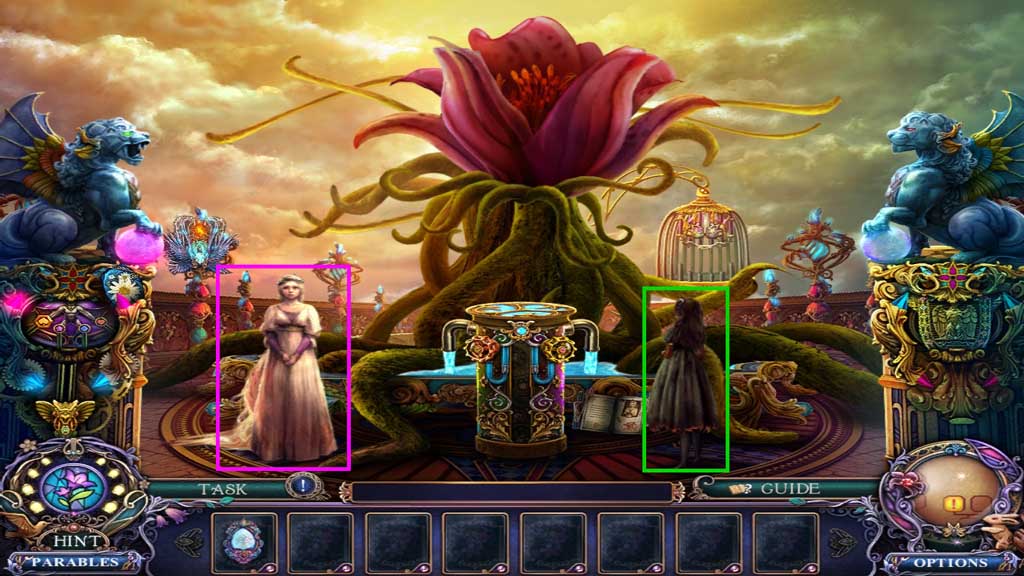
- Speak to the girl.
- Give Rapunzel the mirror of inversion.
- Congratulations! You have successfully completed the main game of Dark Parables: Ballad of Rapunzel Collector’s Edition
General Information & Tips
Prologue
Chapter One
Chapter Two
Chapter Three
Chapter Four
Ask for help in the comments below!
Prologue
Chapter One
Chapter Two
Chapter Three
Chapter Four
Ask for help in the comments below!